Shipshape in Bristol Fashion.
Colorado, United States
Joined: January 25, 2004
KitMaker: 11,669 posts
AeroScale: 11,011 posts
Posted: Wednesday, October 03, 2007 - 01:35 PM UTC
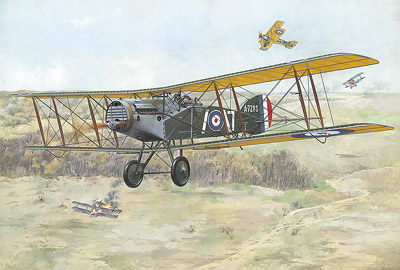
My next build is the Roden Bristol Fighter (F2b.) Though I am staying pretty much OOB with this one I have to say, "What a box!" The Rolls Royce Eagle went together well. I recommend using a section of brass rod for a replacement to a lower water pipe. This can take the load and and the thin plastic engine bearers wont carry the whole weight. I did substitute a spare "Part of Poland" radiator inset and shutters.
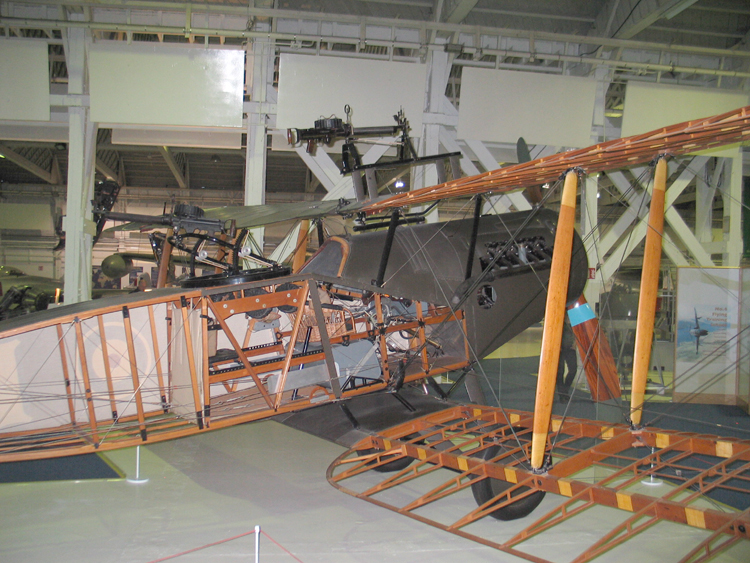
Next I will dress out the kit instrument panel by drilling out the instrument bezels molded to the part, apply clear plastic and gauge face decals behind that. Since the kit does not have a floor I used the Part of Poland item as a template and cut one from sheet stock. Thanks to our ever vigilant "Merlin" here is my photo reference at the RAF Museum.
http://photos.kitmaker.net/showgallery.php/cat/19336". . .The most important thing is to know why you build and then get the most that you can out of building." via D.D.
Colorado, United States
Joined: January 25, 2004
KitMaker: 11,669 posts
AeroScale: 11,011 posts
Posted: Wednesday, October 03, 2007 - 08:09 PM UTC
One of our missing in actions is Lars Qvarfordt. He asked a question some time back and its taken me this long to dig up the answer.
Greetings Lars,
Here is a bit of fun for you.
The Dazzle scheme Bristol you asked about some time back has a history. In July 1919 F3480 had been on strength with # 11 Group in Ireland and was flown by Group Captain G. I. Carmichael DSO. It was later in #106 RAF that it gained its dazzle scheme and was flown by Flt. Lt. Waller.
Regards Stephen
". . .The most important thing is to know why you build and then get the most that you can out of building." via D.D.
Östergötland, Sweden
Joined: April 04, 2006
KitMaker: 1,058 posts
AeroScale: 1,004 posts
Posted: Wednesday, October 03, 2007 - 09:22 PM UTC
thank´s Stephen
Still collecting info about this dazzling brisfit.Will get it done somehove anyday.Have started up an Brisfit in the 72-scale just to have something to look at on the shelf.
For the moment I´m build the Razorback ( I know that´s not me, but I just had to

For the rest of this year I will get some of the old project finished, and not start to many new ones. Still got that camel somewere

Thank´s mate
Larsa
Indiana, United States
Joined: May 14, 2007
KitMaker: 3,117 posts
AeroScale: 2,270 posts
Posted: Thursday, October 04, 2007 - 09:55 AM UTC
How does this kit compare to Eduards offering?
"Treat 'em Rough", Current Builds--Wingnut Rumpler
I am frequently seen with blood shot eyes from staying up past my nap time to get the right colour scheme on my latest WWI model?
Victoria, Australia
Joined: November 26, 2006
KitMaker: 608 posts
AeroScale: 602 posts
Posted: Thursday, October 04, 2007 - 10:06 AM UTC
Hi Steve,
Looking great! Nice to see you tackling another allied subject.
I take it that you are leaving the top coweling off?
Captain A,
I built this last year. I judge it as the second most frustrating build I have ever done, but I am more than happy with the result.
Are you going to hand carve a four bladed Prop?

Cheers,
Hugh
Colorado, United States
Joined: January 25, 2004
KitMaker: 11,669 posts
AeroScale: 11,011 posts
Posted: Thursday, October 04, 2007 - 04:21 PM UTC
Quoted Text
How does this kit compare to Eduard's offering?
Greetings CaptainA; The main difference between the Eduard and Roden kits is buidability. Both are about equal.
The Eduard kit goes together well but has no engine. There are only facades to mount the exhaust pipes to.
The Roden kit has tight fitting parts and a complete engine.
Eduard aims its kits at mainstream modelers. The average Joe or Josephine. 2-3 colour schemes. The Profipack version was that last of that line.
Roden aims its kits at detail loving modelers looking for variety. 5-6 colour schemes. Mal did a kit review on the Bristol F2b Nightfighter over on the British Bulldogs site.
". . .The most important thing is to know why you build and then get the most that you can out of building." via D.D.
Colorado, United States
Joined: January 25, 2004
KitMaker: 11,669 posts
AeroScale: 11,011 posts
Posted: Thursday, October 04, 2007 - 05:16 PM UTC
Quoted Text
Hi Steve, Looking great! Nice to see you tackling another allied subject. I take it that you are leaving the top cowling off? . . .Are you going to hand carve a four bladed Prop? Cheers, Hugh
I still have this , 2 @ Se 5a types and another DH 2 in line. Yes I thought of doing a maintenance scene. On the four bladed prop . . . hhhmmm.
". . .The most important thing is to know why you build and then get the most that you can out of building." via D.D.
Indiana, United States
Joined: May 14, 2007
KitMaker: 3,117 posts
AeroScale: 2,270 posts
Posted: Saturday, October 06, 2007 - 04:39 AM UTC
After I posted my last question, I went to the Eduard site and noticed they are re-releasing this kit with a checkerboard and crocodile scheme. I might need to get that one.
"Treat 'em Rough", Current Builds--Wingnut Rumpler
I am frequently seen with blood shot eyes from staying up past my nap time to get the right colour scheme on my latest WWI model?
Removed by original poster on 10/29/07 - 08:25:55 (GMT).
Indiana, United States
Joined: May 14, 2007
KitMaker: 3,117 posts
AeroScale: 2,270 posts
Posted: Tuesday, October 09, 2007 - 08:30 AM UTC
So what scheme are you going to do? That British red, white and green disruptive pattern with teeth looks real nice. I really like the flying carp also. Or is that a sturgeon?
"Treat 'em Rough", Current Builds--Wingnut Rumpler
I am frequently seen with blood shot eyes from staying up past my nap time to get the right colour scheme on my latest WWI model?
Colorado, United States
Joined: January 25, 2004
KitMaker: 11,669 posts
AeroScale: 11,011 posts
Posted: Tuesday, October 09, 2007 - 07:58 PM UTC
Greetings Carl;
I believe both were called "Crocodile" while the later was also called "Brisfish."
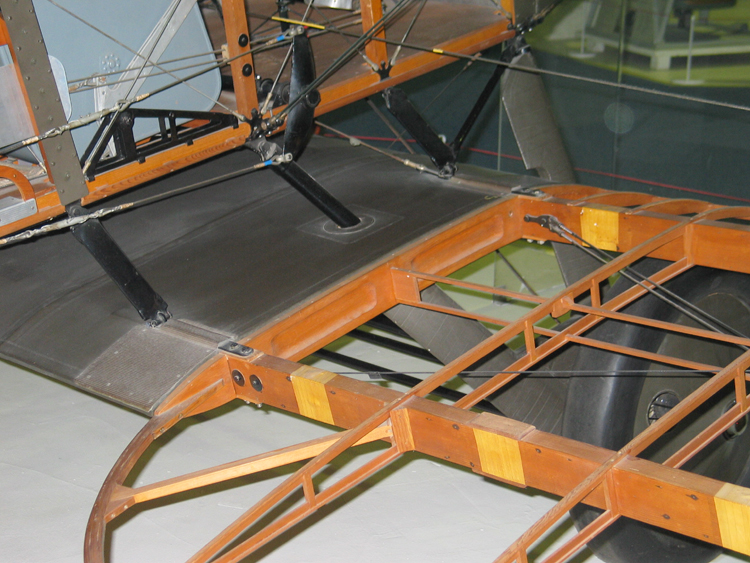
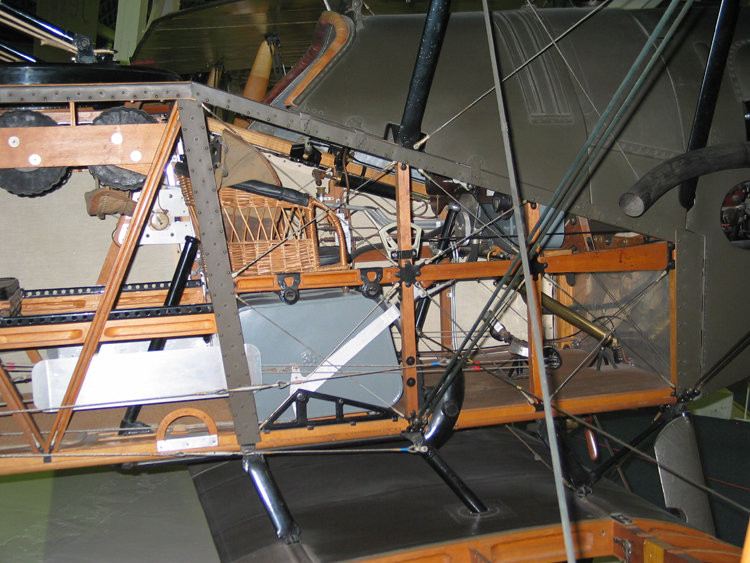
Since our Good Man Merlin "Hocus Pocus, prestigitato" Rowan Baylies has provided images of the Bristol Fighter on display at Hendon we may as well use them here for full effect.
". . .The most important thing is to know why you build and then get the most that you can out of building." via D.D.
Colorado, United States
Joined: January 25, 2004
KitMaker: 11,669 posts
AeroScale: 11,011 posts
Posted: Thursday, October 11, 2007 - 02:11 PM UTC
Greetings all;
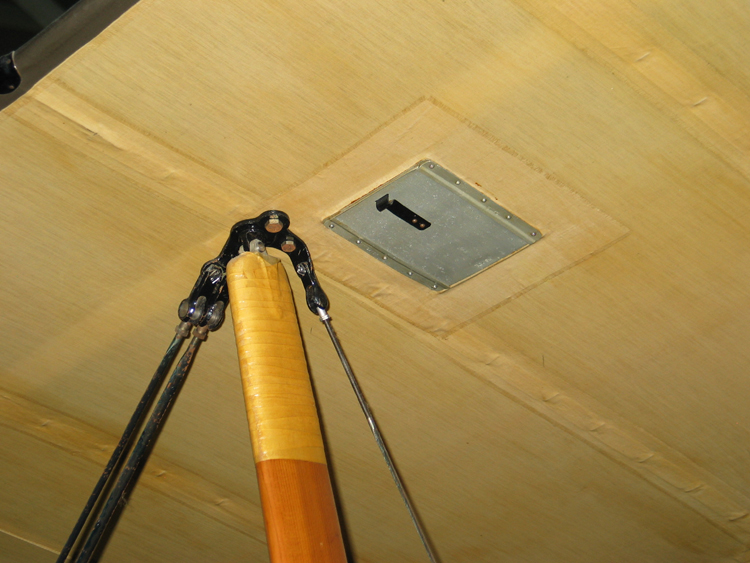
The next bit is to see if you can spot the Modern influence in this recovering of the Bristol airframe. Note the image previously and this one.
". . .The most important thing is to know why you build and then get the most that you can out of building." via D.D.
Colorado, United States
Joined: January 25, 2004
KitMaker: 11,669 posts
AeroScale: 11,011 posts
Posted: Tuesday, October 16, 2007 - 08:55 PM UTC
The subject of this build is the Roden Bristol Fighter F2b. This build will differ from most of my builds previously. One of the most unique concerns of building a Brisfit is the lower wing attachment. There are eight contact points on the fuselage lower longerons. I Plotted the strut paths and substituted only two of them (PP20 X2) with brass rod. These turn out the be the
rear under carriage legs. Images to be shot later today.
". . .The most important thing is to know why you build and then get the most that you can out of building." via D.D.
New York, United States
Joined: December 15, 2006
KitMaker: 365 posts
AeroScale: 344 posts
Posted: Wednesday, October 17, 2007 - 09:37 PM UTC
Stephen,
I have the same Roden kit in my collection that you show at the beginning of the thread. The instructions for the kit do not include any rigging diagrams, in fact they suggest using the box art as reference! Outside of picking up an Eduard kit, which is not a bad option, what other source do you recommend?
Dwayne
Colorado, United States
Joined: January 25, 2004
KitMaker: 11,669 posts
AeroScale: 11,011 posts
Posted: Thursday, October 18, 2007 - 07:38 AM UTC
Quoted Text
Stephen,
I have the same Roden kit in my collection that you show at the beginning of the thread. The instructions for the kit do not include any rigging diagrams, in fact they suggest using the box art as reference! Outside of picking up an Eduard kit, which is not a bad option, what other source do you recommend?
Dwayne
Greetings Dwayne;
Here are my references;
Aeroscale images posted by Rowan Baylies
http://photos.kitmaker.net/showgallery.php/cat/19336Bristol Fighter by J.M. Bruce, Datafile Special #1 , Windsock Publications 1992.
The Bristol Fighter J.M. Bruce , Profile Publications # 21 1965.
The Bristol Fighter J.M. Bruce, Vintage Warbirds # 4, Arm & Armour Press 1985.
". . .The most important thing is to know why you build and then get the most that you can out of building." via D.D.
Victoria, Australia
Joined: November 26, 2006
KitMaker: 608 posts
AeroScale: 602 posts
Posted: Thursday, October 18, 2007 - 10:15 AM UTC
Greetings Dwayne
I used the Squadron Publication "Bristol Fighter in Action".
There is no specific rigging data contained within, but carefull study of the photographs told me most of what I needed to know.
Stephen, this kit was the only one that I have ever seriously considered using a Jig to get the wings onto the Fuselage.
As it was, I did without and made four attempts at getting the Lower main plane attached before I was successful.
Cheers,
Hugh
Colorado, United States
Joined: January 25, 2004
KitMaker: 11,669 posts
AeroScale: 11,011 posts
Posted: Thursday, October 18, 2007 - 02:24 PM UTC
Greetings Hugh.
With my modifications I had two dry runs. They went so well that my second became the final and I tacked it in place. I checked that everything was plumb, made some minor adjustments and finished the attachment of the other short struts. I let it set for about twenty four hours and attached the top wing in about 1.5 hours. (I have to admit I used cyano excellerent and eyeballed the eight outer wing struts.) I replaced the four cabane struts with extruded brass ("STRUTZ" from Aeroclub.) All the time checking the parallel relationship run of the top and bottom wing to each other while I worked. If we are lucky the images will be back in 3-4 days and I'll post them then.
The rigging has caused me to take pause an reflect. There are a couple of lines you might not expect, but for this configuration they are completely understandable. Also the Hendon images posted by our own Rowan Baylies show the double RAF wires are painted in black and are a heavier guage than the rest of the RAF rigging. I am considering a Kevlar thread that I picked up at an Anglers & tackle store. (The same place I picked up the wrapped wire I used on the 1/32 Roden Pfalz D.III). As of last night I had begun to rig the cabane area.
If anyone remembers my Camel builds from last year you will recall I mentioned that BEF aircraft always seem to have half again as much rigging as any other machine from that time era. By the way the Squadron in Action series are good for plotting rigging "BUT" be cautous of their captions.
". . .The most important thing is to know why you build and then get the most that you can out of building." via D.D.
Colorado, United States
Joined: January 25, 2004
KitMaker: 11,669 posts
AeroScale: 11,011 posts
Posted: Monday, October 22, 2007 - 07:27 PM UTC
Greetings all;
Here is the continuation of the Roden build. These images are about 5 days old.

The lower wing attachments are shown to advantage here.


". . .The most important thing is to know why you build and then get the most that you can out of building." via D.D.
Indiana, United States
Joined: May 14, 2007
KitMaker: 3,117 posts
AeroScale: 2,270 posts
Posted: Tuesday, October 23, 2007 - 06:02 AM UTC
That wicker seat looks real good. Is it a kit part?
"Treat 'em Rough", Current Builds--Wingnut Rumpler
I am frequently seen with blood shot eyes from staying up past my nap time to get the right colour scheme on my latest WWI model?
Colorado, United States
Joined: January 25, 2004
KitMaker: 11,669 posts
AeroScale: 11,011 posts
Posted: Wednesday, October 24, 2007 - 08:41 AM UTC
Quoted Text
That wicker seat looks real good. Is it a kit part?
Well its is a kit part . . .just not a Roden kit part.
". . .The most important thing is to know why you build and then get the most that you can out of building." via D.D.
Victoria, Australia
Joined: November 26, 2006
KitMaker: 608 posts
AeroScale: 602 posts
Posted: Wednesday, October 24, 2007 - 10:17 AM UTC
Hm, yes. Looks suspicously like the wicker seat from the profipack kit from another popular manufacturer of WWI kits.
I too scavanged the seats from this kit (In it's Duel Combo form) for use on my Roden BE2c, but then decided after they were built up and painted that I would use the Roden kit seats anyway.
Looking good so far Stephen.
Cheers,
Hugh
Colorado, United States
Joined: January 25, 2004
KitMaker: 11,669 posts
AeroScale: 11,011 posts
Posted: Saturday, October 27, 2007 - 04:04 PM UTC
MerlinV and a fine job you did of it.
I am kind of hoping that Brad cancian will show up with his build of the Bristol F.2b with a Sunbeam Arab engine. Roden kit #429.
http://www.roden.eu/HTML/429.htm". . .The most important thing is to know why you build and then get the most that you can out of building." via D.D.
Colorado, United States
Joined: January 25, 2004
KitMaker: 11,669 posts
AeroScale: 11,011 posts
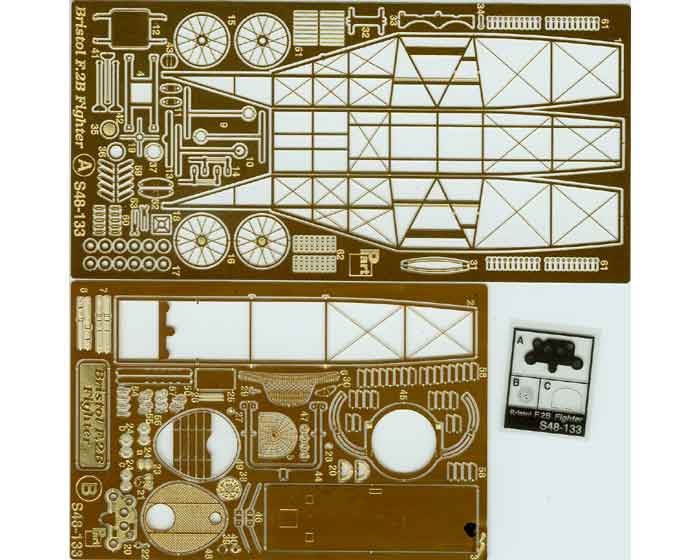
Posted: Saturday, October 27, 2007 - 04:06 PM UTC
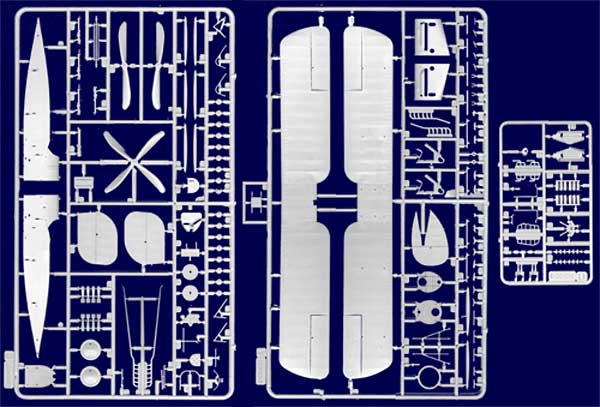
Here is the relevant sprue for the Sunbeam Arab motor.
". . .The most important thing is to know why you build and then get the most that you can out of building." via D.D.
Colorado, United States
Joined: January 25, 2004
KitMaker: 11,669 posts
AeroScale: 11,011 posts
Posted: Saturday, October 27, 2007 - 04:27 PM UTC
For my build with the Rolls Royce Falcon 230hp;
The top wing went on without any real concerns. The rigging was completed yesterday and I am in the throws of doing some touch ups which is usually the last stage. before taking the finished build photos.
The Scarff ring was built using the AM "Part of Poland" items for this kit. Very impressive. Even a minor amount of experience coupled with a little patience and Bam! It goes together very nicely. I opted to replace The mounting bar with a section of bent brass rod in the appropriate diameter. The kit has Mk II and Mk III types of Lewis guns and I opted for the twin mounted Mk III types withthe 97 round ammunition drums. A few bits and peces went into the union bars that framed the Lewis gun muzzles and breeches together. Ring and bead sights are also from the "Part of Poland set." Seen here below .
See page 7.
http://www.jadarhobby.waw.pl/aircraft-148-c-18_24_28.html?page=7&sort=2a". . .The most important thing is to know why you build and then get the most that you can out of building." via D.D.
Colorado, United States
Joined: January 25, 2004
KitMaker: 11,669 posts
AeroScale: 11,011 posts
Posted: Saturday, October 27, 2007 - 04:56 PM UTC
Most of my "Part of Poland" pieces will go together in a diorama about instructional training. But there are some pieces that would not be on a frame in such a settiing so I have gotten away with using them to detail this build.
". . .The most important thing is to know why you build and then get the most that you can out of building." via D.D.


