_GOTOBOTTOM
Pre-Flight Check
Constructive critique of your finished or in-progress photos.
Hawker Hurricane mk.I (1:72)
Emeritus
_VISITCOMMUNITY
Uusimaa, Finland
Joined: March 30, 2004
KitMaker: 2,845 posts
AeroScale: 1,564 posts
Posted: Wednesday, October 10, 2007 - 03:22 AM UTC
Hi,

Remember the Revell 1:72 Hurricane I was about to build for FUMS last year, but gave up on the idea after discovering that quite a few modifications were needed to make it a true mk.I?
Well, here it is again. With no campaign deadlines looming ahead, I've been making slowish but steady progress on this one along my current main builds. I've been posting these pics on a Finnish modeling site, but I thought it won't do any harm to show them here as well.

As I mentioned in the FUMS campaign thread, this Revell kit, though marketed as a mk.IIB (and with correct Finnish markings, which is always nice), isn't really that out of the box. In fact, it's actually a mk.I with more mg's in the wings and a mk.II spinner and props. The fuselage is still of the shorter mk.I type.
To make it a proper mk.I, I had to make numerous modifications. Replacing the spinner & props and removing the outer two machine guns from each wing being the most significant.
So, this is what has happened so far.

This is where I started again. The only new thing in this pic is the milliput used to smooth out the wing-to-fuselage seam, which wasn't the best possible. The lost panel lines where scribed on later. The interior is almost compeletely replaced with PE parts that came with the extratech set I used on this model. In fact, the only styrene parts in the office is the original instrument panel behind the acetate film & PE assembly and the headrest that isn't glued on yet. (this I recently made from styrene sheet, as cutting up and sanding a piece to shape was way much easier than separating the original headrest from the plastic cockpit back wall)
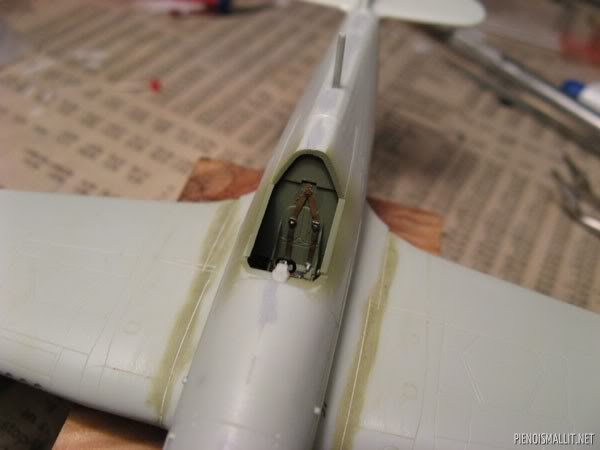

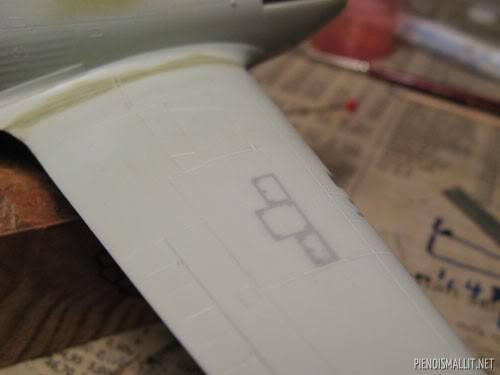
Moving to the wings, modifying them from B to A type was as simple as filling out the excess machine gun openings, access hatches and shell ejector chutes. Fortunately one fellow modeler on the Finnish site reminded me to fill the access hatches on top of the wings too, otherwise I would have probably noticed it too late (or not at all, as I had done this on my first Hurricane as well...).

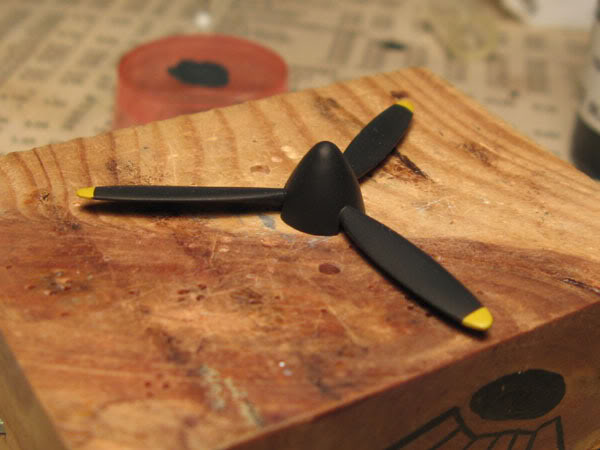
The prop and spinner were next, and this spot needed the most effort so far. I had the original propeller already glued to the spinner, so I dug into my spare parts box(es). The only suitable part I found was a spinner from a LaGG-3 kit. No extra props lying around. I had to take the kit-supplied prop into use. Since the spinner is glued around the prop, I had no choice but to saw and cut the spinner apart to free the propeller, pretty much destroying the part in the progress. Not a big loss though, since the long and pointed mk.II spinner wouldn't have been of use anyway.
Once freed, the propeller blades were sanded down to a shape better resembling a mk.I prop.
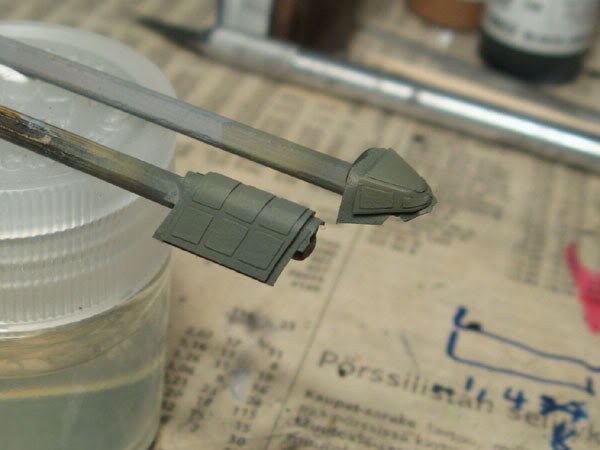
The spinner required more modifying. First, the openings for the prop were enlarged, then the cannon barrel opening in the tip was plugged with styrene rod, leaving a length sticking out, to help putty attach better. The tip was then formed with milliput, and sanded to shape. Those green traces are squadron green putty.


While test fitting the unmodified LaGG spinner, I discovered that the diameter of the spinner was a little smaller than the nose. This difference I fixed by gluing thin styrene sheet to both the nose of the aircraft and the bottom of the spinner and then sanding until they fit together nicely. (notice the white styrene in the lower pic of the spinner)

One of the inaccuracies in the Revell kit were the wheels. With four spokes, they won't do. What I needed was wheels like this:
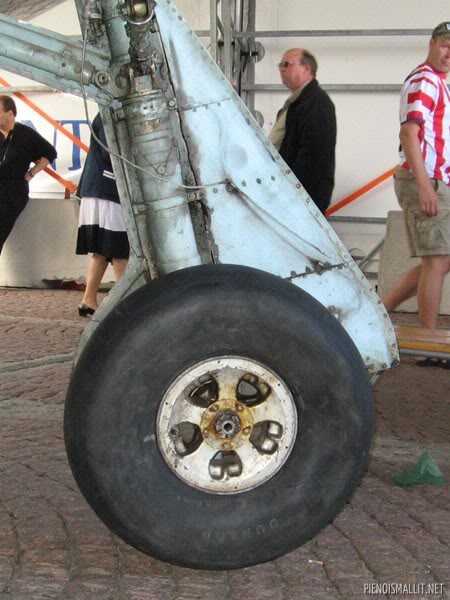
So I went and bought a Revell Spitfire mk.V to donate suitable five-spoked wheels. (there go my efforts to shrink the stash... )

The new wheel is being test fitted here. Actually, they fitted better than the original ones. But that benefit was partly lost because the wheels mount to the landing gear at a slight angle, unless modified. So I sanded the landing gear axels in order to get the wheel sit perpendicular to the ground.

I had to compromise with the exhausts a little. The kit came with both flared and tubular exhausts, but neither were 100% right. I decided that the tubular ones were just fine after cutting down the tubes a little and drilling them out.


The tailwheel was mount was different, so it was modified and recieced a copper wire pin for a rigid joint to the fuselage. The recess for the tailwheel in the fuselage was also slightly cut and sanded to get a better mk.I look to it.


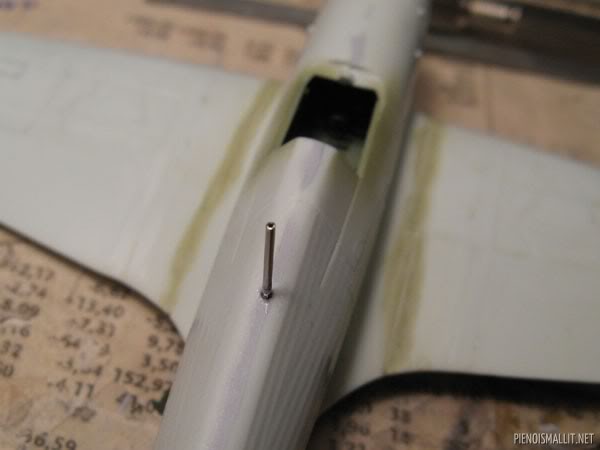
I was already thinking that I might actually end up with the kit's moulded-on radio mast intact. Until I accidentally knocked it a little too hard while handling the model. Well, that was a good excuse to make a more accurate mast from a needle.

Movind down to the landing gear, there wasn't much to do. The mandatory brake lines were added to the main landing gear using copper wire.
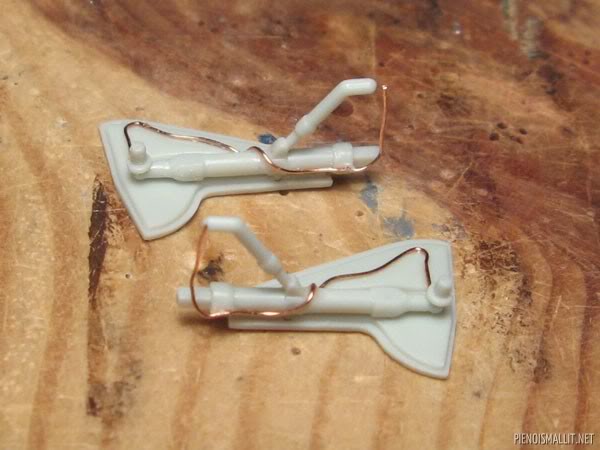
Somehow, the smaller support struts lacked the part that goes to the wheel well. Not only was it inaccurate, it also made it harder to position correctly while gluing them on later. So, in came copper wire.
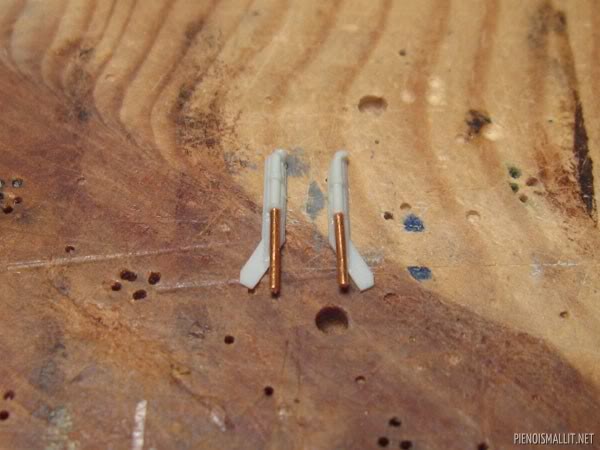
While looking at my reference photos, I noticed the landing gear doors lacked one small rivet. This dealt with two squash-moulded rivets.


The last additions before priming were a piece of brass wire inserted in front of the radiator.
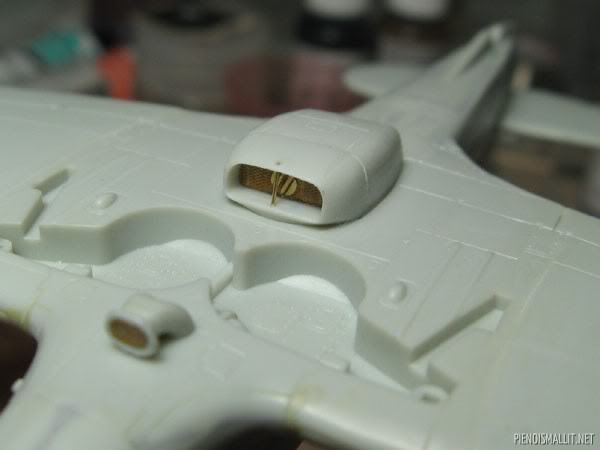
(I chose to drill a hole and insert the wire "through the roof" instead of trying to cut a lenght that would fit in)
The kit was missing a "ski box" hatch in the fuselage, so I scribed one.
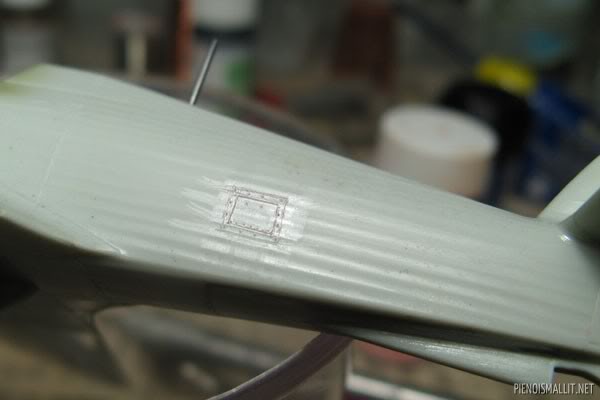
The isn't 100% accurate, but definately better than nothing.

..And to end this monstrously long summary, "happened so far" post, here's the airframe, after a coat of mr. surfacer 1000, from a spray can.


I hope you didn't fall asleep. I promise the following posts will be shorter as that last pic shows the model how it is now.
magnusf
_VISITCOMMUNITY
Stockholm, Sweden
Joined: May 02, 2006
KitMaker: 1,953 posts
AeroScale: 1,902 posts
Posted: Wednesday, October 10, 2007 - 08:17 AM UTC
One of my favourite aircraft in my favourite scale! I will follow this one with interest in the future. A very ambitious detailing job that turns out very well!

Regards

Magnus
Emeritus
_VISITCOMMUNITY
Uusimaa, Finland
Joined: March 30, 2004
KitMaker: 2,845 posts
AeroScale: 1,564 posts
Posted: Wednesday, October 10, 2007 - 08:54 AM UTC
Thanks for the compliments.

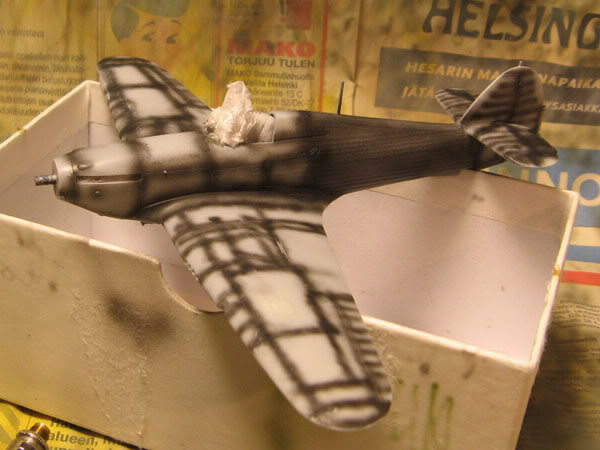
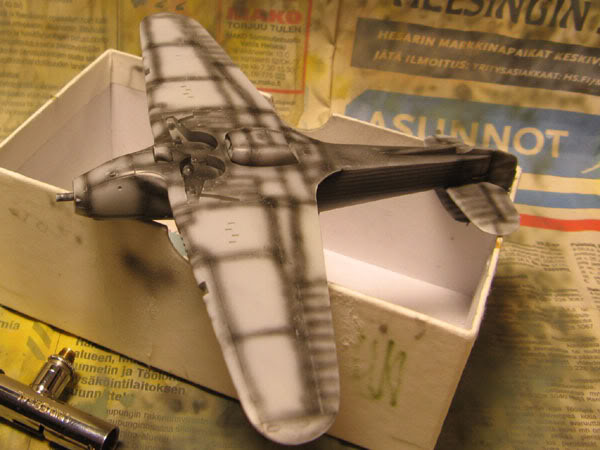
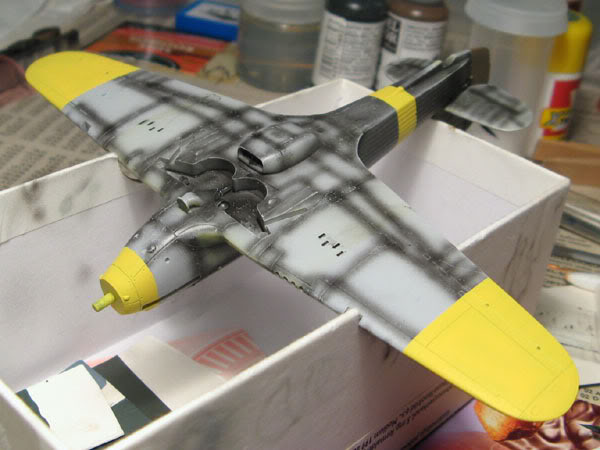
More progress coming up. I just got the preshading sprayed on, my first time doing so (in the past I used a wash-like thinned paint), so the results aren't top-notch. But it's a start.
Also, I was kind of testing a couple of different paints on it, so I'll blame them too!


Lifecolors' "oil" tensocrom wash was used on the undersides, straight from the bottle (it's more diluted, so I could get a subtler coat more easily for the light colors to follow.), vallejo's model air on the right wing and a mixture of both on the rest.
I'm not 100% satisfied with the results, but all this will be covered by the warpaint anyway.
SGTJKJ
#041
_VISITCOMMUNITY
Kobenhavn, Denmark
Joined: July 20, 2006
KitMaker: 10,069 posts
AeroScale: 3,788 posts
Posted: Wednesday, October 10, 2007 - 10:28 PM UTC
Looks good, Eatu.

A lot of nice details on this one - I wonder what level of detail you could pack into a 1/35 tank, if you can add these nice details in 1/72. Oh wait, I think I have already seen that on your outstanding T34/85 at armorama

Looking forward to see more
CMOT70
_VISITCOMMUNITY
Victoria, Australia
Joined: August 23, 2007
KitMaker: 629 posts
AeroScale: 539 posts
Posted: Thursday, October 11, 2007 - 12:45 PM UTC
Very nice job!

I'm assuming then that this is not a Hasegawa kit in a Revell box?

Andrew
Emeritus
_VISITCOMMUNITY
Uusimaa, Finland
Joined: March 30, 2004
KitMaker: 2,845 posts
AeroScale: 1,564 posts
Posted: Thursday, October 11, 2007 - 07:26 PM UTC

Quoted Text

Very nice job!

I'm assuming then that this is not a Hasegawa kit in a Revell box?


Thanks.
And yes, this is revell's own kit.

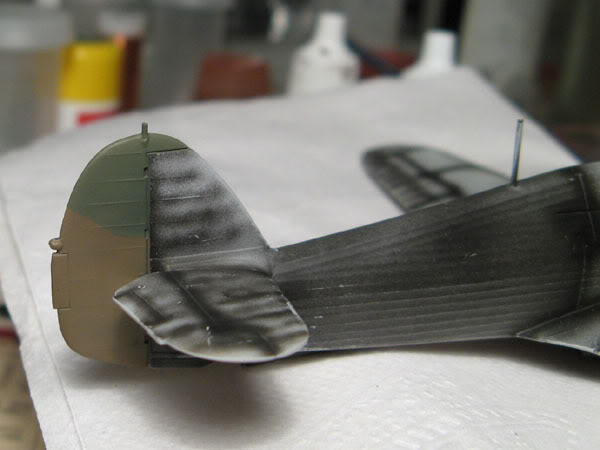
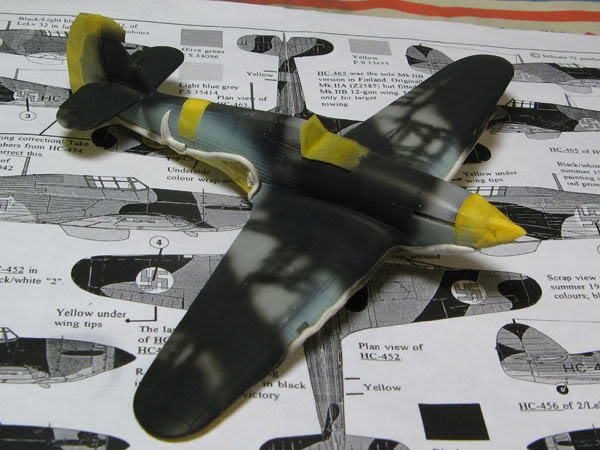
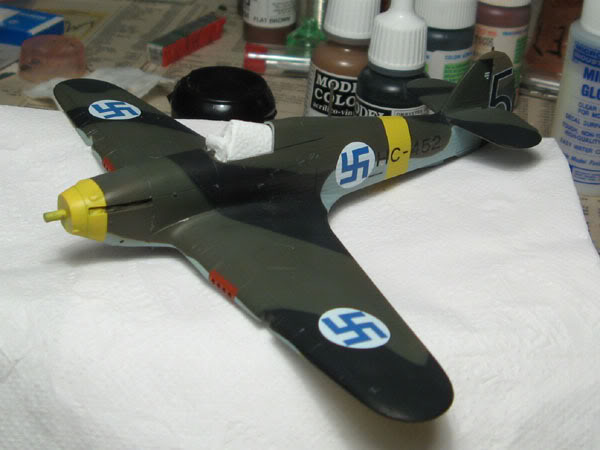
Now I got the British colors painted, dark earth & dark green. Both from xtracrylics.


Emeritus
_VISITCOMMUNITY
Uusimaa, Finland
Joined: March 30, 2004
KitMaker: 2,845 posts
AeroScale: 1,564 posts
Posted: Friday, October 12, 2007 - 10:11 PM UTC


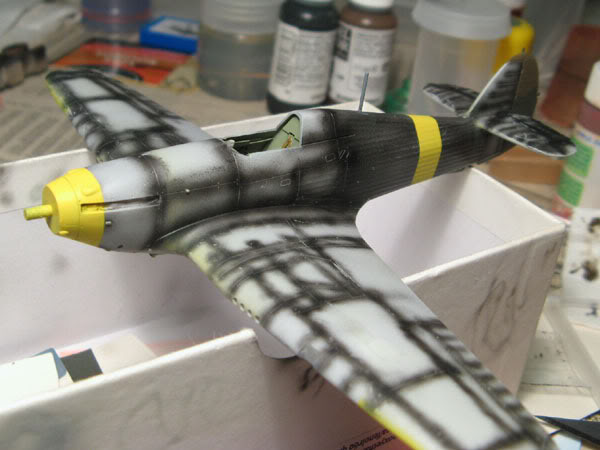
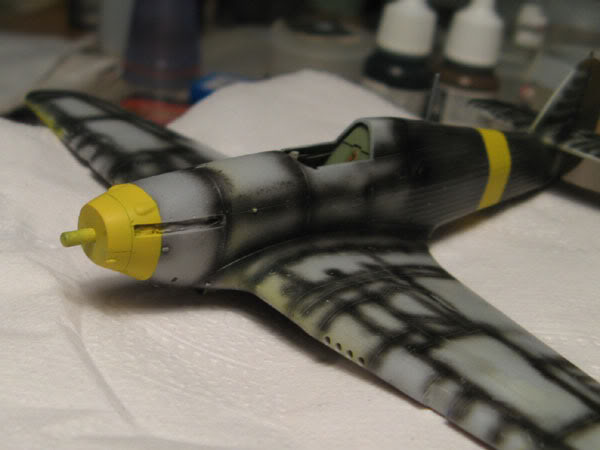
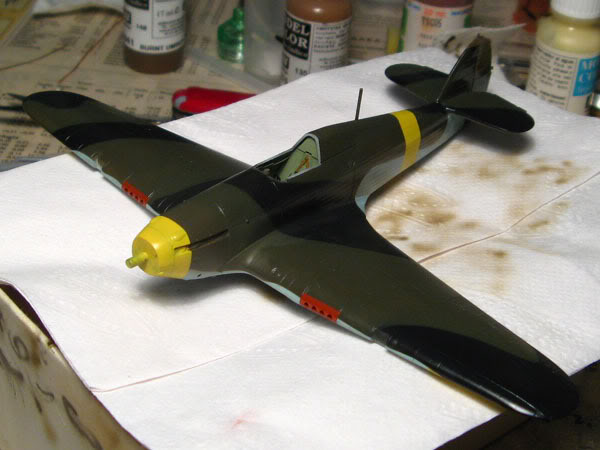
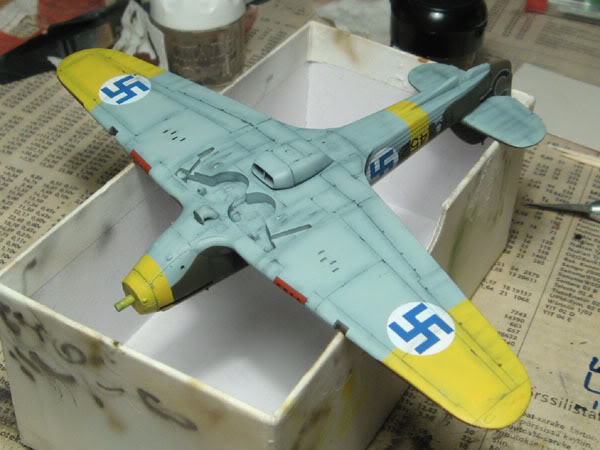
There, I got the yellow areas painted. The preshading didn't show very well in the these pics, so I took two more with my desk light turned off and different camera settings.


That airbrushed black preshading was much too dark for the yellow areas, they stayed greenish. I misted a coat of light grey over them and re-sprayd the yellow now it worked fine. Next time I'll go easier on the areas that are going to be yellow (or similar colors), or use a dark grey or something.
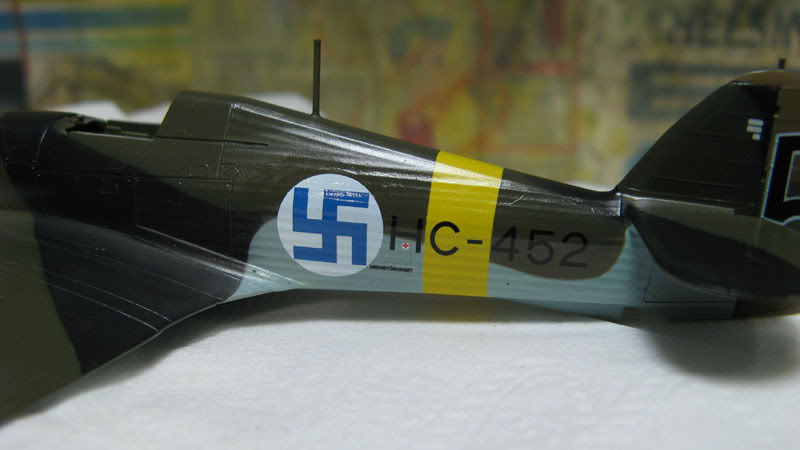
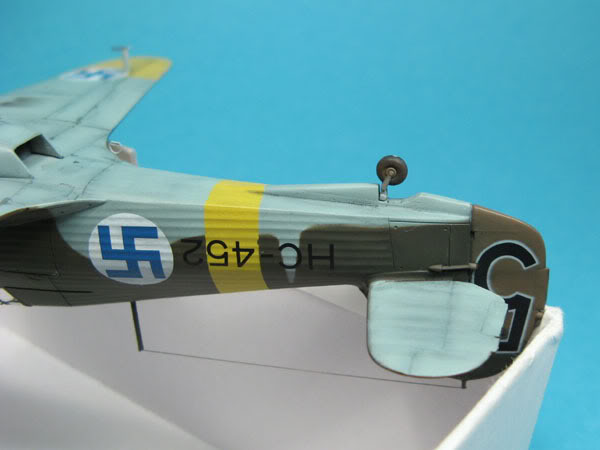
Oh, and if you're wondering, yes, this will be a Finnish machine. (HC-452 to be exact)
Emeritus
_VISITCOMMUNITY
Uusimaa, Finland
Joined: March 30, 2004
KitMaker: 2,845 posts
AeroScale: 1,564 posts
Posted: Saturday, October 13, 2007 - 11:29 PM UTC
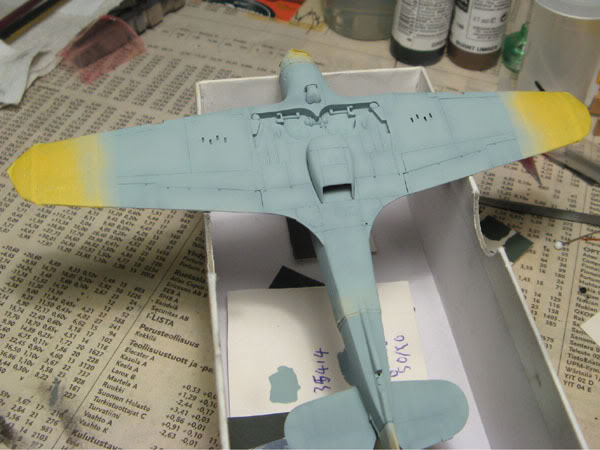
Underside light blue is on.

magnusf
_VISITCOMMUNITY
Stockholm, Sweden
Joined: May 02, 2006
KitMaker: 1,953 posts
AeroScale: 1,902 posts
Posted: Sunday, October 14, 2007 - 04:26 AM UTC
Reeeeallly nice! What decals are you planning to use?


Magnus
f1matt
_VISITCOMMUNITY
Manitoba, Canada
Joined: August 13, 2006
KitMaker: 1,021 posts
AeroScale: 184 posts
Posted: Sunday, October 14, 2007 - 05:48 PM UTC
I have never seen a Hurricane painted in these colors before. What nationality is it? Looks great.
Emeritus
_VISITCOMMUNITY
Uusimaa, Finland
Joined: March 30, 2004
KitMaker: 2,845 posts
AeroScale: 1,564 posts
Posted: Sunday, October 14, 2007 - 07:50 PM UTC

Quoted Text

I have never seen a Hurricane painted in these colors before. What nationality is it? Looks great.


It's going to be in in Finnish airforce colors. The upperside will recieve a black-green camo, which I'm hoping to get painted today.
The rudder is in British camo because it was taken from a different plane (HC-455, which wasn't yet painted in the regular Finnish camo) when overhauled.
Emeritus
_VISITCOMMUNITY
Uusimaa, Finland
Joined: March 30, 2004
KitMaker: 2,845 posts
AeroScale: 1,564 posts
Posted: Monday, October 15, 2007 - 07:34 PM UTC
Masking takes more time than you would think, you know.
I got the black areas painted yesterday.
First, masks on:


And here's the results:


I mixed the scale-black shade from 1 part RLM66, 2 parts black (both from xtracrylics). I aribrushed the black fields generous in size, freehand. In the past, I remember making the mistake of painting some areas too small, only to find out when starting to mask the other color.
Next it's time for the green. And masking that canopy.
SGTJKJ
#041
_VISITCOMMUNITY
Kobenhavn, Denmark
Joined: July 20, 2006
KitMaker: 10,069 posts
AeroScale: 3,788 posts
Posted: Tuesday, October 16, 2007 - 10:09 PM UTC
Looks good, Eetu. How are you going to mask the camouflage pattern - or are you going the paint brush way? Good luck witrh the cockpit masking.

Looking forward to see more
Emeritus
_VISITCOMMUNITY
Uusimaa, Finland
Joined: March 30, 2004
KitMaker: 2,845 posts
AeroScale: 1,564 posts
Posted: Tuesday, October 16, 2007 - 11:34 PM UTC

Quoted Text

Looks good, Eetu. How are you going to mask the camouflage pattern - or are you going the paint brush way? Good luck witrh the cockpit masking.

Looking forward to see more


Thanks.
For the camo pattern masking, I'm doing the same as with the rest, sticky-tac and masking tape.
Now I got it painted. I sprayed the black freehand because masking that would use up even more 'tac and tape. Of course, this kind of hurts the preshading, but spraying on the green indicated that an overal black for the upperside wouldn't have hurted.
For this model, I tried xtracrylics' forest green, which looked good when I made some test samples on cardboards. Well, over black, coats were green from the start, but over the lighter primer, it looked quite brown until I got the coat more opaque.
So, with the coats required, the preshade effect almost completely disappeared. Well, at least it's good practise with the airbrush...
I can't post photos right now, sorry. My sister borrowed it for his art endeavours. I'll snatch go it back on friday when I'm going to a LHS get eduard's masks for the canopy.
I may even get the decals on by friday.
m:-)
Emeritus
_VISITCOMMUNITY
Uusimaa, Finland
Joined: March 30, 2004
KitMaker: 2,845 posts
AeroScale: 1,564 posts
Posted: Thursday, October 18, 2007 - 09:49 PM UTC
Okay, here we are now. I got the model painted and glossed up ready for the decals.
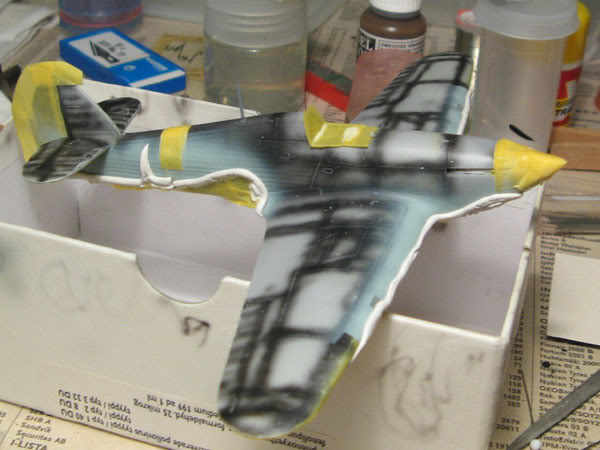
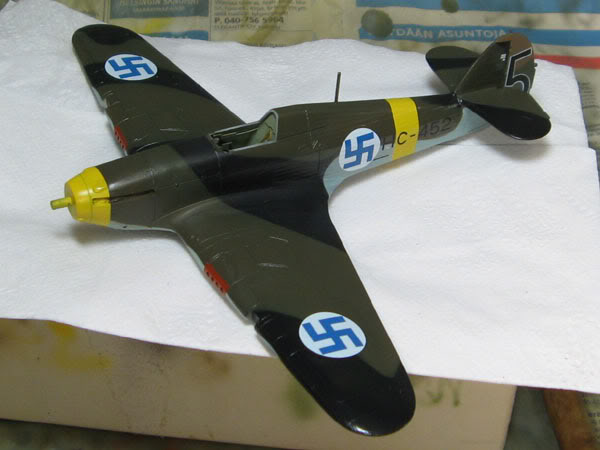
For the green, I tried xtracrylics' forest green this time.
Emeritus
_VISITCOMMUNITY
Uusimaa, Finland
Joined: March 30, 2004
KitMaker: 2,845 posts
AeroScale: 1,564 posts
Posted: Monday, October 22, 2007 - 11:21 PM UTC
Now I've learnt one thing with airbrushing. Cover up everything you don't want paint ending up to. I made that mistake while painting the red MG areas. I protected the surroundings generously with wide masking tape, and sprayed the red close to the model with a lowish pressure and taking care not to wonder around. Despite my efforts, I ended up with severa spots of very faint overspray over the model. So I went back and touched up those areas. While doing that, I noticed that while this forest green paint I used makes a really nice Finnish camo green over dark surfaces, but has a brown appearance over light colors, until multiple coats are on.
I've got to remember that. Next time I'll spray the whole upperside with black, then mask up the black bands and spray on the green.

Btw, here's some more progress. Decals are on:


Those InScale decals behaved themselves, apparently I haven't applied them over a gloss enough surface before, causing awful silvering. The rudder numbers and victory markings came from InScale's Hurricane sheet, as well as the ski container text under the registry code on the left side. On the rudder, three brushed-on coats of microscale's gloss were apparently enough, as the number decals didn't show any signs of silvering and snuggled down nicely with micro-sol, despite being thickish (reminds me of tamiya's decals)
Despite the InScale sheet having markings for this plane, I opted to use Techmod's Finnish lettering for the registry codes. The national markings are from techmod too. As normal, they went on with no problems.
f1matt
_VISITCOMMUNITY
Manitoba, Canada
Joined: August 13, 2006
KitMaker: 1,021 posts
AeroScale: 184 posts
Posted: Tuesday, October 23, 2007 - 01:40 PM UTC
Very cool looking Hurricane. As far as the pre shading being all covered up. Well that's why there is post shading. I usually like to do a lot more post shading because that way the markings get weathered too. And I don't know how many times I have kicked myself for not masking a larger area when painting. I feel your pain.

Emeritus
_VISITCOMMUNITY
Uusimaa, Finland
Joined: March 30, 2004
KitMaker: 2,845 posts
AeroScale: 1,564 posts
Posted: Saturday, October 27, 2007 - 03:26 AM UTC
I guess procrastination is good sometimes. I paid a visit to that LHS and there were eduard masks for the hurricane.
I was just about to start masking the regular way.


That modified spinner turned out fine. I was afraid paint would reveal flaws in the finish, but to my delight it was just fine.


I got the canopy painted so far. Now I'll do some chipping on the plane, then apply a flat coat to the components (to make a surface for the pastel weathering to come) and remove the masking from the canopy.
Emeritus
_VISITCOMMUNITY
Uusimaa, Finland
Joined: March 30, 2004
KitMaker: 2,845 posts
AeroScale: 1,564 posts
Posted: Sunday, October 28, 2007 - 09:39 PM UTC

There, now I got he model flatcoated and ready for pastel treatment, which I'll use to accent panel lines and add some weathering. Before spraying on the flat, I did some paint chips with metallics and a small brush.


I goofed with the canopy a little and had to spend more time on that. I sprayed the forest green straight on top of the interior green which went on first. It of course turned out brownish because of the light paint underneath. A quick coat of black and another try with forest green worked much better.


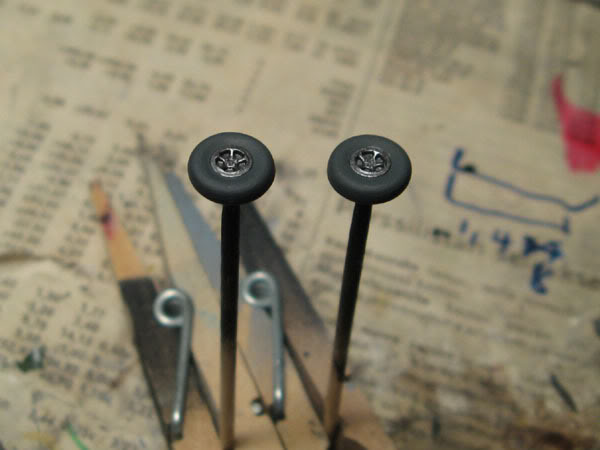
That's a selection of small parts that I painted separately and the wheels.
I tried to glue some aluminium foil to the back of the landing lights, but they didn't hold so I painted them instead. I think should go back and drill a hole to the back to simulate a light bulb.
slodder
_VISITCOMMUNITY
North Carolina, United States
Joined: February 22, 2002
KitMaker: 11,718 posts
AeroScale: 305 posts
Posted: Sunday, October 28, 2007 - 10:31 PM UTC
Fantastic attention to detail. I was worried that the pre-shading would fade a lot with a dark overcoat. I base preshading based more on the end coat than anything. Ohwell like you said - good practice.
Emeritus
_VISITCOMMUNITY
Uusimaa, Finland
Joined: March 30, 2004
KitMaker: 2,845 posts
AeroScale: 1,564 posts
Posted: Sunday, October 28, 2007 - 11:49 PM UTC

Quoted Text

Fantastic attention to detail. I was worried that the pre-shading would fade a lot with a dark overcoat. I base preshading based more on the end coat than anything. Ohwell like you said - good practice.


Thanks.
You're right, the topside colors covered up the preshape almost completely, partly because I noticed that this particular green I used has a brownish appearance over light colors when you're not making an opaque thicker coat, but just right over black. On future builds having the same camo scheme, I'll preshade the bottom and paint it as usual, then paint the whole upperside with scale black, mask and spray the green.
Not a big deal with the preshade, pastel treatment makes for a similar effect.

Edit: I'm considering replacing the solid-moulded landing lights with a backing formed with foil and doing the glass with tape. Guess I'll have to go grab a couple of mince pies to get suitable firm foil, and some tape...
Fortunately the eduard masks included pieces for the landing lights so cutting the tape should be a breeze.
Emeritus
_VISITCOMMUNITY
Uusimaa, Finland
Joined: March 30, 2004
KitMaker: 2,845 posts
AeroScale: 1,564 posts
Posted: Tuesday, October 30, 2007 - 07:09 AM UTC
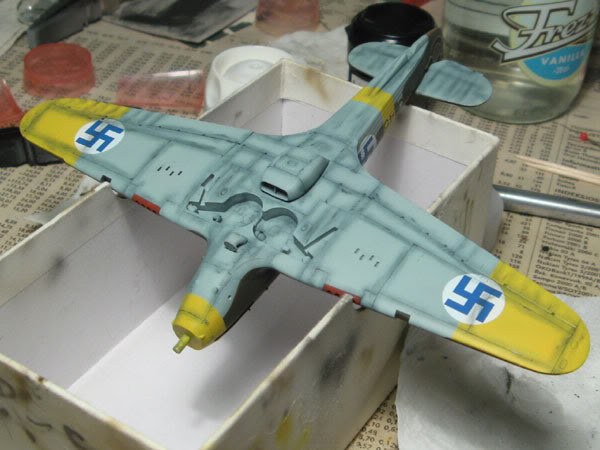
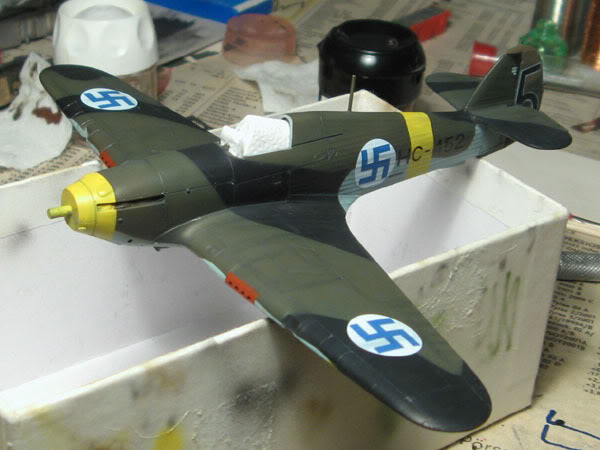
I did the pastel treatment today.
Here's a "before picture":


And this is how the underside turned out:


Because of the darker colors, the treatment isn't as readily apparent on the topside, but it's there:
Emeritus
_VISITCOMMUNITY
Uusimaa, Finland
Joined: March 30, 2004
KitMaker: 2,845 posts
AeroScale: 1,564 posts
Posted: Wednesday, November 07, 2007 - 11:26 PM UTC
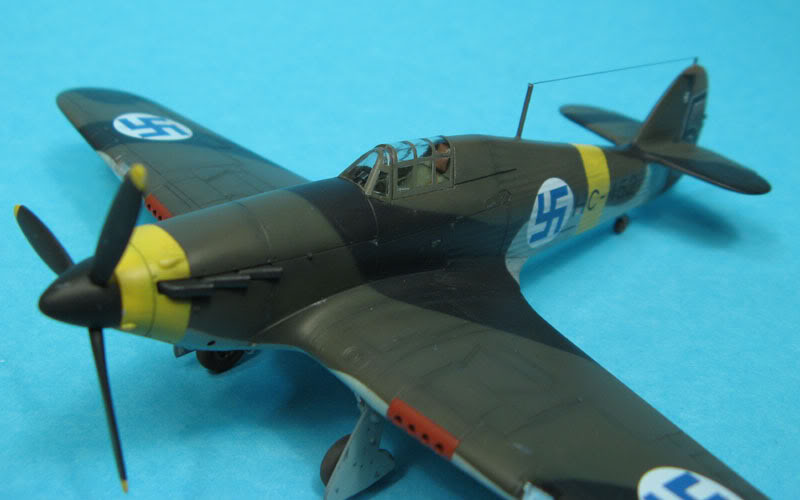
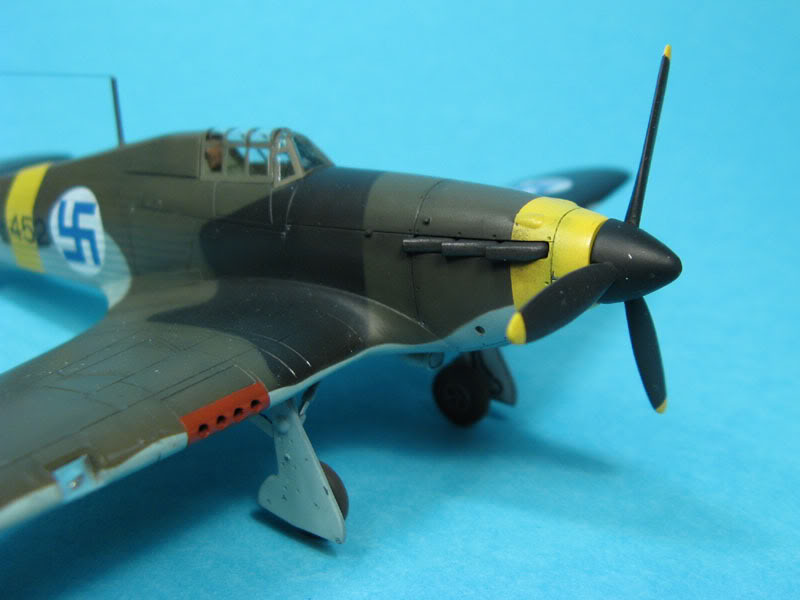
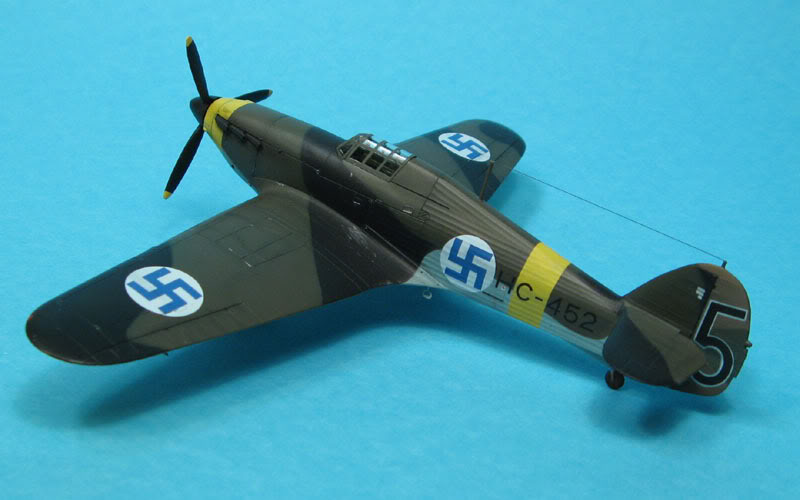
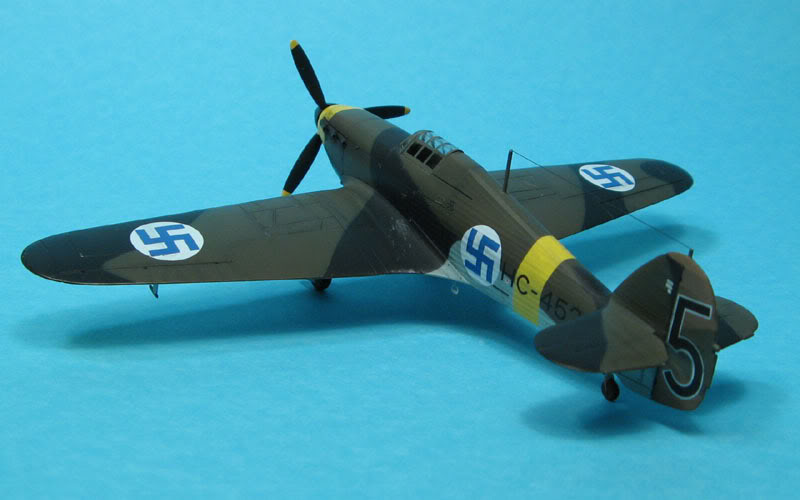
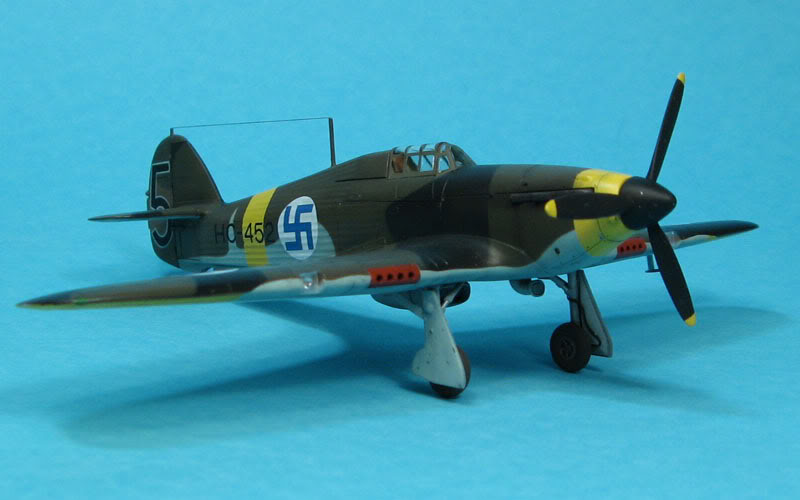
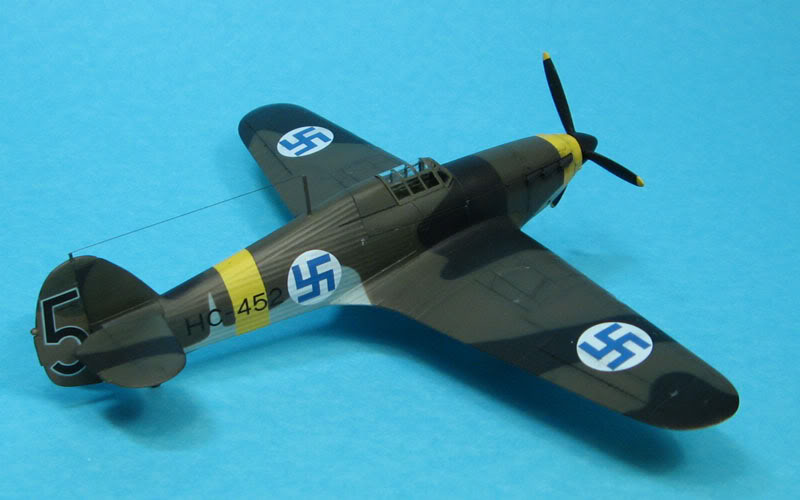
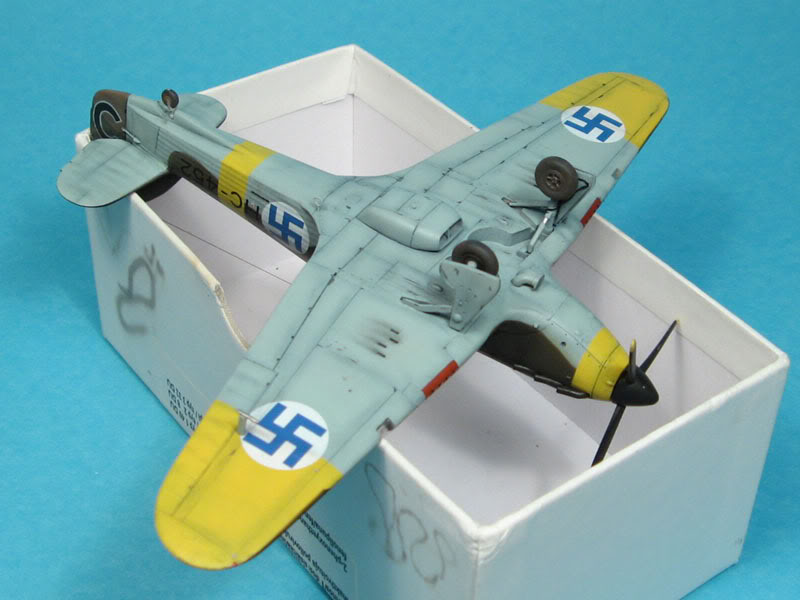
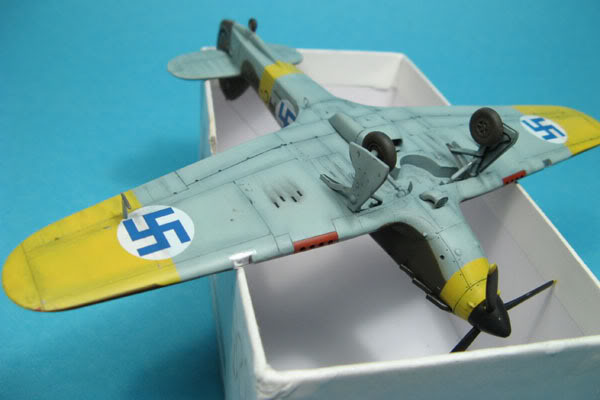
Finally, I got it done.
Sorry for not being able to post pics from between the last in-prog set and finished, but here it is anyway.
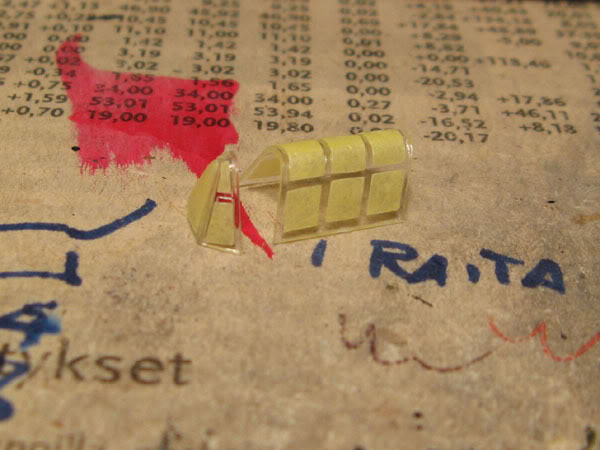
The only notable updates were the glass for the gunsight and the landing lights, which I made from thicker aluminium foil and gloss tape. The eduard masks were big help in cutting up the tape. When the pieces of tape were in place, I carefully applied future to the edges to seal them and prevent hair, dust and other stuff clinging to it.
But enough talk, here it is.


Hope you like it.
leon
_VISITCOMMUNITY
Noord-Brabant, Netherlands
Joined: January 13, 2006
KitMaker: 65 posts
AeroScale: 37 posts
Posted: Thursday, November 08, 2007 - 05:17 AM UTC
It looks verry nice, i didn't know tho that the Mk.1 had a 3bladed Prop, i thought they had a 2 bladed one.

Greetings Léon
magnusf
_VISITCOMMUNITY
Stockholm, Sweden
Joined: May 02, 2006
KitMaker: 1,953 posts
AeroScale: 1,902 posts
Posted: Thursday, November 08, 2007 - 08:17 AM UTC
A Hurricane to be proud of! Good work!

Magnus
 _GOTOTOP