_GOTOBOTTOM
World War II
Discuss WWII and the era directly before and after the war from 1935-1949.
Hosted by Rowan Baylis
S-199 WIP
Yeti123
_VISITCOMMUNITY
Michigan, United States
Joined: February 11, 2008
KitMaker: 311 posts
AeroScale: 278 posts
Posted: Sunday, February 17, 2008 - 04:56 PM UTC
This is the first time have tried to post anything and hopefully this works.. I thought I would share some photos of my most recent project. I love obscure topics and 109s, so to me the 199 is the best of both worlds. I recently purchased the Avia S-199 in Israeli Air Force Service by Alex Yofe. Great book! It inspired me to dig out the old Hobbycraft kit , the Aires update, and some left over brass I have had for years. Both the kit and the Aires set really provide parts that are a mix for both Czech machines and the early production aircraft that were sold to the fledgling IAF. For examle, the Aires kit photo shows cockpit armor for a a late production model with sliding canopy. These were not used by the IAF according to my sources. You can see, I have done alot of surgery to the kit allready. IBottom line: More work than I anticipated to get an accurate replica. Why is everything more work than you think? Thank you for the chance to share.


vanize
_VISITCOMMUNITY
Texas, United States
Joined: January 30, 2006
KitMaker: 1,954 posts
AeroScale: 1,163 posts
Posted: Sunday, February 17, 2008 - 05:32 PM UTC
Hi tsneely,

looks like you have put the link to webpage the image is on inside the "img" brackets instead of the actual url of the image. to get the url of the image, right click on the photo on your link and select the "properties" option. the location of the actuakl image will display in the pop up window. you can just copy that and paste it between the "img" and "/img" commands.

for example, your first image's url is:
http://gallery.kitmaker.net/data/500/Picture11.jpg

not: http://gallery.kitmaker.net/showphoto.php/photo/245113

you can edit to fix, or just put "url" instead of "img" if you want to link to the page instead of the image.

anyway, I am looking forward to watching this build, as I have this kit as well. It'd be great if you could post more comments about the process (high and low points of the kit, what it takes to install the update kit, etc) as well as the in progress pictures.

Merlin
Staff MemberSenior Editor
AEROSCALE
#017
_VISITCOMMUNITY
United Kingdom
Joined: June 11, 2003
KitMaker: 17,582 posts
AeroScale: 12,795 posts
Posted: Sunday, February 17, 2008 - 07:02 PM UTC
Hi there

The urls were a bit muddled, but that should work now.

All the best

Rowan
propwash
_VISITCOMMUNITY
Charente, France
Joined: July 06, 2007
KitMaker: 289 posts
AeroScale: 231 posts
Posted: Sunday, February 17, 2008 - 08:32 PM UTC
That cockpit is looking great so far. Will be keen to follow your progress and great to see an unusual subject.
Yeti123
_VISITCOMMUNITY
Michigan, United States
Joined: February 11, 2008
KitMaker: 311 posts
AeroScale: 278 posts
Posted: Sunday, February 17, 2008 - 10:09 PM UTC
Sorry for the confusion on the URLs everyone. I'm sure on the future updates I will get it right. Thank you Vance for the help.
ejclide
_VISITCOMMUNITY
Ohio, United States
Joined: January 03, 2008
KitMaker: 150 posts
AeroScale: 119 posts
Posted: Monday, February 18, 2008 - 09:15 AM UTC
I don't know if you already have this figured out for sure, but if you go to allyoucanupload.com, you can upload as many pics as you want, and once they're uploaded it gives you really easy links you can just copy and paste right onto these forums!

hope that helps.
Merlin
Staff MemberSenior Editor
AEROSCALE
#017
_VISITCOMMUNITY
United Kingdom
Joined: June 11, 2003
KitMaker: 17,582 posts
AeroScale: 12,795 posts
Posted: Monday, February 18, 2008 - 07:08 PM UTC
Hi again

Like Propwash, I'm also really looking forward to seeing how this one progesses - it's looking great so far!

All the best

Rowan
Yeti123
_VISITCOMMUNITY
Michigan, United States
Joined: February 11, 2008
KitMaker: 311 posts
AeroScale: 278 posts
Posted: Thursday, February 28, 2008 - 01:15 PM UTC
Sorry folks for the delay in updating this thread. Life always seems to get in the way of my hobbies. The build has been a long affair, with a lot of measure twice, cut once, and curse because I should have measured three times.
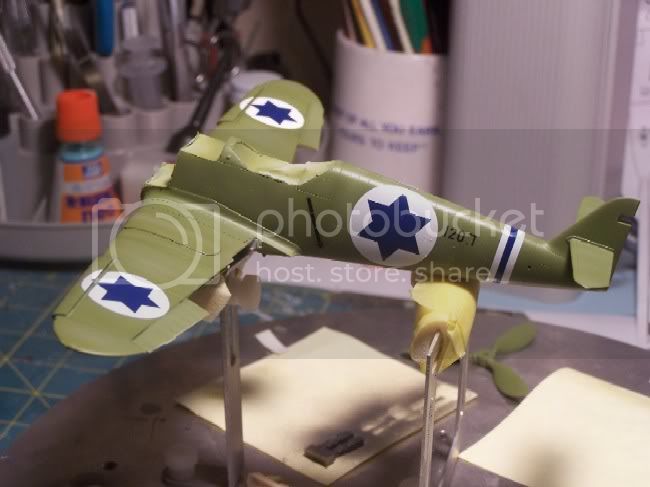
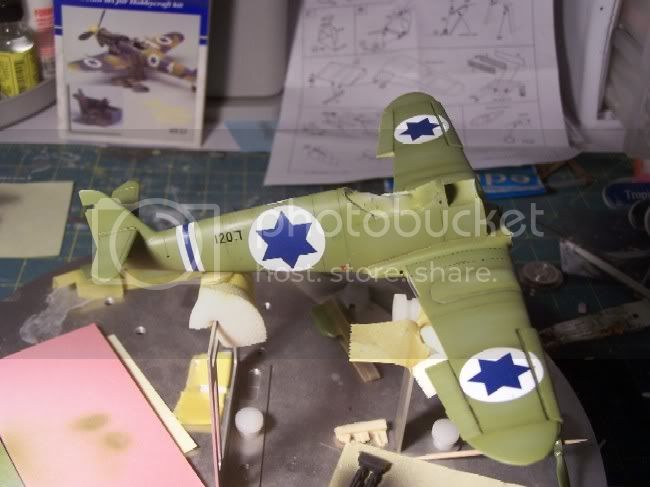
Vance asked about some of the fine points on the build. First of all, I love the base hobbycraft kit. I have built several of these (I know the Has kit is much more detailed). You can't beat the price and they go together well. A great platform for practicing painting Luftwaffe schemes for that Has masterpiece waiting in the closet. As for the 199, if you did nothing to the kit, it would look like a 199.


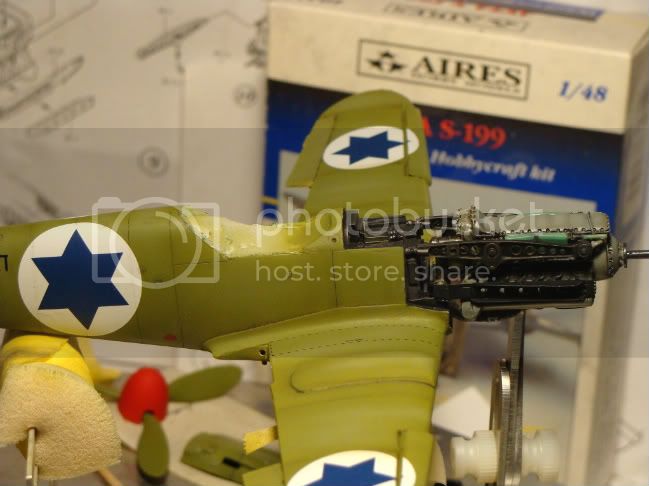
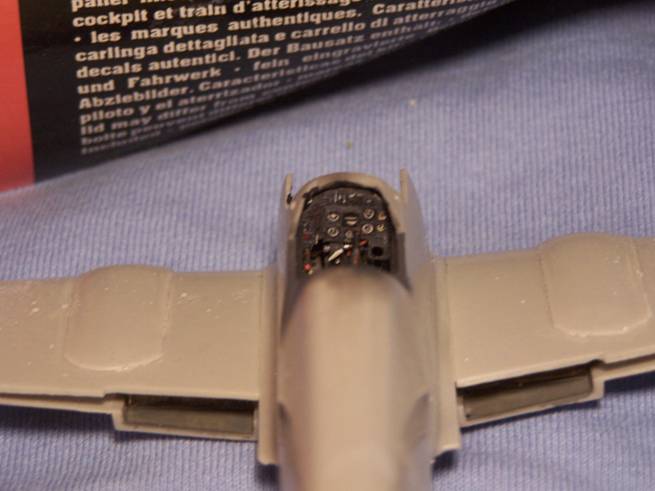
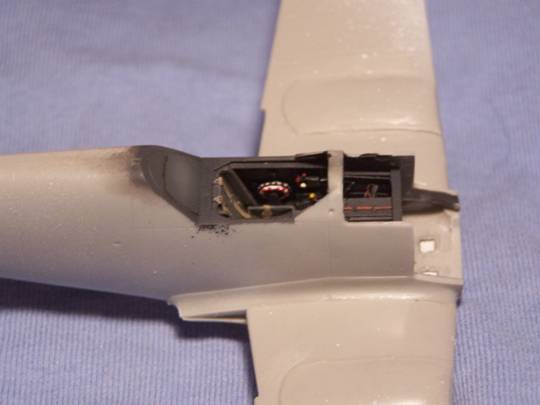
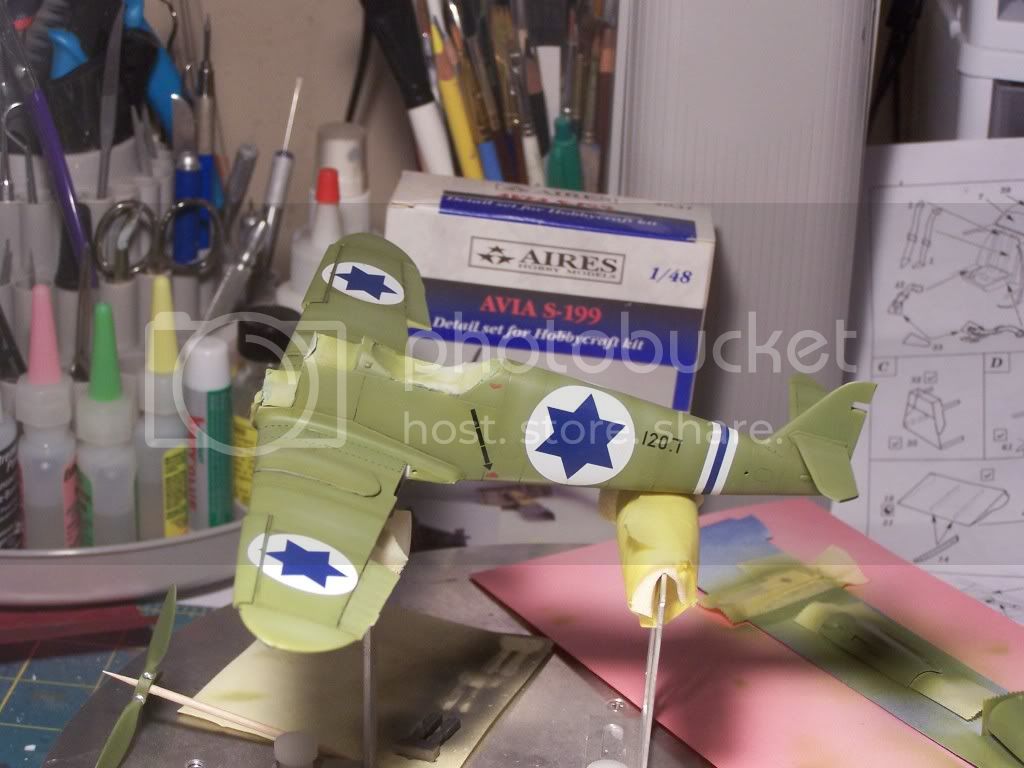
The Aires detail set so far has worked well. The only issue to this point in the build has been getting the instrument panel to fit. I used a contour gauge on the opening and cut out a backing plate out of sheet. This also gave a much more secure join of the panel to the cockpit opening. The rest of the Aries cockpit fit like a glove.


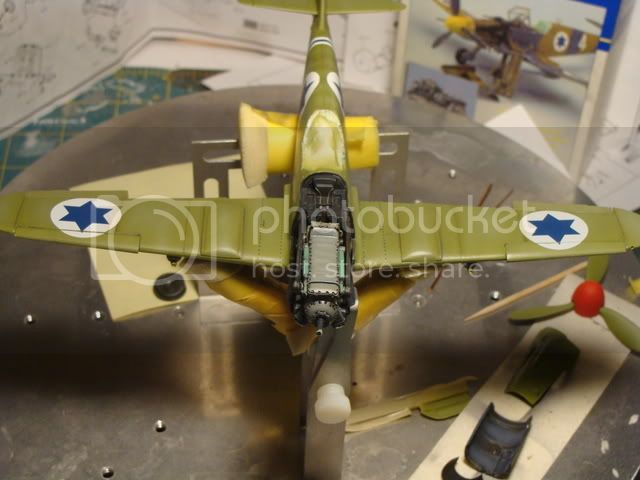
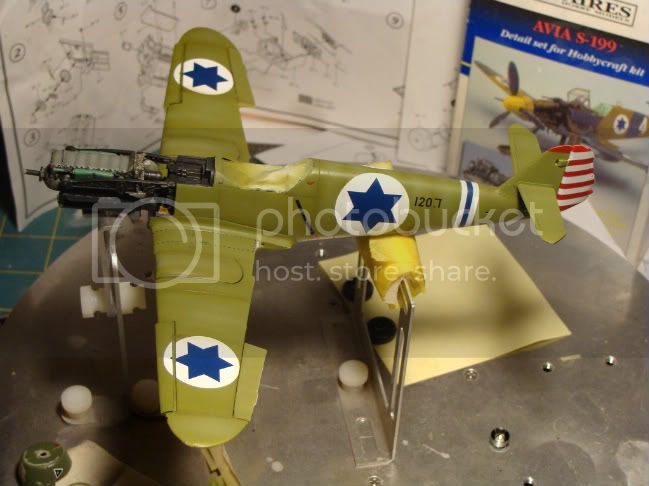
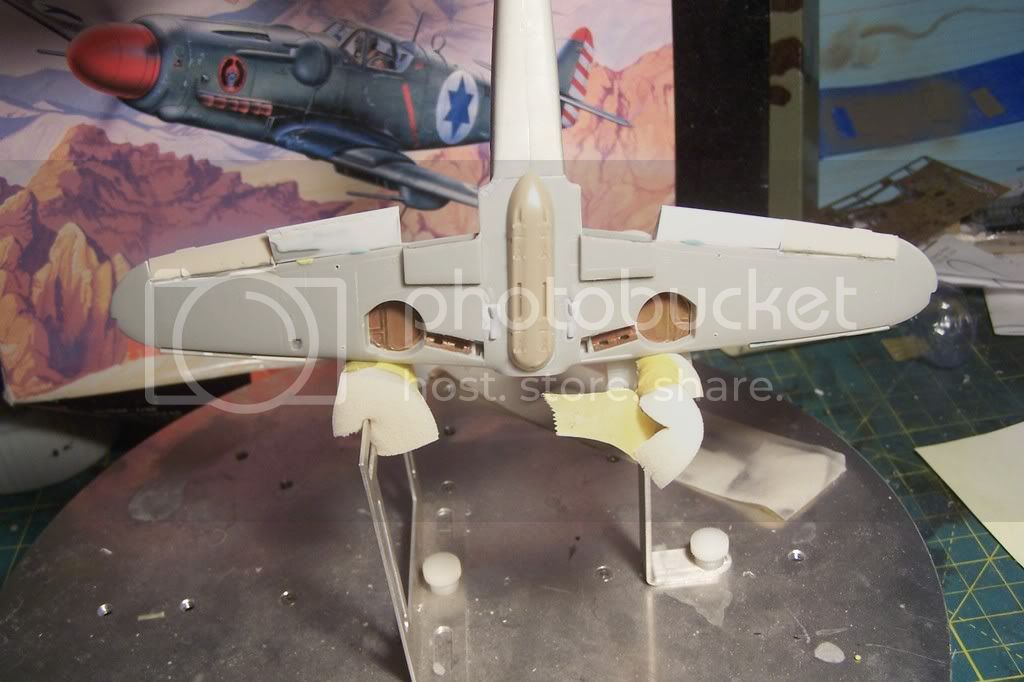
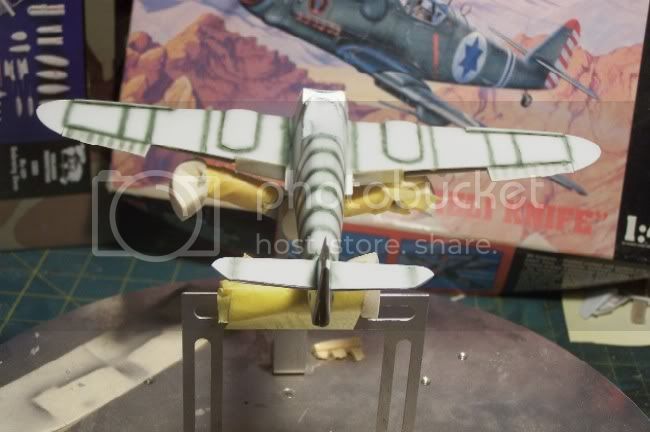
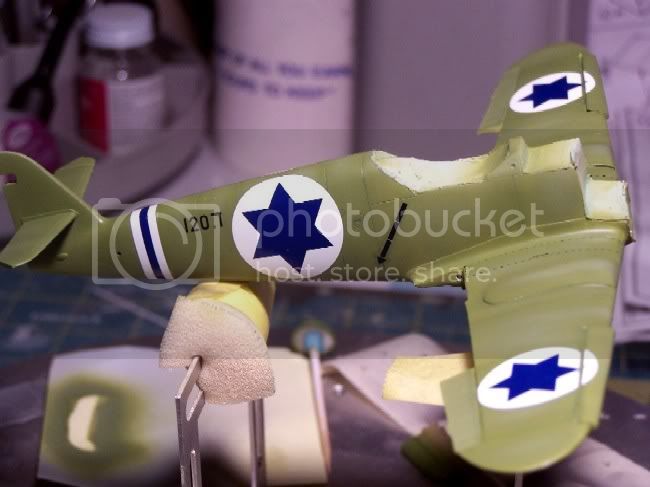
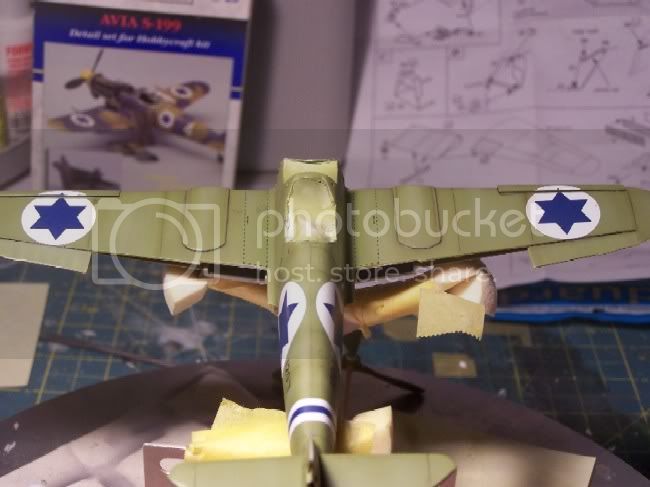
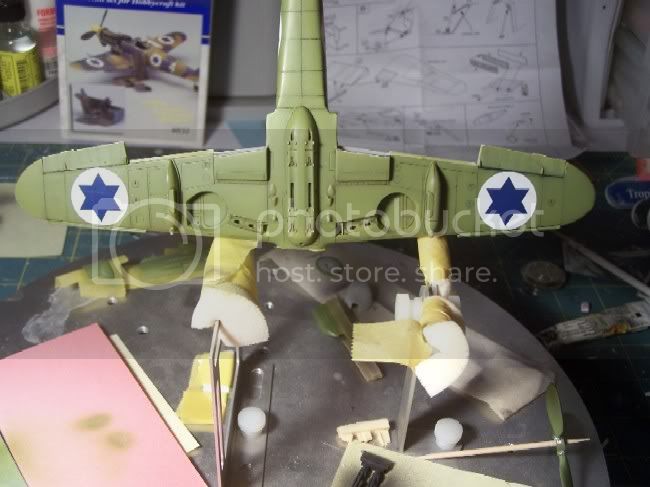
If you are going to be really accurate the bottom needs to have the MG131 ejection chutes covered over. On the 199 the spent shells were captured in a compartment of the magazine. I also added 4 prominent scoops made from plastic rod and sanded to shape.


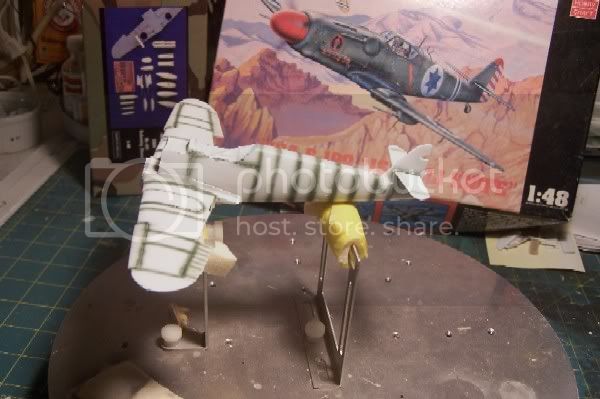
The Israeli machines were early 199s so they had the battery hatch cover (I think that’s what it is) behind the pilot’s seat. I made this from scrap plastic and corrected my earlier omission. Here are the rest of the progress shots. (At least I hope these are) I did add the ETC rack from VP since my source showed that it was left on most of the aircraft even if they were not carrying bombs.


More to follow.


drizzt73
_VISITCOMMUNITY
New South Wales, Australia
Joined: April 15, 2006
KitMaker: 158 posts
AeroScale: 70 posts
Posted: Friday, February 29, 2008 - 11:26 AM UTC
looks good so far Taylor, that engine looks great.
What stand is that you have?
cheers
Yeti123
_VISITCOMMUNITY
Michigan, United States
Joined: February 11, 2008
KitMaker: 311 posts
AeroScale: 278 posts
Posted: Friday, February 29, 2008 - 07:39 PM UTC
The stand is from an outfit called Model Expo. They stock a lot of ship stuff but they also sell tools. The platform comes with a good selection of brackets to make all kinds of stands. It is big enough to hold large scale models safely.
http://www.modelexpo-online.com


Yeti123
_VISITCOMMUNITY
Michigan, United States
Joined: February 11, 2008
KitMaker: 311 posts
AeroScale: 278 posts
Posted: Tuesday, March 04, 2008 - 11:59 AM UTC
Here are a few update photos. I have finished the color coat. I do not know if the preshade effect shows up in these pictures. The next step is to airbrush a lighter color to represent faded paint. Something that happened pretty quick in the Israeli climate.


whittman181
_VISITCOMMUNITY
Massachusetts, United States
Joined: December 30, 2006
KitMaker: 646 posts
AeroScale: 67 posts
Posted: Tuesday, March 04, 2008 - 12:10 PM UTC
Coming along nicely The instrament panel and the engine look great.
WingTzun
_VISITCOMMUNITY
Illinois, United States
Joined: February 01, 2006
KitMaker: 853 posts
AeroScale: 137 posts
Posted: Tuesday, March 04, 2008 - 12:37 PM UTC

Quoted Text

Coming along nicely The instrament panel and the engine look great.


I agree Taylor and an interesting subject too. Is that a home made paint stand?

Yeti123
_VISITCOMMUNITY
Michigan, United States
Joined: February 11, 2008
KitMaker: 311 posts
AeroScale: 278 posts
Posted: Tuesday, March 04, 2008 - 01:05 PM UTC
David:
The stand is from an outfit called Model Expo. The platform comes with a good selection of brackets to make all kinds of stands. It is big enough to hold large scale models safely.
http://www.modelexpo-online.com
drizzt73
_VISITCOMMUNITY
New South Wales, Australia
Joined: April 15, 2006
KitMaker: 158 posts
AeroScale: 70 posts
Posted: Tuesday, March 04, 2008 - 02:51 PM UTC
looking good so far Taylor, what colour and brand of paint is that? it looks nice!

cheers
Yeti123
_VISITCOMMUNITY
Michigan, United States
Joined: February 11, 2008
KitMaker: 311 posts
AeroScale: 278 posts
Posted: Wednesday, March 05, 2008 - 05:41 AM UTC

Quoted Text

looking good so far Taylor, what colour and brand of paint is that? it looks nice!

cheers


It is Polly Scale RLM 68 which is almost an exact match to the RAL chip that was given in Alex Yofe's book. I have always had good luck with this brand of paint.
Yeti123
_VISITCOMMUNITY
Michigan, United States
Joined: February 11, 2008
KitMaker: 311 posts
AeroScale: 278 posts
Posted: Monday, March 10, 2008 - 12:11 PM UTC
I got a chance to do some work over the weekend. The decals are on, the highlights have been added, everything is painted, and I am waiting for the future to set a while before I add the oil wash. (not my strength)
The decals are a combination of kit items and insignia from an old Sky sheet. The kit insignia are a bit transparent, but are definitely useable. I have heard some bad things about Hobby Craft decals, but I have had no problems.

Thanks everyone for all of your comments.


Yeti123
_VISITCOMMUNITY
Michigan, United States
Joined: February 11, 2008
KitMaker: 311 posts
AeroScale: 278 posts
Posted: Tuesday, March 18, 2008 - 01:34 PM UTC
Hit a bit of a snag. Dropped the only bottle of base color and of course it shattered. While I am waiting I might get something done on the P61.

These photos are after the wash. I am pretty much done with the fuselage for now. Next I will be trying to mate the engine to the firewall.


vanize
_VISITCOMMUNITY
Texas, United States
Joined: January 30, 2006
KitMaker: 1,954 posts
AeroScale: 1,163 posts
Posted: Wednesday, March 19, 2008 - 01:22 AM UTC
looking very nice indeed!

she's going to be lovely (in that ungainly kind of way) when you are done.
Red4
_VISITCOMMUNITY
California, United States
Joined: April 01, 2002
KitMaker: 4,287 posts
AeroScale: 1,164 posts
Posted: Thursday, March 20, 2008 - 02:48 PM UTC
Looking good. I'm doing the same exact airplane, minus the Aires detail set. Had some minor issue with the decals on mine, as once they hit the model, they didn't want to budge. As such, the wing markings are a little askew as it were, but nothing major. I should be putting the wraps on mine here soon. Did you find the white and blue tail marking to be too short to fit all the way around the fuselage? Mine was and I had to use the extra set to match them up. Again, good looking build! "Q"
TedMamere
_VISITCOMMUNITY
Moselle, France
Joined: May 15, 2005
KitMaker: 5,653 posts
AeroScale: 4,347 posts
Posted: Thursday, March 20, 2008 - 08:44 PM UTC
Hi Taylor!

Looks very nice. The pre and post shading is superb!

I'm looking forward to see more...

I hope you saved your pictures for an Aeroscale feature?

Jean-Luc
Yeti123
_VISITCOMMUNITY
Michigan, United States
Joined: February 11, 2008
KitMaker: 311 posts
AeroScale: 278 posts
Posted: Friday, March 21, 2008 - 03:26 PM UTC
Thank you everyone for the comments and the encouragement.


Mathew:
Yes, the stripe was short. I had masked off the white primer to make a band since these decals have always been a bit translucent. That helped alot and a small piece of blue stipe from a CAM deal set and I really can't tell. I can not wait to see yours


Jean-Luc: I have the pictures. I am still working on my photography skills. At least there not all pictures of my thumb thanks to my daughter Congratulations on being published in Tamiya Model Magazine. That is incredible.
Holdfast
Staff MemberPresident
IPMS-UK KITMAKER BRANCH
#056
_VISITCOMMUNITY
England - South West, United Kingdom
Joined: September 30, 2002
KitMaker: 8,581 posts
AeroScale: 4,913 posts
Posted: Saturday, March 22, 2008 - 12:04 AM UTC
Yes, this is shaping up to be a fantastic model, I particularly like the pre-shading

Mal
Yeti123
_VISITCOMMUNITY
Michigan, United States
Joined: February 11, 2008
KitMaker: 311 posts
AeroScale: 278 posts
Posted: Sunday, March 30, 2008 - 03:02 PM UTC
I have been moving slow on this one. When I went to start putting the engine in I found the smaller engine bearers were badly warped 
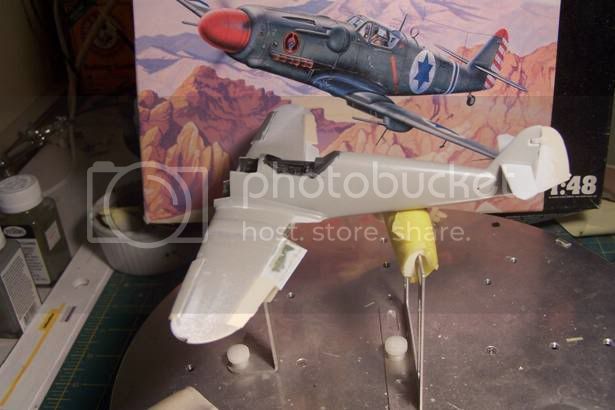
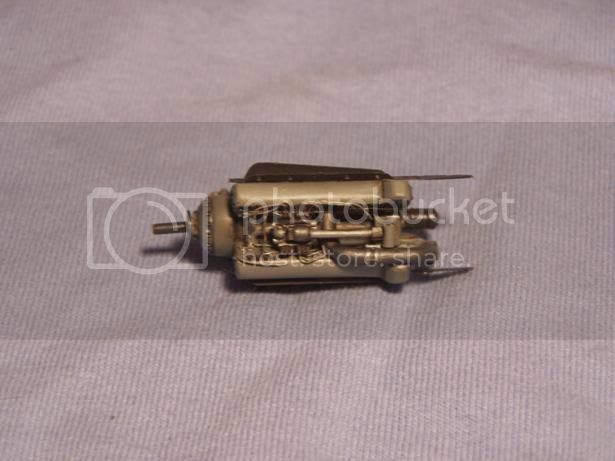
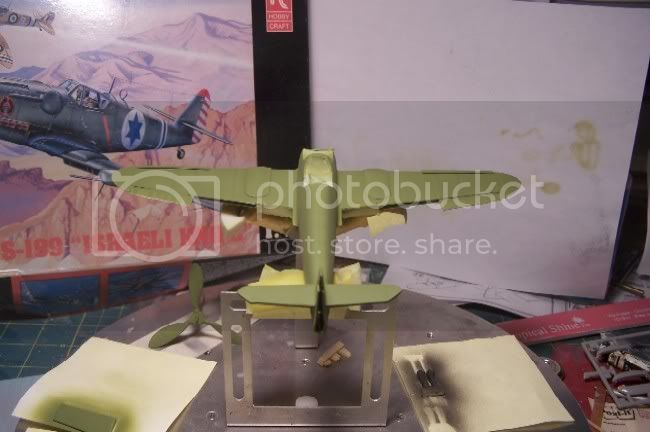
Another surprise was the forward oil tank cover was missing from my kit. I am trying to use parts that I cut from the kit to make a replacement. Here's as far as I got this weekend.


Merlin
Staff MemberSenior Editor
AEROSCALE
#017
_VISITCOMMUNITY
United Kingdom
Joined: June 11, 2003
KitMaker: 17,582 posts
AeroScale: 12,795 posts
Posted: Sunday, March 30, 2008 - 09:52 PM UTC
Hi again Taylor

Really nice! Let's get this one on the Frontpage when it's finished!

All the best

Rowan
 _GOTOTOP