Moving onto Twin Spinners, and a search through the stash revealed the Dragon 1:72 P38 Droopsnoot.
Because of the lack of windows in the front section of the fusalage Im going to build this as a standard P38J. The nose for this is still included in the droopsnoot kit so no need to buy any AM products apart from decals.
Ive ordered a sheet which has a few options but I havent decided which scheme this will wear when finished.
Onto the kit.
Heres an
Inbox Review
Time to see how it all goes together
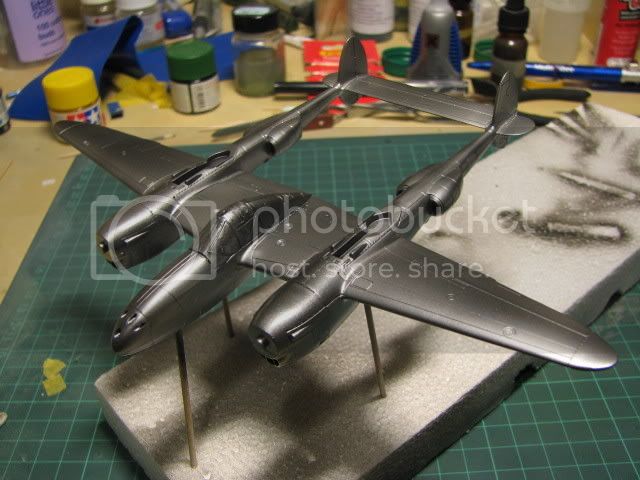
Not sticking rigidly to the assembly sequence offered by the instructions, Ive built the two booms, but not before I added some lead solder pellets.
Pellets are also added to the front of the central section which also contains the cockpit.
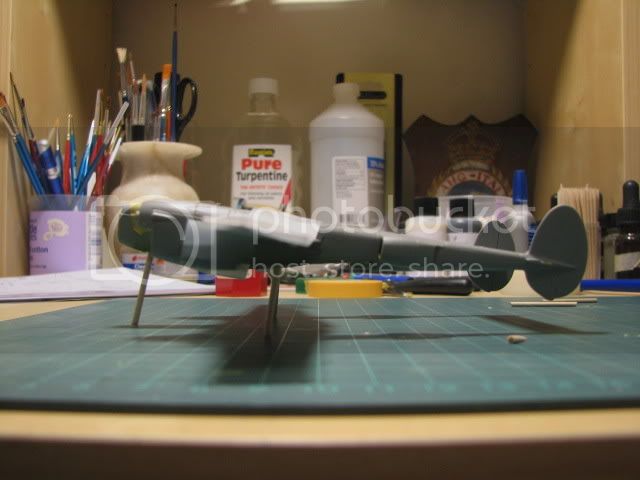
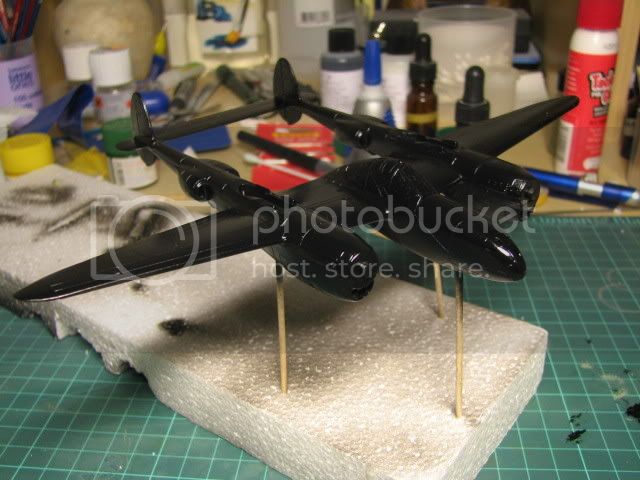
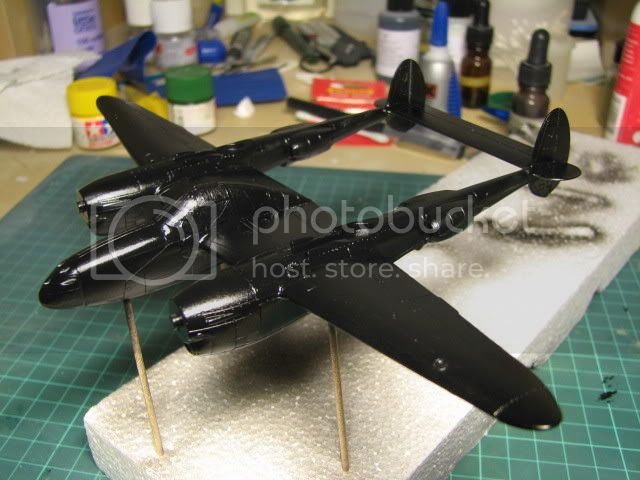
Heres the main reason for not following the instruction sequence rigidly. I wanted to test if Id added enough ballast.
Following a secret scientific formula involving angles of dangles and centre of gravity movement I calculated the weight required.
A...find what areas of the model have space for pellets.
B..cram as any pellets into these areas as possible.
C....add a couple more for luck
D...tape the sub assemblies together, add cocktail sticks for undercarriage.
E..cross fingers
I made the nose wheel "undercarriage" longer than the main undercarriage to test how the P38 would sit with the slight "nose up" attitude that Lightnings seemed to sit at. This was exagerated to make sure Id added enough ballast.
Now its time to start working on those pesky seams. I need to pay special attention to theses as Im planning a NMF for this.
Nige
Hosted by Rowan Baylis
Twin Spinners P38 Lightning
Posted: Saturday, March 29, 2008 - 07:25 AM UTC
magnusf
Stockholm, Sweden
Joined: May 02, 2006
KitMaker: 1,953 posts
AeroScale: 1,902 posts
Joined: May 02, 2006
KitMaker: 1,953 posts
AeroScale: 1,902 posts
Posted: Saturday, March 29, 2008 - 08:07 AM UTC
Too bad your'e not doing the droopsnoot but that lack of windows is really annoying! It's odd that they don't do their homework to 100% while theyr'e at it anyway.
I have one of these in green built more than ten years ago. I remember the kit as being slightly troublesome to build but I still like the end result!
Magnus
I have one of these in green built more than ten years ago. I remember the kit as being slightly troublesome to build but I still like the end result!
Magnus
Posted: Monday, March 31, 2008 - 04:59 AM UTC
Hi Magnus.
Yes,its a shame about the missing windows, but at least the original parts are still there to build a "J"
The fits not too bad, but not exactly shake and bake, and dry fitting is order of the day. Plenty of swipes with the sanding sticks before going anywhere near the plastic with the glue.
Ive got the booms together and primed. A bit of rescribing was needed where panel lines had been sanded away but nothing too drastic.
The central cockpit section is together and Im cleaning that up and started dry running the fit to the booms. Its going to need some filler but not much.
Photos when the main airframe is together.
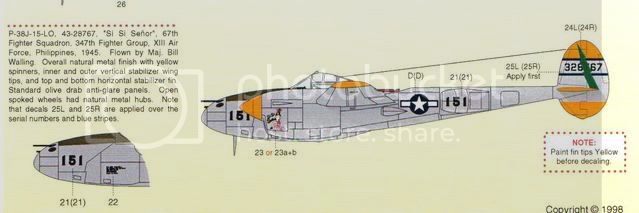
The decal sheet arrived today and Ive chosen my scheme.
The yellow and NMF should look quite eyecatching.
Nige
Posted: Monday, March 31, 2008 - 05:17 AM UTC
Quoted Text
The yellow and NMF
AAAAAAAAAAGGGGHHHHH More yellow paint - time to get the scotch out !!!
Good luck with that nige.
Andy
Posted: Monday, March 31, 2008 - 05:24 AM UTC
Quoted Text
Quoted Text
The yellow and NMF
AAAAAAAAAAGGGGHHHHH More yellow paint - time to get the scotch out !!!
Good luck with that nige.
Andy
Ah,,it'll be fine
Now,,,where did I put that bottle of 21 Year Old Single Malt
Nige
Posted: Monday, March 31, 2008 - 07:53 AM UTC
So that's the illusive no tail sitting formulea that I have been searching for Shaping up for another beauty Nige.
Mal
Mal
magnusf
Stockholm, Sweden
Joined: May 02, 2006
KitMaker: 1,953 posts
AeroScale: 1,902 posts
Joined: May 02, 2006
KitMaker: 1,953 posts
AeroScale: 1,902 posts
Posted: Monday, March 31, 2008 - 07:56 AM UTC
I didn't brave the NMF so I look forward to yours!
Nice scheme, yellow always looks good (if you can get it to cover )
Magnus
Nice scheme, yellow always looks good (if you can get it to cover )
Magnus
Yeti123
Michigan, United States
Joined: February 11, 2008
KitMaker: 311 posts
AeroScale: 278 posts
Joined: February 11, 2008
KitMaker: 311 posts
AeroScale: 278 posts
Posted: Monday, March 31, 2008 - 09:04 AM UTC
Nigel:
First, any paint finish is a good reason to enjoy a nice single malt.
I built the J version of that kit a few years ago for a pacific war vet at my church. I remember alot of sanding because the surface was really rough, almost sandy. Is the dropsnoot surface similar?
First, any paint finish is a good reason to enjoy a nice single malt.
I built the J version of that kit a few years ago for a pacific war vet at my church. I remember alot of sanding because the surface was really rough, almost sandy. Is the dropsnoot surface similar?
Posted: Monday, March 31, 2008 - 12:06 PM UTC
The 3 main sections are primed and should be together tomorrow.
Taylor,,the surface of the plastic doesnt seem too bad after primer.
I'll be priming the whole airframe in gloss black before I start spraying the Alclad, and if it doesnt look up to the NMF then I'll decide weather to polish everything or change to an olive drab scheme.
Nige
Taylor,,the surface of the plastic doesnt seem too bad after primer.
I'll be priming the whole airframe in gloss black before I start spraying the Alclad, and if it doesnt look up to the NMF then I'll decide weather to polish everything or change to an olive drab scheme.
Nige
Posted: Tuesday, April 01, 2008 - 04:40 AM UTC
Slow and steady progress, and its starting to look like a P38
More work to be done on the joins im afraid, but its not too bad a fit.
I'll be leaving it for a day or two while everything sets properly before I start filling and sanding again.
Im surprised how much it weighs now its all together. Im starting to wonder if the nose undercarriage will be strong enough. Its a bit on the heavy side up front
Nige
CaptainA
Indiana, United States
Joined: May 14, 2007
KitMaker: 3,117 posts
AeroScale: 2,270 posts
Joined: May 14, 2007
KitMaker: 3,117 posts
AeroScale: 2,270 posts
Posted: Wednesday, April 02, 2008 - 12:10 PM UTC
Quoted Text
Now,,,where did I put that bottle of 21 Year Old Single Malt
Nige
I would save that for when you are not drinking. That is why I live near Bourbon country. Want a trade?
Now for some seriosity. Looks like you have a really nice build going on there. P-38s are really cool aircraft. In the hands of a master such as yourself, this could be something really great.
Posted: Wednesday, April 02, 2008 - 06:26 PM UTC
Ah,bourbon county.
I remember a great time searching for obscure bourbons that you cant buy over here in the UK when I was in Atlanta a few years ago.
I agree, the P38 is a stylish looking aricraft, and Ive always liked the look of them.
In a masters hands yes, the kit could be really great, but Im certainly no master modeller.
I like to think Im getting a bit better every build, and I certainly learn something new everytime, but master modeller Im not.
A great compliment though,,thanks
Nige
mj
Illinois, United States
Joined: March 16, 2002
KitMaker: 1,331 posts
AeroScale: 325 posts
Joined: March 16, 2002
KitMaker: 1,331 posts
AeroScale: 325 posts
Posted: Thursday, April 03, 2008 - 04:34 AM UTC
Nigel, if you are not a master builder, then there is no hope for me at all . I wonder if you know how much of an influence you are here. I always look forward to seeing what you are doing when I see you as a poster on a thread. This P-38 is a case in point. I am planning on having a go at another one soon, so I am watching this quite closely. I know I am going to learn a lot from you on this build, so I thank you in advance. I've already learned I need to check out the 21yr. old Single Malt section of the liquer store next visit.
Cheers,
Mike
Cheers,
Mike
Posted: Monday, April 07, 2008 - 11:48 AM UTC
Hi Mike.
Err,,I have absolutely no idea. Im just enjoying the hobby and hopefully by the build blogs etc I get to put something back to the site. Ive met some fabulous people on here, and learnt so much.Many of the UK Aeroscalers are now personal friends who I meet up with regularly at shows. (Still trying to catch up with Rowan for a trip round MotorBooks and a pint though,,,LOL,,maybe this year Rowan,,:) )
Onto the P38.
Modelling time is at a premium at the moment but Ive managed to make a bit of progress.
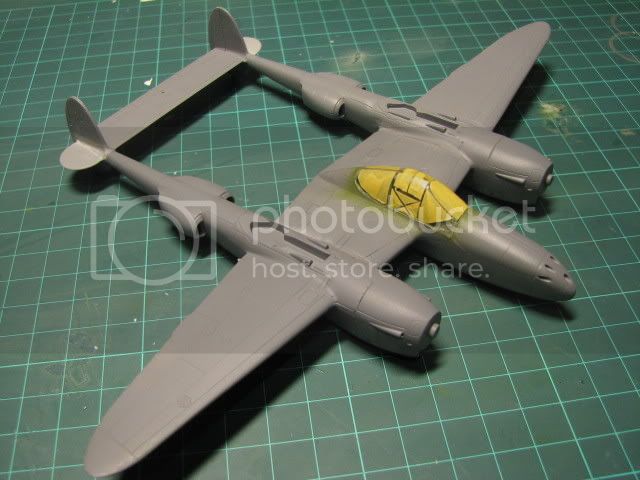
Firstly,the seams are now hopefully all finished. A large amount of sanding, a moderate amount of filling, and a small amount of rescribing later, and its time to fit the masked canopy.
The next stage (for me personally) is to add a base coat of gloss black Tamiya acrylic. This serves as an undercoat for the Alclad and will also show up any flaws in the same way as a NMF. This will allow me to address any outstanding fit issues before spraying the Alclad, and its a lot easier to work on a black acrylic paintjob than a NMF one.
Theres also one more reason for spraying my NMF planes gloss black at this stage.
I think they look sooo cool!,,,
After a close inspection of the seams etc when this is properly dry, it'll be time to break out the Alclad
Nige
CMOT70
Victoria, Australia
Joined: August 23, 2007
KitMaker: 629 posts
AeroScale: 539 posts
Joined: August 23, 2007
KitMaker: 629 posts
AeroScale: 539 posts
Posted: Monday, April 07, 2008 - 01:43 PM UTC
Looks good Nige.
I agree with your use of Tamiya Gloss Black acrylic as a good base for alclad- especially for the Chrome and Polished Aluminium (which are different to the rest of the range). Though i admit to never having done a NMF aircraft yet, my experience with Alclad has been for old style alloy F1 car monocoques. But the theory should all be the same i suppose, i'll have to give a NMF aircraft a try soon.
Andrew
WingTzun
Illinois, United States
Joined: February 01, 2006
KitMaker: 853 posts
AeroScale: 137 posts
Joined: February 01, 2006
KitMaker: 853 posts
AeroScale: 137 posts
Posted: Monday, April 07, 2008 - 04:59 PM UTC
It does look cool in black!!
Does the gloss black undercoat give you any preshading benefit with a NMF?
CaptainA
Indiana, United States
Joined: May 14, 2007
KitMaker: 3,117 posts
AeroScale: 2,270 posts
Joined: May 14, 2007
KitMaker: 3,117 posts
AeroScale: 2,270 posts
Posted: Tuesday, April 08, 2008 - 10:15 AM UTC
I like the black also. Just call it a nightfighter in a rainstorm.
Posted: Thursday, April 10, 2008 - 10:56 AM UTC
Thanks everyone
No real preshading benefits from the gloss black undercoat, but I have found that it makes the panel lines stand out quite nicely,although a wash is still required to bring these out to their best advantage.
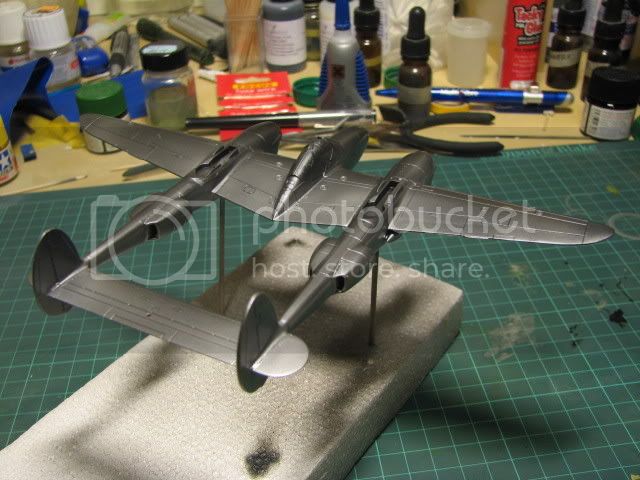
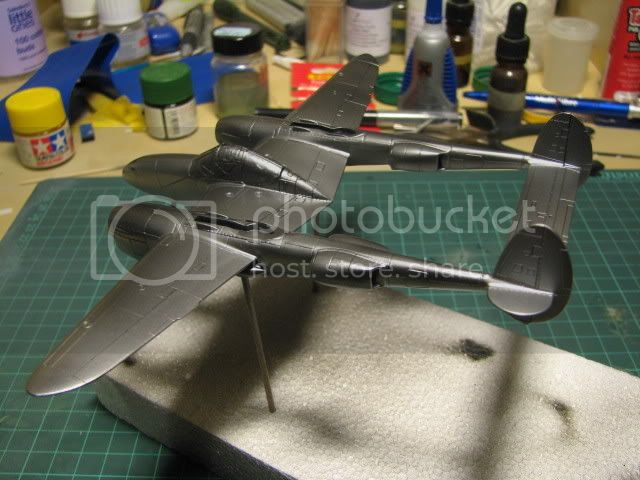
An unexpected few hours at home tonight has allowed me to blow some Alclad Alluminium at the P38. There are a few places that require attention but I wont be able to get back to this for another week. Plenty of time for the Alclad to cure properly and hopefully a few swipes with a fine sanding stick should do the trick and I can get onto the next stage which will be spraying some panels in different shades of Alclad and then adding the olive drab anti glare panels and the yellow wing and rudder tips.
Nige
ejclide
Ohio, United States
Joined: January 03, 2008
KitMaker: 150 posts
AeroScale: 119 posts
Joined: January 03, 2008
KitMaker: 150 posts
AeroScale: 119 posts
Posted: Thursday, April 10, 2008 - 06:23 PM UTC
looks fantastic Nige, as usual! How many coats of that aluminum did you spray on there? I thought two would be good the time I tried it, but I still had some peeling issues. of course I guess that could be something other than how much paint I applied! Regardless, I can't wait to see it with the yellow tips and anti glare patches on there. I hope this week goes by fast!
Eric
Eric
magnusf
Stockholm, Sweden
Joined: May 02, 2006
KitMaker: 1,953 posts
AeroScale: 1,902 posts
Joined: May 02, 2006
KitMaker: 1,953 posts
AeroScale: 1,902 posts
Posted: Friday, April 11, 2008 - 08:39 PM UTC
Veeery cool Nigel!
I will have to do one in NMF myself, I have the Dragon Night Fighter and the Academy P-38J in the stash. For obvious reason the NMF candidate will have to be the Academy kit
Magnus
I will have to do one in NMF myself, I have the Dragon Night Fighter and the Academy P-38J in the stash. For obvious reason the NMF candidate will have to be the Academy kit
Magnus
Yeti123
Michigan, United States
Joined: February 11, 2008
KitMaker: 311 posts
AeroScale: 278 posts
Joined: February 11, 2008
KitMaker: 311 posts
AeroScale: 278 posts
Posted: Saturday, April 12, 2008 - 06:16 AM UTC
Nigel:
Looking gorgeous with all that shiny paint. I love NMF and this one is reall shaping up. I hav e not tried one in a while and I normally use SNJ although I did purchase some Alclad recently. The yellow is going to stricking when done.
Posted: Sunday, April 13, 2008 - 08:53 AM UTC
Thanks guys.
Still a long way to go, I reckon there are about 6 places where it needs attention before I can carry on. That Alclad is SO unforgiving!
Gotta get home first though,,lol,still got a few days to go.
Nige
Still a long way to go, I reckon there are about 6 places where it needs attention before I can carry on. That Alclad is SO unforgiving!
Gotta get home first though,,lol,still got a few days to go.
Nige
Posted: Thursday, April 17, 2008 - 12:50 PM UTC
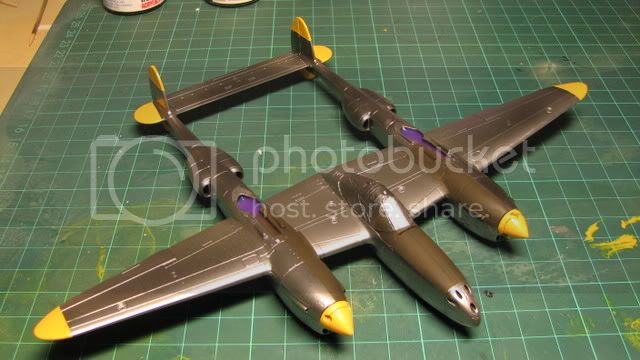
Once again Ive spent a day slowly dissapearing under a growing pile of used Tamiya masking tape. Im glad I buy it from Japan or Hong Kong!
Id planned to do a few panels in different shades of Alclad but couldnt get any motivation together so I opted to do the yellow tips and anti glare panels to try and kick start some enthusiasm. I think its worked
Theres a couple of places where the yellow paint has run down the engraved panel lines but that will chip out with a cocktail stick and whats left will be covered by the panel wash.
While I was removing the masking the canopy came with it and is now just resting in place, hence the large gap at the front.
The purple is liquid mask in the supercharger recesses, not some mad paint scheme.Who in their right mind would paint something in a mad paint scheme?
Nige
Id planned to do a few panels in different shades of Alclad but couldnt get any motivation together so I opted to do the yellow tips and anti glare panels to try and kick start some enthusiasm. I think its worked
Theres a couple of places where the yellow paint has run down the engraved panel lines but that will chip out with a cocktail stick and whats left will be covered by the panel wash.
While I was removing the masking the canopy came with it and is now just resting in place, hence the large gap at the front.
The purple is liquid mask in the supercharger recesses, not some mad paint scheme.Who in their right mind would paint something in a mad paint scheme?
Nige
Posted: Saturday, April 19, 2008 - 02:08 AM UTC
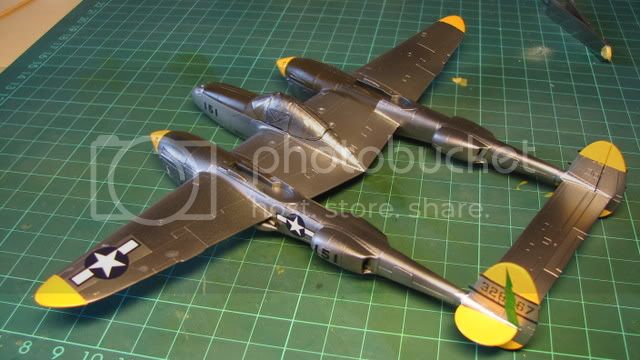
Decals are on.
I really like the tail. Green lightning strikes over yellow/black bands and a NMF
Time to get the various bits and pieces painted up ready to go on at the end of the build.
Nige
I really like the tail. Green lightning strikes over yellow/black bands and a NMF
Time to get the various bits and pieces painted up ready to go on at the end of the build.
Nige
Posted: Monday, April 21, 2008 - 11:41 PM UTC
Almost there, and I'll post some photos soon.
But first a question for those of you who have either built the Dragon P38J kit or have it in your stash.
The machine guns are truely horrible (parts A4-8), so Ive bought a set of 50 cal's from Quickboost. Because of the configuration of the guns in the Lightning I need to cut these to the length of the kit parts, but being a "Droop Snoot" kit theres no instructions for which gun goes where.
Could anyone scan or describe which gun goes where so I can cut the resin 50 cals to length please?
Nige