_GOTOBOTTOM
Pre-Flight Check
Constructive critique of your finished or in-progress photos.
Twin Spinners Martin B-10/12
bf443
_VISITCOMMUNITY
Idaho, United States
Joined: May 16, 2003
KitMaker: 895 posts
AeroScale: 457 posts
Posted: Thursday, April 24, 2008 - 08:17 PM UTC
Holy Cow! I’m on a roll tonight!

Here is my entry for the Twin Spinners. A Williams Brothers 1/72 Martin B-10 that I plan to model as a B-12 (No real external difference) stationed at Wheeler Army Air Field, December 1941.

Fortunately the kit has few parts and is going together really quick. The fit is not good in some spots but easily fixable. The directions have been most difficult so far. Some of the stuff is very vague. The plastic seems very soft the propellers don’t want to sit straight. The interior is very basic and there is a huge hole of nothing where the nose turret is supposed to be. The landing gear however has weak attachment points and I already managed to break one main gear, which I re-glued and now it’s time to stop for the night. Oh course since I made good progress tonight that means it will be weeks (try months) before I finish this.


Sincerely,
Brian
bf443
_VISITCOMMUNITY
Idaho, United States
Joined: May 16, 2003
KitMaker: 895 posts
AeroScale: 457 posts
Posted: Friday, April 25, 2008 - 07:25 PM UTC
Hell everyone,

I painted the primer coat tonight and other than a small but nasty spot to fill just in front of the cockpit I think everything is okay. I expected the model to be larger than it is, even for 1/72.


Sincerely,
Brian
bf443
_VISITCOMMUNITY
Idaho, United States
Joined: May 16, 2003
KitMaker: 895 posts
AeroScale: 457 posts
Posted: Monday, April 28, 2008 - 09:30 AM UTC
Hello everyone,

I had a little time in between the nice weather and kids naps to pre-shading on the model with a Testors Paint Pen. I hope to start painting tonight or Wednesday.

Sincerely,
Brian


jaypee
_VISITCOMMUNITY
Scotland, United Kingdom
Joined: February 07, 2008
KitMaker: 1,699 posts
AeroScale: 1,384 posts
Posted: Monday, April 28, 2008 - 11:26 AM UTC
Wow that yellow and blue plastic is ugly just calling out for the coat of primer.
How does the preshading go with a pen like that?
What I mean is how do you avoid a hard transition from light to dark?
bf443
_VISITCOMMUNITY
Idaho, United States
Joined: May 16, 2003
KitMaker: 895 posts
AeroScale: 457 posts
Posted: Monday, April 28, 2008 - 12:32 PM UTC

Quoted Text

Wow that yellow and blue plastic is ugly just calling out for the coat of primer.
How does the preshading go with a pen like that?
What I mean is how do you avoid a hard transition from light to dark?


A good airbrush, time without kids, a beer and patience


Hello JP,

Seriously, I have used the pen before check out my I-16 for the "Between the Wars" I used the paint pen on that kit and I think if turned out okay.

Sincerely,
Brian
bf443
_VISITCOMMUNITY
Idaho, United States
Joined: May 16, 2003
KitMaker: 895 posts
AeroScale: 457 posts
Posted: Friday, May 23, 2008 - 05:22 PM UTC
Hello everyone,

I have the basic painting done on the bomber. One item I’m not sure about is the interior color. When the aircraft were delivered from the factory were they unpainted on the inside? I assumed that was the case and painted the interior Aluminum but if anyone knows this is incorrect let me know I can easily change it at this point.

Sincerely,
Brian


mikado
_VISITCOMMUNITY
Singapore / 新加坡
Joined: July 10, 2005
KitMaker: 329 posts
AeroScale: 15 posts
Posted: Saturday, May 24, 2008 - 07:31 PM UTC

Quoted Text


A good airbrush, time without kids, a beer and patience


Brian,
Looking good so far....can't wait to see more of the build...

..a beer. ???... You must have a steady hand as well especially after the beer...
bf443
_VISITCOMMUNITY
Idaho, United States
Joined: May 16, 2003
KitMaker: 895 posts
AeroScale: 457 posts
Posted: Thursday, June 05, 2008 - 06:05 PM UTC
Hello everyone,

Mike, thanks for the compliment. I guess this kit would be the first "Limited run" for me. I have some progress to report.


Sincerely,
Brian
bf443
_VISITCOMMUNITY
Idaho, United States
Joined: May 16, 2003
KitMaker: 895 posts
AeroScale: 457 posts
Posted: Saturday, June 14, 2008 - 03:13 PM UTC
I filled in those holes and bad seams with scrap plastic and putty. This is how they look now.


Sincerely,
Brian
bf443
_VISITCOMMUNITY
Idaho, United States
Joined: May 16, 2003
KitMaker: 895 posts
AeroScale: 457 posts
Posted: Wednesday, June 25, 2008 - 08:35 PM UTC
Hello everyone,

I worked on the cockpit canopies and turret tonight. Painting the frames was a real nightmare. I used a combination of freehand and some blue masking tape. I also built a machine gun from scrap and placed it into the turret since the kit does not have one.


Sincerely,
Brian
bf443
_VISITCOMMUNITY
Idaho, United States
Joined: May 16, 2003
KitMaker: 895 posts
AeroScale: 457 posts
Posted: Monday, July 07, 2008 - 11:17 AM UTC
Hello everyone,

I applied the decals over several days in between family stuff. The kit decals looked okay but I found they were very fragile (I need to paint in cracks on tail stripes and two of the national insignia have slivers of white outside the blue border). I had to use aeromaster insignia and letters/numbers to finish it out so I have some small touch ups to do and seal them before the wash job.


Sincerely,
Brian

CaptainA
_VISITCOMMUNITY
Indiana, United States
Joined: May 14, 2007
KitMaker: 3,117 posts
AeroScale: 2,270 posts
Posted: Wednesday, July 09, 2008 - 10:04 AM UTC
Very Nice.
bf443
_VISITCOMMUNITY
Idaho, United States
Joined: May 16, 2003
KitMaker: 895 posts
AeroScale: 457 posts
Posted: Sunday, July 20, 2008 - 09:46 AM UTC
Hello everyone,

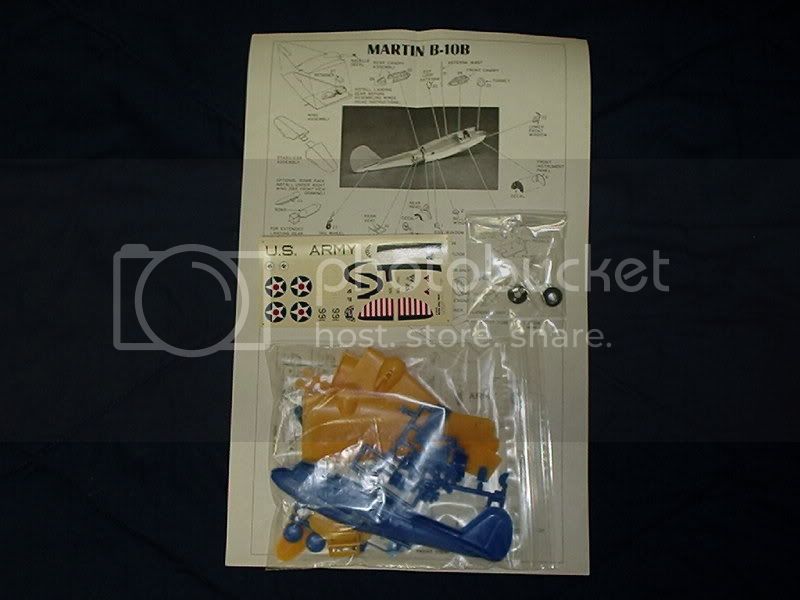
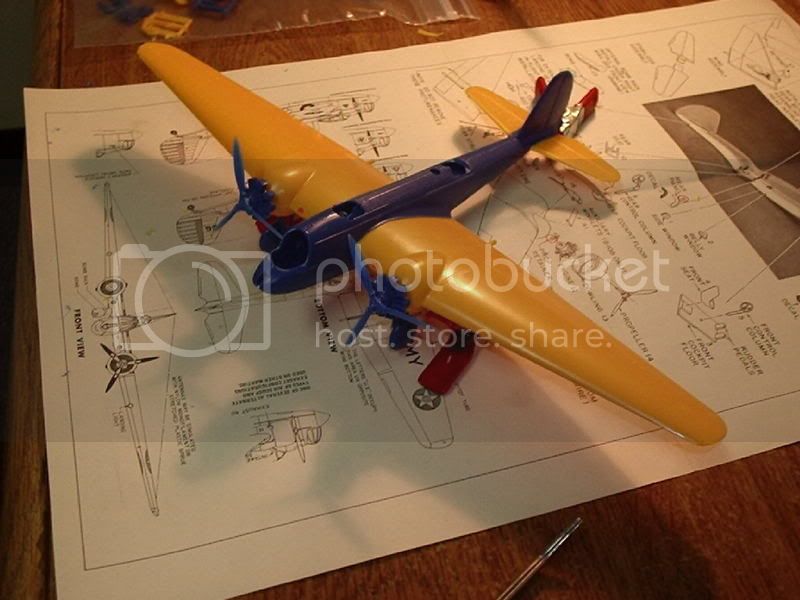
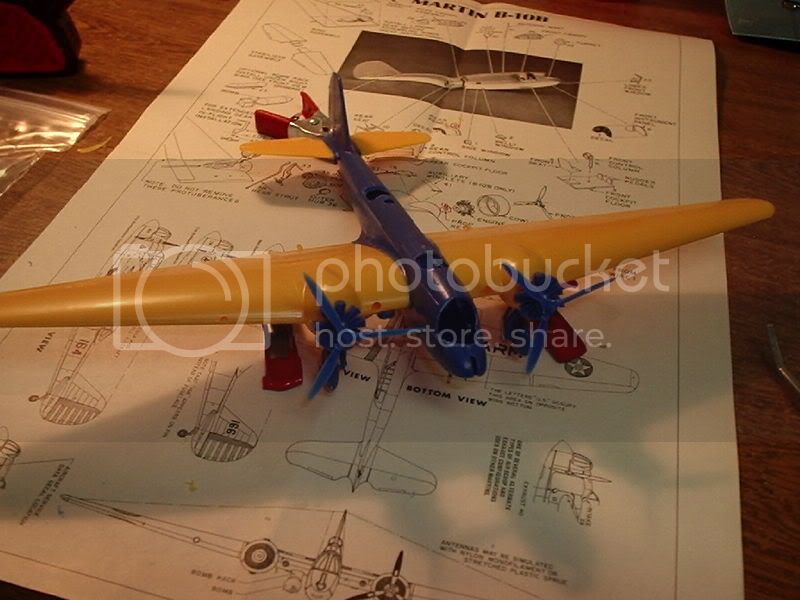
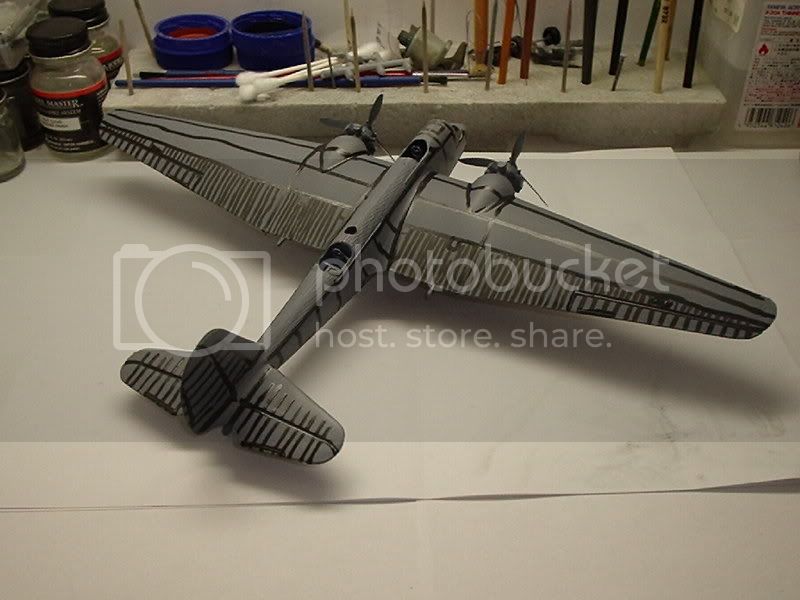
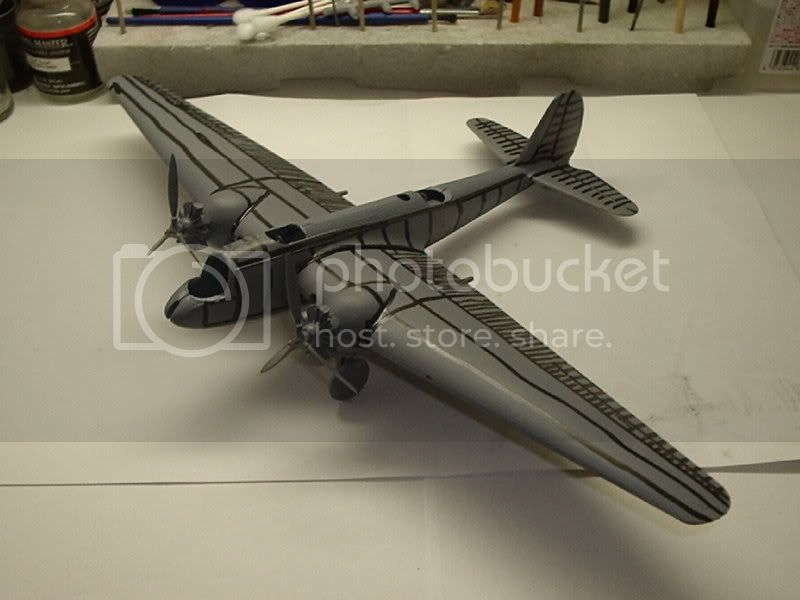
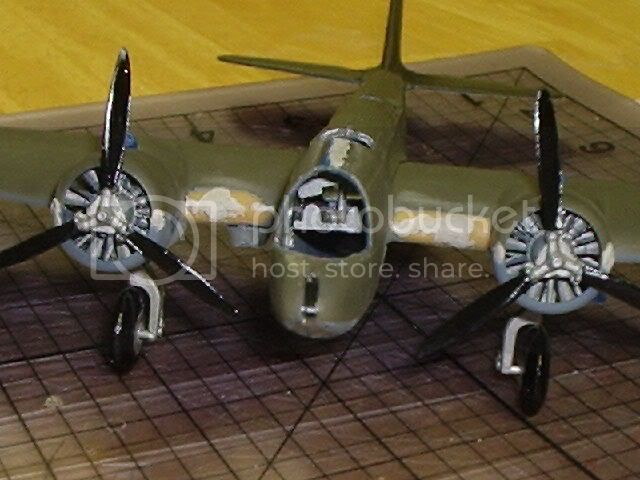
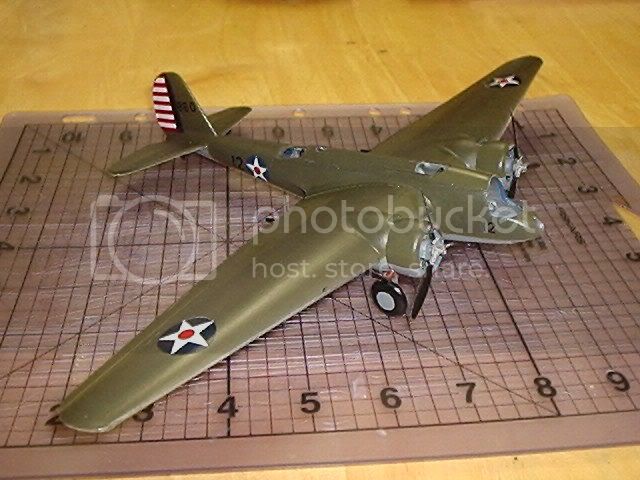
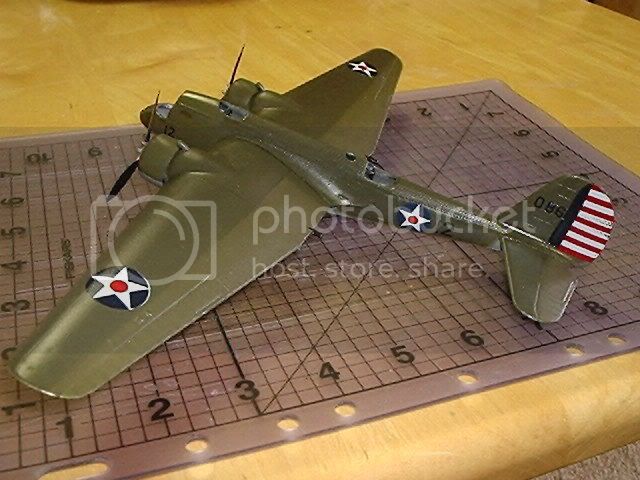
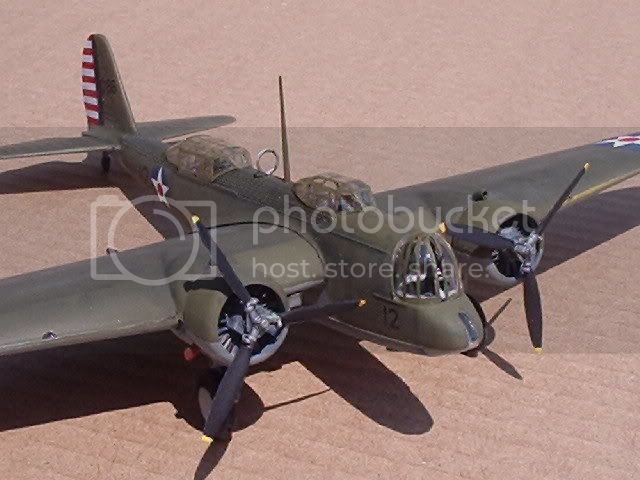
I am calling it finished! Washed with Payne’s Grey and scrubbed to death with Q-tips (used to much thinner and it dried to fast) Canopy and turret are on, mast and loop added, props painted, wing lights painted and my kids are eyeing it to closely! This kit (Williams Bothers) is right when they say experience is required. I’m not complaining but they did print that on the box.


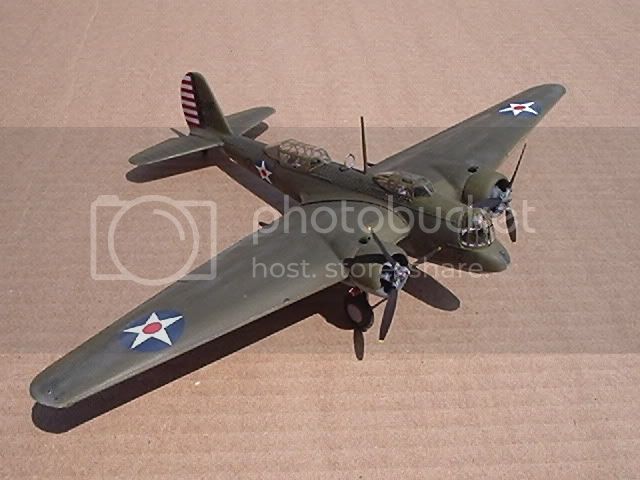
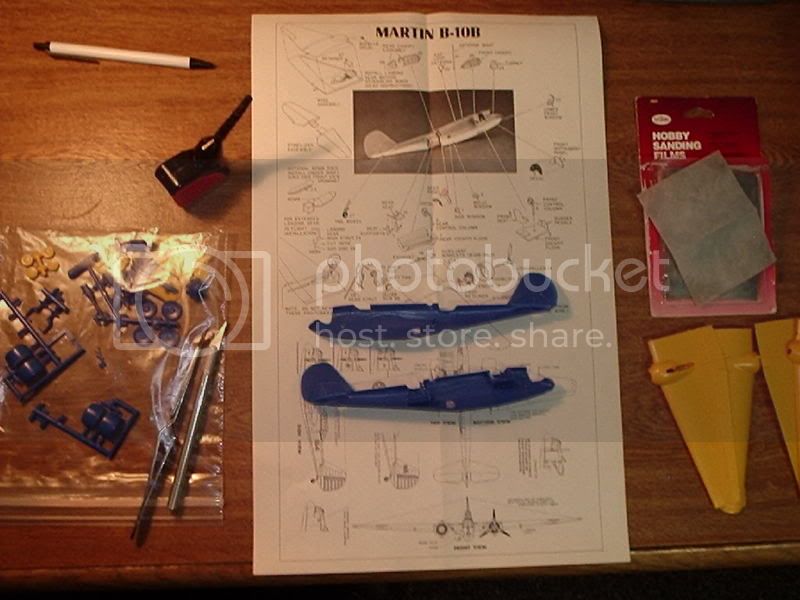
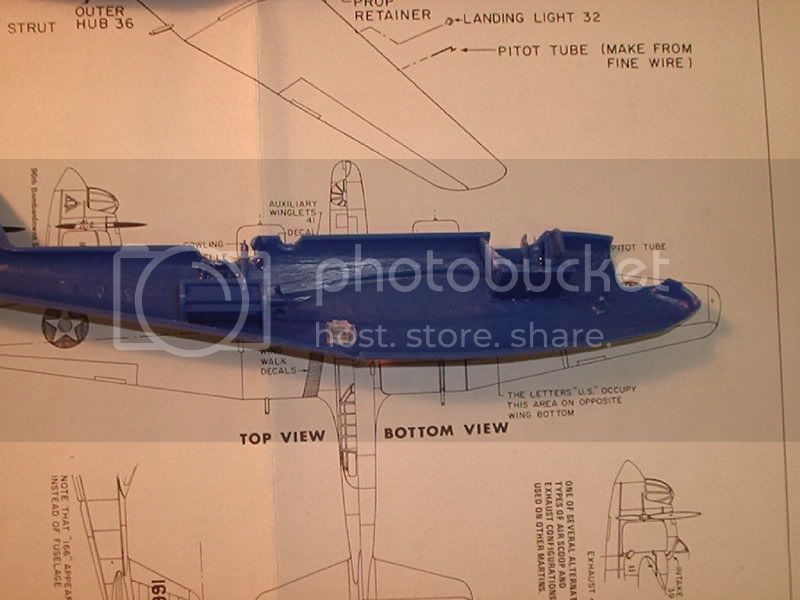
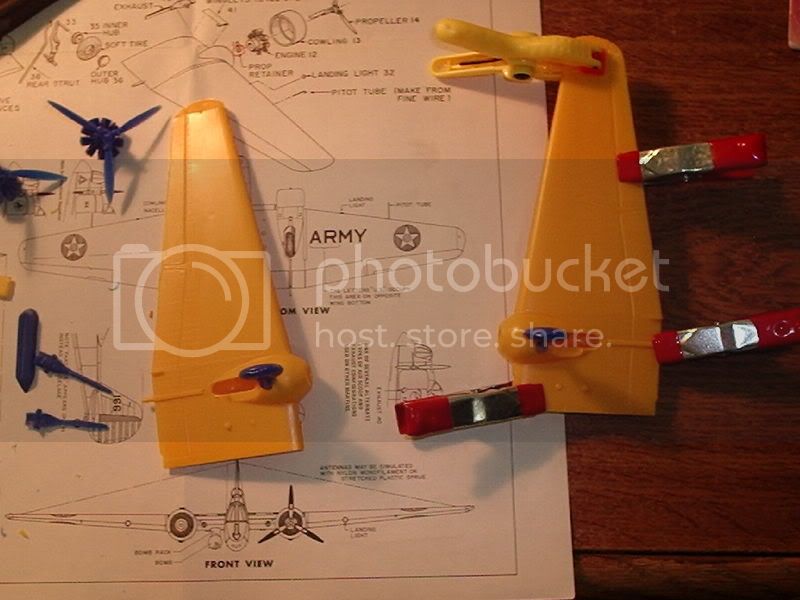
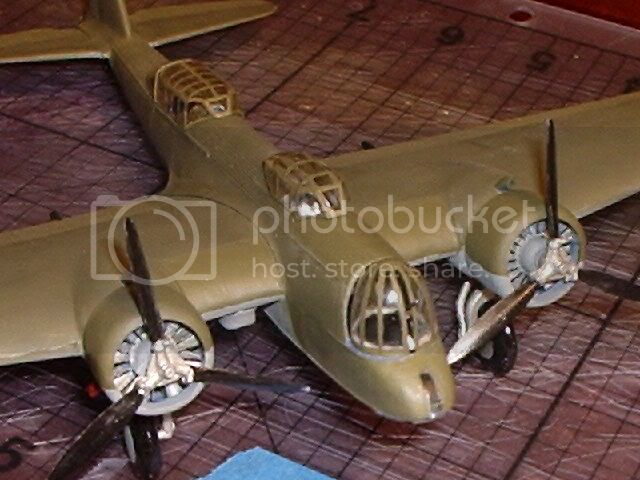
Lots of cleanup and directions are vague in spots as is the narrative for it. The cockpit parts were the most difficult nothing lined up and the pictures did not match reality in any way. The plastic is really soft with did prevent a part or two from snapping but real care is needed when cutting or scribing.


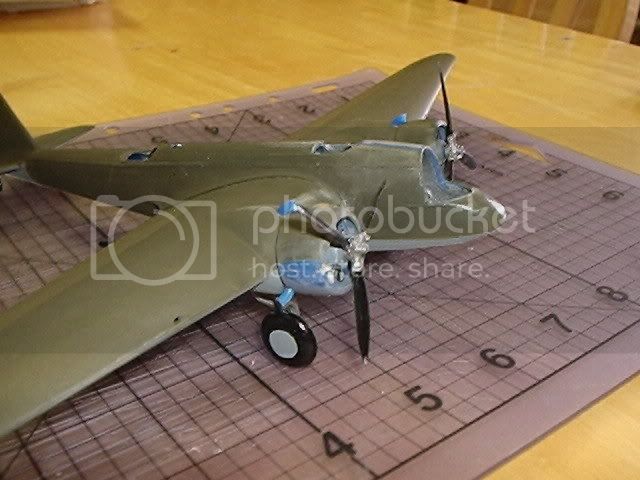
The clear parts are thick and some more distorted than other even after dipping in future. The framing is very hard to see which made it very difficult to mask and paint (I resorted to freehand on some of it). No machine guns are provided so I scratched one for the nose turret. The kit has one bomb that is to be hung on an exterior wing rack but I have not viewed any picture of them being so equipped.


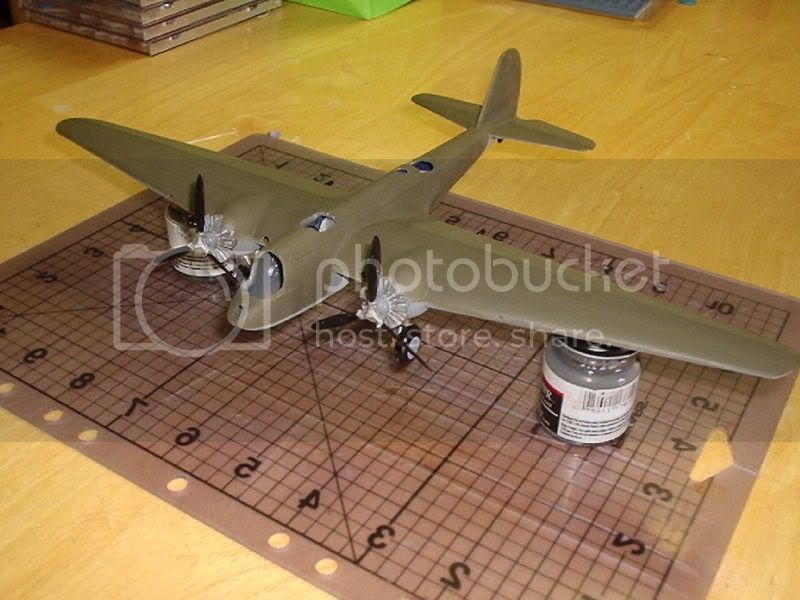
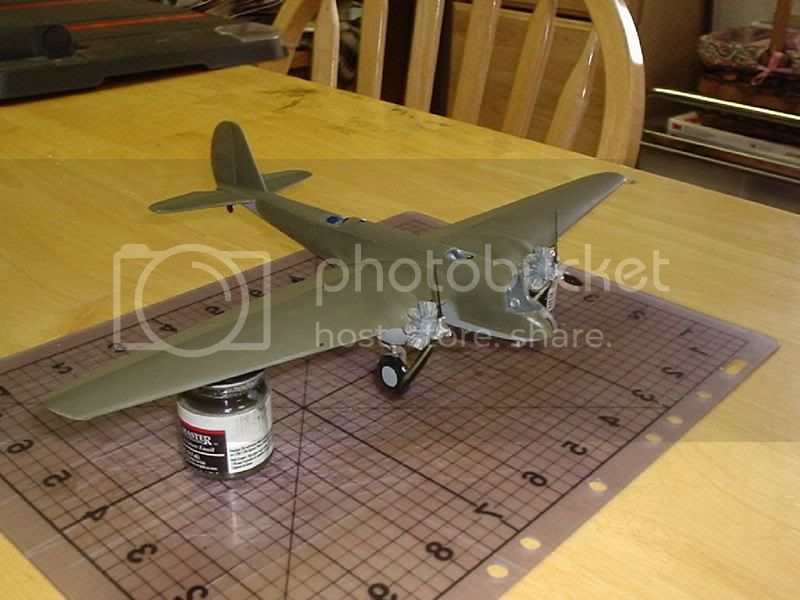
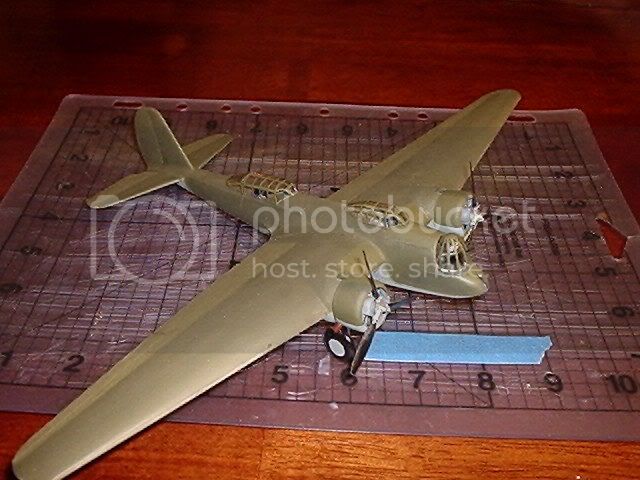
I wanted to build an aircraft from the Pearl Harbor attack. As for the aircraft itself I had to take some creative interpretation, as I could not locate any pictures of a Martin B-10/12 right before or during December 7th, 1941. The closet dated photo I found was for several B-10’s in 1939 at Hickam Field.


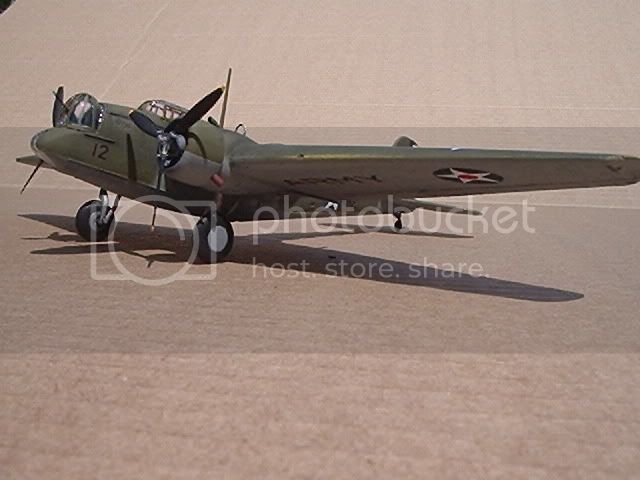
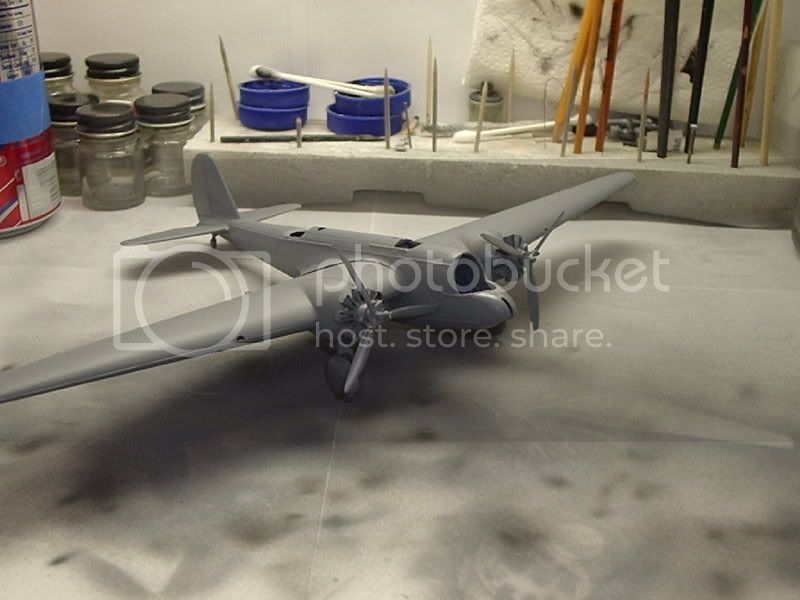
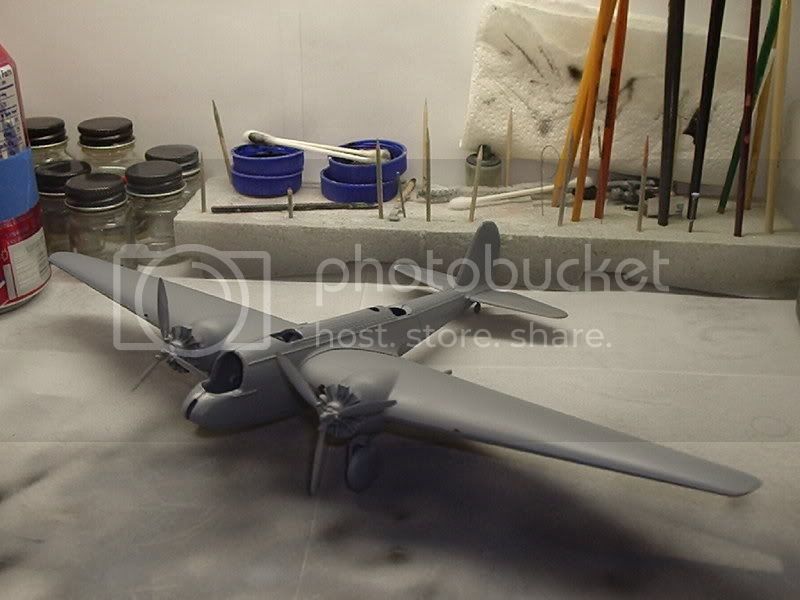
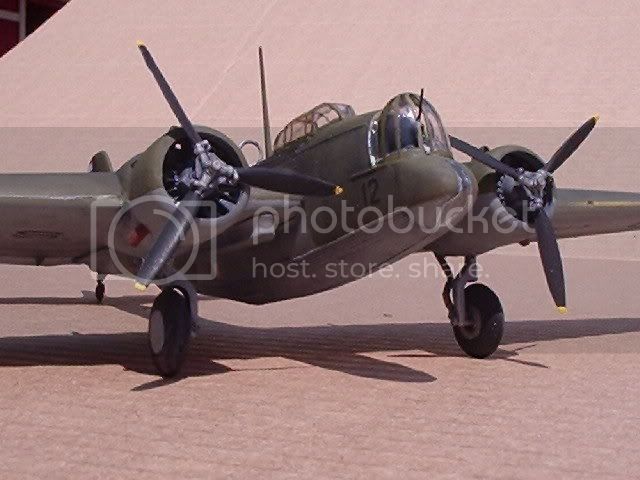
On December 7th, 1941 Three B-10/12 were present from the 86th Observation Squadron stationed at Bellows Field. They were tasked with Coastal Patrol and Anti-Submarine duty. The 86th also operated O-47’s, which I did find painted in Olive Drab and Neutral Grey so I went ahead and painted the Martin the same. All three Martins survived the attack.


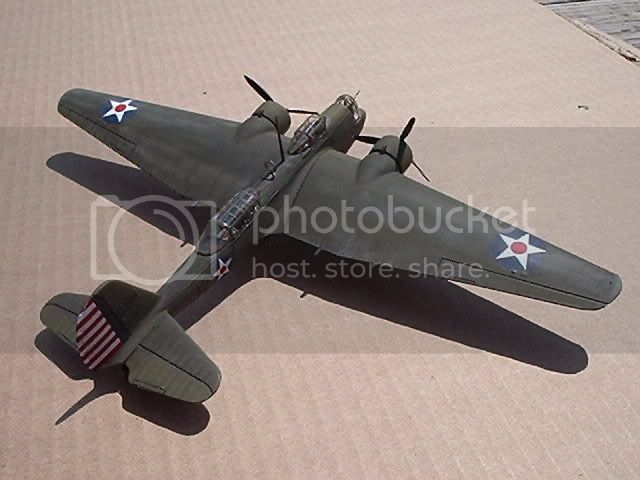
To support my camouflaged painting I did find one B-10 photo after 1941 and the turret was removed and the opening faired over. It was painted Olive Drab and Neural Grey. I enjoyed the build with some minor bumps but if you want a B-10 this is the ONLY game in the modeling world.


This aircraft just calls out to be produced with latest tooling. Maybe Academy would tackle it since they have addressed the early B-17’s and to be greedy how about a B-18 Bolo as well.


Thanks for great campaign. Now I’m off to finish the Aces High build!

Sincerely,
Brian
AJLaFleche
_VISITCOMMUNITY
Massachusetts, United States
Joined: May 05, 2002
KitMaker: 8,074 posts
AeroScale: 328 posts
Posted: Sunday, July 20, 2008 - 11:56 AM UTC
Nice job on a tough old kit.
I have to say, however, despite all the effort you put into the pre-shading, I can't see any evidence of it after you painted the kit. (not that that'sa bad thing, IMHO.)
bf443
_VISITCOMMUNITY
Idaho, United States
Joined: May 16, 2003
KitMaker: 895 posts
AeroScale: 457 posts
Posted: Monday, July 21, 2008 - 01:09 PM UTC
Hello everyone,

Carl and Al LaFleche, thank you both for the compliments. The during the construction the kit did get me down a little. I enjoy the painting and decal phase the best that's when a model really comes to life. Now that i have one under my belt I know what needs to be improved on skill wise. I have another kit of the B-10 I may build it someday in Argentine Navy markings since they flew them throughout WWII. The B-10 at the US Air Force Museum in Dayton served for Argentina and was returned to the US its the only know B-10 left in the world.

Sincerely,
Brian
UNITEDSTATESNAVY
_VISITCOMMUNITY
Idaho, United States
Joined: July 07, 2007
KitMaker: 243 posts
AeroScale: 150 posts
Posted: Monday, July 21, 2008 - 05:13 PM UTC

Quoted Text

Hello everyone,

I had a little time in between the nice weather and kids naps to pre-shading on the model with a Testors Paint Pen. I hope to start painting tonight or Wednesday.

Sincerely,
Brian


do not see much evidence of shading on the finished product...or is it the photo quality? I am somewhat new to modeling and would consider using the shade pen, have you tried other methods?.I need to research the options for shading and your build caught my attention as the shade pen technique is news to me.I always think how I could duplicate the weathering of the real plane however we are dealing with a small plastic model...will be fun to experiment on my own with weathering and maybe try something innovative?
bf443
_VISITCOMMUNITY
Idaho, United States
Joined: May 16, 2003
KitMaker: 895 posts
AeroScale: 457 posts
Posted: Tuesday, July 22, 2008 - 03:45 AM UTC
Hello Dave,

Yes, much of the pre-shading dissapeared but if you look closer at the wings it did show. I have used brush, paint pen and airbrush for pre-shading on different projects. I think the air brush is the most effective but it requires a steady hand.

The brush and pen work better for small stuff and of course if you do not have an airbrush.

Sincerely,
Brian
UNITEDSTATESNAVY
_VISITCOMMUNITY
Idaho, United States
Joined: July 07, 2007
KitMaker: 243 posts
AeroScale: 150 posts
Posted: Tuesday, July 22, 2008 - 11:36 AM UTC
I think I will give the paint pen a try...much less daunting and will give the airbrush a try later, I am able too see the panel recess weathering now.....had a few Becks in me last night and was not able to appreciate the subtleness...thanks for the info.
 _GOTOTOP