_GOTOBOTTOM
Early Aviation
Discuss World War I and the early years of aviation thru 1934.
1/32 Roden GB 2008 Nieuport 28 C.1
Repainted
_VISITCOMMUNITY
Östergötland, Sweden
Joined: April 04, 2006
KitMaker: 1,058 posts
AeroScale: 1,004 posts
Posted: Friday, May 02, 2008 - 07:02 AM UTC
Yap I´ll have it. The new Nieuport 28C1 from Roden. It´s a gem gents, what can I say more.It´s almost an upscale of the 48 scale kit, just some more details to add in the cockpit.
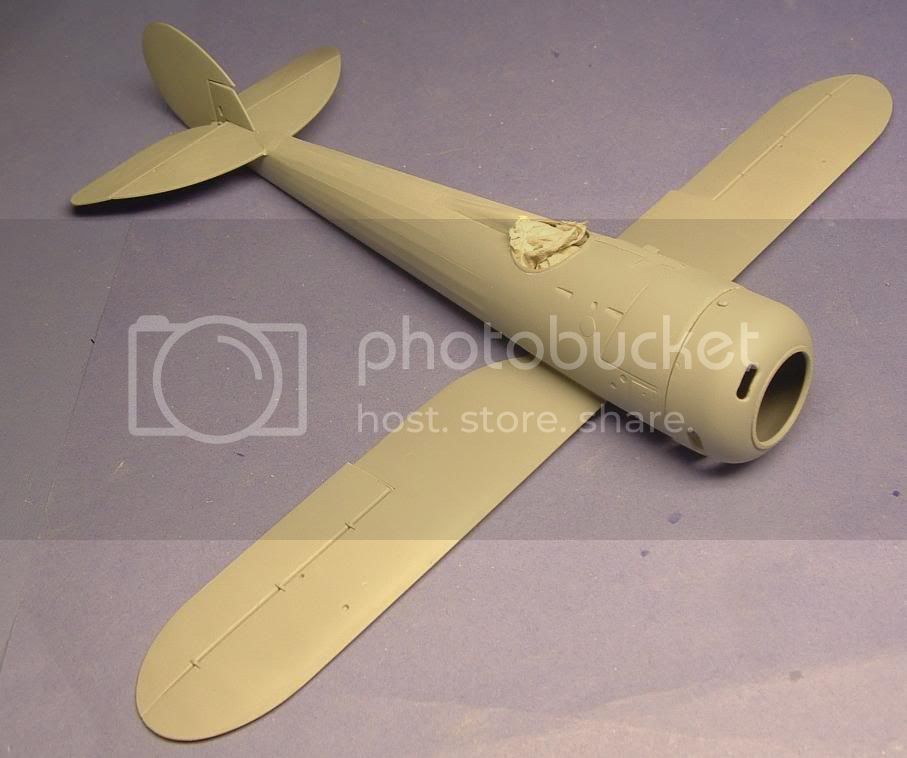
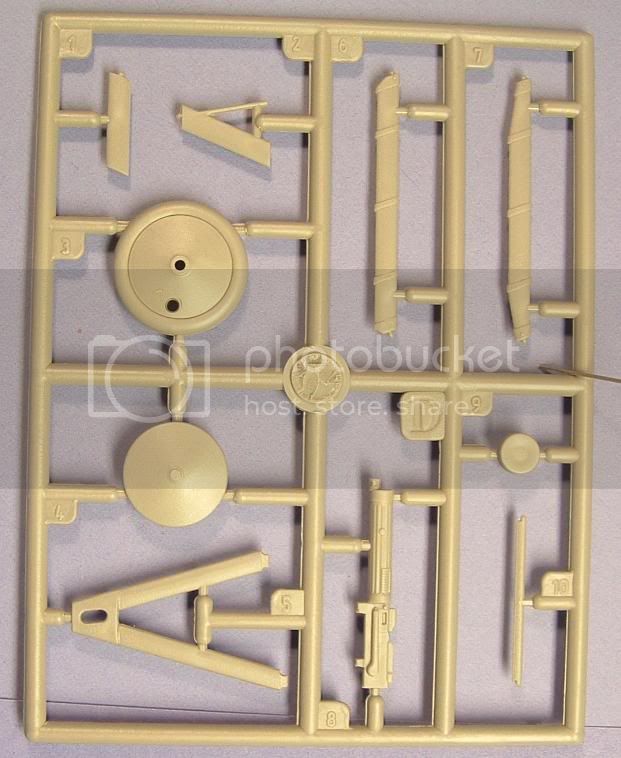
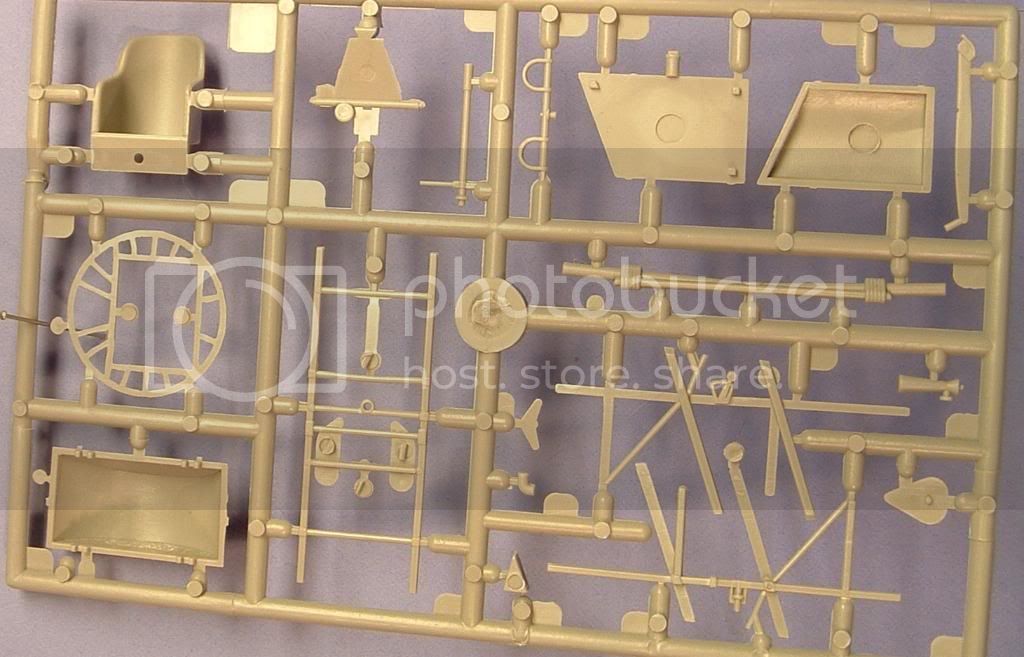
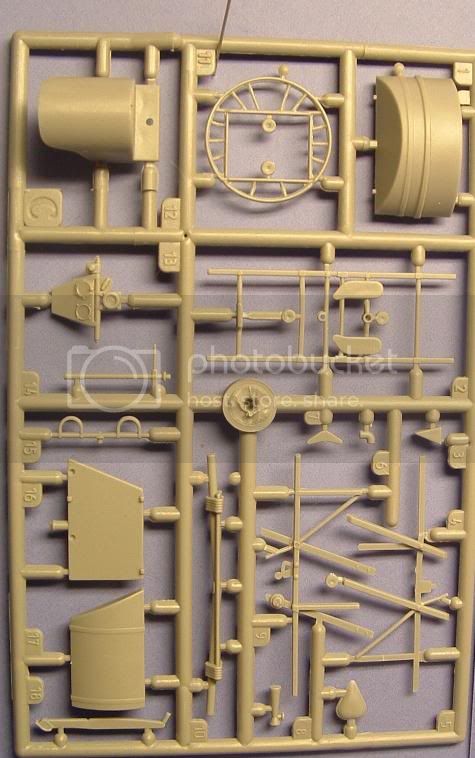
Having eyeballed on the bits for an half hour now and there is some stuff witch can be inproved
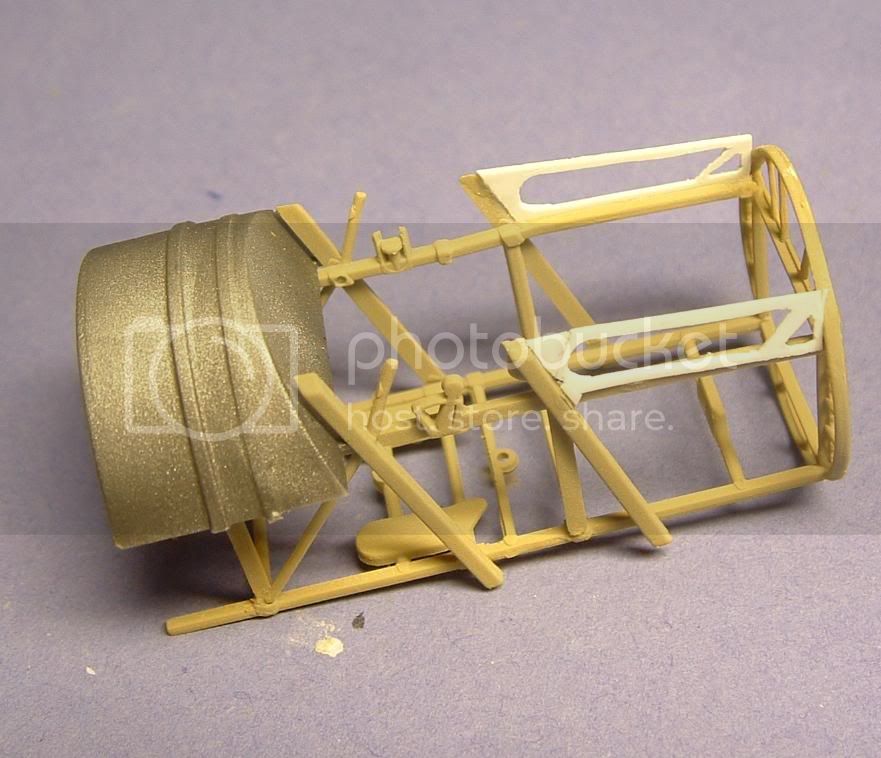
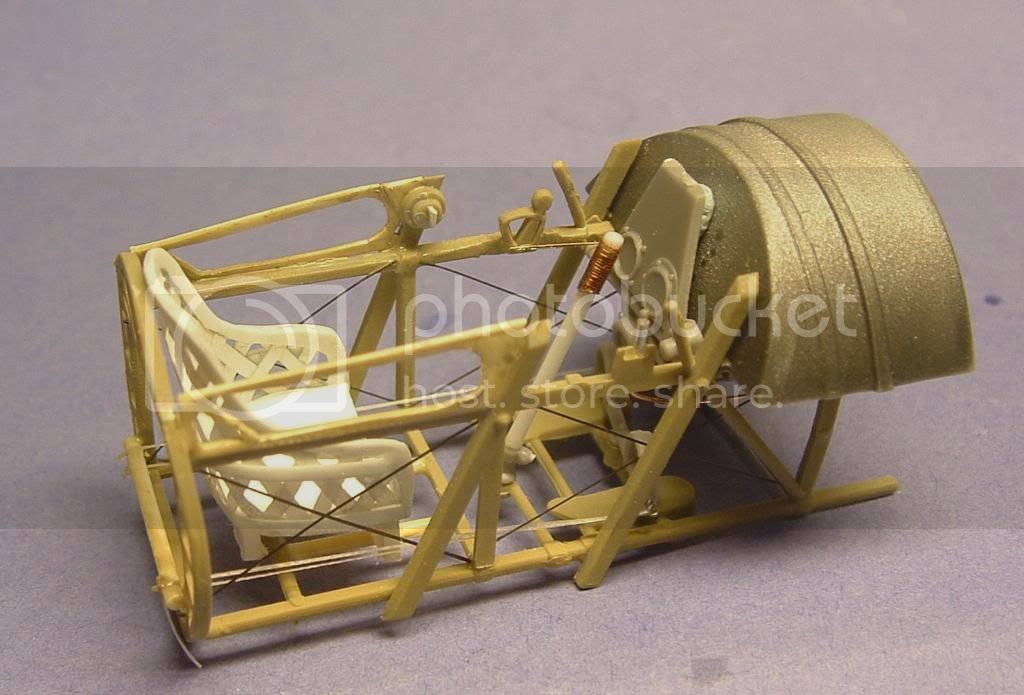
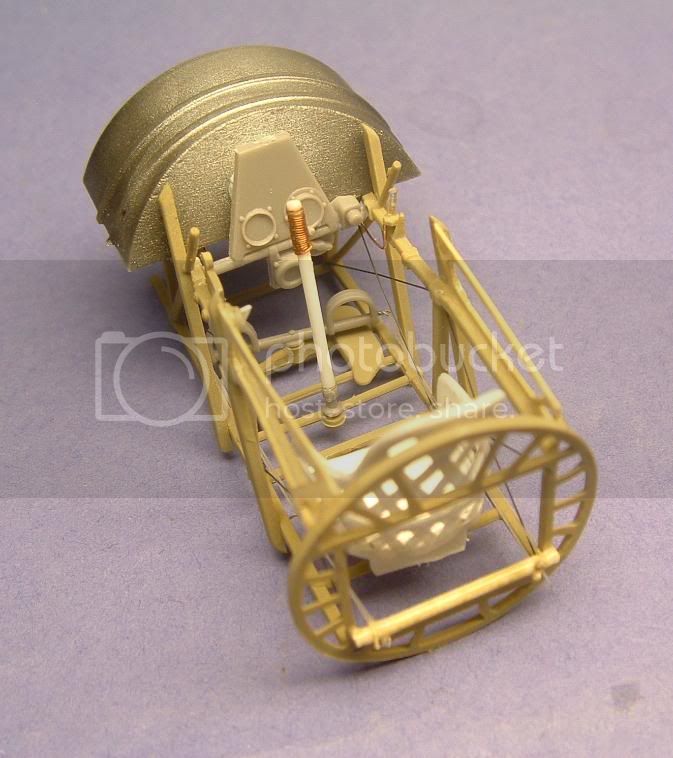
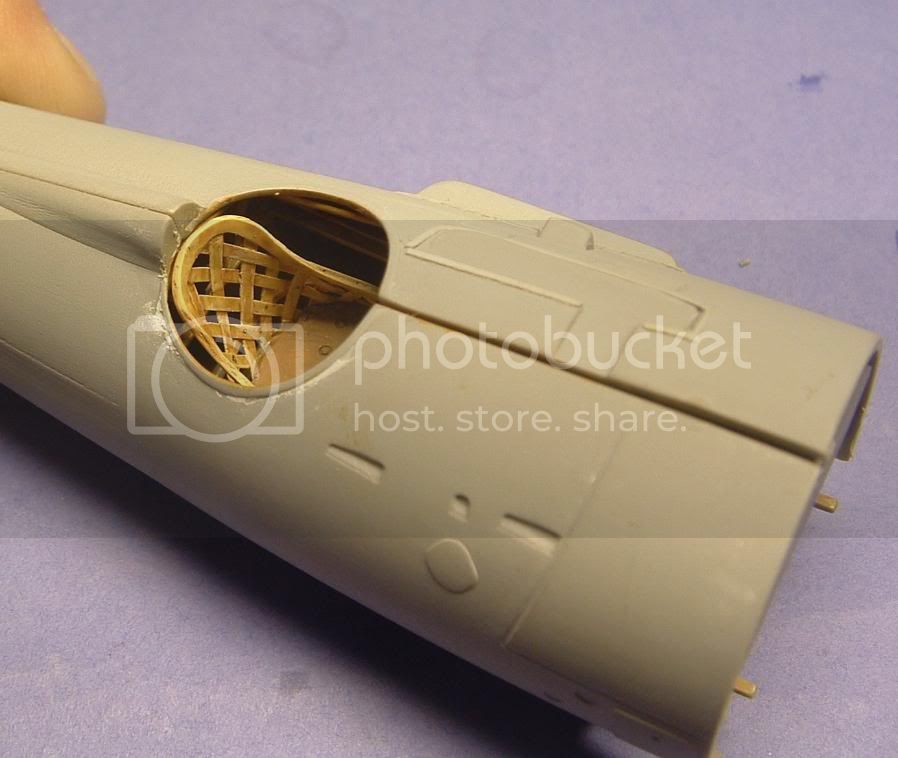
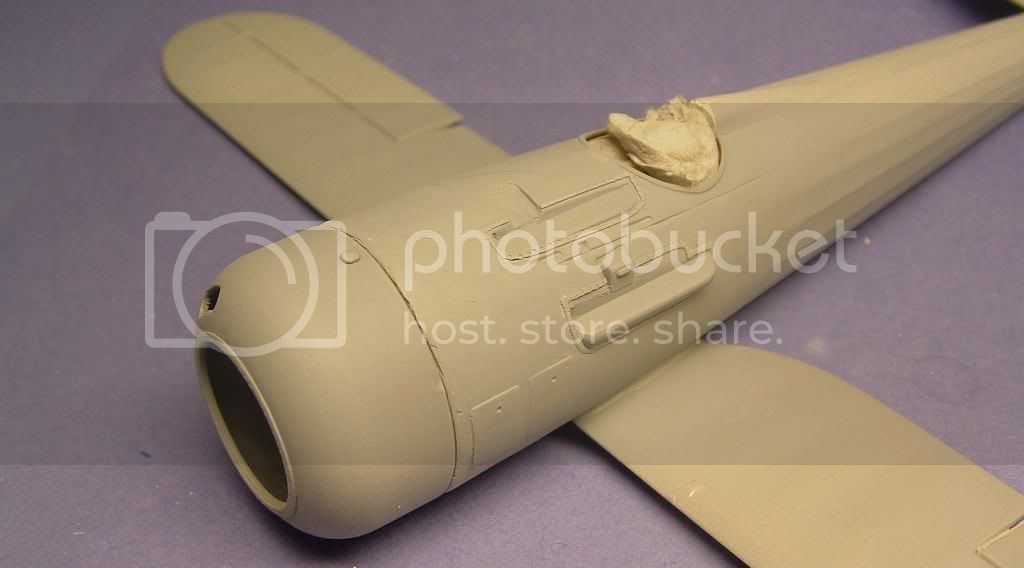
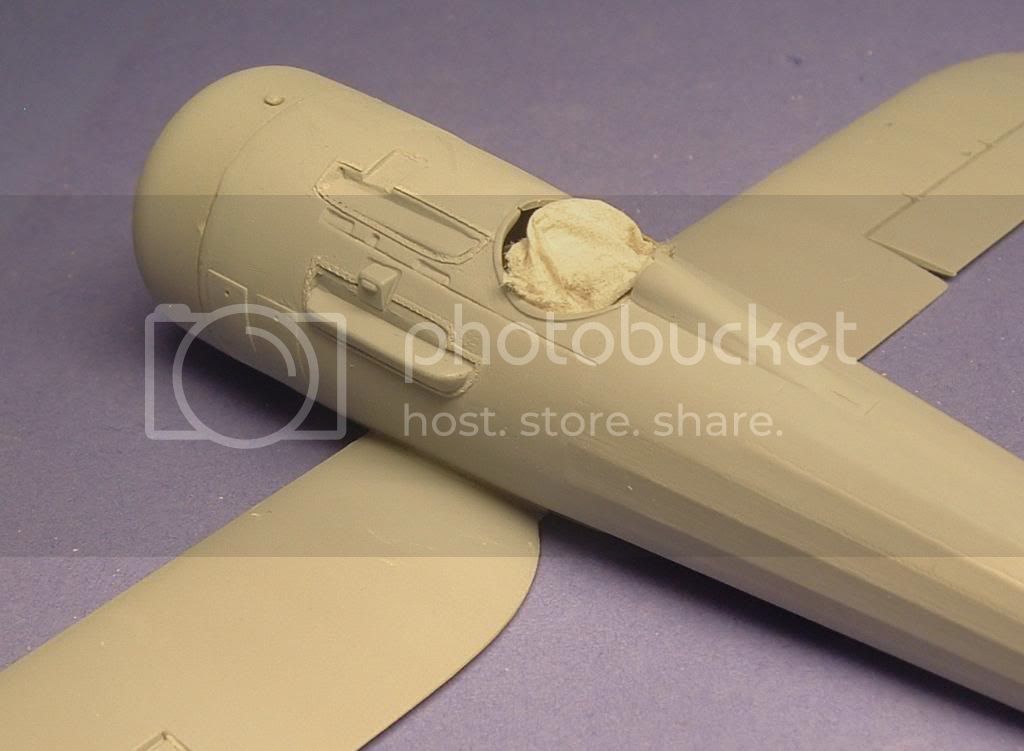
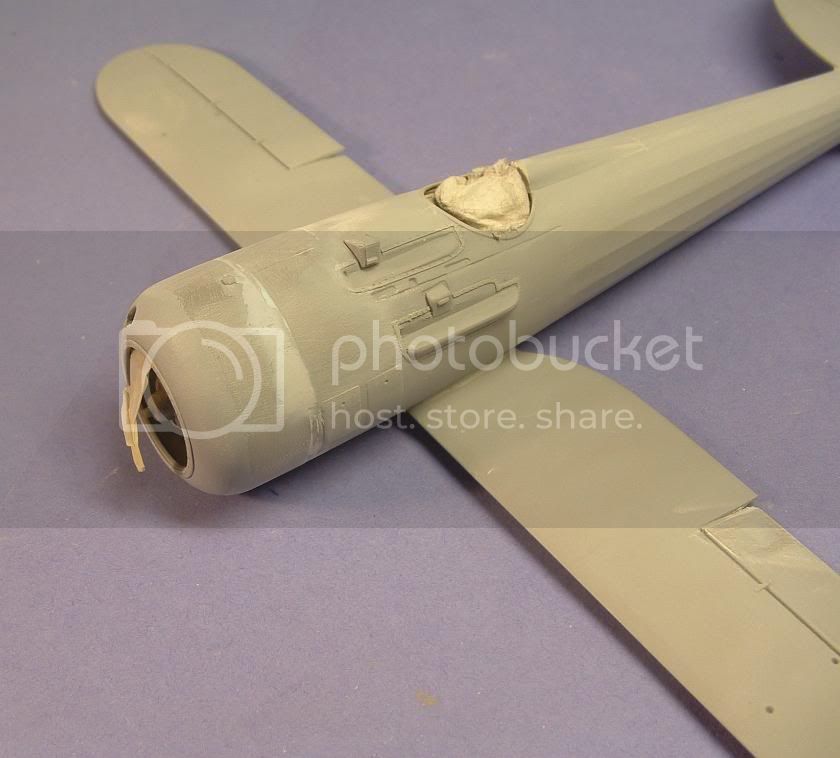
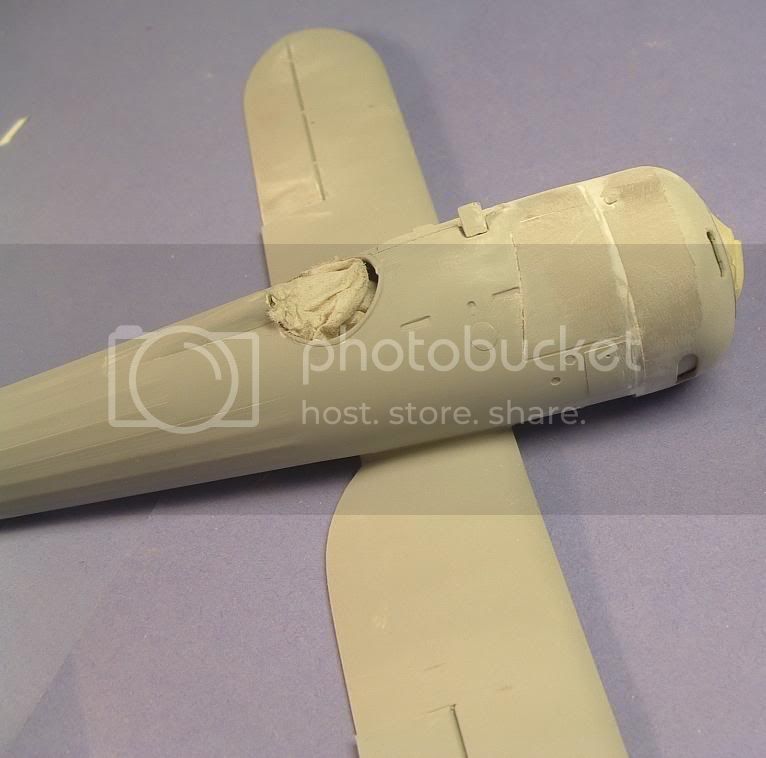
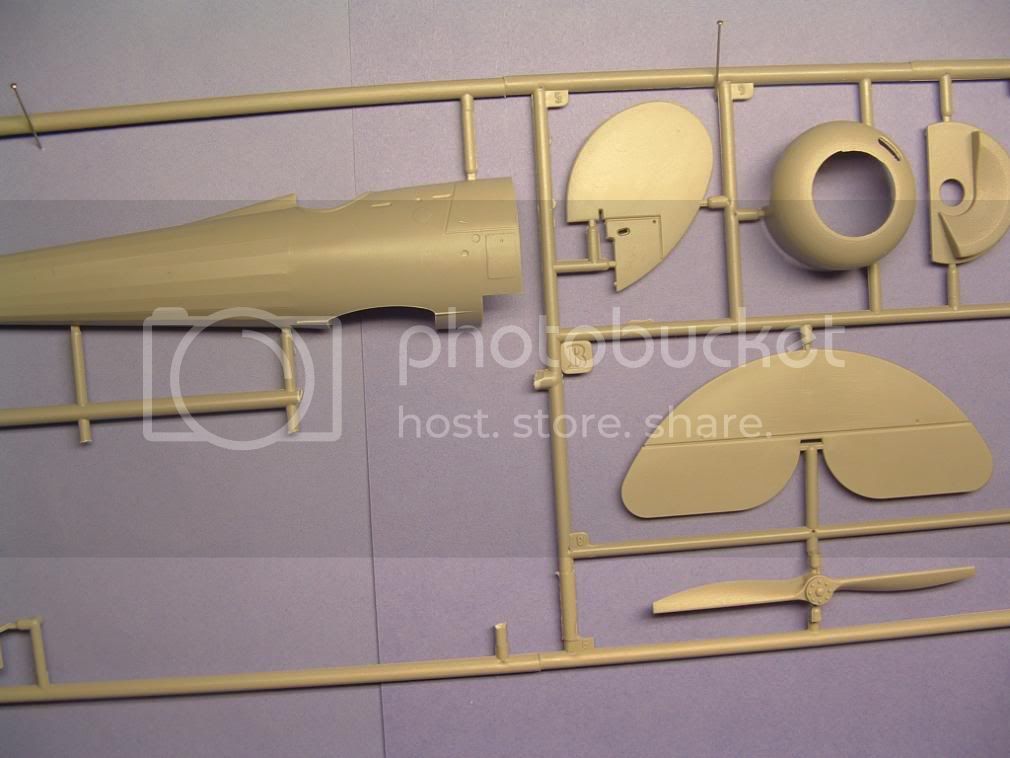
Cowling lacks of the front ring
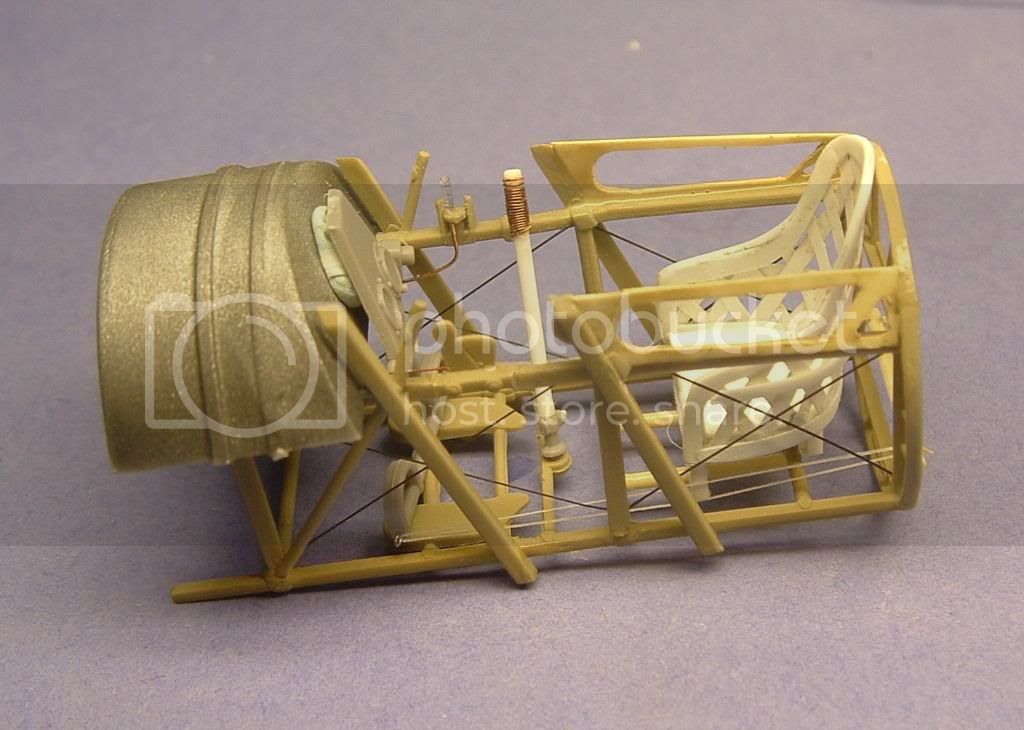
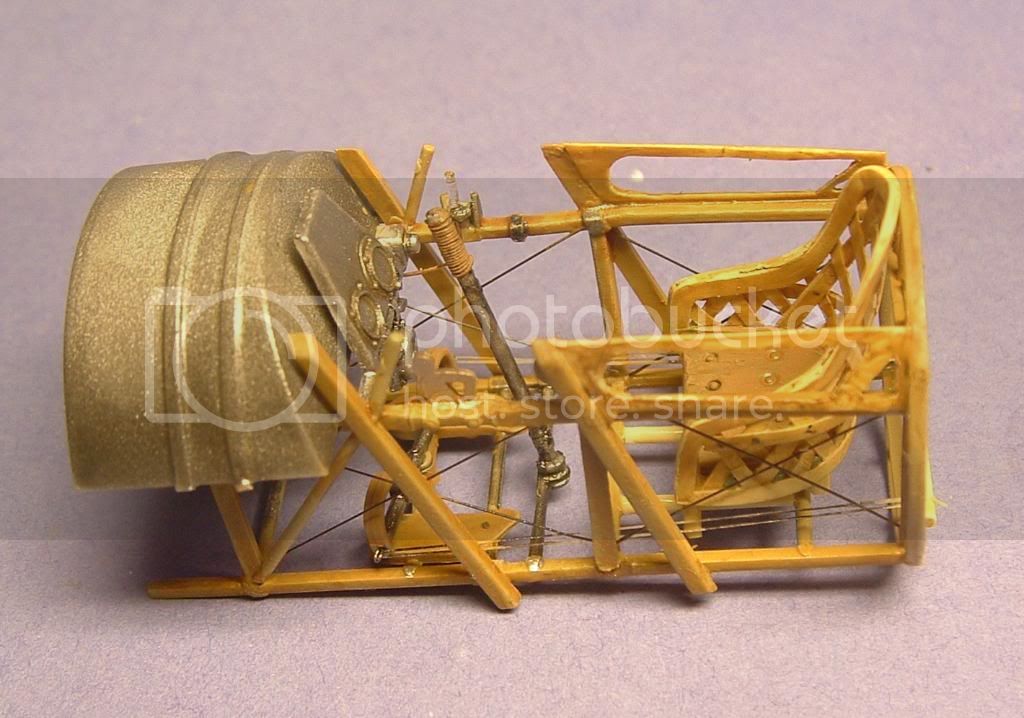
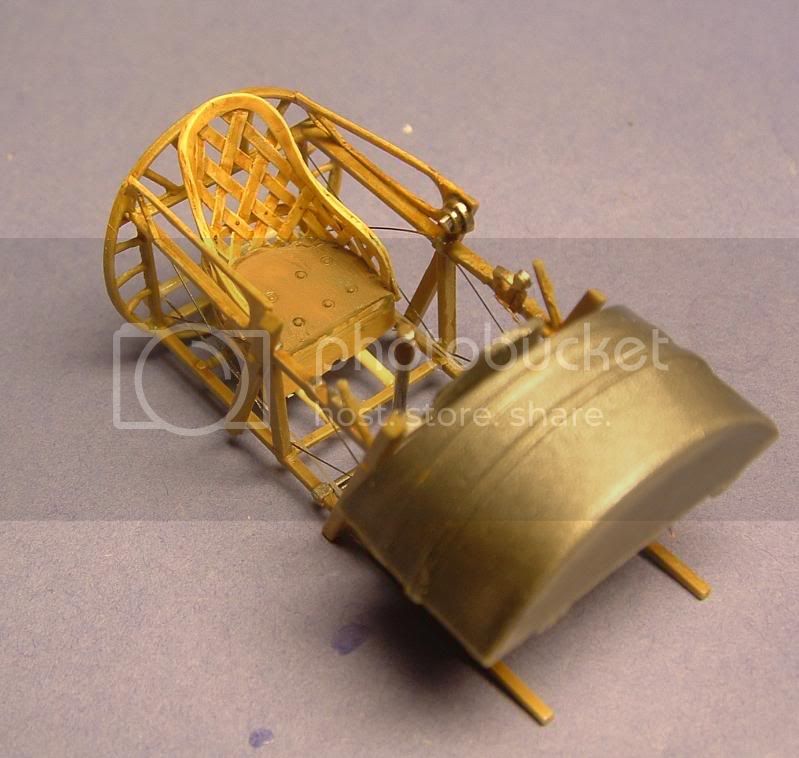
No innerdetail of the ribbs inside the cockpit
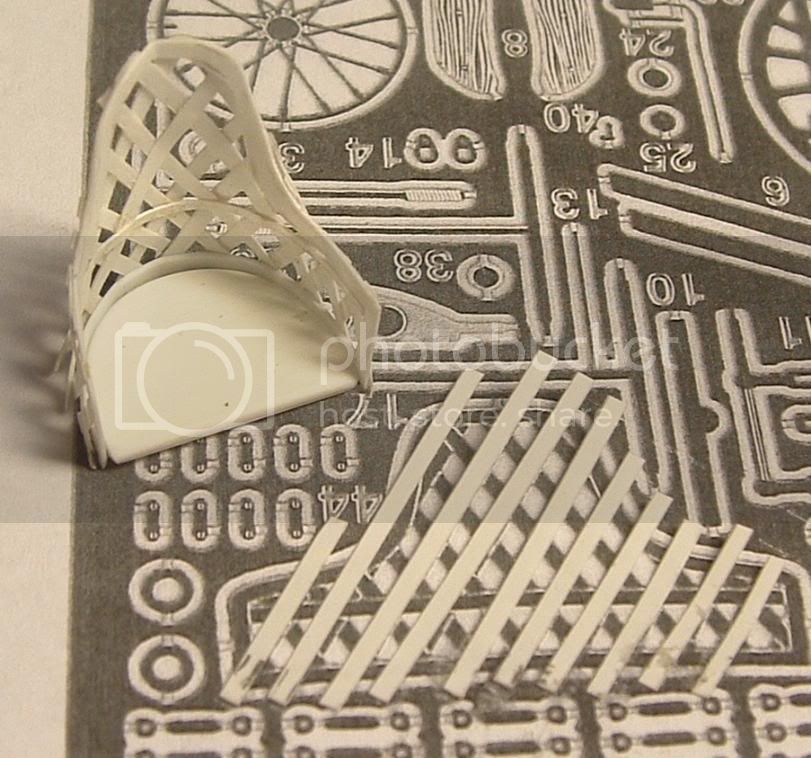
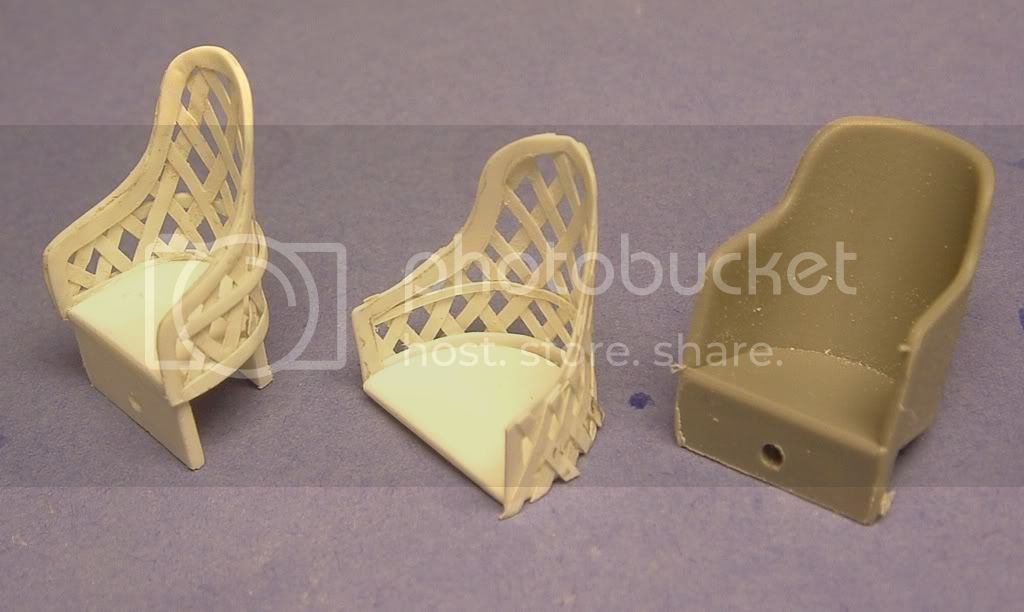
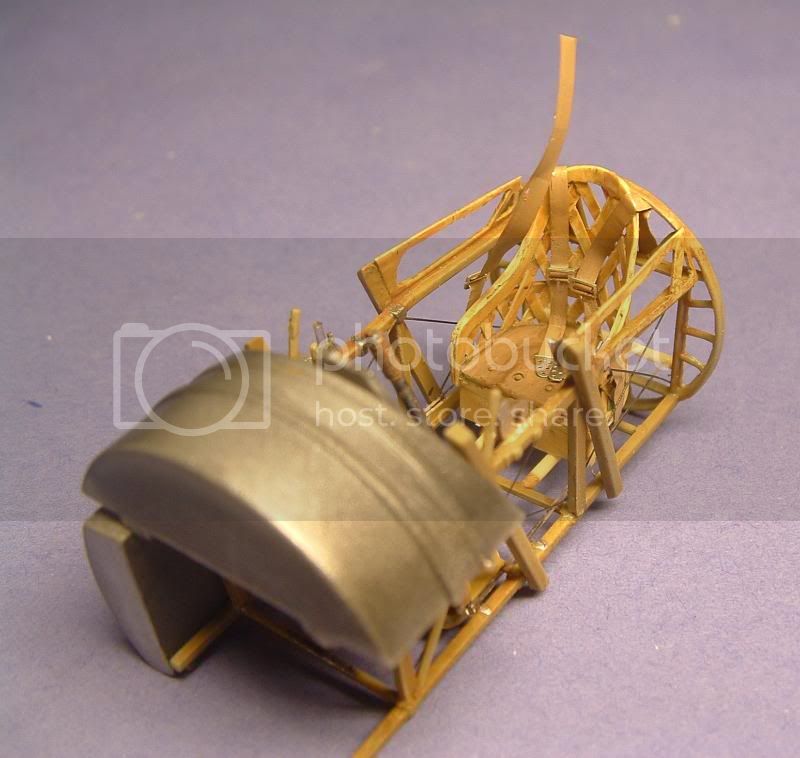
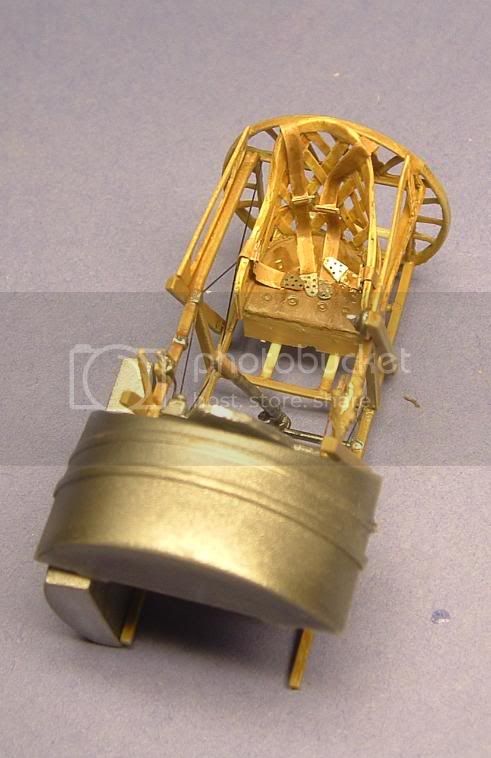
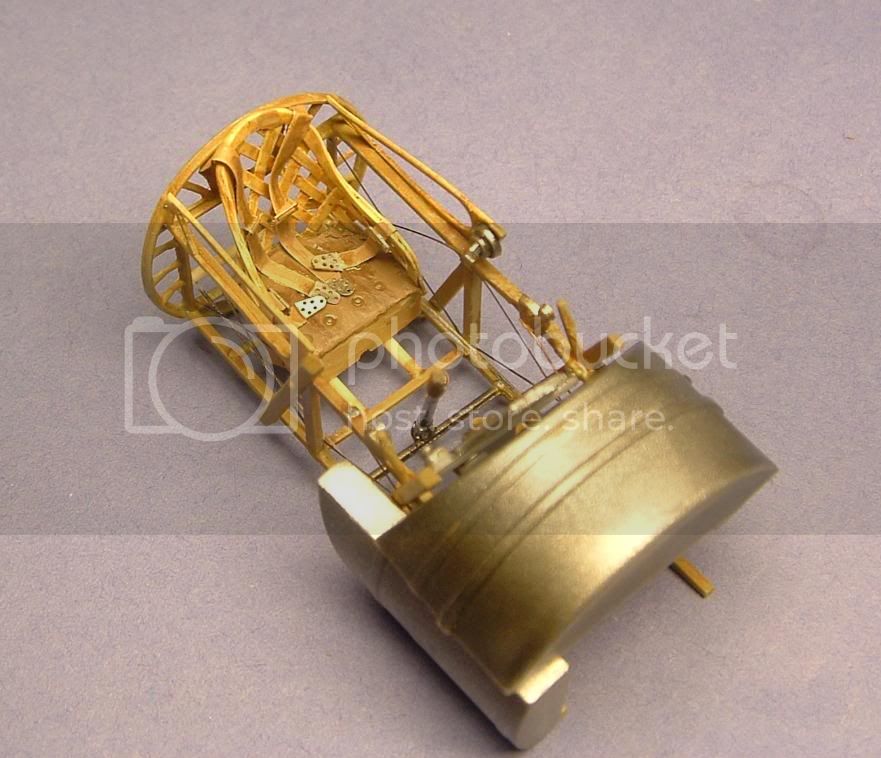
The seat is the same as in the 48 scale.
Don´t like the surface under the wings
There is more I´m sure but this is just what I´m picked out.

Do not get that idea that I´m not like this one I do really. nothing that a modeller with some skill can inprove, and if you do that you´ll end up with a hell of model here. All the right stuff is here. So if you´re in for this help me and send Parts a mail and ask them for an etch for this one.

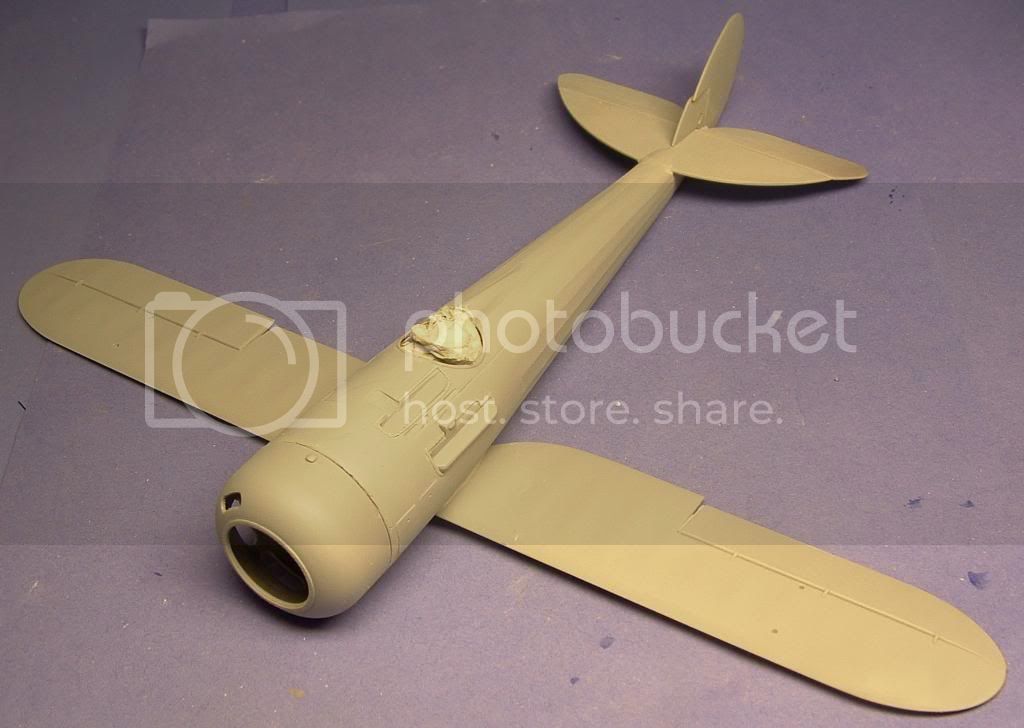
here´s the first pics. You´ve seen the overalpics on Rodens site so her´s mine.
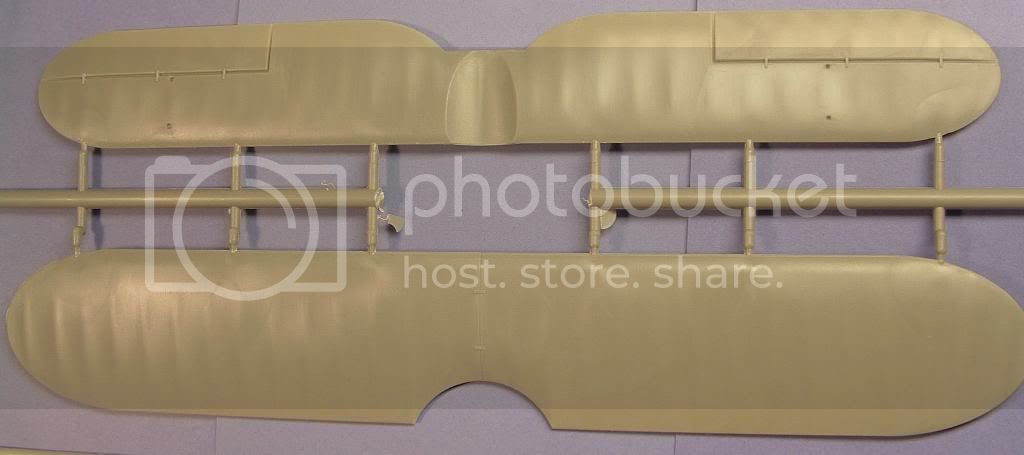

Wings upperside


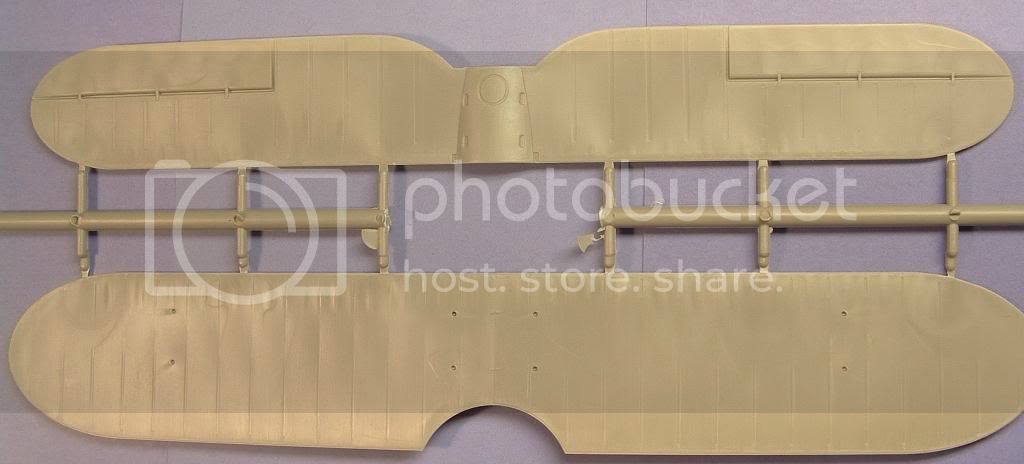
Underside of the wings,


If you´r into this there will be more pics of the build. I´m starting up the build tomorrow afternoon. It´s going to be an (almost) OOB build for the Swedish Distributer, exclusive on the IPMS Sweden site, but is you´r Swedish as bad as mine english, I´ll will send in pics here to

cheers

Larsa
RAGIII
_VISITCOMMUNITY
North Carolina, United States
Joined: June 19, 2007
KitMaker: 604 posts
AeroScale: 600 posts
Posted: Monday, May 05, 2008 - 03:00 AM UTC
Loks great! I am sure Part will get around to enlarging their 1/48th PE set for this one. That being said , Lonestar is the only company so far that has given an accurate representation of the seat! Part should study the photos of the smithsonian? rebuild. The seat is lattice and goes from one side of the cockpit to the other.
RAGIII
Repainted
_VISITCOMMUNITY
Östergötland, Sweden
Joined: April 04, 2006
KitMaker: 1,058 posts
AeroScale: 1,004 posts
Posted: Monday, May 05, 2008 - 05:05 AM UTC

Quoted Text

Loks great! I am sure Part will get around to enlarging their 1/48th PE set for this one. That being said , Lonestar is the only company so far that has given an accurate representation of the seat! Part should study the photos of the smithsonian? rebuild. The seat is lattice and goes from one side of the cockpit to the other.
RAGIII


Hi
do you have any useful photo´s to share?
I will start scratching the seat tomorrow, and that would be a real help.

Larsa
RAGIII
_VISITCOMMUNITY
North Carolina, United States
Joined: June 19, 2007
KitMaker: 604 posts
AeroScale: 600 posts
Posted: Monday, May 05, 2008 - 01:04 PM UTC
I once had several photos on my favorites but a recent change to a Lap Top has caused me to lose some sites that were cached. Attached is one I found quickly just by typing in nieuport28 in my search engine.
RAGIII

http://www.nasm.si.edu/museum/garber/nieuport/nieuport_fus.htm


That obviously failed to work but a trip to the site will get you where you need to be.
JackFlash
_VISITCOMMUNITY
Colorado, United States
Joined: January 25, 2004
KitMaker: 11,669 posts
AeroScale: 11,011 posts
Posted: Monday, May 05, 2008 - 04:41 PM UTC
An easy fix Rick. No worries!
JackFlash
_VISITCOMMUNITY
Colorado, United States
Joined: January 25, 2004
KitMaker: 11,669 posts
AeroScale: 11,011 posts
Posted: Saturday, May 10, 2008 - 04:20 PM UTC
Larsa Please keep us informed of your progress here. Also I would like to thank you sincerely for posting it with us here. Please keep us updated!
Repainted
_VISITCOMMUNITY
Östergötland, Sweden
Joined: April 04, 2006
KitMaker: 1,058 posts
AeroScale: 1,004 posts
Posted: Saturday, May 10, 2008 - 09:33 PM UTC

Quoted Text

Larsa Please keep us informed of your progress here. Also I would like to thank you sincerely for posting it with us here. Please keep us updated!


More is on the way Stephen.

The interior frame is glued together and some detailing is done.

Still working on the seat from plasticard. A second seat is made, and this time I´ll try to get it correct. The first one was a test to see if the plasticard would pass the test.Other have done this seat in soft brass, but plasticard is a better material for me.


Larsa
Repainted
_VISITCOMMUNITY
Östergötland, Sweden
Joined: April 04, 2006
KitMaker: 1,058 posts
AeroScale: 1,004 posts
Posted: Wednesday, May 14, 2008 - 05:42 AM UTC
Hi
A second seat has been made, and this time it fits into the frame. All major details is done, so from here it´s all painting ahead.


First you have the final seat, in the middle the test seat and last the seat frome Roden.


Larsa
Repainted
_VISITCOMMUNITY
Östergötland, Sweden
Joined: April 04, 2006
KitMaker: 1,058 posts
AeroScale: 1,004 posts
Posted: Saturday, May 17, 2008 - 09:05 PM UTC
Hi
The interior got it´s paint, still some paints to go on.Instrumentdecals and seat belts will be added, hopefully today.


Sort I know but that´s all for this time
Larsa
thegirl
_VISITCOMMUNITY
Alberta, Canada
Joined: January 19, 2008
KitMaker: 6,743 posts
AeroScale: 6,151 posts
Posted: Saturday, May 24, 2008 - 02:24 AM UTC
Details are looking great so far , love your seat far better then any PE out there . What thickness of plastic did you use for this ?
Repainted
_VISITCOMMUNITY
Östergötland, Sweden
Joined: April 04, 2006
KitMaker: 1,058 posts
AeroScale: 1,004 posts
Posted: Saturday, May 24, 2008 - 04:31 AM UTC

Quoted Text

Details are looking great so far , love your seat far better then any PE out there . What thickness of plastic did you use for this ?


Hi Terry
The seat, yes I´ll hd to do something about that so my head was spinning during work and when I was driving home this idea was made. So I did one as test, just to see if the plasticardstrips would hold and they did, so a second was done. The seat took me about an hour to make.
The thickness is 0,10" or 0,25 mm i Evergreens plasticard.


Larsa
Repainted
_VISITCOMMUNITY
Östergötland, Sweden
Joined: April 04, 2006
KitMaker: 1,058 posts
AeroScale: 1,004 posts
Posted: Saturday, May 24, 2008 - 10:07 AM UTC
Hi
Time for update
The interior is finished, just a coat off satin varnish all over it to cover up some glue. The seat belt material is a thicker aluminumfoil from a package off Lasagne. Cut to strips and painted up. So from here the interior will be glued into the fuselage and the underwing will be attached. The engine is already painted up so next will be to prepare for basecolour and preshading.


Larsa
thegirl
_VISITCOMMUNITY
Alberta, Canada
Joined: January 19, 2008
KitMaker: 6,743 posts
AeroScale: 6,151 posts
Posted: Saturday, May 24, 2008 - 12:46 PM UTC
Hi Larsa : I have the Roden 1/48 kit and will be doing my seat the same way . And my name is spelled with an i not y LOL .
JackFlash
_VISITCOMMUNITY
Colorado, United States
Joined: January 25, 2004
KitMaker: 11,669 posts
AeroScale: 11,011 posts
Posted: Saturday, May 24, 2008 - 02:15 PM UTC
Greetings Larsa!

Excellent work. Will you display this with cowling on or off?
Repainted
_VISITCOMMUNITY
Östergötland, Sweden
Joined: April 04, 2006
KitMaker: 1,058 posts
AeroScale: 1,004 posts
Posted: Monday, May 26, 2008 - 07:38 PM UTC
Hi
Terri, sorry about the Y

Stephen
I will have the cowling on. I don´t have the time to make the engine up that display with removed cowling. The engine is nice but display it that way would some more work to it.

Larsa
JackFlash
_VISITCOMMUNITY
Colorado, United States
Joined: January 25, 2004
KitMaker: 11,669 posts
AeroScale: 11,011 posts
Posted: Monday, May 26, 2008 - 08:13 PM UTC

Quoted Text

Stephen I will have the cowling on. I don´t have the time to make the engine up that display with removed cowling. The engine is nice but display it that way would some more work to it. Larsa


Colour me totally bummed out.
Repainted
_VISITCOMMUNITY
Östergötland, Sweden
Joined: April 04, 2006
KitMaker: 1,058 posts
AeroScale: 1,004 posts
Posted: Monday, May 26, 2008 - 08:46 PM UTC
Hi
The fuselage went together nicely, some care was taken to line it up, and then some tiny filling was needed, on the pics it seams to be lots of filler, but that’s easy sanded away.
Hopefully i’m sending more pics later today folks


Larsa
RAGIII
_VISITCOMMUNITY
North Carolina, United States
Joined: June 19, 2007
KitMaker: 604 posts
AeroScale: 600 posts
Posted: Tuesday, May 27, 2008 - 12:19 PM UTC
Looks really good so far! I am glad you clarified the look of the putty as it seemed to be more than a little
RAGIII
thegirl
_VISITCOMMUNITY
Alberta, Canada
Joined: January 19, 2008
KitMaker: 6,743 posts
AeroScale: 6,151 posts
Posted: Wednesday, May 28, 2008 - 02:36 AM UTC
Larsa , your kit so far is great , can't wait to see the finished model ! No worries on the "y" happens to me all the time lol
Repainted
_VISITCOMMUNITY
Östergötland, Sweden
Joined: April 04, 2006
KitMaker: 1,058 posts
AeroScale: 1,004 posts
Posted: Friday, May 30, 2008 - 05:56 AM UTC
Hi Ragi
The putty in easy to sand of, so don´t worry.
Terri, it´s cool

New updates tomorow, I´ll have it sanded an hopefully ready for primer.


Larsa
Repainted
_VISITCOMMUNITY
Östergötland, Sweden
Joined: April 04, 2006
KitMaker: 1,058 posts
AeroScale: 1,004 posts
Posted: Saturday, May 31, 2008 - 06:42 AM UTC
Hi
I´ve got the primer on today, and having still some tiny spots to refill around the cowling. Next stage after the last filler will be preparing for some preshading. Yep´s this is a lovely kit to build. I recommend this kit strongly to folks around already if they want to jumpstart at an Roden or Big WW1.


Larsa Q
MerlinV
_VISITCOMMUNITY
Victoria, Australia
Joined: November 26, 2006
KitMaker: 608 posts
AeroScale: 602 posts
Posted: Tuesday, June 03, 2008 - 12:43 AM UTC
Looking Good Larsa,
I was a little worried that your Filler would show after priming.

The stringer effect on he fuselage works well doesn't it.

Cheers,

Hugh
Repainted
_VISITCOMMUNITY
Östergötland, Sweden
Joined: April 04, 2006
KitMaker: 1,058 posts
AeroScale: 1,004 posts
Posted: Tuesday, June 03, 2008 - 04:43 AM UTC

Quoted Text

Looking Good Larsa,
I was a little worried that your Filler would show after priming.

The stringer effect on he fuselage works well doesn't it.

Cheers,

Hugh


Hi Hugh
Ther eis allways a small risk that the filler will show thrue the primer. If so I´ll resand the surface and starts with some tiny silverpaint in the airbrush. That´s allways stops the unwanted finish. The primer also telling the story if everthing is smoth and nice.
The stringereffect is just so nice I agree.
Next step noww is to mask the ribs and prepare for some nice preshadings before the final paint. Pics on that will come.


Larsa
Repainted
_VISITCOMMUNITY
Östergötland, Sweden
Joined: April 04, 2006
KitMaker: 1,058 posts
AeroScale: 1,004 posts
Posted: Friday, June 06, 2008 - 11:48 PM UTC
Hi
I have put some filler a second time around the cowling. Just to get it nice and smooth.So next thin coat of primer I´ll hope it will look good.

I have started to work on the wickersgun from the kit. I will only use one gun mounted on the model. for thge moment I haven´t decided witch gun, the upper or lower one.


Larsa
FUTURE
_VISITCOMMUNITY
New South Wales, Australia
Joined: June 05, 2002
KitMaker: 61 posts
AeroScale: 56 posts
Posted: Saturday, June 07, 2008 - 08:08 PM UTC
More More. Keep going. One of my favourite aircraft. Love what you did to make the seat.
 _GOTOTOP