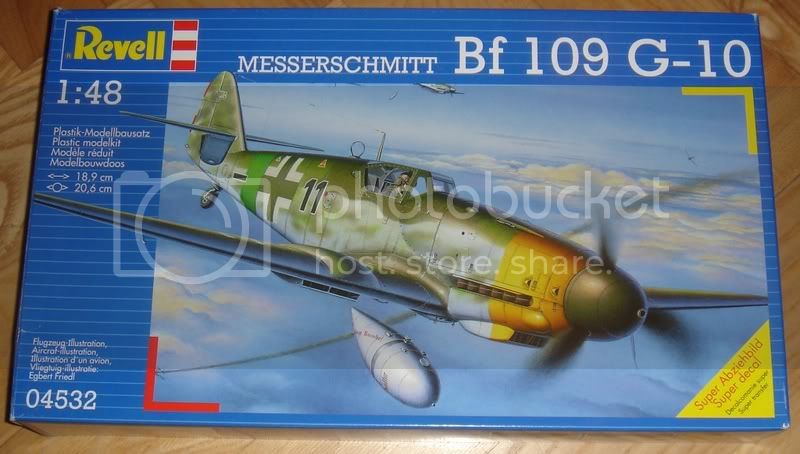
Me 109G-10/R2 for Paparazzi campaign

#041
Kobenhavn, Denmark
Joined: July 20, 2006
KitMaker: 10,069 posts
AeroScale: 3,788 posts
Posted: Saturday, August 09, 2008 - 08:58 AM UTC
Campaign'oholic - 252+ campaigns completed
Germany
Joined: September 07, 2005
KitMaker: 5,609 posts
AeroScale: 5,231 posts
Posted: Saturday, August 09, 2008 - 09:17 AM UTC
Hi Jesper
I already made a comment in the campaign thread regarding literature. I will not repeat it here.
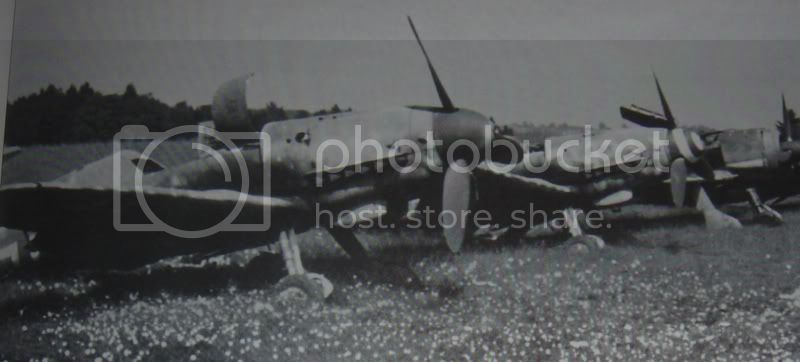
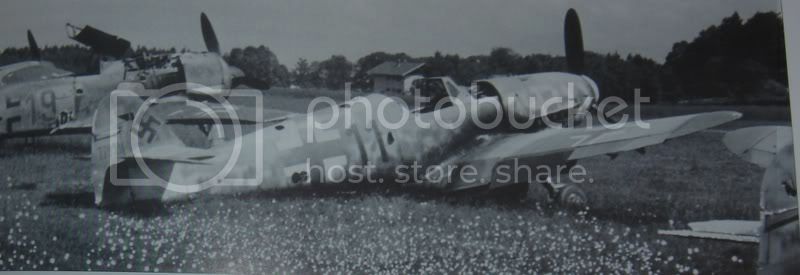
The "Black 11" is camouflaged in a standard fighter pattern (74/75) with large blotches forgot wich factory, WNF or maybe Erla (Leipzig). The top b/w picture seems to be similar /see below canopy). OTOH the contrast on the wing in the b/w pix is much stronger than on the colour photo .. hard to tell if maybe 74 was replace by one of the RLM 80ies.
I would go with a standard 74/75/76 first and then have another look at the model
cheers
Steffen
DULCE ET DECORUM EST PRO HOBBY MORI
#041
Kobenhavn, Denmark
Joined: July 20, 2006
KitMaker: 10,069 posts
AeroScale: 3,788 posts
Posted: Thursday, August 14, 2008 - 08:18 PM UTC
Thanks for the comments, Steffen.
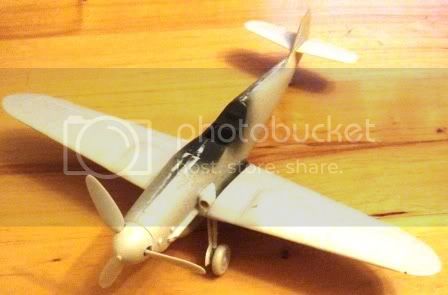
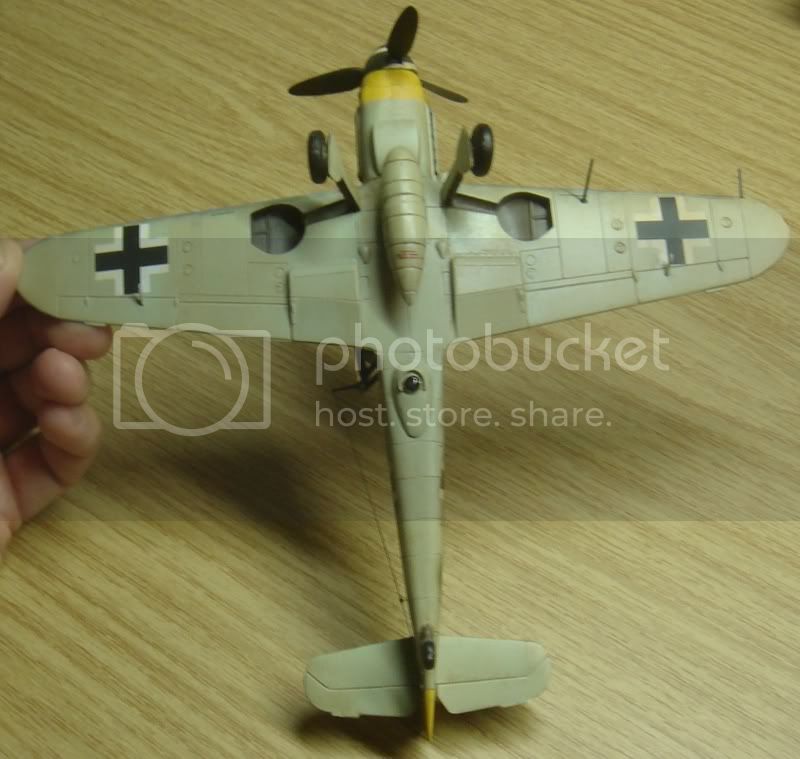
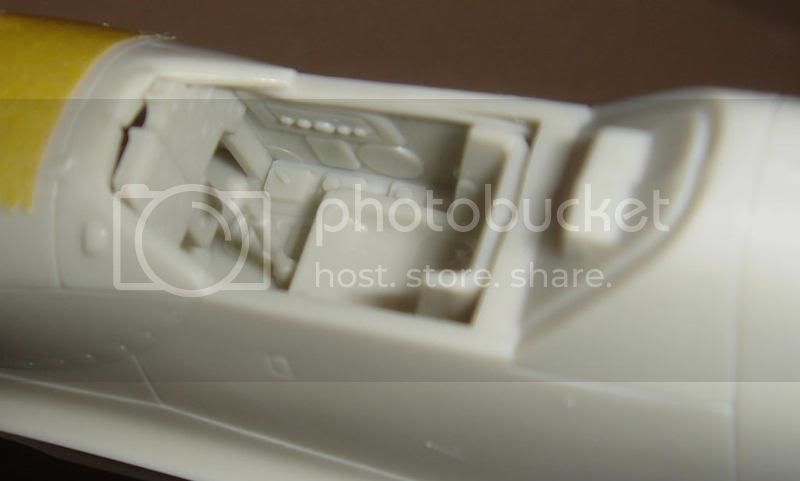
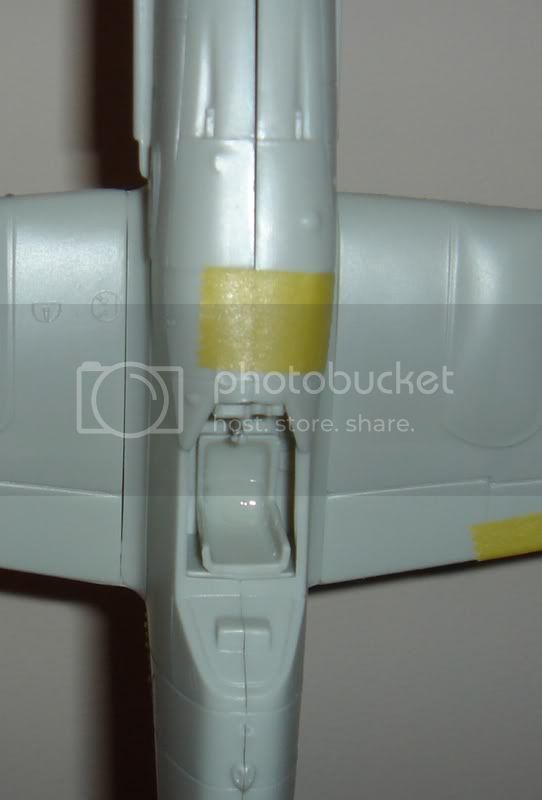
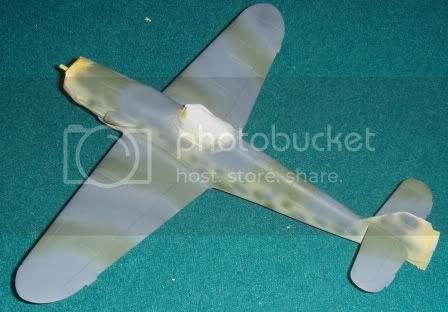
I have started on the build. This bird is going to fly together. The fit is excellent. It seems like it is not even necessary to use glue between the fuselage and the wing section. In the pictures below it is only a dry fit - no glue yet.
The cockpit is pretty basic and leaves plenty of room for improvement, but considering the limited visibility of the cockpit when finished it is adequate for me.
One of the tail sections has the Revell-Monogram marking molded on in raised letters. Interesting detail


However, it is very easy to just scrape it of with a hoby knife and sand it down.
More to follow....


Campaign'oholic - 252+ campaigns completed
#041
Kobenhavn, Denmark
Joined: July 20, 2006
KitMaker: 10,069 posts
AeroScale: 3,788 posts
Posted: Monday, August 18, 2008 - 08:44 PM UTC
Campaign'oholic - 252+ campaigns completed
Rigas, Latvia
Joined: July 04, 2007
KitMaker: 268 posts
AeroScale: 245 posts
Posted: Friday, August 22, 2008 - 12:53 AM UTC
Nice Gustav! I always liked those late war Butcher Birds.
Very good work on that camera! Respect!!
Anymore pics yet?

#041
Kobenhavn, Denmark
Joined: July 20, 2006
KitMaker: 10,069 posts
AeroScale: 3,788 posts
Posted: Sunday, September 28, 2008 - 10:08 PM UTC
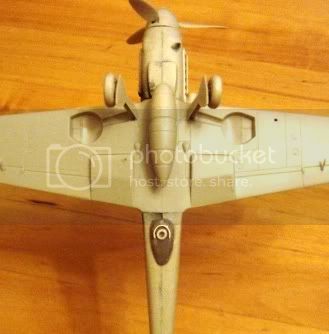
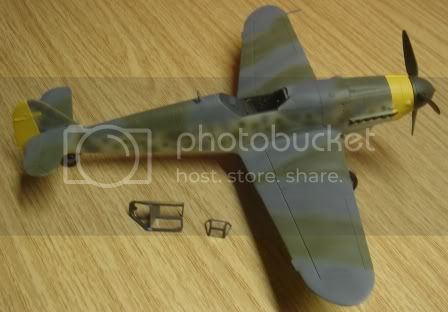
Now I have finally picked up this project again.
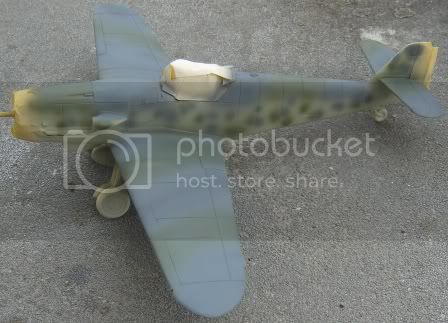
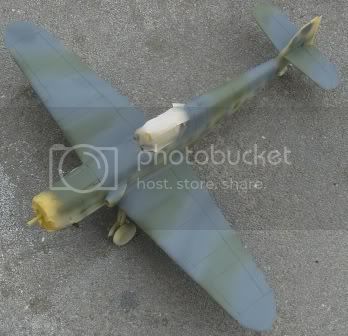
The camouflage basic was finished yesterday, but there are still a few places to touch up. I also tried to do some "sawtooth" camouflage on the wing leading edges, but I might remove it again. I am not sure I am really satisfied with it.
I am not making any specific aircraft, but I am being inspired by the pictures earlier in this tread.
More to follow soon.....

Campaign'oholic - 252+ campaigns completed
Aarhus, Denmark
Joined: July 18, 2003
KitMaker: 3,377 posts
AeroScale: 115 posts
Posted: Monday, September 29, 2008 - 12:14 AM UTC
Nice work with the airbrush.
Cheers
It´s happy days for modellers...
#041
Kobenhavn, Denmark
Joined: July 20, 2006
KitMaker: 10,069 posts
AeroScale: 3,788 posts
Posted: Monday, September 29, 2008 - 03:10 AM UTC
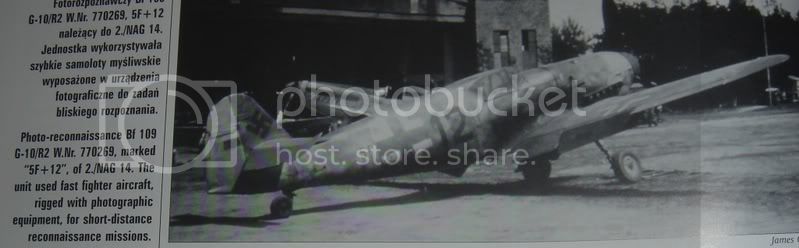
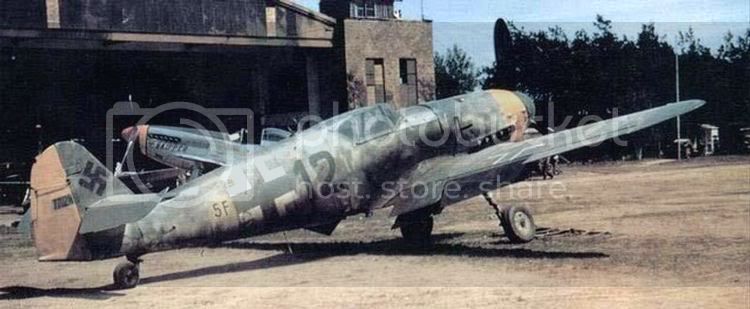
Thanks, Jan. It worked out pretty well, despite being freehand. I used the photo of an Me 109G-10 R2 below as a reference/inspiration.
I have some templates for the mottling, but I have only tested them on old kits so far.
Campaign'oholic - 252+ campaigns completed
Michigan, United States
Joined: February 11, 2008
KitMaker: 311 posts
AeroScale: 278 posts
Posted: Monday, September 29, 2008 - 02:37 PM UTC
Jesper:
Looking good. I love the scatch built camera. For free hand the camo turned really well. Looking forward to seing this one done.

Current Builds:
FW 190 D (Butcher Bird)
P61A (Night Stalkers)
P47D (CaveTonitrum)
Sea Fury ( Airedale Navy)
S-199 for finish the job again on Armorama
#041
Kobenhavn, Denmark
Joined: July 20, 2006
KitMaker: 10,069 posts
AeroScale: 3,788 posts
Posted: Monday, September 29, 2008 - 10:02 PM UTC
Thanks, Taylor
More to follow this week as work progresses.....
Campaign'oholic - 252+ campaigns completed
#041
Kobenhavn, Denmark
Joined: July 20, 2006
KitMaker: 10,069 posts
AeroScale: 3,788 posts
Posted: Wednesday, October 01, 2008 - 11:41 PM UTC
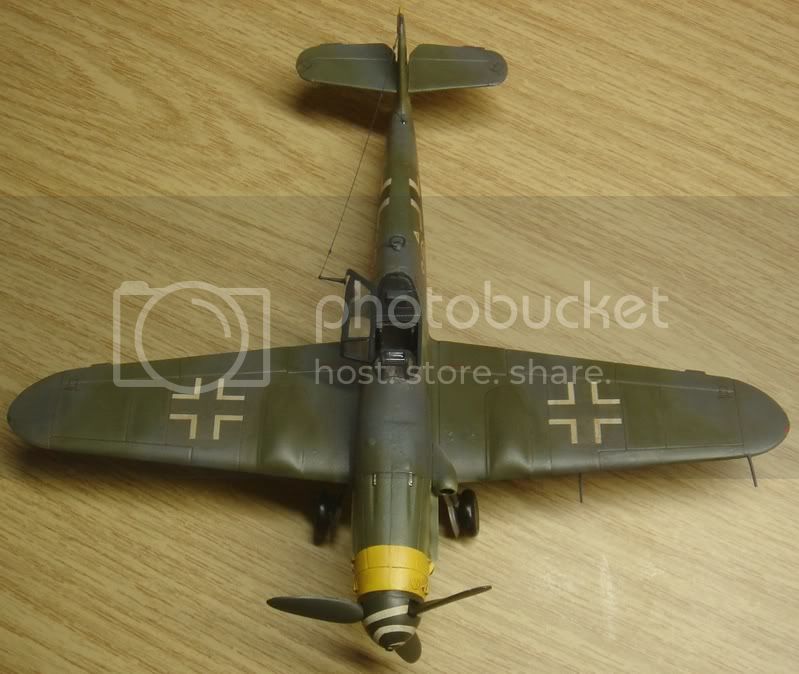
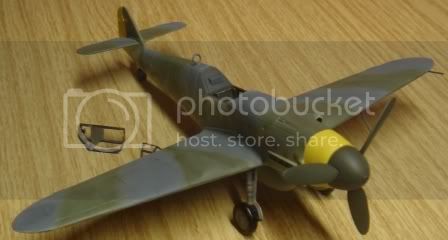
Here is an update on my build. The basic paint job is now in place and a semi gloss coat has been applied. Next is the decals and then weathering. I will use the kit decals combined with some red tactical numbers outlined in white.
The cockpit is a terrible fit leaving large gaps on one side, so I guess I will leave the cockpit open.
More to follow....
Campaign'oholic - 252+ campaigns completed
#041
Kobenhavn, Denmark
Joined: July 20, 2006
KitMaker: 10,069 posts
AeroScale: 3,788 posts
Posted: Thursday, October 02, 2008 - 08:41 PM UTC
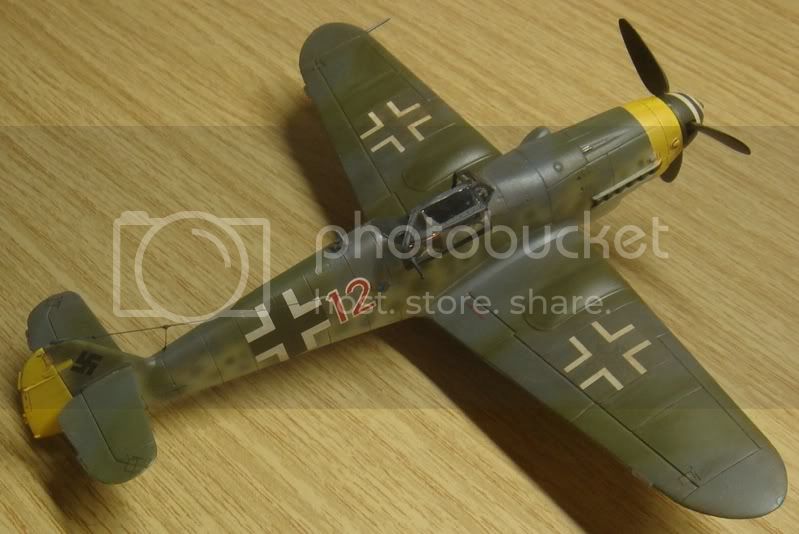
I have now applied the decals. I used this kit to experiment with different kinds of varnish to settle the decals. Especially the outline crosses are a problem for me as they often end up with a light center. So far it seems like Vallejo gloss varnish helps to settle the decals well onto the surface.
Next is an overall semi mat coat and then weathering.
Comments welcome.
Campaign'oholic - 252+ campaigns completed
Germany
Joined: September 07, 2005
KitMaker: 5,609 posts
AeroScale: 5,231 posts
Posted: Thursday, October 02, 2008 - 09:47 PM UTC
Hi Jesper
very nice!!
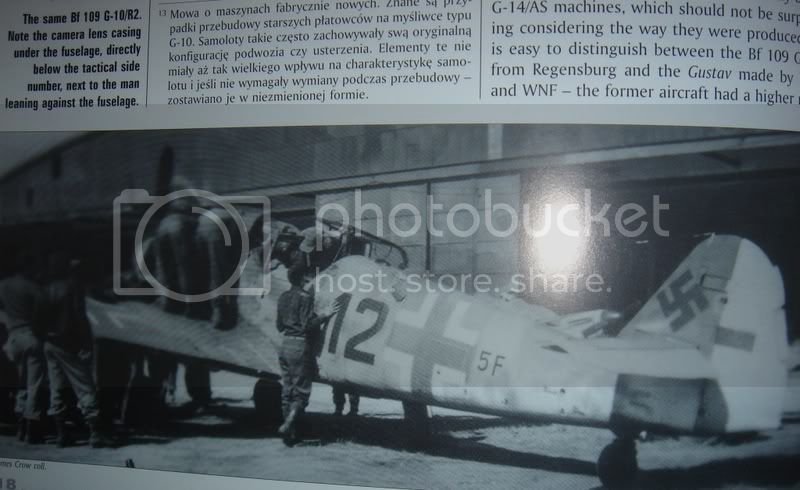
but didn't you want to replicate this machine:
solid black number and you did
just curious because you have black numbers on your decal sheet (shown above)
cheers
Steffen
DULCE ET DECORUM EST PRO HOBBY MORI
#041
Kobenhavn, Denmark
Joined: July 20, 2006
KitMaker: 10,069 posts
AeroScale: 3,788 posts
Posted: Friday, October 03, 2008 - 11:33 AM UTC
Hi Steffen
Thanks for the comment. I am also pretty satisfied so far. Especially on the paint job.
Normally I would go for a specific machine, but not this time, as I did not have a specific machine that I wanted to do.
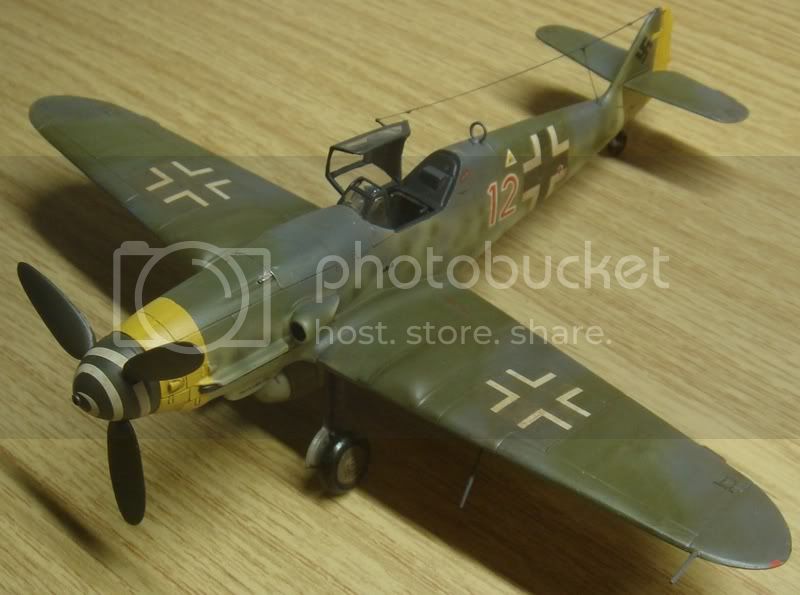
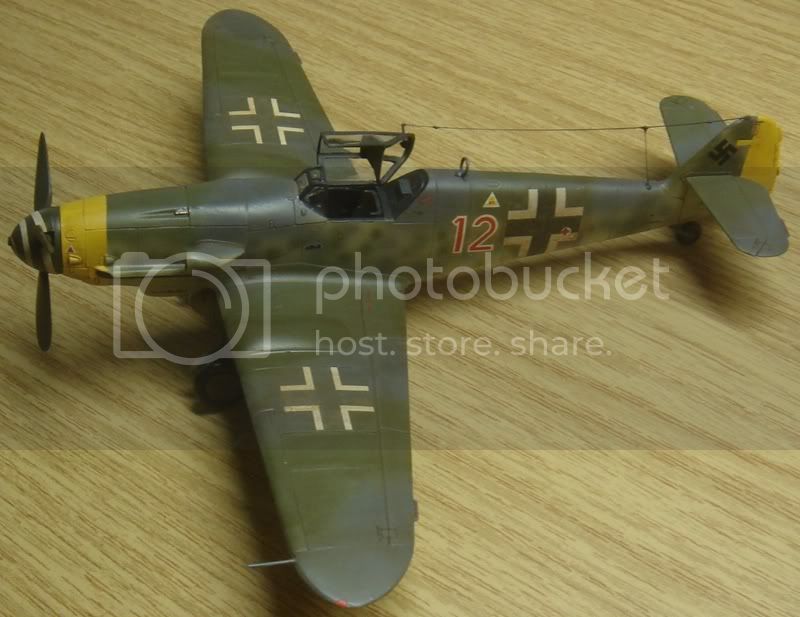
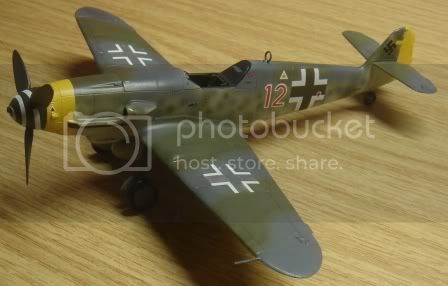
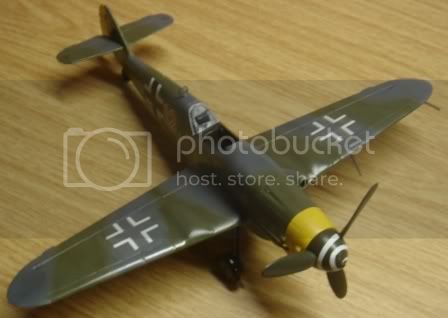
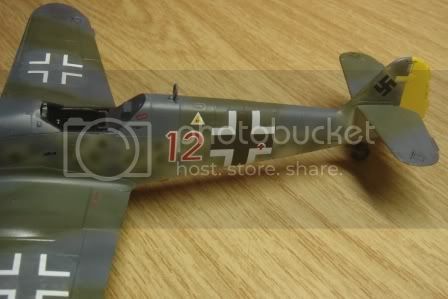
Instead I let myself be inspired by "5F + black 12" and "+ black 11". However, I wanted to use two camouflage colours RLM 75 and RLM 82 with higher contrast so I went with an imaginary machine. In addition I wanted to try my skills at the spotted camouflage on the fuselage sides and on the white spiral on the spinner.
The white spinner and spotted camouflage was 'taken' from "black 11" and the yellow tail and nose from "black 12". I also left the wheel covers on as on "black 11".
Another issue was the the problem of recreating the werk. nr. and the small "5F" in decal form on "black 12". Although this could probably have been overcome by sorting through the decal spares box.
More to follow
Campaign'oholic - 252+ campaigns completed
Buenos Aires, Argentina
Joined: September 07, 2006
KitMaker: 918 posts
AeroScale: 688 posts
Posted: Friday, October 03, 2008 - 11:57 AM UTC
Wow, that´s an excellent job you are doing. It´s getting very nice. I´ll wait for more
Michigan, United States
Joined: February 11, 2008
KitMaker: 311 posts
AeroScale: 278 posts
Posted: Friday, October 03, 2008 - 04:31 PM UTC
Jesper:
Another great build. I can't wait to see the weathering completed
Current Builds:
FW 190 D (Butcher Bird)
P61A (Night Stalkers)
P47D (CaveTonitrum)
Sea Fury ( Airedale Navy)
S-199 for finish the job again on Armorama
#041
Kobenhavn, Denmark
Joined: July 20, 2006
KitMaker: 10,069 posts
AeroScale: 3,788 posts
Posted: Saturday, October 04, 2008 - 10:23 PM UTC
Thanks for the comments, guys. I appreciate it.
More to follow soon.
Campaign'oholic - 252+ campaigns completed
Rigas, Latvia
Joined: July 04, 2007
KitMaker: 268 posts
AeroScale: 245 posts
Posted: Saturday, October 04, 2008 - 10:29 PM UTC
This is truelly a perfect looking Gustav with a camera on it's belly - typical tourist!
#041
Kobenhavn, Denmark
Joined: July 20, 2006
KitMaker: 10,069 posts
AeroScale: 3,788 posts
Posted: Wednesday, October 08, 2008 - 11:38 PM UTC
Campaign'oholic - 252+ campaigns completed
Michigan, United States
Joined: February 11, 2008
KitMaker: 311 posts
AeroScale: 278 posts
Posted: Thursday, October 09, 2008 - 02:44 PM UTC
Jesper:
Congratulations. The final product looks great
I agree, why hide all that paint work with exhaust stains
Current Builds:
FW 190 D (Butcher Bird)
P61A (Night Stalkers)
P47D (CaveTonitrum)
Sea Fury ( Airedale Navy)
S-199 for finish the job again on Armorama
#041
Kobenhavn, Denmark
Joined: July 20, 2006
KitMaker: 10,069 posts
AeroScale: 3,788 posts
Posted: Thursday, October 09, 2008 - 09:46 PM UTC
Thanks for the comment, Taylor. I really appreciate it.
Campaign'oholic - 252+ campaigns completed
Germany
Joined: September 07, 2005
KitMaker: 5,609 posts
AeroScale: 5,231 posts
Posted: Thursday, October 09, 2008 - 10:39 PM UTC
Hi Jesper
I agree, great build!! I prefer real planes but there is nothing wrong with your approach.
One nitpick that I just became aware looking at your pictures. The red and white colours have a significant offset seen at the number and red cross. Maybe you also consider some rework on the wing "Balkenkreuz" it looks as if there is some silvering between the chevrons .....
please forgive me .. seems I just cannot keep

all the best
Steffen
DULCE ET DECORUM EST PRO HOBBY MORI
Moselle, France
Joined: May 15, 2005
KitMaker: 5,653 posts
AeroScale: 4,347 posts
Posted: Thursday, October 09, 2008 - 10:45 PM UTC
Hi Jesper,
Very nice!
I would add some exhaust stains though...
Jean-Luc
Better think one hour and build five minutes...
Than think five minutes and build an hour!
#041
Kobenhavn, Denmark
Joined: July 20, 2006
KitMaker: 10,069 posts
AeroScale: 3,788 posts
Posted: Friday, October 10, 2008 - 01:59 AM UTC
Thanks for the comments, guys.
Steffen, you should not be
Comments and looking at other peoples work is what has enabled me to improve since starting on aircraft kits two years ago. Aeroscale was actually my inspiration to start as I have almost entirely build tanks before signing up for the kitmaker network.

It is true that there is a slight offset in the numbers, but it is very slight. Basically only on the curve of the "2". The red cross is actually terrible. I do not know how I missed that.
You have very sharp eyes

There is actually quite some silvering on the wing crosses - more than can be seen in the photos. A big problem for me that has followed me, especially for Luftwaffe builds due to the large amount of clear decal film on the late war wing crosses. I have tested a number of different approaches on this build and I think I have found the right solution now. My next luftwaffe build will show.
I might go for your suggestion, Jean-Luc. Although so far I have resisted adding exhaust stains. Maybe just some modest stains.
Campaign'oholic - 252+ campaigns completed
Uusimaa, Finland
Joined: March 30, 2004
KitMaker: 2,845 posts
AeroScale: 1,564 posts
Posted: Friday, October 10, 2008 - 02:44 AM UTC
It turned out really nice. Congratulations.
Shows that you don't always need the newest kit to make a good-looking model.
I've had some trouble with decal silvering over mottled schemes as well. They're such pain in the rear to touch up. (by brush the touch-ups stick out like a sore thumb, with an airbrush the masking is difficult over the decals) On future models, I'll be spraying another gloss coat before decaling on mottled surfaces to be 100% sure I won't get any silvering.
Regarding the exhaus stains, I would add some. Doesn't have to be heavy, just to show the aircraft is not factory-fresh (unless that's what you want to depict).
Any plans on adding seatbelts?