

Here is a bit of fun on the subject of the Profipack. The Combo issue was a double version of this kit.
Review here.
Early Aviation Thread
Early Aviation
Discuss World War I and the early years of aviation thru 1934.
Discuss World War I and the early years of aviation thru 1934.
Hosted by Jim Starkweather
REVIEW
Eduard Sop. F.1 Wknd #8450
JackFlash

Joined: January 25, 2004
KitMaker: 11,669 posts
AeroScale: 11,011 posts
Posted: Saturday, April 04, 2009 - 08:13 PM UTC
JackFlash
Joined: January 25, 2004
KitMaker: 11,669 posts
AeroScale: 11,011 posts
Posted: Thursday, April 09, 2009 - 11:36 PM UTC
Here the lower wing has been attached.

JackFlash
Joined: January 25, 2004
KitMaker: 11,669 posts
AeroScale: 11,011 posts
Posted: Friday, April 17, 2009 - 10:58 PM UTC
Stay pins for the Bentley are in place now for the push rods.

B24Liberator
Joined: November 07, 2008
KitMaker: 134 posts
AeroScale: 113 posts
Posted: Friday, April 17, 2009 - 11:54 PM UTC
Stephen -
Excellent job on the wood grain, and I really like the shade of PC 10 there!. Looking really great! Can't help but love the Camel!
For anyone out there who hasn't read the book "Camel Drivers" -- do so! It will put you in the mood to build one!
Excellent job on the wood grain, and I really like the shade of PC 10 there!. Looking really great! Can't help but love the Camel!
For anyone out there who hasn't read the book "Camel Drivers" -- do so!
It will put you in the mood to build one!
Mobious
Joined: May 18, 2008
KitMaker: 210 posts
AeroScale: 80 posts
Posted: Saturday, April 18, 2009 - 07:38 AM UTC
I really like the wood grain effect you've achieved. Very realistic.
JackFlash
Joined: January 25, 2004
KitMaker: 11,669 posts
AeroScale: 11,011 posts
Posted: Wednesday, April 22, 2009 - 02:32 PM UTC
Thanks Gents for the kind words on the wood grain.
Here is a bit of fun on the Bentley 150hp rotary that was done for this build. Not as much detail as I uaully like but still it looks ok in the cowling. A little more black wash and its done.
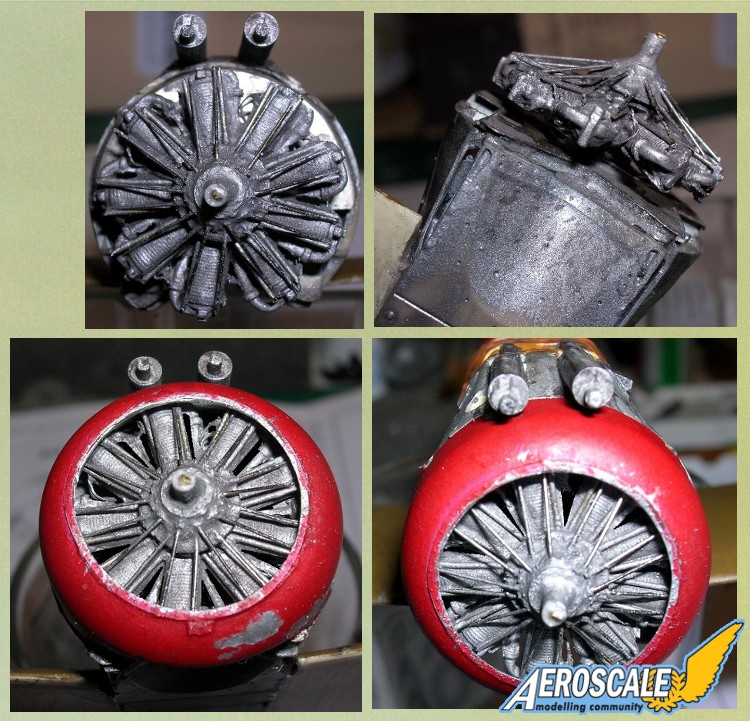
Here is a bit of fun on the Bentley 150hp rotary that was done for this build. Not as much detail as I uaully like but still it looks ok in the cowling. A little more black wash and its done.

thegirl

Joined: January 19, 2008
KitMaker: 6,743 posts
AeroScale: 6,151 posts
Posted: Wednesday, April 22, 2009 - 05:56 PM UTC
Looks good Stephen , I like how you weathered the cowl .
Mobious
Joined: May 18, 2008
KitMaker: 210 posts
AeroScale: 80 posts
Posted: Thursday, April 23, 2009 - 09:50 AM UTC
That looks great Stephen. Really adds to the look with the cowling installed. A very nice visual depth to the engine area.
JackFlash
Joined: January 25, 2004
KitMaker: 11,669 posts
AeroScale: 11,011 posts
Posted: Sunday, April 26, 2009 - 09:46 PM UTC
If I had more time I would have done some detail of the push rod anchor points as the attach the crank case. Now for the rigging as the top wing went on without a hitch. This is my 6th Eduard Camel kit.
JackFlash
Joined: January 25, 2004
KitMaker: 11,669 posts
AeroScale: 11,011 posts
Posted: Wednesday, April 29, 2009 - 08:01 PM UTC

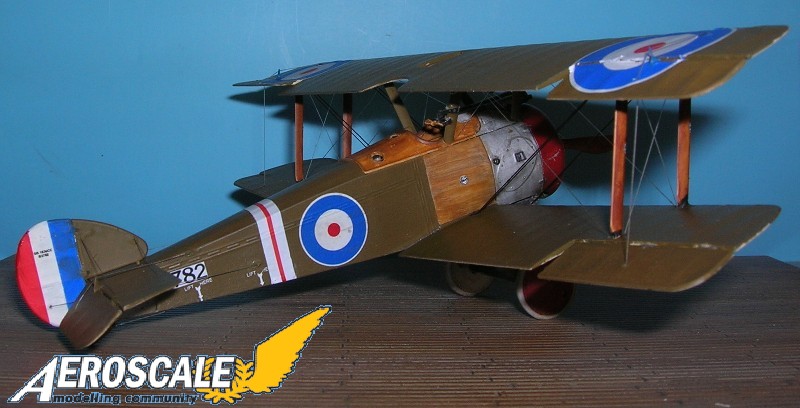
Almost completed. Still need to rig tail unit & ailerons. Next the fuel pump strut mounted generator (spares box.) Then clean up sol & set residue. Finally the final clear coat. I went with the basic cowling but in rerality I should probably have used the RNAS type with twing spandaus (Eduard only offer the the single Vickers type.)
It seems the RNAS types with the Bentleys installed had that overlapping upper cowling. As a matter of fact it may have been strickly a naval contract installment on F.1 & 2F.1 types no matter what engine was installed. Several of the known images of Camels in this production series bear this out

Roxter

Joined: July 04, 2007
KitMaker: 268 posts
AeroScale: 245 posts

Posted: Wednesday, April 29, 2009 - 08:05 PM UTC
Great looking Camel, Stephen! Any closer pics?

JackFlash
Joined: January 25, 2004
KitMaker: 11,669 posts
AeroScale: 11,011 posts
Posted: Wednesday, April 29, 2009 - 08:13 PM UTC
Definately when completed I'll post some high resilution images.
Roxter
Joined: July 04, 2007
KitMaker: 268 posts
AeroScale: 245 posts
Posted: Wednesday, April 29, 2009 - 08:16 PM UTC
can't wait to see more pics! really love that natural wood surface!
Mobious
Joined: May 18, 2008
KitMaker: 210 posts
AeroScale: 80 posts
Posted: Friday, May 01, 2009 - 01:10 PM UTC
Hey Stephen, The rigging looks great. I really like the looks of this one, the woodgrain, the added detail to the engine. Very nice work.
JackFlash
Joined: January 25, 2004
KitMaker: 11,669 posts
AeroScale: 11,011 posts
Posted: Wednesday, May 06, 2009 - 07:06 AM UTC
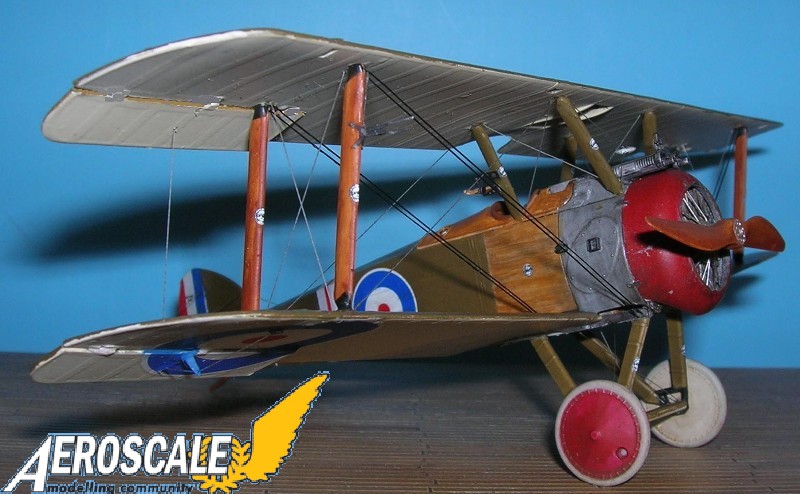
Well gentle folk of Aeroscale here is the completed kit with some added parts from the spares box.

JackFlash
Joined: January 25, 2004
KitMaker: 11,669 posts
AeroScale: 11,011 posts
Posted: Wednesday, May 06, 2009 - 07:08 AM UTC
Here are a few more for Roxter!
JackFlash
Joined: January 25, 2004
KitMaker: 11,669 posts
AeroScale: 11,011 posts
Posted: Wednesday, May 06, 2009 - 07:10 AM UTC
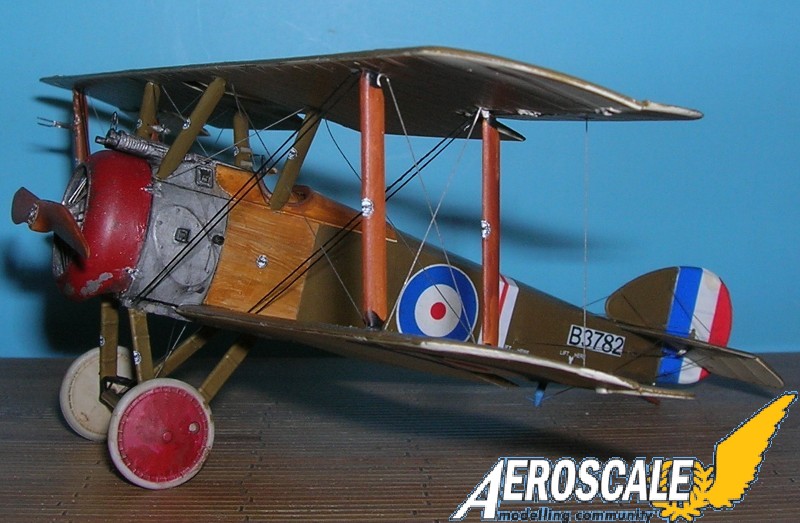
And still a few more.


This is the end of the tail. . .er uh tale. My thanks to Rowan (leave my wand alone) Baylies and to the generous people at Eduard for the review kit.

This is the end of the tail. . .er uh tale. My thanks to Rowan (leave my wand alone) Baylies and to the generous people at Eduard for the review kit.
Roxter
Joined: July 04, 2007
KitMaker: 268 posts
AeroScale: 245 posts
Posted: Wednesday, May 06, 2009 - 07:13 AM UTC
I just can't get enough of that natural wood effect! Awesome! Thanx! Any figures? By the way, what's that "fork" on the left side strut?
JackFlash
Joined: January 25, 2004
KitMaker: 11,669 posts
AeroScale: 11,011 posts
Posted: Wednesday, May 06, 2009 - 07:45 AM UTC
Greetings Roxter;
Yes, I will put one of the Eduard1/48 British figures with it when I put it in the case. Though I was toying with one of the Mark Copplestone jobs. . . for a moment. The "fork is the airspeed indicator. Pretty common om most BEF aircraft.
Yes, I will put one of the Eduard1/48 British figures with it when I put it in the case. Though I was toying with one of the Mark Copplestone jobs. . . for a moment. The "fork is the airspeed indicator. Pretty common om most BEF aircraft.
guitarlute101
Joined: December 18, 2006
KitMaker: 1,121 posts
AeroScale: 1,063 posts
Posted: Wednesday, May 06, 2009 - 01:25 PM UTC
Excellent work as always, Stephen. I have two of these to build.
Do you know of any pictures of the clear wing inspection panels from an actual Camel?
Mark
JackFlash
Joined: January 25, 2004
KitMaker: 11,669 posts
AeroScale: 11,011 posts
Posted: Wednesday, May 06, 2009 - 05:19 PM UTC
I may have something on that. I'll get back to you.
thegirl
Joined: January 19, 2008
KitMaker: 6,743 posts
AeroScale: 6,151 posts
Posted: Wednesday, May 06, 2009 - 05:50 PM UTC
Wonderful Job done Stephen ! The whole project is very eye catching with the weathering job done and just love that wood grain . Thank you for sharing the review of the build with us kind kinder folk !

Kalt

Joined: June 14, 2006
KitMaker: 222 posts
AeroScale: 219 posts

Posted: Wednesday, May 06, 2009 - 07:00 PM UTC
I like it! especially the Wood representation.
Congratulations,
Claudio
Congratulations,
Claudio
Mobious
Joined: May 18, 2008
KitMaker: 210 posts
AeroScale: 80 posts
Posted: Thursday, May 07, 2009 - 10:12 AM UTC
Inspiring finish, I really like the weathered look of the cowling. very nicely done Stephen. The rigging is beautiful. Thanks for sharing! 
 |

WEB HOSTING BY


Copyright ©2021 AeroScale and Kitmaker Network, a subsidiary of Silver Star Enterprises
All Rights Reserved. Please read our Conditions of Use and Privacy Policy.
All Rights Reserved. Please read our Conditions of Use and Privacy Policy.