Stephen,
The SPAD is looking great.Of the two kit you mention in this thread which is the better of the two? From what I see there are good points in both, but I prefer the cockpit details of the DML kit.
Regards,
Gregory Jouette
Early Aviation
Discuss World War I and the early years of aviation thru 1934.
Discuss World War I and the early years of aviation thru 1934.
Hosted by Jim Starkweather
REVIEW
Eduard 1:48 Spad XIIIgajouette

Joined: February 01, 2007
KitMaker: 365 posts
AeroScale: 356 posts

Posted: Monday, August 17, 2009 - 07:10 AM UTC

JackFlash

Joined: January 25, 2004
KitMaker: 11,669 posts
AeroScale: 11,011 posts

Posted: Monday, August 17, 2009 - 08:28 AM UTC
Quoted Text
Stephen,
The SPAD is looking great.Of the two kits you mention in this thread which is the better of the two? From what I see there are good points in both, but I prefer the cockpit details of the DML kit. Regards,
Gregory Jouette
Thank you Gregory for your comments. They both do have their good points. The greatest advantages of the Eduard kit over the DML are the outside surface details and its availability. The DML is over-all very accurate, needed better or rather finer details to best the Eduard kit.

JackFlash

Joined: January 25, 2004
KitMaker: 11,669 posts
AeroScale: 11,011 posts

Posted: Monday, August 17, 2009 - 08:29 AM UTC
Quoted Text
Coming along very nicely Stephen !
Did you break a wing strut by the way ?
My evil twin "Eyegore" did it. . .

JackFlash

Joined: January 25, 2004
KitMaker: 11,669 posts
AeroScale: 11,011 posts

Posted: Monday, August 17, 2009 - 09:54 PM UTC
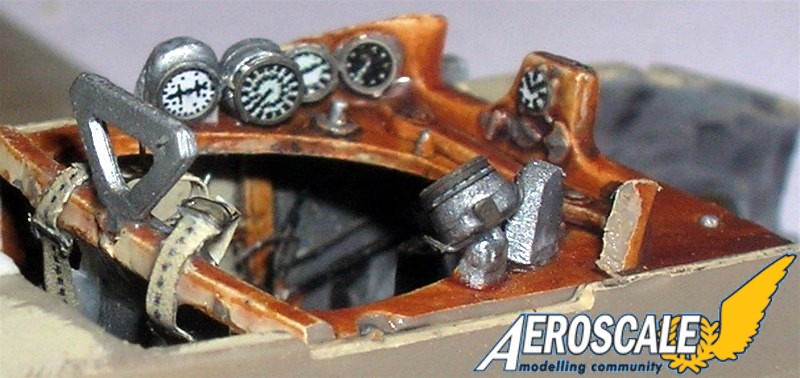
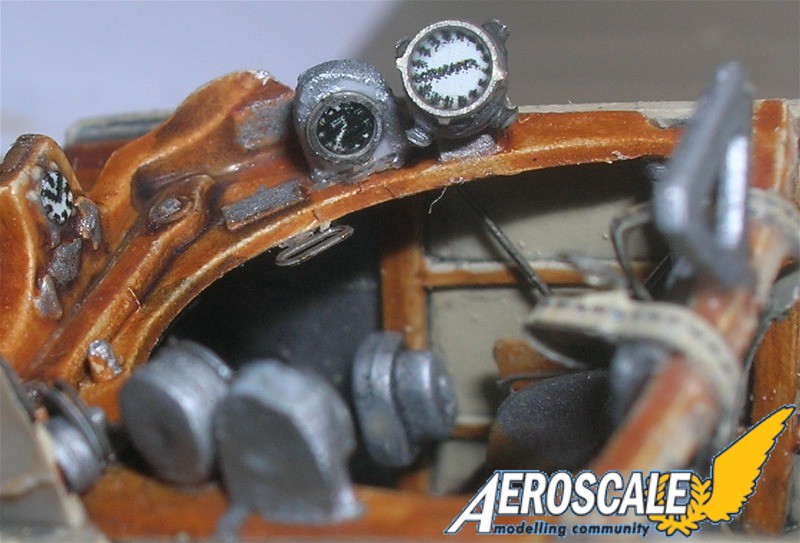
These images show work on the cockpit.


JackFlash

Joined: January 25, 2004
KitMaker: 11,669 posts
AeroScale: 11,011 posts

Posted: Monday, August 17, 2009 - 09:57 PM UTC
Here the instruments are added to the shelf. I actually replaced 2 gauges with items closer fitting the original types equipment.


JackFlash

Joined: January 25, 2004
KitMaker: 11,669 posts
AeroScale: 11,011 posts

Posted: Monday, August 17, 2009 - 10:02 PM UTC
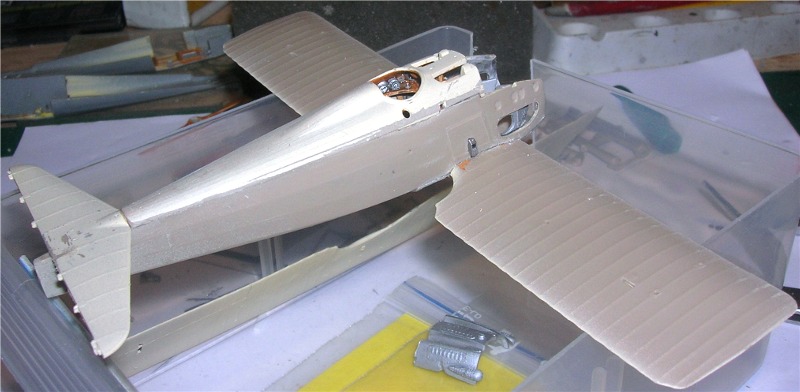
Now for a simulated engine. . .

thegirl

Joined: January 19, 2008
KitMaker: 6,743 posts
AeroScale: 6,151 posts

Posted: Tuesday, August 18, 2009 - 01:45 AM UTC
Go Stephen Go !
How are you finding the fit of the kit so far ? Did you have the same fit issues as Louis did ?
How are you finding the fit of the kit so far ? Did you have the same fit issues as Louis did ?

JackFlash

Joined: January 25, 2004
KitMaker: 11,669 posts
AeroScale: 11,011 posts

Posted: Tuesday, August 18, 2009 - 08:53 AM UTC
I am finding the same issues. I settled most of it by cutting down the wings of the instrument panel and slightly arching the upper deck.

JackFlash

Joined: January 25, 2004
KitMaker: 11,669 posts
AeroScale: 11,011 posts

Posted: Tuesday, August 18, 2009 - 09:05 PM UTC
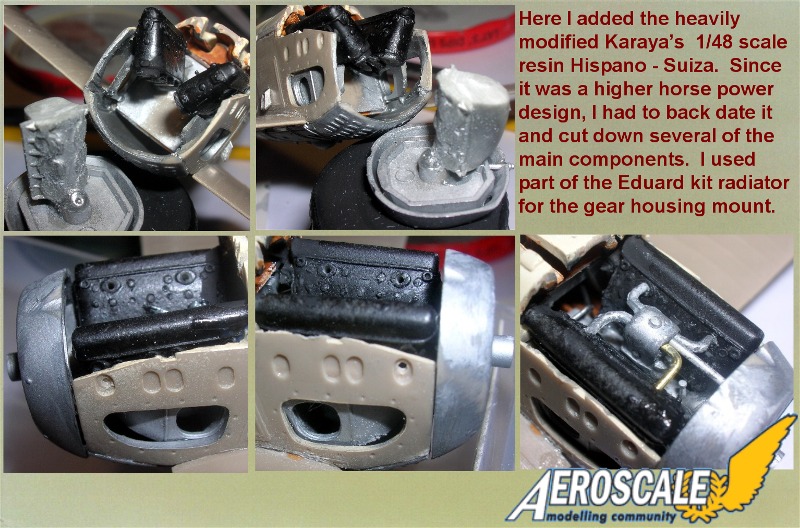
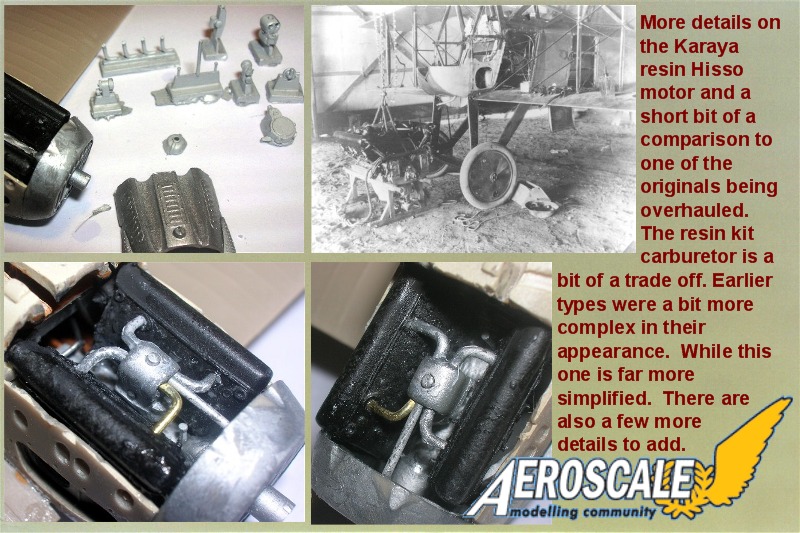
Remember the Karaya Hispano - Suiza 300hp? Well its now a 220hp Hisso. Almost. I lost one of the "induction pipes" So I fitted a brass one.
For the Karaya engine review Click Here.
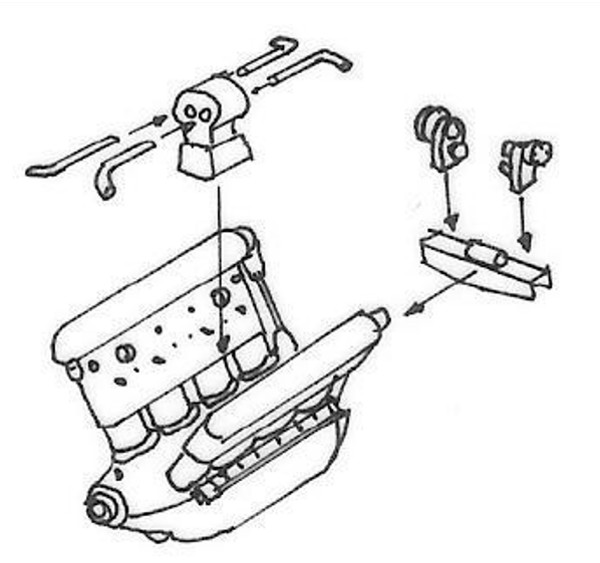
Also dear folks I have added images to the review not seen elswhere.
See here.
For the Karaya engine review Click Here.
Also dear folks I have added images to the review not seen elswhere.
See here.
thegirl

Joined: January 19, 2008
KitMaker: 6,743 posts
AeroScale: 6,151 posts

Posted: Wednesday, August 19, 2009 - 01:53 AM UTC
Very nice job done on mod for the power plant .
Are you planning on have the cowl off ?
Are you planning on have the cowl off ?

JackFlash

Joined: January 25, 2004
KitMaker: 11,669 posts
AeroScale: 11,011 posts

Posted: Wednesday, August 19, 2009 - 08:55 AM UTC
Definately cowl off. In my builds I like to have at least one example of a kit type with the engine compartment open. It will give me a chance to use some of the Eduard figures I have.
thegirl

Joined: January 19, 2008
KitMaker: 6,743 posts
AeroScale: 6,151 posts

Posted: Wednesday, August 19, 2009 - 12:56 PM UTC
Cool , that will look very sharp !
Will you add more detail into the area ?
Will you add more detail into the area ?

JackFlash

Joined: January 25, 2004
KitMaker: 11,669 posts
AeroScale: 11,011 posts

Posted: Wednesday, August 19, 2009 - 01:02 PM UTC
Absolutely, more details is the ticket.

JackFlash

Joined: January 25, 2004
KitMaker: 11,669 posts
AeroScale: 11,011 posts

Posted: Sunday, August 23, 2009 - 11:38 PM UTC
Here are the wheel mask applications. Any concerns can be easily cleaned up with a quick run of a brush soaked in clean thinner.


JackFlash

Joined: January 25, 2004
KitMaker: 11,669 posts
AeroScale: 11,011 posts

Posted: Friday, August 28, 2009 - 09:33 PM UTC
More work in the engine compartment.


JackFlash

Joined: January 25, 2004
KitMaker: 11,669 posts
AeroScale: 11,011 posts

Posted: Monday, August 31, 2009 - 05:33 PM UTC
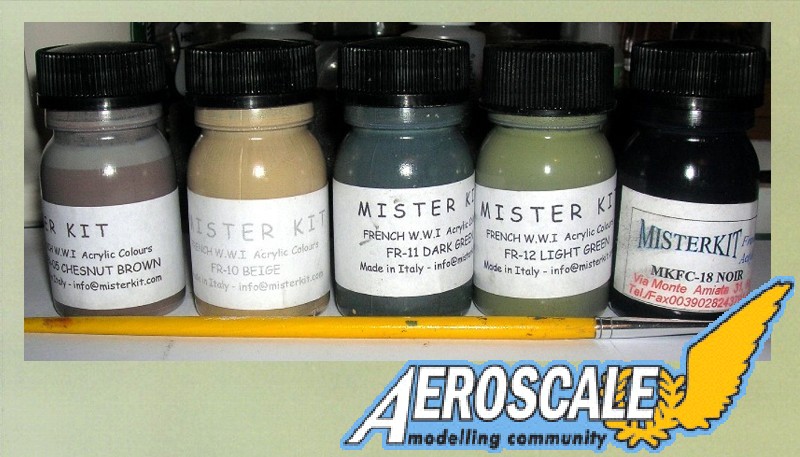
Well I have started adding the colour to this kit. But this round I will use the Misterkit acrylics.
See here.
See here.


JackFlash

Joined: January 25, 2004
KitMaker: 11,669 posts
AeroScale: 11,011 posts

Posted: Monday, August 31, 2009 - 05:38 PM UTC
I am honestly surprised that no one has called me on the plumbing from the radiator to the carburetor?

JackFlash

Joined: January 25, 2004
KitMaker: 11,669 posts
AeroScale: 11,011 posts

Posted: Monday, August 31, 2009 - 11:42 PM UTC
Here is a comaprison to the basic Karaya resin for the 300hp Hisso backdating it to the 220hp Hisso for the this Spad XIII.


JackFlash

Joined: January 25, 2004
KitMaker: 11,669 posts
AeroScale: 11,011 posts

Posted: Tuesday, September 01, 2009 - 07:28 PM UTC
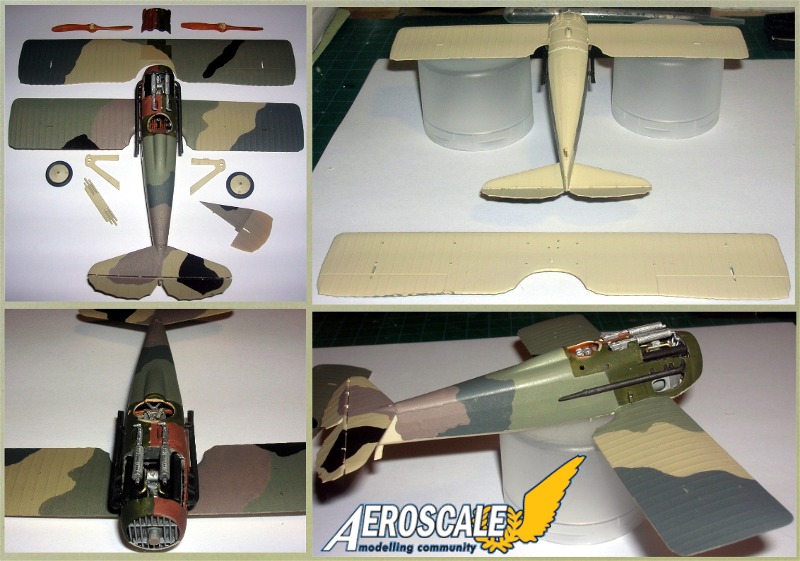
The French 5 colour Camouflage is applied. This profile will represent parts from 2 different Manufacturer applications. The top wing is from the Bernard Co.. The fuselage and lower wing is from the parent company S.P.A.D. Co.

JackFlash

Joined: January 25, 2004
KitMaker: 11,669 posts
AeroScale: 11,011 posts

Posted: Tuesday, September 01, 2009 - 07:30 PM UTC
Let me say also that I am very impressed with the MisterkitUSA acrylic paints.
thegirl

Joined: January 19, 2008
KitMaker: 6,743 posts
AeroScale: 6,151 posts

Posted: Wednesday, September 02, 2009 - 01:48 AM UTC
Verry nice Stephen ! I really like the colour hues of the paints and will save time on having to mix the colours to get the right shades . Oh yes great job on the engine as well !
thehannaman

Joined: April 04, 2006
KitMaker: 279 posts
AeroScale: 194 posts

Posted: Wednesday, September 02, 2009 - 08:21 AM UTC
Awesome work as usual Stephen. Where are Misterkit paints available from?

JackFlash

Joined: January 25, 2004
KitMaker: 11,669 posts
AeroScale: 11,011 posts

Posted: Wednesday, September 02, 2009 - 10:08 AM UTC
Quoted Text
Awesome work as usual Stephen. Where are Misterkit paints available from?
Just tell Mike you heard it here.
http://www.misterkitusa.com/

JackFlash

Joined: January 25, 2004
KitMaker: 11,669 posts
AeroScale: 11,011 posts

Posted: Thursday, September 03, 2009 - 07:50 AM UTC
Working on attaching the top wing now. A word of caution here mount the interplane struts first then add the cabane struts. The forward ange of incidence on the cabane struts needs to be exact and this is accomplished when the interplane struts are vertical and plumb.
Louis

Joined: May 21, 2006
KitMaker: 472 posts
AeroScale: 471 posts

Posted: Friday, September 04, 2009 - 11:58 PM UTC
Hi Stephen
I had not seen that you had begun and ended your spad (almost ended). However I waited for it.
It is splendid.
Colours are very nice and go to him very well.
Louis
I had not seen that you had begun and ended your spad (almost ended). However I waited for it.
It is splendid.
Colours are very nice and go to him very well.
Louis
 |


