General Aircraft
This forum is for general aircraft modelling discussions.
Hosted by Jim Starkweather
COMPETITION
Aircraft WeatheringPosted: Saturday, November 22, 2008 - 05:35 AM UTC
Hi all
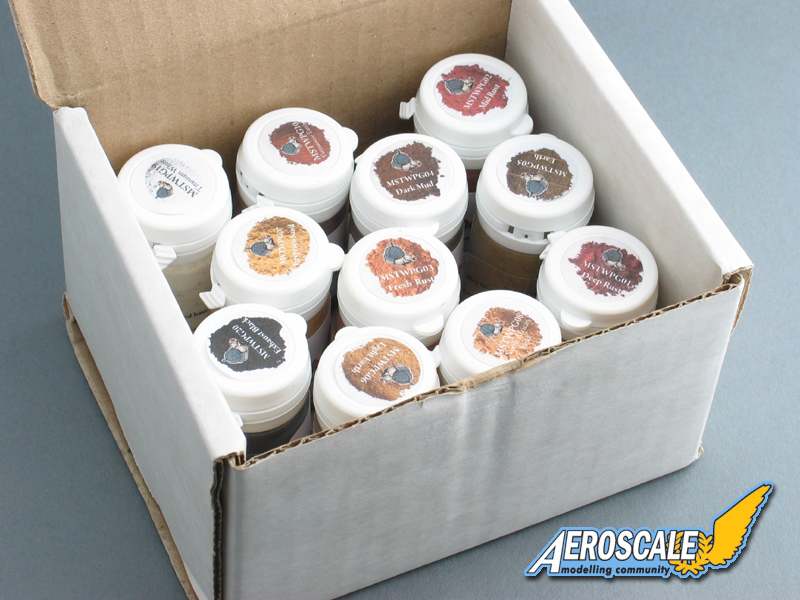
To coincide with the Review of Mastercasters' Weathering Products, Jay Laverty has very kindly donated a boxed set of 11 x Warpigs as a competition prize. So, if you haven't tried them yet, this could be your chance!
The competition is open to all Kitmaker members except Staff and the rules are simple:
1. One entry each and it must be your own work. You can build specially for this competition or enter a model you've finished previously.
2. The model must be of a single aircraft, but it can appear on a base or vignette (The aircraft MUST be the primary subject - a wreck tucked away in the background won't count).
3. The model can be in any scale and in any medium.
4. The model can be “out of the box”, scratch built, or anything in between.
5. You may post up to 3 pictures of the model in this thread and add details about the build if you wish. Pictures must not be larger than 800 pixels wide. The 1st photo in your entry will be transferred to a folder in the Gallery for voting.
6. Any non-compliance with these rules may result in disqualification and ignorance of these rules is not an excuse for not abiding by them.
Obviously, the theme is weathering, so you should go for something that displays it to advantage. The weathering can done be with any medium and it can be as subtle or extreme as you like - that's your choice.
You may start adding your photos as soon as you like, but the closing date is Sunday Jan 11th 2009 12:00 GMT to give time for anyone who wants to build something specially over the Christmas & New Year Holiday. After that, I'll put the photos into a Gallery folder for everyone to vote on and the winner will be announced the following weekend and receive the set of pigments.
Good luck and have fun
Rowan
Red4
California, United States
Joined: April 01, 2002
KitMaker: 4,287 posts
AeroScale: 1,164 posts
Joined: April 01, 2002
KitMaker: 4,287 posts
AeroScale: 1,164 posts
Posted: Monday, November 24, 2008 - 12:09 PM UTC
ohhhh, I'm in on this one.... Nice. "Q"
Kalt
Mendoza, Argentina
Joined: June 14, 2006
KitMaker: 222 posts
AeroScale: 219 posts
Joined: June 14, 2006
KitMaker: 222 posts
AeroScale: 219 posts
Posted: Monday, November 24, 2008 - 05:55 PM UTC
Weathering eh, I'm in too
Desmoquattro
New Brunswick, Canada
Joined: September 10, 2008
KitMaker: 235 posts
AeroScale: 18 posts
Joined: September 10, 2008
KitMaker: 235 posts
AeroScale: 18 posts
Posted: Thursday, December 04, 2008 - 06:46 AM UTC
Where are we supposed to place our images/send them?
Posted: Thursday, December 04, 2008 - 06:51 AM UTC
Quoted Text
Where are we supposed to place our images/send them?
See rule 5 above
Nige
Desmoquattro
New Brunswick, Canada
Joined: September 10, 2008
KitMaker: 235 posts
AeroScale: 18 posts
Joined: September 10, 2008
KitMaker: 235 posts
AeroScale: 18 posts
Posted: Thursday, December 04, 2008 - 11:42 AM UTC
Ahh, missed that. I'll be posting some pics of my heavily weathered FW 190 soon!
Desmoquattro
New Brunswick, Canada
Joined: September 10, 2008
KitMaker: 235 posts
AeroScale: 18 posts
Joined: September 10, 2008
KitMaker: 235 posts
AeroScale: 18 posts
Posted: Friday, December 05, 2008 - 08:03 AM UTC
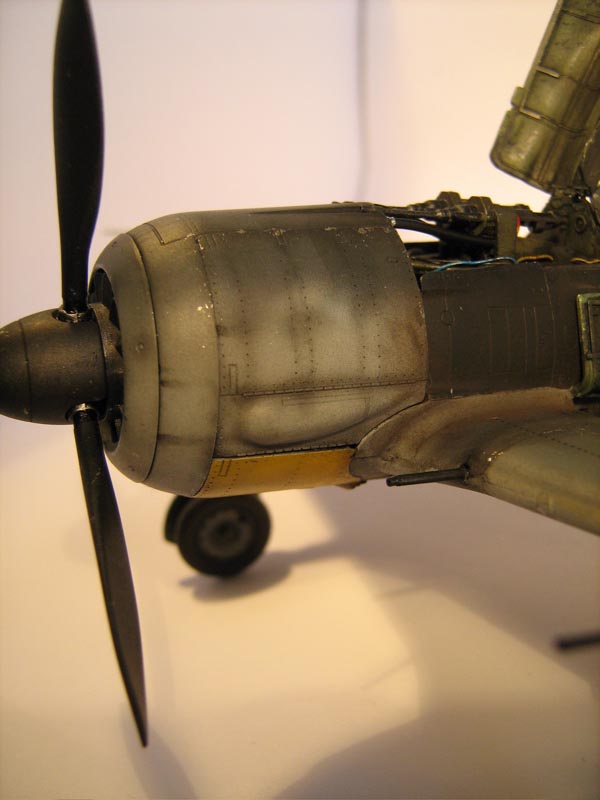
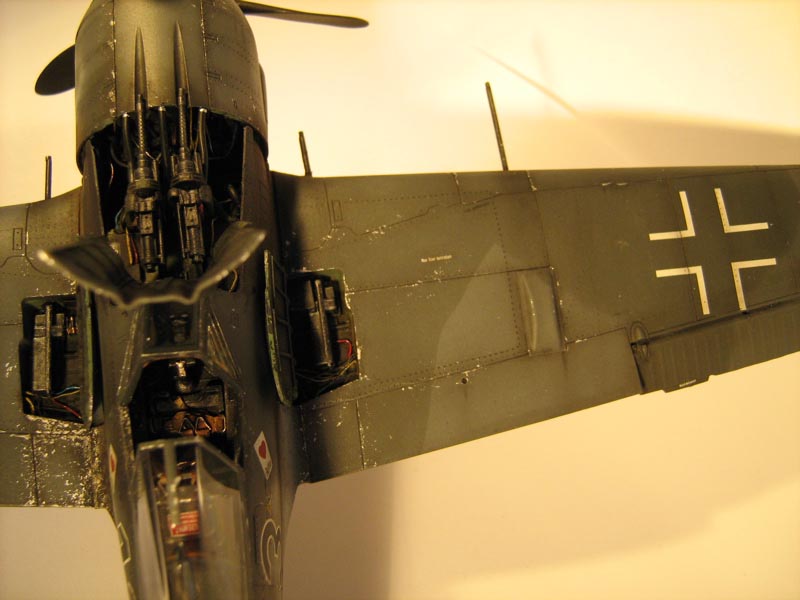
Here's my entry; 1/48th Accurate Miniatures / Eduard FW 190 A8. This was Joseph Priller's plane during the Normandy invasion, I figured by this point in the war the Luftwaffe wasn't going to be maintaining planes to the utmost, so I went for a heavily used look. The model was post-shaded using water based ink, washes and filters were done with oil paints, streaking and staining is oil paint, exhaust stains are chalk pigments, and metallic effects are ground up graphite. Paint chips are silver paint applied with a Scotchbrite pad, toned down in a random fashion with a filter of raw umber and/or flat coat. Chipping under the hatches is my own mix of darkened panzer grey. Further pictures are in the Butcher Bird gallery if anyone wants a closer look at some of the details.
For the model, I practiced what Shep Paine used to call "creative gizmology"; using reference photos as a rough guide I cobbled together wiring, plumbing and details. Most of the models I see have all-yellow wiring; this makes no sense to me, as anyone who works on vehicles will know that everything needs to be colour coded or you'd never know what wire goes where. Thus I painted the looms a rainbow of colours. Adds a touch of brightness to an otherwise drab paint scheme. You can't see it here, but the pilot harness was completely scratchbuilt (based on references) from lead foil and buckles made of bent wire.
There were a few fit issues, so if you notice anything askew, I already know. The engine didn't fit into the cowling particularly well.
Posted: Friday, December 05, 2008 - 09:41 AM UTC
Nice one Jason!
It's great to see thing's getting underway.
All the best
Rowan
It's great to see thing's getting underway.
All the best
Rowan
Red4
California, United States
Joined: April 01, 2002
KitMaker: 4,287 posts
AeroScale: 1,164 posts
Joined: April 01, 2002
KitMaker: 4,287 posts
AeroScale: 1,164 posts
Posted: Saturday, December 06, 2008 - 01:50 PM UTC
Quoted Text
Take a look inside a modern tank engine compartment sometime, or even an old one for that matter. Pretty much all black lines with sliver and or gold colored fittings. To the mechs that worked on these things, even aircraft, they committed to memory what was what and where it went. No need for a color coding system as they were trained on the equipment. A common color throught out would also cut down on manufacturing costs negating the need to switch from one color to another as lines changed. I'm sure there was some type of description somewhere that stated what it was for anyways. Just my .0178 cents worth. Nice Butcher Biird. "Q" Most of the models I see have all-yellow wiring; this makes no sense to me, as anyone who works on vehicles will know that everything needs to be colour coded or you'd never know what wire goes where
youngc
Western Australia, Australia
Joined: June 05, 2007
KitMaker: 2,166 posts
AeroScale: 105 posts
Joined: June 05, 2007
KitMaker: 2,166 posts
AeroScale: 105 posts
Posted: Saturday, December 06, 2008 - 08:17 PM UTC
I have an aircraft build planned, unfortunately I can't see myself starting it until mid next year.
Sounds like a fun competition and great prize too! I'll keep an eye on this thread.
Chas
Sounds like a fun competition and great prize too! I'll keep an eye on this thread.
Chas
Mecenas
Joined: December 23, 2007
KitMaker: 1,596 posts
AeroScale: 1,275 posts
KitMaker: 1,596 posts
AeroScale: 1,275 posts
Posted: Saturday, December 06, 2008 - 11:40 PM UTC
I'm in! You don't have to encourage me twice!
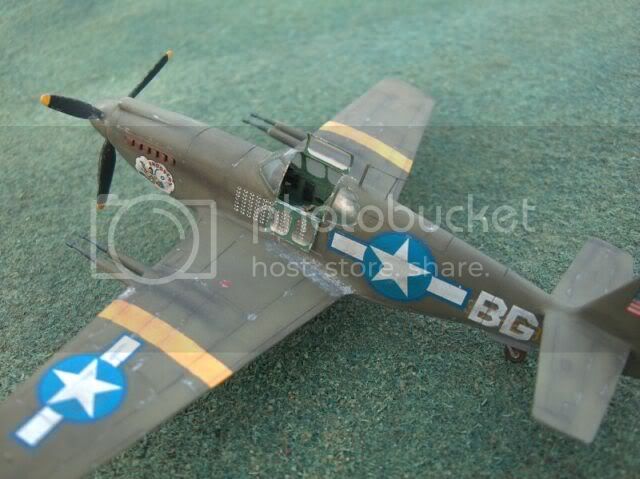
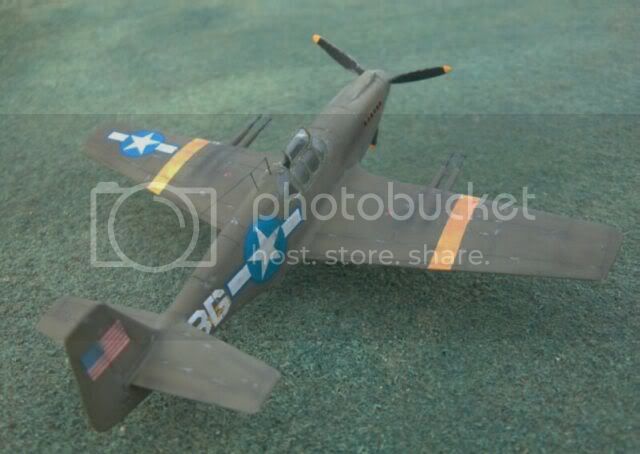
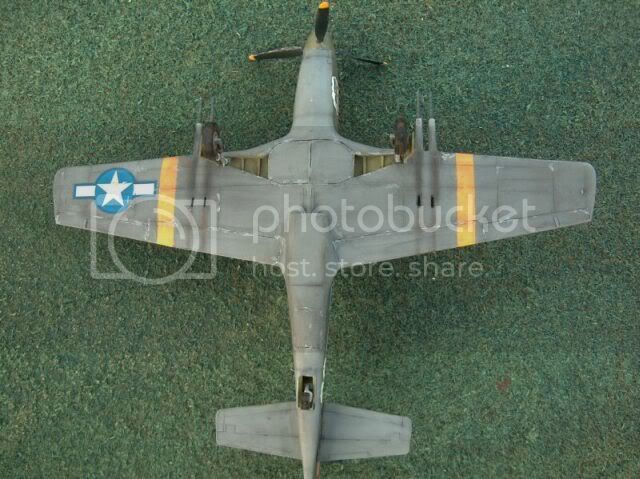
This is 1:72 scale P51A Mustang from the Smer Hi-tech kit. Built almost out of the box with some scratch detalis (gun barrels, vac canopy).
Desmoquattro
New Brunswick, Canada
Joined: September 10, 2008
KitMaker: 235 posts
AeroScale: 18 posts
Joined: September 10, 2008
KitMaker: 235 posts
AeroScale: 18 posts
Posted: Sunday, December 07, 2008 - 03:37 AM UTC
Good job on the P51, I thought it was quarter scale at first glance!
Erlawerke
Moselle, France
Joined: October 26, 2007
KitMaker: 34 posts
AeroScale: 31 posts
Joined: October 26, 2007
KitMaker: 34 posts
AeroScale: 31 posts
Posted: Monday, December 08, 2008 - 09:14 PM UTC
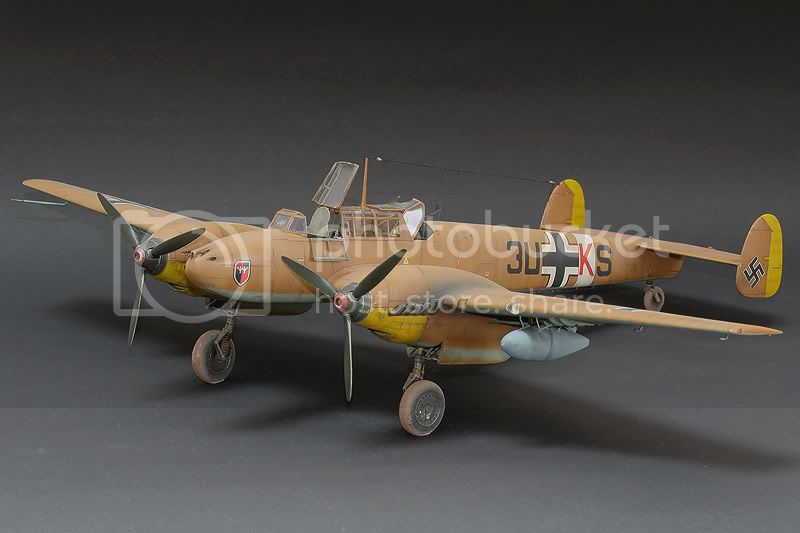
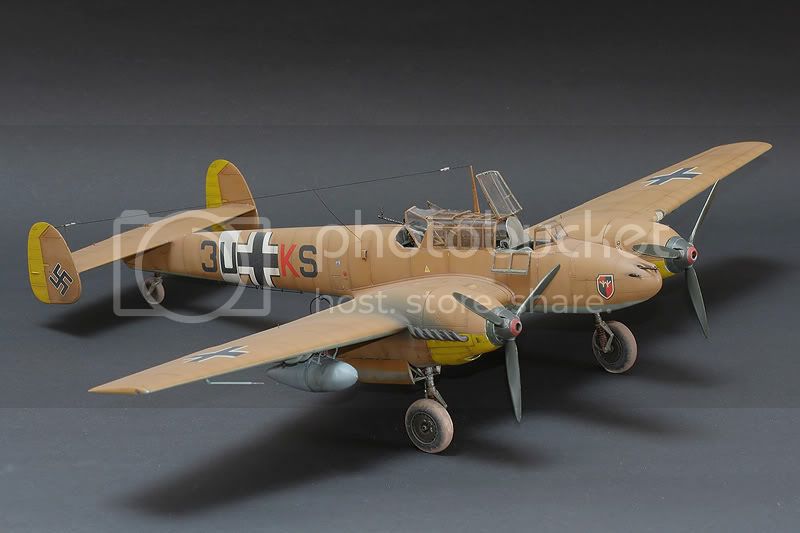
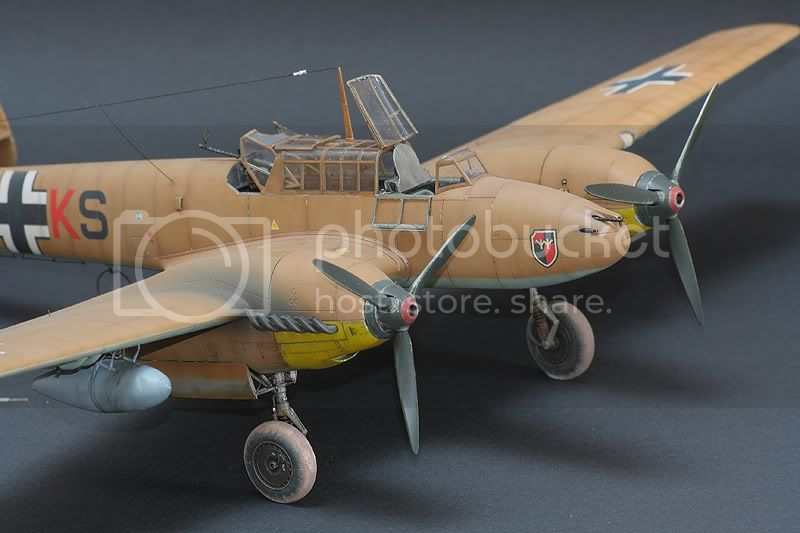
Here is my Messerschmitt Bf 110E from Eduard in 1:48. The reason I built a Bf 110 in a desert scheme is because it's very unusual to see this model in these colours.
The interior sections were painted, as usual, in RLM02 and washed with dark oilcolors. The sticks, buttons and other areas were coloured like original pictures.
The Bf 110E had not only a heating flap on the nose, also on starboard behind the gunner. Also there was a plate on the starboard engine to be sure that there comes no exhaust to the air intake. Neither are included in this model, although it should be an 'E variant… Also, the pilot's armour was not included which I scratch-built from sheet.
As always, I began with pre-shading the model in a dark grey. After that I brushed the basic colors RLM 78/79 from Gunze on the upper and underside. On a single-coloured airplane like this one, you have to shade all the details to avoid a boring coloured model. After decaling, the complete model was filtered to give a lightly weathered look to the decals.
Concluding the details, brake lines and exhausts stains were added to the finished Model.
The_Migrant
Alberta, Canada
Joined: March 13, 2007
KitMaker: 43 posts
AeroScale: 38 posts
Joined: March 13, 2007
KitMaker: 43 posts
AeroScale: 38 posts
Posted: Friday, December 12, 2008 - 03:11 PM UTC
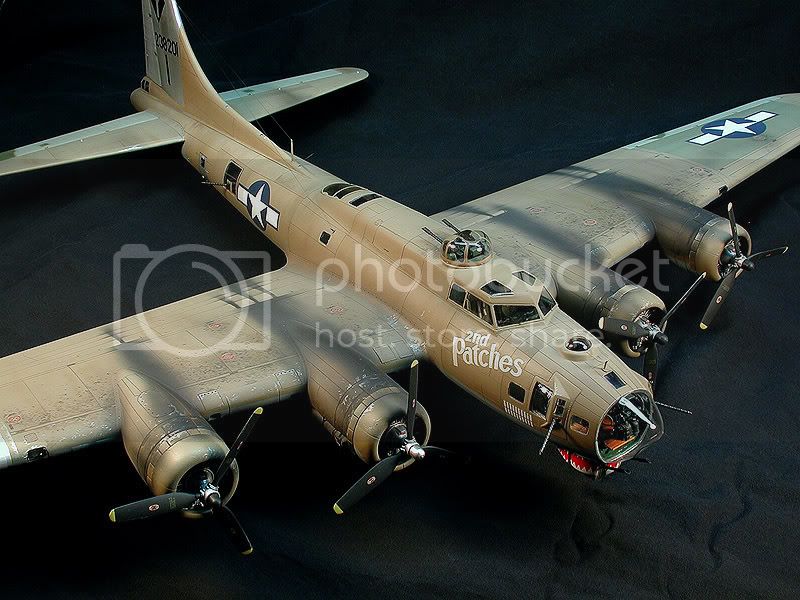
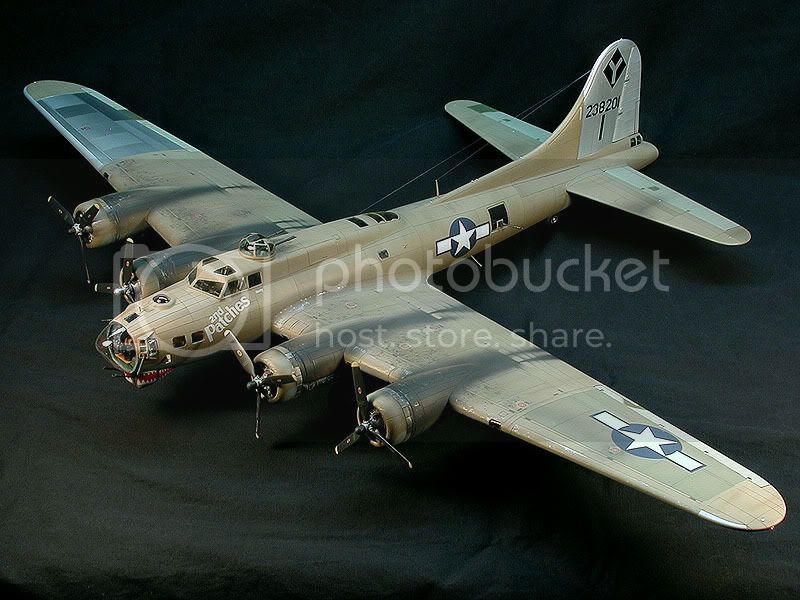
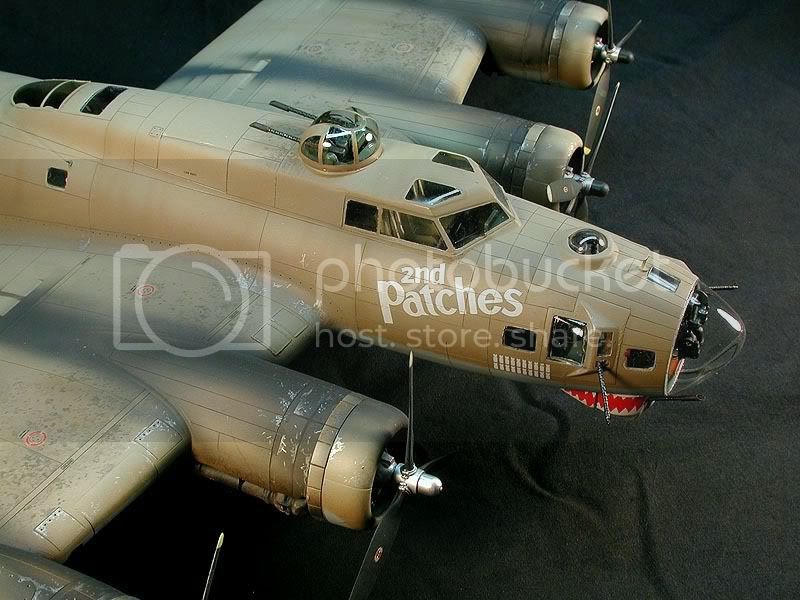
This is Monogram's 1/48 B-17G finished as '2nd Patches', a war-weary and heavily patched 'Fort. The kit has been re-scribed, interior detailed, vac canopy/dome, Karaya perforated metal gun barrels added and my own custom decals. Weathering was based on period colour photos and includes heavy exhaust staining, mechanics' bootprints on the wings, faded and patched fabric surfaces, rain streaking on the fuselage etc. Part of the wing was replaced with a NMF section, as was the fin.
TheUman
Ohio, United States
Joined: September 22, 2006
KitMaker: 67 posts
AeroScale: 18 posts
Joined: September 22, 2006
KitMaker: 67 posts
AeroScale: 18 posts
Posted: Friday, December 19, 2008 - 08:38 AM UTC
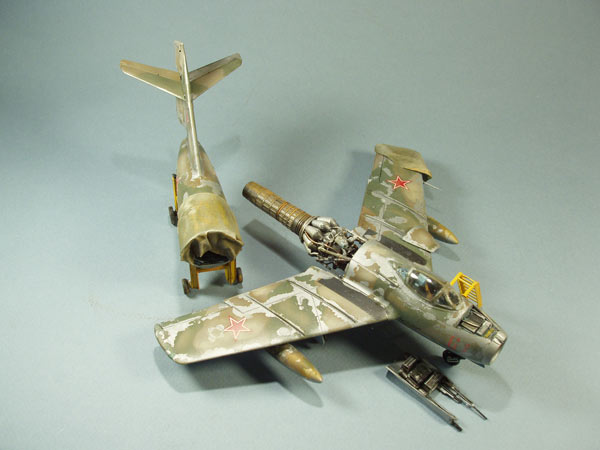
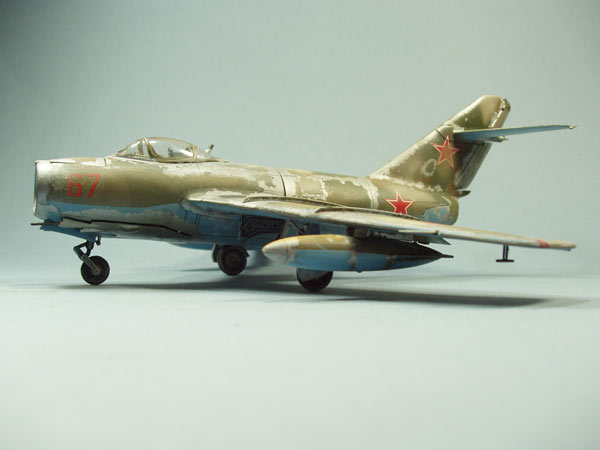
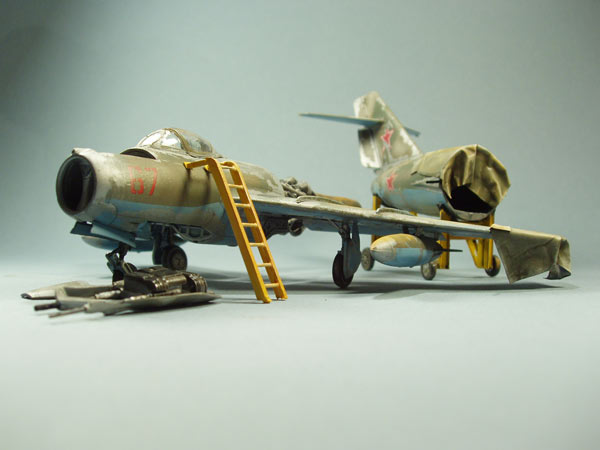
I'm in: This is the Trumpeter MIG-15bis highly distressed, as they appeared ater a couple of Russian winters. The kit is a real bear to put together.
thehannaman
New York, United States
Joined: April 04, 2006
KitMaker: 279 posts
AeroScale: 194 posts
Joined: April 04, 2006
KitMaker: 279 posts
AeroScale: 194 posts
Posted: Friday, December 19, 2008 - 10:44 AM UTC
Great builds, All!
I haven't a prayer but I figured I throw mine in for good fun. It's Eduards I-16 type 24. I've posted pics of it on here before. It's 1/48 and straight out of the box. No decals, all markings are painted. Weathering is done with airbrush, Prismacolor pencils and artists oil. The paint chipping is done by painting the base color on and masking the chipped areas with rubber cement applied with a toothpick. After the whitewash is sprayed on, clear Scotch tape is used to remove the rubber cement masking. Hope you like:
bf443
Vendor
Idaho, United States
Joined: May 16, 2003
KitMaker: 895 posts
AeroScale: 457 posts
Joined: May 16, 2003
KitMaker: 895 posts
AeroScale: 457 posts
Posted: Saturday, December 20, 2008 - 11:59 AM UTC
Hello everyone,
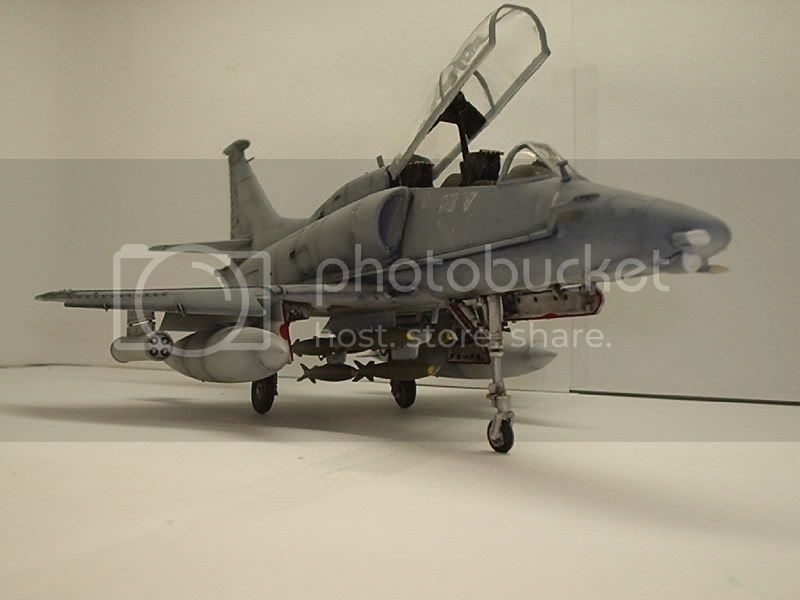
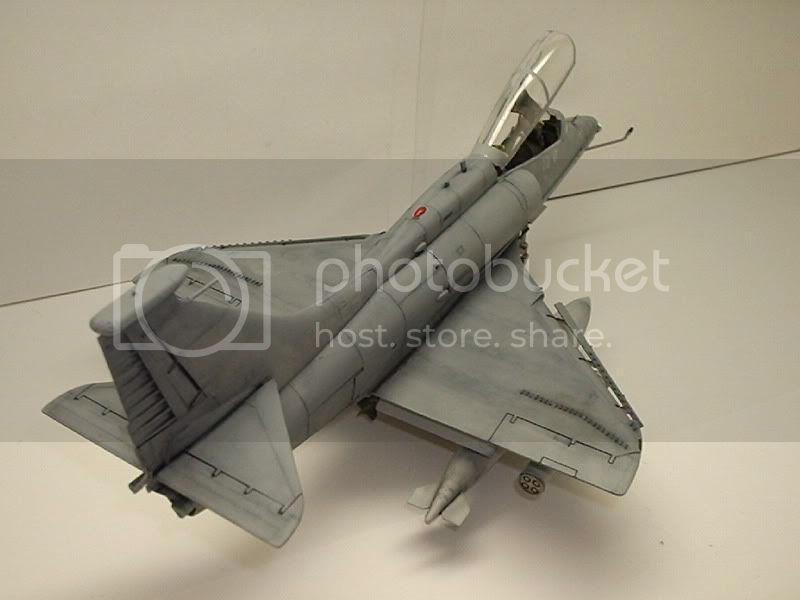
Here is my entry. Monogram OA-4M Skyhawk.
Sincerely,
Brian
Here is my entry. Monogram OA-4M Skyhawk.
Sincerely,
Brian
Red4
California, United States
Joined: April 01, 2002
KitMaker: 4,287 posts
AeroScale: 1,164 posts
Joined: April 01, 2002
KitMaker: 4,287 posts
AeroScale: 1,164 posts
Posted: Saturday, December 27, 2008 - 04:11 AM UTC
Unfortunately I am going to have to bail out on this one I have had some other things come up that I need to deal with first. Best of luck to the rest of you. The B-17 and that Mig-15...nice work guys Thanks, "Q"
Posted: Monday, January 05, 2009 - 01:59 AM UTC
Hi all
Just a reminder that this is the last week for entries. I'll set up the vote in the Gallery next Sunday afternoon (UK time).
All the best
Rowan
Just a reminder that this is the last week for entries. I'll set up the vote in the Gallery next Sunday afternoon (UK time).
All the best
Rowan
Posted: Sunday, January 11, 2009 - 12:17 AM UTC
Hi again
Times up. The competition is now closed for entries. There's a temporary problem in uploading to the Content area of the gallery, but I'll set up the vote asap and let you know when it's ready.
All the best
Rowan
Times up. The competition is now closed for entries. There's a temporary problem in uploading to the Content area of the gallery, but I'll set up the vote asap and let you know when it's ready.
All the best
Rowan