_GOTOBOTTOM
World War II
Discuss WWII and the era directly before and after the war from 1935-1949.
Hosted by Rowan Baylis
Trumpeter 1/32 Lockheed P-38L Lightning
warreni
_VISITCOMMUNITY
South Australia, Australia
Joined: August 14, 2007
KitMaker: 5,926 posts
AeroScale: 2,201 posts
Posted: Monday, January 26, 2009 - 08:47 AM UTC
Thanks Nick.

No piccies at the moment. Have been doing all the little fiddly things like putting the seat and control column in. Had an issue with the gunsight (beside the missing reflector) and had to remove a bit of plastic from the support arm to allow the widscreen assembly to fit correctly. I am theorising that the new instrument panel is a little larger than the original and hence the fit problem.

I have tried to fit the gunbay doors in the closed position but they just don't fit. Seems that hinge housing at the top is much too big. I will probably pose the doors open with the support arms in place. Or maybe I could just do a diorama thingy with the parts laying on the ground while ground crew work in the area... Nah! Will just pose them in the open position..

Well it is time to head off to the hobby room for some painting of the wheel wells, and maybe if I am lucky I can get the undercoat on as well. It is very humid here at the moment so I am not sure how the paint will react at the moment.

Cheers!!
thegirl
_VISITCOMMUNITY
Alberta, Canada
Joined: January 19, 2008
KitMaker: 6,743 posts
AeroScale: 6,151 posts
Posted: Tuesday, January 27, 2009 - 02:28 AM UTC
I have been following this for some time now and I'm vert impressed . Thanks for sharing .
warreni
_VISITCOMMUNITY
South Australia, Australia
Joined: August 14, 2007
KitMaker: 5,926 posts
AeroScale: 2,201 posts
Posted: Tuesday, January 27, 2009 - 07:48 AM UTC
Thanks for that Terri.

Wow! A girl who makes models! :-)

A little progress yesterday. Found a picture in a Walk Around book of the F6F Hellcat of the rockets like the ones used on the Lightning. They have grey bodies, olive drab forward parts then a silver tip.. oh and a thin yellow stripe around the nose. This is the scheme I will use with my rockets as I can't seem to find any more colour references.

Filled some more seams that I had filled before but as usual the BMF shows up everything. Oh well.. it is a model after all.. :-) The white glue method seems to work OK, but then some places have needed mr Surfacer 500 or Mr Hobby disolved putty.

How I came to be looking at the Hellcat book is that I started the Trumpeter 1/32 F6F-5N while I was waiting for some putty to dry. Might have to get the interior set for it yet as there are no lap belts in the kit, just the shoulder harness.. Don't ask me why!!

Will post some more photos a little later.

Bye for now.
youngc
_VISITCOMMUNITY
Western Australia, Australia
Joined: June 05, 2007
KitMaker: 2,166 posts
AeroScale: 105 posts
Posted: Tuesday, January 27, 2009 - 12:55 PM UTC
It's looking great,

I've always wanted to attempt a 1/32 warbird, some day...

Chas
thegirl
_VISITCOMMUNITY
Alberta, Canada
Joined: January 19, 2008
KitMaker: 6,743 posts
AeroScale: 6,151 posts
Posted: Wednesday, January 28, 2009 - 02:12 AM UTC
(Wow! A girl who makes models! :-) ) Yes Warren a Girl ! I build WW1 aircraft so that's where i hang out on the site mostly !
warreni
_VISITCOMMUNITY
South Australia, Australia
Joined: August 14, 2007
KitMaker: 5,926 posts
AeroScale: 2,201 posts
Posted: Wednesday, January 28, 2009 - 06:18 AM UTC
I have three too build but have tofinish a few before I get to the WW1 kites.
warreni
_VISITCOMMUNITY
South Australia, Australia
Joined: August 14, 2007
KitMaker: 5,926 posts
AeroScale: 2,201 posts
Posted: Saturday, January 31, 2009 - 10:51 AM UTC
Greetings fellow modellers!

Much has happened with the painting of the P-38 in the past few days. Much of it good but some of it baaaadd..

Did you know that Metalizer Sealer doesn't prevent the metal-type paint being lifted? I found that out the hard way. I finished spraying the plane with Mr Hobby Metal Colour Aluminium paint and let it dry overnight being careful how I handled the plane as I knew the paint comes of on your fingers. Next day I sprayed on Testor's Metalizer Sealer and then let it dry overnight again. This morning I applied a piece of Tamiya masking tape to numerous areas in preperation for an Itsy Bitsy II paint job. I noticed that one of the pieces I had applied had lifted. I thought I musn't have pushed it down previously and pushed it down again but it wouldn't stick. Had a closer look and the tape was covered in silver paint. Oh marvellous!!!


See that nice shiny stripe...

When I peeled the tape off the gun bay door it left a much shinier stripe down the middle of the panel so now I will have to touch up that piece. The other parts didn't seem to have this happen.
From this I assume that the metalizer sealer didn't, and I have just applied a coat of Future to see if this cures the problem.

I am having second thoughts about Itsy Bitsy II as well for this one as I can't really find any references showing me the bottom of the aircraft and how the black areas go, soooo I think I will do the plain one with the white spinners and fin tips as this one I know where the paint goes!

Glad I have the F6F-5N to keep me occupied while I wait for various bits and bobs to dry.

Till next time..
B24Liberator
_VISITCOMMUNITY
Minnesota, United States
Joined: November 07, 2008
KitMaker: 134 posts
AeroScale: 113 posts
Posted: Saturday, January 31, 2009 - 12:51 PM UTC
Warren-

You are adhering pefectly to the old military adage of "Adapt, improvise and overcome" I love it! Keep up the good work and hang in there!
warreni
_VISITCOMMUNITY
South Australia, Australia
Joined: August 14, 2007
KitMaker: 5,926 posts
AeroScale: 2,201 posts
Posted: Saturday, January 31, 2009 - 05:03 PM UTC
Must be my background.. 20+ years in the RAAF..
warreni
_VISITCOMMUNITY
South Australia, Australia
Joined: August 14, 2007
KitMaker: 5,926 posts
AeroScale: 2,201 posts
Posted: Sunday, February 01, 2009 - 05:25 PM UTC
Ahh! The joys of modelling...

The fun with the metallic paint continues. This time I sprayed the anti-glare panel on the nose matt black. Then I masked up the matt paint rather than the metallic stuff, but while I was masking I had to reset a piece of tape and when I pulled it off.. Yep, you guessed it.. The mattblack came off with the silver underneath. Joy..

So I am stripping both panels even as I type this and I am going to try a different approach tomorrow morning after I go to the hobby shop for some supplies.

B24Liberator
_VISITCOMMUNITY
Minnesota, United States
Joined: November 07, 2008
KitMaker: 134 posts
AeroScale: 113 posts
Posted: Monday, February 02, 2009 - 12:42 AM UTC
Warren -

You forgot to mention the stop at the pub on the way to / from the hobby store
Texas-Ama
_VISITCOMMUNITY
Texas, United States
Joined: December 26, 2008
KitMaker: 32 posts
AeroScale: 25 posts
Posted: Monday, February 02, 2009 - 03:34 PM UTC
Hi I don't know what you have been told about the Testors Metalizer paints but it is my experience that you always put the Metalizer on last. In other words you paint your anti-glare panel and stripes or whatever and then you mask them off and then put on Metalizer. Hope you get your problems worked out because your building a fine model.

Texas

warreni
_VISITCOMMUNITY
South Australia, Australia
Joined: August 14, 2007
KitMaker: 5,926 posts
AeroScale: 2,201 posts
Posted: Monday, February 02, 2009 - 05:06 PM UTC
Hi everyone.

Just a quick update today. Am stuck at home with only the motorcycle today. But it was raining this morning and being a fair weather rider the Lightning didn't get its undercoated panels. Here are the two painted prop assemblies. No decals on them as yet.


The two Olive Drab anti-glare panels on the engine cowls are done as is most of the maat black one on the nose. Just waiting to finish those two panels and there should only be a day or two of decalling and Futuring to be done.

Until tomorrow (or the day after)..

warreni
_VISITCOMMUNITY
South Australia, Australia
Joined: August 14, 2007
KitMaker: 5,926 posts
AeroScale: 2,201 posts
Posted: Tuesday, February 03, 2009 - 05:41 PM UTC
Once upon a time there was a man who started to build a lovely P-38L Lightning and decided to tell all about it on the internet so all the world could see how it went.

All was going well until he got close to the final painting stage and discovered that his lovely aluminium paint was coming off on his fingers whenever he handled the model. "I know how to fix this!" he said to himslef and coated the model in Future floor polish. After it had dried it certainly stopped the paint coming off on his fingers and he went to work on the final parts. He sprayed the gun bay panel lovely aluminum and after it had dried he then coated it in Future.

All was well until he applied some masking tape to the silver paint and discovered that it come off even with the Future coat. "Oh poo!" he said (well it was the 'F' word actually). No matter what he tried he seemed to have no luck. Then it dawned on him that it may be necessary to have a coat of primer on the panels first to help the paint stick.

The next day he wended his way to the 'local' hobby store where he looked for primer, but alas it was only available in rattle cans. This was not good as rattle cans are a VERY expensive way to buy paint, especially when he has three airbrushes (don't ask). He then went up to the friendly dwarf behind the counter (well actually the boss of the shop) and asked him about primer. The only primer in tins was Humbrol enamel. Alas this was no good either as the man doesn't like using enamels due to the terrible clean-up problems.

Then the friendly dwarf pointed to the Gunze Mr Metal Primer and said "There you are! That is what you need." The man thought this strange as he had this at home already, but he thought it was only for use on metal parts (PE). Little did he know that he had the solution to his problem right there at home. He hadn't realised the solution was there as the instructions on the bottle are all in a strange script that virtually no one in the fair land can understand (Japanese only. Shame Gunze! Shame!). The metal actually means for Mr Metal Color paints!

The man was happy, but made himself even happier by discovering a 1/35 Trumpeter Sturer Emil at a very low price. Yet another one for his stash of kits.

When the man got home he painted the panels with the Mr Color Metal Primer. After letting them dry for a short while he sprayed on the matt black of the anti-glare panels at the top of the panels. After letting that dry he used post-it note paper to mask the panels. Imagine his delight when he removed the post-it note paper and the paint did not stick to it!! And he lived happily ever after...

The End

As you may guess from the above I have cured my paint problem and should have the plane ready for decals on the morrow! You are always learning something new with this hobby..

Till tomorrow, or probably the day after as it is my wedding anniversary tomorrow and I am sure my wife will have 'plans'..

thegirl
_VISITCOMMUNITY
Alberta, Canada
Joined: January 19, 2008
KitMaker: 6,743 posts
AeroScale: 6,151 posts
Posted: Tuesday, February 03, 2009 - 05:50 PM UTC
The wife will have plans !
B24Liberator
_VISITCOMMUNITY
Minnesota, United States
Joined: November 07, 2008
KitMaker: 134 posts
AeroScale: 113 posts
Posted: Friday, February 06, 2009 - 02:59 PM UTC
Happy Aniversary Warren -

Yes, I'm sure the "War Department" will indeed have plans....

Enjoy & again congrats !!
warreni
_VISITCOMMUNITY
South Australia, Australia
Joined: August 14, 2007
KitMaker: 5,926 posts
AeroScale: 2,201 posts
Posted: Friday, February 06, 2009 - 09:11 PM UTC
Hello Everyone.

Thanks for the wishes Johannes, but my wife had some plans, but for quite a few hours I was in the hobby room! What a woman I have!

Anyway. between the Mirage IIIR for Paparazzi Campaign, the F6F-5N Hellcat for the other build log and a Kitech (argh!!) FB-111A for the Swing -Wing campaign, I finally finished off the Lightning!

No REAL problems at the end, except for a few frustrating parts where things didn't go right. The main problem was, as you may know, the paint. After finally undercoating the gun bay panels the paint sticks to them fine. BUT I wasn't going to strip and paint the rest of the plane so I worked around the paint problem.

I also had a heart stopper when the final matt coat came out like the plane had frost all over it. I swore a bit then sprayed it again with paint from a fresh jar and it seemed to work well, and it fixed the frosty look as well.. luckily..

Then I discovered I had forgotten to mask the engine inspection windows in the inner sides of the booms before applying the matt coat. A cotton bud and some metho solved that problem.

The final part to put on was the canopy in the open position. Couldn't just use CA and spray on the accelerator as it isn't good for windows as I found out earlier. So I had an idea to spray the accelerator into a small plastic lid and apply it with a small wooden skewer. Worked fine after the first time when the skewer stuck to the canopy as well!

Please excuse the small tail prop. It won't be needed much longer as I have an idea for a small diorama involving tie down chains and a field. I have the chain already and will have the field tomorrow so I will post a piccy or two when I get to do the diorama.

Sorry for the size of the photos but I am running out of space!!


The wee beasty!


I tried to give the aluminium a weathered, dull look that was a bit patchy, and I think I succeeded.


The 'Office'. Sorry you can't see much but the canopy is pretty heavily framed.


As you can see I didn't do Itsy Bitsy II due to the paint problems. Maybe next time. I like the kit and there will be a next time.


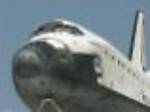
Centre nacelle and the port engine.


The business end of the beasty. You can't see it in the piccies but I did the aerials from stretched sprue.


I HAD to ise the rocket trees as they were a P-38L signature item. This is a scheme of a light grey body with olive drab noses as I found on a website showing a Hellcat with these same rockets. Just call it artistic license if it is wrong.

If anyone would like some more piccies just send me a request and I will send them to you via email.

Thanks again to all who have had a look.

thegirl
_VISITCOMMUNITY
Alberta, Canada
Joined: January 19, 2008
KitMaker: 6,743 posts
AeroScale: 6,151 posts
Posted: Saturday, February 07, 2009 - 01:32 AM UTC
Fantastic Warren ! even with the trouble on which the paint gived you . it turned out super !


Cheers
CaptainA
_VISITCOMMUNITY
Indiana, United States
Joined: May 14, 2007
KitMaker: 3,117 posts
AeroScale: 2,270 posts
Posted: Saturday, February 07, 2009 - 09:08 AM UTC
Real nice job Warren. I really like the finish you got on it.
Texas-Ama
_VISITCOMMUNITY
Texas, United States
Joined: December 26, 2008
KitMaker: 32 posts
AeroScale: 25 posts
Posted: Saturday, February 07, 2009 - 06:32 PM UTC
Great Looking Model I really lick to see a modeler that works through a problem and finishes the model. That's how we all learn in this hobby

Texas
warreni
_VISITCOMMUNITY
South Australia, Australia
Joined: August 14, 2007
KitMaker: 5,926 posts
AeroScale: 2,201 posts
Posted: Saturday, February 07, 2009 - 06:58 PM UTC
Thanks for all the kind words guys and gal. Next one will be much easier now I know about the primer for the metal paint.
Removed by original poster on 02/08/09 - 15:17:53 (GMT).
B24Liberator
_VISITCOMMUNITY
Minnesota, United States
Joined: November 07, 2008
KitMaker: 134 posts
AeroScale: 113 posts
Posted: Sunday, February 08, 2009 - 08:36 AM UTC
Congrats Warren!!

Not only for having finish the Lightening, but having an understanding wife as well. I'm glad the anniversary as well as the completion of the P-38 were enjoyable!
papy42
_VISITCOMMUNITY
Illinois, United States
Joined: February 09, 2009
KitMaker: 3 posts
AeroScale: 2 posts
Posted: Sunday, February 08, 2009 - 02:56 PM UTC
Hi Warren,

I am a new member and was looking at the great work you did on the P-38 I am a new modeller to and just became interested on the 1/32 scale, I like the F4U Corsair and will begin the long journey of looking for books and tips to model it.

Would it be posible to see the pics of your P-38 construction from the beggining?

My email is [email protected]

Thanks

Jerry
papy42
_VISITCOMMUNITY
Illinois, United States
Joined: February 09, 2009
KitMaker: 3 posts
AeroScale: 2 posts
Posted: Sunday, February 08, 2009 - 02:59 PM UTC
Hi Terri

My name is Jerry and I saw the P-38 work that Warren did and was fabulous!, I also read that you model WW1 planes?

Can you share any pics of your work?

I just about to begin my first 1/32 F4U Corsair and I am looking for Pointers!

I you can send any pics it would be greatly appreciated !!

Jerry

[email protected]

 _GOTOTOP