_GOTOBOTTOM
Pre-Flight Check
Constructive critique of your finished or in-progress photos.
TBM Avenger 1/48
hellvetier
_VISITCOMMUNITY
Bern, Switzerland
Joined: April 17, 2008
KitMaker: 264 posts
AeroScale: 88 posts
Posted: Friday, February 20, 2009 - 07:25 AM UTC
Thanks for the nice comment Tobar, here is the follow up...

The end is near

Decaling was a pain in the a**. But I think the problem weren't the decals, they went on very good, a little bit thick, but ok. Then I brushed on the softener from Gunze and on the underside it was like acid on the big insignia decal... So I bought the Model Master softener but it didn't work well too. The decals didn't set in the panel lines, but what the heck. Better like this than to destroy them. After finishing I put on a layer of gloss varnish to seal everything. Next time I'll put more gloss on, perhaps it'll work better.

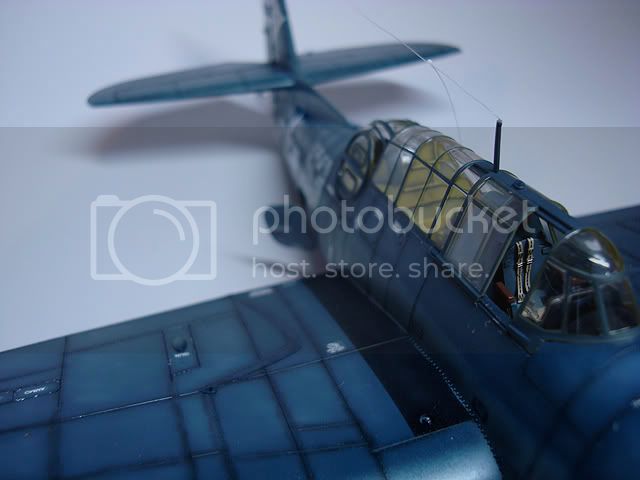
Next I painted on the exhaust stains and worked on many little parts like the canope, bomb bay doors and many other little things, like you see on my 'inspection' pics

A few steps more and it'll be finished - finally - after many hours of work I'm looking forward to finish this build and beginn something else. Though I bought the Eduard Fairy Fulmar which perhaps will be my next build, or any more suggestions?!

Have a nice evening!


BobCard
_VISITCOMMUNITY
Florida, United States
Joined: August 09, 2006
KitMaker: 1,008 posts
AeroScale: 14 posts
Posted: Friday, February 20, 2009 - 08:13 AM UTC
I've been following along because at some point I want to make a diorama with the 1/32 TBM and it would be my first plane trying to do the weathering. If it comes out half as good as this I'd be happy. It looks fantastic and your doing a great job on her. It might take me a bit to save up enough for the 1/32 but dreams do come true.
Congradulations on some fine work and I'll be looking forward to the final photos.
Bob
Tin_Bitz
_VISITCOMMUNITY
United Kingdom
Joined: June 26, 2008
KitMaker: 35 posts
AeroScale: 23 posts
Posted: Saturday, February 21, 2009 - 02:52 AM UTC
Hi

Just thought I’d say well done. The aircraft looks great, did it take you long to complete?
hellvetier
_VISITCOMMUNITY
Bern, Switzerland
Joined: April 17, 2008
KitMaker: 264 posts
AeroScale: 88 posts
Posted: Sunday, February 22, 2009 - 09:16 AM UTC
@ Bob: I hope you're going to blog your 1/32. For me the scale is just too big. And thanks for the nice comment

@ Tim: Thanks for looking! It took me about a month and it was the only project I worked on. I invested many hours, but I didn't count them. I think the interior took me the longest. But it's a very nice project.
hellvetier
_VISITCOMMUNITY
Bern, Switzerland
Joined: April 17, 2008
KitMaker: 264 posts
AeroScale: 88 posts
Posted: Sunday, February 22, 2009 - 09:23 AM UTC
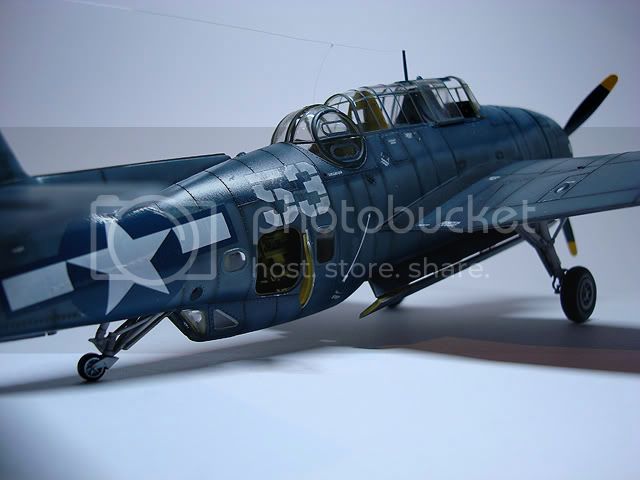
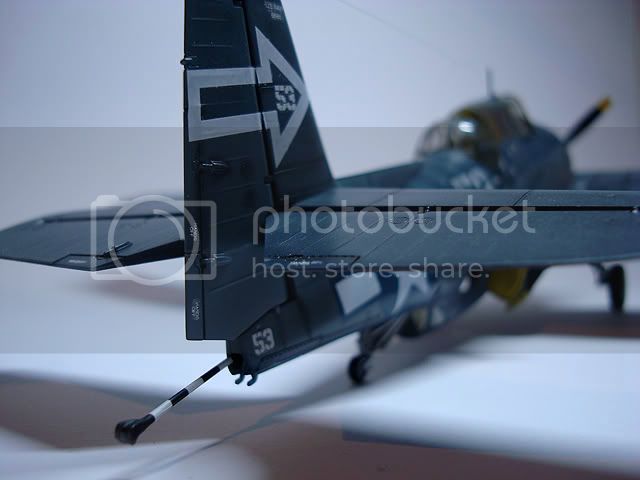
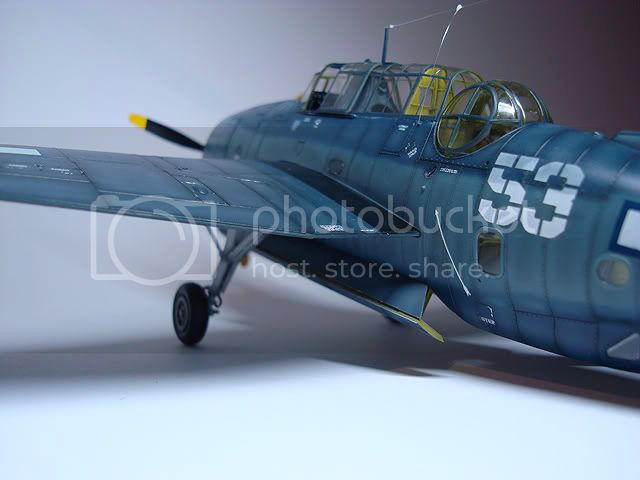
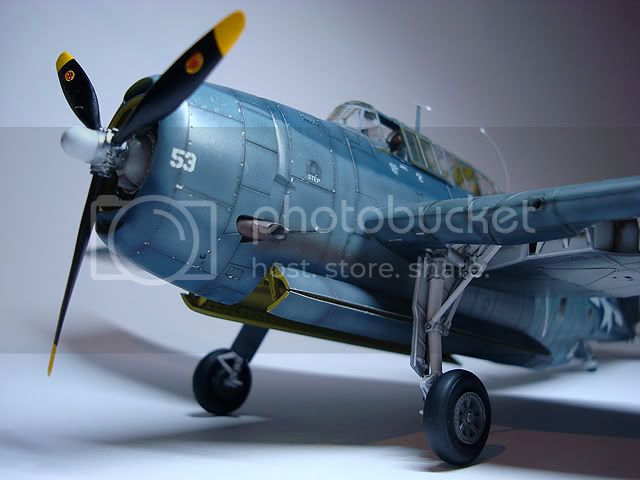
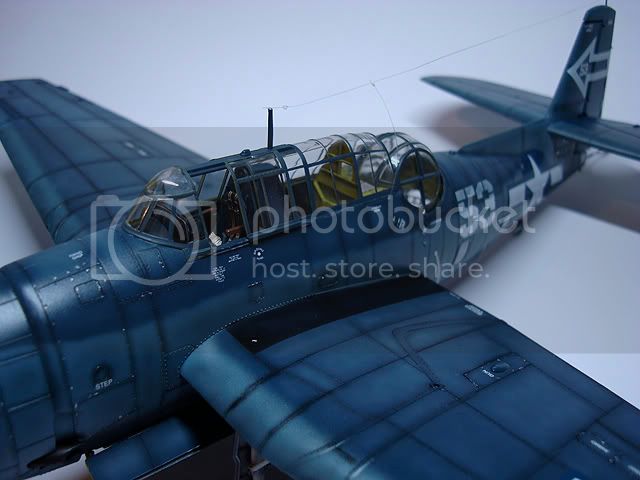
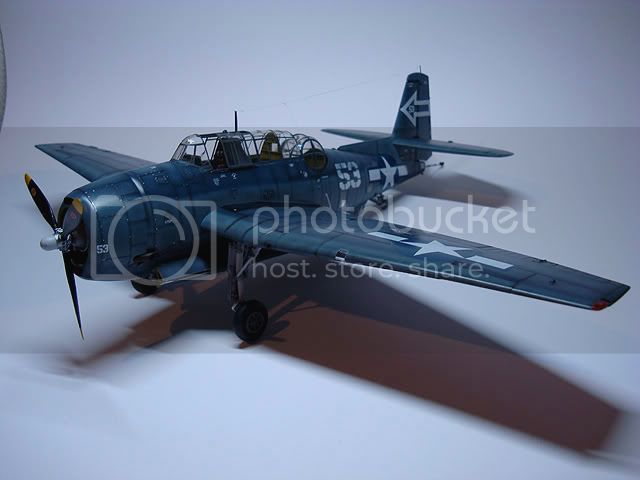
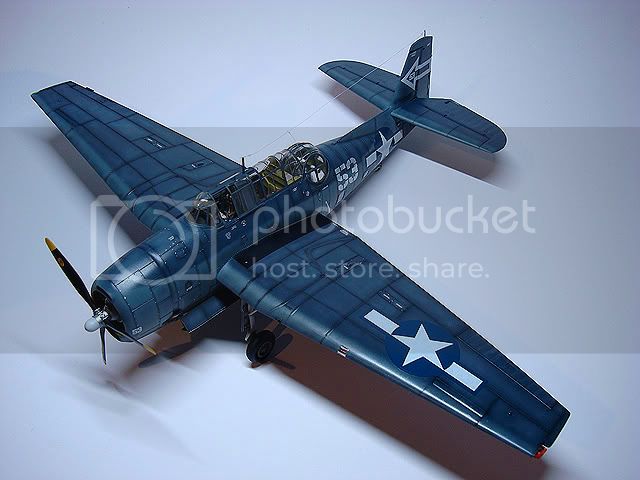
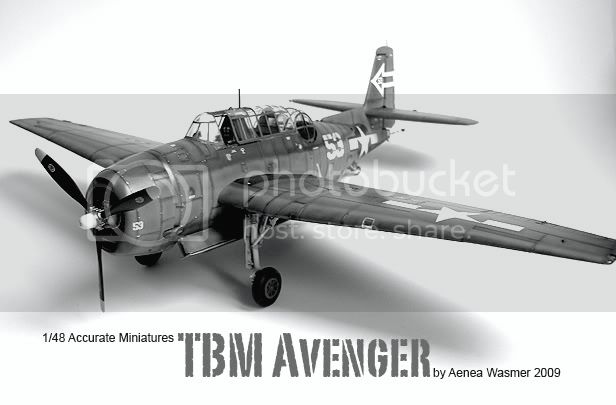
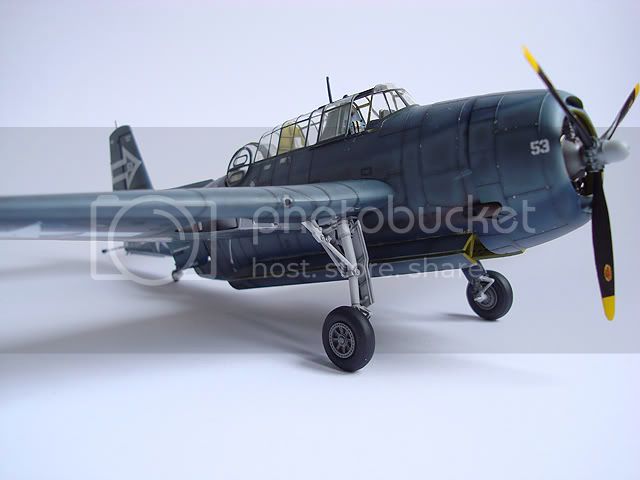
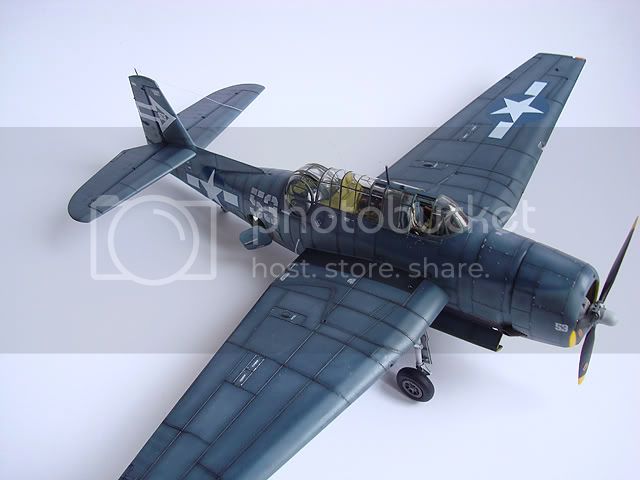
I finished my looongest project, the Accurate Miniatures TBM/TBF 1/48

Comments like always welcome!


rv1963
_VISITCOMMUNITY
New York, United States
Joined: December 07, 2004
KitMaker: 1,888 posts
AeroScale: 39 posts
Posted: Tuesday, February 24, 2009 - 12:04 PM UTC
Your work on this plane is amazing just amazing i will keep going back to this build again and again, you said you get a lot of paint buildup in the airbrush using i assume acrylic paint try adding some Createx airbrush retarder a few drops will slow the drying time just enough to to help stop the buildup you will have to experiment with different brands.
Bigrip74
_VISITCOMMUNITY
Texas, United States
Joined: February 22, 2008
KitMaker: 5,026 posts
AeroScale: 2,811 posts
Posted: Wednesday, February 25, 2009 - 03:59 PM UTC
@ A.W. great build, thanks for the pictures.

@ Robert: Where did you pick up the Createx, sounds like what I need for my acrylic paint.


Robert
hellvetier
_VISITCOMMUNITY
Bern, Switzerland
Joined: April 17, 2008
KitMaker: 264 posts
AeroScale: 88 posts
Posted: Wednesday, February 25, 2009 - 11:46 PM UTC
@ Robert: I hope it could be a little bit of a help for your build I bought some drying retarder and will try it on my next weathering!

Thanks for everyone who left a comment during the blog and helped me to get going with the build!!!!!
Especially a BIG THANK YOU to JM Villalba who answered my questions with patience!!!

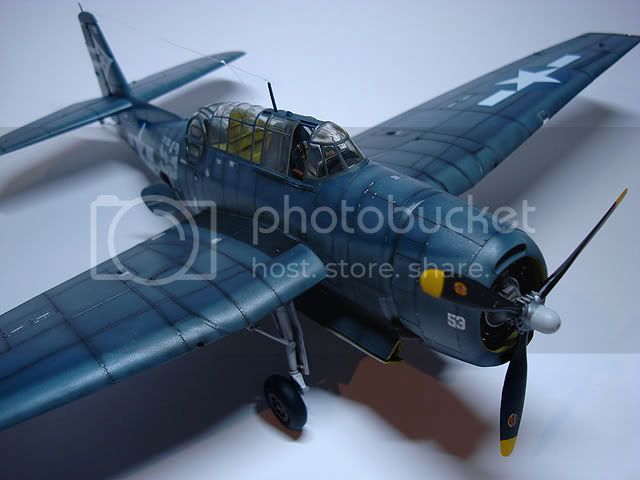
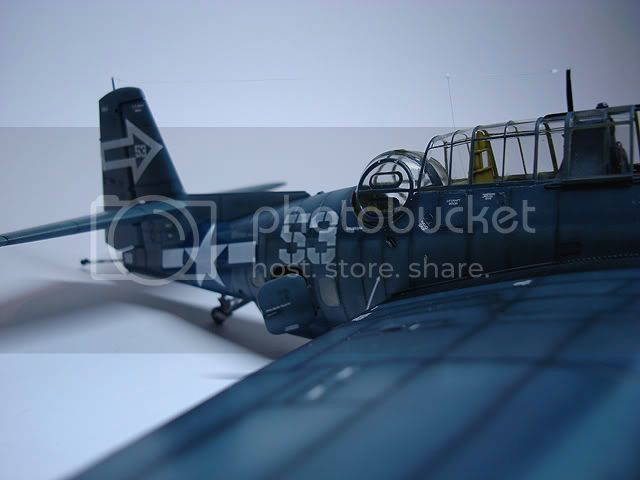
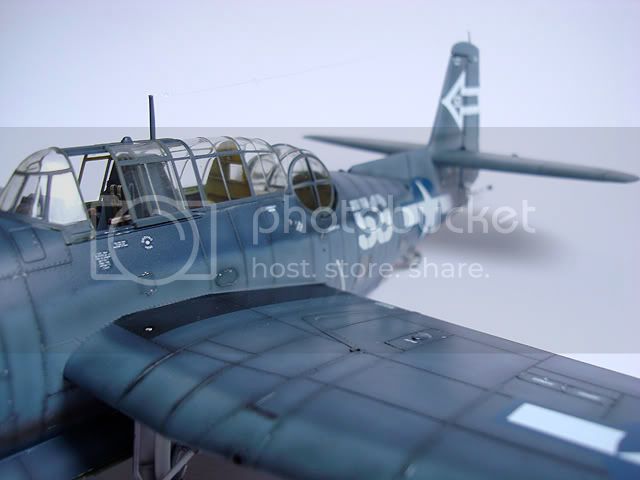
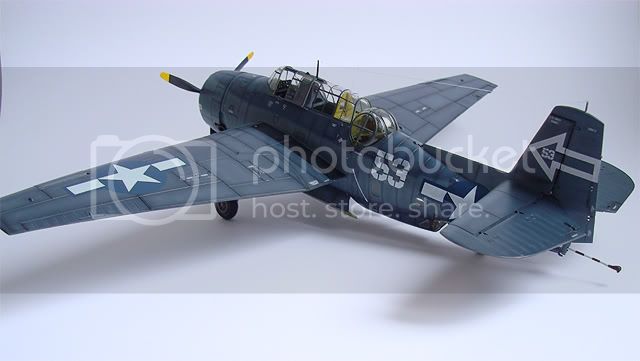
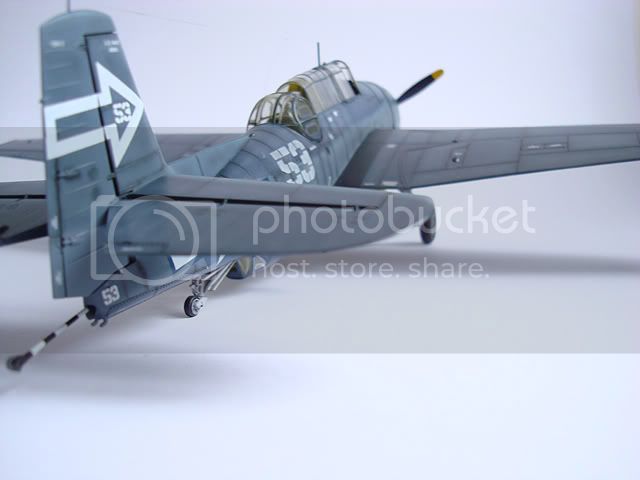
Here are some final pics in better light.

Long live the Avengers


Spot
_VISITCOMMUNITY
North Carolina, United States
Joined: June 17, 2005
KitMaker: 95 posts
AeroScale: 33 posts
Posted: Thursday, February 26, 2009 - 03:35 AM UTC
Awesome, looks real only shrunk, one question tho, maybe I'm ignorant, or blind, or both, lol, but is there a reason there's no machine gun in the turret?

Once again, gorgeous model
mj
_VISITCOMMUNITY
Illinois, United States
Joined: March 16, 2002
KitMaker: 1,331 posts
AeroScale: 325 posts
Posted: Thursday, February 26, 2009 - 04:24 AM UTC
What a fantastic Avenger!! . I'vew always been afraid to try weathering my models (afraid of messing up a good build), but seeing the results you are able to achieve, I will have to give it a try. I can't say enough good things about your Avenger. It's one of my favorite planes, and you really just knocked this one out of the park. Congratulations. I must stop typing now, and go back and look at your pics. Can't get enough of them.

Cheers,
Mike
hellvetier
_VISITCOMMUNITY
Bern, Switzerland
Joined: April 17, 2008
KitMaker: 264 posts
AeroScale: 88 posts
Posted: Thursday, February 26, 2009 - 10:11 PM UTC
@ Ian: Thanks for your comment! I followed the SBS guide from Villalba on the AM homepage and did not much reference work on my own. He stated, that this plane was a night fighter and has been escorted during the missions. So no need for a machine gun in the turret and/or in the back of the fuselage.

@ Mike: The Avenger is now (or has become during the build ) one of my favourite planes too! I'm glad that you like my model. Weathering IMHO is all about experimenting and practising. So no regrets if a model gets bad, at least you learned something

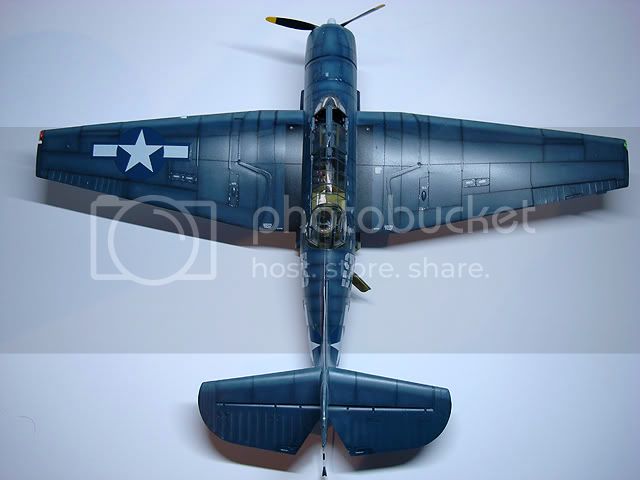
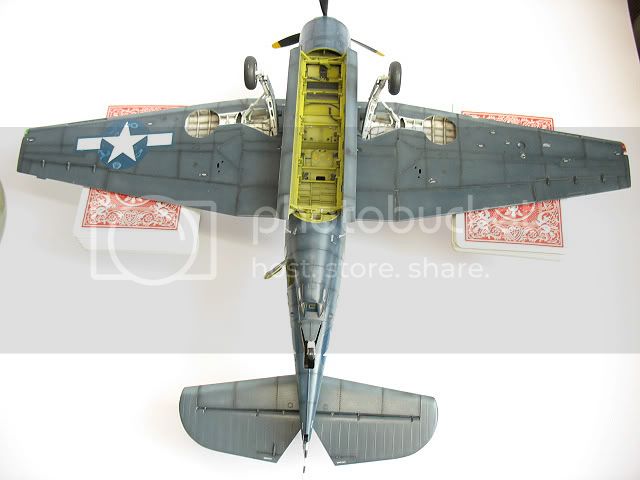
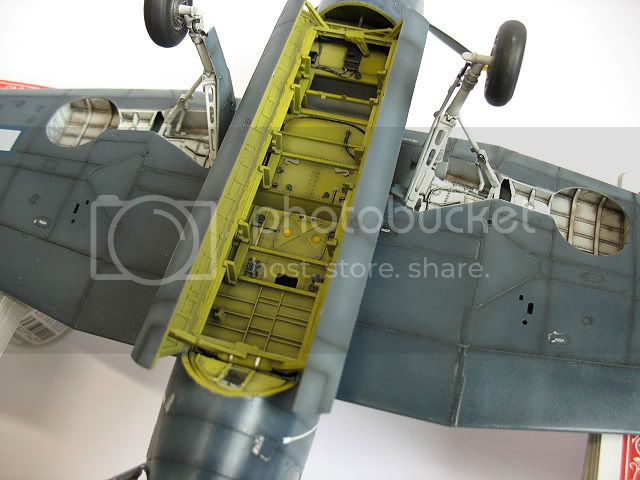
Here some pics from the underside:
As you can see something went terribly wrong with the insignia decal. Next time I'll mask and paint it. For me it's always a fight to put these on


Thanks for looking!
ebergerud
_VISITCOMMUNITY
California, United States
Joined: July 15, 2010
KitMaker: 297 posts
AeroScale: 76 posts
Posted: Thursday, December 27, 2012 - 04:24 PM UTC
hellvetier

I know this is old news but I just finished an Accurate Miniatures Avenger like yours - the Bermuda Triangle special. (I painted it white and gray and sent it to the Atlantic.) Just wanted to tell you that my build would have been much harder without yours. As I understand it AM used to have a web site that had video builds of their kits: that's no longer with us. And the instructions as they stand are miserable. There must have been a dozen medium to major problems that were solved because I had your work to examine. (I don't think I'd have ever figured out the landing gear with the crude graphics given.) So I really appreciate the existence of a splendid photo build like this. And thumbs way up on your build: clean as a whistle and I wish I could do as well. (But there weren't any U-boats in the Bermuda Triangle - or maybe there were. Lot of them in the Gulf earlier in the war.) Thanks again.
Eric Bergerud
chris1
_VISITCOMMUNITY
Auckland, New Zealand
Joined: October 25, 2005
KitMaker: 949 posts
AeroScale: 493 posts
Posted: Monday, December 31, 2012 - 05:33 PM UTC
Hi There AW
Hope you have a great new year.
What a great build
I've had to book mark this build as I hope to do either the Italeri or Academy rebox of this kit,once I've finished the Italeri SBD Dauntless.

Is there any issues I should know about???

I ask as its taken me 3 hours to figure out where one piece goes as the Italeri instructions show how and where to split the part but not where it goes,(is shown in another exploded view but not mentioned.)

Regards


Chris
RotorHead67
_VISITCOMMUNITY
Virginia, United States
Joined: May 07, 2003
KitMaker: 1,174 posts
AeroScale: 226 posts
Posted: Monday, December 31, 2012 - 06:18 PM UTC
Wasmer:
I've got to say....I think that is the best tri-blue pacific
scheme I've ever seen. The panel lines and fading affects are
perfect. The panel fading is above par. You definitely have one to be proud of. Excellent Job.!!! I wish I could do that kind of airbrush work as well. Great blog and build.
Todd
sweaver
_VISITCOMMUNITY
Kentucky, United States
Joined: April 19, 2007
KitMaker: 759 posts
AeroScale: 184 posts
Posted: Tuesday, January 08, 2013 - 05:41 AM UTC
I know it's an old thread, but I'll chime in here and say: Great job!

Gotta love those AM kits...sad to see them go.
Joel_W
Staff MemberAssociate Editor
AUTOMODELER
_VISITCOMMUNITY
New York, United States
Joined: December 04, 2010
KitMaker: 11,666 posts
AeroScale: 7,410 posts
Posted: Wednesday, July 10, 2013 - 03:42 AM UTC
Samuel, just found Wasmer's Blog thread as well. Just a fantastic build of a more then complicated Accurate Miniature kit.

Wasmer, your finished Avenger is truly a great build. Love the paint and weathering. As for the decal issues, I've always used Microscale's Set & Sol, which works perfectly 95% of the time. If you're dealing with thick decals, you can try Solvoset, but it's really strong stuff. I prefer to use a pin and knife to get decals to lay down into seams or really snug down over high shaped areas. I do this after the decal has dried, and come back to work on the problem areas using Sol as my wetting agent. Sometimes a final touch of up paint is necessary, as decals can just stretch so far.

I built the Hobby Boss Avenger a few years ago. The AM kit seems to have better and finer detail.

Joel
 _GOTOTOP