_GOTOBOTTOM
Pre-Flight Check
Constructive critique of your finished or in-progress photos.
TBM Avenger 1/48
hellvetier
_VISITCOMMUNITY
Bern, Switzerland
Joined: April 17, 2008
KitMaker: 264 posts
AeroScale: 88 posts
Posted: Thursday, January 22, 2009 - 08:35 PM UTC
Hei chaps!

This is my second online blog for an aircraft. Since my last P-40N blog I built only some armor models. But after my new shipment of PE parts arrived I was happy to beginn something else than on tracks.

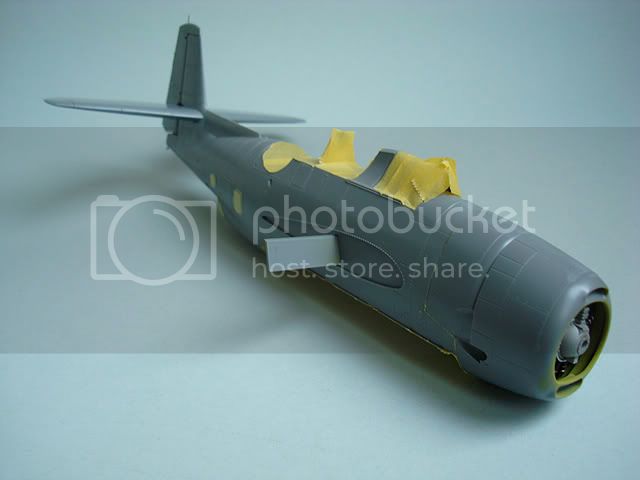
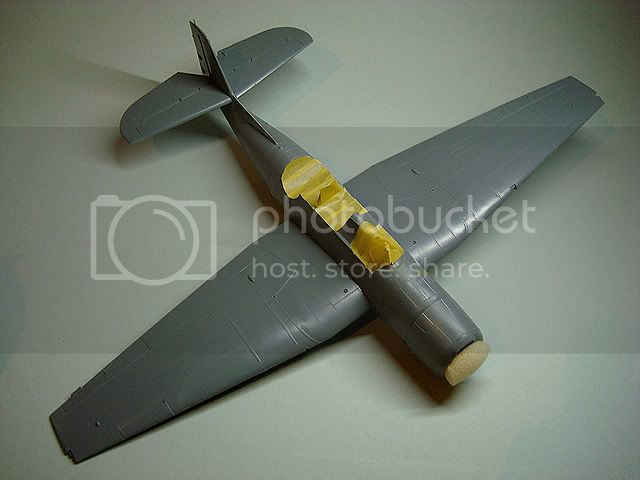
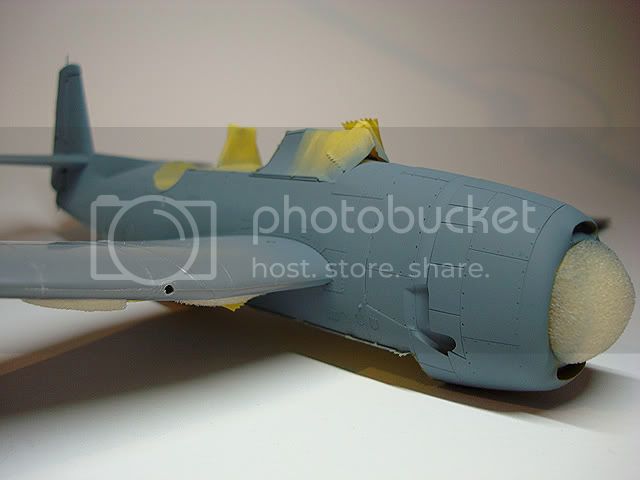
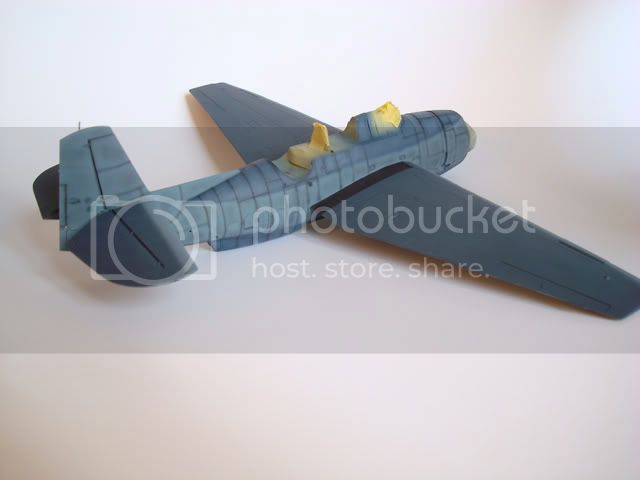
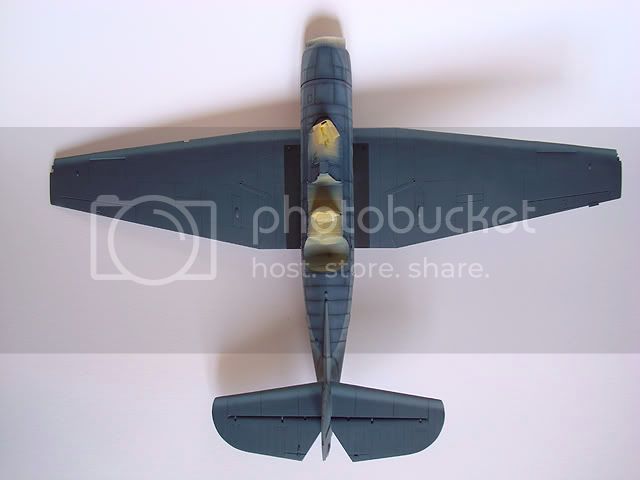
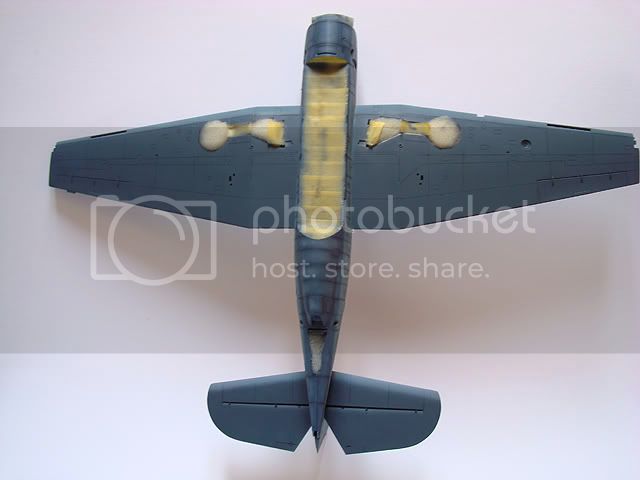
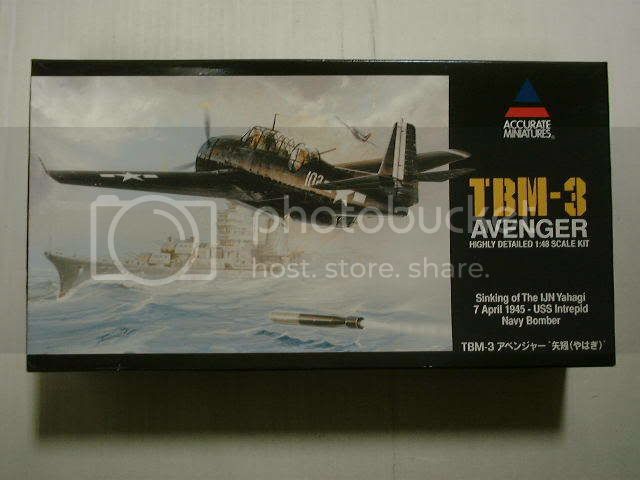
Here's my new buildLog, a TBM Avenger 3D from Accurate Miniatures in 1/48:


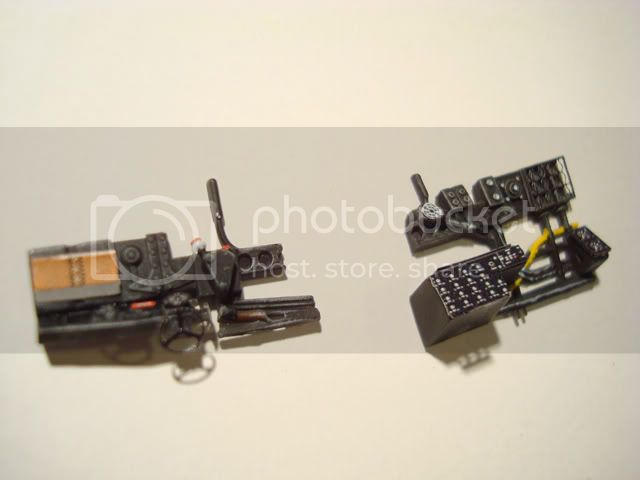
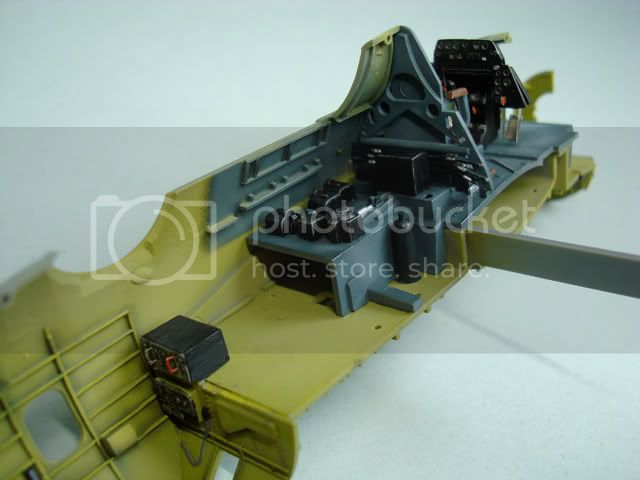
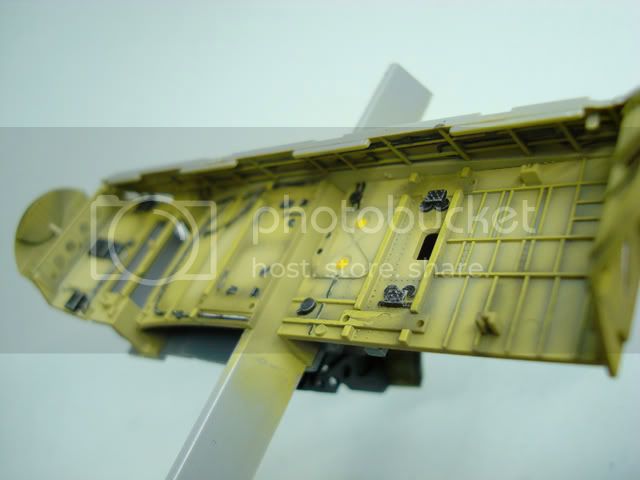
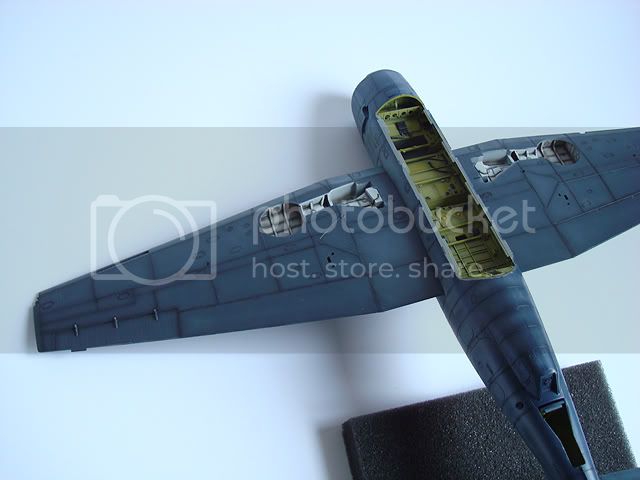
I'll use the Eduard PE set which is nicely done and adds much detail to the interior and to the exterior.

On the Accurate Miniatures Homepage is a online build made by Juan Manuel Villalba which I'll be following. Because I don't like the instructions too much and I like his result very much.

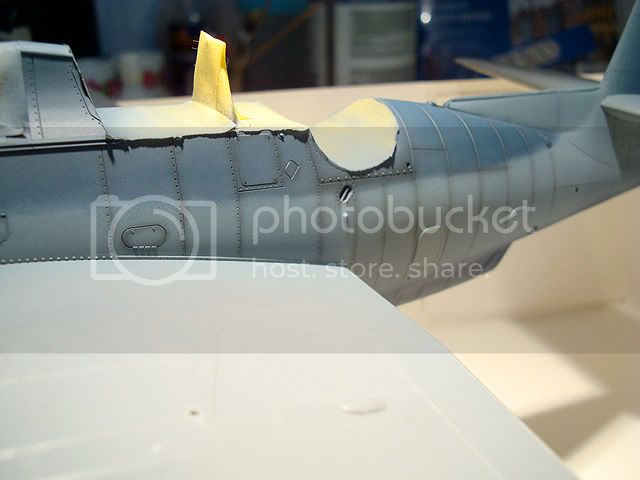
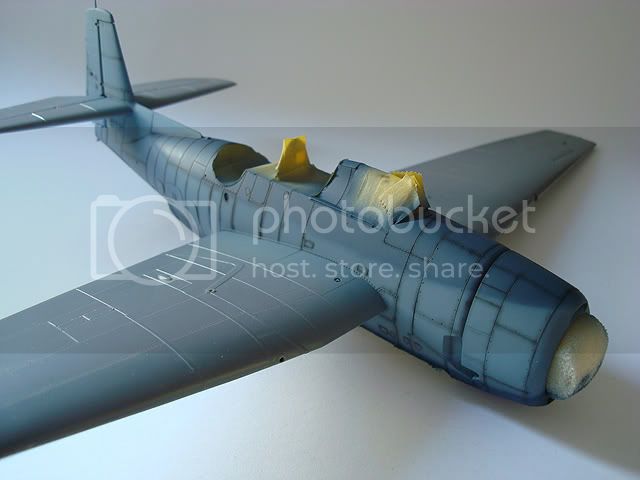
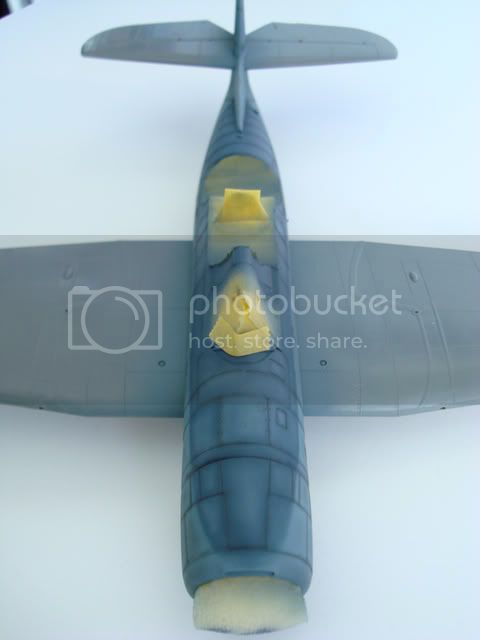
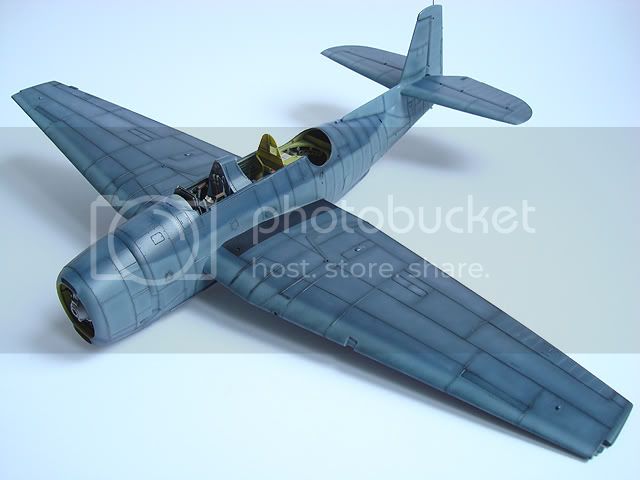
It's going to be the nice US Navy three-tone camouflage.

So. let's start:

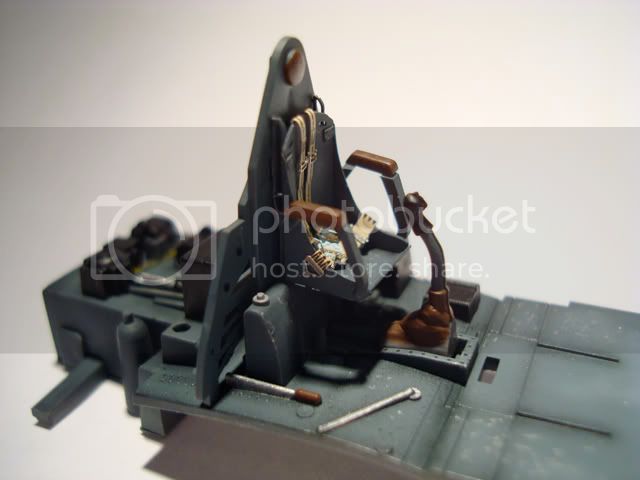
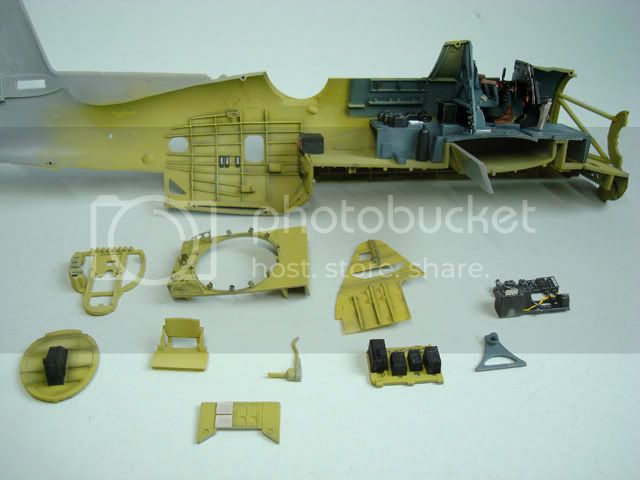
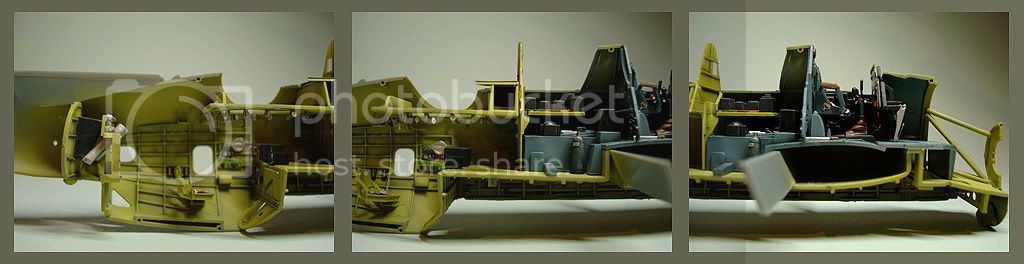
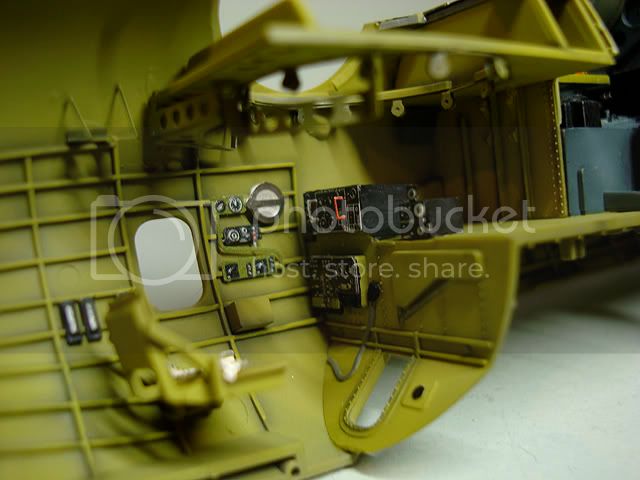
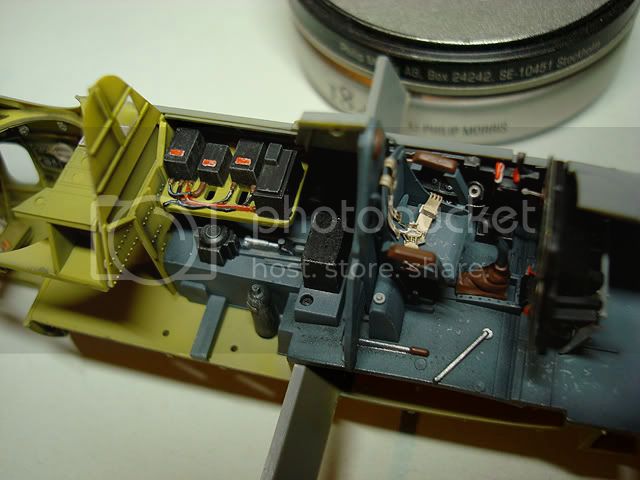
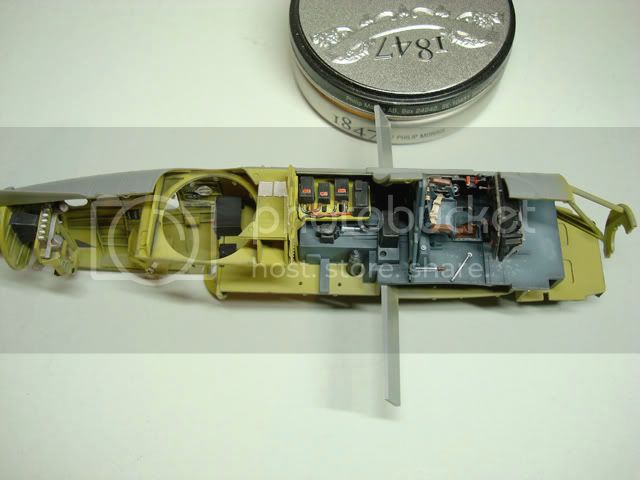
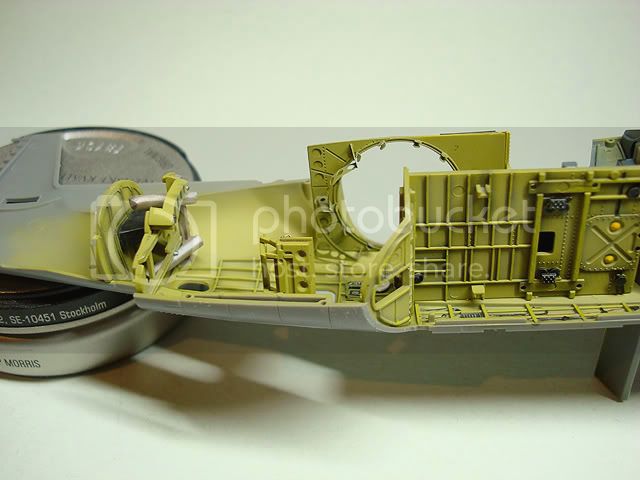
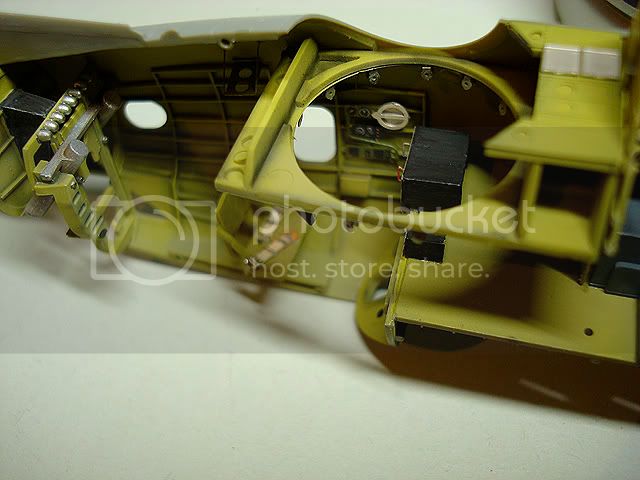
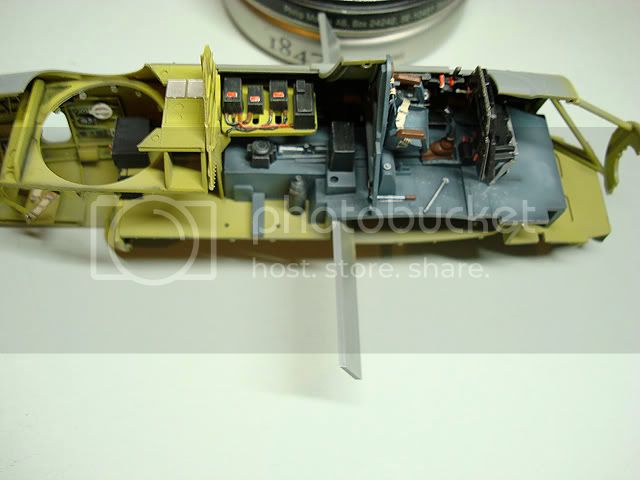
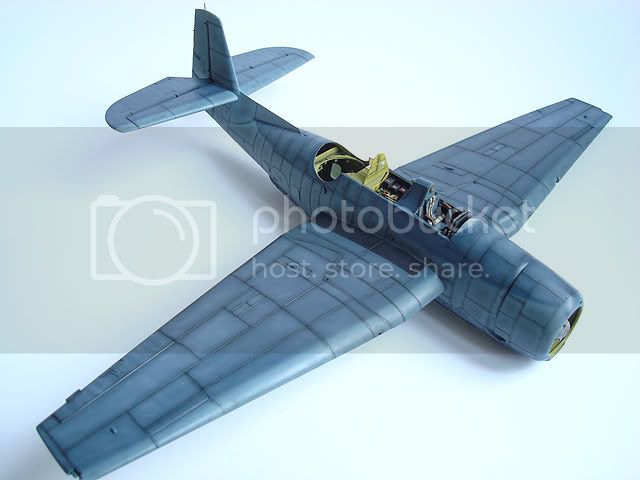
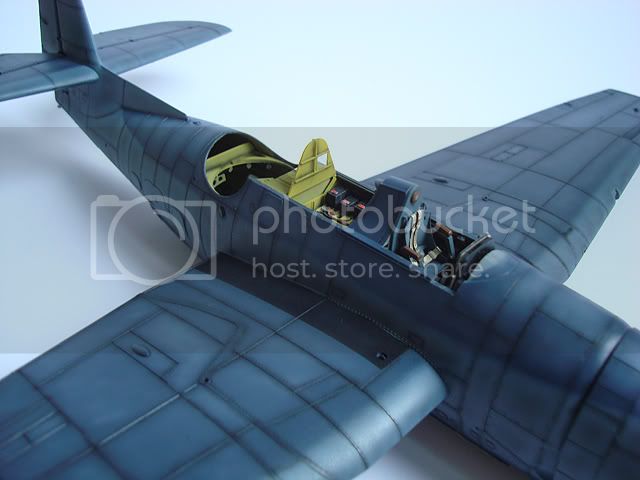
I already spent an evening beginning with the cockpit.

First I mixed some Bronze Green and sprayed it all over.
Second step were the shades with dilluted black.
Then a lightened base color was sprayed randomly.
Details were picked out with a brush and some drybrushing with a light grey.
I just use Tamiya paints.

The dry-fitted cockpit.


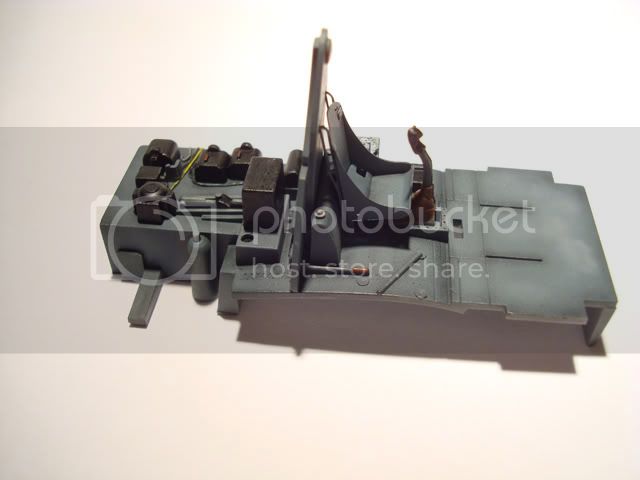
There are some hings to add like scratches and the instrument panel.

Comments like always welcome!

Regards,

A. W.
JPTRR
Staff MemberManaging Editor
RAILROAD MODELING
#051
_VISITCOMMUNITY
Tennessee, United States
Joined: December 21, 2002
KitMaker: 7,772 posts
AeroScale: 3,175 posts
Posted: Thursday, January 22, 2009 - 08:50 PM UTC
Hi A.W.,

I look forward to your build.
You may find this useful: TBM-3E Walkaround
LongKnife
_VISITCOMMUNITY
Jönköping, Sweden
Joined: April 25, 2006
KitMaker: 831 posts
AeroScale: 688 posts
Posted: Thursday, January 22, 2009 - 10:02 PM UTC
Hi A W.

Pit is looking good, som I'm eager to see the coming updates.

I've found a few wartime pics of Avengers in Life Magazines online photocache. Give me a message with your e-mail in it, and I'll mail them to you. One of them is a nice and shabby three-toner without any code letters or anything on.

Tony
russamotto
_VISITCOMMUNITY
Utah, United States
Joined: December 14, 2007
KitMaker: 3,389 posts
AeroScale: 375 posts
Posted: Friday, January 23, 2009 - 03:02 AM UTC
Looks very good. I have the TBM-3 night bomber version. I want to get another so I can do it better. I will follow the rest of your build for help.
hellvetier
_VISITCOMMUNITY
Bern, Switzerland
Joined: April 17, 2008
KitMaker: 264 posts
AeroScale: 88 posts
Posted: Friday, January 23, 2009 - 07:01 AM UTC
Thanks for your comments. This is always motivating

A little progress on the cockpit.
I painted wear with a silver pencil and added seatbelts and glued the seat in place.

What about a light oil wash?


Regards, A. W.
hellvetier
_VISITCOMMUNITY
Bern, Switzerland
Joined: April 17, 2008
KitMaker: 264 posts
AeroScale: 88 posts
Posted: Saturday, January 31, 2009 - 03:15 AM UTC
Long time since my last update. Had much to work for university. But here it is:

The cockpit fuselage is slowly coming together. There are many beautiful details coming with this kit. There's much brush painting needed. As you see I'm still not finished. Very good exercise for a steady hand.


Still a lot of parts to complete for the interior...
TedMamere
_VISITCOMMUNITY
Moselle, France
Joined: May 15, 2005
KitMaker: 5,653 posts
AeroScale: 4,347 posts
Posted: Saturday, January 31, 2009 - 04:05 AM UTC
Hi A.W.,

Very nice interior painting!

On the pictures the bronze green look very blue, almost grey. It make a nice contrast to the yellow zinc chomate though. I'm looking forward to see the next step. Will you submit your build for a feature on the site?

Jean-Luc
LongKnife
_VISITCOMMUNITY
Jönköping, Sweden
Joined: April 25, 2006
KitMaker: 831 posts
AeroScale: 688 posts
Posted: Saturday, January 31, 2009 - 06:02 AM UTC
Ouch A-W.

That bomb bay is sweet, and I have great hopes for the whole Avenger. The pit isn't only hand exercise, you have got to have eagle eyes too.

Tony
hellvetier
_VISITCOMMUNITY
Bern, Switzerland
Joined: April 17, 2008
KitMaker: 264 posts
AeroScale: 88 posts
Posted: Monday, February 02, 2009 - 09:10 AM UTC
@ Jean-Luc: Merci pour ton commentaire! J'ai fait la couleur grise moi-même. J'avais pas de bonne référence, alors j'ai experimenté et je crois que ce n'est pas la couleur correcte, mais elle me plaît J'aimerais bien faire un feature pour le site, mais je ne suis pas sûre comment l'avion regarde à la fin.

@ Tony: Tack sa mycket for your very motivating reply! The further you are in the progress the more mistakes can happen. Something is always loose and you have to glue it back on I hope it'll be finde to the end

Here we go with the interior almost finished. Only some little things to add on the left fuselage side is up next. Comments welcome...


Thanks for looking!
jugjunkie
_VISITCOMMUNITY
South Africa
Joined: January 20, 2009
KitMaker: 140 posts
AeroScale: 84 posts
Posted: Monday, February 02, 2009 - 08:30 PM UTC
That is beautiful work my mate! Your attention to detail and the execution are fabulous! Very well done and i am so looking forward to the completion of this one.

Geoff
LongKnife
_VISITCOMMUNITY
Jönköping, Sweden
Joined: April 25, 2006
KitMaker: 831 posts
AeroScale: 688 posts
Posted: Monday, February 02, 2009 - 10:32 PM UTC
This is getting better and better. I see that you've caught a bad habit from us too! How on earth do you get snus through the Swiss customs? When I went through in the eighties and nineties, it was illegal to even own in die Schweiz, so I had to put a bar inside the spare tyre

Anyway. The chromate yellow is great. What's your sequence? Primer, preshade, mist the colour on, and drybrush with lightened shade?

Tony
gaborka
_VISITCOMMUNITY
Borsod-Abauj-Zemblen, Hungary
Joined: October 09, 2005
KitMaker: 626 posts
AeroScale: 264 posts
Posted: Tuesday, February 03, 2009 - 01:48 AM UTC
Very clean build, as you would expect from a Swiss builder. I wish I were so tidy in my model building.

thegirl
_VISITCOMMUNITY
Alberta, Canada
Joined: January 19, 2008
KitMaker: 6,743 posts
AeroScale: 6,151 posts
Posted: Tuesday, February 03, 2009 - 02:44 AM UTC
Very impressive so far , great job on the preshading ! Looking forward to more pic's .
hellvetier
_VISITCOMMUNITY
Bern, Switzerland
Joined: April 17, 2008
KitMaker: 264 posts
AeroScale: 88 posts
Posted: Tuesday, February 03, 2009 - 04:55 AM UTC
@ Geoff: Hey man, thanks for the comment! It's such a nice kit with so many details, it would be a pitty not to invest time to pick them out and I got plenty (just kidding while modelling you can forget time...)

@ Tony: Hehe.. yeah Snus... today you can order it over the net legally, but if the customs open the shipment you pay a lot extra. But till now, I'm sure they thought it would be only modelling supplies to my address By the way, what did you do in Switzerland? Vacation? My grandmother 'Mormor' is from Sweden, so I'm learning this language

I don't prime the plastic i do the following:
1. Put on the base coat
2. Paint the shades with dilluted black (Post-shade)
3. With the highlighted base coat I put on some randome spots
4. Dry brush with the base coat or with a light great as appropriate

@ Gabor: I try to keep it tidy. Next will be a Swiss Watch in 1/72 scale

@ Terri: Thanks for the comment, I'm pleased that you like it. It was the first time I use a post shade method.

What's up now:

I finished the enginge


And closed up the fuselage without any problems. Here some more pics of the interior


Now the progress will be faster

Thanks for looking!
LongKnife
_VISITCOMMUNITY
Jönköping, Sweden
Joined: April 25, 2006
KitMaker: 831 posts
AeroScale: 688 posts
Posted: Tuesday, February 03, 2009 - 06:33 AM UTC
Thanks for the explanation AW. I will make an interpretation of it on my next Bf 109. Grey is easier though, don't you think?

About 20 years ago I was working as a machine installer, and where ever you went in europe, you had to pass Switzerland. I spent a night east of Bielersee during appleblossom though. One of the most pretty morning views I've ever had!

Since you're swiss it's impossible to tell your native language, but if it's german and your'e trying swedish, your'e in for a treat. German is about all rules, and swedish is all about exceptions. I wish you all the luck though. And for myself, it only took about a year to learn. But that was my first year ever, that....

Tony
hellvetier
_VISITCOMMUNITY
Bern, Switzerland
Joined: April 17, 2008
KitMaker: 264 posts
AeroScale: 88 posts
Posted: Wednesday, February 04, 2009 - 09:33 AM UTC
I think grey could be easier to apply the painting technique. It was my first try with this color, but sam as you, I'm gonna buy a Me109 and try it too.

:[]-- Tony: Yeah, Switzerland and it's lakes. I liked the 'Schären Islands' in Sweden very much. Still learning the 'ett', 'en' article exceptions of your language

A little progress: fuselage closed, sanded and masked with the rudders attached. Wheel wells are painted but have to be weathered like the other parts.


Have a good night
hellvetier
_VISITCOMMUNITY
Bern, Switzerland
Joined: April 17, 2008
KitMaker: 264 posts
AeroScale: 88 posts
Posted: Thursday, February 05, 2009 - 10:18 AM UTC
To keep it short:

Completed the build and finished the wheel wells, but forgot to take some pictures.


First coat of paint, the self-made intermediate blue with Tamiya XF-18, XF-19, Sky blue and a little bit of red.


I'll highlight the panels with the same color and some grey mixed.

Regards....
jaypee
_VISITCOMMUNITY
Scotland, United Kingdom
Joined: February 07, 2008
KitMaker: 1,699 posts
AeroScale: 1,384 posts
Posted: Thursday, February 05, 2009 - 10:53 AM UTC
i remember making the airfix avenger about twenty years ago, and love the
big fat bird. this build is just something else that is a clean skin does it
come out of the box like that? Keep it up AW
hellvetier
_VISITCOMMUNITY
Bern, Switzerland
Joined: April 17, 2008
KitMaker: 264 posts
AeroScale: 88 posts
Posted: Wednesday, February 11, 2009 - 04:40 AM UTC
@ JP: when it comes to aircrafts I like the big jugs too It's not entirely OOB, I added the Eduard PE kit.

First thing when I came back from my holidays in the snow was:

1. Mix and paint the Non-Specular Blue
2. Post-shading the panel lines.

But it wasn't as easy as I thought:
- I masked of the NS-Blue areas with Tac as I read some articles about this stuff and I had to try it. For me, it didn't work very well. It didn't stick good to the model, so I took it of and sprayed it by hand.

- The post-shading was very difficult to achieve. The highly diluted mix was ok, but it takes much practise to work very correct. The second problem besides the lack of practise was, that the alcohol or tamiya thinner vaporized and the mix got more and more color, and I didn't noticed as I was concentrating on my panel lines. That's why some are darker than others. And my Aztek airbrush constantly got dried color on the needle which gives nice spiderwebs on the plane as you give too much color because it's stuck, and suddenly a big load pops out and ruins you panel line...

I'm not so happy with the result. One time I got the Tamiya primer in my hand to start from scratch, but as I thought, that the panels got a second paint job from the weathering and that the decals are covering some mistakes, I'll let it be.

And that's the status quo:


Sorry about the bad pictures! Next will be the weathering of the panels, then there will be more and better pics!

Comments like always welcome

Regards,

A. W.
LongKnife
_VISITCOMMUNITY
Jönköping, Sweden
Joined: April 25, 2006
KitMaker: 831 posts
AeroScale: 688 posts
Posted: Wednesday, February 11, 2009 - 08:59 AM UTC
Hi AW. I'm sorry to hear about the needle buildup, but I'm glad I'm not alone with it. I guess I will stick to preshading. What you show looks pretty smooth though, so it will be a gem when she's finished.

Keep working with our exceptions. They are one of the few things we can really pest the world with. "EN modell av ETT flygplan!"

Tony
wingman
_VISITCOMMUNITY
Pennsylvania, United States
Joined: December 09, 2003
KitMaker: 880 posts
AeroScale: 654 posts
Posted: Wednesday, February 11, 2009 - 11:03 AM UTC
Very, very, very nice interior A.W. Looking forward to seeing this done. Very nice photos too, Wingman out.
hellvetier
_VISITCOMMUNITY
Bern, Switzerland
Joined: April 17, 2008
KitMaker: 264 posts
AeroScale: 88 posts
Posted: Thursday, February 12, 2009 - 02:35 AM UTC
@ Tony: I got a tipp from ChuckW to dip the needle in a silicon based windshield varnish. I think preshade is much easier but as I try to follow JM Villalbas SBS guide I wanted to try the postshading which is a different style. I'm still on my holidays, so exceptions can wait till next week.

@ Wingman: Thanks for your nice comment especially on the photos, as I try to improve, but taking a good picture is very difficult.

Weathering has begun. I added grey to the NS-Blue and black to the intermediate blue. But first I tried to overspray/lighten the shades with the intermediate blue color I saved in a jar. But it didn't work very well, perhaps something got into the color while standing...
More weathering when the wings have been painted, and that will be next.


hellvetier
_VISITCOMMUNITY
Bern, Switzerland
Joined: April 17, 2008
KitMaker: 264 posts
AeroScale: 88 posts
Posted: Saturday, February 14, 2009 - 04:52 AM UTC
Today I finished the base camo of the TBM. The scheme was painted free-hand. Flat black was used for the anti-skid panels.
Next will be the post-shading and weathering of the new painted parts, then a gloss coat and decals.


I hope that I masked the cockpit enough...
hellvetier
_VISITCOMMUNITY
Bern, Switzerland
Joined: April 17, 2008
KitMaker: 264 posts
AeroScale: 88 posts
Posted: Monday, February 16, 2009 - 05:03 AM UTC
Painting stage is now finished. I applied a gloss coat from a spraycan. Next will be the decals and then the pro modellers wash which I recently recieved but haven't used till now.

Landing gear is assembled and canope is masked. Still many little things to complete and add to the model...


Thanks for looking!
Tobar
_VISITCOMMUNITY
Arizona, United States
Joined: October 17, 2002
KitMaker: 192 posts
AeroScale: 70 posts
Posted: Monday, February 16, 2009 - 09:56 AM UTC
Very Nice Job on the Paint....
It really has that "Used" look to it...

Can't wait too see more.....
 _GOTOTOP