

Early Aviation
Discuss World War I and the early years of aviation thru 1934.
Discuss World War I and the early years of aviation thru 1934.
Hosted by Jim Starkweather
Eduard 1:48 Spad XIII

guitarlute101

Joined: December 18, 2006
KitMaker: 1,121 posts
AeroScale: 1,063 posts
Posted: Thursday, March 19, 2009 - 05:56 AM UTC
Excellent work, Louis. I'm enjoying your thread immensely! I can't wait to see what you've got in store next.
Mark

JackFlash
Joined: January 25, 2004
KitMaker: 11,669 posts
AeroScale: 11,011 posts
Posted: Thursday, March 19, 2009 - 01:58 PM UTC
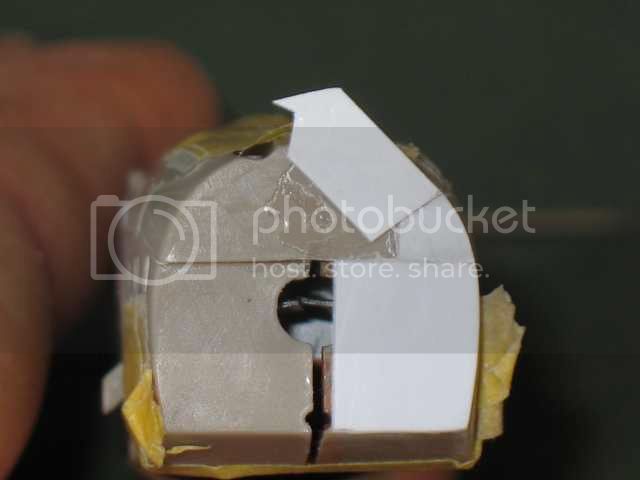
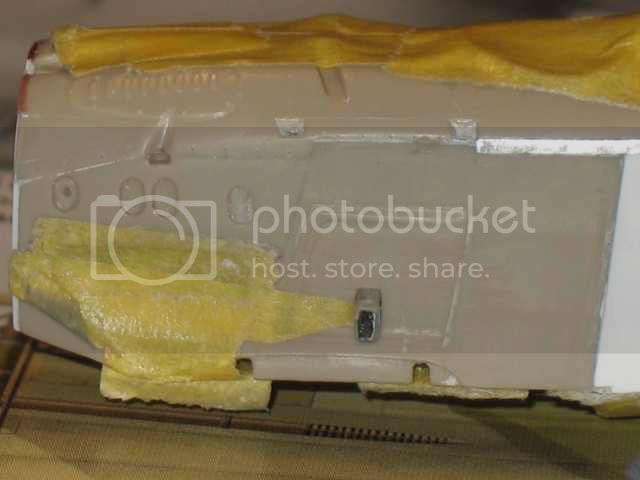
Wow! Louis that is quite a gap there at the bottom. Is this because
1. something inside was too wide
2. or a design flaw (shortcoming)?
It looks like the cowling will be too large if the fuselage bottom is pinched tight together at the nose. I am guessing but it looks like about .030 thou gap?

Louis

Joined: May 21, 2006
KitMaker: 472 posts
AeroScale: 471 posts
Posted: Thursday, March 19, 2009 - 08:21 PM UTC
Hi and thank vou!
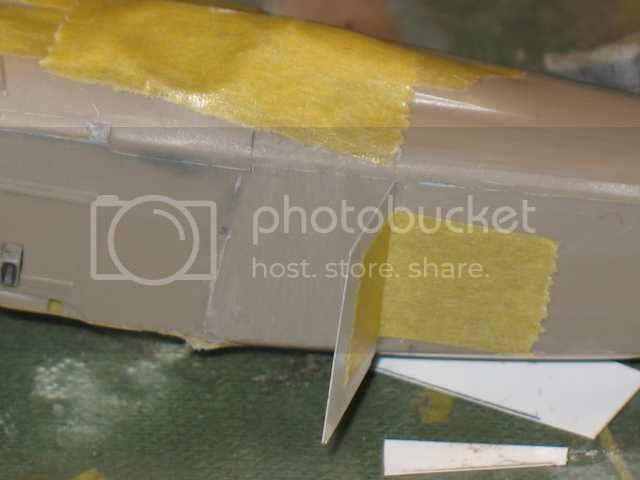
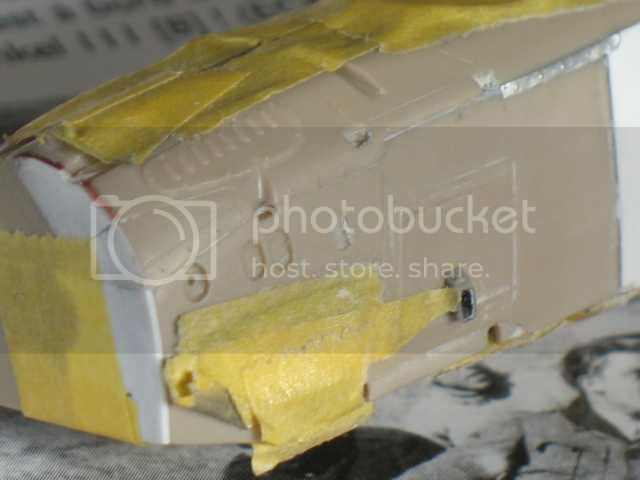
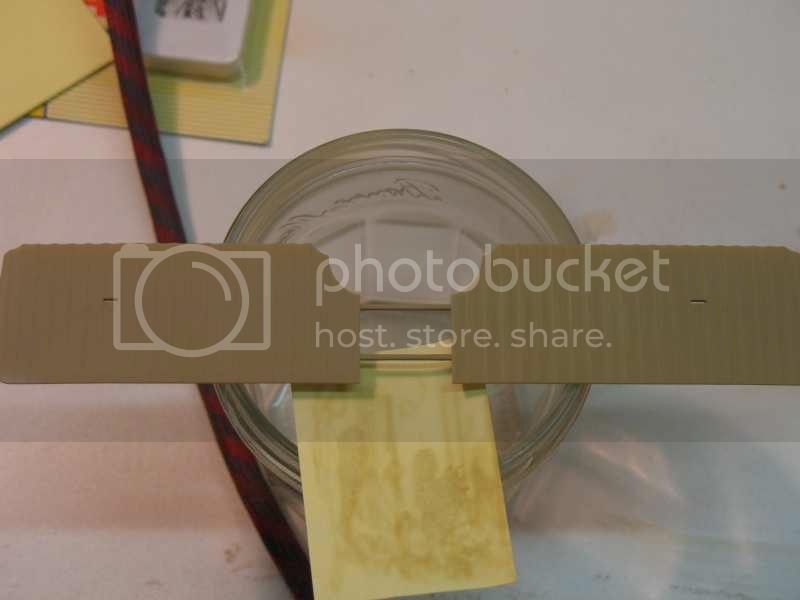
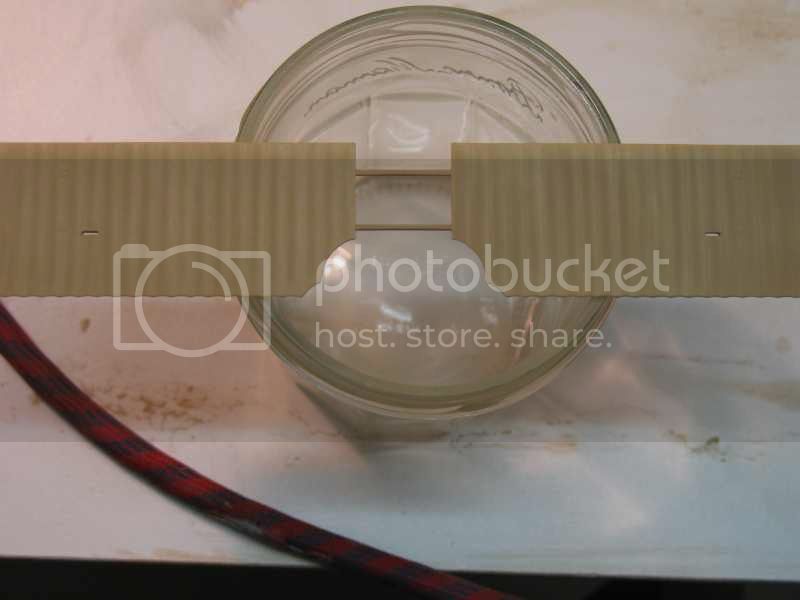
I did not glue together both sides of the airframe to be able to adapt them to the capot and to the the underside of the airframe:
unglued :
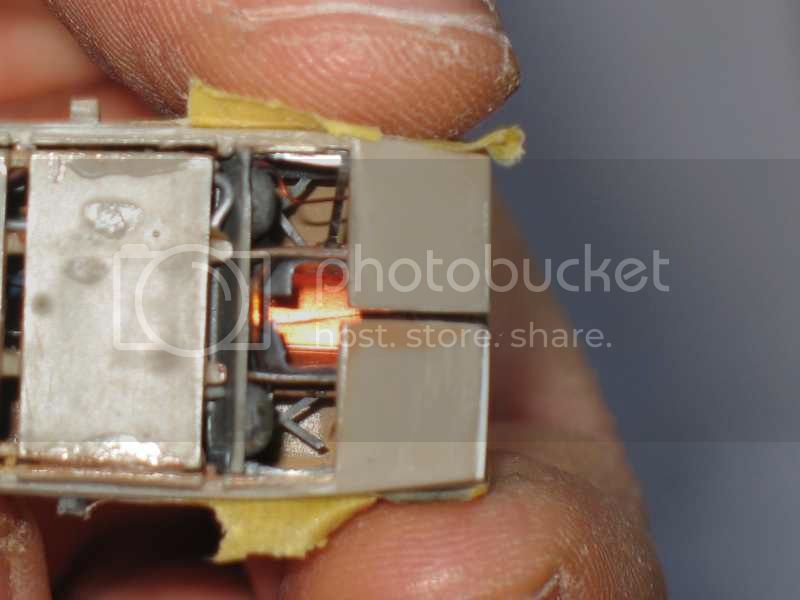
glued together :
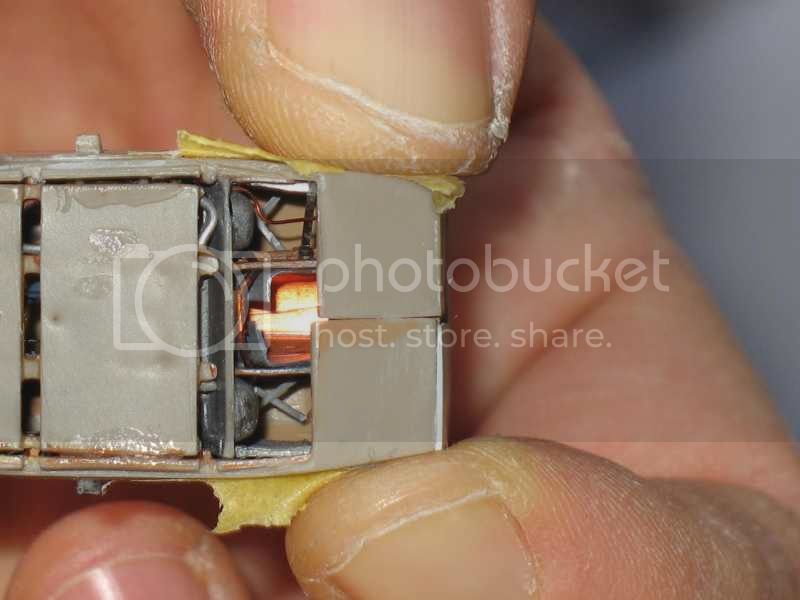
with the underside of the airframe and both side not glued:
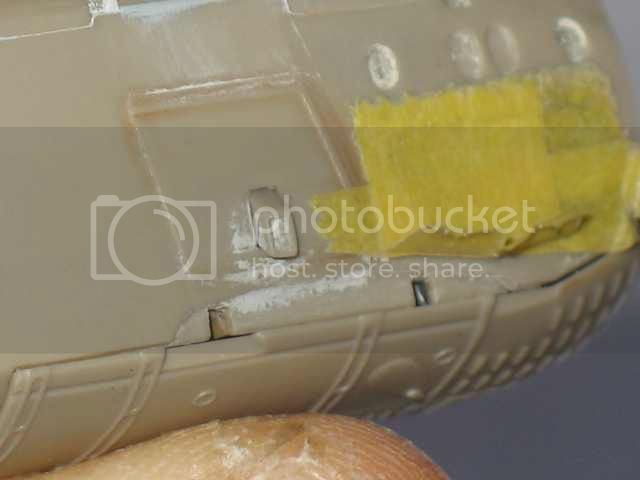
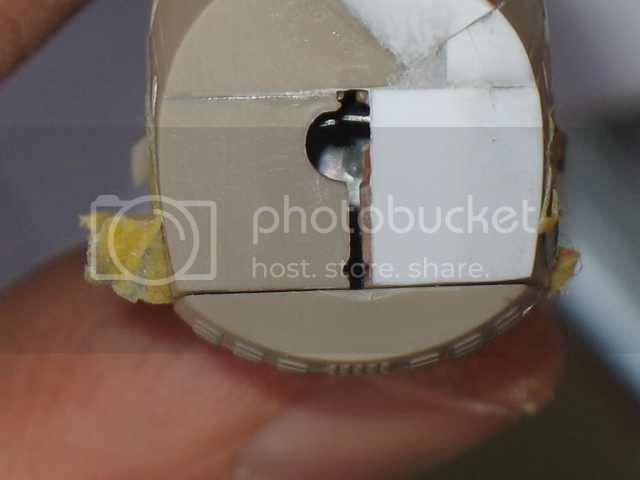
You can see the underside "fits well enough" (is ok) when right and left side are not glued. It's a BIG design flaw ?
A+
Quoted Text
1. something inside was too wide
2. or a design flaw (shortcoming)?
I did not glue together both sides of the airframe to be able to adapt them to the capot and to the the underside of the airframe:
unglued :
glued together :
with the underside of the airframe and both side not glued:
You can see the underside "fits well enough" (is ok) when right and left side are not glued. It's a BIG design flaw ?
A+
thegirl

Joined: January 19, 2008
KitMaker: 6,743 posts
AeroScale: 6,151 posts
Posted: Friday, March 20, 2009 - 01:17 AM UTC
Wow that is a nasty design flaw ! it almost seems that Eduard rushed to get this kit out .
I have the dual combo in 72 scale and the moldings are the same now I woundering if that has the same short comings as well .
Louis you have show us expectional skills and my hat is of to you sir , it would seem that the floor is to wide for the fuselage and needs to sanded down as well as the fire wall .
to get a tight fit . I'm going to have to unpack this kit and have a closer look at it . I have made notes from your experience with this build and look forward to more .
Louis
Joined: May 21, 2006
KitMaker: 472 posts
AeroScale: 471 posts
Posted: Saturday, March 21, 2009 - 10:39 AM UTC
Thank you Terri.
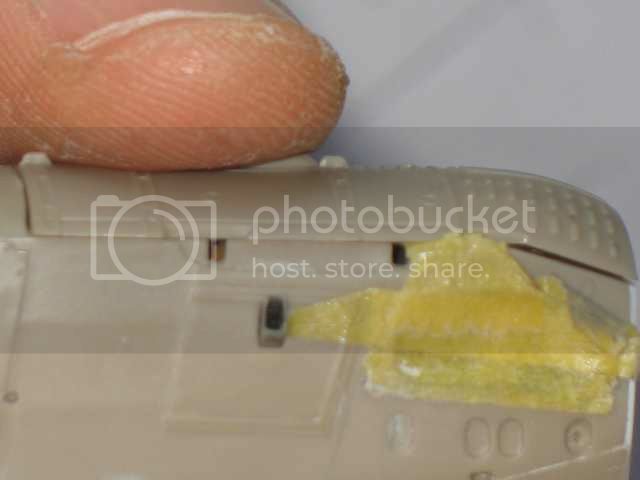
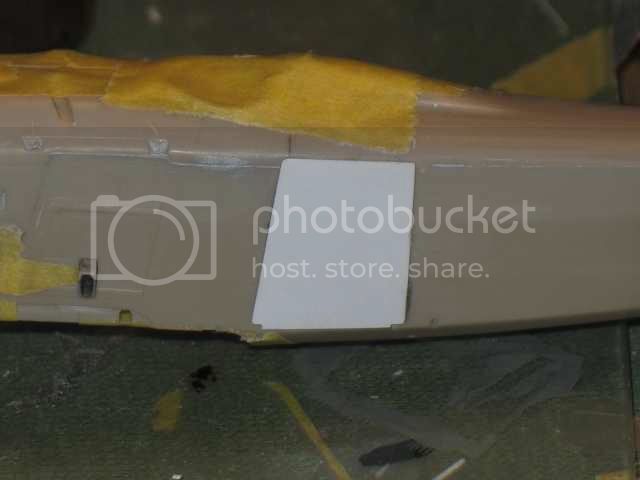
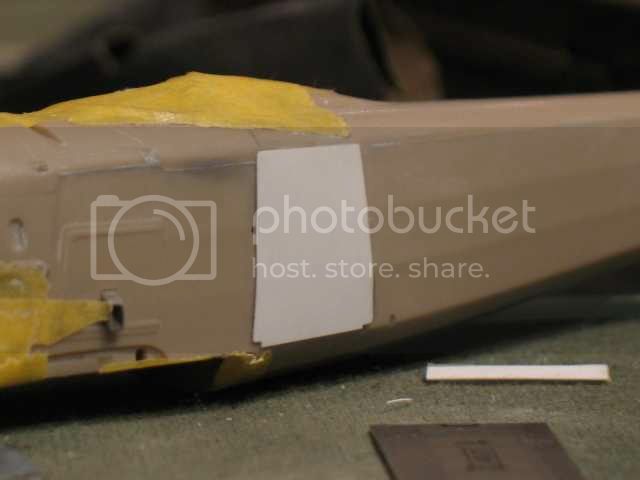
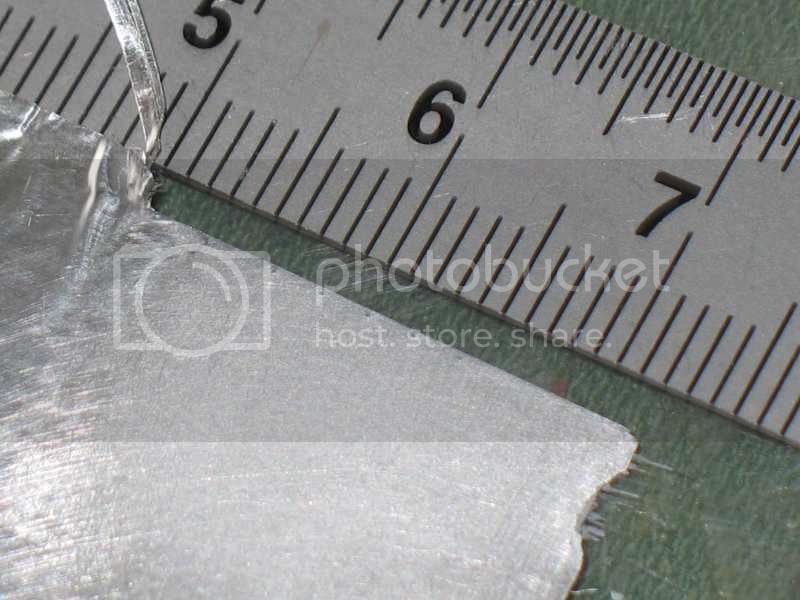
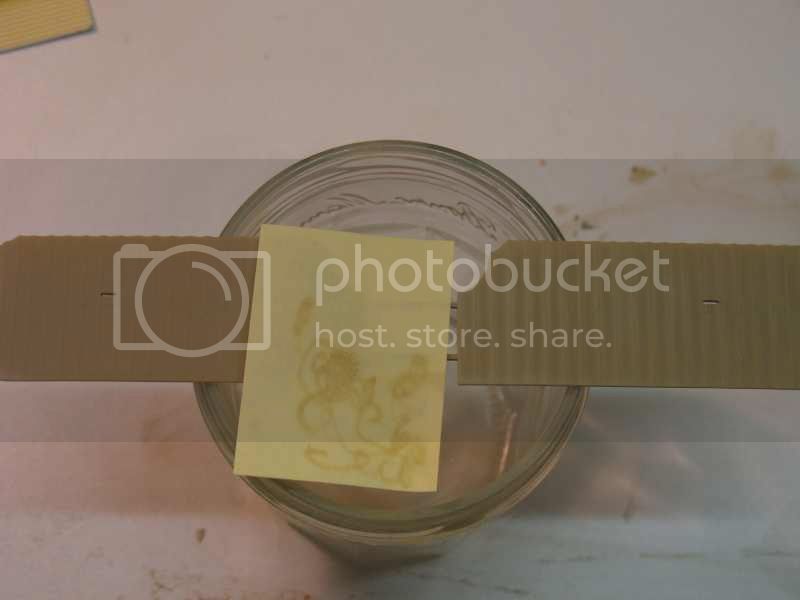
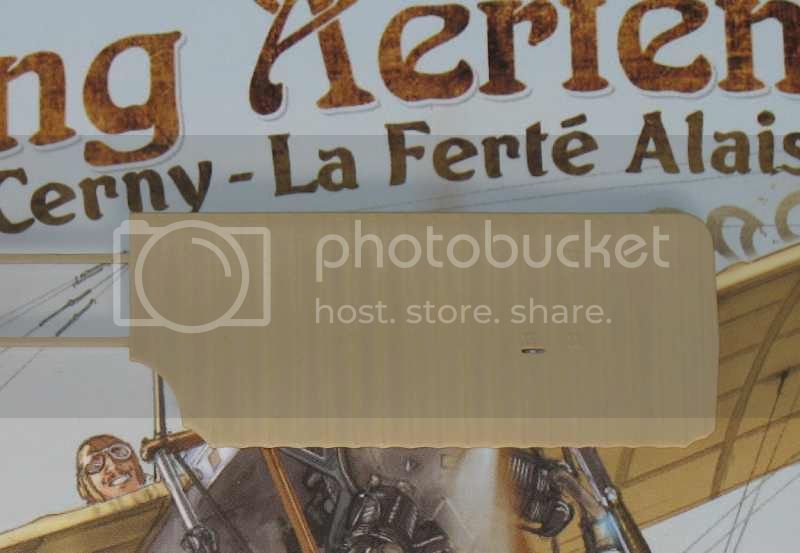
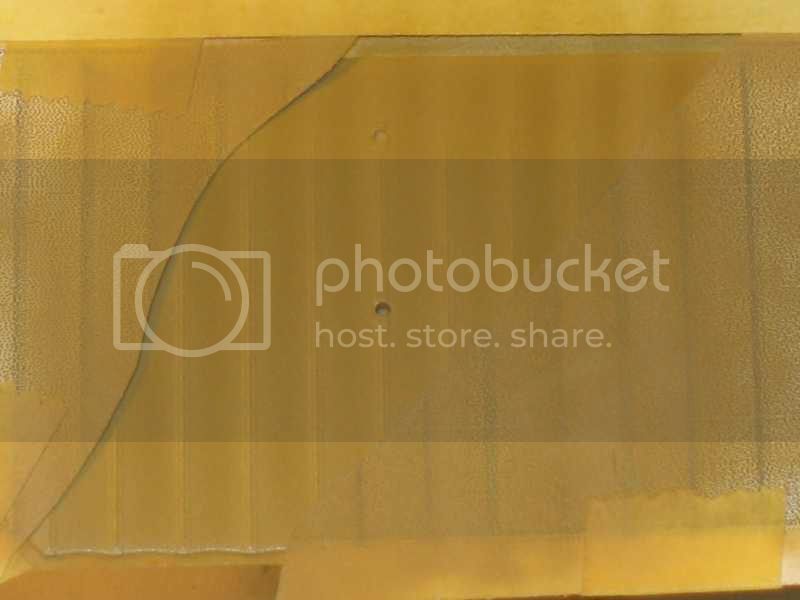
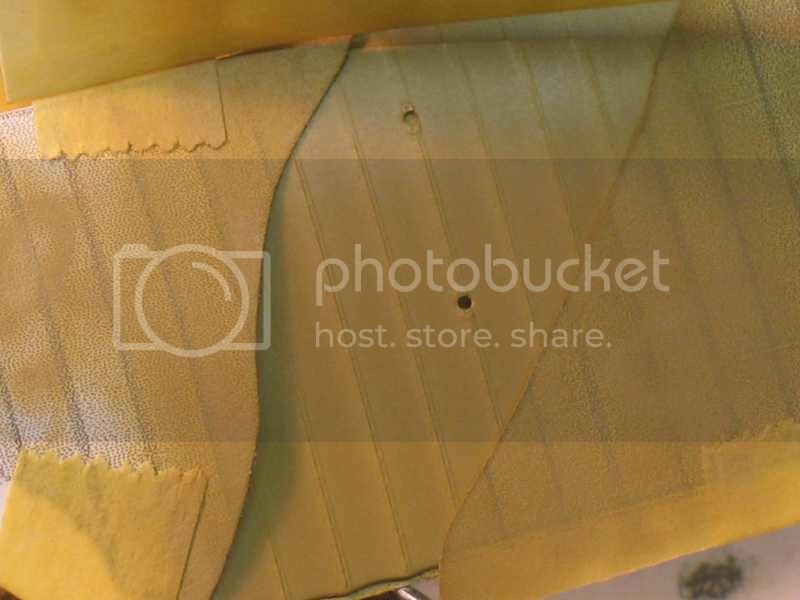
I did again the plate:
I have blacken it with a pencil and put over a piece of scotch tape to take a print.
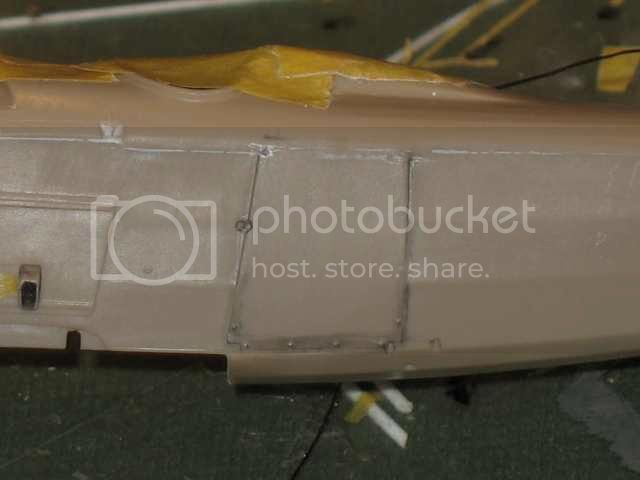
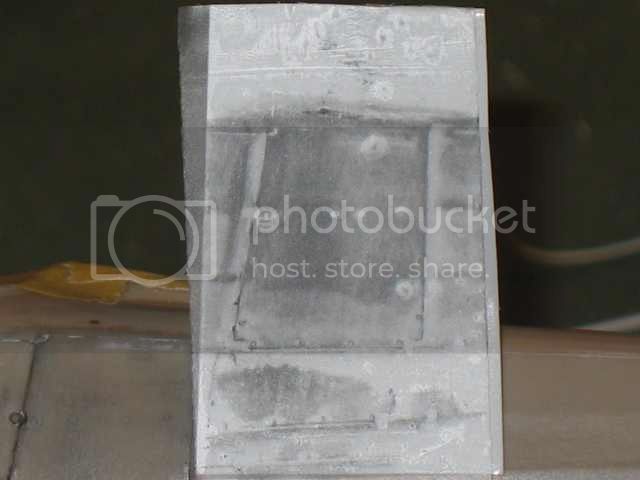
I glued it on a plastic leaf and cut the new plate.
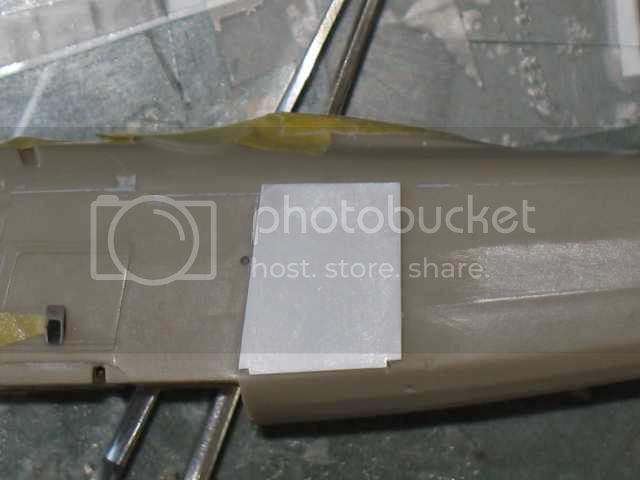
The plane's plate is sanded a little.
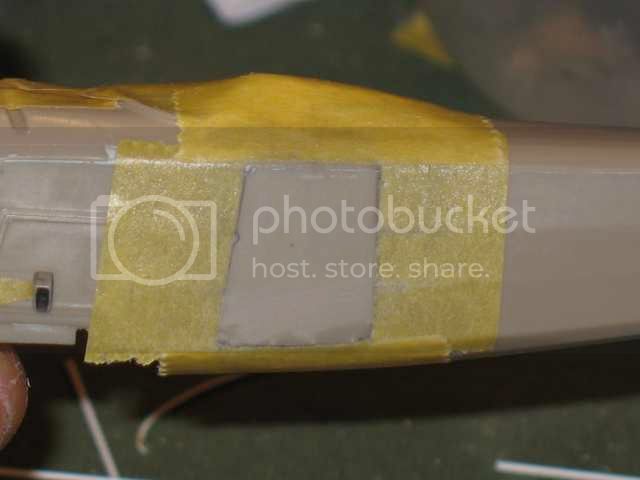
And the new plate glued. The scotch tape allows to set it up without making a mistake.
A+
I did again the plate:
I have blacken it with a pencil and put over a piece of scotch tape to take a print.
I glued it on a plastic leaf and cut the new plate.
The plane's plate is sanded a little.
And the new plate glued. The scotch tape allows to set it up without making a mistake.
A+
thegirl
Joined: January 19, 2008
KitMaker: 6,743 posts
AeroScale: 6,151 posts
Posted: Saturday, March 21, 2009 - 11:03 AM UTC
very nice recovery Louis . I was able to dig out mt kit and do some test fitting and yes nothing lines up on the left side . I have nade notes and placed them in the box for in the future . Of course now I'm waiting to see the lower wing and belly pan in place . Didn't fit to well on my . This is like building a limited run kit with all the bell and whistles of fit issues .
What are you using for your refs ?
What are you using for your refs ?
Louis
Joined: May 21, 2006
KitMaker: 472 posts
AeroScale: 471 posts
Posted: Saturday, March 21, 2009 - 11:41 AM UTC
I do not dare to imagine building your spad with all that.
If you need I have a french article ("wingmaster magazine") about 1/72 spad building.
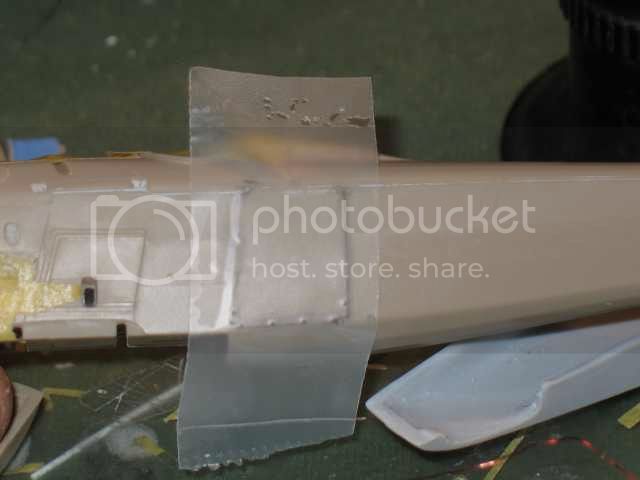
First try with "metallic scotch tape":
what is it "refs"? is it "book"?
a+
If you need I have a french article ("wingmaster magazine") about 1/72 spad building.
First try with "metallic scotch tape":
what is it "refs"? is it "book"?
a+
thegirl
Joined: January 19, 2008
KitMaker: 6,743 posts
AeroScale: 6,151 posts
Posted: Saturday, March 21, 2009 - 12:13 PM UTC
Yes louis ( refs ) means what books our articles you use for the build .
Nice trick with the tape , I was not aware that you can get in metallic .
Nice trick with the tape , I was not aware that you can get in metallic .
JackFlash
Joined: January 25, 2004
KitMaker: 11,669 posts
AeroScale: 11,011 posts
Posted: Saturday, March 21, 2009 - 01:55 PM UTC
Very nice replacement method.
Louis
Joined: May 21, 2006
KitMaker: 472 posts
AeroScale: 471 posts
Posted: Saturday, March 21, 2009 - 06:38 PM UTC
Thank you.
I'm using windsock N°32 and this site where you can find all you need (200 photo?):
http://memorial.flight.free.fr/index.html
A+
I'm using windsock N°32 and this site where you can find all you need (200 photo?):
http://memorial.flight.free.fr/index.html
A+
thegirl
Joined: January 19, 2008
KitMaker: 6,743 posts
AeroScale: 6,151 posts
Posted: Monday, March 23, 2009 - 01:26 AM UTC
Thanks for the links Louis . I have the windsock but you can never have enough info when doing a project . 
Louis
Joined: May 21, 2006
KitMaker: 472 posts
AeroScale: 471 posts
Posted: Tuesday, March 24, 2009 - 11:19 AM UTC
Hi,
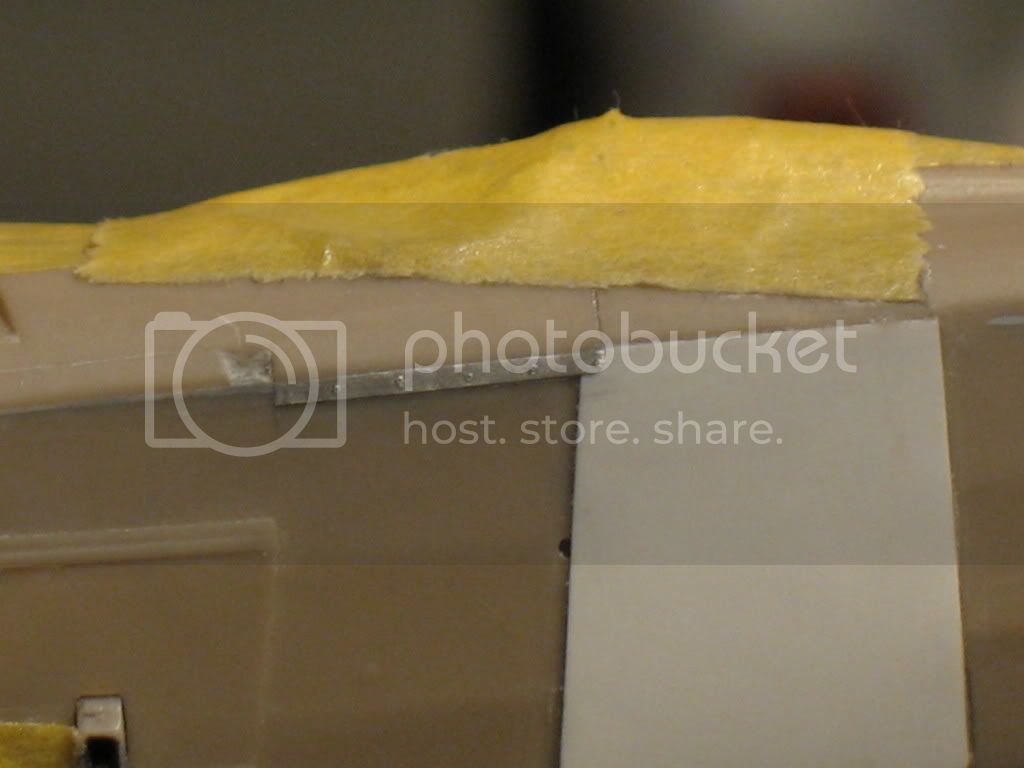
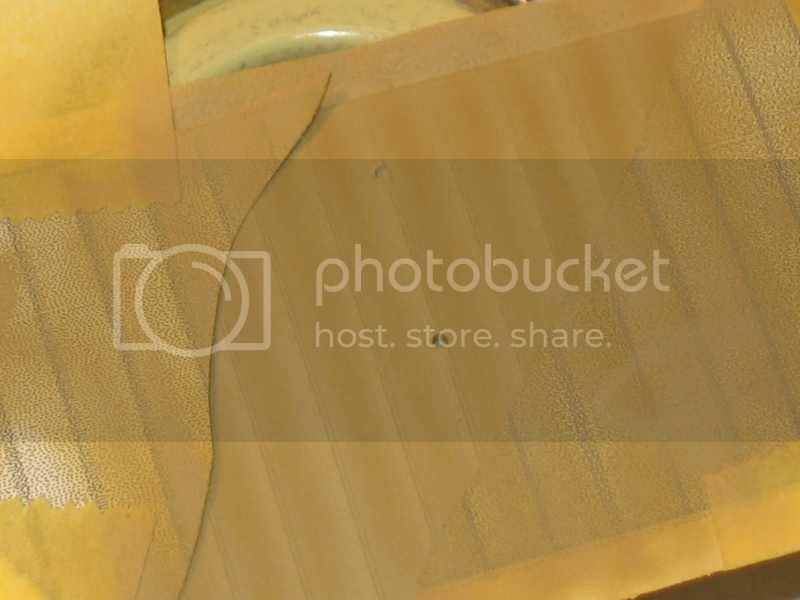
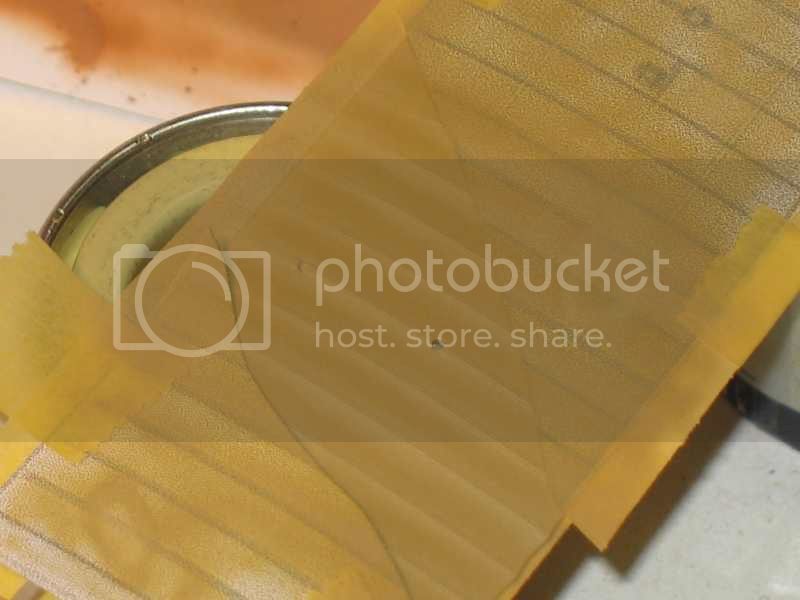
the first plate was destroyed when I wanted to fabricate roundness. I did it again four times, glued together four times and sanded glue four times...
Finally I glued it by using plastic band to fabricate tabs (in black "dymo") as wedge.
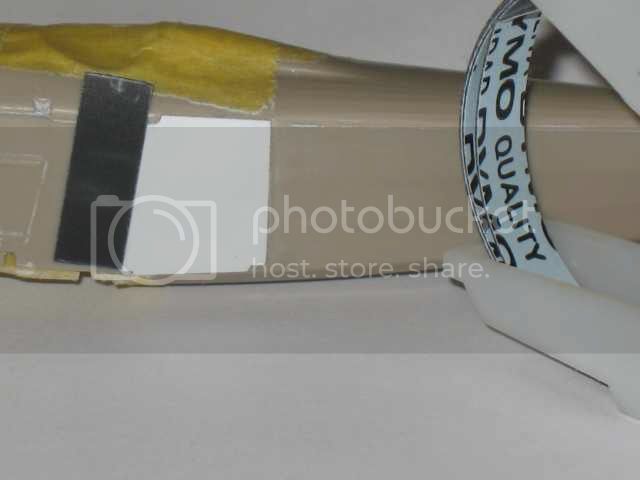
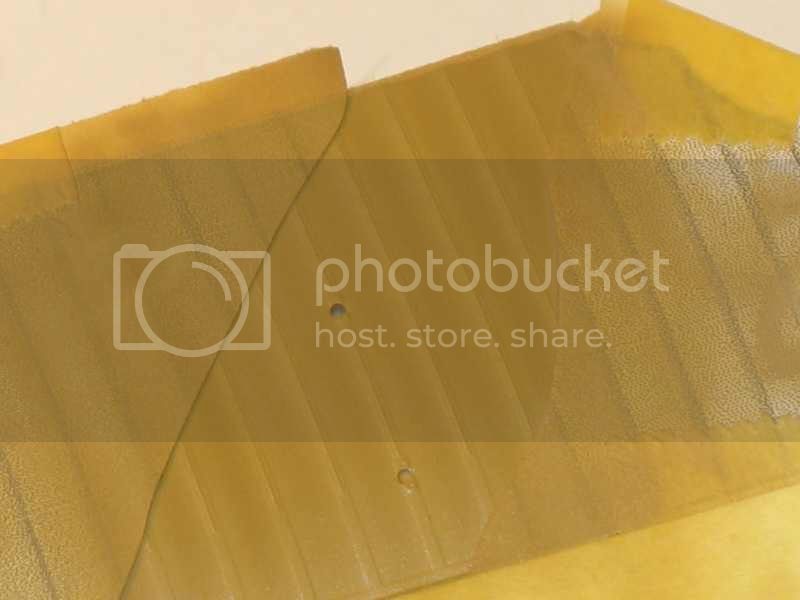
The sheeting is done again and rivets in the hood are fabricated with a pin and scotch tape for tabs.
The metallic scotch tape must be sanded to become very fine before being cut. Riveting is made before cutting.
A+
the first plate was destroyed when I wanted to fabricate roundness. I did it again four times, glued together four times and sanded glue four times...
Finally I glued it by using plastic band to fabricate tabs (in black "dymo") as wedge.
The sheeting is done again and rivets in the hood are fabricated with a pin and scotch tape for tabs.
The metallic scotch tape must be sanded to become very fine before being cut. Riveting is made before cutting.
A+
Louis
Joined: May 21, 2006
KitMaker: 472 posts
AeroScale: 471 posts
Posted: Thursday, March 26, 2009 - 07:52 PM UTC
Hi,
I would like to paint wings inferior. She will be an American spad. I read that underside was grey, or without painting nobody seem to know (as always).
I read the article on the 5 French tones:
http://www.theaerodrome.com/forum/camouflage-markings/38912-french-5-color-chips-methune-handbook.html
What is about MisterKit paint ??
A+
thegirl
Joined: January 19, 2008
KitMaker: 6,743 posts
AeroScale: 6,151 posts
Posted: Friday, March 27, 2009 - 12:50 AM UTC
Hi Louis . from what I have read in the wind sockdata files and other refs . It depends on with the manufacture who built the aircraft . The two colours used where either a light grey or a pale yellow . In another ref I have ( Medal of Honor vol 1 Aviators of World War One by Alan E .Durkota ) The under side of American spads where painted ecru ( light yellow ) This is not clear dope line shade , but it is close . Stephen will have more accurate info on this ( He's are guru here and watches over us . )
I have not used Mrkits paints before , they are acrylic paints and are designed for the WW1 modeler . Mike does have a web site ( misterkit usa . com and he has colour chips of these paints . ) Sephen is doing a review of this paints , but I don't know if he has finished it yet . This is still all new to me for I'm learning as well . I do hope that I was able to help in some way and not miss lead you into thinking my answer(s) are corroet ,, I have been know to be wrong before and get things mix up . But I do try !
I have not used Mrkits paints before , they are acrylic paints and are designed for the WW1 modeler . Mike does have a web site ( misterkit usa . com and he has colour chips of these paints . ) Sephen is doing a review of this paints , but I don't know if he has finished it yet . This is still all new to me for I'm learning as well . I do hope that I was able to help in some way and not miss lead you into thinking my answer(s) are corroet ,, I have been know to be wrong before and get things mix up .
But I do try !Louis
Joined: May 21, 2006
KitMaker: 472 posts
AeroScale: 471 posts
Posted: Saturday, March 28, 2009 - 05:06 AM UTC
Hi Terri,
you try very well !!!
Thank you for your help.
Here you can see different colours for the same federal standart reference:
french-5-color
The colours depend of the mark....
I believe I would paint it by using of painting humbrol and by blending them. I'm using this site:
conversion table
A+
you try very well !!!
Thank you for your help.
Here you can see different colours for the same federal standart reference:
french-5-color
The colours depend of the mark....
I believe I would paint it by using of painting humbrol and by blending them. I'm using this site:
conversion table
A+
Removed by original poster on 03/29/09 - 11:45:33 (GMT).
Louis
Joined: May 21, 2006
KitMaker: 472 posts
AeroScale: 471 posts
Posted: Sunday, March 29, 2009 - 12:47 AM UTC
I'm finding Stephen's work about MisterKit WW1 paint:
Here:
MisterKitpaint
Thank you Stephen!
And more here:
http://www.wwi-models.org/misc/Colors/French/humbrol.html
Here:
MisterKitpaint
Thank you Stephen!
And more here:
http://www.wwi-models.org/misc/Colors/French/humbrol.html
thegirl
Joined: January 19, 2008
KitMaker: 6,743 posts
AeroScale: 6,151 posts
Posted: Sunday, March 29, 2009 - 01:21 AM UTC
Thanks Louis for the support . For the year on which I've been on this site I have learn a few things , but there is alot of info out there and for me it can be over whelming to learn it all . It's also grea t when I do get the info mixed up on the help from you guys on correcting me , not giving me a hard time . Glad you where able to find what you needed . and thank for the links .
Louis
Joined: May 21, 2006
KitMaker: 472 posts
AeroScale: 471 posts
Posted: Saturday, April 04, 2009 - 11:35 AM UTC
Thank you Terri.
I begin to paint the underside yellow....but witch one??? "clear beige" , "yellow brown", "yellow dirty" , yellow ???
You find a lot of reference: FS 13596 FS 33564 FS33446 FS33522 FS 36415 FS 30318
And more here:
http://www.wwi-models.org/misc/Colors/French/humbrol.html
So I chose the one who pleased me most....
Hu 72 X 1 + HU 94 X1
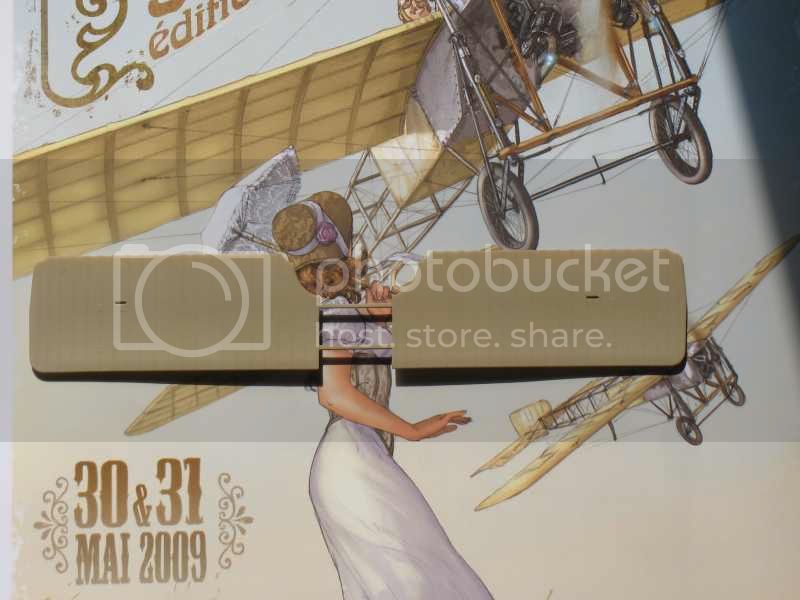
I clarified lines representing the structure of the wing (on the right) with the same color + hu74+ hu34 and a lot of essence to dilute ("in raised hand ", no scotch tape):

And on more with same color + Hu 34 (white):
the two wings:
To finish, I shade off the different colors with color more clear Hu 72+ hu 94+ hu 74 + hu34 and very dilued. I'm painting all the wing.
I should touch up painting a bit once she will be dry.
My photo are bad, the differences between colors are less marked into reality.
A+
Please: how can I change my "avatar"?
I begin to paint the underside yellow....but witch one??? "clear beige" , "yellow brown", "yellow dirty" , yellow ???
You find a lot of reference: FS 13596 FS 33564 FS33446 FS33522 FS 36415 FS 30318
And more here:
http://www.wwi-models.org/misc/Colors/French/humbrol.html
So I chose the one who pleased me most....
Hu 72 X 1 + HU 94 X1
I clarified lines representing the structure of the wing (on the right) with the same color + hu74+ hu34 and a lot of essence to dilute ("in raised hand ", no scotch tape):
And on more with same color + Hu 34 (white):
the two wings:
To finish, I shade off the different colors with color more clear Hu 72+ hu 94+ hu 74 + hu34 and very dilued. I'm painting all the wing.
I should touch up painting a bit once she will be dry.
My photo are bad, the differences between colors are less marked into reality.
A+
Please: how can I change my "avatar"?
Louis
Joined: May 21, 2006
KitMaker: 472 posts
AeroScale: 471 posts
Posted: Wednesday, April 08, 2009 - 10:45 AM UTC
Hi,
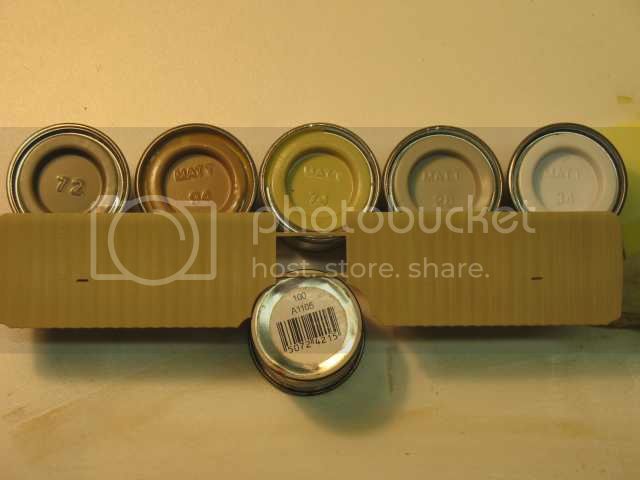
Beige colour is FS 30266, 3x Hu 81 + 2x Hu26 :
This colour is clarified with white to make the bottom 3x Hu 81 + 2x Hu26 + 3x34 (all this part is painted with this one).
The traces of structures are "sunny" with the same shade with more white:

A darker colour than basic shade is applied between nervures.
3x Hu 81 + 2x Hu26 + 1x Hu186:
All the wing is painted with diluted first color 3x Hu 81 + 2x Hu26 and "shading off " (??) the different colours :
It's very difficult to make a photo who show that...shade "change" with light.
A+
Beige colour is FS 30266, 3x Hu 81 + 2x Hu26 :
This colour is clarified with white to make the bottom 3x Hu 81 + 2x Hu26 + 3x34 (all this part is painted with this one).
The traces of structures are "sunny" with the same shade with more white:
A darker colour than basic shade is applied between nervures.
3x Hu 81 + 2x Hu26 + 1x Hu186:
All the wing is painted with diluted first color 3x Hu 81 + 2x Hu26 and "shading off " (??) the different colours :
It's very difficult to make a photo who show that...shade "change" with light.
A+

Merlin

#017


Joined: June 11, 2003
KitMaker: 17,582 posts
AeroScale: 12,795 posts

Posted: Wednesday, April 08, 2009 - 10:52 AM UTC
Quoted Text
It's very difficult to make a photo who show that...shade "change" with light.
Hi Louis
Don't worry - the subtle highlighting on the ribs shows up beautifully.
All the best
Rowan


thegirl
Joined: January 19, 2008
KitMaker: 6,743 posts
AeroScale: 6,151 posts
Posted: Thursday, April 09, 2009 - 03:26 AM UTC
Merlin is right , shows up very well , and most impressive ! 
Louis
Joined: May 21, 2006
KitMaker: 472 posts
AeroScale: 471 posts
Posted: Monday, April 13, 2009 - 08:50 AM UTC
Hi,
thank you girls and guys ( Can I say that???)
The wing is painted:
Black: is black....
Light green: Hu 90 + 2x Hu 102
Dark green:6x Hu116 + 6x Hu117+ 1x Hu163
Dark brown: 2x Hu29 + 1x Hu60 + 1x Hu33
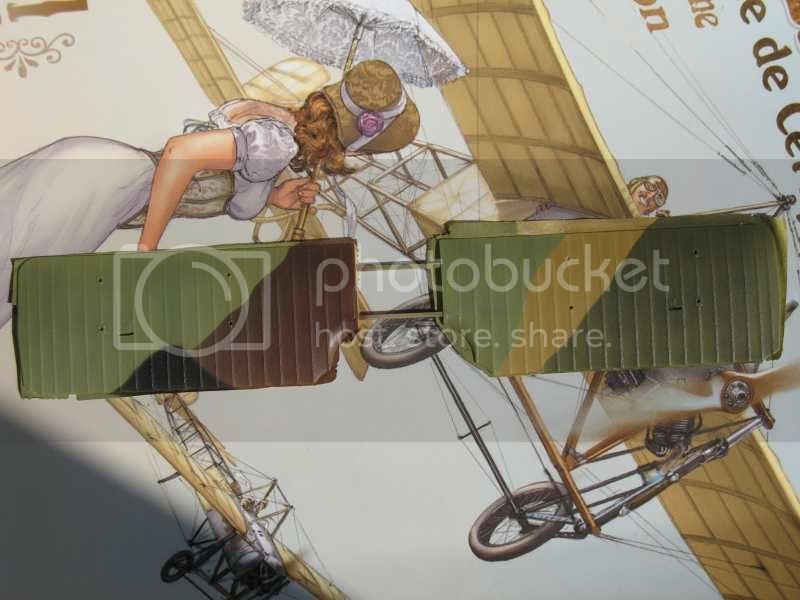
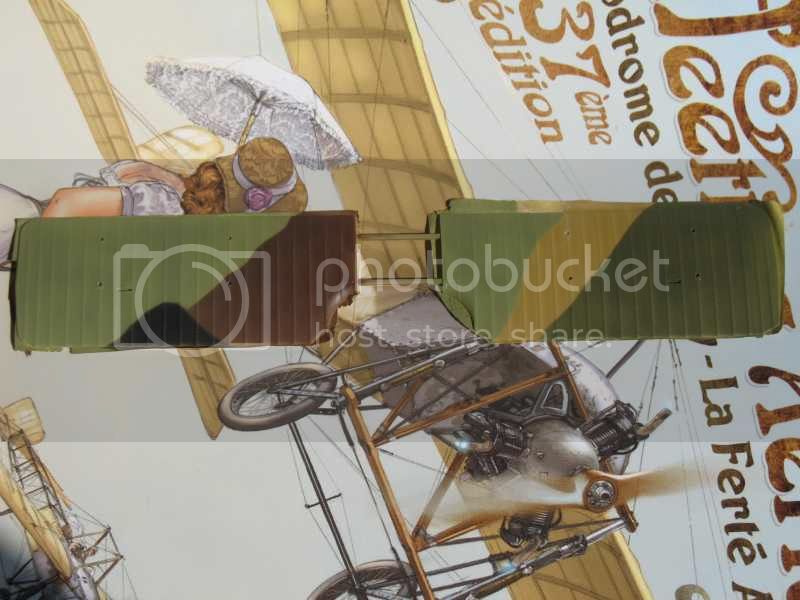
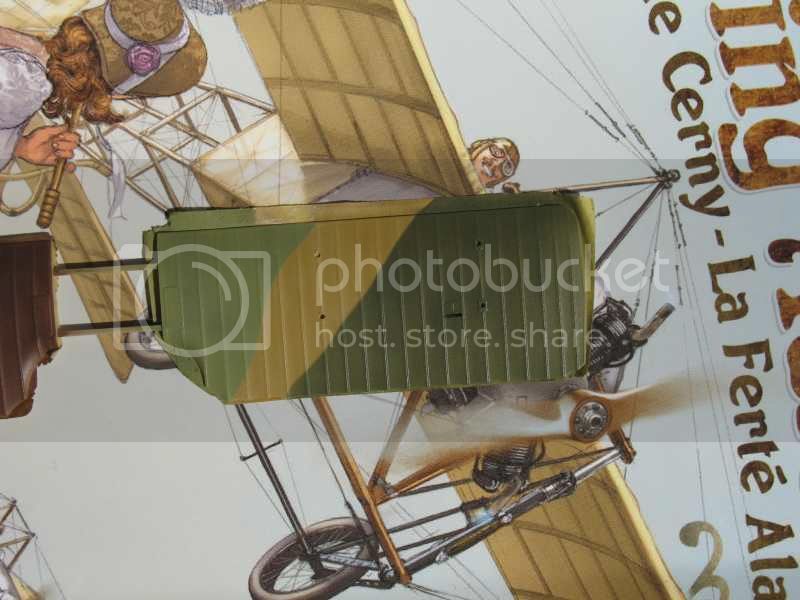
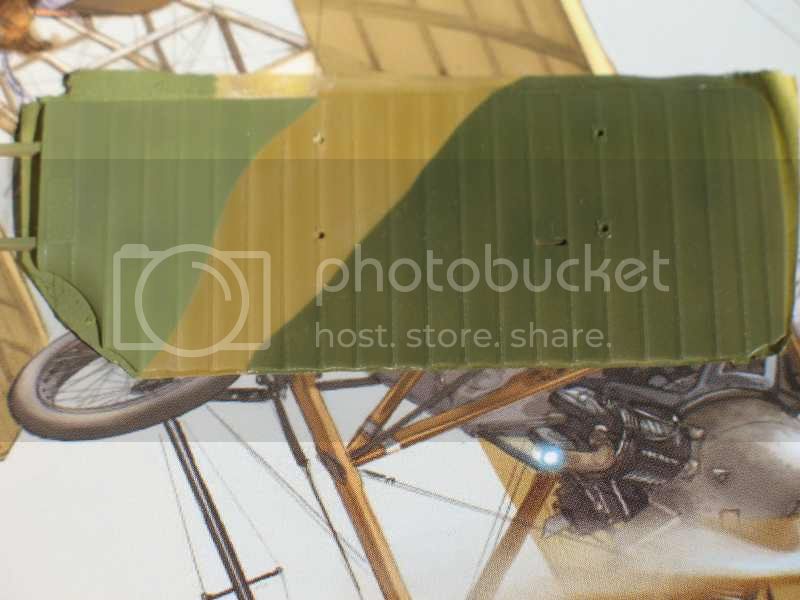
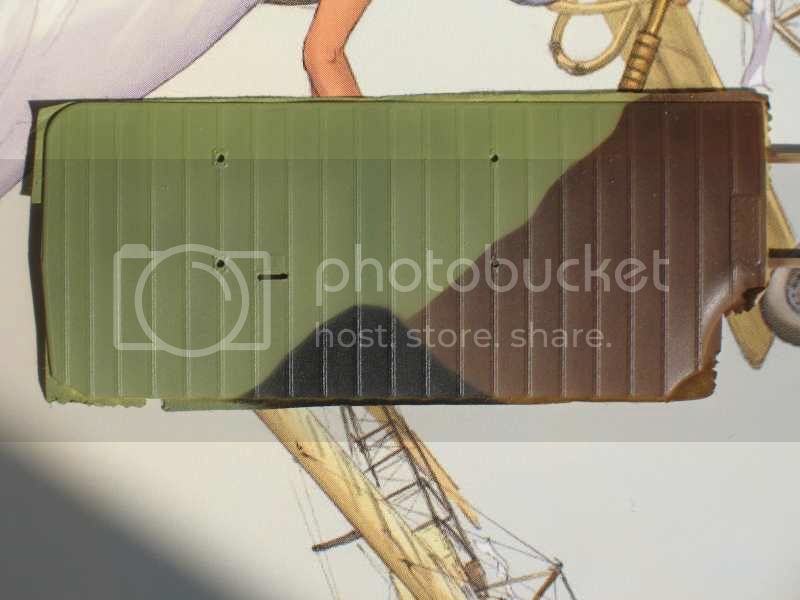
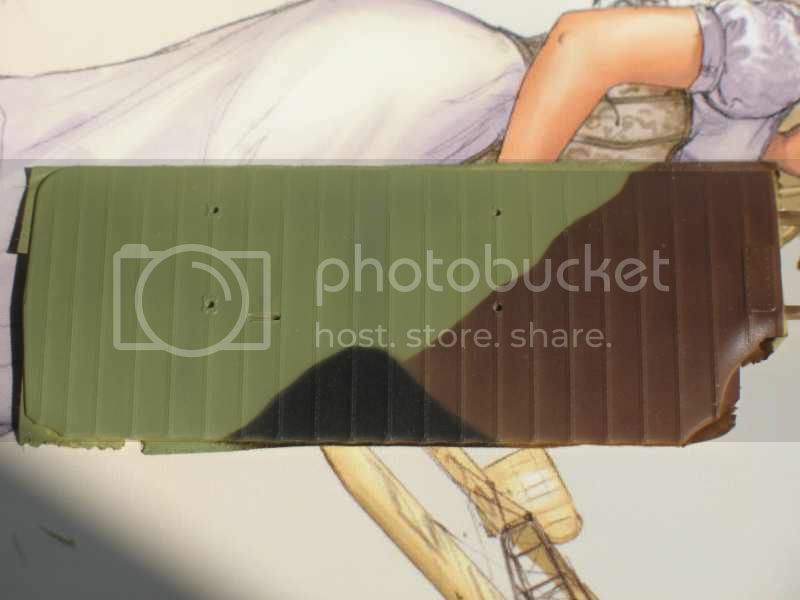
Dark green is strange...
Light green too ??
A+
thank you girls and guys ( Can I say that???)
The wing is painted:
Black: is black....
Light green: Hu 90 + 2x Hu 102
Dark green:6x Hu116 + 6x Hu117+ 1x Hu163
Dark brown: 2x Hu29 + 1x Hu60 + 1x Hu33
Dark green is strange...
Light green too ??
A+
guitarlute101
Joined: December 18, 2006
KitMaker: 1,121 posts
AeroScale: 1,063 posts
Posted: Monday, April 13, 2009 - 09:18 AM UTC
Very nice job, Louis.
Mark
JackFlash
Joined: January 25, 2004
KitMaker: 11,669 posts
AeroScale: 11,011 posts
Posted: Tuesday, April 14, 2009 - 05:39 AM UTC
Excellent work Louis. My sincere thanks for showing the work here. Model On please!
 |

WEB HOSTING BY


Copyright ©2021 AeroScale and Kitmaker Network, a subsidiary of Silver Star Enterprises
All Rights Reserved. Please read our Conditions of Use and Privacy Policy.
All Rights Reserved. Please read our Conditions of Use and Privacy Policy.