_GOTOBOTTOM
World War II
Discuss WWII and the era directly before and after the war from 1935-1949.
Hosted by Rowan Baylis
Photo Dev Unit 1940
robot_
_VISITCOMMUNITY
United Kingdom
Joined: March 08, 2009
KitMaker: 719 posts
AeroScale: 691 posts
Posted: Sunday, March 08, 2009 - 02:07 AM UTC
Hello,

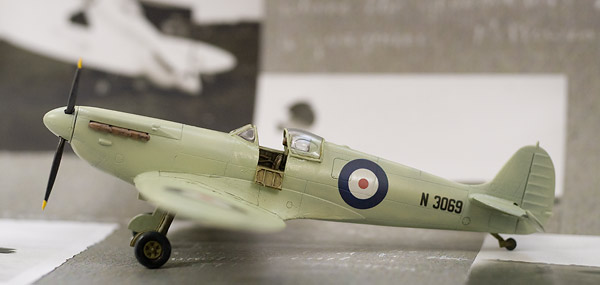
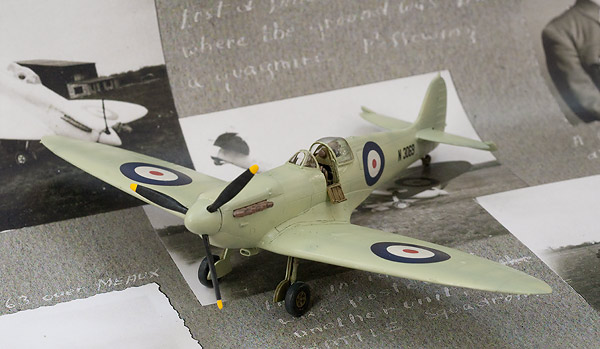
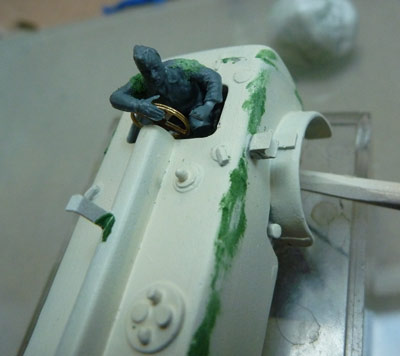
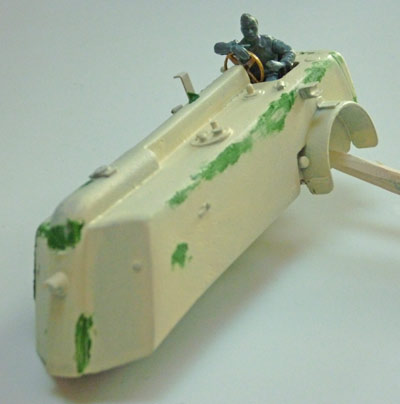
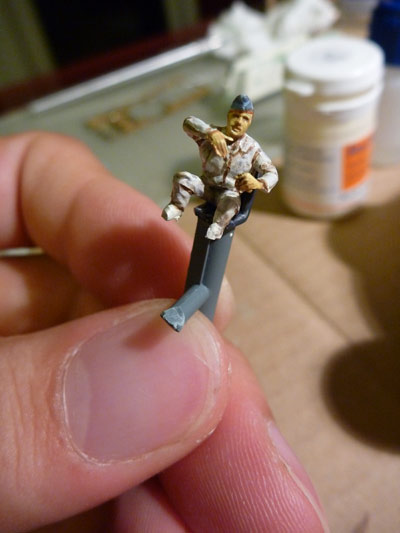
I have just started building again, after a 10 year break. I am part way through building a series of kits to represent some of the aircraft used by the PDU in late February 1940. I am building Spitfire N3069 (a PR Mk.Ib at this time), using the Tamiya Mk.Ia kit as a basis, with Aires cockpit, and a vac-formed canopy with teardrops. I have made some major mistakes already- the wheel wells are the wrong colour, the cockpit detail is probably wrong (there is too much stuff on the walls of the aires cockpit for a MkI I think), when installing the cockpit, I glued the sides of the fuselage together under tension. Only afterwards did I realise how deformed the wing roots had become. I had to butcher them badly to get the wings to go on 
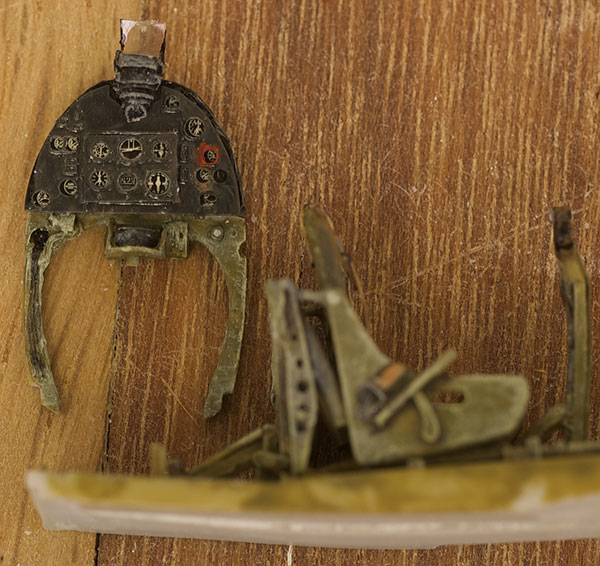
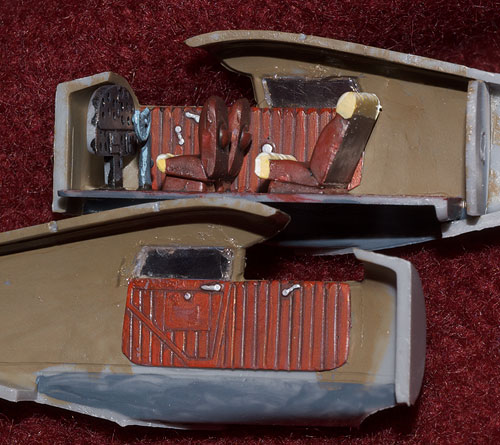
I spent hours scraping the side walls of the plastic cockpit and sanding the resin to avoid this...


The most major error was that I used an old diagram of the camera mounts in the wings, and it showed a small teardrop blister around the lenses. After I made these and added them, I saw clear photos of a PR Ib with the glass windows for the lenses flush with the underside of the wing...


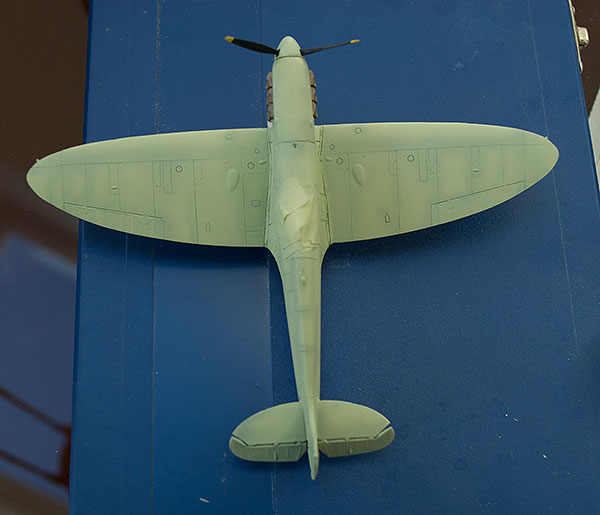
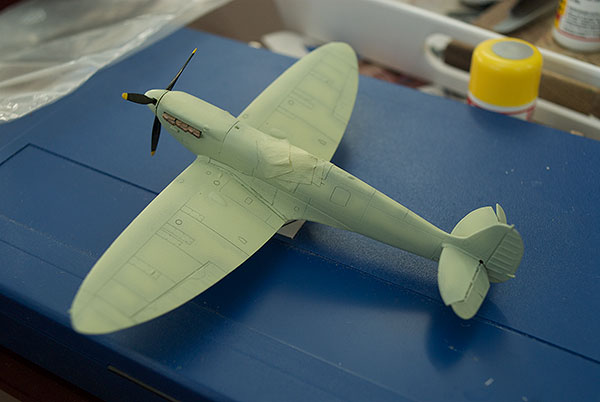
This was my first attempt at using an airbrush. I am using Xtracryllix paints. I undercoated the plane in white, and pre-shaded with black, then sprayed over in camotint (Sky lightened quite a bit with white).

Anyway, the other planes I will be making are:

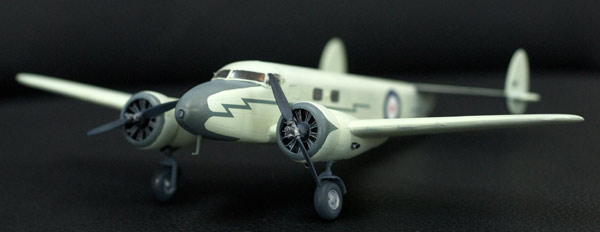
Hudson N7334 (shot down by friendly fire on 3rd March), which has a interesting camouflage scheme:


I'll be using the MPM Hudson MkI kit. The interior on this kit looks really nice. It can also be made into different aircraft (e.g. Lockheed 14, later Hudsons). There is a model of an aircraft in this camo sheme here: http://passionmaquettes47.free.fr/MAQUETTE...DSON/index.html

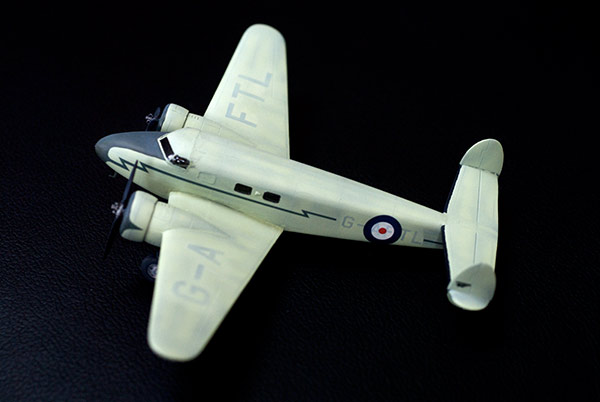
I've started on Cotton's famous Lockheed 12A, G-AFTL, using Special Hobby's version, which seems quite nice, but is a little harder to assemble than a mainstream kit (vac-form canopy, no alignment pegs). Here is a great looking build of this model:
http://sturm.szm.sk/kod/stranky/l12_m.html

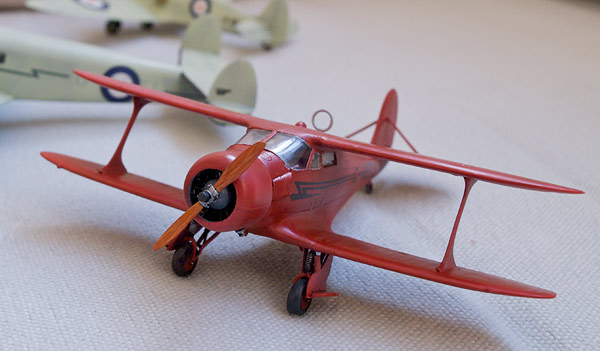
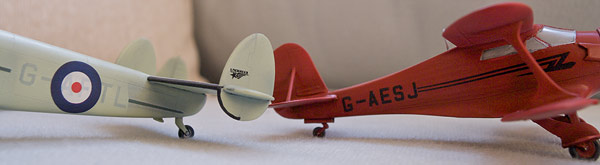
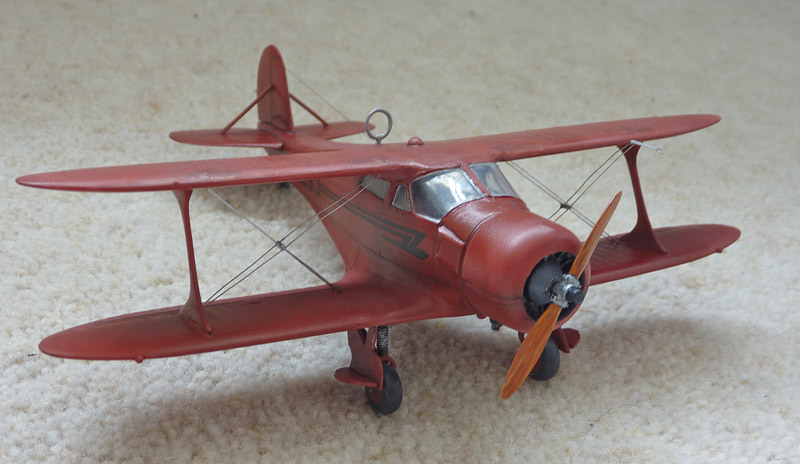
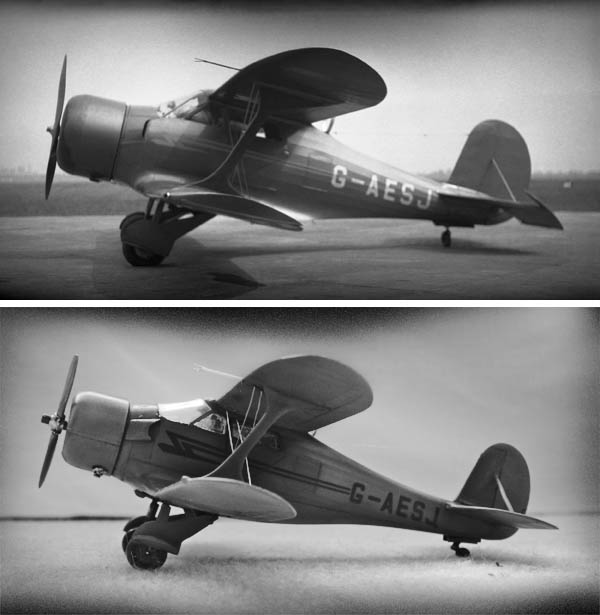
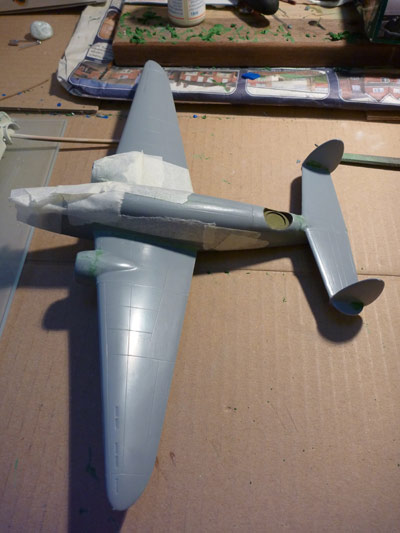
Then finally, I am building a Beechcraft Staggerwing 17, using the Sword D-17S model (see this review: http://modelingmadness.com/reviews/allies/us/hammstagg.htm ). The plane I am making is G-AESJ, a C-17R, which has a shorter fuselage, steeper windscreen, different engine and different tail to the model. But it is too much work to correct these problems, unfortunately! This aircraft carried an SIS/MI6 photographer (who usually took passport photos for forging papers for agents) to photograph the German navy at Wilhelmshaven on Septemember 2nd 1939, on the eve of the declaration of war. It was also used as a general communications aircraft by the Unit.

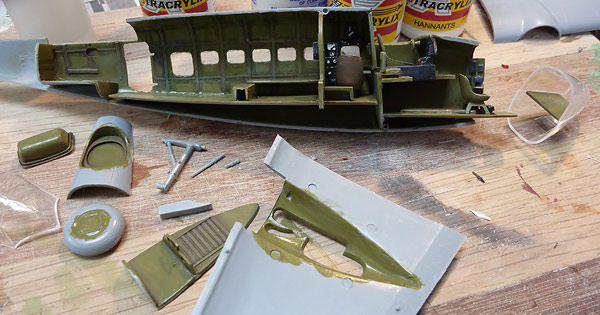
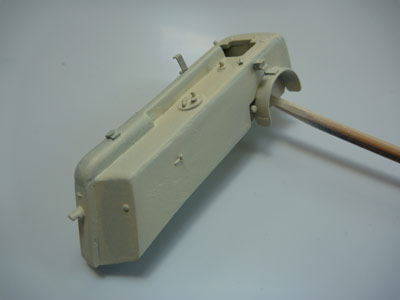
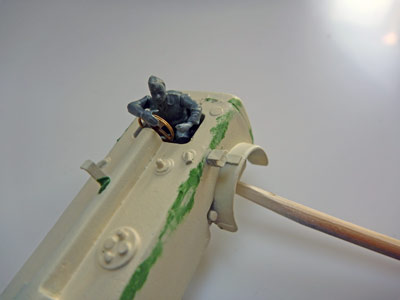
Here are some shots of my model's interior (I now know the wheel is on upside-down!)


I am having a nightmare with choosing a suitable glue for clear parts (as seen above). I have just bought some Krystal Klear, so hopefully this will solve my problems.

Thanks for reading this far!
JimMrr
_VISITCOMMUNITY
Ontario, Canada
Joined: January 03, 2007
KitMaker: 1,505 posts
AeroScale: 595 posts
Posted: Tuesday, March 10, 2009 - 01:57 AM UTC
I think that your finish on the Spit cockpit is rather excellent. You have grasped the foundation of how to really show off the detail in a miniature. All you need is to practice a bit!EXCELLENT work
robot_
_VISITCOMMUNITY
United Kingdom
Joined: March 08, 2009
KitMaker: 719 posts
AeroScale: 691 posts
Posted: Tuesday, March 10, 2009 - 04:51 AM UTC

Quoted Text

I think that your finish on the Spit cockpit is rather excellent. You have grasped the foundation of how to really show off the detail in a miniature. All you need is to practice a bit!EXCELLENT work


Thanks for the encouragement Jim. I gets a bit depressing seeing some of the flawless builds on this site- and the close-up photos make my handiwork look very sloppy!
JimMrr
_VISITCOMMUNITY
Ontario, Canada
Joined: January 03, 2007
KitMaker: 1,505 posts
AeroScale: 595 posts
Posted: Tuesday, March 10, 2009 - 05:08 AM UTC
I agree with you that sometimes the pendulum swings toward the elitist here, and I think sometimes people forget that we all start somewhere. Im being very honest when I say that I see all that you need in those pics of your cockpit....just practice and tighten up your paintwork and youll be a real contender.
robot_
_VISITCOMMUNITY
United Kingdom
Joined: March 08, 2009
KitMaker: 719 posts
AeroScale: 691 posts
Posted: Wednesday, March 25, 2009 - 05:35 AM UTC
Well, the Spitfire is nearing completion. All the decals were laser printed by me- my first time, so I was pleased. Also my first time using Micro Set + Sol.


I need to attach the pitot tube, give it another gloss coat, then weather it.

The Lockheed 12A's overall sky/comotint exterior has been painted, and the interior of the Hudson has been painted too.
JimMrr
_VISITCOMMUNITY
Ontario, Canada
Joined: January 03, 2007
KitMaker: 1,505 posts
AeroScale: 595 posts
Posted: Thursday, March 26, 2009 - 06:37 AM UTC
Very nice . Id love to get into printing my own decals. I find manufacturers to be questionable in terms of quality of things such as roundels and Hinemarus,etc..
robot_
_VISITCOMMUNITY
United Kingdom
Joined: March 08, 2009
KitMaker: 719 posts
AeroScale: 691 posts
Posted: Monday, March 30, 2009 - 09:35 PM UTC
One of the reasons I printed my own roundels was to achieve a transparent effect for the Lockheed 12A's fuselage roundels that were applied over the serial number. In a photograph of the aircraft after the unit had been taken on by the RAF, the aircraft's civilian registration is visible, but much lighter than in earlier photographs. In that photo you can see the serial in the white part of the roundel, an effect I think I have captured in the model- see the last photo below.


I have only just given a coat of matt varnish this morning. A little bit of work is needed around the side windows of the cockpit, but other than that I am quite pleased (there is a nightmare join between the vac-formed canopy and the top of the fuselage, but tried my best...).
JimMrr
_VISITCOMMUNITY
Ontario, Canada
Joined: January 03, 2007
KitMaker: 1,505 posts
AeroScale: 595 posts
Posted: Wednesday, April 01, 2009 - 05:12 AM UTC
Looks pretty good
robot_
_VISITCOMMUNITY
United Kingdom
Joined: March 08, 2009
KitMaker: 719 posts
AeroScale: 691 posts
Posted: Saturday, April 04, 2009 - 09:38 AM UTC
Thanks Jim for your continued support of my thread!

I have discovered another aircraft adapted by the No.2 Camouflage Unit/PDU in 1940- a Blenheim Mk.I (L1348). It is quite well documented that Cotton's team adapted two Mk.VI's to achieve higher speeds, and that these changes were applied to several fighter squadrons using the Mk.IV. Nowhere in the histories of the PR Units is this Mk.I mentioned- it turns up in a couple of Google Books searches in books on the Blenheim.

A photo of this unusual plane:
http://www.aviationarchive.org.uk/stories/getobjectstory.php?rnum=G1939

A side view is available from a Russian site (copied from Philip Moyes, Aircraft Profile 93, 1966)
http://base13.glasnet.ru/text/ap/blen-i/12.htm

I plan to make this aircraft from the MPM Blenheim Mk.I kit, with Aeroclub airscrews to represent the upgraded constant speed Rotols. The plane features a metal nose, which may be tricky to make, but I will try using the spare Lockheed 14 nose that comes in MPM's Hudson kit. It also has clipped wings (91cm shorter wingspan), and no turret. Also features Sky paint on the undersurface.
CReading
#001
_VISITCOMMUNITY
California, United States
Joined: February 09, 2002
KitMaker: 1,726 posts
AeroScale: 89 posts
Posted: Saturday, April 04, 2009 - 03:46 PM UTC
Hey, just stumbled on to this thread...excellent stuff Ben. Can't wait to see your rendering the Hudson paint job. The profile and photos are very interesting.
The Spit looks great and I envy anyone who has the ability to make their own decals.
On the clear parts try gluing with regular Elmer's white glue. Dry fit your pieces first and get them to fit as closely as possible. Elmer's drys clear and won't mess up your clear parts.

Keep up the good job and please post more Hudson photos soon.
Cheers,
Charles
robot_
_VISITCOMMUNITY
United Kingdom
Joined: March 08, 2009
KitMaker: 719 posts
AeroScale: 691 posts
Posted: Sunday, April 12, 2009 - 09:01 AM UTC
The MPM Blenheim Mk.I has still not arrived from Hannants, but I have my hands full with the Hudson. The interior has been a big pain! I've had to modify quite a few bits to get them to fit, but the fuselage is now closed. Unfortunately not much will be visible, so these photos are the closest look anyone will get. I had to make up the dials and things- random red and white on the black components looks OK from a distance- I didn't have any references.


robot_
_VISITCOMMUNITY
United Kingdom
Joined: March 08, 2009
KitMaker: 719 posts
AeroScale: 691 posts
Posted: Monday, April 20, 2009 - 07:50 AM UTC
Well, the Hudson's fuselage is now closed, and the wings and tail are on, but it needs a lot of work before I can even think about starting to paint it.

This past weekend I got the undercarriage on the Beechcraft 17 (took a while to figure it out, as there were numerous incorrect builds of this kit's landing gear on the internet- it was obvious once I saw some clear photos of the real thing). I painted it red, as it could well have been this colour (it looks quite dark on a black and white photo)- Cotton's version of events (Aviator Extraordinary) has it that it was camoutint (which I find unlikely as that appears almost white in photos, and the plane was bought and used mainly for communications, not reconnaissance), he also states it was a 'Beechcraft monoplane'...


The transfers were again printed by me- I am very please with the art-deco stylised bird that is found on the side of lots of Beech 17's. I was really happy when the photo of the exact aircraft also had this feature. I was less happy when it was obvious that it was a lighter colour than the colour of the aircraft (as I can't print lighter colours/white on my laser-printer). I decided to make the serial and bird design in black (the serial should be in white).


Still needs rigging, and an aerial wire from the base of the loop to the tail (the loop is also not painted), and, like all the models, needs weathering.

Merlin
Staff MemberSenior Editor
AEROSCALE
#017
_VISITCOMMUNITY
United Kingdom
Joined: June 11, 2003
KitMaker: 17,582 posts
AeroScale: 12,795 posts
Posted: Monday, April 20, 2009 - 08:26 AM UTC
Hi Ben

This would make for a really interesting Feature article when the collection's complete. I've always fancied doing the Hudson in 1:48 since seeing a reference to the spectacular camouflage in SAM (I think) many years ago.

All the best

Rowan
robot_
_VISITCOMMUNITY
United Kingdom
Joined: March 08, 2009
KitMaker: 719 posts
AeroScale: 691 posts
Posted: Friday, May 15, 2009 - 10:02 PM UTC
Thanks Rowan, I definitely will write it up as a feature if people are interested (mainly to let people know more about the history, rather than to show my modelling (in)abilities!).


I rigged the Beechcraft with fine wire- would have probably looked more in scale if I used smoke invisible thread, but I wanted you use that for the aerial, and wanted to have a contrast between the two thicknesses.

I'm disappointed that my stylised 'bird' transfer down the side of the plane is less accurate than I thought- the 'wings' are supposed to cross over- a bit hard to explain.

I've done some weathering with watercolours, but I think I may re-spray the top of the wings, as I've not cleaned up where I drilled through for the wiring very well. I'll also print a transfer for the serial to run over the top of the wing- as I think this was normal for civilian aircraft in the late 1930's.

With the Roden UC-43 Traveller coming out in 1/48, it will be possible to do all these aircraft, except the Lockheed 12A, in 1/48 . The UC-43 is basically a D-17, the same as the Sword model I used. G-AESJ was actually a shorter-bodied C17, so a real modeller have to reduce it (including changing the angle of the windscreen!).
robot_
_VISITCOMMUNITY
United Kingdom
Joined: March 08, 2009
KitMaker: 719 posts
AeroScale: 691 posts
Posted: Thursday, July 30, 2009 - 10:53 AM UTC


Hudson is being filled and sanded- hope to get some primer on and another round of filling this weekend.


I have started working on the Thompson fuel tender, from Flightpath. I needed quite a lot of filler, but only because I make such a disaster out of getting the basic four pieces together. Here it is after the first round of filling and a coat of primer:


More filling, and a driver:


Driver's shoulder gaps filled:


Left hand re-created (accidentally took too much material away):


More etch for the driver: hand brake and gear stick:


Driver in place- shoulder putty smoothed with liquid poly- I found out this useful property by accident.


Driver with some paint on. I will blend in the brown shading of the overalls, and may try to get more definition in the face and right hand- and his shoes will be painted black.


Not sure about the figure on the left (I intended him to represent Sidney Cotton). The figure is a Preiser Luftwaffe officer. I need to work on the uniform and cap. The smaller Heller RAF pilot will represent Shorty Longbottom.


I have been planning a scratch built interior for the resin Heston Racer model I have started- I think I will make it with the canopy not in place (the first and only flight was made without it). I will make the ducted radiator cooling system too. I have found some excellent detail photos of the duct and the landing gear in PDFs that can be found on the 'Flight' archives- published in 1943. If anyone made a Napier Sabre in 1/72 I would be tempted to do a cowling-off modification, but luckily for my sanity, I can't find one.


amegan
#243
_VISITCOMMUNITY
England - North East, United Kingdom
Joined: March 21, 2008
KitMaker: 996 posts
AeroScale: 915 posts
Posted: Thursday, July 30, 2009 - 12:17 PM UTC
Interesting thread, and your models are nice. I've tried all the rigging variations and smoke invisible thread is best for 1/48. The Staggerwing is unusual, I photographed one at the PFA rally about 4 years ago, nice aircraft. I like the idea of the theme running through the modelling.
 _GOTOTOP