_GOTOBOTTOM
World War II: USA
Aircraft of the United States in WWII.
Hosted by Rowan Baylis
Burma Banshee 1/48 Hasegawa P-40N-1
alpha_tango
_VISITCOMMUNITY
Germany
Joined: September 07, 2005
KitMaker: 5,609 posts
AeroScale: 5,231 posts
Posted: Saturday, June 13, 2009 - 11:28 PM UTC
Hi Gang

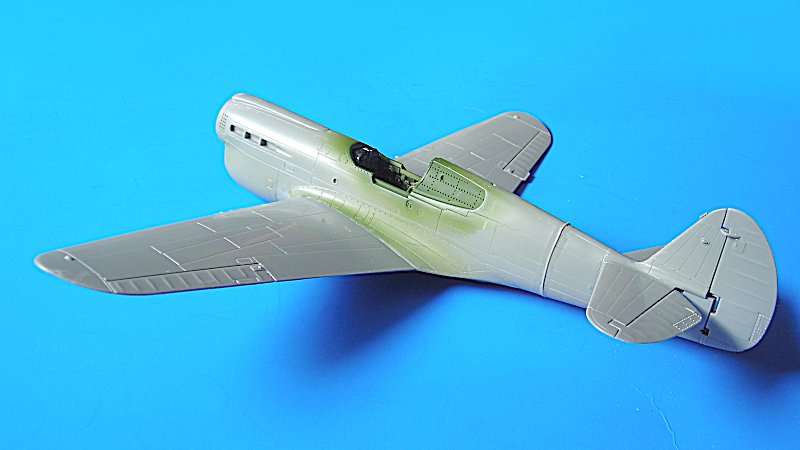
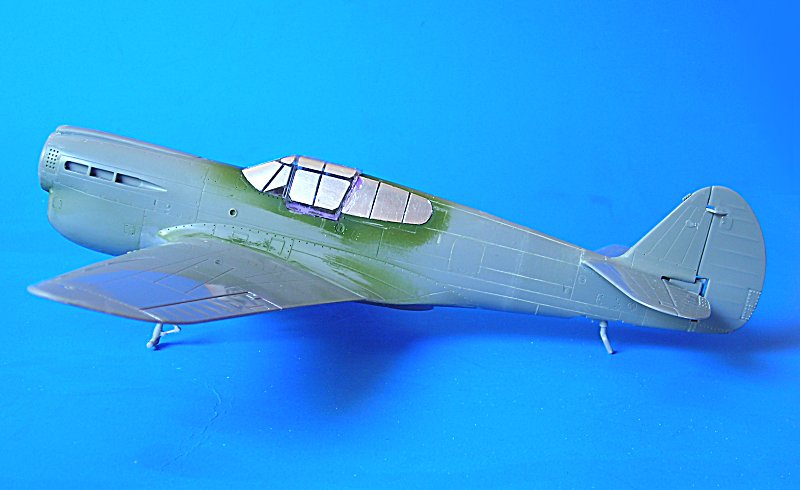
having finshed the 109 recently it is time to start another project .. well actually it is started for some weeks already, but yesterday I was finally "finished" with the multipartfuselageputtysandingorgy .. I just have no more motvation for that crap ad thus it is like it is. i polished the areas and moved on to the pit.

Before you ask .. yes I have a ton started or almost finished models .. but thats the fun in my approach to modelling ... I can do what I want

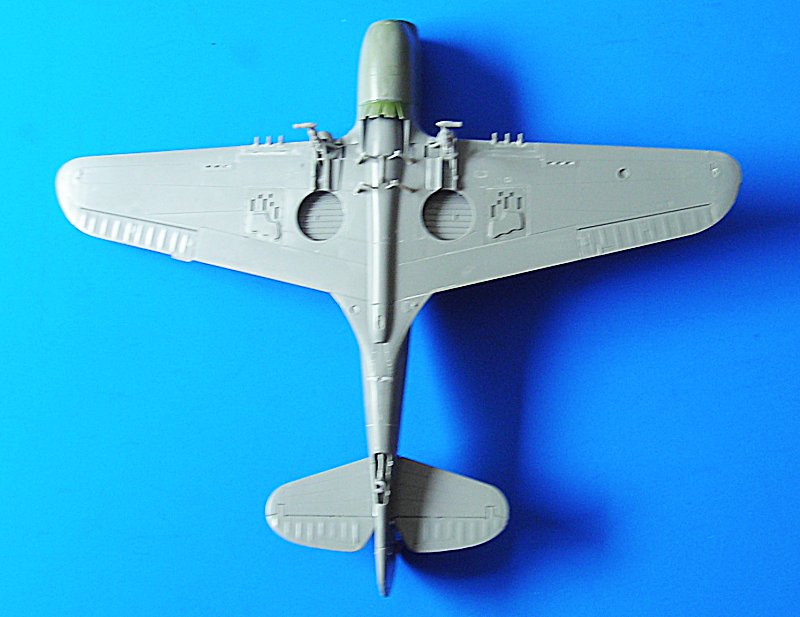
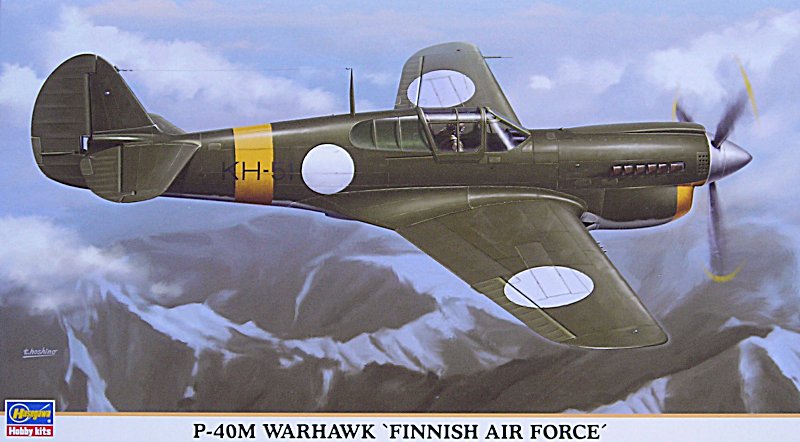
I used the Hasegawa P-40M as a starting point


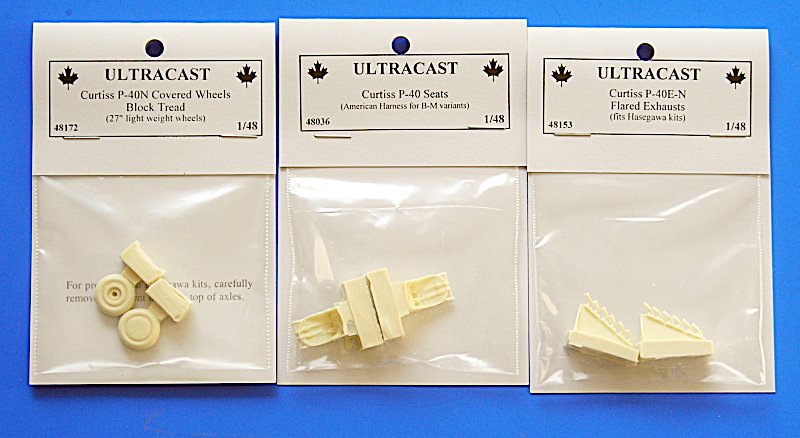
to make it a P-40 N-1 it should have only 2 guns per wing (but most were retrofitted with them) and the lighter and smaller wheels. I organized that stuff from Ultracast and as I was at it I bought seats and exhausts too.


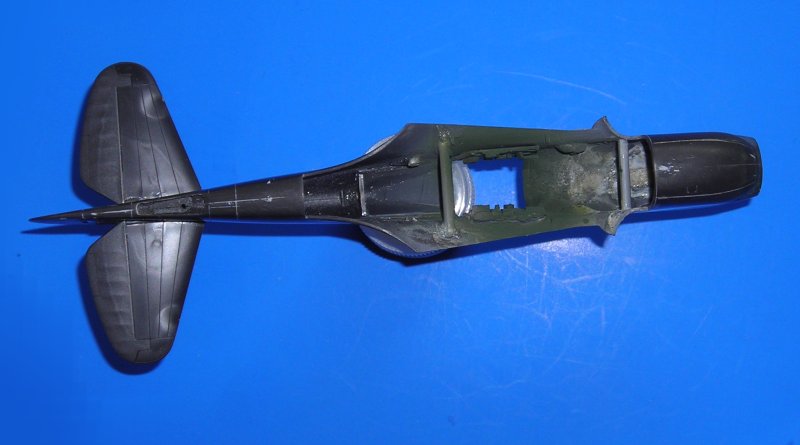
then I glued the Fuselage parts to make two halfs and then - when dry - joined the halfs to make a fuselage. I puttied the gaps with almost all I had, but the result was sitll not perfect. (in the pic you see the halfs still separate and filled with Tamiya light curing putty) So I added another layer of Mr. Surfacer 500 polished it and called it finished


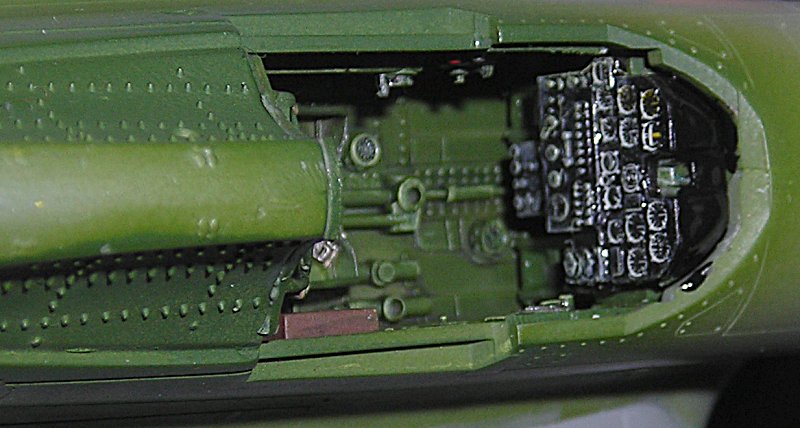
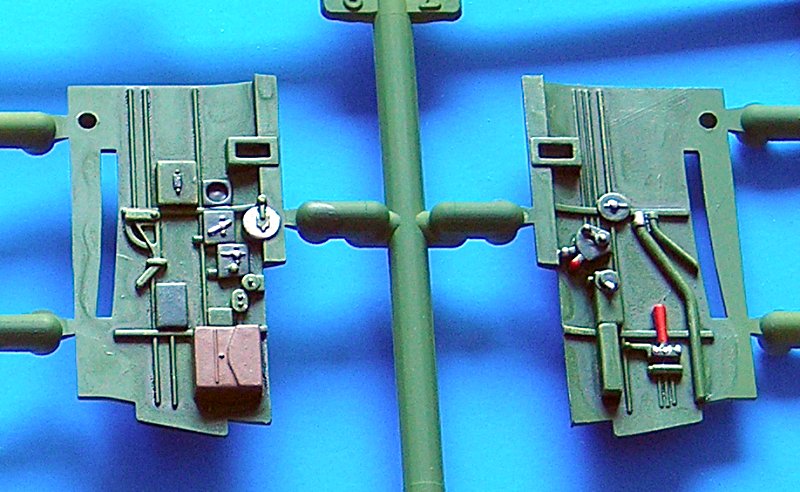
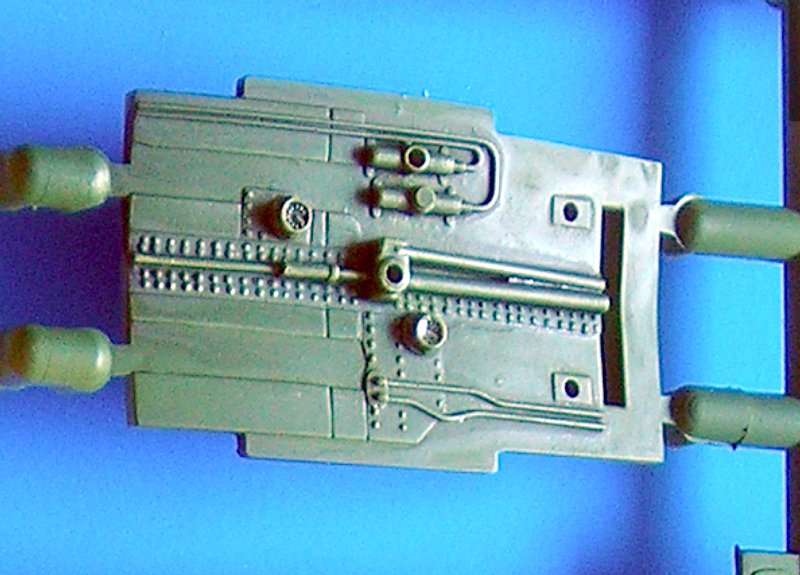
Now to the cockpit. Not much to say here. OOB, except the seat will be replaced by the UC part (I stil have to paint the belts, so no pic of it yet.


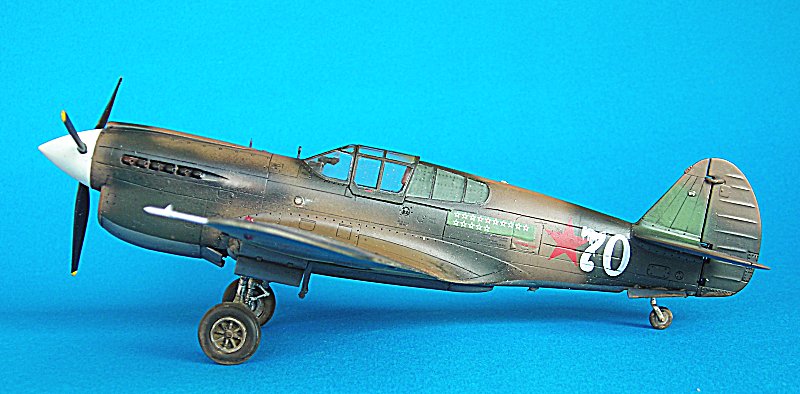
I have decals from Eagle Strike for Samuel E. Hammer (5 kill ace) and I was lucky to find two pix of that crate at http://www.burmabanshees.com/adairburma.html


I have no Idea how long this project will take ... we will see

all the best

Steffen
Emeritus
_VISITCOMMUNITY
Uusimaa, Finland
Joined: March 30, 2004
KitMaker: 2,845 posts
AeroScale: 1,564 posts
Posted: Sunday, June 14, 2009 - 03:21 AM UTC
Nice start!
I got that same kit in my stash. When I got it I was surprised with the nice level of cockpit details, especially on the floor. The instrument panel also looks so nice I'll probably just add seatbelts when I get around building it.

How did the fuselage inserts fit? Any discrepancies between the shapes or other such issues?

Good choice on the markings department! I think that death head motif is possibly even cooler than the flying tigers' shark mouths.
alpha_tango
_VISITCOMMUNITY
Germany
Joined: September 07, 2005
KitMaker: 5,609 posts
AeroScale: 5,231 posts
Posted: Sunday, June 14, 2009 - 03:37 AM UTC
Hi Eetu

I found the decal set in a moduni sale .. then I found out that Samuel Hammer was an ace (I try to build only aces .. KC holder for Luftwaffe, HSU for Soviet VVS) .. so the c&m was first and then I tried to get a proper kit .

You are right on the cockpit detail ... I used the kit instrument and added the decal for the dials .. the rest was just drybrushed. The fuselage is closed and the wing added now (it is already pretty dark (due to weather) so i take a pic tomorrow.

I think it is better you do not ask me about the jigsaw fuselage .. I absolutely hate it ... Eduard made a new fuselage for every 190 and I praise them for that even if the kit as such is a bit overly complicated. but Hasegawa screw up big time (IMHO) on the P-40. You have to get totally rid of the seams .. which is harder than you might think. Well at least I did not succeed. I will give it a nice thick primer coat and hope it levels out properly.

Here is my first try:


and I did not get better than that (and believe me I tried really hard, because filling and sanding is not all that annoying to me like it seems for other people)

all the best

Steffen
thegirl
_VISITCOMMUNITY
Alberta, Canada
Joined: January 19, 2008
KitMaker: 6,743 posts
AeroScale: 6,151 posts
Posted: Sunday, June 14, 2009 - 03:41 AM UTC
I would have to agree , excellent choice for the markings !!! Nice to see a P40 with out the shark mouth .

Can't commet on the kit though . Used to have it in the stash and ended up trading it for some WW1 stuff . I was impressed on the level of detail on the kit parts . Only one I built was the old Monogram casting , which is still a good kit .

Like Eetu said , off to a great start . Would it have been better to glue the two fuslage halves to gether first then dry fit the tail ? One could but shimes if needed . I would not want all that sanding to do .......................................................
Emeritus
_VISITCOMMUNITY
Uusimaa, Finland
Joined: March 30, 2004
KitMaker: 2,845 posts
AeroScale: 1,564 posts
Posted: Sunday, June 14, 2009 - 04:18 AM UTC
Yep, I wrote a preview on the kit and comparing the parts to scale drawings, it appeared that none of the fuselage inserts were along natural panel lines, requiring filling and sanding with every piece.
How's the light curing putty btw? I haven't used that one before.
Also, did the numeous wing machine gun inserts require any putty or did they fit fine?

One just has to agree that P-40 must have been designed with nose art in mind. Those skulls really look awesome on them.

Didn't some of Eduard's reboxing of Mauve kits have this skull nose art as well?
There's no multi-part fuselage in that kit, but I remember reading about them that they have the oil cooler assembly slightly inaccurate, and some goof with the oleo scissors in the langing gear.
alpha_tango
_VISITCOMMUNITY
Germany
Joined: September 07, 2005
KitMaker: 5,609 posts
AeroScale: 5,231 posts
Posted: Sunday, June 14, 2009 - 04:25 AM UTC

Quoted Text

Would it have been better to glue the two fuslage halves to gether first then dry fit the tail ? One could but shimes if needed . I would not want all that sanding to do .......................................................


Well Terri, I would not recommend this. It is best to get a good as possible fit of all the parts first and then join the halfs - the instructions tell you otherwise but I have seen enough kits that were totally screwed due to this.

I do not mind filling the gaps at the normal joints. You can reach them very well and optical illusions are on your side. but if you have steps or faint trenches (is that an oxymoron?) at the fuselage sides where should be straight metal sheet .... how do you want to hide that? ... I am getting into rant mode again and I do not want to ... it is like it is and we'll all see how it turns out

thanks for the kind comment

all the best

Steffen
alpha_tango
_VISITCOMMUNITY
Germany
Joined: September 07, 2005
KitMaker: 5,609 posts
AeroScale: 5,231 posts
Posted: Sunday, June 14, 2009 - 04:35 AM UTC
Hi again Eetu


Quoted Text

How's the light curing putty btw? I haven't used that one before.


it works quite nice and I have had good results levelling out steps and larger flat areas. the problem here is that you have a very faint line that no normal stuff seems to stick in and when you are done sanding it is still there or again ..


Quoted Text

Also, did the numerous wing machine gun inserts require any putty or did they fit fine?.


I have put in some care with the underwing panels and if you take your time and dryfit and watch the drying process and ... then you can get a good result there. The wing LE gun parts do N O T fit !


Quoted Text

Didn't some of Eduard's reboxing of Mauve kits have this skull nose art as well? There's no multi-part fuselage in that kit, but I remember reading about them that they have the oil cooler assembly slightly inaccurate, and some goof with the oleo scissors in the langing gear.


I have some of the Mauve kits (eduard: Fisken NZ boxing and China Ltd. edition) and i like them. I do not know what all the shortcomings are (see how loong I already have them) but they require a spreader to make the fuselage half way meet the wing ... thus my kits are still unfinished. I will have a look in the stash and maybe take a pic tomorrow ... maybe I read about the mistakes somewhere and thus shelved the kits?!

all the best

Steffen
thegirl
_VISITCOMMUNITY
Alberta, Canada
Joined: January 19, 2008
KitMaker: 6,743 posts
AeroScale: 6,151 posts
Posted: Sunday, June 14, 2009 - 04:42 AM UTC
Thanks for the feed back Steffen . I only asked because I never build a kit with that type of assembly configration before . Didn't mean to hit your rant button .

I'm looking forward to progress !
alpha_tango
_VISITCOMMUNITY
Germany
Joined: September 07, 2005
KitMaker: 5,609 posts
AeroScale: 5,231 posts
Posted: Sunday, June 14, 2009 - 04:53 AM UTC
Hi Terri

not your fault ... it is just that darn kit ... and of course me.

I just got an idea that I must test. I will broaden the "gap" (it is really just a small line) and glue in some streched sprue with lots of Tamiya extra thin ... that should work ....

off to the bench

cheers

Steffen
alpha_tango
_VISITCOMMUNITY
Germany
Joined: September 07, 2005
KitMaker: 5,609 posts
AeroScale: 5,231 posts
Posted: Sunday, June 14, 2009 - 07:48 AM UTC
O.K. friends, the weather cleared up a bit and I took some pix ...


comments welcome (BTW the pit is not done yet)

cheers

Steffen
dcandal
_VISITCOMMUNITY
Buenos Aires, Argentina
Joined: September 07, 2006
KitMaker: 918 posts
AeroScale: 688 posts
Posted: Sunday, June 14, 2009 - 12:02 PM UTC
A very interest project Steffe, it seems very nice
CMOT70
_VISITCOMMUNITY
Victoria, Australia
Joined: August 23, 2007
KitMaker: 629 posts
AeroScale: 539 posts
Posted: Sunday, June 14, 2009 - 02:33 PM UTC
A good subject choice Steffen. Have you ever had a look at the Fly Models P-40 part one decal sheet? It is one of the best aftermarket sheets i've ever seen...and it has markings for some of the skull aircraft as well as many others (i used one of the Flying Tigers options for a Monogram "B" earlier this year. Fly Models decals are by Cartograph.

But you have an Eagle Strike sheet and they are usually very good as well.

Andrew
alpha_tango
_VISITCOMMUNITY
Germany
Joined: September 07, 2005
KitMaker: 5,609 posts
AeroScale: 5,231 posts
Posted: Sunday, June 14, 2009 - 08:30 PM UTC
Thank you Daniel!

@Andrew: Many thanks for your input! ... you mean Sky Models, don't you (which is different from Skys models who do Israeli subjects)? .. I have a few of their sheets, but IMO there might be some issues as many of the schemes are copied from elswhere and thus have to be checked .. the decal quality is outstanding though! The EagleStrike sheet is o.k. but I will have to rework the skull as it is not as fine detailed as in the picture (see above).

all the best

Steffen
CMOT70
_VISITCOMMUNITY
Victoria, Australia
Joined: August 23, 2007
KitMaker: 629 posts
AeroScale: 539 posts
Posted: Monday, June 15, 2009 - 05:27 AM UTC

Quoted Text

Thank you Daniel!

@Andrew: Many thanks for your input! ... you mean Sky Models, don't you (which is different from Skys models who do Israeli subjects)? .. I have a few of their sheets, but IMO there might be some issues as many of the schemes are copied from elswhere and thus have to be checked .. the decal quality is outstanding though! The EagleStrike sheet is o.k. but I will have to rework the skull as it is not as fine detailed as in the picture (see above).

all the best
Steffen


Yes you're right i meant Sky Models, just a typo there i was typing from memory without actually having the sheet on hand. I have it with me now though. It has 19 subjects but only 2 of Banshee's. And one of those is a later P40N version, the other one is a P40N-1 of 1st Lt.P.S. Adair (3kills). The skulls look fine to me, but compared to the close up pic above they could still be missing some fine shading/detail...though each aircraft had a totally unique version of course.

Andrew
alpha_tango
_VISITCOMMUNITY
Germany
Joined: September 07, 2005
KitMaker: 5,609 posts
AeroScale: 5,231 posts
Posted: Monday, June 15, 2009 - 05:48 AM UTC
Thanks again Andrew!

i just had a look in my decal stack and I have that set. Sadly no aces so I am very happy that I have the ES decals and the pix ...

all the best

Steffen
hkopper
_VISITCOMMUNITY
Florida, United States
Joined: March 01, 2008
KitMaker: 529 posts
AeroScale: 340 posts
Posted: Monday, June 15, 2009 - 07:04 AM UTC
Nice work Steffen!! I can't wait to see future updates on the build.
alpha_tango
_VISITCOMMUNITY
Germany
Joined: September 07, 2005
KitMaker: 5,609 posts
AeroScale: 5,231 posts
Posted: Monday, June 15, 2009 - 11:33 PM UTC
Thanks Hermann

here is the next batch. I did some more touch ups in the cockpit and added the under carriage and fuel tank holders (can be seen in the pic above). I like to rest my model on the u/c during airbrushing .. I know there is a risk, but I prefer it this way (most times). Just the control stick and the gun sight and I am ready to close the canopy --- another risky task as I have very very often glue running under the rear side glas. I will try to use Gators Glue sparingly and let it dry for a few minutes before attaching the glas ... a friend of mine had good results this way.

The streched sprue worked quite well .. I will try this from the beginning for the next Hasegawa P-40.


And here is my Eduard/Mauve P-40N .. it is the ProfiPack edition and shall get decals for DeHaven. You see I have pressed in 2 spreaders secured with super glue and still there is a significant gap. The forward one has the proper size to make the fuselage sit right and the aft just cannot be broader as I feared for the intergrity of the fuselage. I will probably fill the gap with Magic Sculp .... once I pick up this project again ....


as always: comments, hints and critique welcome

all the best

Steffen

Emeritus
_VISITCOMMUNITY
Uusimaa, Finland
Joined: March 30, 2004
KitMaker: 2,845 posts
AeroScale: 1,564 posts
Posted: Tuesday, June 16, 2009 - 01:23 AM UTC
Doing a good job on both kits!
The rear fuselage insert joint in the hasegawa version can still be seen, but that's probably because of the differing colors of the materials? So you just carved the seam a little wider, glued in a piece of stretched sprue and shaved off the excess? Seems to have worked great.

Those details that are visible in the pic of the Mauve kit look good too. How's the gap in the fuselage-wing joint? Big, consistent? If it's width is the same all the way, I'd use styrene sheet as a shim. Glue it in prior to attaching the wing, but fitting it in to get it set nice and sturdy, then shave and sand of the excess when the cement has dried. If there's any panel lines to be scribed across the shim, it's easy to do with the wing separate. And if the only problem with the fit is the gap, you'll get a nice seam without having to work with putty, risking filling up any details.

alpha_tango
_VISITCOMMUNITY
Germany
Joined: September 07, 2005
KitMaker: 5,609 posts
AeroScale: 5,231 posts
Posted: Tuesday, June 16, 2009 - 02:12 AM UTC
Hi Eetu

thanks for the comments!.

Hasegawa: Yes in the pic it seems as if there is still a gap, but I do not know how to photograph it better. I used the Tritool modelling saw (not the scriber saw, which is a bit thinner) for opening the gap a bit and then I used a streched sprue from the kit. After dry I sanded the whole affair down to level. The fuselage is polished now and checking it agains the light there is no gap or bump or anything .. just as I want it to be .. of course the panel lines suffered a bit from filling and rescribing numerous times. Also I did not redo the cockpit inserts and those faults are still there.

Eduard: the ProfiPack boxing had a lot of resin included thus the cockpit (which is very sparse in the Mauve kit) is very detailed (though not fully painted on my model) ... you can see lots of superglue and microballs in the fuselage
The gap is pretty constant due to my efforts. maybe half a mm on each side (or a bit less), still very visible. i am not a big fan of the plastic card filling. I have seen Bret Greens use of Miliput for such gaps and I am pretty fond of that method ... almost no sanding and no details filled (because you can easily remove all excess while it is still wet) .. but the Eduard/ Mauve kit is back in the stash now.

all the best

Steffen
alpha_tango
_VISITCOMMUNITY
Germany
Joined: September 07, 2005
KitMaker: 5,609 posts
AeroScale: 5,231 posts
Posted: Tuesday, June 16, 2009 - 11:05 PM UTC
Hi All

Just a small update, but there went some work in to get to this point. The pit was finished the canopy added and tehn masked. As I had no Eduard set, I used my old but trusted BMF method .. just will have to polish the clear parts when done. The sliding part of the canopy is just fixed with Maskol to seal the gaps and to be glued on later...


Now I have to check the instructions, if I forgot anything and then I can put on some paint ....

all the best

Steffen
thegirl
_VISITCOMMUNITY
Alberta, Canada
Joined: January 19, 2008
KitMaker: 6,743 posts
AeroScale: 6,151 posts
Posted: Wednesday, June 17, 2009 - 02:21 AM UTC
Steffen , good job on the rear tail to fuselage join . Even if it did send you into a whole new world of ranting . Turned very well !
alpha_tango
_VISITCOMMUNITY
Germany
Joined: September 07, 2005
KitMaker: 5,609 posts
AeroScale: 5,231 posts
Posted: Wednesday, June 17, 2009 - 03:40 AM UTC

Quoted Text

Steffen , good job on the rear tail to fuselage join .


Hi Terri

Well, it is not as good as I first thought but some more layers of paint might do the rest. the model got a layer of automotive primer from the rattle can (dirty job but dries very fast) Tamiya NG on the underside and Gunze OD (2) . (of course I airbrushed the wheel wells and the canopy green before the other layers)


I better let it dry over night to see if the primer still gasses out or if it everything is fine.


Quoted Text

Even if it did send you into a whole new world of ranting .


You have no idea how far I can get into such things. This was just a very slight unpleasantness ....

all the best

Steffen
chris1
_VISITCOMMUNITY
Auckland, New Zealand
Joined: October 25, 2005
KitMaker: 949 posts
AeroScale: 493 posts
Posted: Wednesday, June 17, 2009 - 09:01 AM UTC
Hi ya Steffen
She sure is looking good mate.
I'm tempted to have another go at another P-40. (Built the Italeri one 1/48 my 1st big build, it was sort of a trial)so I can use the Waiarapa Wildcat markings.,Geoff Fisken RNZAF highest scoring Commonwealth ace in the Pacific.Sorry for the history lesson.

But have been concerned about the join you were having issues with its good to see it can be sorted to a high level.

Thanks for a great ongoing build.

Chris

alpha_tango
_VISITCOMMUNITY
Germany
Joined: September 07, 2005
KitMaker: 5,609 posts
AeroScale: 5,231 posts
Posted: Wednesday, June 17, 2009 - 08:30 PM UTC
many thanks Chris!

The AMT kit is not too bad either (Italeri rebox). I have Eduards P-40M with decals for Wairarapa Wildcat (want to do these one day) and the Eduard/Mauve P-40N above is going to get Bob DeHavens c&m. And I have the Chinese Ltd. Edition which will get markings for the Chinese ace .... all in a faaar future (if I live long enough) .. but I guess next will be another Luftwaffe project (best an old one to be finished).

I hurried a bit too much yesterday and got a slightly wrinkled surface (mainly on the wings) .. nothing too serious, but i will wait some more hours before I proceed polishing it.

all the best

Steffen

alpha_tango
_VISITCOMMUNITY
Germany
Joined: September 07, 2005
KitMaker: 5,609 posts
AeroScale: 5,231 posts
Posted: Thursday, June 18, 2009 - 04:15 AM UTC
Hi all

I have started decalling the crate ... beginning with the skull as I will have to rework it... big time


cheers

Steffen
 _GOTOTOP