_GOTOBOTTOM
Pre-Flight Check
Constructive critique of your finished or in-progress photos.
Eduard Fw-190 A8/R2 (act 2)
hkopper
_VISITCOMMUNITY
Florida, United States
Joined: March 01, 2008
KitMaker: 529 posts
AeroScale: 340 posts
Posted: Tuesday, July 21, 2009 - 12:58 AM UTC


This will be my second attempt at this kit (hopefully with better results). My first attempt was plagued with a lot of problems and being my first try at building a plane, I should've started out with an easier kit. Having finished my Tamiya 190 and Eduard bf-110, I feel a bit more confident to revisit my old friend or nemesis

First I would like to take the time to make an announcement that will explain my absence from the site. On Monday, July 13, I became the proud daddy of a healthy bouncing baby girl (Luna Mar Kopper):


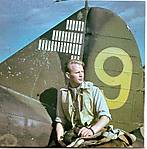
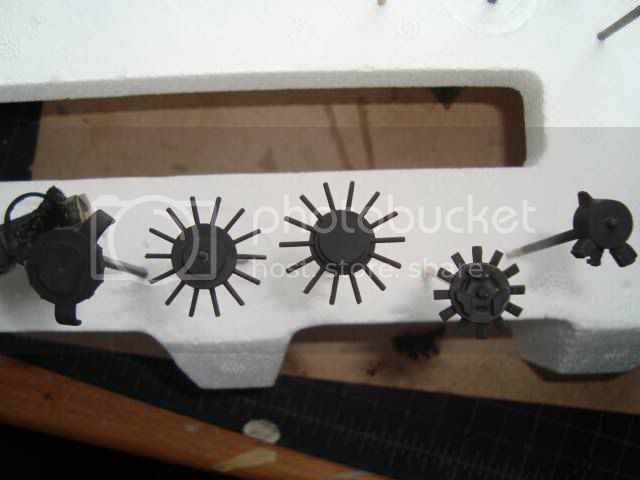
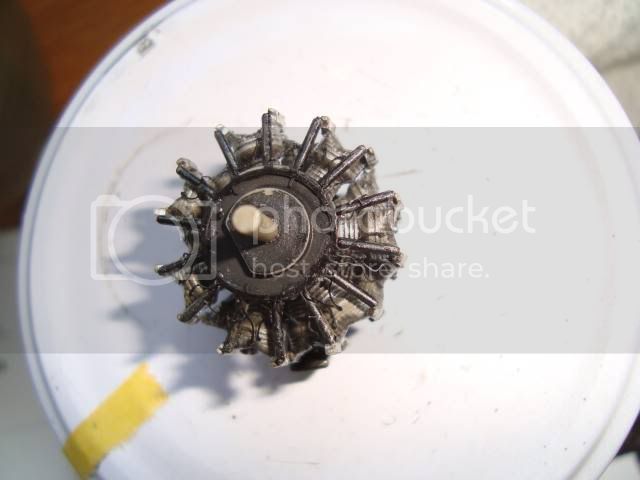
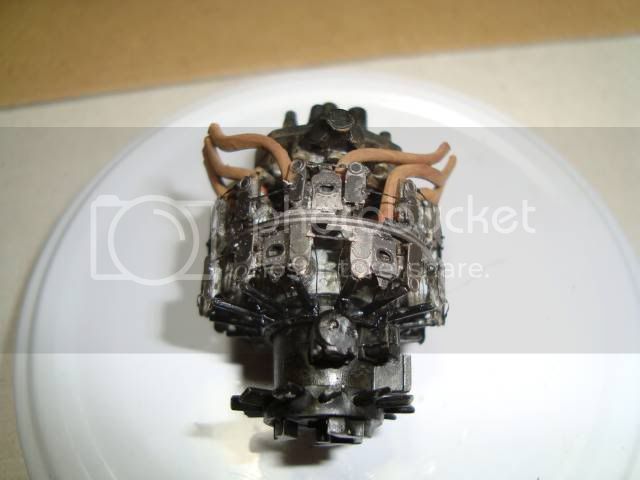
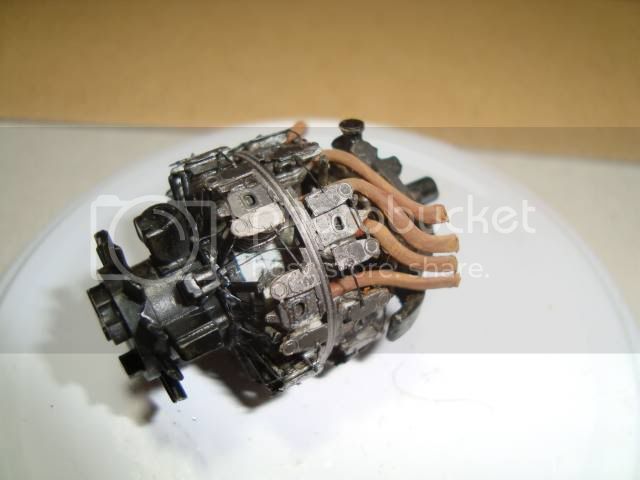
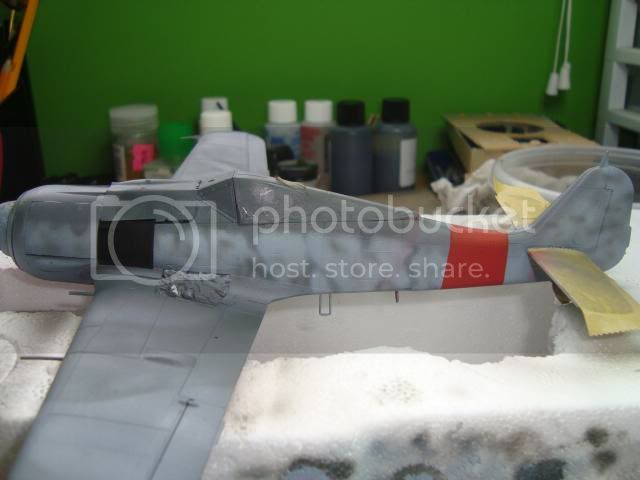
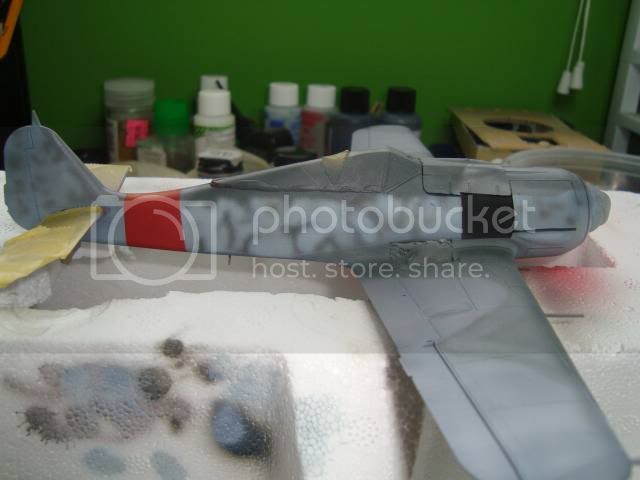
For the build, I'm shooting for Unteroffizier Ernst Schroder's "red nineteen". This is mainly due to it's extra armament and nose mg's. The build is mainly straight out of the box with the exception of Eduards extra detail set for the butcher bird.

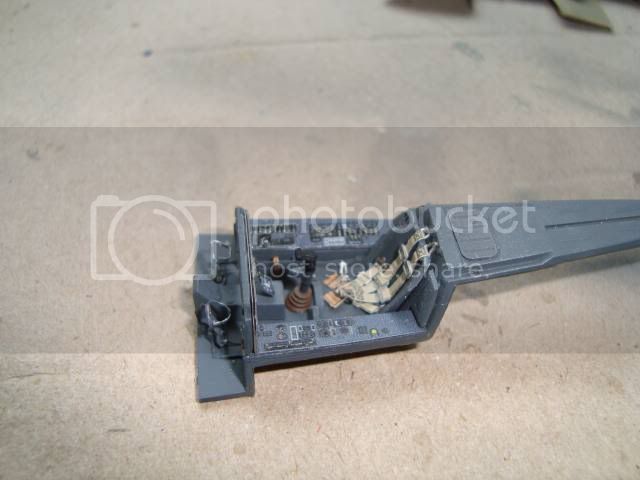
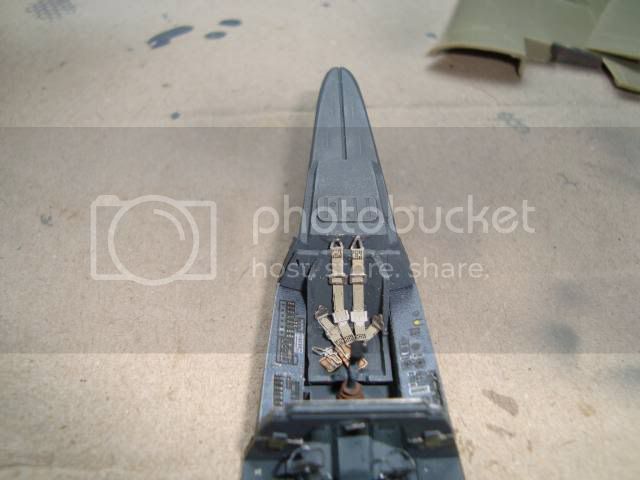
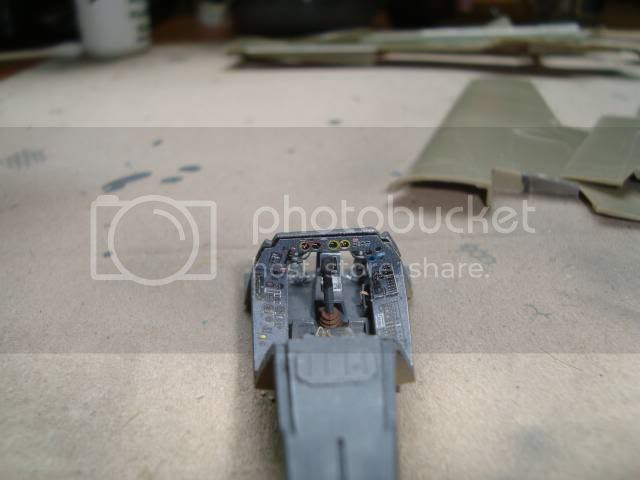
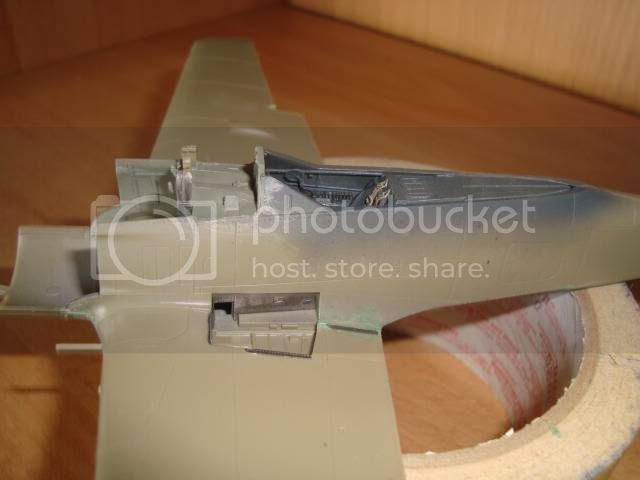
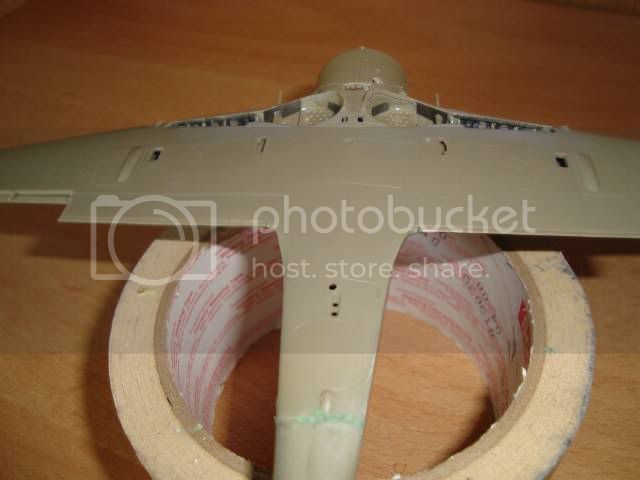
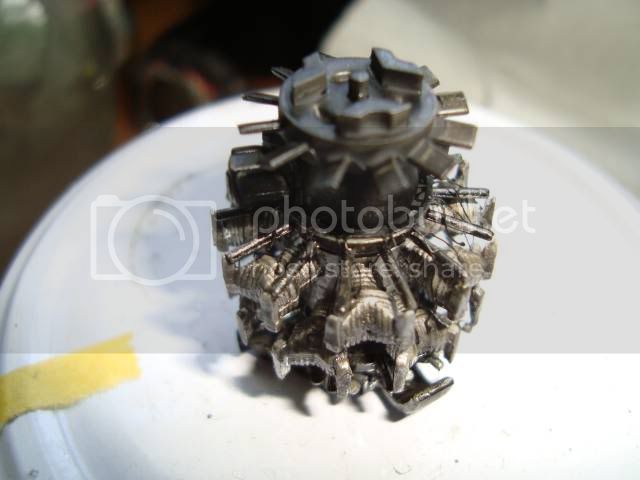
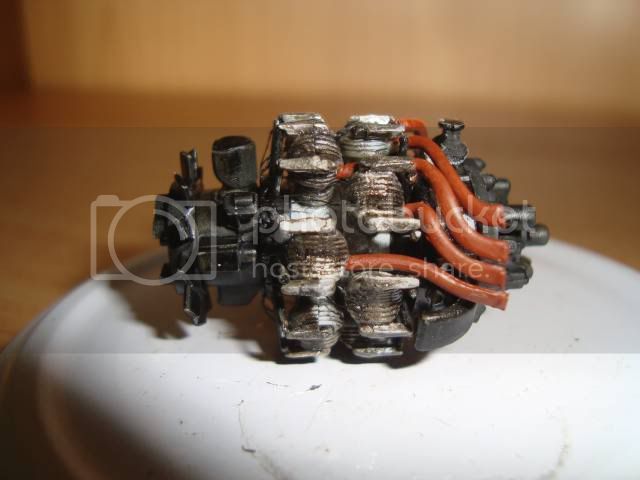
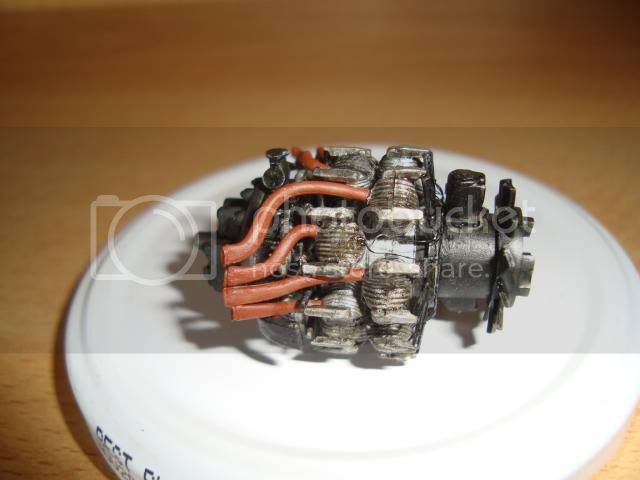
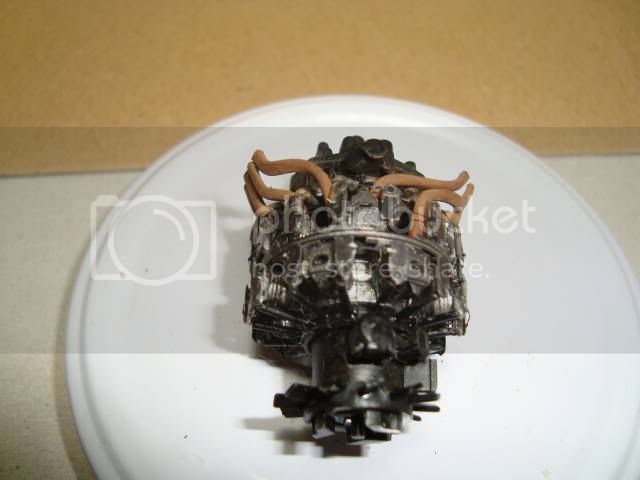
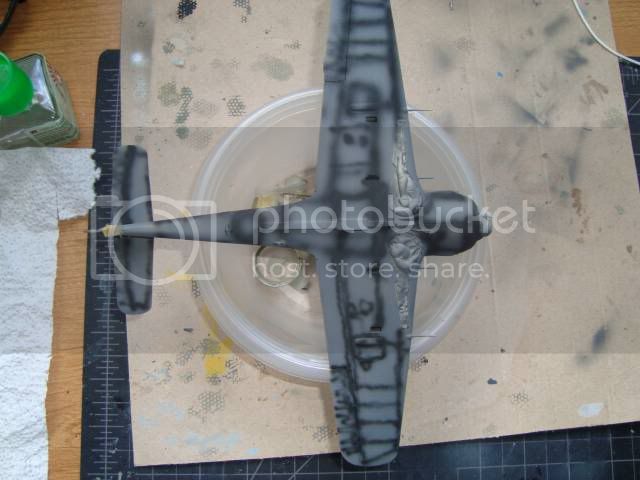
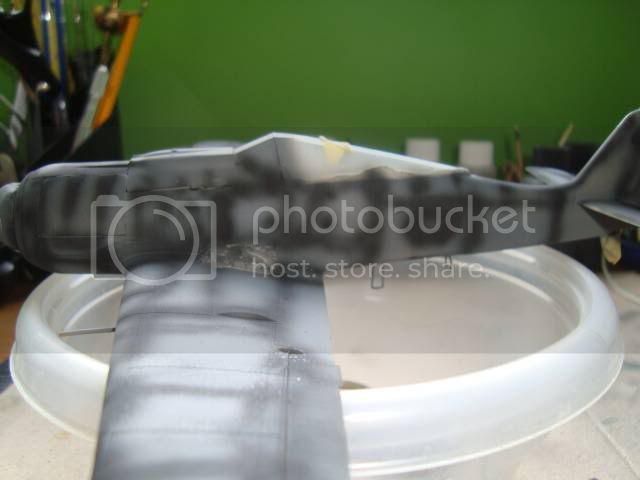
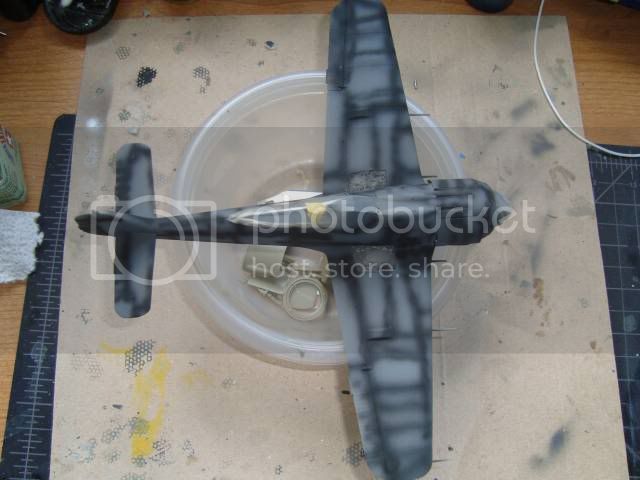
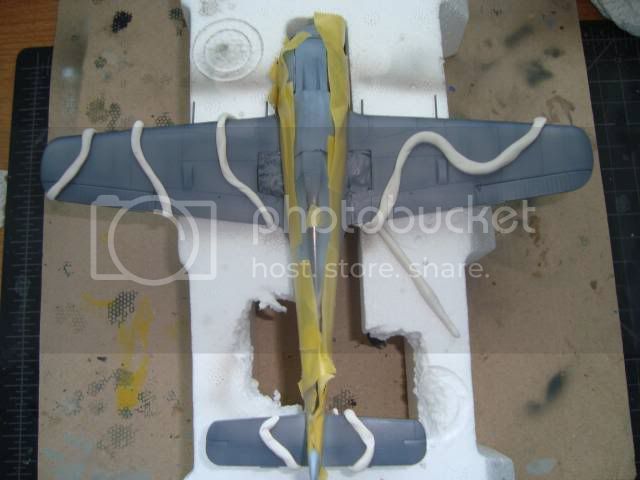
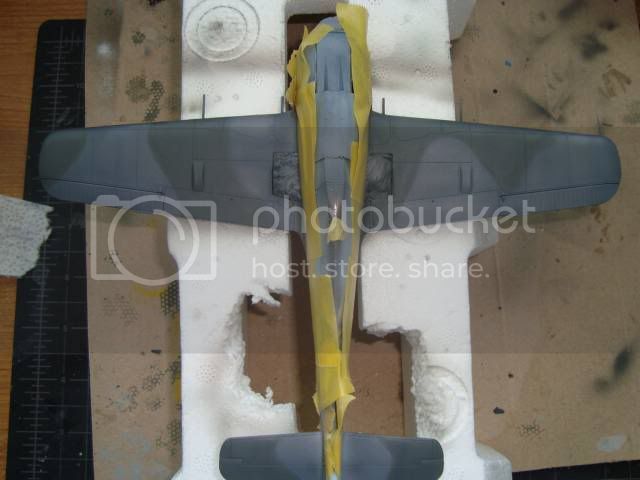
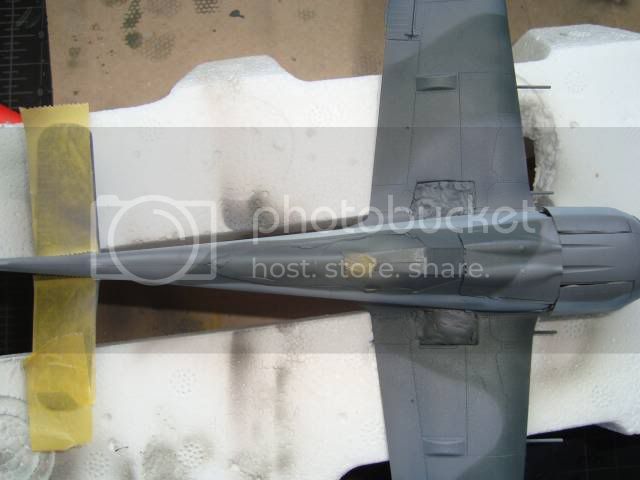
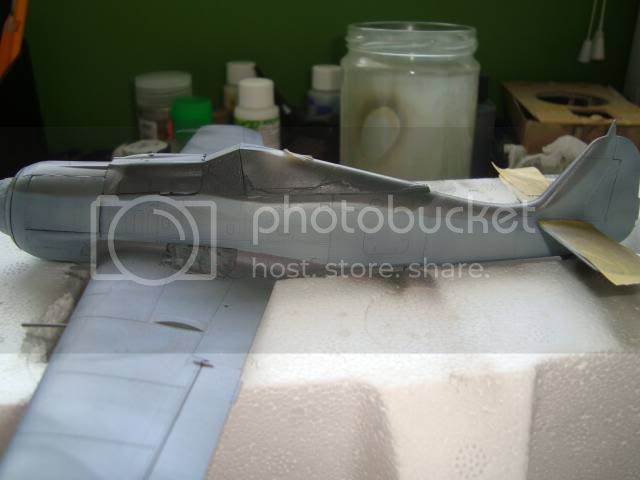
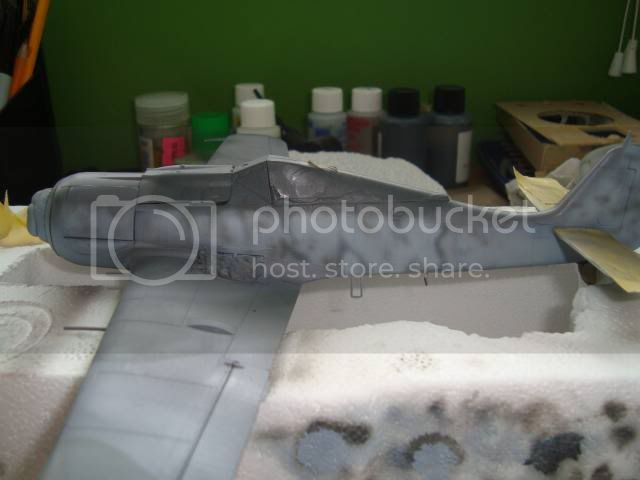
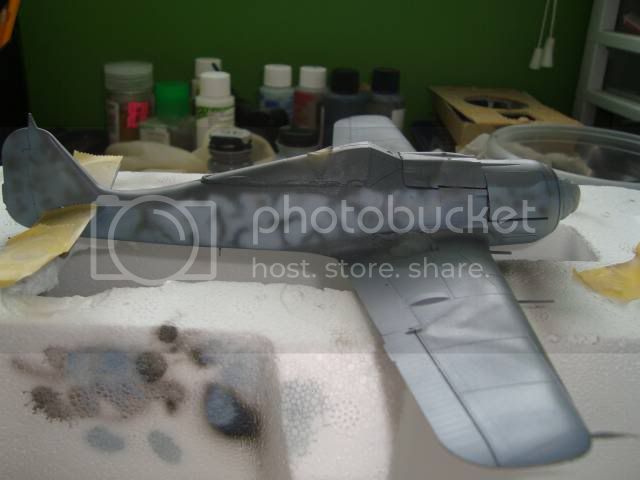
Below are pix of the build so far:


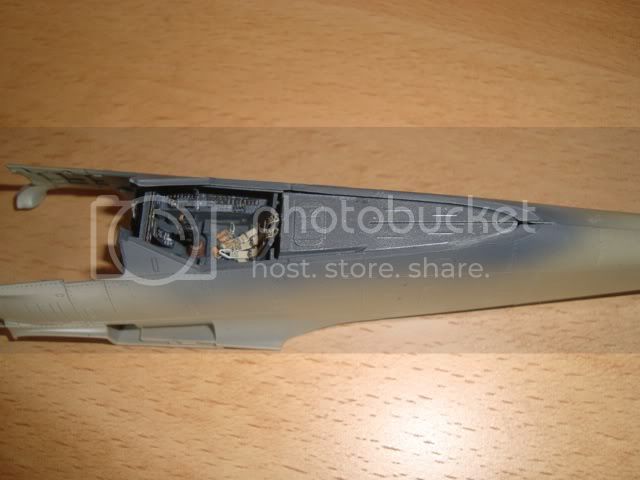
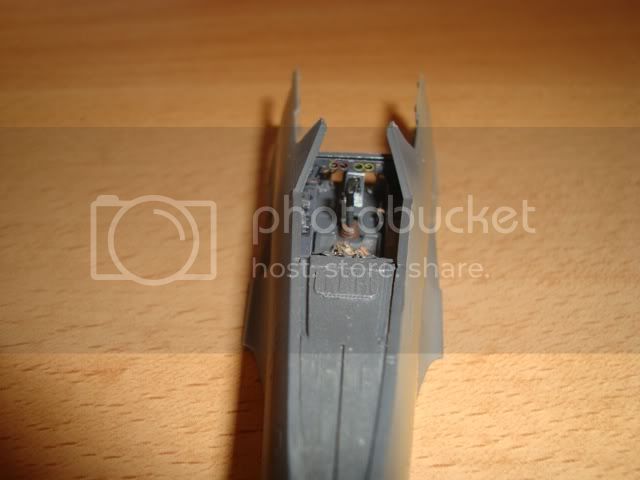
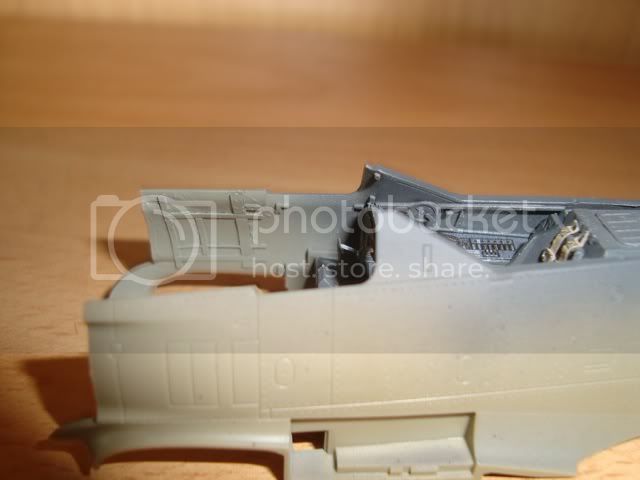
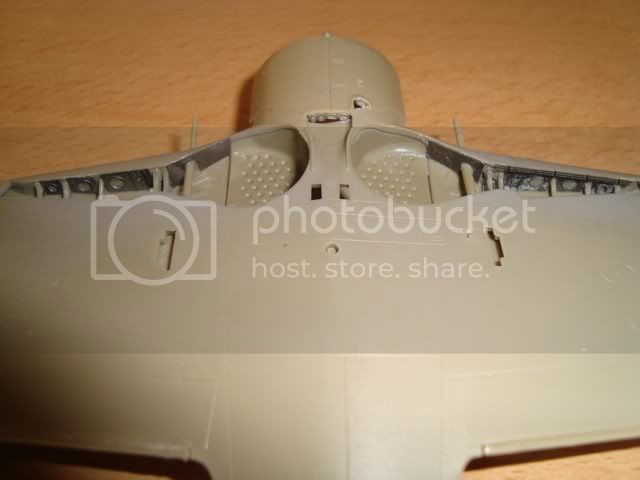
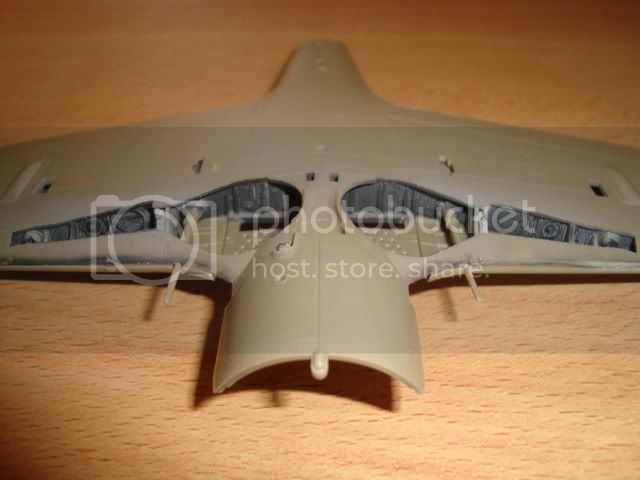
So far, the build is going smoothly. The only fit issue is with the wing halves. I guess that due to the detail of the wing well, the upper half is pushed forward a bit and is not flush with the lower half. I'll have use a bit of filler and sanding to remedy the issue.

I do have one question for the community: In the past builds, I used Tamiya tape to mask the wheel well. This turned out to be a bit tedious for I hate tape and tape hates me. I was wondering if there was a easier way to mask the wheel well?

Cheers,
Hermann E. Kopper
TuomasH
_VISITCOMMUNITY
Turku ja Pori, Finland
Joined: September 10, 2008
KitMaker: 470 posts
AeroScale: 279 posts
Posted: Tuesday, July 21, 2009 - 01:16 AM UTC
Hermann, congraculations for your new scale model


For the wheel wells, how about foam rubber? (I don't know if thats the correct term, I used dictionary). Just squeeze it inside the wheel wells and when it expands it should cover it nicely.
hkopper
_VISITCOMMUNITY
Florida, United States
Joined: March 01, 2008
KitMaker: 529 posts
AeroScale: 340 posts
Posted: Tuesday, July 21, 2009 - 03:10 AM UTC
Here are some additional pix of the "tub" prior to the union of the fuselage halves:


The interior was painted using the standard RLM 66 plus a bit of drybrushing using light-gray to pick up the edges. The Wheel well and engine compartment will recieve a coat of RLM 02. All RLM paints used on the build are from ModelMasters acrylics.
hkopper
_VISITCOMMUNITY
Florida, United States
Joined: March 01, 2008
KitMaker: 529 posts
AeroScale: 340 posts
Posted: Wednesday, July 22, 2009 - 01:35 AM UTC
Tuomas, thank you for those kind words. In reference to rubber foam, is it a sponge like substance? where do you find the product (i.e. art store, ..)
alpha_tango
_VISITCOMMUNITY
Germany
Joined: September 07, 2005
KitMaker: 5,609 posts
AeroScale: 5,231 posts
Posted: Wednesday, July 22, 2009 - 01:39 AM UTC
Hi Hermann

I have a question about the fuselage .. I always thought eduard had parts with the armour plates molded in place? or are you building one without these? ...

all the best

Steffen
TuomasH
_VISITCOMMUNITY
Turku ja Pori, Finland
Joined: September 10, 2008
KitMaker: 470 posts
AeroScale: 279 posts
Posted: Wednesday, July 22, 2009 - 01:55 AM UTC

Quoted Text

In reference to rubber foam, is it a sponge like substance? where do you find the product (i.e. art store, ..)


I think it is same as sponge, you can find it inside your furnitures etc. as padding.
CrewChief16
_VISITCOMMUNITY
Khania, Greece / Ελλάδα
Joined: July 09, 2008
KitMaker: 28 posts
AeroScale: 27 posts
Posted: Wednesday, July 22, 2009 - 03:04 AM UTC
Congratulations for the beautiful baby.....this is the best model could anyone ever have.I have one too but i still cannot make him drink his milk from the airbrush
hkopper
_VISITCOMMUNITY
Florida, United States
Joined: March 01, 2008
KitMaker: 529 posts
AeroScale: 340 posts
Posted: Wednesday, July 22, 2009 - 04:19 AM UTC
Steffen, the kit came with two fuselages, one with the armor and another without. The build that I'm shooting for is Ernst Schroder, which in essence ended up being a A-8 variant and not the A-8-R2.

Nektarios, thanks for the well wishes.

Cheers,
Hermann
erwin_rommel
_VISITCOMMUNITY
Brest, Belarus
Joined: July 20, 2009
KitMaker: 105 posts
AeroScale: 76 posts
Posted: Wednesday, July 22, 2009 - 06:04 AM UTC
Beautiful baby and amazing "Anton", I`ve bougth F-8 PP kit and so - how did you fix PE parts, is Super glue will suit?
hkopper
_VISITCOMMUNITY
Florida, United States
Joined: March 01, 2008
KitMaker: 529 posts
AeroScale: 340 posts
Posted: Wednesday, July 22, 2009 - 07:49 AM UTC
Aleksey, to glue the PE parts, i do use super glue. Normally I would use Loctite super glue gel (it is a bit on the thick side and not too runny). For this build, I'm trying out an acrylic super glue that was mentioned in numerous post with good recommendations. It is called "Gator's Grip" and so far its fantastic. It grips good and the good thing is that it's slow to dry allowing you the time to position the part where you want it. The best thing is that if you use too much, you can wipe the excess with a wet Q-tip or cloth.
Cheers,
Hermann
erwin_rommel
_VISITCOMMUNITY
Brest, Belarus
Joined: July 20, 2009
KitMaker: 105 posts
AeroScale: 76 posts
Posted: Wednesday, July 22, 2009 - 08:13 AM UTC
thanks for your advice,
I asked about SG in general because here in Belarus we`ve got another brends of it.
hkopper
_VISITCOMMUNITY
Florida, United States
Joined: March 01, 2008
KitMaker: 529 posts
AeroScale: 340 posts
Posted: Saturday, July 25, 2009 - 04:42 AM UTC
The build continues:
I just finished adding additional pe details to the wheel well and gun mounts. I've still to master the art of handling PE parts, thus you'll see some bend marks and excess glue that I'll have to try to sand out.


The next step was to add the firewall and join the fuselage with the wings. I couldn't get a good fit for the firewall and had to resort to using super glue to join and close the gaps between the fuselage and the firewall. The fuselage did fit fine and a small amount of filling needed.


The next step is the one that I'm dreading. The construction of the engine and it's compartment. After glancing at the instructions, it appears that it has the possiblity of being truely a nightmare (I'm keeping all fingers crossed). I think that I'll pre-shade and paint the wheel well. firewall and gun mounts before tackling the engine though (starting to hesitate already ) Wish me luck and thanks for tuning in!!

Cheers,
Hermann
hkopper
_VISITCOMMUNITY
Florida, United States
Joined: March 01, 2008
KitMaker: 529 posts
AeroScale: 340 posts
Posted: Sunday, July 26, 2009 - 11:43 AM UTC
The assembly of the engine has commenced. The paints that were used were Tamiya's flat aluminum, flat black and smoke (used for the wash).


The next set of pix illustrates that wiring provided in Eduard's detail set. The positioning is definitely off but I'm just happy to have been able to attach the super fine and delicate PE. For This I had to connect each individual cable to each cylinder (I had to take out my magnifying glass for this endeavor.


The next step will consist of setting up and aligning the individual exhaust tubes.

Cheers,
Hermann E. Kopper
TuomasH
_VISITCOMMUNITY
Turku ja Pori, Finland
Joined: September 10, 2008
KitMaker: 470 posts
AeroScale: 279 posts
Posted: Sunday, July 26, 2009 - 10:49 PM UTC
Uhh, thats a very thin PE. You better move it careful, to not break it. It is almost impossible to fix if you break it from middle.
hkopper
_VISITCOMMUNITY
Florida, United States
Joined: March 01, 2008
KitMaker: 529 posts
AeroScale: 340 posts
Posted: Monday, July 27, 2009 - 05:35 AM UTC
Thanks Tuomas!
The engine is half done. I've added the individual exhaust and painted them with ModelMaster's acrylic rust. In the end I'll add a bit of smoke pigments and some homemade rust pigments. I did this by taking a piece of steel wool (used to clean pots) and submerged it into a container with water for a couple of minutes. I then removed the water from the container and let it dry near a window for a couple of days till it rusted natually. It's a bit time consuming but well worth the effort.


The next step will be to complete adding the remainding PE parts to the engine (while includes more wiring ) This will be followed by adding the engine mount to the fuselage and finally attaching the engine to the aircraft. I'm hoping that it will be a smoother ride from there on (until it's time to prime and paint).

Cheers,

Hermann E. Kopper
hkopper
_VISITCOMMUNITY
Florida, United States
Joined: March 01, 2008
KitMaker: 529 posts
AeroScale: 340 posts
Posted: Tuesday, July 28, 2009 - 02:12 PM UTC
I believe that I'm finally finished with the engine. I finished adding the extra PE part to the engine (there some more left to put but they were a bit too much for my shaky hands and eyesight (not to mention my sanity). Below are several pix that I took.


Cheers,
Hermann
robot_
_VISITCOMMUNITY
United Kingdom
Joined: March 08, 2009
KitMaker: 719 posts
AeroScale: 691 posts
Posted: Tuesday, July 28, 2009 - 09:17 PM UTC
Hermann,

Your engine looks really, really great! The exhausts look really realistic after the rust treatment. You must have taken a lot of care with those wires- I would have been too frustrated by how small everything is.

For masking wheel wells, I run a strip of masking tape around the walls, then fill the space in the middle with damp tissue. I then pull in the edges of the tape a bit, and push it down (the tissue should hold it against the side of the wheel wells, and this allows better access to paint up to the edges of the wells). It doesn't take very long, and you don't have to cut any tape accurately (if the tape is too long, just overlap it around the inside of the walls), and the width doesn't matter, as you push it down out of the way.

And congratulations on your new arrival!
hkopper
_VISITCOMMUNITY
Florida, United States
Joined: March 01, 2008
KitMaker: 529 posts
AeroScale: 340 posts
Posted: Wednesday, July 29, 2009 - 12:53 AM UTC
Thanks Ben for the kind words and masking tip. The suggestion for masking the wheel well sounds very doable and effective. I'll give it a try with this build and will let post the outcome!

Cheers,
Hermann
hkopper
_VISITCOMMUNITY
Florida, United States
Joined: March 01, 2008
KitMaker: 529 posts
AeroScale: 340 posts
Posted: Saturday, August 22, 2009 - 04:02 AM UTC
Made some progress to the build but haven't had the chance to post. Here are the updates:
Here we have the engine installed:


Plan primed and preshaded:


Ready to apply cammo to the upper wing and tail (rlm 74 and 75)..masked by using blue tac:


Thanks for watching,

Hermann
hkopper
_VISITCOMMUNITY
Florida, United States
Joined: March 01, 2008
KitMaker: 529 posts
AeroScale: 340 posts
Posted: Saturday, August 22, 2009 - 04:08 AM UTC
Here I'm about to add cammo to the upper fuselage:


Mottle:


(had a bit of overspray with the red on the left side of the fuselage ..will touch it up in the end).
Next in the agenda will be adding the under carriage, nose guns, and replace the engine cover with those provided in Eduard's PE detail set. Thanks for watching,

Hermann
alpha_tango
_VISITCOMMUNITY
Germany
Joined: September 07, 2005
KitMaker: 5,609 posts
AeroScale: 5,231 posts
Posted: Saturday, August 22, 2009 - 04:36 AM UTC
Very nice Hermann!!

Do you do it in Schröders "Kölle Allaaf!" /"Edelgard" markings?

cheers

Steffen

hkopper
_VISITCOMMUNITY
Florida, United States
Joined: March 01, 2008
KitMaker: 529 posts
AeroScale: 340 posts
Posted: Saturday, August 22, 2009 - 04:47 AM UTC
That's my intention Steffen. Thanks for the reply!!
thegirl
_VISITCOMMUNITY
Alberta, Canada
Joined: January 19, 2008
KitMaker: 6,743 posts
AeroScale: 6,151 posts
Posted: Saturday, August 22, 2009 - 06:59 AM UTC
Hi H !

Very nice job done on the camo and engine !
hkopper
_VISITCOMMUNITY
Florida, United States
Joined: March 01, 2008
KitMaker: 529 posts
AeroScale: 340 posts
Posted: Saturday, August 22, 2009 - 10:26 AM UTC
Thanks Terri and Steffen !!
PanzerMike
_VISITCOMMUNITY
Hamilton, New Zealand
Joined: May 09, 2007
KitMaker: 298 posts
AeroScale: 120 posts
Posted: Saturday, August 22, 2009 - 02:10 PM UTC
Looking great so far the engine looks amazing
 _GOTOTOP