World War II
Discuss WWII and the era directly before and after the war from 1935-1949.
Discuss WWII and the era directly before and after the war from 1935-1949.
Hosted by Rowan Baylis
Airfix Tiger Moth 1/72

Dirkpitt289

Joined: May 24, 2008
KitMaker: 346 posts
AeroScale: 307 posts

Posted: Friday, August 28, 2009 - 05:31 AM UTC
For the first time in my modeling career I ran radio cable and was pleased at the outcome. Now I'm ready to kick it up a notch. I just need to get the right material to use as cables. I'm pretty sure the nylon stockings I used on my Mig 3 won't work so well on a biplane. 


robot_

Joined: March 08, 2009
KitMaker: 719 posts
AeroScale: 691 posts

Posted: Saturday, August 29, 2009 - 02:50 AM UTC
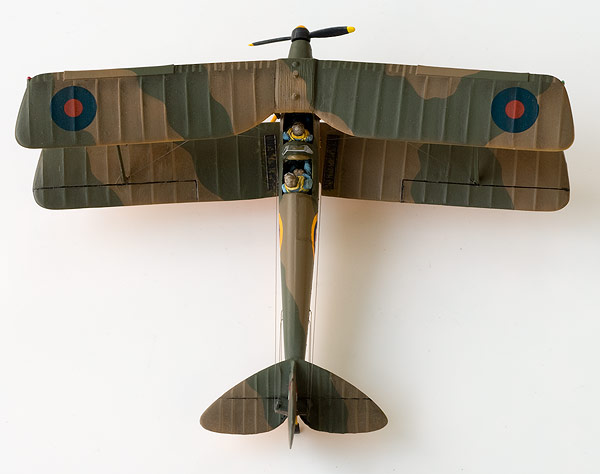
The Tiger Moth is now finished. I am very pleased with it! 
Definitely my best model so far, which is annoying, as it is such a small and cheap kit!


These were taken before the post-shading was air brushed (I used dilute brown and black watercolour). I used Eduard 0.5mm masking strips. It took about 2.5 hours to put on the masks, and about 45 minutes to remove the all! After the shading, but before I removed the masks, I gave it a coat of matte varnish, in case the varnish made the colour run or spread. Everything went well, and I added the prop, painted a few more bits and pieces (e.g. navigation lights). It might be a bit too dirty now, but I think it looks good from a distance.
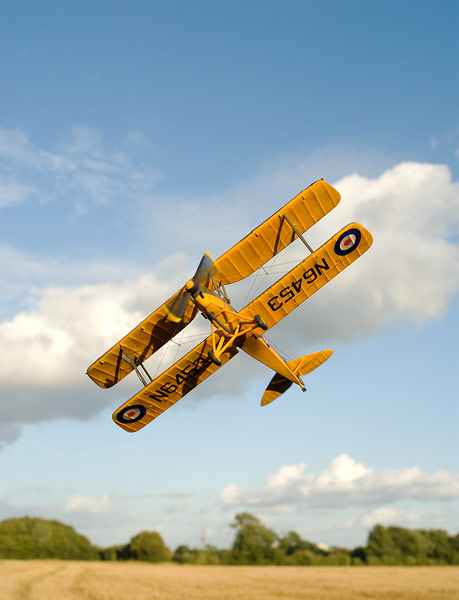
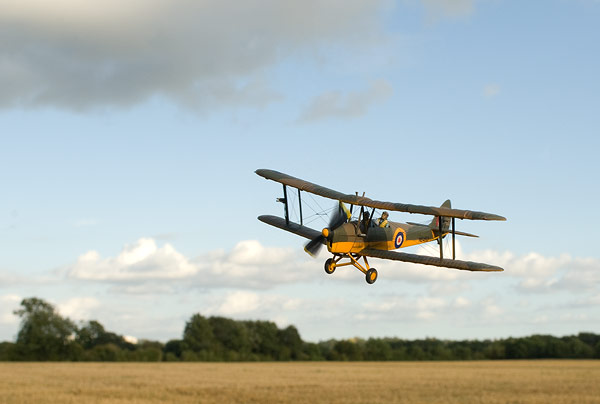
I'll take the model outside to some fields to photograph it later!

Definitely my best model so far, which is annoying, as it is such a small and cheap kit!


These were taken before the post-shading was air brushed (I used dilute brown and black watercolour). I used Eduard 0.5mm masking strips. It took about 2.5 hours to put on the masks, and about 45 minutes to remove the all! After the shading, but before I removed the masks, I gave it a coat of matte varnish, in case the varnish made the colour run or spread. Everything went well, and I added the prop, painted a few more bits and pieces (e.g. navigation lights). It might be a bit too dirty now, but I think it looks good from a distance.
I'll take the model outside to some fields to photograph it later!

robot_

Joined: March 08, 2009
KitMaker: 719 posts
AeroScale: 691 posts

Posted: Saturday, August 29, 2009 - 09:05 AM UTC
Posted: Saturday, August 29, 2009 - 08:04 PM UTC
Ben, the Moth looks great! Stunning what you can do out of an Airfix kit! And thanks for the tip on the rigging! I've had plans for a WWI plane for a while, might be just the input needed...
Cheers
Stef
Cheers
Stef

jaypee

Joined: February 07, 2008
KitMaker: 1,699 posts
AeroScale: 1,384 posts

Posted: Sunday, August 30, 2009 - 03:48 AM UTC
really cool. You've captured the fun spirit of the tiger moth in a most excellent fashion.
Seeing as you went to the bother of masking for ribbing effect and how well it worked
would you jst sand off the raised rib detail if you were to do it again?
Seeing as you went to the bother of masking for ribbing effect and how well it worked
would you jst sand off the raised rib detail if you were to do it again?
PolarBear

Joined: February 23, 2005
KitMaker: 820 posts
AeroScale: 629 posts

Posted: Monday, August 31, 2009 - 04:56 AM UTC
Fantastic job on that "simple" model! I just love what you've done with it! 
Cheers! // PolarBear

Cheers! // PolarBear


mj

Joined: March 16, 2002
KitMaker: 1,331 posts
AeroScale: 325 posts

Posted: Monday, August 31, 2009 - 03:57 PM UTC
That is an amazing result, with that old Airfix kit. Given the kit, and the painting mishap, you should be really proud of the end result. Great job. 
cheers,
Mike

cheers,
Mike

robot_

Joined: March 08, 2009
KitMaker: 719 posts
AeroScale: 691 posts

Posted: Tuesday, September 01, 2009 - 05:04 AM UTC
Thanks Stefan, J-P, Bjorn and Mike- your comments are much appreciated!
J-P- I did think about reducing the waviness of the fabric surface- I would look better if it wasn't so exaggerated. I didn't decide on masking the ribs until after I painted the camo, but yes, if doing it again, I would sand them.
J-P- I did think about reducing the waviness of the fabric surface- I would look better if it wasn't so exaggerated. I didn't decide on masking the ribs until after I painted the camo, but yes, if doing it again, I would sand them.
Posted: Wednesday, September 02, 2009 - 05:49 AM UTC
Congratulations Ben.
Youve made a super job of the old Airfix kit, and the pictures are something else!
How did you take the "in flight" shots?
Nige
Youve made a super job of the old Airfix kit, and the pictures are something else!
How did you take the "in flight" shots?
Nige

robot_

Joined: March 08, 2009
KitMaker: 719 posts
AeroScale: 691 posts

Posted: Wednesday, September 02, 2009 - 06:05 AM UTC
Thanks Nigel. I really enjoyed it (apart from when removing the masking...).
The photos were taken by hanging the model by the same thread used for the rigging, then photoshopping the thread out.
The photos were taken by hanging the model by the same thread used for the rigging, then photoshopping the thread out.
 |


