

 --<
--< World War II
Discuss WWII and the era directly before and after the war from 1935-1949.
Discuss WWII and the era directly before and after the war from 1935-1949.
Hosted by Rowan Baylis
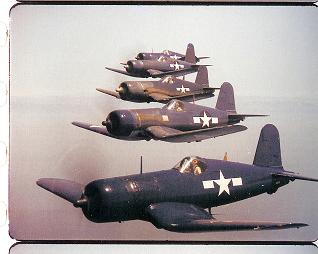
1/48th tamiya f4u-1d corsair

Keeperofsouls2099

Joined: January 14, 2009
KitMaker: 2,798 posts
AeroScale: 2,443 posts
Posted: Thursday, October 22, 2009 - 01:20 PM UTC
steffen has inspired me to do a build log of this project it will be my first so bear with me ill start with the plane ive always wanted to build one of these and it will be a wings up carrier plane laid some photo-etch last night got paint in mail today will post pics soon. :-)--<
--< 

VonCuda
Joined: November 28, 2005
KitMaker: 2,216 posts
AeroScale: 1,080 posts
Posted: Thursday, October 22, 2009 - 01:32 PM UTC
Justin, I've built around 40 billion Corsairs but for some reason I've never gone with the folded wing option. Looking forward to watching you build yours.
BTW, what kit are you building and what scale?
Hermon
BTW, what kit are you building and what scale?
Hermon

Keeperofsouls2099
Joined: January 14, 2009
KitMaker: 2,798 posts
AeroScale: 2,443 posts
Posted: Thursday, October 22, 2009 - 04:02 PM UTC
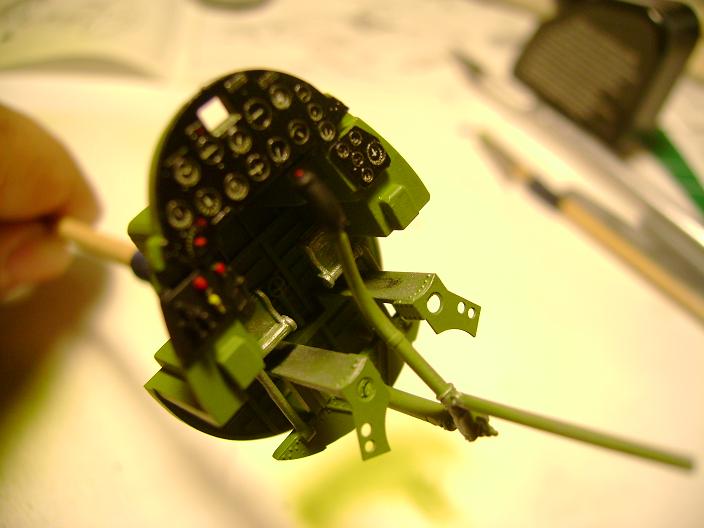
 here is the work that i have done so far camera dosnt catchthe dry brushing so good.sprayed w/polly scale's version of ana/111 interior green worn the areas that were in most use w/testors aluminum and gauges are photo etch along w/pedals.
hermon sorry its tamiyas new reboxing of their 1/48th corsair f4u-1d its nice kit so far

AussieReg

#007

Joined: June 09, 2009
KitMaker: 8,156 posts
AeroScale: 3,756 posts
Posted: Thursday, October 22, 2009 - 05:54 PM UTC
Hi Justin, Very nice work so far, I've looked at this kit in the LHS a few times now so I will be following your build all the way.
Cheers, D
Cheers, D


alpha_tango

Joined: September 07, 2005
KitMaker: 5,609 posts
AeroScale: 5,231 posts
Posted: Thursday, October 22, 2009 - 10:24 PM UTC
I agree, Justin, very nice work!
If I may ask for a bit more structure in your texts? it will make it a bit more readable for "non-native" speakers ....
Edit: img removed as it was just for demo
a bit of postproduction on the pic might help too
all the best
Steffen
If I may ask for a bit more structure in your texts? it will make it a bit more readable for "non-native" speakers ....
Edit: img removed as it was just for demo
a bit of postproduction on the pic might help too
all the best
Steffen

Keeperofsouls2099
Joined: January 14, 2009
KitMaker: 2,798 posts
AeroScale: 2,443 posts
Posted: Friday, October 23, 2009 - 12:11 AM UTC
is that how the pictures look on your end steffan?their crystal clear on mine.
as far as structure ive been playing around trying to fit everything in the boxes.
ill have to start doing more paragraphs and less run on sentances.
as far as structure ive been playing around trying to fit everything in the boxes.
ill have to start doing more paragraphs and less run on sentances.
Keeperofsouls2099
Joined: January 14, 2009
KitMaker: 2,798 posts
AeroScale: 2,443 posts
Posted: Friday, October 23, 2009 - 12:35 AM UTC
sorry,almost forgot happy to have you guys watching thanks,d
steffen i checked and i really dont have any picture editing programs
to speak of sorry
steffen i checked and i really dont have any picture editing programs
to speak of sorry
alpha_tango
Joined: September 07, 2005
KitMaker: 5,609 posts
AeroScale: 5,231 posts
Posted: Friday, October 23, 2009 - 12:39 AM UTC
Hi Justin
on my end your pic is much too dark and bare of any details ... of course if you used a TFT, CRT or other flatscreen stuff it might be different and my adjustment may look totally bad . Also, as I wrote i did not pay much attention to my work on your pic .. best is to take pics in daylight which is hard in autumn/winter when you work all day ....
Yeah some paragraphs and punctuation marks would be welcome .... some capitals (e.g. F4U-1D) might be nice too
not trying to play a teacher here .. I am doing many, many typos myself, not to mention my bad command of English in general .. but I find it quite hard to read your posts. Thank you!
Keep posting! --- despite what I just wrote: to have a build thread that is hard to read is much better than no BLog
all the best
Steffen
on my end your pic is much too dark and bare of any details ... of course if you used a TFT, CRT or other flatscreen stuff it might be different and my adjustment may look totally bad . Also, as I wrote i did not pay much attention to my work on your pic .. best is to take pics in daylight which is hard in autumn/winter when you work all day ....
Yeah some paragraphs and punctuation marks would be welcome
.... some capitals (e.g. F4U-1D) might be nice too not trying to play a teacher here .. I am doing many, many typos myself, not to mention my bad command of English in general .. but I find it quite hard to read your posts. Thank you!
Keep posting! --- despite what I just wrote: to have a build thread that is hard to read is much better than no BLog
all the best
Steffen
Keeperofsouls2099
Joined: January 14, 2009
KitMaker: 2,798 posts
AeroScale: 2,443 posts
Posted: Friday, October 23, 2009 - 07:19 AM UTC
No worries
Keeperofsouls2099
Joined: January 14, 2009
KitMaker: 2,798 posts
AeroScale: 2,443 posts
Posted: Saturday, October 24, 2009 - 03:07 PM UTC
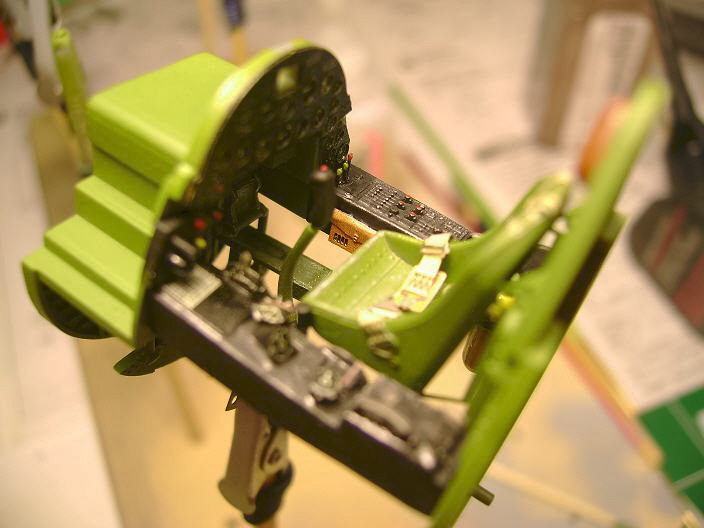
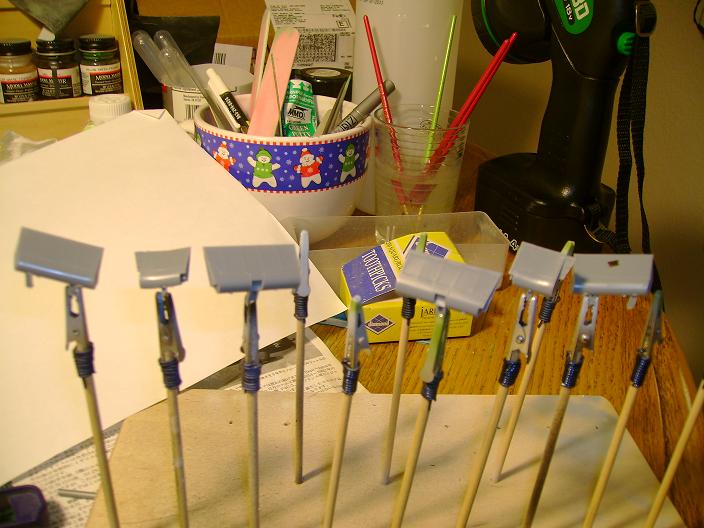
Just an update.Got some more done tonight.
Oh id like to correct myself the interior green is A/A611 poly sorry.
About to go nuts from all the PE but i made it through.
Tried editing photos steffen this was the best i could get.
photography just really isnt my hobby sorry.

Keeperofsouls2099
Joined: January 14, 2009
KitMaker: 2,798 posts
AeroScale: 2,443 posts
Posted: Sunday, October 25, 2009 - 11:20 AM UTC
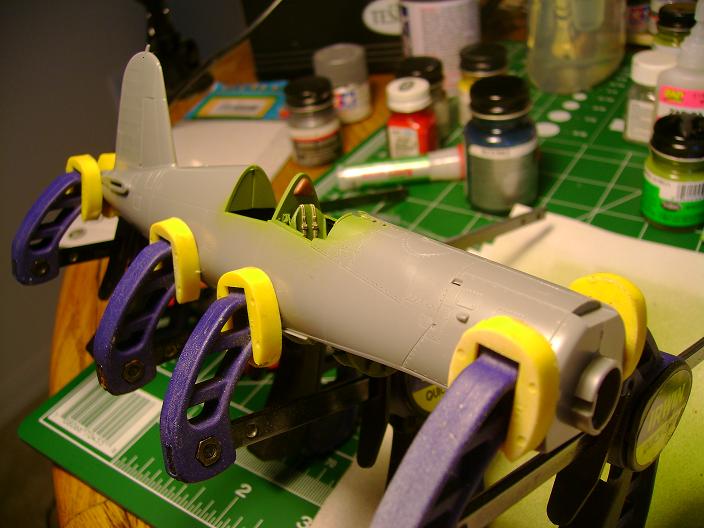
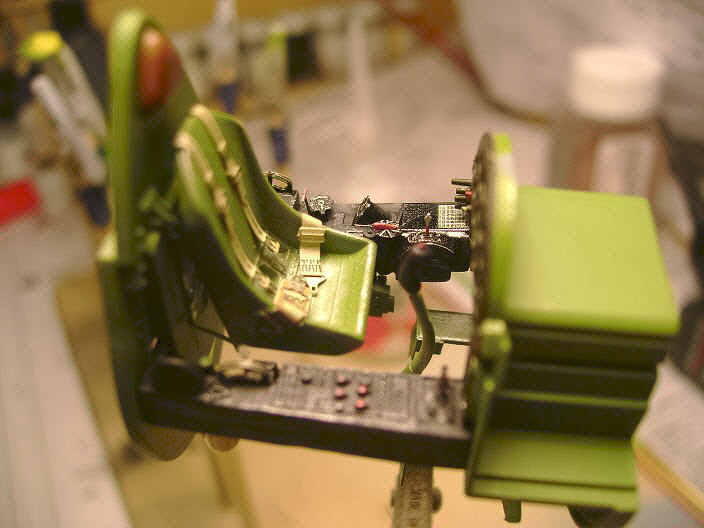
Got alot done today .Interior is painted and weathered.
All PE is done and the two fuselage halfs went together like a dream
This is the nicest fitting kit ive ever built.
Will let dry for tonight and begin removing seams tomorrow.
Dosnt seem like its going to be much like i said this kit fits good.
Cheers,Justin

Removed by original poster on 10/25/09 - 23:33:55 (GMT).
alpha_tango
Joined: September 07, 2005
KitMaker: 5,609 posts
AeroScale: 5,231 posts
Posted: Sunday, October 25, 2009 - 08:13 PM UTC
hi Justin
Looks really good!
as for the fit .. well, it is a Tamiya kit where fit problems are really rare ....
all the best
Steffen
Looks really good!
as for the fit .. well, it is a Tamiya kit where fit problems are really rare ....
all the best
Steffen
Keeperofsouls2099
Joined: January 14, 2009
KitMaker: 2,798 posts
AeroScale: 2,443 posts
Posted: Monday, October 26, 2009 - 01:14 PM UTC
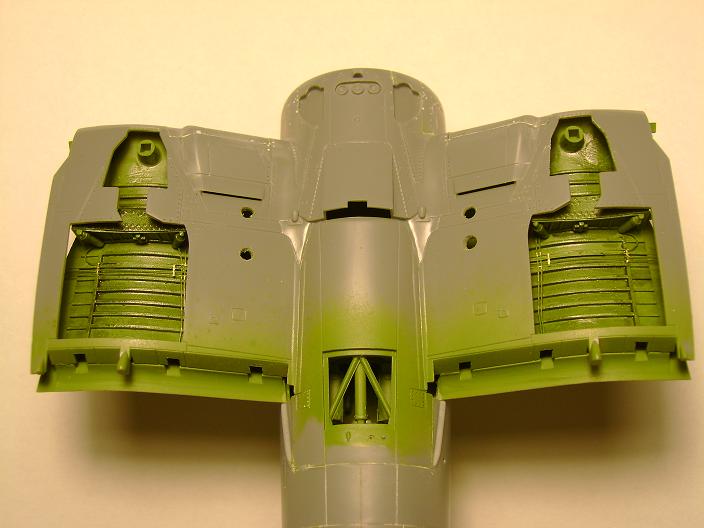
I have a few questions?First off,does anyone have a pic of the wheel bays
as i can not find any ref's looked everywhere cant find any help plz!
Started weathering the wheel bays and need to know what color to paint
the various hydraulic lines and thier fittings.
Mounted the fusalage to the lower wing assembly tonight and removed seam
lines will post pics as soon as i find out those colors.
Build On,
Justin

hkopper
Joined: March 01, 2008
KitMaker: 529 posts
AeroScale: 340 posts
Posted: Monday, October 26, 2009 - 02:54 PM UTC
Nice work Justin. I like the stunning work you have done with the cockpit. That's what I like about Tamiya builds .. They literally build themselves and with great detail. I can't wait for the next post.
Cheers,
Hermann
Cheers,
Hermann
Keeperofsouls2099
Joined: January 14, 2009
KitMaker: 2,798 posts
AeroScale: 2,443 posts
Posted: Monday, October 26, 2009 - 11:20 PM UTC
Thanks hermon i got some work done last night so i will post pics tonight.

thegirl

Joined: January 19, 2008
KitMaker: 6,743 posts
AeroScale: 6,151 posts
Posted: Tuesday, October 27, 2009 - 01:24 AM UTC
Nice build so far Justin !
Uruk-Hai

Joined: January 31, 2003
KitMaker: 795 posts
AeroScale: 21 posts

Posted: Tuesday, October 27, 2009 - 07:09 AM UTC
Coming along fine. Im just taking a break from the 1/72 version of this kit, and I am almost at the same stage. Im gonna make it Ira Kepfords plane.
Cheers
Cheers
VonCuda
Joined: November 28, 2005
KitMaker: 2,216 posts
AeroScale: 1,080 posts
Posted: Tuesday, October 27, 2009 - 11:26 AM UTC
Looks great Justin.
I see you've got the cockpit buttoned up already. I was going to add that a SMALL amount of silver paint drybrushed on the rudder pedals, seat, and instrument panel would really make the pit stand out. Anyway, she's looking good.
Hermon
I see you've got the cockpit buttoned up already. I was going to add that a SMALL amount of silver paint drybrushed on the rudder pedals, seat, and instrument panel would really make the pit stand out. Anyway, she's looking good.
Hermon
Keeperofsouls2099
Joined: January 14, 2009
KitMaker: 2,798 posts
AeroScale: 2,443 posts
Posted: Tuesday, October 27, 2009 - 12:08 PM UTC
hermon i dry brushed the whole inside man my camera sucks.
maybe ill get a new one soon i hope.
thanks to everyone for the positive comments.im in a couple
campains with you guys cant wait to work along side you.
maybe ill get a new one soon i hope.
thanks to everyone for the positive comments.im in a couple
campains with you guys cant wait to work along side you.
Keeperofsouls2099
Joined: January 14, 2009
KitMaker: 2,798 posts
AeroScale: 2,443 posts
Posted: Tuesday, October 27, 2009 - 03:39 PM UTC
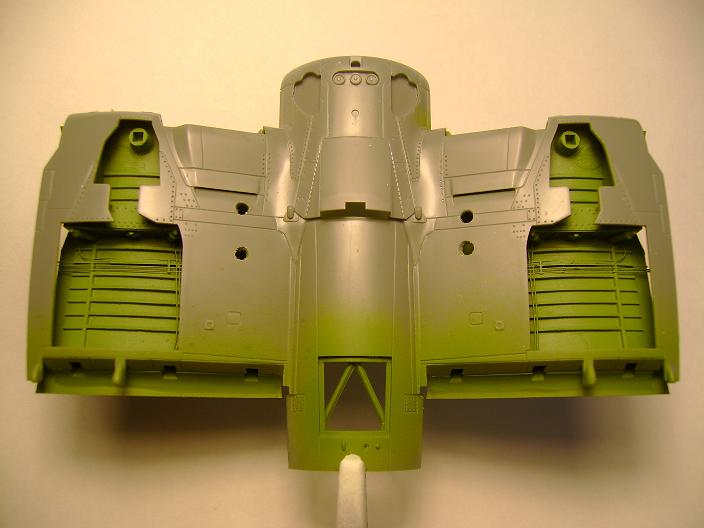
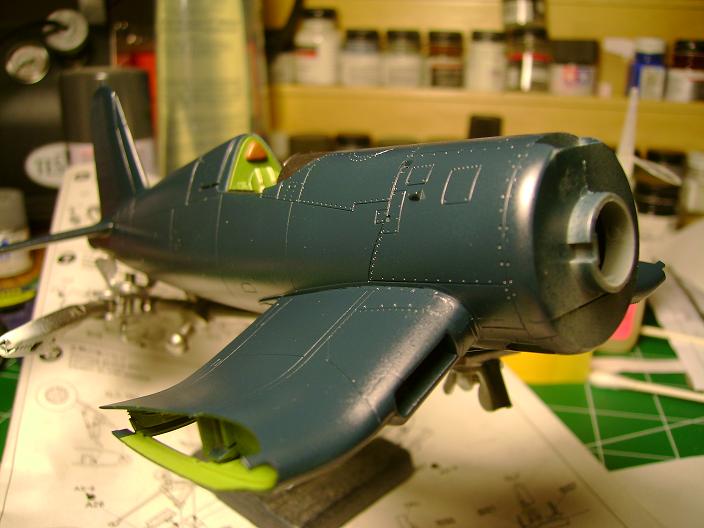
Got my wheel bays weathered got the Right effect i think.
Got flaps all assembled and ready for paint.
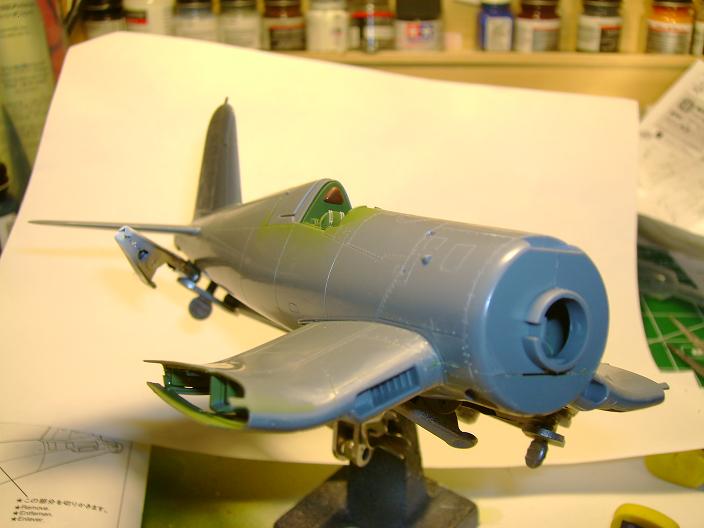
Front view fuselage ready for paint.
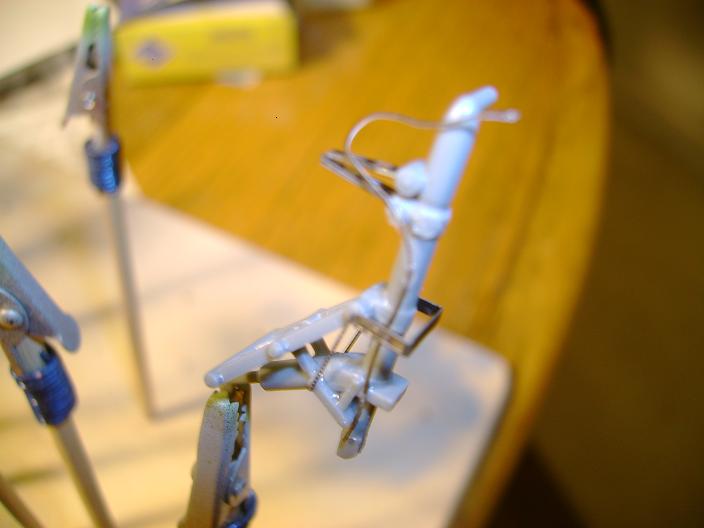
Got one side of the landing gear Photo-etched and then i started
getting ready to throw stuff so i stopped for the night.

Build On,
Justin
Uruk-Hai
Joined: January 31, 2003
KitMaker: 795 posts
AeroScale: 21 posts
Posted: Wednesday, October 28, 2009 - 01:44 AM UTC
Quoted Text
< then i started
getting ready to throw stuff so i stopped for the night.
Yup, thats my rule of thumb as well.

Cheers
VonCuda
Joined: November 28, 2005
KitMaker: 2,216 posts
AeroScale: 1,080 posts
Posted: Wednesday, October 28, 2009 - 12:02 PM UTC
Quoted Text
hermon i dry brushed the whole inside man my camera sucks.
Well, don't blame the camera just yet man. After taking a closer look I can plainly see that you did indeed drybrush the pit with silver. Sorry Justin. It seems that along with my memory, my eyesight is also quickly fading. Hermon
Keeperofsouls2099
Joined: January 14, 2009
KitMaker: 2,798 posts
AeroScale: 2,443 posts
Posted: Wednesday, October 28, 2009 - 11:18 PM UTC
lol its ok hermon
Keeperofsouls2099
Joined: January 14, 2009
KitMaker: 2,798 posts
AeroScale: 2,443 posts
Posted: Thursday, October 29, 2009 - 03:29 PM UTC
Ok so update.I got the landing gear done painted and weathered.
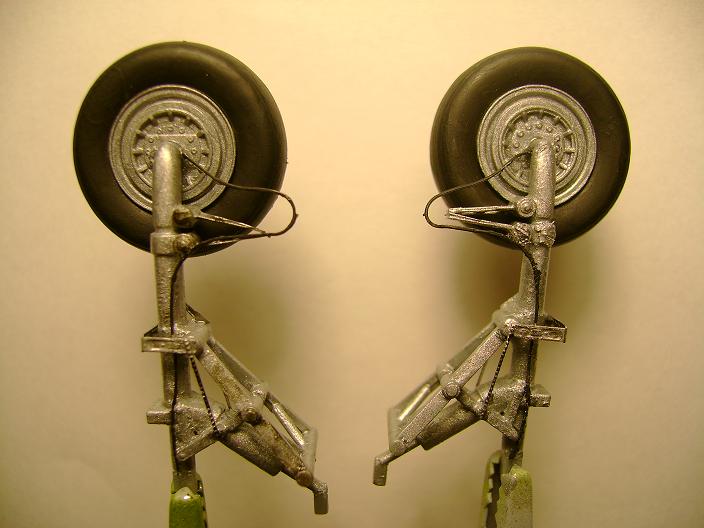
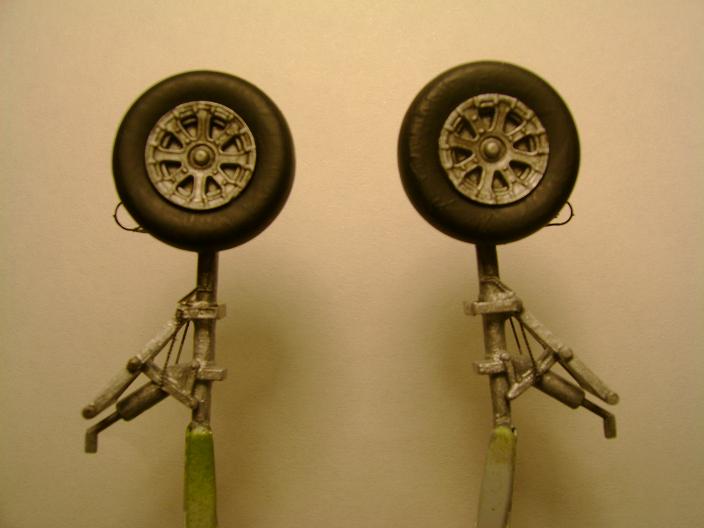
Then i got the fusalage painted and futured.
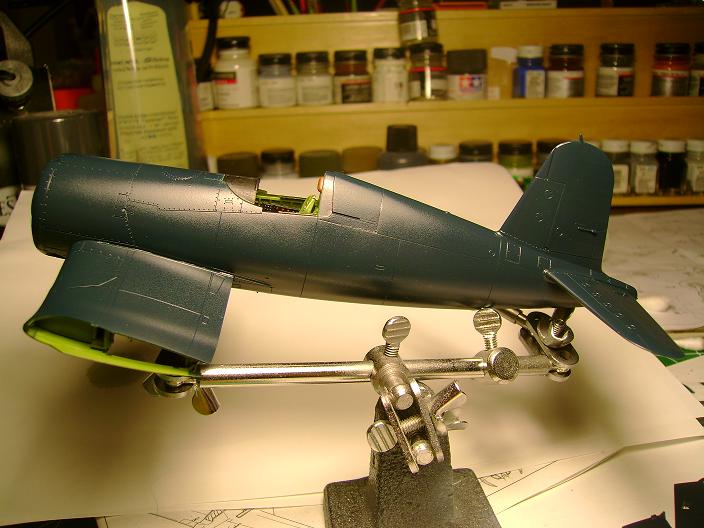
Hope you like it.This one is going to be cool i think.
Cant wait to see it done.
Build On,
Justin
Then i got the fusalage painted and futured.
Hope you like it.This one is going to be cool i think.
Cant wait to see it done.
Build On,
Justin
 |

WEB HOSTING BY


Copyright ©2021 AeroScale and Kitmaker Network, a subsidiary of Silver Star Enterprises
All Rights Reserved. Please read our Conditions of Use and Privacy Policy.
All Rights Reserved. Please read our Conditions of Use and Privacy Policy.