WNW GB 2009 -19 Bristol F2b Des
New South Wales, Australia
Joined: March 26, 2009
KitMaker: 366 posts
AeroScale: 309 posts
Posted: Thursday, December 17, 2009 - 04:48 PM UTC
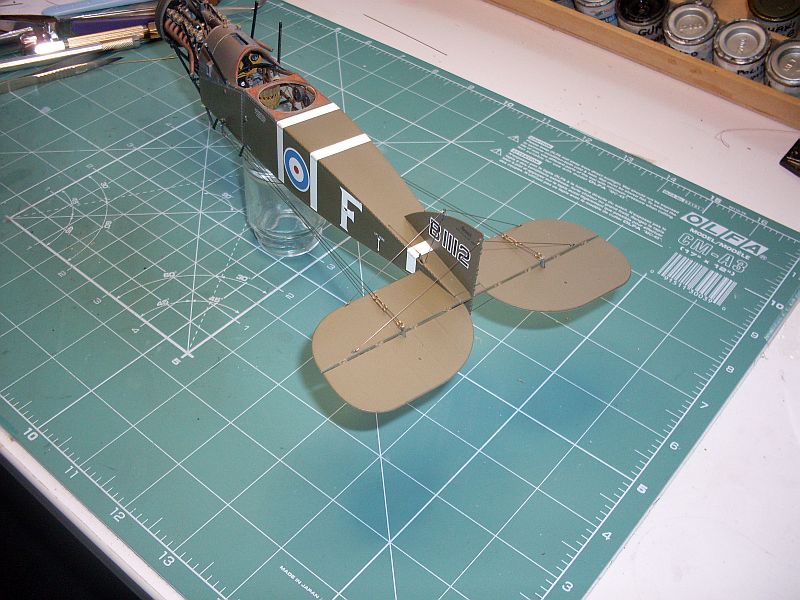
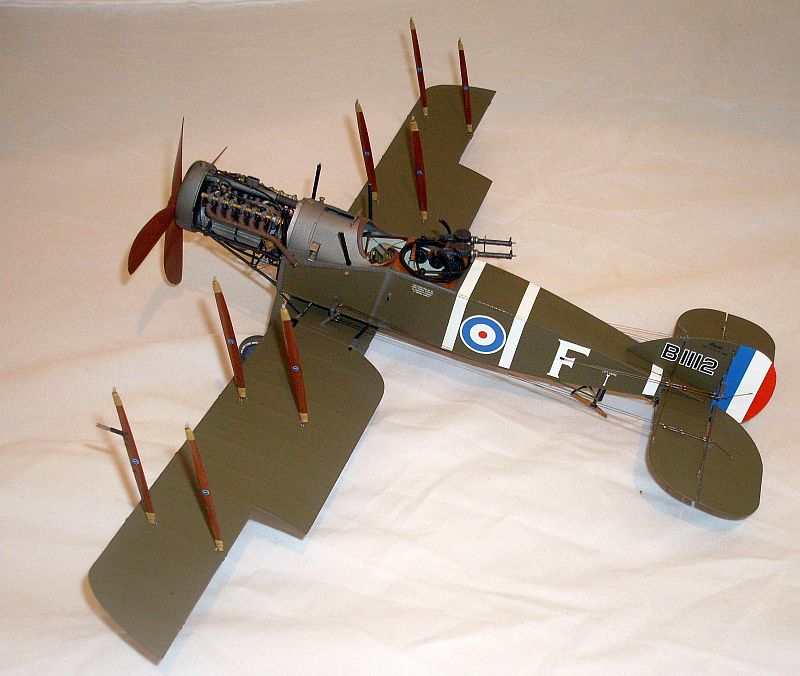
A few more photos just to keep you up to date with what I have been doing. Most of the control rigging is done, still the rudder to do, the rudder will have the double cables as well as the turnbuckles. The bottom wing is now fitted. Control cables are 0.15mm as instructed by WNW, I used mono.
Cheers.
Des.


Check my site for 1:32 scale WW1 aircraft model build logs, build techniques, how to make turnbuckles and eyelets plus much more, plenty of photos of my finished models
Alberta, Canada
Joined: January 19, 2008
KitMaker: 6,743 posts
AeroScale: 6,151 posts
Posted: Friday, December 18, 2009 - 02:24 AM UTC
Very nicely done so far Des ! Just love the rigging so far

Looking forward to the next run of progress pic's !
New South Wales, Australia
Joined: March 26, 2009
KitMaker: 366 posts
AeroScale: 309 posts
Posted: Tuesday, December 22, 2009 - 11:57 PM UTC
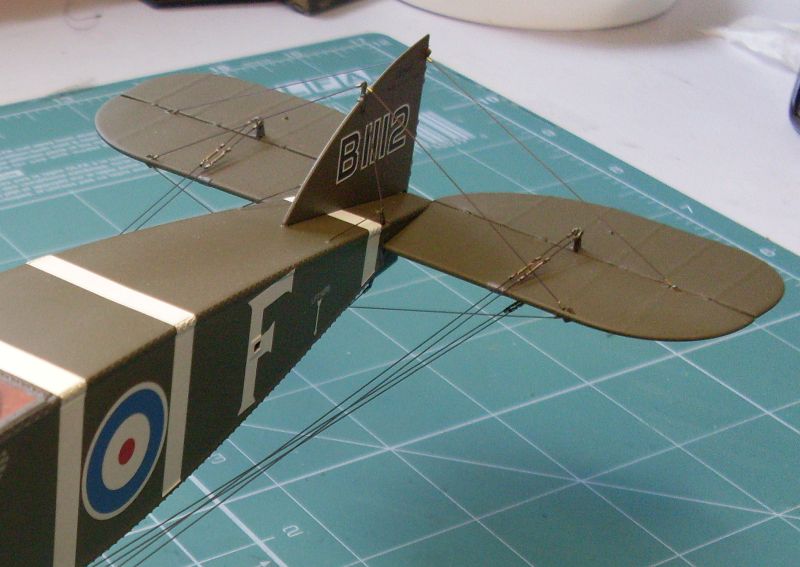
I have completed the tail end rigging using a total of 12 turnbuckles, the double cables sure made the job a bit harder. I still need to paint the buckles and all the other little brass ends. The eyelets have been fitted to the lower wing ready for the wing rigging. I didn't notice until after I took the photos but please excuse the dust on the tail surfaces.
Cheers
Des.


Check my site for 1:32 scale WW1 aircraft model build logs, build techniques, how to make turnbuckles and eyelets plus much more, plenty of photos of my finished models
New South Wales, Australia
Joined: March 26, 2009
KitMaker: 366 posts
AeroScale: 309 posts
Posted: Monday, December 28, 2009 - 01:16 PM UTC
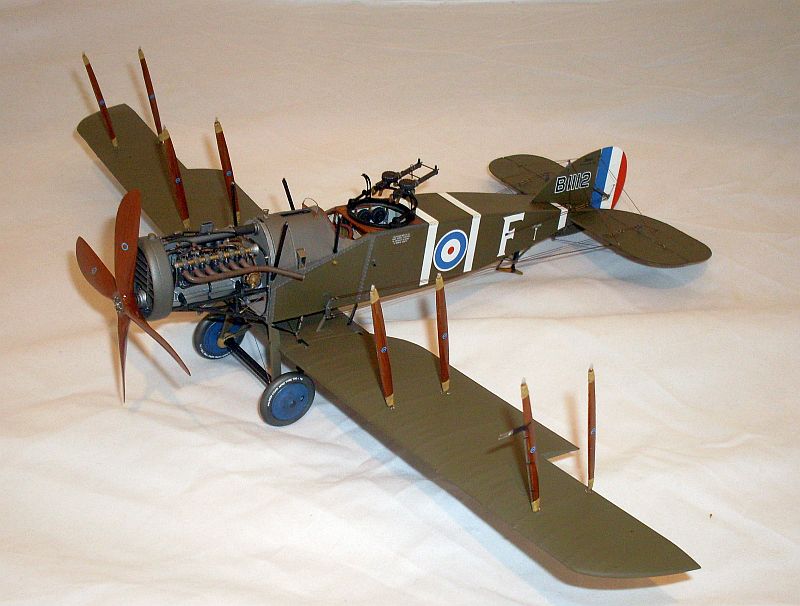
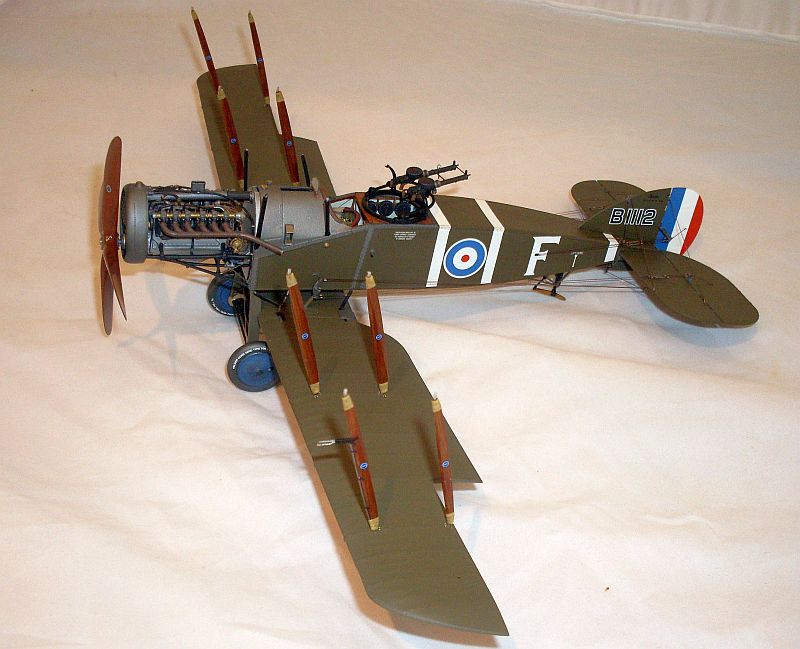
Progress has been a bit slow this last week but here are some photos of what I managed to get done.
The wheels are finished and fitted. The tyres are done with lead pencil dust applied using a small stiff brush, sprayed with gloss clear, decals applied then sprayed with matt clear.
The struts are also finished with decals,clear gloss and simulated reinforcing tape. I used Tamiya tape cut to a width of 0.75mm then wrapped around each end of each strut to a length of 4mm, I coated the tape with matt clear.
The top wing is ready for painting which I hope to get done over the next few days.
Cheers
Des.
Check my site for 1:32 scale WW1 aircraft model build logs, build techniques, how to make turnbuckles and eyelets plus much more, plenty of photos of my finished models
Arizona, United States
Joined: December 12, 2008
KitMaker: 1,423 posts
AeroScale: 1,319 posts
Posted: Tuesday, December 29, 2009 - 01:50 AM UTC
We few, we happy few........
Alberta, Canada
Joined: January 19, 2008
KitMaker: 6,743 posts
AeroScale: 6,151 posts
Posted: Tuesday, December 29, 2009 - 02:07 AM UTC
I will second that !
Most excellent Des

Looking forward to the rigging
Attica, Greece / Ελλάδα
Joined: May 01, 2008
KitMaker: 1,437 posts
AeroScale: 1,241 posts
Posted: Tuesday, December 29, 2009 - 02:20 AM UTC
Wooooooooooooooooooooooooooooow!!!!!!!!!
It's A-W-E-S-O-M-E!!!!!!

(Speechless)
I am thinking about stop building my bristol.
ALL that rigging, the 12 connecting struts!!!!


How long did it take until now???

Cheers Nick

New South Wales, Australia
Joined: March 26, 2009
KitMaker: 366 posts
AeroScale: 309 posts
Posted: Tuesday, December 29, 2009 - 07:39 AM UTC
Thanks for the kind words, most appreciated.
NICK. I started building the Bristol in the last week of October, so I have been working on her for two months.
Terri. The rigging is not far off but this time I will be using a different technique to what I have done in the past, so, fingers crossed that it all works out ok.
Cheers.
Des.
Check my site for 1:32 scale WW1 aircraft model build logs, build techniques, how to make turnbuckles and eyelets plus much more, plenty of photos of my finished models
Attica, Greece / Ελλάδα
Joined: May 01, 2008
KitMaker: 1,437 posts
AeroScale: 1,241 posts
Posted: Tuesday, December 29, 2009 - 09:07 AM UTC
New South Wales, Australia
Joined: March 26, 2009
KitMaker: 366 posts
AeroScale: 309 posts
Posted: Thursday, December 31, 2009 - 08:25 AM UTC
Thanks Nick.
Please don't give up on your project, you are motoring along very well, the rigging may seem daunting but with a little patience you will prevail.
I am retired so I can spend a lot of time on my model each day, some days I work on it for 8 - 10 hours, so even though 2 months does not seem a long time the hours spent over that period is a lot.
Keep modelling Nick and I look forward to seeing your finished model.
Happy New Year

Des.
Check my site for 1:32 scale WW1 aircraft model build logs, build techniques, how to make turnbuckles and eyelets plus much more, plenty of photos of my finished models
Attica, Greece / Ελλάδα
Joined: May 01, 2008
KitMaker: 1,437 posts
AeroScale: 1,241 posts
Posted: Thursday, December 31, 2009 - 11:09 AM UTC
Ok, thank you for the support
Have you seen the last progress on my biplane??
Cheers Nick
Alberta, Canada
Joined: January 19, 2008
KitMaker: 6,743 posts
AeroScale: 6,151 posts
Posted: Thursday, December 31, 2009 - 12:21 PM UTC
Look forward to your method Des . Also nice to see different ways on doing this . I have one plane almost done , just finishing detail painting and set it aside . The second one is in the same state . All I need to do is finish the third one and then start with the rigging tutorial . Three ways of doing it . Each one more advance then the other .
Interesting to see your take on the double landing wires
New South Wales, Australia
Joined: March 26, 2009
KitMaker: 366 posts
AeroScale: 309 posts
Posted: Thursday, December 31, 2009 - 01:29 PM UTC
Thanks Terri.
I have done the double flying wires on the Sopwith Camel, SE-5a, Spad VII and the DH-2 but the Bristol is the first time I have encountered double control wires with turnbuckles.
I'm pre-shading the lower surface of the upper wing at the moment so the rigging process is not far away.
Looking forward to seeing your completed aircraft and reading your rigging tutorial, it's always good to see other methods.
Happy New Year
Des.
Check my site for 1:32 scale WW1 aircraft model build logs, build techniques, how to make turnbuckles and eyelets plus much more, plenty of photos of my finished models
New South Wales, Australia
Joined: March 26, 2009
KitMaker: 366 posts
AeroScale: 309 posts
Posted: Thursday, December 31, 2009 - 04:56 PM UTC
This may be of interest to those who are a bit unsure of the terminology for all those wires on WW1 aircraft.
Des.

Check my site for 1:32 scale WW1 aircraft model build logs, build techniques, how to make turnbuckles and eyelets plus much more, plenty of photos of my finished models

#047
England - East Anglia, United Kingdom
Joined: September 13, 2005
KitMaker: 2,016 posts
AeroScale: 475 posts
Posted: Friday, January 01, 2010 - 08:24 AM UTC
Des,
Fantastic mate,although.
Mrs Torch is less than impressed as I have had to order this kit now

but I may be able to bring her round by taking her to football tomorrow with pub's before and after the match
,but as she don't drink this could be a major flaw in my cunning plan

Keep posting fella,I love this build
Andy
Major Caryle,
"Shall we have a go at the far end now,sir?"
Lt Colonel "Johnny" Frost,
"Having a go,is hardly text book terminology Harry"
Major Caryle,
"But you'll let us try sir?"
A Bridge Too Far
Lottery Campaign "Oh de Vichy"
New South Wales, Australia
Joined: March 26, 2009
KitMaker: 366 posts
AeroScale: 309 posts
Posted: Saturday, January 02, 2010 - 11:37 AM UTC
Thanks guys for your kind words, much appreciated.
A couple more photos of what I have been doing (not much) over the past few days. The pre-shading of the lower surface of the upper wing is almost complete. I still need to make dozens of the little eyelets and brass bits.
Cheers
Des.


Check my site for 1:32 scale WW1 aircraft model build logs, build techniques, how to make turnbuckles and eyelets plus much more, plenty of photos of my finished models
New South Wales, Australia
Joined: March 26, 2009
KitMaker: 366 posts
AeroScale: 309 posts
Posted: Wednesday, January 06, 2010 - 05:19 PM UTC
Check my site for 1:32 scale WW1 aircraft model build logs, build techniques, how to make turnbuckles and eyelets plus much more, plenty of photos of my finished models
Attica, Greece / Ελλάδα
Joined: May 01, 2008
KitMaker: 1,437 posts
AeroScale: 1,241 posts
Posted: Wednesday, January 06, 2010 - 09:52 PM UTC
Colorado, United States
Joined: January 25, 2004
KitMaker: 11,669 posts
AeroScale: 11,011 posts
Posted: Thursday, January 07, 2010 - 04:52 AM UTC
". . .The most important thing is to know why you build and then get the most that you can out of building." via D.D.
Alberta, Canada
Joined: January 19, 2008
KitMaker: 6,743 posts
AeroScale: 6,151 posts
Posted: Thursday, January 07, 2010 - 02:06 PM UTC
I seconded that Des ! Truly amazing craftsmanship , can;t wait to see her rigged now !
Croatia Hrvatska
Joined: December 26, 2009
KitMaker: 144 posts
AeroScale: 109 posts
Posted: Saturday, January 09, 2010 - 07:48 AM UTC
Absolutely perfect
New South Wales, Australia
Joined: March 26, 2009
KitMaker: 366 posts
AeroScale: 309 posts
Posted: Sunday, January 10, 2010 - 01:22 AM UTC
Check my site for 1:32 scale WW1 aircraft model build logs, build techniques, how to make turnbuckles and eyelets plus much more, plenty of photos of my finished models
#047
England - East Anglia, United Kingdom
Joined: September 13, 2005
KitMaker: 2,016 posts
AeroScale: 475 posts
Posted: Sunday, January 10, 2010 - 02:18 AM UTC
Ouch!!!!
I just hit my head when I fell over looking at that!!, stunning,bloody stunning Des.
I'm off to lay down now,with pics of this in my head

Can't wait to get my paws on this kit.
Whats next Des?
Andy
Major Caryle,
"Shall we have a go at the far end now,sir?"
Lt Colonel "Johnny" Frost,
"Having a go,is hardly text book terminology Harry"
Major Caryle,
"But you'll let us try sir?"
A Bridge Too Far
Lottery Campaign "Oh de Vichy"
Alberta, Canada
Joined: January 19, 2008
KitMaker: 6,743 posts
AeroScale: 6,151 posts
Posted: Sunday, January 10, 2010 - 03:21 AM UTC
I should be at your place in a few days to pic this one up Des
It will look great on my shelf
Outstanding Des ! The best Bristol I have seen so far .
( love the rigging )
Arizona, United States
Joined: December 12, 2008
KitMaker: 1,423 posts
AeroScale: 1,319 posts
Posted: Sunday, January 10, 2010 - 04:18 AM UTC
All I can say is OUTstanding!
We few, we happy few........


