

Carl,
Your build is coming along great. I have the texture decals too and was wondering how they would look on a build. I think they do add a nice effect. Thanks for posting the pictures.
Mark
Early Aviation
Discuss World War I and the early years of aviation thru 1934.
Discuss World War I and the early years of aviation thru 1934.
Hosted by Jim Starkweather
WNW GB 2009 -10 SE5a Carl

guitarlute101

Joined: December 18, 2006
KitMaker: 1,121 posts
AeroScale: 1,063 posts
Posted: Friday, April 23, 2010 - 01:01 AM UTC
thegirl

Joined: January 19, 2008
KitMaker: 6,743 posts
AeroScale: 6,151 posts
Posted: Friday, April 23, 2010 - 01:17 AM UTC
The texturing is super Carl , nice effect with the pastels as well . The effects which can be achieved using this method is better then an airbrush IMO 
Looking forward to your next up-date
Looking forward to your next up-date

CaptainA
Joined: May 14, 2007
KitMaker: 3,117 posts
AeroScale: 2,270 posts
Posted: Friday, April 23, 2010 - 11:07 AM UTC
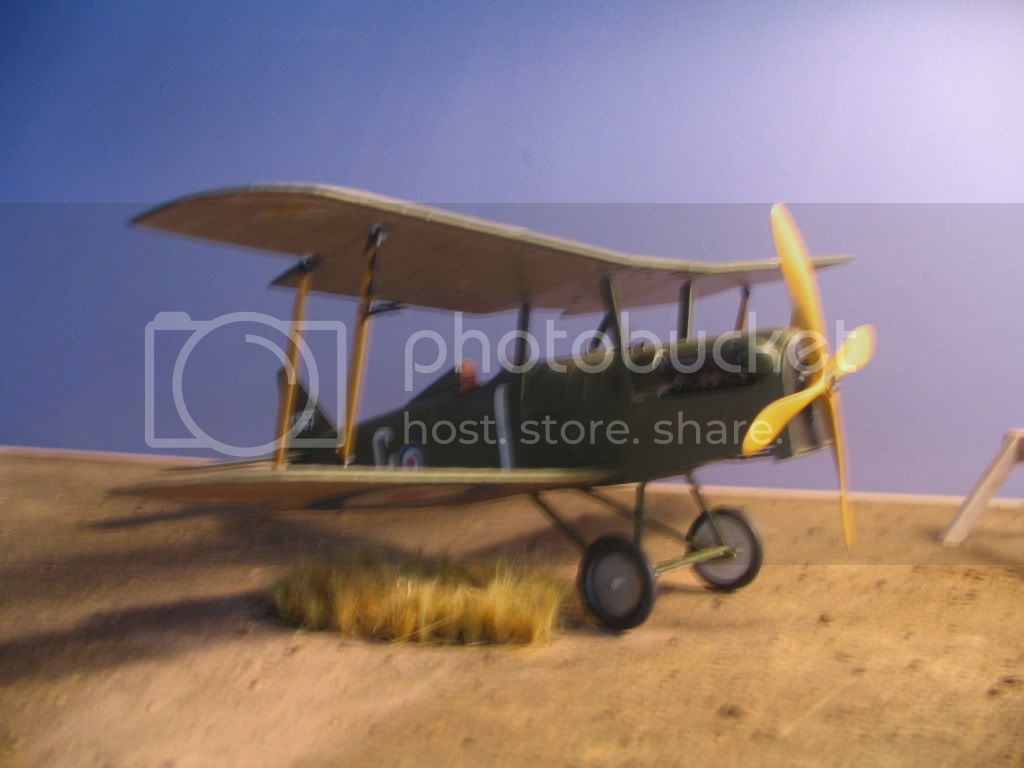
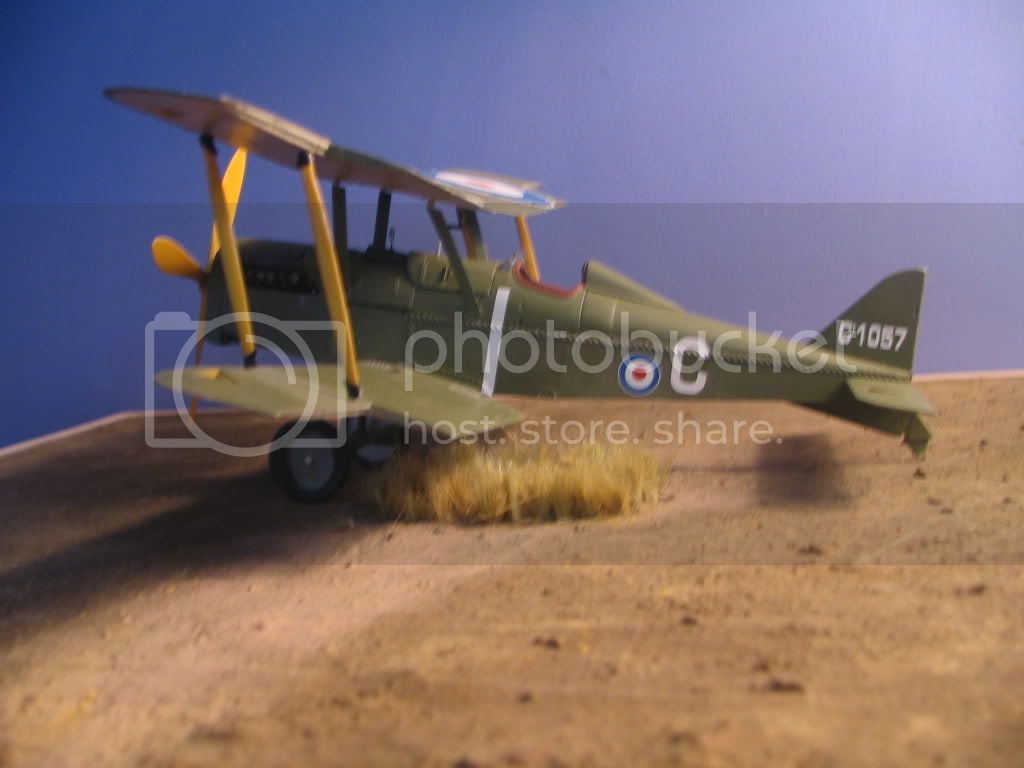
I got the wings painted in PC 10 with leading edge wrap-around. I was going to seal up the fuselage, then discovered I need a plan for doing the control wires. They connect to the underside of the seat and the area in between the lower wings wherethe rudder bar is connected. Hard to explain to people who have not built this, but it looks to be impossible to accomplish. If you connect to the rudder bar, how can you run the wires back into the holes beneath the seat. (The wing has to be glued to the fuselage before you can make the connections) If you run the wires from the holes, then how do you connect them to the rudder bar? I bet a lot of people out there skipped the control wires. 
Some update pics
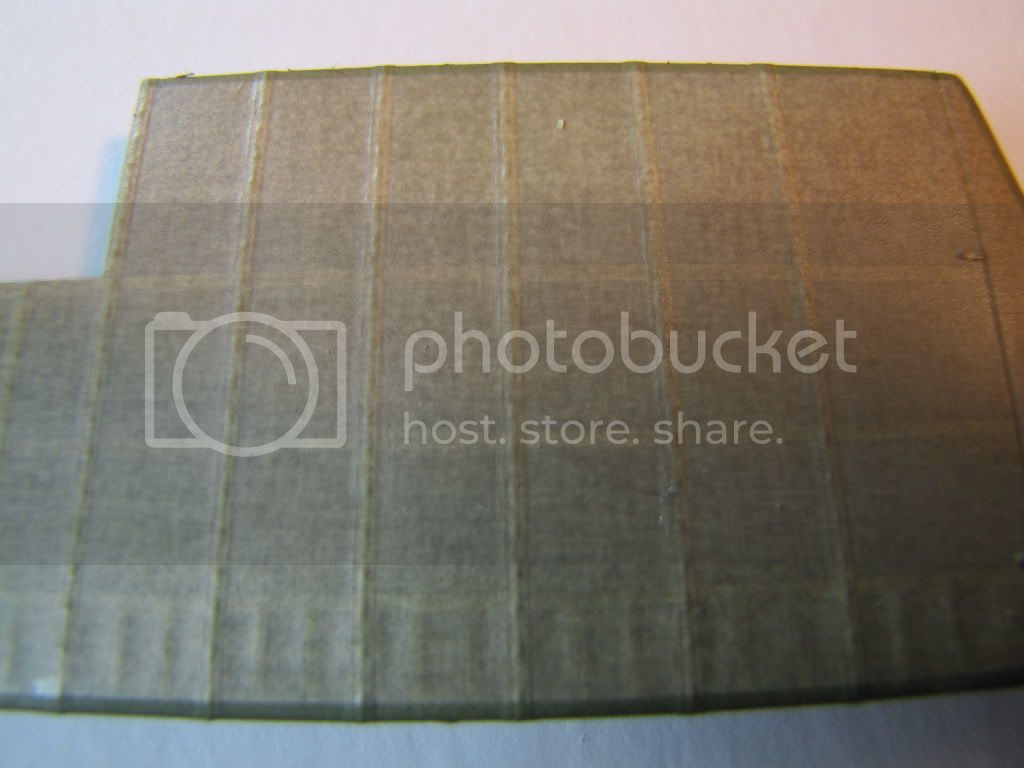
This picture is done with a macro lense at a distance of about an inch. The wings is not warped or curved. You can see the wrap around.
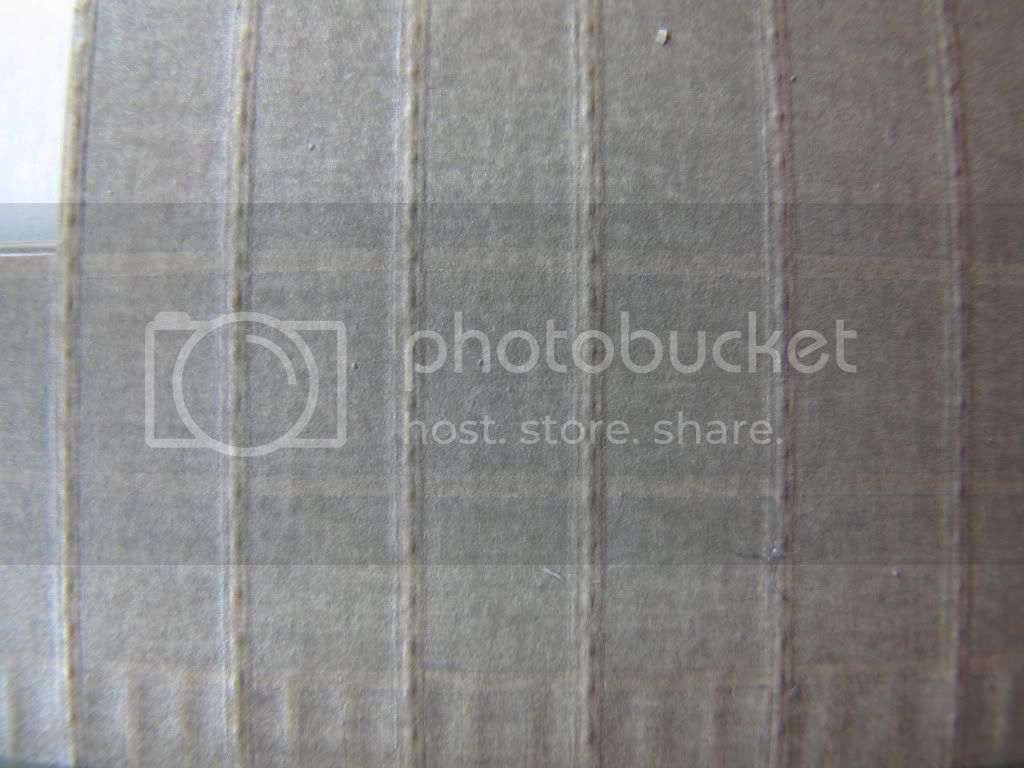
This picture is from a little further away. It shows the subtle affect of the textur decals a little better. They still look a little darker in the pictures than in person.
I ordered 5 more sheets of texture because I do have a Bristol F2.b in the closet.
Thanks for taking the time to post your comments. I really do appreciate feedback.
Some update pics
This picture is done with a macro lense at a distance of about an inch. The wings is not warped or curved. You can see the wrap around.
This picture is from a little further away. It shows the subtle affect of the textur decals a little better. They still look a little darker in the pictures than in person.
I ordered 5 more sheets of texture because I do have a Bristol F2.b in the closet.
Thanks for taking the time to post your comments. I really do appreciate feedback.


JackFlash
Joined: January 25, 2004
KitMaker: 11,669 posts
AeroScale: 11,011 posts
Posted: Friday, April 23, 2010 - 04:31 PM UTC
Impressive Carl nicely done!
CaptainA
Joined: May 14, 2007
KitMaker: 3,117 posts
AeroScale: 2,270 posts
Posted: Sunday, April 25, 2010 - 10:50 AM UTC
I got the fuselage sealed up today. No pictures. Weld beeds aren't really to exciting anyway.

Mgunns
Joined: December 12, 2008
KitMaker: 1,423 posts
AeroScale: 1,319 posts

Posted: Sunday, April 25, 2010 - 12:09 PM UTC
Quoted Text
I got the wings painted in PC 10 with leading edge wrap-around. I was going to seal up the fuselage, then discovered I need a plan for doing the control wires. They connect to the underside of the seat and the area in between the lower wings wherethe rudder bar is connected I bet a lot of people out there skipped the control wires.
 Hi Carl:
The texture decals really add to the overall effect. I wish I had elected to use them. I used real thin rod for the contro wires. I didn't connect them as you mention it is almost impossible, so I went for effect.
CaptainA
Joined: May 14, 2007
KitMaker: 3,117 posts
AeroScale: 2,270 posts
Posted: Tuesday, April 27, 2010 - 01:15 AM UTC
I put some music wire through holes under the seat and glued p the fuselage. I also put some turnbuckles on the rudder bar. When I mate the wing to the fuselage, I cam just reach in with some tweezers and a drop of CA to mate them up. Or so that is the plan. You military folk out there know what happens to plans.
The weld wasn't dry yesterday, so I put the SE 5a off to the side and did a little work on the D.V. I will be heading in the office in a little bit to get some sanding done.
The weld wasn't dry yesterday, so I put the SE 5a off to the side and did a little work on the D.V. I will be heading in the office in a little bit to get some sanding done.

Rotebaron

Joined: August 10, 2010
KitMaker: 182 posts
AeroScale: 179 posts
Posted: Tuesday, August 10, 2010 - 10:57 AM UTC
Carl, now I know with did you mean with Campaigns... and is great!!!!!!
Cheers.
Al
Cheers.
Al
thegirl
Joined: January 19, 2008
KitMaker: 6,743 posts
AeroScale: 6,151 posts
Posted: Tuesday, August 10, 2010 - 03:25 PM UTC
Hey Carl !
Nice to hear you back on this project once more and making some progress .
Which I should get back to mine , time is running out here .
When I did my , I left the seat out . Added the rigging to the rudder bar . It was easy to slip them into the holes and then glued the rudder bar in place . Of course I used plastic rod for this and bits of stretched q-tip slip over the rods , then glued the seat in place and added the belts .
Some pic's would be nice though Carl , you always bug me about pic's
CaptainA
Joined: May 14, 2007
KitMaker: 3,117 posts
AeroScale: 2,270 posts
Posted: Wednesday, September 22, 2010 - 07:28 AM UTC
I really don't want to take up to much time or space right now, so I will just post the pictures and talk more about the build, and why it has taken so long, later on tonight when I have a bit more time.
Mgunns
Joined: December 12, 2008
KitMaker: 1,423 posts
AeroScale: 1,319 posts
Posted: Wednesday, September 22, 2010 - 09:43 AM UTC
[quote]I really don't want to take up to much time or space right now, so I will just post the pictures and talk more about the build, and why it has taken so long, later on tonight when I have a bit more time.
It looks like you have made some progress. Looking forward to more.
Best
Mark
It looks like you have made some progress. Looking forward to more.Best
Mark
tailsitter
Joined: November 10, 2006
KitMaker: 8 posts
AeroScale: 3 posts

Posted: Friday, October 15, 2010 - 04:02 PM UTC
Looks good carl. Did you have any trouble with the decals?

warreni

Joined: August 14, 2007
KitMaker: 5,926 posts
AeroScale: 2,201 posts

Posted: Friday, October 15, 2010 - 08:54 PM UTC
Looking great Carl.
I am up to the painting stage before I attach the top wing to the rest of the airframe. This aircraft has more rigging than another I have built so far. The cluster of four lines at the top of one of the undercarriage legs is really difficult, especially when you put them in the wrong legs first go! Must be a Wolsley powered one coming I think...
Keep up the good work...
Warren
CaptainA
Joined: May 14, 2007
KitMaker: 3,117 posts
AeroScale: 2,270 posts
Posted: Monday, October 18, 2010 - 10:07 AM UTC
I have been goofing off again. House work and other fun things. The little bit of time I have had has been spent on the D.III.
Thanks. Decals were great. Not a problem at all.
Quoted Text
Looks good carl. Did you have any trouble with the decals?
Thanks. Decals were great. Not a problem at all.

OEFFAG_153

Joined: February 19, 2010
KitMaker: 1,473 posts
AeroScale: 1,450 posts

Posted: Monday, October 18, 2010 - 07:50 PM UTC
Hi Carl coming along very nicely indeed. Looking forward to the finishing touches and rigging.
Best Regards
Mikael
Best Regards
Mikael
JackFlash
Joined: January 25, 2004
KitMaker: 11,669 posts
AeroScale: 11,011 posts
Posted: Thursday, October 06, 2011 - 05:45 PM UTC
Greetings Carl any word on this build?
 |

WEB HOSTING BY


Copyright ©2021 AeroScale and Kitmaker Network, a subsidiary of Silver Star Enterprises
All Rights Reserved. Please read our Conditions of Use and Privacy Policy.
All Rights Reserved. Please read our Conditions of Use and Privacy Policy.