

Early Aviation
Discuss World War I and the early years of aviation thru 1934.
Discuss World War I and the early years of aviation thru 1934.
Hosted by Jim Starkweather
WNW GB 2009 -10: SE 5a Bill
bill_c

Joined: January 09, 2008
KitMaker: 10,553 posts
AeroScale: 1,198 posts
Posted: Sunday, January 10, 2010 - 06:11 AM UTC
Don't be discouraged, Mark! I think it's going to yield a good kit, though it's important for WNW to know about the kit's problems so they can either correct them or provide warning on their website. They have, for example, updated the cockpit painting instructions. I'd like to see them let consumers know the fit issues in the cowling. This isn't the first kit to have them, but the "buzz" and hype around these kits have perhaps obscured the fact that they're the effort of human beings, and therefore flawed.

thegirl

Joined: January 19, 2008
KitMaker: 6,743 posts
AeroScale: 6,151 posts
Posted: Monday, January 11, 2010 - 04:21 AM UTC
Quoted Text
Thanks, Terri (blushing).
Now you got me blushing

Bill is right Mark , don't be discouraged by the flaws in the kit with fit issues . It is great to know about them and will aid many modellers and WNW in the future . Yes there was a lot of hype over the kits when they first came out and a few things got over looked . Now that they are starting to come out it's easier to address the fit issues and learn how they where resolved . I just started my build this weekend and I'm glad to know about the cowling fit . Keep at it , your doing a fine job !
So .......when is the next up-date Bill ?
bill_c
Joined: January 09, 2008
KitMaker: 10,553 posts
AeroScale: 1,198 posts
Posted: Monday, January 11, 2010 - 04:35 AM UTC
Quoted Text
So .......when is the next up-date Bill ?
Well, I went to add the paint last night, but found out the main camo PC10 is a mix of Tamiya XF62 (OD) and XF10 (flat brown) in a mix of 2-1. I have the XF62, but purchased X10 (Gunmetal) by mistake.

My LHS is closed today, so I'll have to go later this week.
But I have some photos of the white undercoat, black shading and CDL overcoat I'll be uploading shortly. Then it's on to the decaling.
I've decided to leave the control cables to the last and leave them unpainted metal. Does that make sense?

Mgunns
Joined: December 12, 2008
KitMaker: 1,423 posts
AeroScale: 1,319 posts

Posted: Monday, January 11, 2010 - 06:26 AM UTC
Quoted Text
Bill is right Mark , don't be discouraged by the flaws in the kit with fit issues . It is great to know about them and will aid many modellers and WNW in the future . Yes there was a lot of hype over the kits when they first came out and a few things got over looked . Now that they are starting to come out it's easier to address the fit issues and learn how they where resolved . I just started my build this weekend and I'm glad to know about the cowling fit . Keep at it , your doing a fine job !
Thanks for the encouragement Bill and Terri: I never throw models away, no matter how frustrating they are. I started on it again. Took some pics, I can't get close ups with my camera, but pics none the less, and am making progress. Knowing I am not the only one encountering this issue makes it more challenging to continue. I will post pics on my build blog. Thanks again.
I am looking forward to more from both of you on your builds. Terri: I had the same issue with the P.E. The instructions weren't really clear as to the bending. Don't worry too much, once it is buttoned up, it is not very visible.

JackFlash
Joined: January 25, 2004
KitMaker: 11,669 posts
AeroScale: 11,011 posts
Posted: Monday, January 11, 2010 - 04:30 PM UTC
Quoted Text
". . .I've decided to leave the control cables to the last and leave them unpainted metal. Does that make sense?"
Perfect sense for the control cables.
thegirl
Joined: January 19, 2008
KitMaker: 6,743 posts
AeroScale: 6,151 posts
Posted: Tuesday, January 12, 2010 - 01:45 AM UTC
Been there before with not having the right colour and picking up the wrong one at the hobby shop
Yes it makes perfect sence to do the control cables last . It's the second last thing I do for a build . The prop being the very last item to add .
Yes it makes perfect sence to do the control cables last . It's the second last thing I do for a build . The prop being the very last item to add .
bill_c
Joined: January 09, 2008
KitMaker: 10,553 posts
AeroScale: 1,198 posts
Posted: Tuesday, January 12, 2010 - 03:17 AM UTC
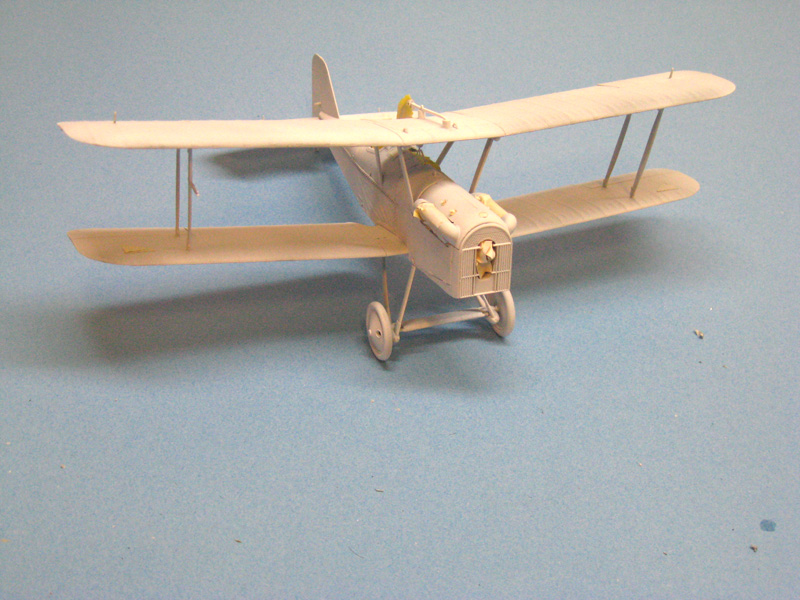
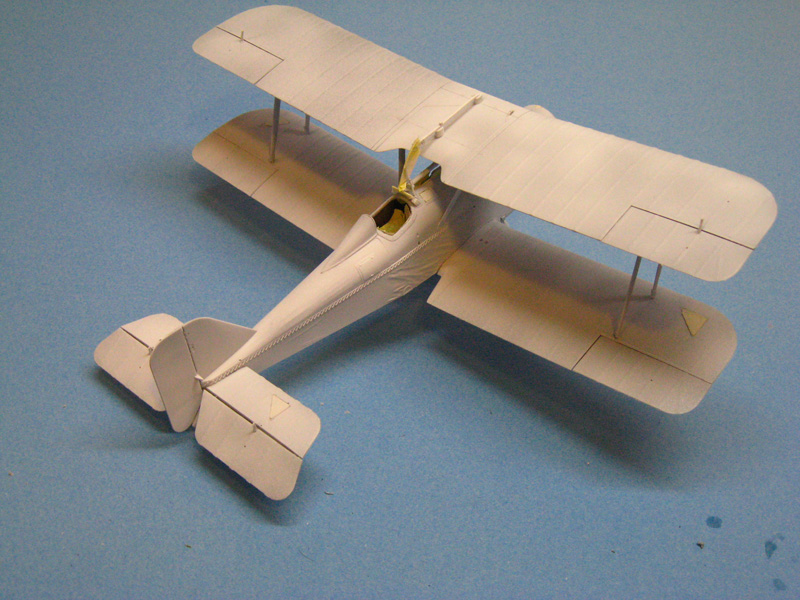
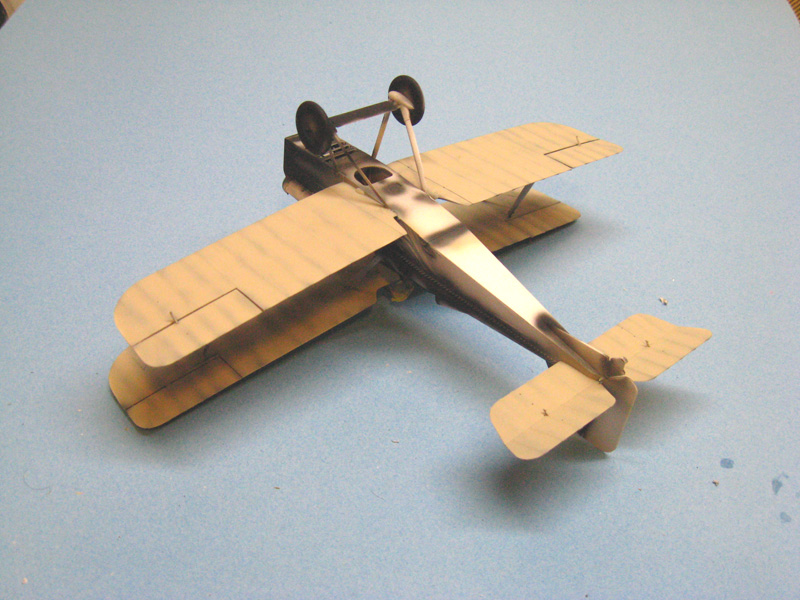
Here is the plane painted with a flat white undercoat:
Now the flat black shadowing:
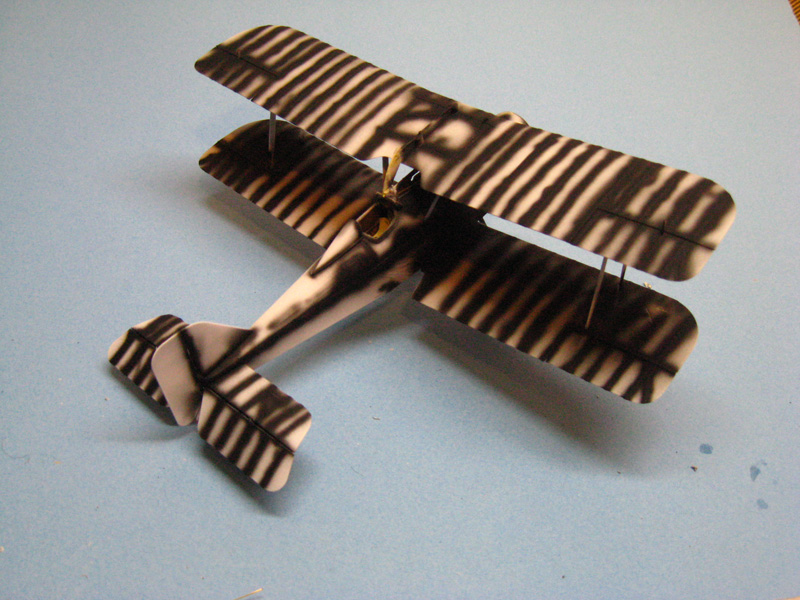
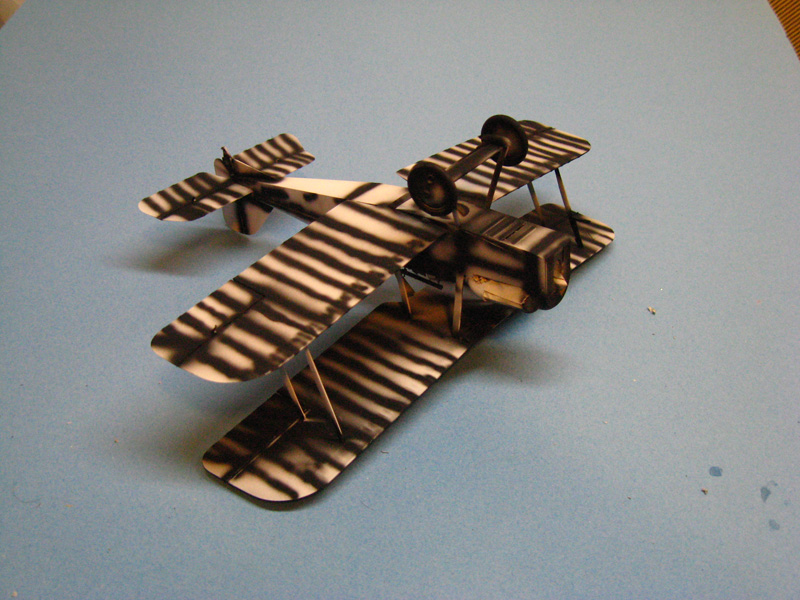
And finally, the CDL overcoating:
Now the flat black shadowing:
And finally, the CDL overcoating:
Mgunns
Joined: December 12, 2008
KitMaker: 1,423 posts
AeroScale: 1,319 posts
Posted: Tuesday, January 12, 2010 - 04:28 AM UTC
It's coming along nicely Bill. I am about three steps behind you on mine, now that I have gone back to it.
Keep those photo's coming.
Keep those photo's coming.

CaptainA
Joined: May 14, 2007
KitMaker: 3,117 posts
AeroScale: 2,270 posts
Posted: Tuesday, January 12, 2010 - 08:25 AM UTC
I think you are capturing the esence of WWI with this build. It is really coming along nicely. Now comes the hardest part of the build. Deciding what to use for PC 10.

bill_c
Joined: January 09, 2008
KitMaker: 10,553 posts
AeroScale: 1,198 posts
Posted: Tuesday, January 12, 2010 - 08:52 AM UTC
Quoted Text
I think you are capturing the esence of WWI with this build. It is really coming along nicely. Now comes the hardest part of the build. Deciding what to use for PC 10.
Thank you both for your compliments.
I'm going with the WNW painting guide and Tamiya XF-55 and XF-10 in a 2-1 ratio.
bill_c
Joined: January 09, 2008
KitMaker: 10,553 posts
AeroScale: 1,198 posts
Posted: Tuesday, January 12, 2010 - 04:43 PM UTC
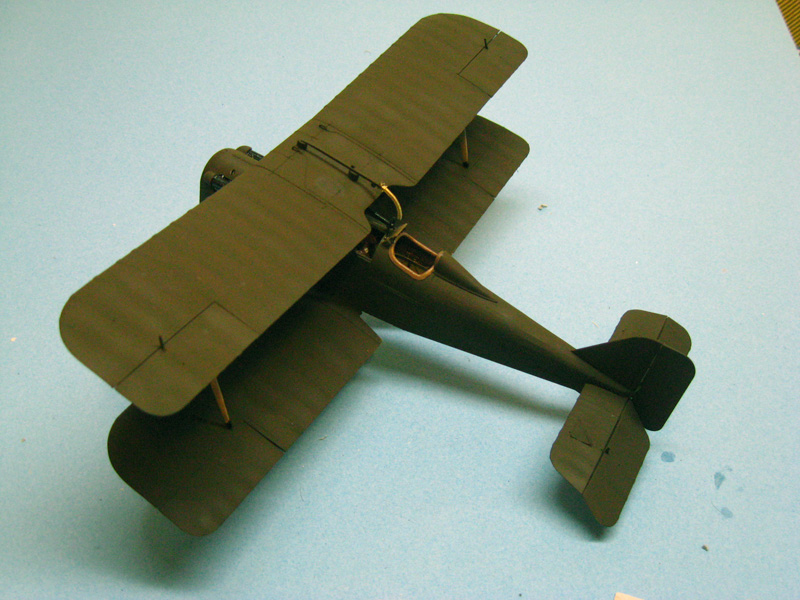
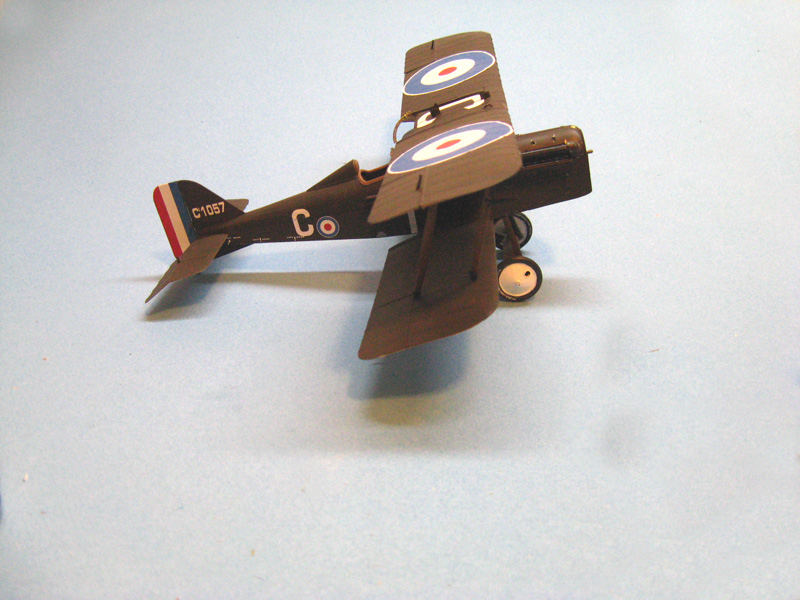
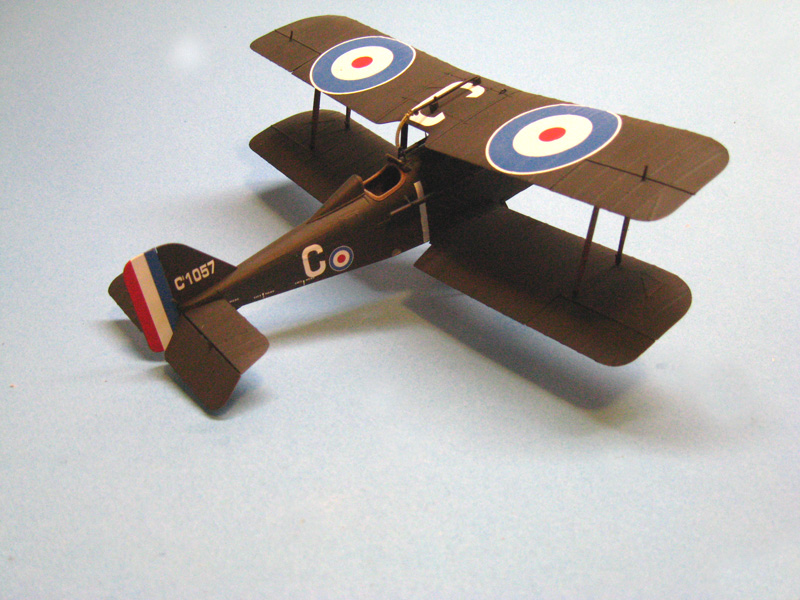
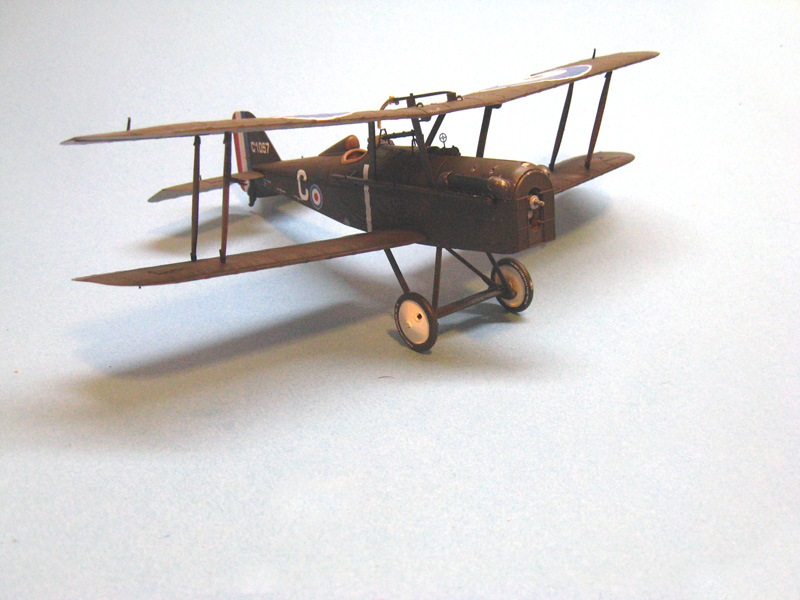
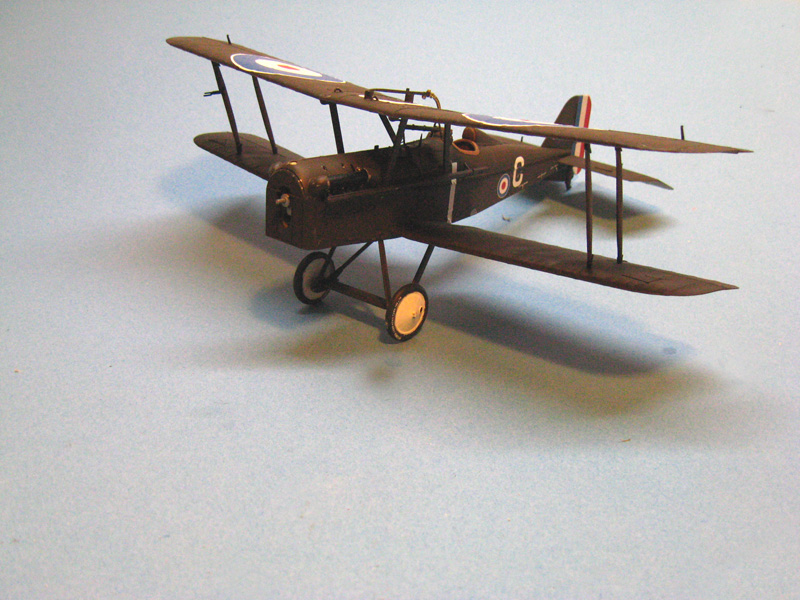
Here she is with her coat of PC10:
thegirl
Joined: January 19, 2008
KitMaker: 6,743 posts
AeroScale: 6,151 posts
Posted: Tuesday, January 12, 2010 - 05:06 PM UTC
Very nice effect with the per-shading Bill . It adds just the right amount of flavor to the build .
Excellent job Bill , looking forward to you next up-date
Excellent job Bill , looking forward to you next up-date
bill_c
Joined: January 09, 2008
KitMaker: 10,553 posts
AeroScale: 1,198 posts
Posted: Tuesday, January 12, 2010 - 05:21 PM UTC
Thanks, Terri. I'm watching yours, too. Going to finish up the painting, then it's on to decals. Dreading the wiring a bit, but maybe it will be easier than I thought, LOL!
Does anyone know if you're supposed to anneal the bracket fret of PE for the Radu Brinzan set?
Does anyone know if you're supposed to anneal the bracket fret of PE for the Radu Brinzan set?
JackFlash
Joined: January 25, 2004
KitMaker: 11,669 posts
AeroScale: 11,011 posts
Posted: Tuesday, January 12, 2010 - 06:59 PM UTC
Do the wing & rudder decals after you do the (control cable)rigging. Edited because I had not had any coffee.
Mgunns
Joined: December 12, 2008
KitMaker: 1,423 posts
AeroScale: 1,319 posts
Posted: Wednesday, January 13, 2010 - 01:17 AM UTC
Wow Bill:
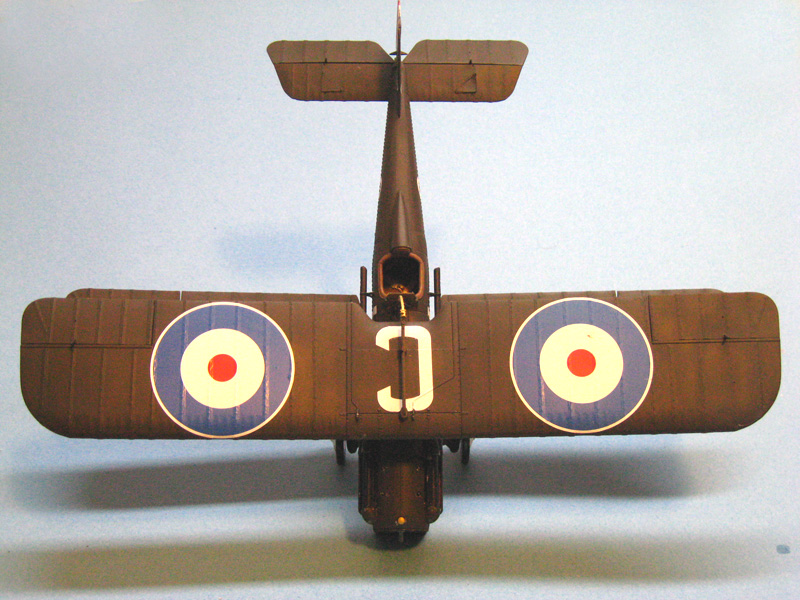
Terri is right, the preshading really highlights the ribbing on the upper surfaces nicely. I like it. Motivates to continue work on mine. I am home tonight and will be working on it.
Good luck with the rigging. I have a set of the RB bracing as well, and will be scoping out how you do yours.
Terri is right, the preshading really highlights the ribbing on the upper surfaces nicely. I like it. Motivates to continue work on mine. I am home tonight and will be working on it.
Good luck with the rigging. I have a set of the RB bracing as well, and will be scoping out how you do yours.
bill_c
Joined: January 09, 2008
KitMaker: 10,553 posts
AeroScale: 1,198 posts
Posted: Wednesday, January 13, 2010 - 05:15 AM UTC
Quoted Text
Do the wing & rudder decals after you do the rigging.
Hmmm, I was thinking of doing them first, since the version I'm doing (C) has the roundels recessed on the wings away from the control wires.... But....
Should the RAF wire terminals be annealed? The wires are stainless steel, so they don't need it. But I don't know if the terminals are brass or another metal.
And thanks, Mark, I'm glad to be an inspiration. Others here taught me by their kindness in sharing steps and techniques. I'm thrilled to be able to "pass it on."
JackFlash
Joined: January 25, 2004
KitMaker: 11,669 posts
AeroScale: 11,011 posts
Posted: Wednesday, January 13, 2010 - 07:22 AM UTC
To be clear. The interplane rigging first. Then decal, then the flying control cables to the control horns. Sorry to be so general. . . had not had any coffee.
JackFlash
Joined: January 25, 2004
KitMaker: 11,669 posts
AeroScale: 11,011 posts
Posted: Monday, January 18, 2010 - 05:32 PM UTC
Ahh! When you said recessed it threw me. You mean "inset" toward the center line. I get it.
bill_c
Joined: January 09, 2008
KitMaker: 10,553 posts
AeroScale: 1,198 posts
Posted: Monday, January 18, 2010 - 05:34 PM UTC
My bad, sorry about that.
The "C" version is the easiest to decal, part of why I chose it for my first biplane.
The "C" version is the easiest to decal, part of why I chose it for my first biplane.
bill_c
Joined: January 09, 2008
KitMaker: 10,553 posts
AeroScale: 1,198 posts
Posted: Sunday, January 31, 2010 - 11:59 AM UTC
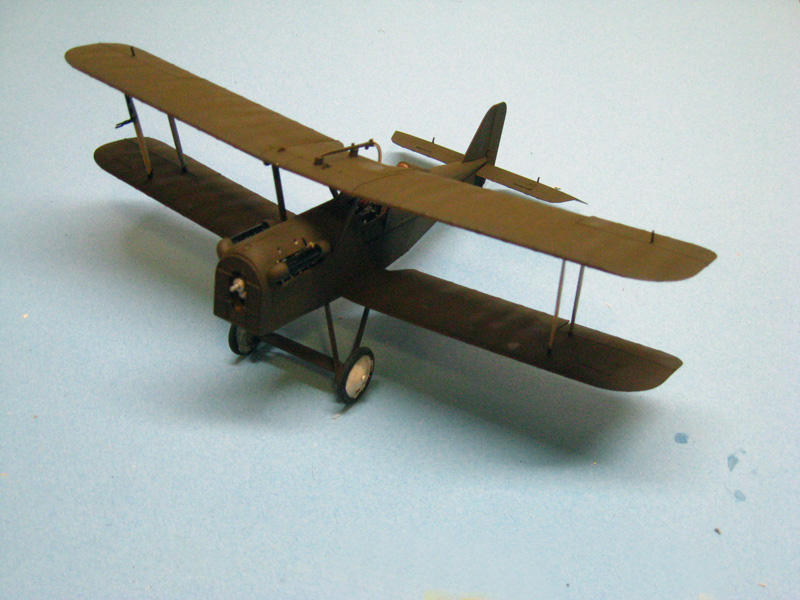
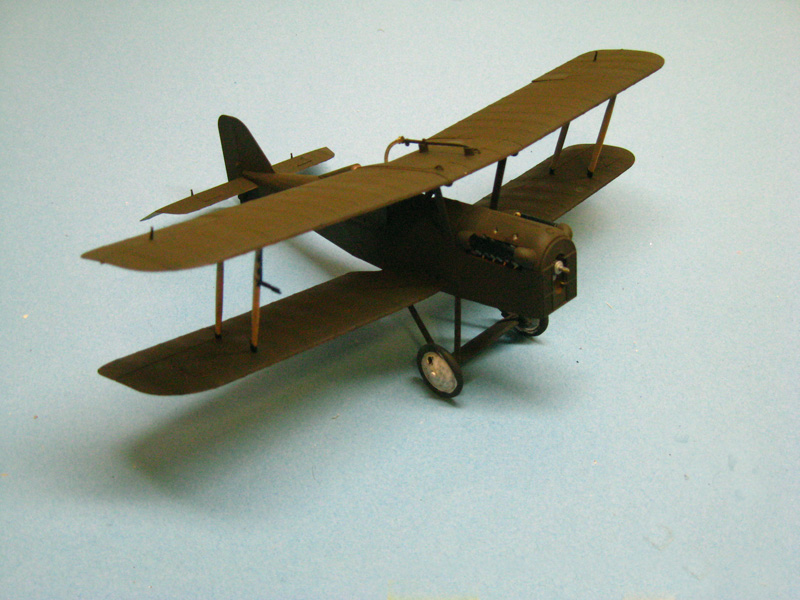
OK, I took the plunge and applied the decals. They went on beautifully, and I think the only touch-up I'll need is along the spine of the tail.
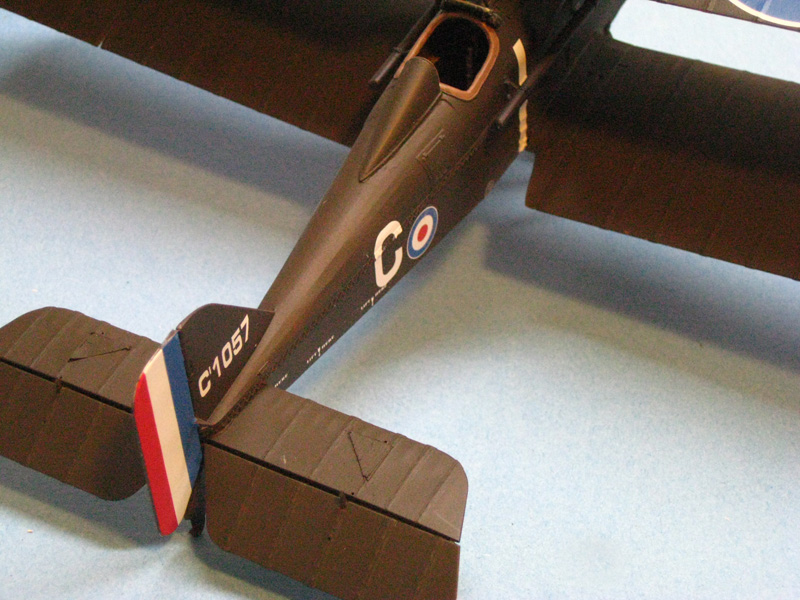
Of course, now I realize I forgot to photograph the underside.
Of course, now I realize I forgot to photograph the underside.
thegirl
Joined: January 19, 2008
KitMaker: 6,743 posts
AeroScale: 6,151 posts
Posted: Sunday, January 31, 2010 - 01:08 PM UTC
The decals look great Bill ! Did you have to use any set or sol with them ?
Mgunns
Joined: December 12, 2008
KitMaker: 1,423 posts
AeroScale: 1,319 posts
Posted: Sunday, January 31, 2010 - 02:06 PM UTC
Lookin good there Bill: It is nice to see this coming together for you. I was beginning to wonder if some gremlin had invaded your space, haply that isn't the case. 
guitarlute101
Joined: December 18, 2006
KitMaker: 1,121 posts
AeroScale: 1,063 posts
Posted: Sunday, January 31, 2010 - 03:39 PM UTC
Great job, Bill. What did you think of the cowling fit?
Mark
bill_c
Joined: January 09, 2008
KitMaker: 10,553 posts
AeroScale: 1,198 posts
Posted: Monday, February 01, 2010 - 02:53 AM UTC
Quoted Text
The decals look great Bill ! Did you have to use any set or sol with them ?
Thanks, Terri! I think they would have been fine without wetting solution, but I did use a drying agent (Micro-Sol? the red one?) to make them "sit" properly.
Quoted Text
Lookin good there Bill: It is nice to see this coming together for you. I was beginning to wonder if some gremlin had invaded your space, haply that isn't the case.
Thanks, Mark, I was on the road for a week, and am just catching up.
Quoted Text
Great job, Bill. What did you think of the cowling fit?
Thank you, Mark. The cowling fit?
(unprintable)
WNW did not get the fit right in the design of this model. I'm sure that's going to get me bounced out of contention, but I would not want others thinking it was their fault the cowling doesn't go on right. It took some wrestling and some filling. Not a lot, but not the "slam dunk" I thought it should be on a kit of this quality. But heh, it could be worse-- Revell of Germany's old kits, LOL!
CaptainA
Joined: May 14, 2007
KitMaker: 3,117 posts
AeroScale: 2,270 posts
Posted: Monday, February 01, 2010 - 09:35 AM UTC
Looks great Bill.
So are you on permanent duty from armorama, or just TDY?
So are you on permanent duty from armorama, or just TDY?
 |

WEB HOSTING BY


Copyright ©2021 AeroScale and Kitmaker Network, a subsidiary of Silver Star Enterprises
All Rights Reserved. Please read our Conditions of Use and Privacy Policy.
All Rights Reserved. Please read our Conditions of Use and Privacy Policy.