_GOTOBOTTOM
Early Aviation
Discuss World War I and the early years of aviation thru 1934.
WNW GB 2009 -10: SE 5a Bill
bill_c
Staff MemberCampaigns Administrator
MODEL SHIPWRIGHTS
_VISITCOMMUNITY
New Jersey, United States
Joined: January 09, 2008
KitMaker: 10,553 posts
AeroScale: 1,198 posts
Posted: Monday, December 21, 2009 - 09:30 AM UTC
Alright, I'm airborne!

I have built many armor models, and a few aircraft (still struggling with TWO Revell of Germany BF110 G-4 nightfighters in 1/32), but this is my first WW I plane. I plan to do a MOSTLY OOB build, though some missing components on the WNW kit make me wonder. Also, the inside rigging is just a "suggestion" in styrene and not a proper bit of wire, soooo. Anyway, here are my materials:


A kit, and Radu Brinzan rigging goodies.
thegirl
_VISITCOMMUNITY
Alberta, Canada
Joined: January 19, 2008
KitMaker: 6,743 posts
AeroScale: 6,151 posts
Posted: Monday, December 21, 2009 - 01:51 PM UTC
Right on Bill ! Great to have you on and what a great choice for your first WW1 subject

What scheme are you going for ?
RAGIII
_VISITCOMMUNITY
North Carolina, United States
Joined: June 19, 2007
KitMaker: 604 posts
AeroScale: 600 posts
Posted: Monday, December 21, 2009 - 02:01 PM UTC
welcome to the build. Those pe rigging attachments and wires look like they will require some intense work. Have Fun!
RAGIII
bill_c
Staff MemberCampaigns Administrator
MODEL SHIPWRIGHTS
_VISITCOMMUNITY
New Jersey, United States
Joined: January 09, 2008
KitMaker: 10,553 posts
AeroScale: 1,198 posts
Posted: Tuesday, December 22, 2009 - 03:51 AM UTC
Hi, Terri and Rick!

The PE has me a little daunted in theory. I also plan on getting some Eduard guide horns, etc. Not sure what regular wire to use, LOL! Someone described the SE5 as a "Chinese fighting box kite rigging." Seems about right to me.

Terri, I'm not sure whether to use scheme C or E (Lt. APC Wigan or GH Lewis). The former has the roundels inboard and so there's no issue of cutting them for the ailerons or running afoul of the guide horns. That's a plus for a first-timer at Early Aviation. Not like I'm placing national markings on a WWII aircraft where the radio aerial is the only wire you have to worry about. But the Lewis plane also has a grey prop, and I prefer the natural wood scheme.
Mgunns
_VISITCOMMUNITY
Arizona, United States
Joined: December 12, 2008
KitMaker: 1,423 posts
AeroScale: 1,319 posts
Posted: Tuesday, December 22, 2009 - 05:04 AM UTC
Hi Bill:

I am doing the same kit. I plan on using a combination of EZ line fine (berkshirejunction.com) and the Radu flat wire. I have the same attachment points as you and as Rick I believe said they do look daunting. I will wait until I get to that part and see what I decide to do. I have the Eduard PE for it, number escapes me but it has the instruments, internal bracing, seat belts and attachment points and the real bonus here is "INSTRUCTIONS" on where most of it goes.
Like you, I plan on pretty much OOB, some of the PE is too fiddly for me.
Welcome aboard and good luck with your build. Together we will all have fun and an accomplishment to show for it.
jaypee
_VISITCOMMUNITY
Scotland, United Kingdom
Joined: February 07, 2008
KitMaker: 1,699 posts
AeroScale: 1,384 posts
Posted: Tuesday, December 22, 2009 - 05:21 AM UTC
Goes for any SE5a. I used the downloadable wingnut Instructions to rig my little revell se5a.
If wingnuts have a plane you are building, get their instructions. boy would I love to see one of these done in
the red/white ribbon and blue sunburst scheme. (hee hee hint hint).
Once I clear the stash (2 years away yet) I'll treat myself to one of these and do it in those colours.
I might even be a half decent modeller by then
I'm looking forward to all the WNW builds. Just as the Roden ones last year.

bill_c
Staff MemberCampaigns Administrator
MODEL SHIPWRIGHTS
_VISITCOMMUNITY
New Jersey, United States
Joined: January 09, 2008
KitMaker: 10,553 posts
AeroScale: 1,198 posts
Posted: Tuesday, December 22, 2009 - 05:28 AM UTC
Mark, John-Paul, thanks. I figure I will make many mistakes and learn from it all.

Mark, is the EZ Line to scale?
Mgunns
_VISITCOMMUNITY
Arizona, United States
Joined: December 12, 2008
KitMaker: 1,423 posts
AeroScale: 1,319 posts
Posted: Tuesday, December 22, 2009 - 08:21 AM UTC

Quoted Text

Mark, is the EZ Line to scale?


I have both the thick and the thin. I think the thin is better. I think for the flying wires the thick is good, but for the rest the thin seems to work better. It is a little fiddly to work with as it is like working with a real small rubber band, but it is very forgiving and if you accidentally cut it, you can stretch it and still use it.
This is my latest with the thin. I know it is a bit blurry, but it gives you an idea. It is the 1/32nd Hobby Craft Spad XIII.
bill_c
Staff MemberCampaigns Administrator
MODEL SHIPWRIGHTS
_VISITCOMMUNITY
New Jersey, United States
Joined: January 09, 2008
KitMaker: 10,553 posts
AeroScale: 1,198 posts
Posted: Tuesday, December 29, 2009 - 04:40 AM UTC
Ok, I finally got some time to work on this baby, and it's been well worth it.

The first stages are the body and the cockpit. I was disappointed in the molding for the interior, with lots of knock-out holes that need to be filled if you plan on having the engine cowling off to show the motor. The interior guy wires are molded-on, which are OK to my estimation:

I replaced them with fine styrene rounds:


The challenge with the cockpit is the rigging. The kit gives you a diagram, but doesn't tell you how to do it. So I used a mix of styrene rounds, plus 0.15mm steel and brass wire:


I have shown the interim steps here, so the wires aren't all fully-painted:


The instructions have you put the two fuselage halves together, then attach the lower wing where the rudder control is mounted, but that would make installing the control lines very difficult, so I did my own version:


The results were pleasing to me:
Mgunns
_VISITCOMMUNITY
Arizona, United States
Joined: December 12, 2008
KitMaker: 1,423 posts
AeroScale: 1,319 posts
Posted: Tuesday, December 29, 2009 - 04:51 AM UTC
You are about as far as I am on mine. I hope your fit is better than mine, although I used the PE, which really seems to throw things off on these WNW kits. You certainly took some time on the control wires to good effect.

bill_c
Staff MemberCampaigns Administrator
MODEL SHIPWRIGHTS
_VISITCOMMUNITY
New Jersey, United States
Joined: January 09, 2008
KitMaker: 10,553 posts
AeroScale: 1,198 posts
Posted: Tuesday, December 29, 2009 - 05:25 AM UTC
Thanks, Mark. The fit is so-so in spots, and I needed a lot of putty on putting the fuselage halves together.
thegirl
_VISITCOMMUNITY
Alberta, Canada
Joined: January 19, 2008
KitMaker: 6,743 posts
AeroScale: 6,151 posts
Posted: Tuesday, December 29, 2009 - 01:58 PM UTC
Nice start so far Bill , did you go with the wrinkle fabric fuselage ?

Haven't started my build yet -still waiting for the PE set to come in the mail . Canada post can be slow at times . Nice to have a heads up on the control cables and your solution to over come that area in the build .
wombat58
_VISITCOMMUNITY
New South Wales, Australia
Joined: March 26, 2009
KitMaker: 366 posts
AeroScale: 309 posts
Posted: Tuesday, December 29, 2009 - 07:54 PM UTC
Looking good so far Bill, the wood grain turned out well, anxious to see more progress photos.

Des.
Mgunns
_VISITCOMMUNITY
Arizona, United States
Joined: December 12, 2008
KitMaker: 1,423 posts
AeroScale: 1,319 posts
Posted: Wednesday, December 30, 2009 - 01:32 AM UTC

Quoted Text

Nice start so far Bill , did you go with the wrinkle fabric fuselage ?

Haven't started my build yet -still waiting for the PE set to come in the mail . Canada post can be slow at times . Nice to have a heads up on the control cables and your solution to over come that area in the build .


Have a care with the PE! I thought I could handle it, as I have used it many times before, but this one baffled me. I think a lot of trimming is in order. Good luck.
bill_c
Staff MemberCampaigns Administrator
MODEL SHIPWRIGHTS
_VISITCOMMUNITY
New Jersey, United States
Joined: January 09, 2008
KitMaker: 10,553 posts
AeroScale: 1,198 posts
Posted: Wednesday, December 30, 2009 - 09:04 AM UTC
Thanks, everyone, more shots coming. I'm putting on the instrument panel decals tonight, that will let me seal up the fuselage. I moved ahead and built the guns and the engine, since they will need careful painting.

I decided against PE, since the kit is very detailed (other than the rigging).

Besides, I could never compete against Terri, so I'll stick to OOB.
bill_c
Staff MemberCampaigns Administrator
MODEL SHIPWRIGHTS
_VISITCOMMUNITY
New Jersey, United States
Joined: January 09, 2008
KitMaker: 10,553 posts
AeroScale: 1,198 posts
Posted: Friday, January 08, 2010 - 04:24 AM UTC
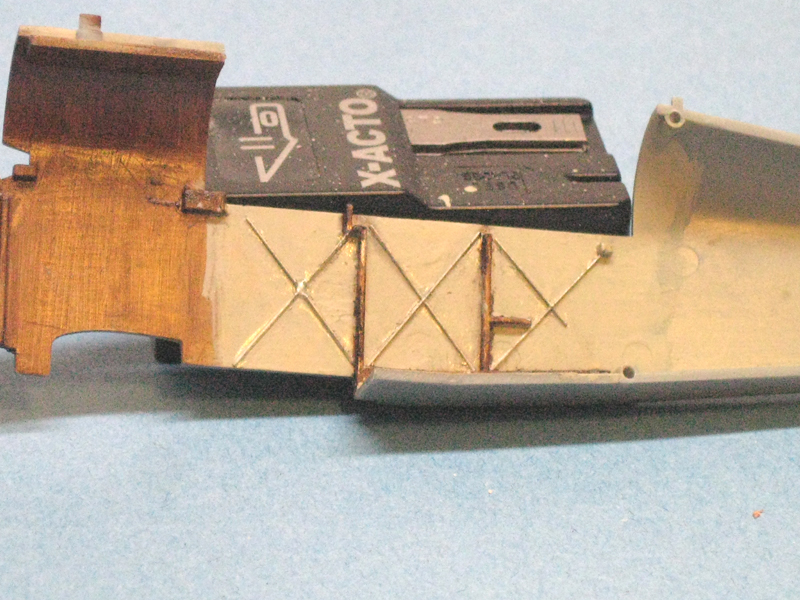
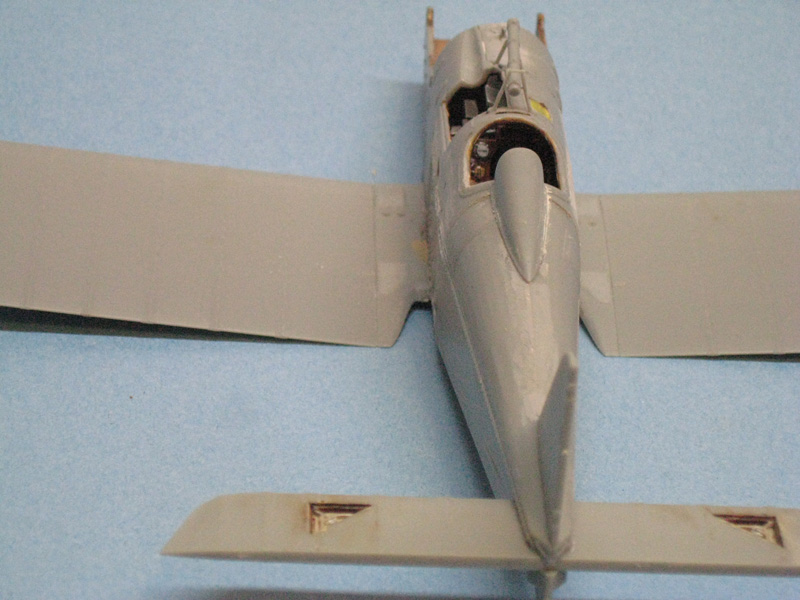
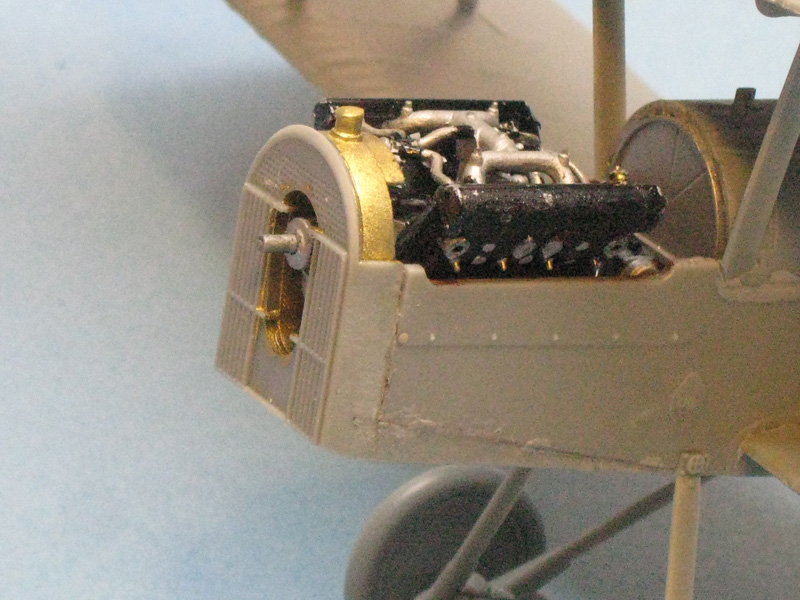
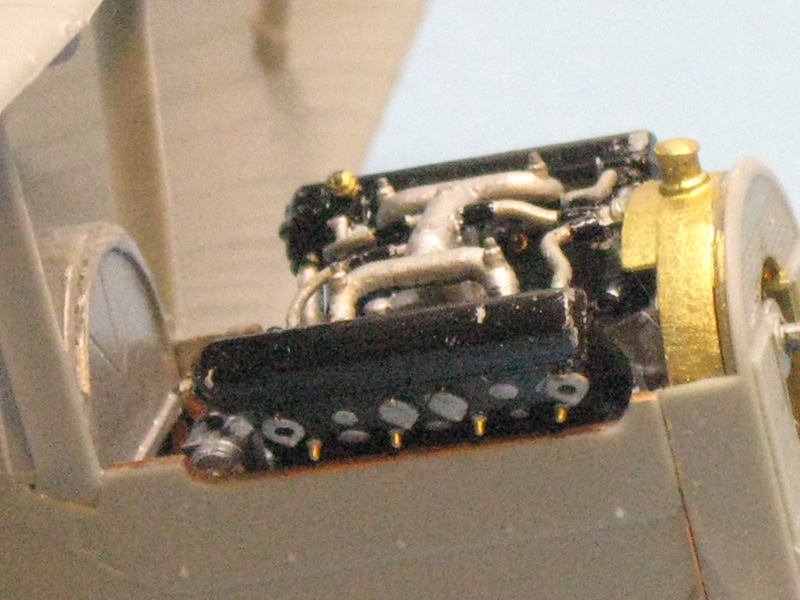
OK, I guess this is where I put myself out of the running for winning this sucker, LOL, but I have to point out some of the issues I've had up to now. First of all is fit: the kit falls together in most places, but has some SERIOUS gaps show up at the wrong time, specifically putting the fuselage halves together and getting the engine cowl to fit properly.

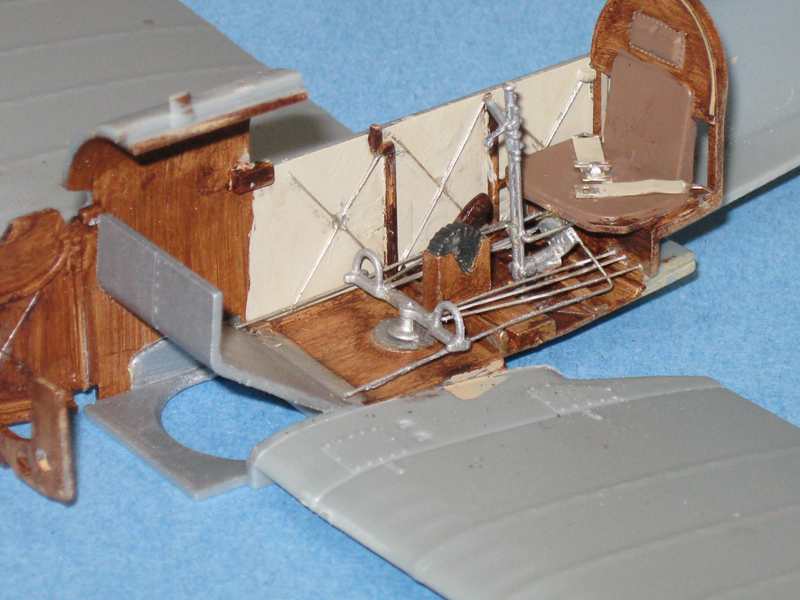
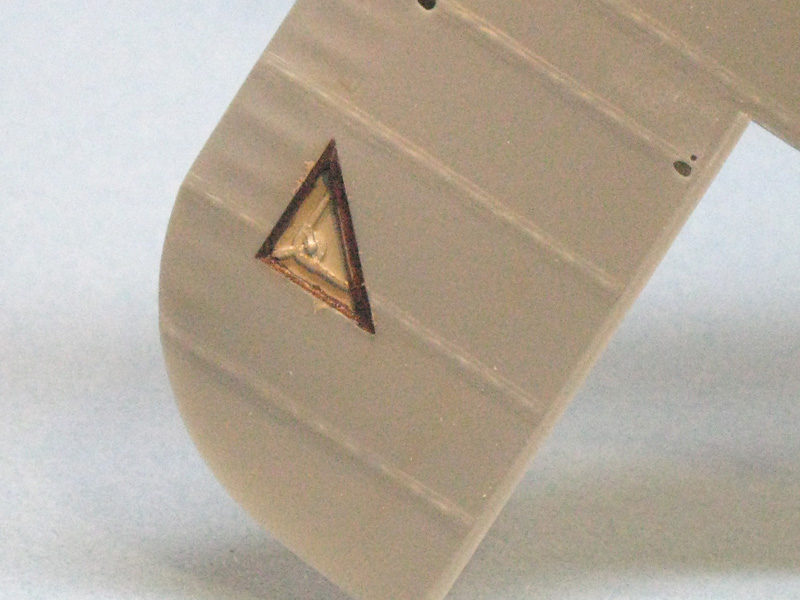
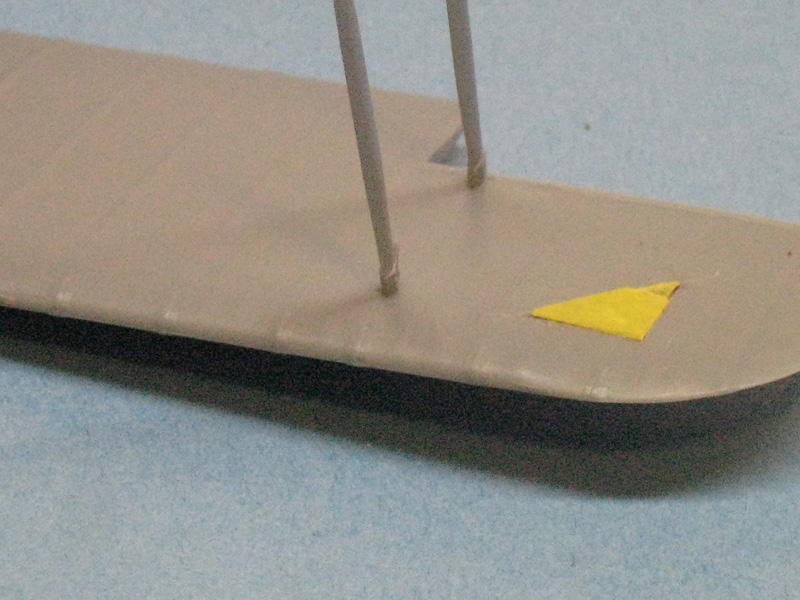
Second, there is simply not enough guidance in some crucial areas. For example, the glass inspection ports on the wings. As you can see from the photos, I have them masked incorrectly (they should be narrower than the entire piece of styrene). This could easily have been pointed out in the instructions with a simple photo (there is a photo, but it's not connected). You can say that driving from New York to LA is simple, but if they don't tell you to take I-80 instead of I-95, you'll end up in Florida, LOL!

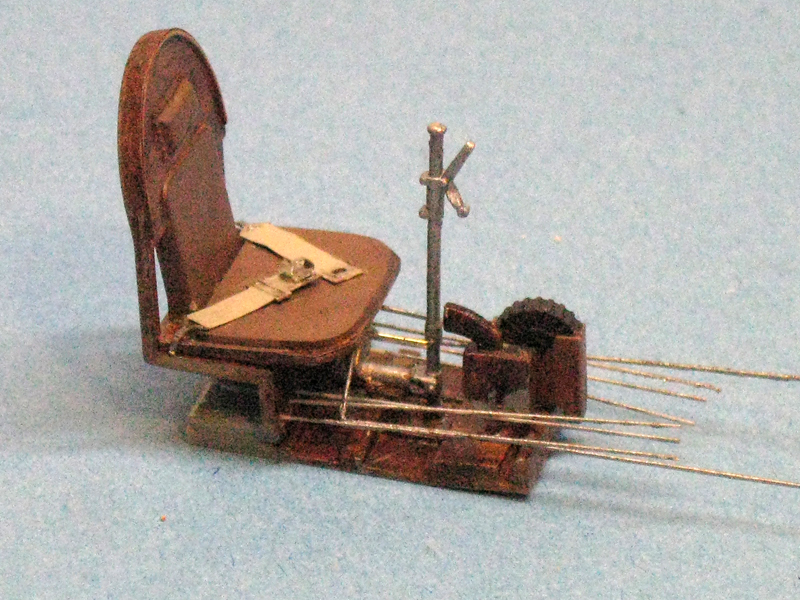
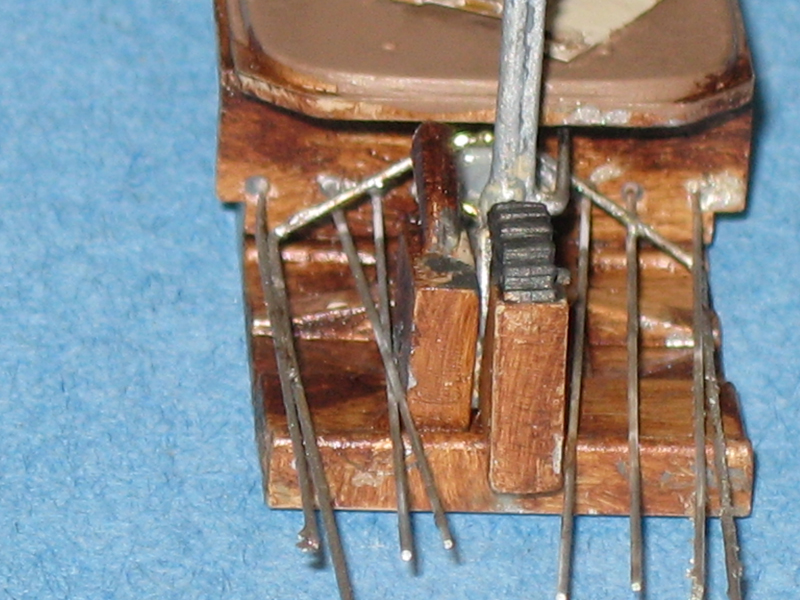
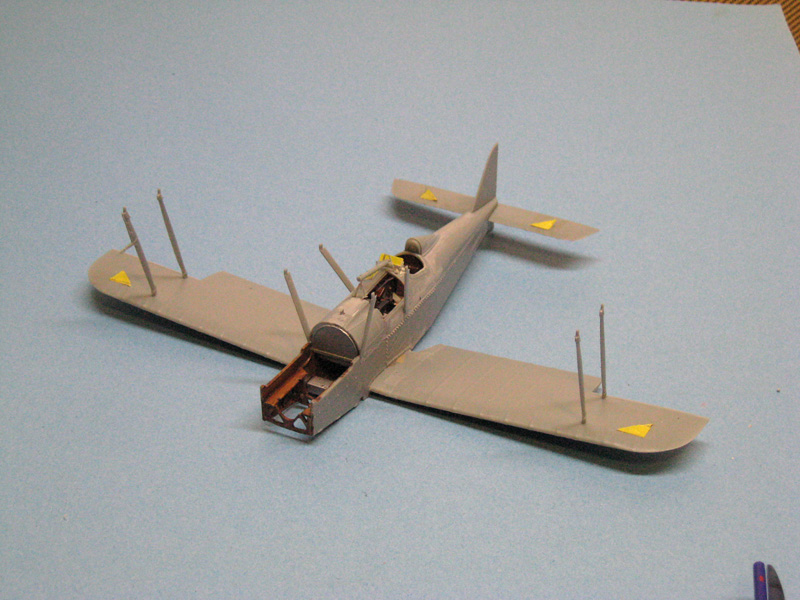
That having been said, this is a very good kit in many respects, and I'm up to wrestling with the rigging:


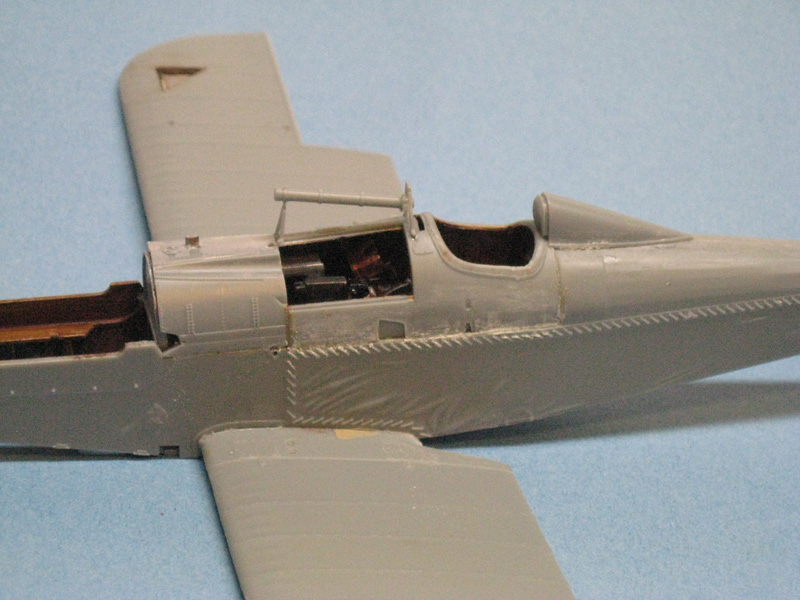
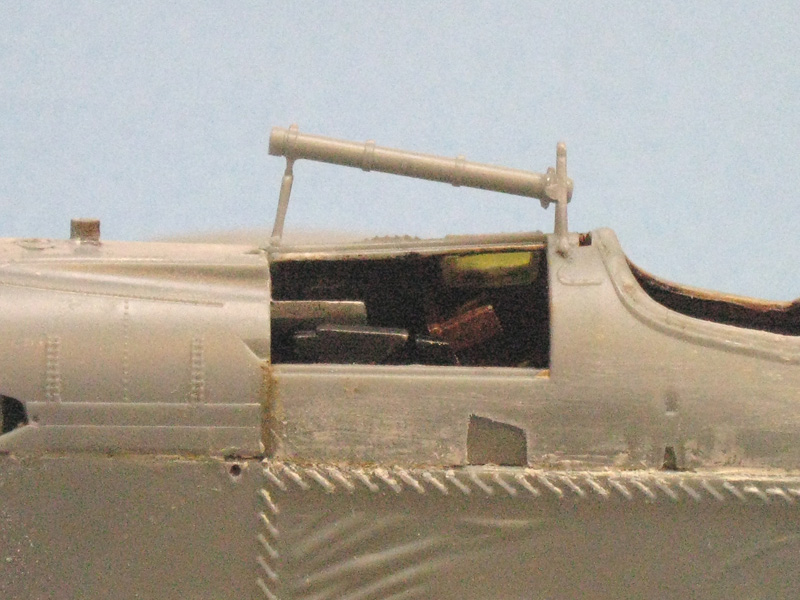
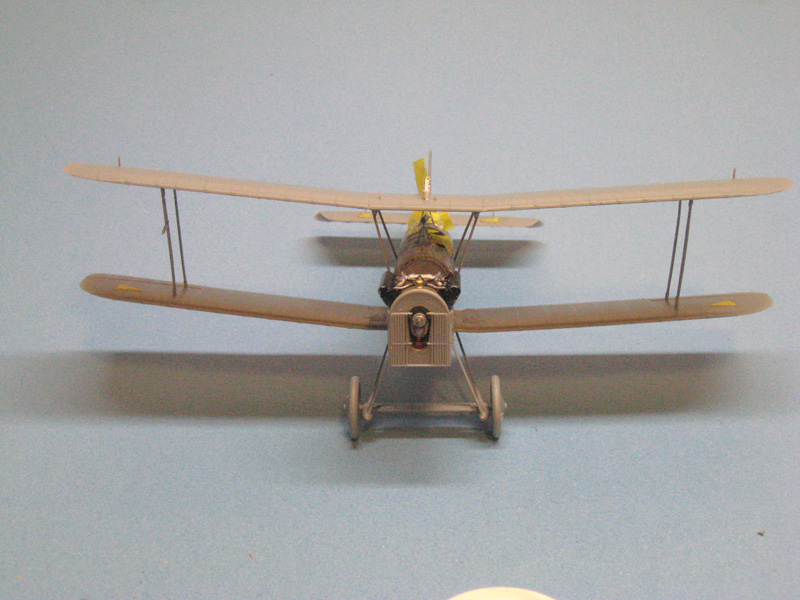
Not sure about the angle of the gun sight, but this is what you get following the instructions:


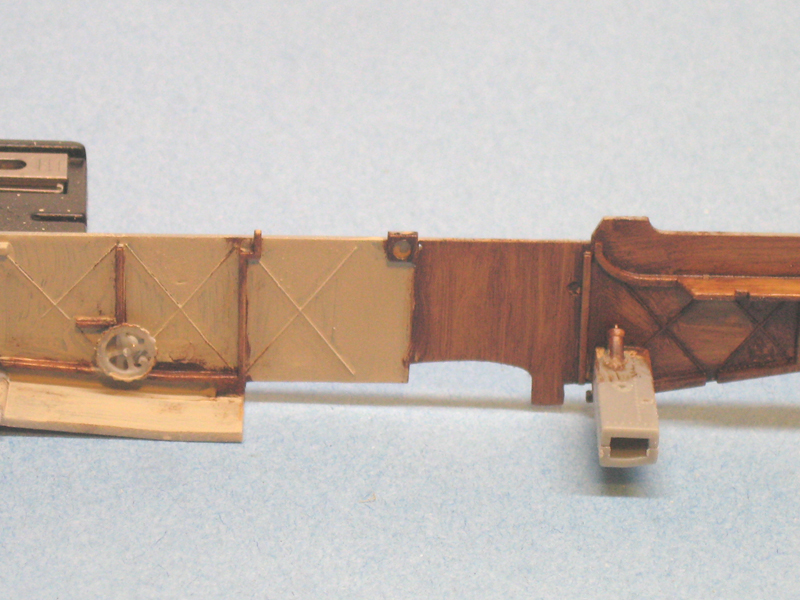
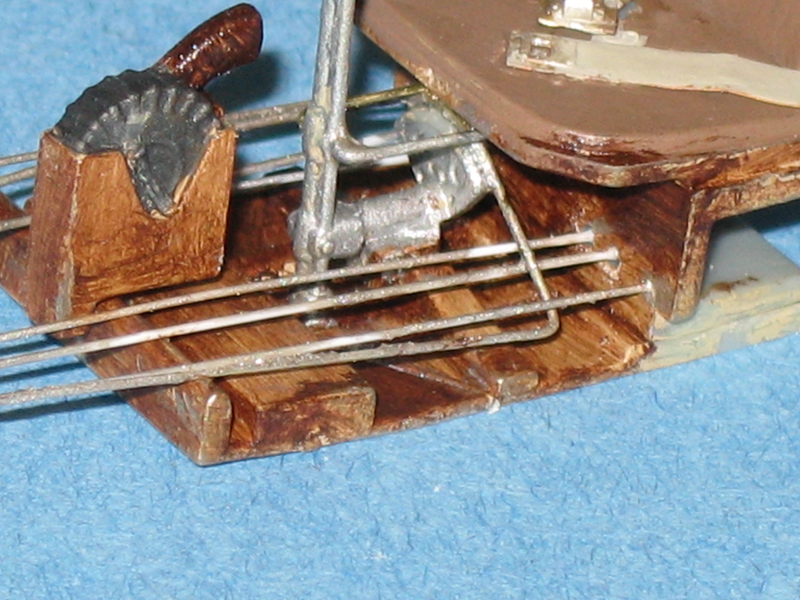
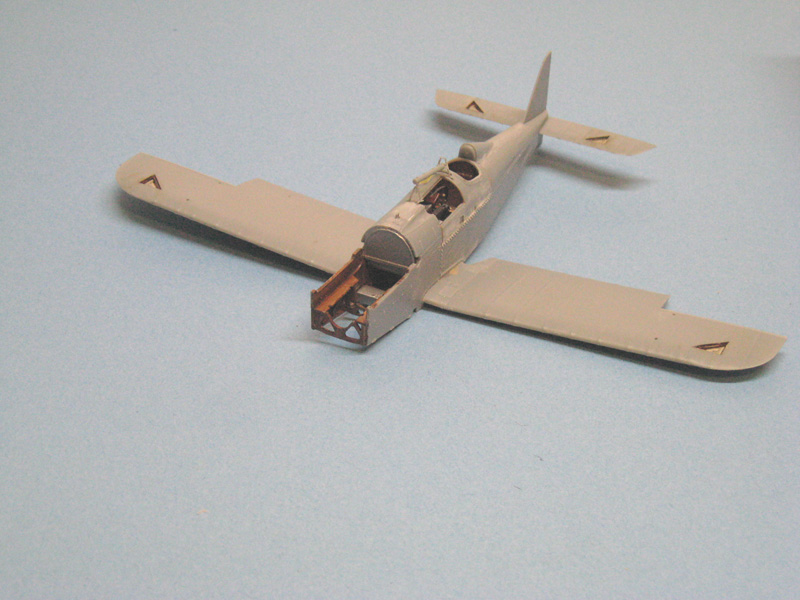
Now the wing support struts:

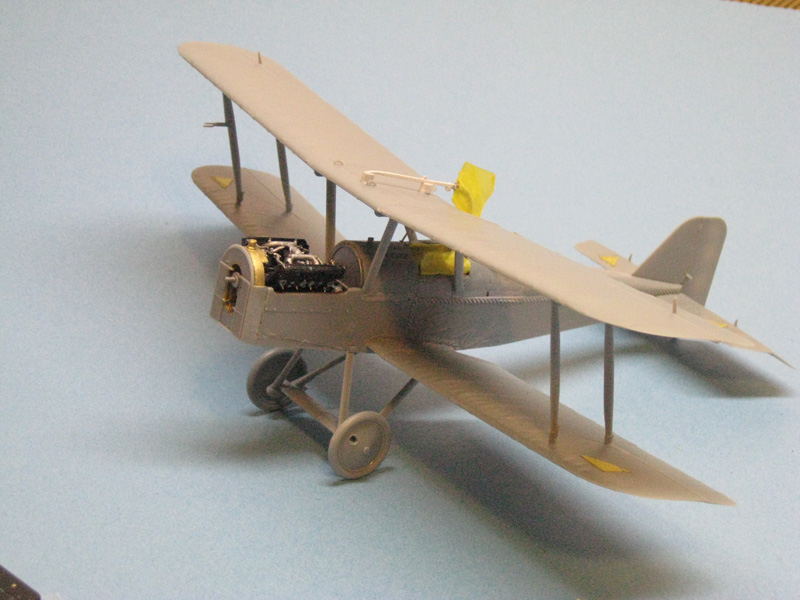
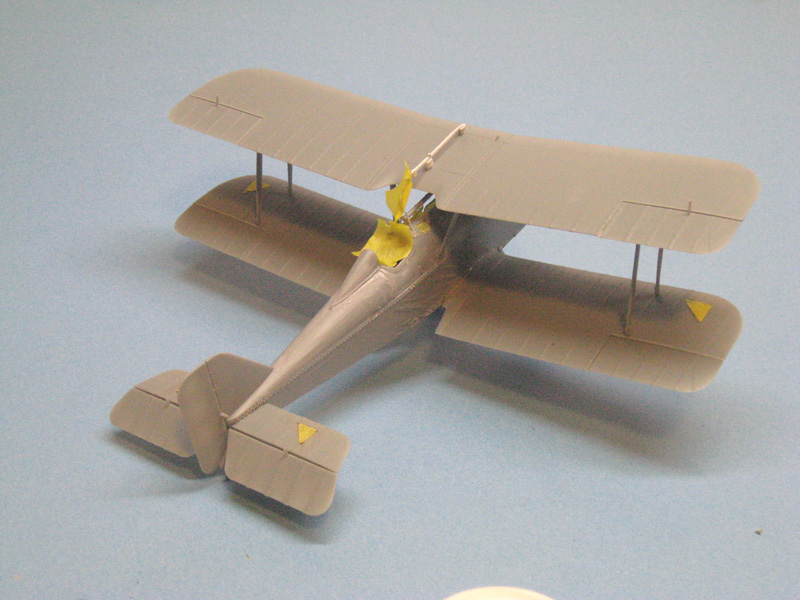
The "wrong" masking:
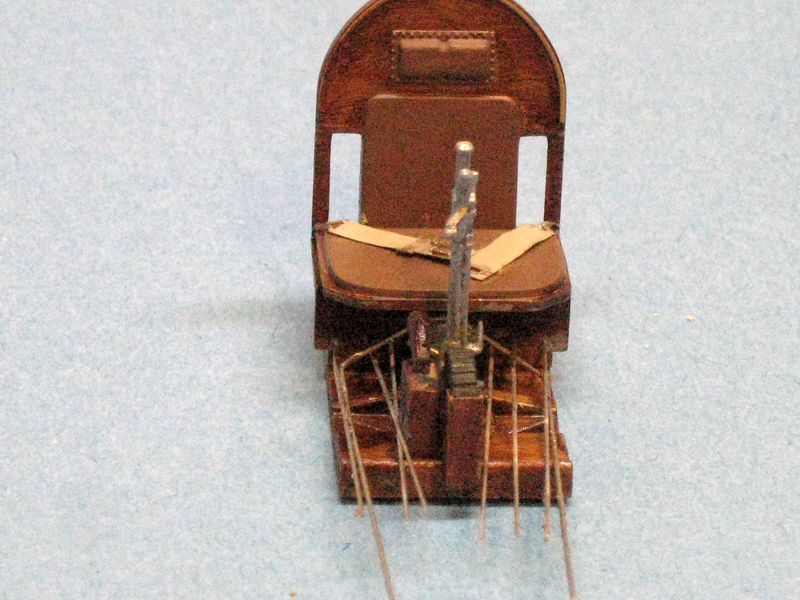
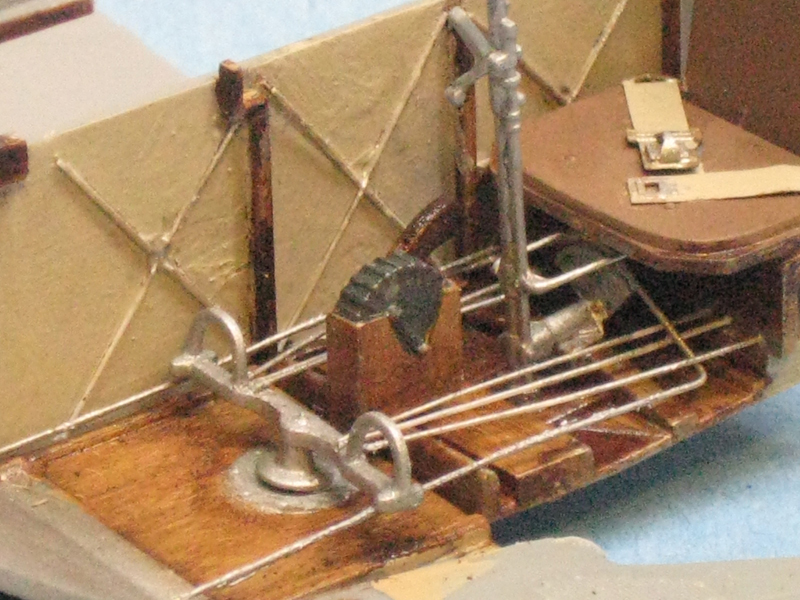

And where I am now:


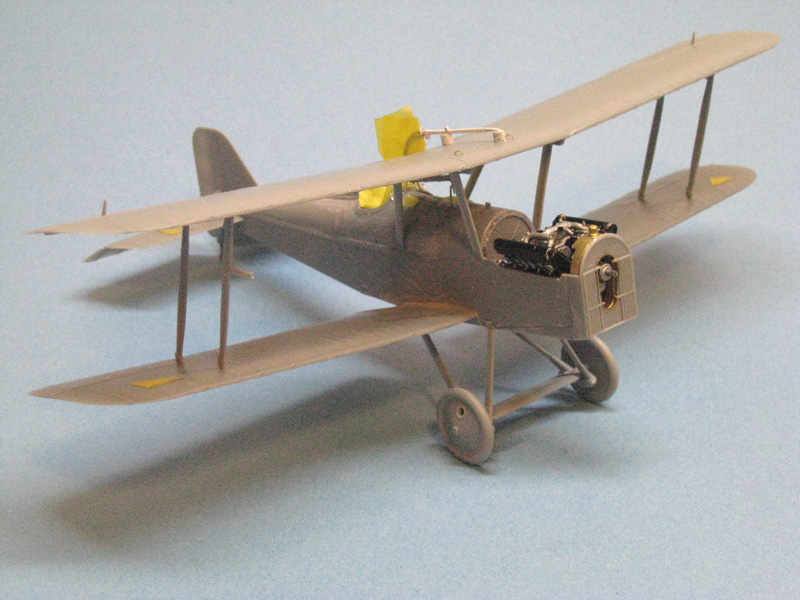
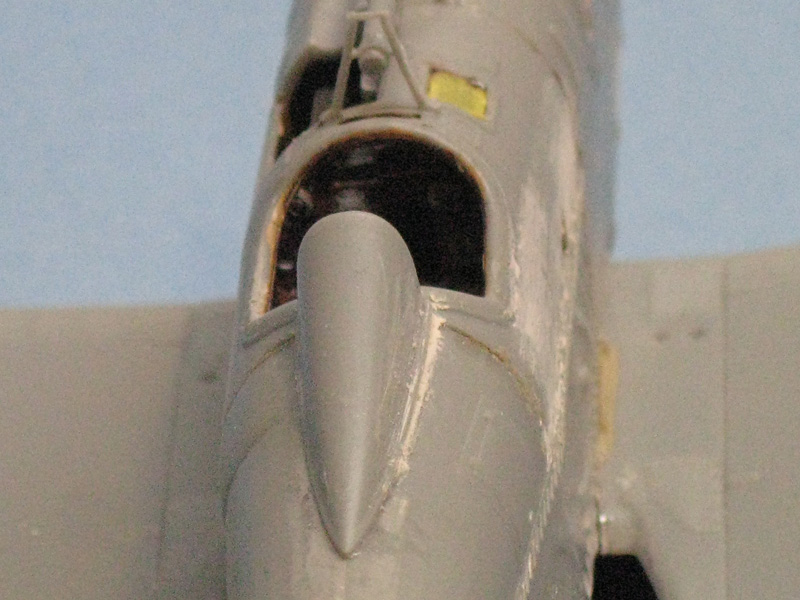
You can see the poor fit on the cowl underside has "marred" the hinge detailing:

Mgunns
_VISITCOMMUNITY
Arizona, United States
Joined: December 12, 2008
KitMaker: 1,423 posts
AeroScale: 1,319 posts
Posted: Friday, January 08, 2010 - 04:49 AM UTC
Hi Bill:

At least you are making some progress. I am going to wait until I get the new SE5 and start over. I may revisit what I have so far at a later date, but until then, keep up the good work and keep those pictures coming. Are you going to cover the engine area or expose it?
Can you do a close up of the seat in the cockpit area. I found the instructions a little vague in that area as well.

Before you button it all up, I would seriously redo the gun sight. That can't be right, something wrong there.

Cheers
Mark
bill_c
Staff MemberCampaigns Administrator
MODEL SHIPWRIGHTS
_VISITCOMMUNITY
New Jersey, United States
Joined: January 09, 2008
KitMaker: 10,553 posts
AeroScale: 1,198 posts
Posted: Friday, January 08, 2010 - 06:08 AM UTC

Quoted Text

Are you going to cover the engine area or expose it?


I would have liked to have the cowl removable, but it's a tight fit and either you do it on or off. The instructions encourage you to leave it open, and frankly, part of me wondered if it's just because the engine is so nice, or if they WNW folks know about the fit issues? I will post some photos of the cowl on when I finish with the putty filling and sanding.

Quoted Text

Can you do a close up of the seat in the cockpit area? I found the instructions a little vague in that area as well.


Do you mean this?

Or this?


Quoted Text

Before you button it all up, I would seriously redo the gun sight. That can't be right, something wrong there.


That's why I asked here. Is it the kit, or should the site be at that angle?
Mgunns
_VISITCOMMUNITY
Arizona, United States
Joined: December 12, 2008
KitMaker: 1,423 posts
AeroScale: 1,319 posts
Posted: Friday, January 08, 2010 - 07:10 AM UTC

Quoted Text


Quoted Text

Are you going to cover the engine area or expose it?


I would have liked to have the cowl removable, but it's a tight fit and either you do it on or off. The instructions encourage you to leave it open, and frankly, part of me wondered if it's just because the engine is so nice, or if they WNW folks know about the fit issues? I will post some photos of the cowl on when I finish with the putty filling and sanding.

Quoted Text

Can you do a close up of the seat in the cockpit area? I found the instructions a little vague in that area as well.


Do you mean this?

Or this?


Quoted Text

Before you button it all up, I would seriously redo the gun sight. That can't be right, something wrong there.


I looked at Keith's finished build of the kit and it is at that angle. It just looks off but then when you compare it with the angle of the gun, it fits. Based on that, I would leave it alone.

That's why I asked here. Is it the kit, or should the site be at that angle?

JackFlash
_VISITCOMMUNITY
Colorado, United States
Joined: January 25, 2004
KitMaker: 11,669 posts
AeroScale: 11,011 posts
Posted: Friday, January 08, 2010 - 03:54 PM UTC

Quoted Text


". . .Not sure about the angle of the gun sight, but this is what you get following the instructions. . ."


That is the correct angle. The Vickers was not mounted level. The Lewis gun was mounted level. The Vickers gun was usually sighted in 50 -100 yards out based on the the pilot's preference. The point is the Vickers was to intersect with the Lewis gun's trajectory using the scope sight. the ring and bead sight was only used for back up should the glass become destroyed or damaged.
JackFlash
_VISITCOMMUNITY
Colorado, United States
Joined: January 25, 2004
KitMaker: 11,669 posts
AeroScale: 11,011 posts
Posted: Friday, January 08, 2010 - 04:12 PM UTC
Though they are two different kits I have provided here the link to my Roden Viper engine build as there are some helpful image references of restored and original SE 5a aircraft.

My build here.
bill_c
Staff MemberCampaigns Administrator
MODEL SHIPWRIGHTS
_VISITCOMMUNITY
New Jersey, United States
Joined: January 09, 2008
KitMaker: 10,553 posts
AeroScale: 1,198 posts
Posted: Friday, January 08, 2010 - 06:22 PM UTC
Thanks, Stephen, those are very helpful.
thegirl
_VISITCOMMUNITY
Alberta, Canada
Joined: January 19, 2008
KitMaker: 6,743 posts
AeroScale: 6,151 posts
Posted: Saturday, January 09, 2010 - 02:48 AM UTC
Very nice progress Bill !

Looking forward to seeing some colour on her now !
bill_c
Staff MemberCampaigns Administrator
MODEL SHIPWRIGHTS
_VISITCOMMUNITY
New Jersey, United States
Joined: January 09, 2008
KitMaker: 10,553 posts
AeroScale: 1,198 posts
Posted: Sunday, January 10, 2010 - 04:50 AM UTC
Thanks, Terri (blushing).
Mgunns
_VISITCOMMUNITY
Arizona, United States
Joined: December 12, 2008
KitMaker: 1,423 posts
AeroScale: 1,319 posts
Posted: Sunday, January 10, 2010 - 05:32 AM UTC
Thanks for the up close photo's. I am going to persever on the one that I started and see how it goes. I have gotten over my frustration and seeing the progress you are making is encouraging.

When I get the current project finished I will start it up and post under my name.

Cheers
Mark
 _GOTOTOP