_GOTOBOTTOM
Modern (1975-today): USA
Modern aircraft of the United States.
Kitech F-16 Build Log
md72
#439
_VISITCOMMUNITY
Washington, United States
Joined: November 05, 2005
KitMaker: 4,950 posts
AeroScale: 3,192 posts
Posted: Thursday, January 21, 2010 - 10:14 AM UTC
I’ve been building kits on and off for more years than I want to remember. I’ve just never gotten very good at it. I don’t seem to finish very many either (real life interferes more often than frustration). So maybe this build log is a way to get a little better and finish something.

I pulled the Kitech (Zhengdefu?) F-16 out of the stash. No great loss if I trash it in the process, $4.95 price sticker on it, and lot’s of better F-16’s out there anyway. And, the F-16 has a warm spot in my heart; my first job out of college was designing support equipment for it. So it’s got a lot going for it here.

My general plan is to go thru what’s in the box, kind of an in the box review. Then start building, fixing stuff and getting it done (I hope).

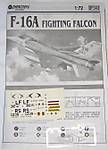
Here’s the box:


Simple side opening box, makes it hard to store stuff once you get started. I noticed that they describe it as a “U.S. Air Force Trainer”. Their newer boxings of the F-16C and D retain this description. I think I saw their F-14 listed as a “U.S. Navy Trainer”. Not sure what they’re trying to tell us.

What’s inside:
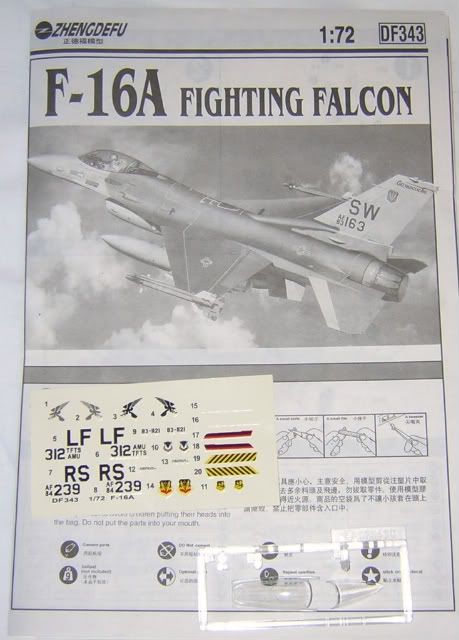
3 sprues; two in light gray, one clear, 3 page instruction sheet and decals for two versions. One is a bird out of Ramstein AFB in ’85 and the other from the F-16C roll-out in 1984. No markings for the SCANG plane on the box.

Unfortunately none of the markings is for an F-16A. According to F-16.net, all three are F-16C’s from block 25C. (Grrrr looks like I have my first change and I haven’t even shown the sprues.) Well, I’m sticking with the title since that’s what’s on the box.

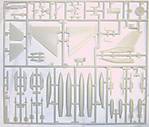
Blundering on, here are the sprues:
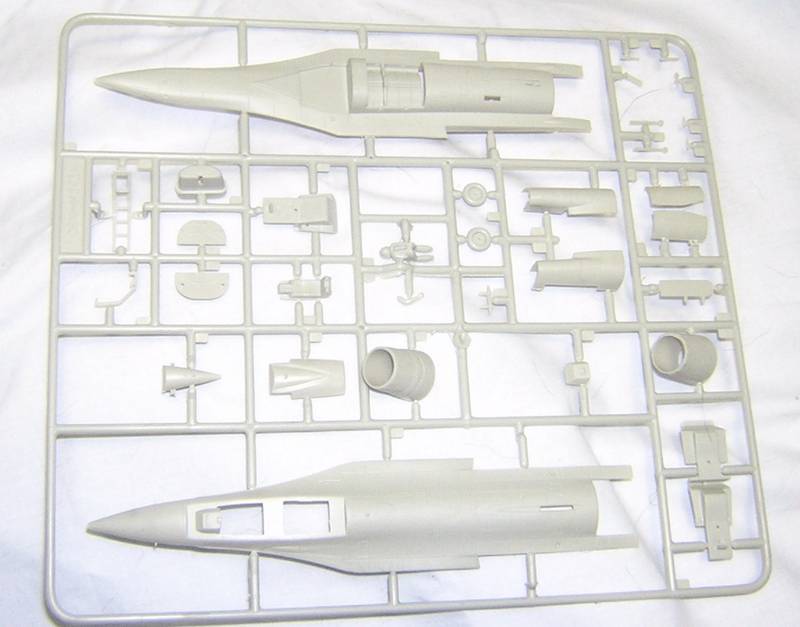


Parts are molded in a light gray; parts took ‘pebbly’ but feel smooth. Won’t know the real story ‘til I try to paint it. The fuselage is split top and bottom, should simplify the seams. Sharp eyed observers will note that the top half of the fuselage has openings for 2 cockpits, there is a 2 seat cockpit, two ejection seats and the “Y” yoke for the 2 place canopy. Sadly there is only one pilot figure and only a 1 place canopy. Different rear cockpit fairings (1 vs. 2 seats) are also included. There are two tail cones; I assume one is for the GE F110 engines. I can’t tell if it’s a large mouth intake, so the GE tail cone may be inaccurate for this fuselage.

The wings are molded in one piece per side, I’m afraid that this could cause sinks, I don’t see any, but the paint will tell. The intake is molded in 4 pieces, an inner shell, a support and left / right outer sides. There might be some filling and sanding in my future. Cockpit detail is sparse, there’s a tub, ejection seat, something that might be a side stick controller and an oddly shaped part that attempts to incorporate the front panel with the EO display. No throttle, or instrument faces.

The clear sprue has the 2 canopy parts, with the front framing molded in. There is also a clear part for the HUD unit. A quick fit of the canopy to the fuselage reveals that the instrument cover is too tall and keeps the canopy from sitting flush with the fuselage. Since there’s a decent representation of the boarding ladder I might try to pose the canopy open. That means I’ll have to figure out how to spruce up the cockpit.

Let me figure out how to get this uploaded and I’ll start on the cockpit next.

Feel free to ask questions, cause I'm going to be asking a few as I go along.
md72
#439
_VISITCOMMUNITY
Washington, United States
Joined: November 05, 2005
KitMaker: 4,950 posts
AeroScale: 3,192 posts
Posted: Thursday, January 21, 2010 - 10:16 AM UTC
OK, looks like my first question is how to properly size the pictures once I load them...
hkopper
_VISITCOMMUNITY
Florida, United States
Joined: March 01, 2008
KitMaker: 529 posts
AeroScale: 340 posts
Posted: Friday, January 22, 2010 - 11:25 AM UTC
I tend to upload the pictures to photobucket in either 1024 x 768 or 640 x 480 resolution. The next step will be to copy the [img] tag to the post.
md72
#439
_VISITCOMMUNITY
Washington, United States
Joined: November 05, 2005
KitMaker: 4,950 posts
AeroScale: 3,192 posts
Posted: Saturday, January 23, 2010 - 05:19 AM UTC
well let's try it.


Edit:
That seems to work better. Thanks
BTW the 2 decals you can't see (15 & 16) are "F-16C NO 1"
md72
#439
_VISITCOMMUNITY
Washington, United States
Joined: November 05, 2005
KitMaker: 4,950 posts
AeroScale: 3,192 posts
Posted: Monday, January 25, 2010 - 09:21 AM UTC
Well, that was a wasted weekend spent it all on 1:1 projects. Did get to spend some time on the cockpit. Boy is it plain, sorta sad since they set the kit up to have the canopy displayed open. Seat with hints of railings, side panels with no detail, no decals to hint at instruments and switches, there was an effort to mold in the landing gear retract switch but that’s about it. There's something on the sprue that supposed to be a side stick controller, but it's triangular in shape.... The front panel / EO attempts to merge the two features, but it doesn't match the shape of the instrument hood, and it takes a lot of imagination to see the EO display in the shape.

I tried to fit the cockpit tub in the fuselage. There’s a nice set of features to set it at the right distance aft and hold it side to side. It’s a real help in getting everything together, but, it holds the tub too far forward and leaves a gap between the rear of the tub and the back of the cockpit opening. I used the back edge of the locator and got a better fit to the cockpit opening. The tub also holds the top and bottom fuselage halves apart. A little sanding on the back bottom corner got the gap to close. I think getting some 3D effects in here will help. If I paint the tub gray, add black squares to mimic the avionics boxes and adding some knobs and switches with plastic rod, it might look passable. Same idea with the instrument panel, possibly even building up a box under the HUD to look like the HUD controls. Might just build up a small box over the EO location and paint it red to look like the remove before flight cover.
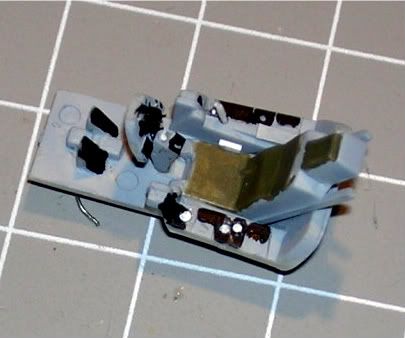
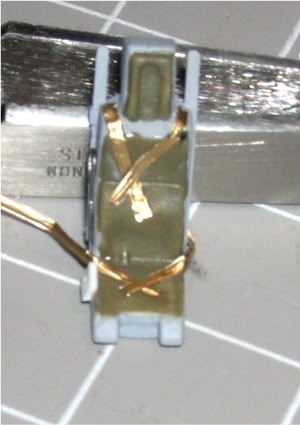
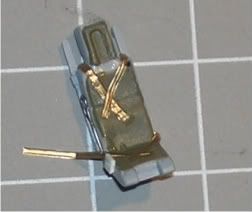
The kit comes with two seats; the seat they indicated was the front seat looks like it sits with the ejection rails thru the canopy. The aft seat seems to work better, I’ll use it. It’s got a good shape for the ACES II seat but it’s crying for detailing. Maybe an O2 bottle, pull handles, seat belts and some cabling. ACES II seats have a pair of pitot tubes sticking off of the head rest; I’d like to try to capture that feature, if it doesn’t end up looking like a squashed bug.

With a little luck I’ll get some photos posted in the next couple of days.
md72
#439
_VISITCOMMUNITY
Washington, United States
Joined: November 05, 2005
KitMaker: 4,950 posts
AeroScale: 3,192 posts
Posted: Tuesday, January 26, 2010 - 09:40 AM UTC
Well, there is something to be said for reading the instructions first. As I was pulling parts together to take photos, I stumbled across another instrument panel on the second sprue. It was the front seat panel, with the HUD control box in place. Up till now I was using the rear seat panel. D’oh! Still has the wrong outline and needs to be trimmed to fit inside the instrument faring. So at least I got some photos this time.

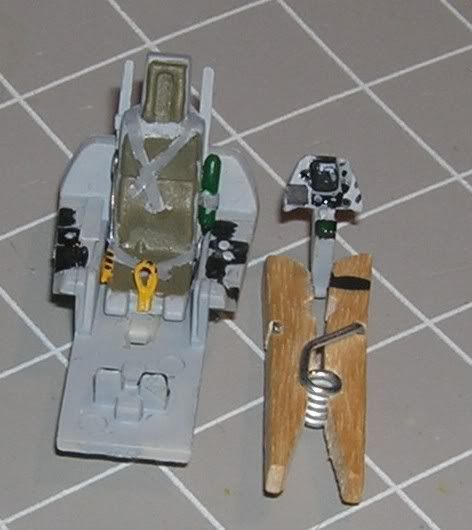
Seats and cockpit with correct front seat instrument panel. The thick base on the front seat makes it interfere with the canopy.

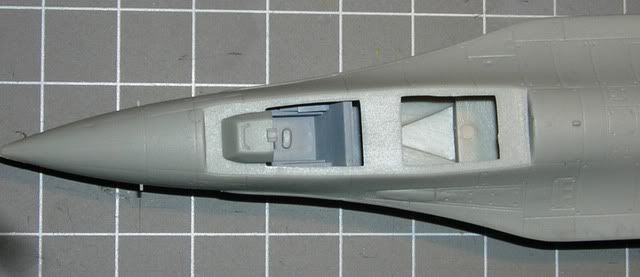
Here's the cockpit location issue I was talking about:


Cockpit and panel in fuselage; (sorry, kinda blurry)
jaypee
_VISITCOMMUNITY
Scotland, United Kingdom
Joined: February 07, 2008
KitMaker: 1,699 posts
AeroScale: 1,384 posts
Posted: Tuesday, January 26, 2010 - 11:02 AM UTC
Whats the plastidc like for sanding. I got the kitech f-117 and it
was like it was made from remoulds, or cheezestrings, or both.

Looks like you've got you work cut out with this one. But how
else can you test your skills Good luck
md72
#439
_VISITCOMMUNITY
Washington, United States
Joined: November 05, 2005
KitMaker: 4,950 posts
AeroScale: 3,192 posts
Posted: Tuesday, January 26, 2010 - 04:34 PM UTC
Only sanded a couple of spots on the cockpit. Didn't notice any problems, but the plastic does seem a but soft and the exterior surfaces seem a bit pebbly. I'll soon see as there are going to be some fit issues.
james84
_VISITCOMMUNITY
Roma, Italy
Joined: January 28, 2006
KitMaker: 1,368 posts
AeroScale: 377 posts
Posted: Tuesday, January 26, 2010 - 07:50 PM UTC
Well, I'll tell you the truth... this looks like a shame of a kit!
md72
#439
_VISITCOMMUNITY
Washington, United States
Joined: November 05, 2005
KitMaker: 4,950 posts
AeroScale: 3,192 posts
Posted: Wednesday, January 27, 2010 - 04:05 AM UTC
Well you're sorta right. It's not on a par with any of Tamigawa's offerings. But, I picked it up for less than U$5, at a half off sale. If I go into any hobby / craft retailer in my area, they're selling the Testors' boxings of Hawk's 50+ year old kits for U$9 and up. I figure that if I finish this kit, it's a win, win, win for me. If it comes out bad, it's a lousy kit. If it comes out good, I'm a better modeler than I thought. Either way I got more experience as a modeler, and maybe even a little better one at that. And, I got a kit out out of the stash and now I can go get another one!
md72
#439
_VISITCOMMUNITY
Washington, United States
Joined: November 05, 2005
KitMaker: 4,950 posts
AeroScale: 3,192 posts
Posted: Tuesday, February 02, 2010 - 09:21 AM UTC
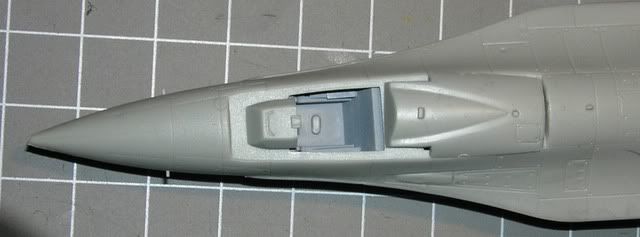
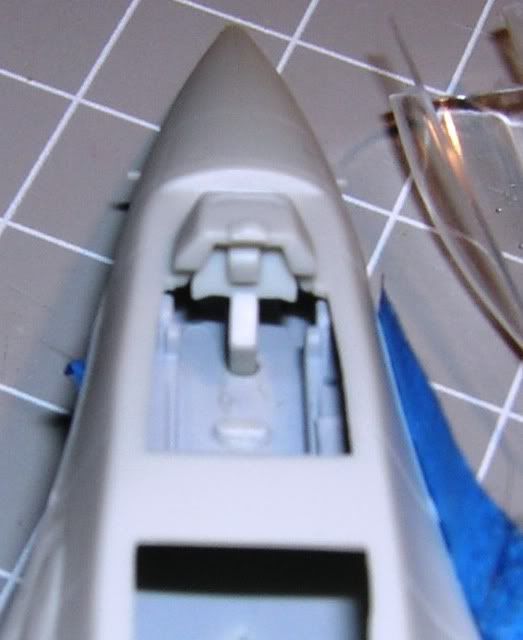
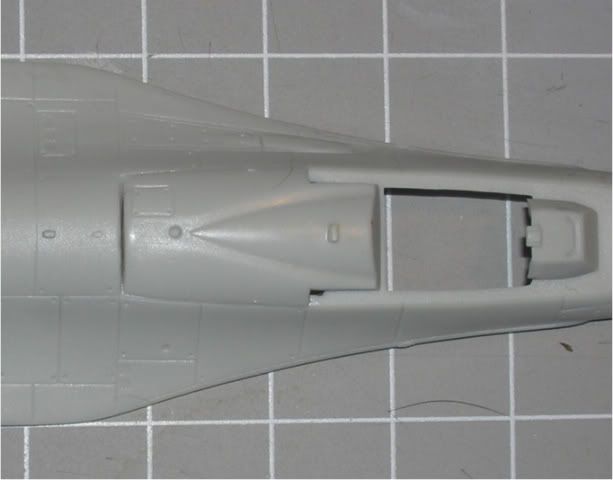
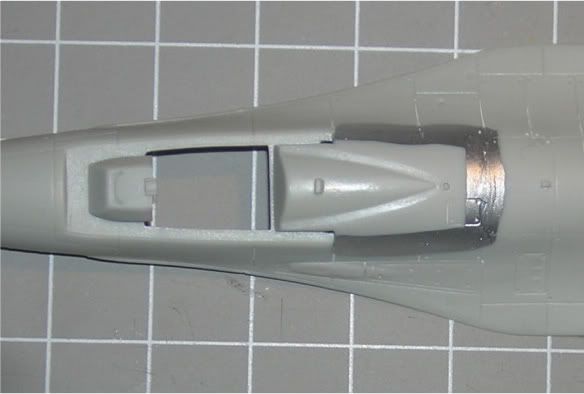
I’m taking a small break from the cockpit (need to find my .020 drill bit). So I took a look at the rear cockpit cover. It didn’t fit too well. In a stroke of ‘inspiration’ I tried to hold the two parts in alignment and use a sanding stick between then to square up the edges before I joined them. Didn’t work, it seemed to make the gap worse:


I stuffed a piece of .010 strip in the gap, glued it in, filed, sanded and checked.


Looks a little better but there's more work to do.

I'll probably have to go in under the cover and add something to block any light coming thru the small gaps under the canopy frame.
md72
#439
_VISITCOMMUNITY
Washington, United States
Joined: November 05, 2005
KitMaker: 4,950 posts
AeroScale: 3,192 posts
Posted: Monday, February 08, 2010 - 09:09 AM UTC
Well I managed to make a tiny bit of progress. and I didn't manage to get andy photos yet. Started to drill out some locations in the cockpit in install some rod to hint at switches and knobs. Problem is .020" stock is HUGE in 1/72. Nearly 1.5" true) So I ended up filling in most of the holes I drilled and tried a couple of other ideas. For dials and gauges, I tried to use a punch to out rings for instrument bezels, never got close to leaving a full ring behind, usually got a half moon for my efforts. Then I tried to just punch a small .040 hole (about 3" true) onto a strip of plastic and the just cut the outside edges to make a square around the hole. Lots easier, might sctually look like an instrument cluster when I'm done.

Gave up on the kit's side stick controller. Going to just put a piece of .02 rod in the hole, cut it to lenght and then use CA or elmers to mimic a hand grip. Thinking about the same path for the throttle also.

Also got started on the seat. Little bit of paint and then try to add pull handles, seat belts, O2 bottle and some tubing for the controls.
VonCuda
_VISITCOMMUNITY
North Carolina, United States
Joined: November 28, 2005
KitMaker: 2,216 posts
AeroScale: 1,080 posts
Posted: Tuesday, February 09, 2010 - 10:18 AM UTC
Mark, for switches and toggles in 1/72 scale try this. Take a piece of wire (phone wire) and unwrap the insulation from it. Seperate the "bundle" of 10 or so tiny wires that make up the one wire. Cut pieces of the tiny wire and glue them in the desired location. I've done this on a few kits and after painting it actually looks decent.

Don't give up. No matter how hard it looks it'll pay off in the end.


Hermon
md72
#439
_VISITCOMMUNITY
Washington, United States
Joined: November 05, 2005
KitMaker: 4,950 posts
AeroScale: 3,192 posts
Posted: Wednesday, February 10, 2010 - 04:06 AM UTC
Thanks VonCuda,
I spent last night madly scrounging for phone wire and mini drill bits. Found both, but the phone wire was solid, not stranded and seemed a bit thick. Tracked down some stranded ground wire that was thinner, .015” (about 1” true), that was just larger than a drill bit I found.

Tried it on a scrap piece and it looks like it should work. If I can cut them off consistently and get just a dab of gray paint on them they will do the trick. Just have to punch out a couple of instrument faces, glue, paint and drop in the Future it might just look like a control panel. Maybe pics tomorrow.
md72
#439
_VISITCOMMUNITY
Washington, United States
Joined: November 05, 2005
KitMaker: 4,950 posts
AeroScale: 3,192 posts
Posted: Monday, February 15, 2010 - 04:01 AM UTC
Progress in fits and starts. Got some cockpit work done.

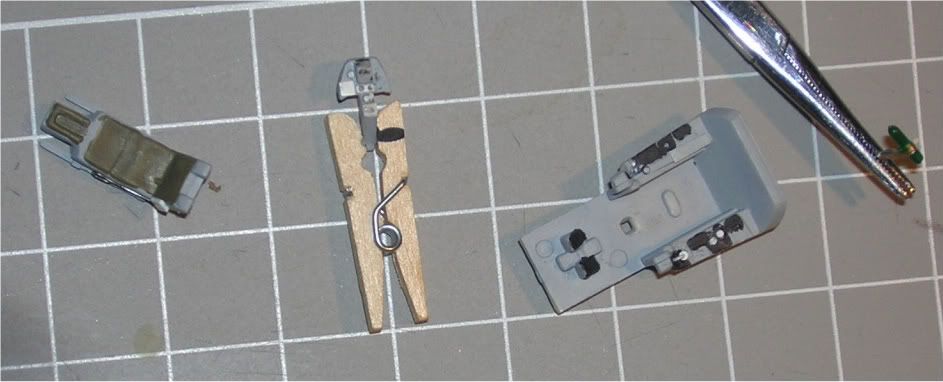
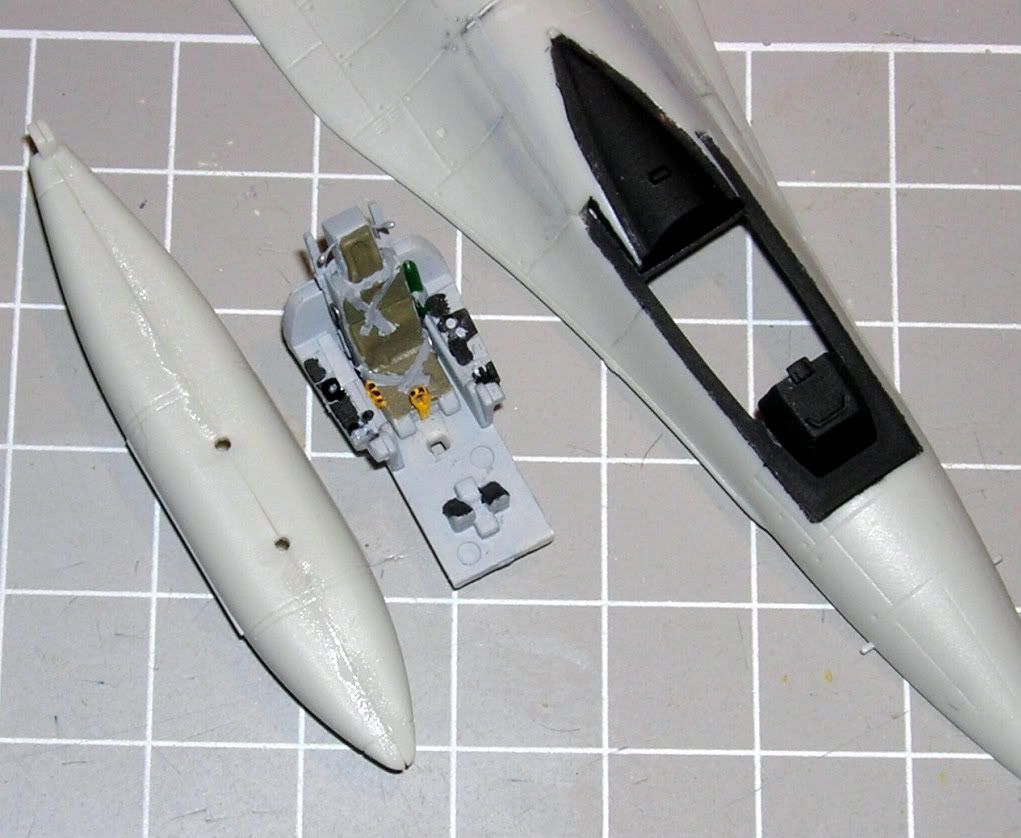
Scrapped off the paint on the control panel, filled in the holes I drilled. Added a block of sheet styrene on the bottom corner of the EO display stand. Hollowed out the center to try to capture the EO display. A drop or 2 of green paint in the hole along with some Future should look like a display. Added some pience with holes in them to look like instrument faces and added a block for the display on th eport side of the panel.

Added a pull handle and wiring to the right side of the seat. and started on an O2 bottle for the left side (green blob on hemostat).

Added some punched out disks from .005" styrene for knobs and gages on the cockpit side panel. I put a piece of plastic rod in the hole for the side stick controller, and now I'm building up some CA on it to sumulate a hand grip. Turns out what I thought was the landing gear retract switch (in the shape of a wheel) was a side panel for the seat. So I glued in a punched out disk to the left panel to capture the idea.


Tried to fit it all together and start seeing a cockpit. The shots too blurry to be any good but at least it's a start.


More tomorrow, maybe even a decent photo.
VonCuda
_VISITCOMMUNITY
North Carolina, United States
Joined: November 28, 2005
KitMaker: 2,216 posts
AeroScale: 1,080 posts
Posted: Monday, February 15, 2010 - 11:07 AM UTC
Looking good Mark. A dark wash over everything will bring out all the detail you're adding. I hope after all that hard work you're planning on leaving the canopy open.


Hermon
md72
#439
_VISITCOMMUNITY
Washington, United States
Joined: November 05, 2005
KitMaker: 4,950 posts
AeroScale: 3,192 posts
Posted: Monday, February 15, 2010 - 11:18 AM UTC
Thanks.

I've still got some painting to go on the cockpit and I've got to finish the air bottle, the ejection handle, side stick and throttle.

Haven't done too many open canopies in my years. But this one will be open since the canopy is bigger than the opening. The F-16's one piece canopy is going to be a challenge.
md72
#439
_VISITCOMMUNITY
Washington, United States
Joined: November 05, 2005
KitMaker: 4,950 posts
AeroScale: 3,192 posts
Posted: Tuesday, February 16, 2010 - 04:54 AM UTC
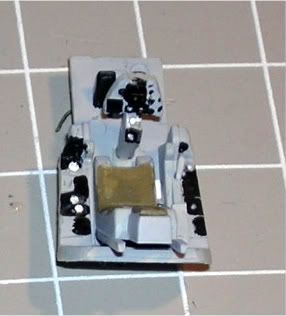
Feel like I'm making some progress. Got a little paint into the cockpip last night.


Hope these are more in focus and look a little bit like a cockpit.
md72
#439
_VISITCOMMUNITY
Washington, United States
Joined: November 05, 2005
KitMaker: 4,950 posts
AeroScale: 3,192 posts
Posted: Wednesday, February 17, 2010 - 03:18 AM UTC
A little work on the ejection seat last night:


A little bit of foil from a bottle of sparkling apple cider for seat belts. Need to finish gluing, trim and paint. Also worked on the pull handle for the ejection seat.
md72
#439
_VISITCOMMUNITY
Washington, United States
Joined: November 05, 2005
KitMaker: 4,950 posts
AeroScale: 3,192 posts
Posted: Sunday, February 21, 2010 - 06:02 PM UTC
Seems like major progress. Got the O2 bottle installed and plumbed in. Finished the eject handle and the O2 handle. Colored the EO display and filled it with future along with a couple of dials and guages. Painted up the joystick too.


Now back to the fuselage and a little painting.
md72
#439
_VISITCOMMUNITY
Washington, United States
Joined: November 05, 2005
KitMaker: 4,950 posts
AeroScale: 3,192 posts
Posted: Thursday, February 25, 2010 - 10:15 AM UTC
Made a tiny bit of progress last night. Got the rear landing gear bay bulkhead installed. Unfortunately the curve of the bulkhead doesn't match the curve of the fuselage.

THe fwd bulkhead curves match a bit better, bu the part seems to be a few thousands too big for the opening, so I have to trim it back and clean up some flash. Hope to have pics tonight or tomorrow.
md72
#439
_VISITCOMMUNITY
Washington, United States
Joined: November 05, 2005
KitMaker: 4,950 posts
AeroScale: 3,192 posts
Posted: Tuesday, March 02, 2010 - 08:59 AM UTC
Well, got a little bit of work done over the weekend.


Masked and sprayed the cockpit surround. One of my best rattle can experiences of late.
Added the pitot tube sensors to the bang seat head rest, OK so they look like bug eyes...
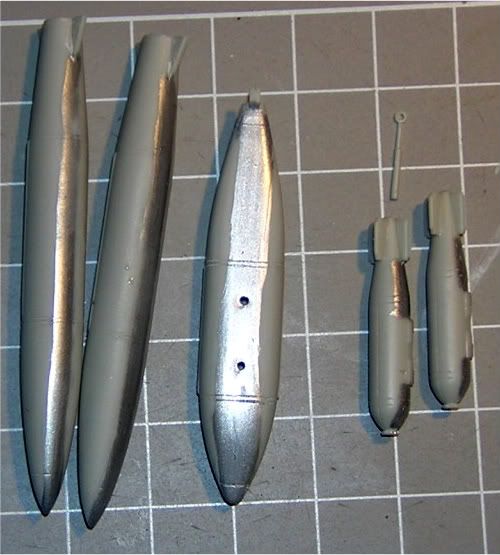
Started on the centerline store, the locator pins were off center so I cut them off and but joined the 2 halves. Bunch of clean up to go.

Finished the interior bulkheads on the MLG, but forgot to take pics.
md72
#439
_VISITCOMMUNITY
Washington, United States
Joined: November 05, 2005
KitMaker: 4,950 posts
AeroScale: 3,192 posts
Posted: Monday, March 08, 2010 - 09:10 AM UTC
OK, it's been a week, what do I have to show for it:

First here are the photos of the MLG bay I promised.

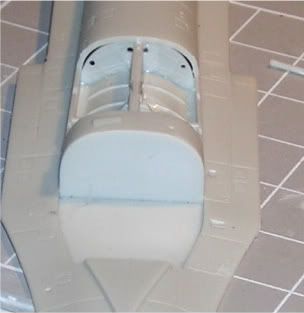
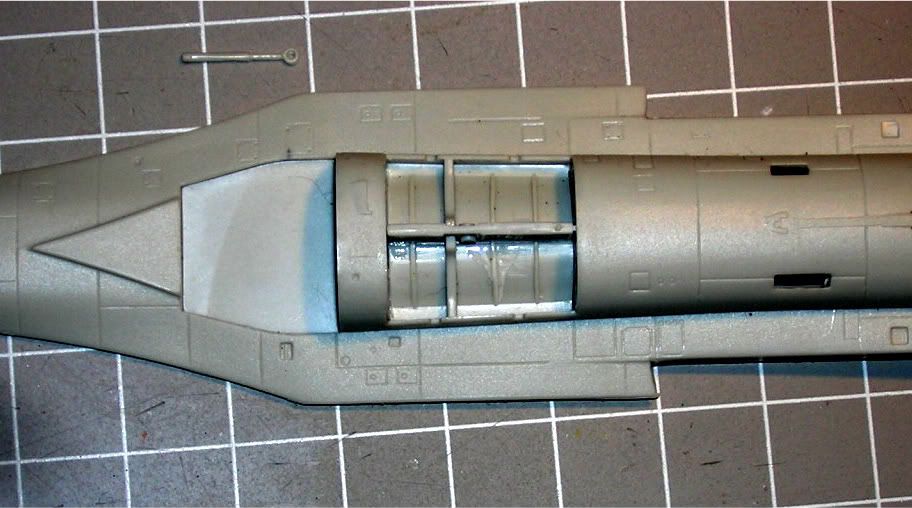
There's the gap between the fuselage and the bulkhead. I'm thinking eo try and fill it from behind with Mr. Surfacer to avoid sanding in there.

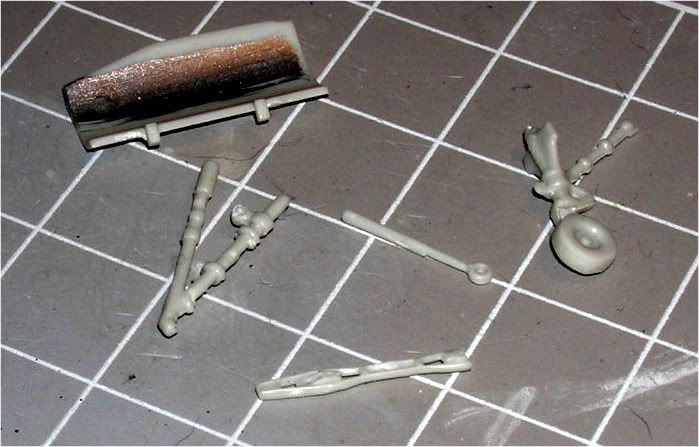
Another view of the bay. I auto 'fixed' it, I don't think it's really this dark, but it does show the 'pebbly' look of the plastic. Huge gaps between the wheel well and the keel frame. Plus the keel frame was too short by about .010, so I jamed in a piece of strip stock to fill the gap.

I finished the underwing stores. Oddest looking bomb shackles I seen, are they legit?


On to the landing gear.

NLG had the two halves offset in the tool. Cleaned it up a bit, the wheel and strut are molded together. I can live with that, would weaken it too much to try and seperate them. But all of the strut crossections are square, not round like in real life, so I tried to knock off the corners.

MLG

Classic! The mold and the assembly diagram don't match. The drawing shows a block on the bottom of the V that the oleo is supposed to fit on. Problem is, it's molded on the wrong side of the strut. Both strus are the same so I'm reasonably sure I don't have the wrong one. The mounting pins are on the wrong side of the part. There's also supposed to be a pin on the fuselage end of the inboard strut to pick up that huge ring in the actuator strut. And the mounting pin on the strut for the hole in the keel frame, not there either.


There was a big enough landing light on the outboard strut that I started to open it up for a lens. Maybe I'll make more progress soon.
Merlin
Staff MemberSenior Editor
AEROSCALE
#017
_VISITCOMMUNITY
United Kingdom
Joined: June 11, 2003
KitMaker: 17,582 posts
AeroScale: 12,795 posts
Posted: Monday, March 08, 2010 - 09:27 AM UTC
Hi Mark

The way you're highlighting problems will be a huge help to those who follow you building this kit.

What type of paint are you using to check the seams and filler? - it looks a trick worth learning.

All the best

Rowan
md72
#439
_VISITCOMMUNITY
Washington, United States
Joined: November 05, 2005
KitMaker: 4,950 posts
AeroScale: 3,192 posts
Posted: Monday, March 08, 2010 - 09:32 AM UTC
Twist on a stolen trick.

Someone, somewhere mentioned using silver paint on seams to highlight flaws. Tried it and it helps. But cleaning the brush got to be a hassle, so I use a plain old Testors silver paint pen. No clean up (unless I get it on my fingers). The bronze color is a gift from Photobucket's "auto fix' function.
 _GOTOTOP