Texas, United States
Joined: May 27, 2009
KitMaker: 1,293 posts
AeroScale: 1,072 posts
Posted: Saturday, February 13, 2010 - 04:56 AM UTC
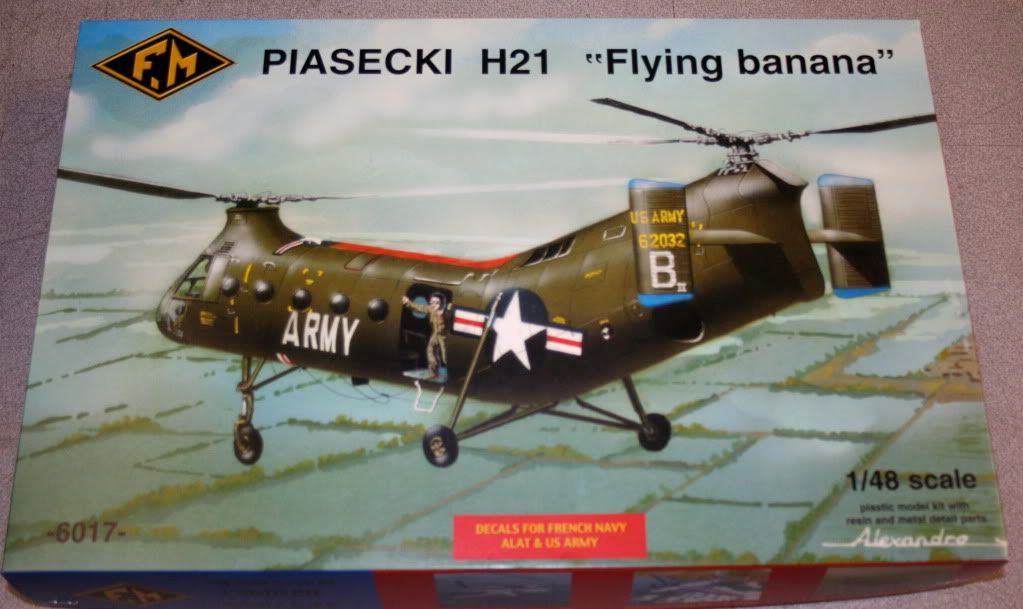
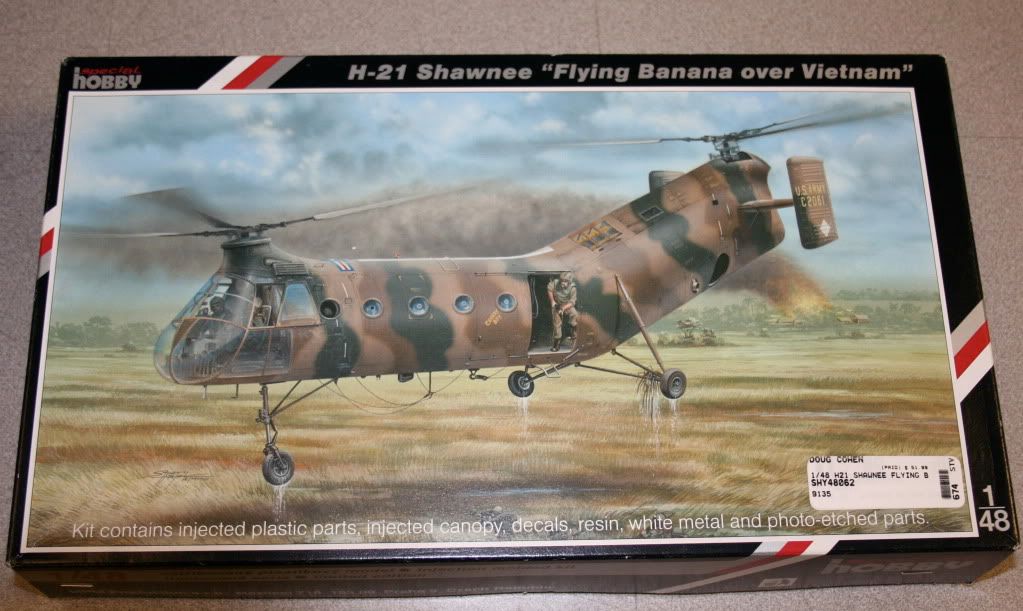
I got the Fonderie Miniature (from now on I will refer to it as the FM) H-21 flying banana when it first came out a few years ago and I intended to build it right away. Of course then Special Hobby (they will be SH from now on) came out with there version of the same helo and I had to buy it as well. As time went on and I played with them both here and there I decided that I would build them both, but with some converting and creative plastic bashing. I am building the FM H-21 as an abandoned German machine and the SH H-21 as a Vietnam chopper in service.
Texas, United States
Joined: May 27, 2009
KitMaker: 1,293 posts
AeroScale: 1,072 posts
Posted: Saturday, February 13, 2010 - 05:50 AM UTC
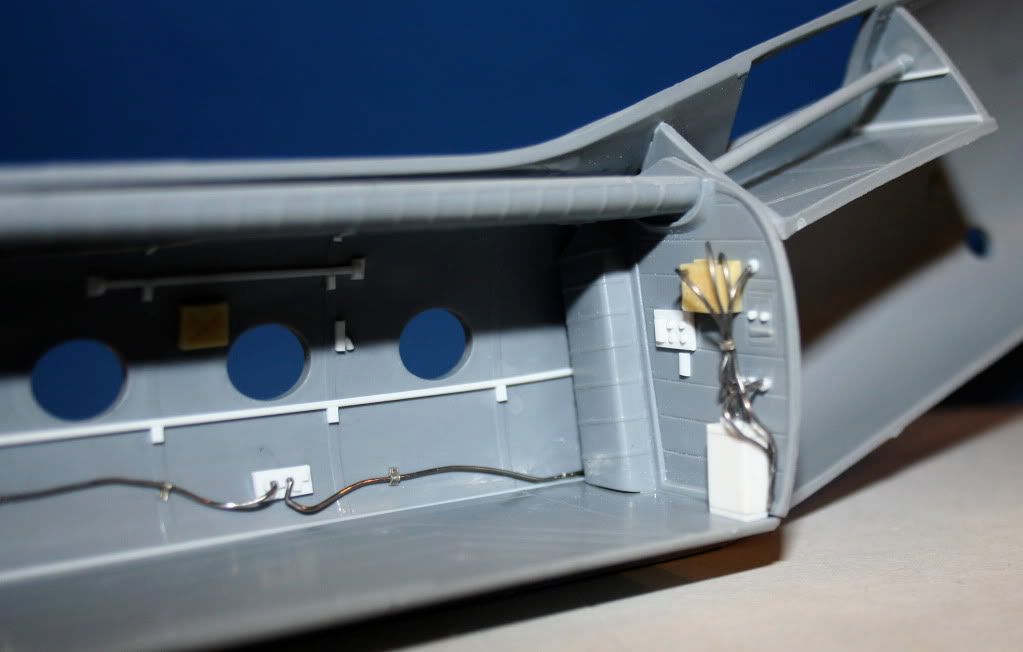
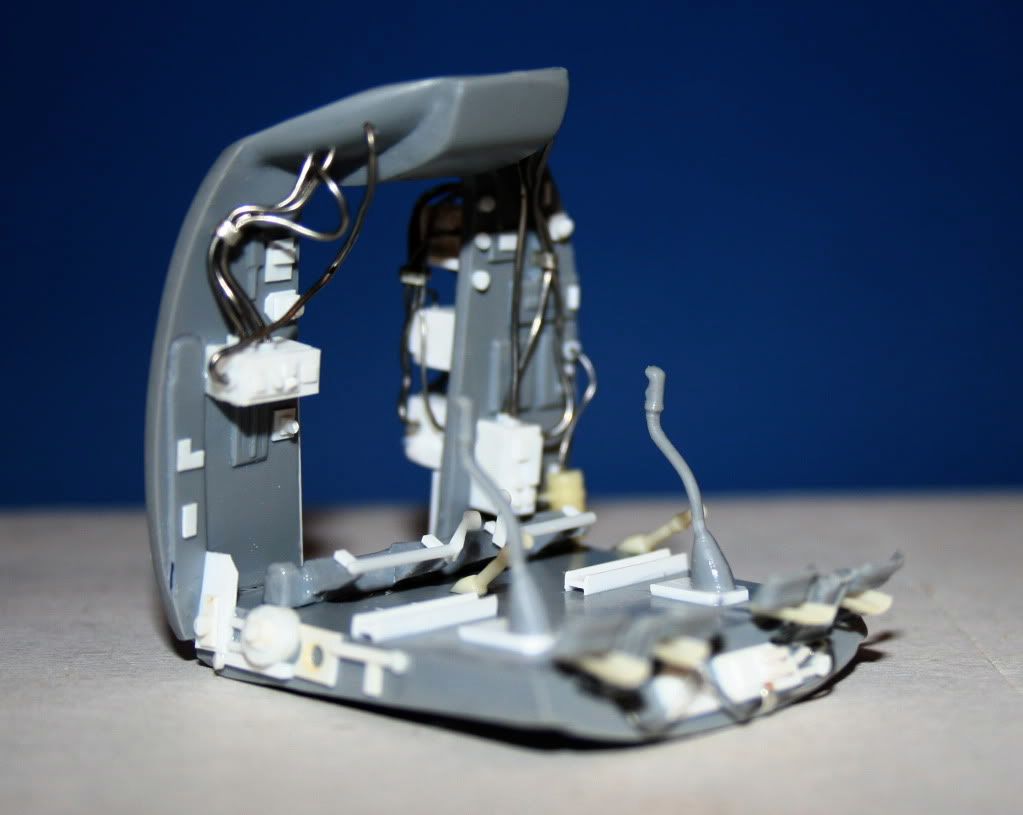
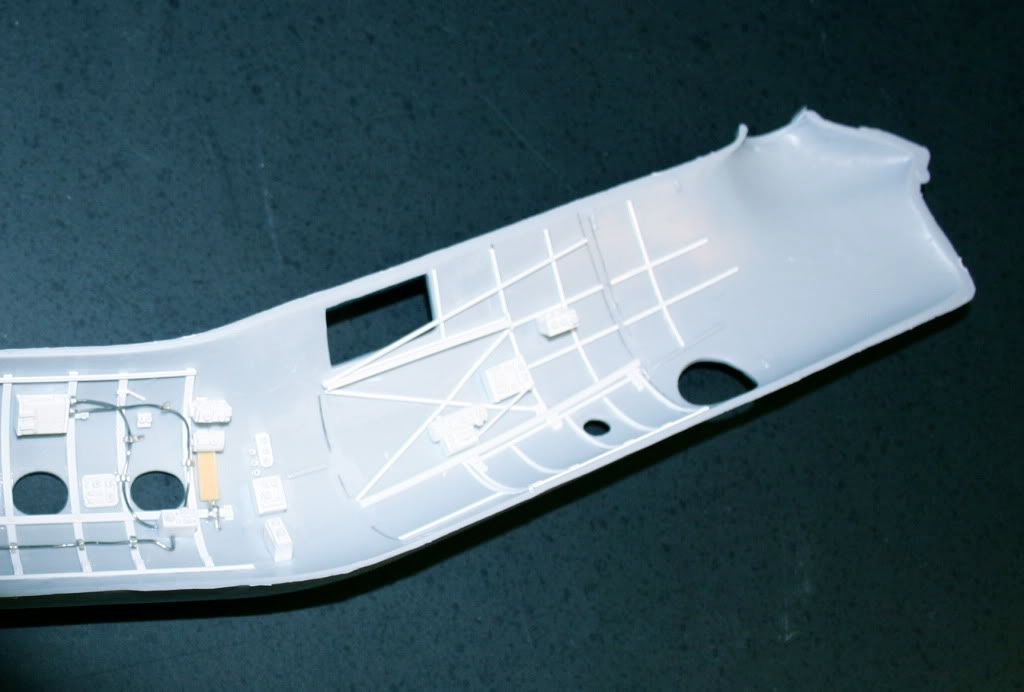
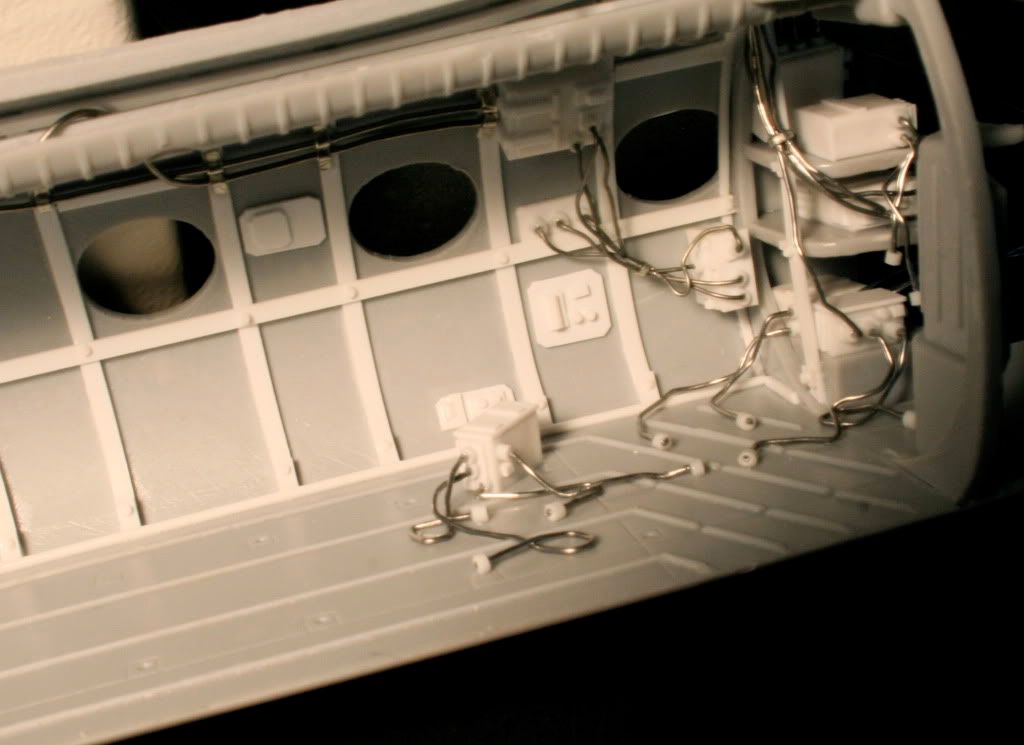
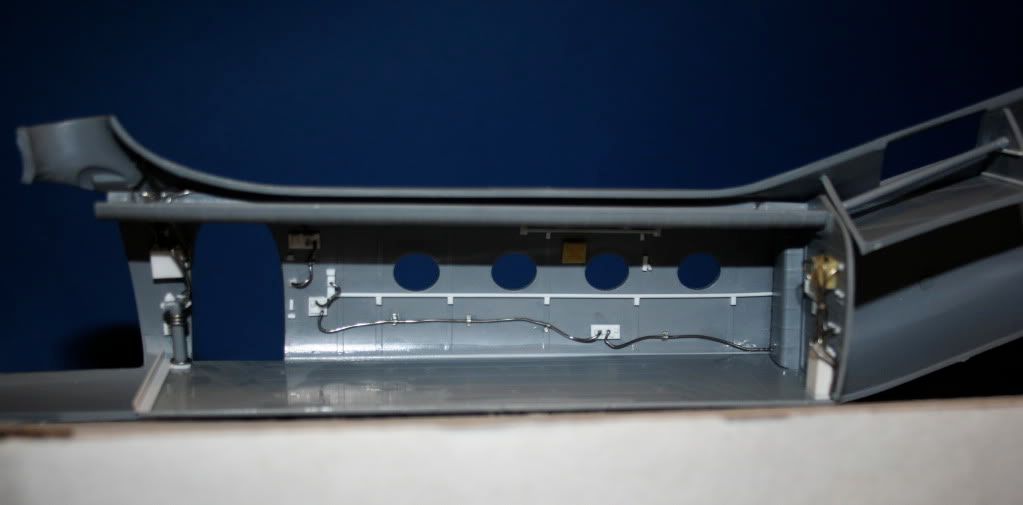
The SH kit (upper photo) has some interior detail so I just added some stuff, the FM kit (bottom photo) has less so more detail will be needed.

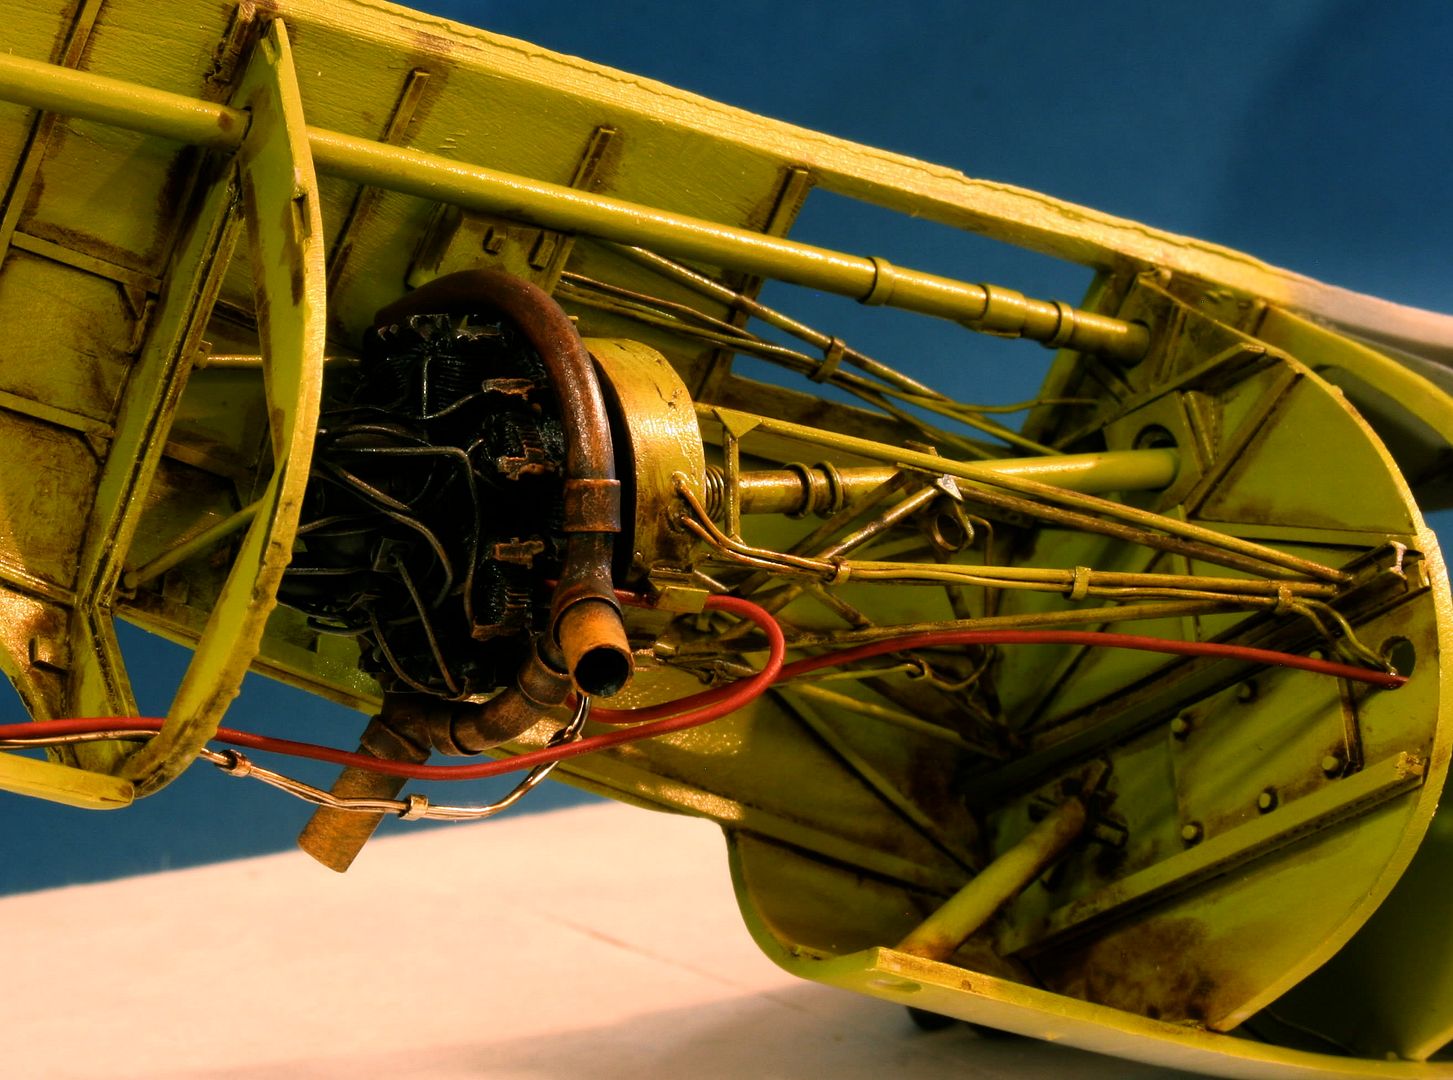
I will be opening the engine compartment on the FM kit so I will be adding detail to it as well, this is the start.
Texas, United States
Joined: May 27, 2009
KitMaker: 1,293 posts
AeroScale: 1,072 posts
Posted: Saturday, February 13, 2010 - 08:44 AM UTC
Texas, United States
Joined: May 27, 2009
KitMaker: 1,293 posts
AeroScale: 1,072 posts
Posted: Saturday, February 13, 2010 - 08:47 AM UTC
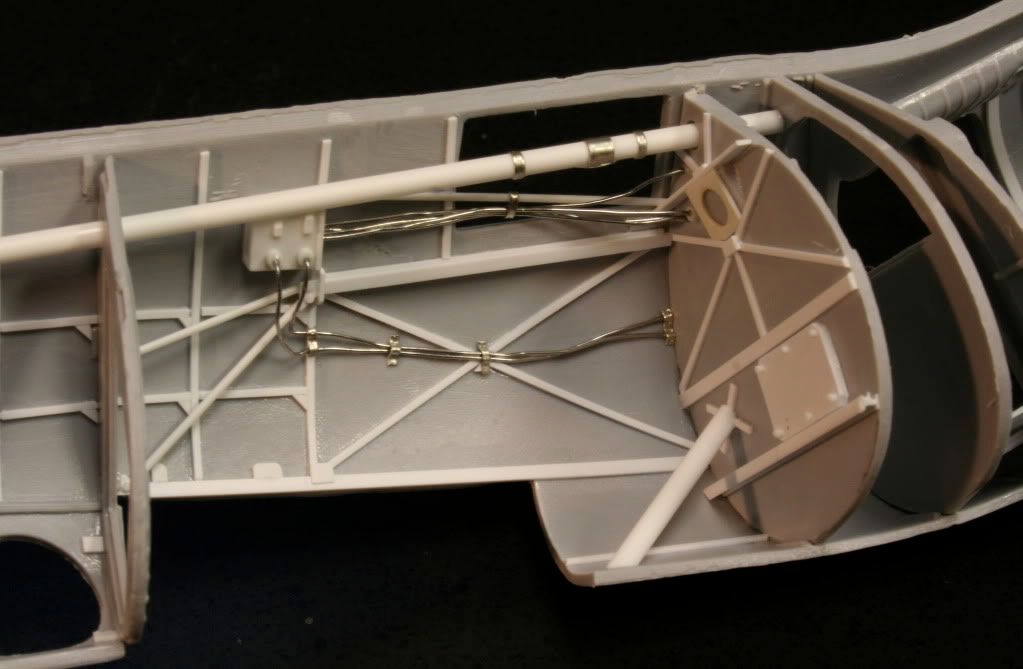
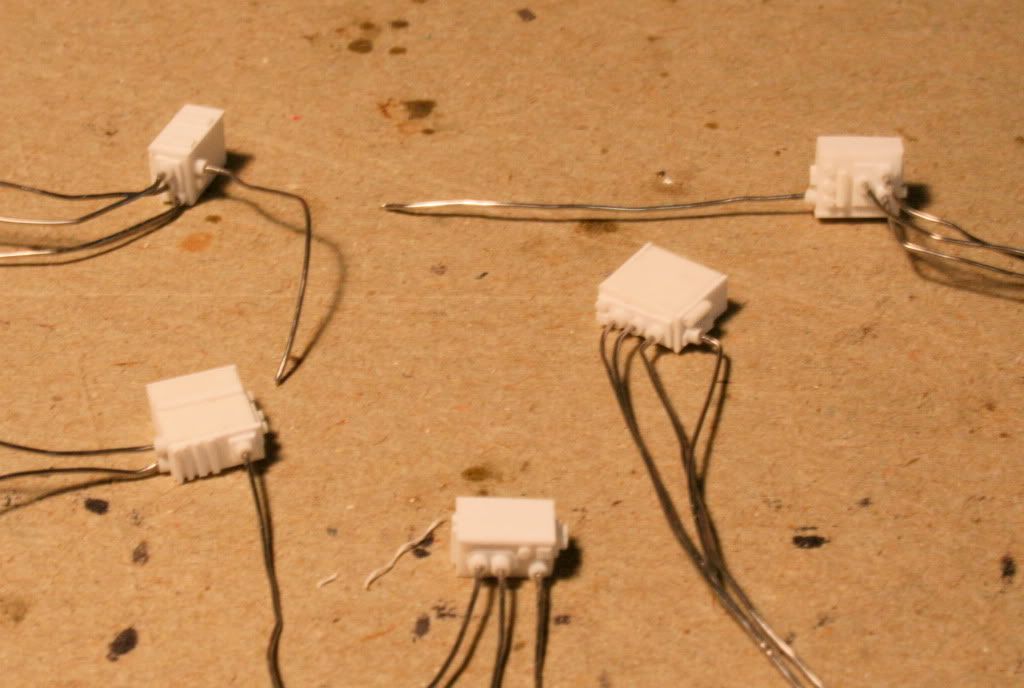
more on the SH kit details.
The radio rack is a good place to do detail.

there are some photo etched parts here and there.
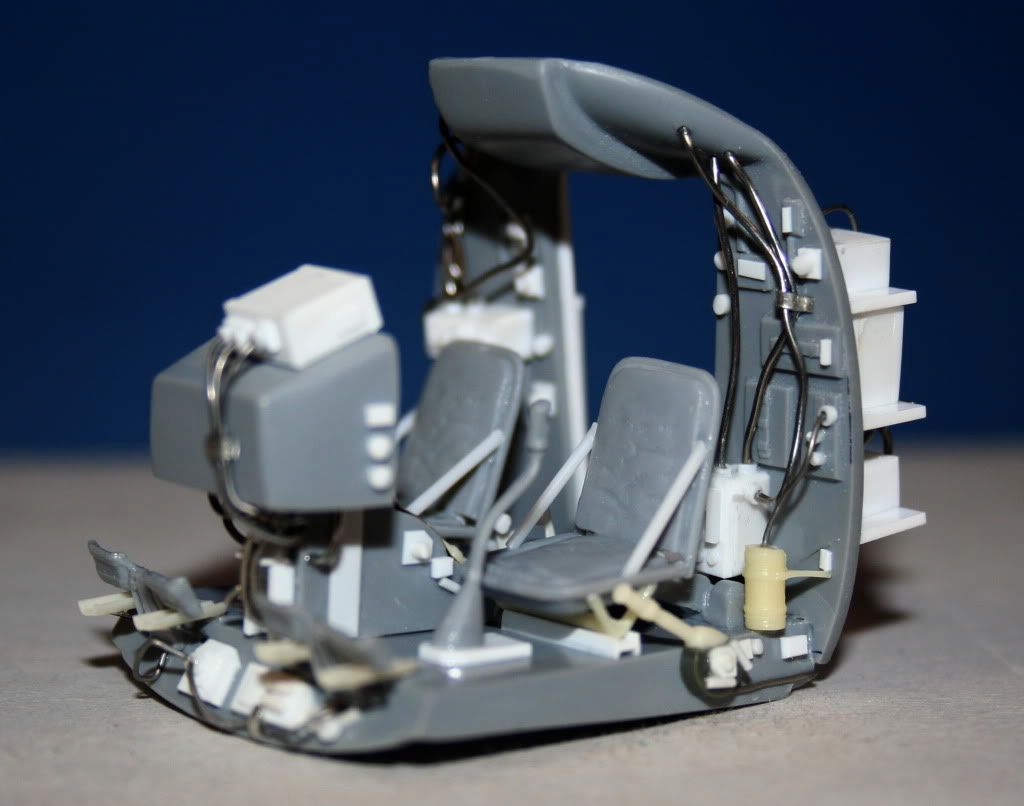
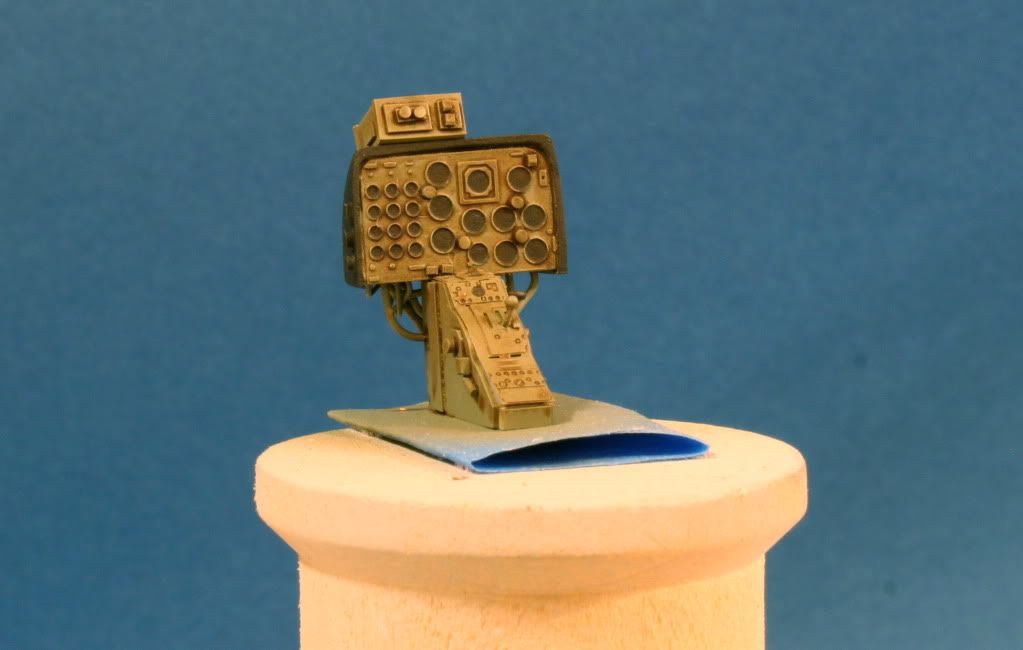
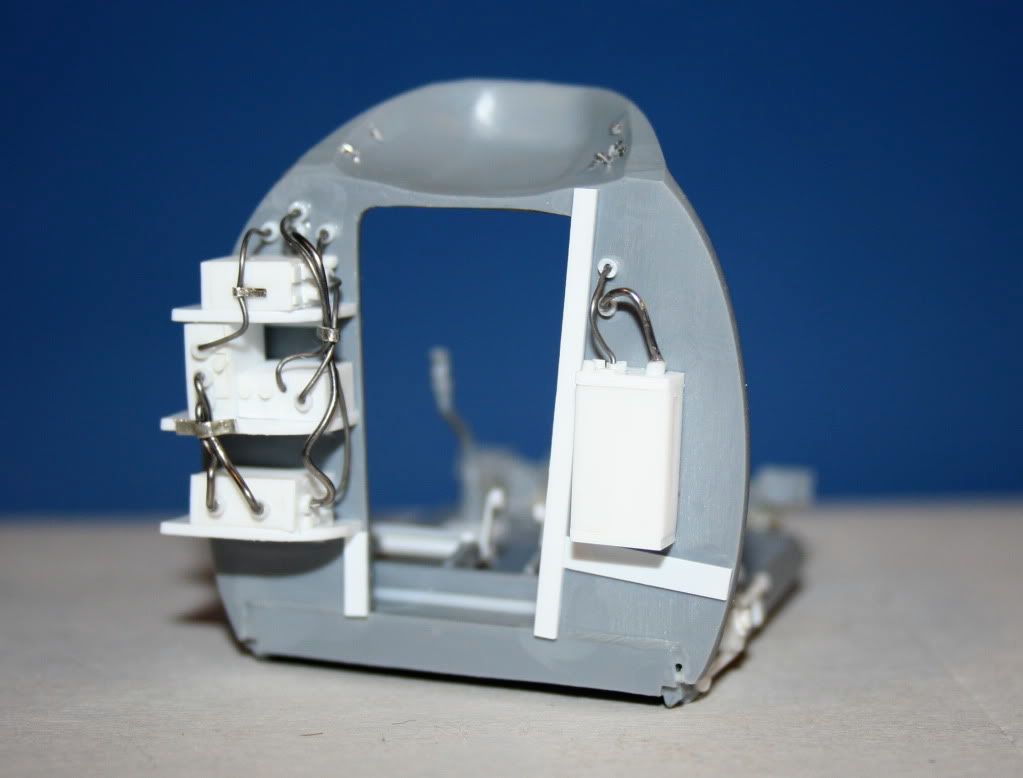
The cockpit needs lots of detail as the nose is all glass and lots will be seen. The yellow parts are resin cast included in the kit.
Germany
Joined: September 07, 2005
KitMaker: 5,609 posts
AeroScale: 5,231 posts
Posted: Saturday, February 13, 2010 - 09:00 AM UTC
Wow Doug!!!
great stuff!! Too bad you already built in all that stuff .. I would have liked a few resin copies of the cockpit/radio parts for my Flying Banana ....... still need to find the courage to continue mine (want to place CMK pilots in the pit, but sill need to add some detail)
all the best
Steffen
DULCE ET DECORUM EST PRO HOBBY MORI
Texas, United States
Joined: May 27, 2009
KitMaker: 1,293 posts
AeroScale: 1,072 posts
Posted: Saturday, February 13, 2010 - 09:58 AM UTC
Quoted Text
Wow Doug!!!
great stuff!! Too bad you already built in all that stuff .. I would have liked a few resin copies of the cockpit/radio parts for my Flying Banana ....... still need to find the courage to continue mine (want to place CMK pilots in the pit, but sill need to add some detail)
all the best
Steffen
Hey Steffen
Yes It would have been nice but I do not know how to do that stuff anyway. Just so you know I started on these two kits because of your build, but I did not want to crowd in on yours so I thought it would be best to do another.
Texas, United States
Joined: May 27, 2009
KitMaker: 1,293 posts
AeroScale: 1,072 posts
Posted: Monday, February 15, 2010 - 05:50 AM UTC
Texas, United States
Joined: May 27, 2009
KitMaker: 1,293 posts
AeroScale: 1,072 posts
Posted: Monday, February 15, 2010 - 05:54 AM UTC
Texas, United States
Joined: May 27, 2009
KitMaker: 1,293 posts
AeroScale: 1,072 posts
Posted: Monday, February 15, 2010 - 05:56 AM UTC
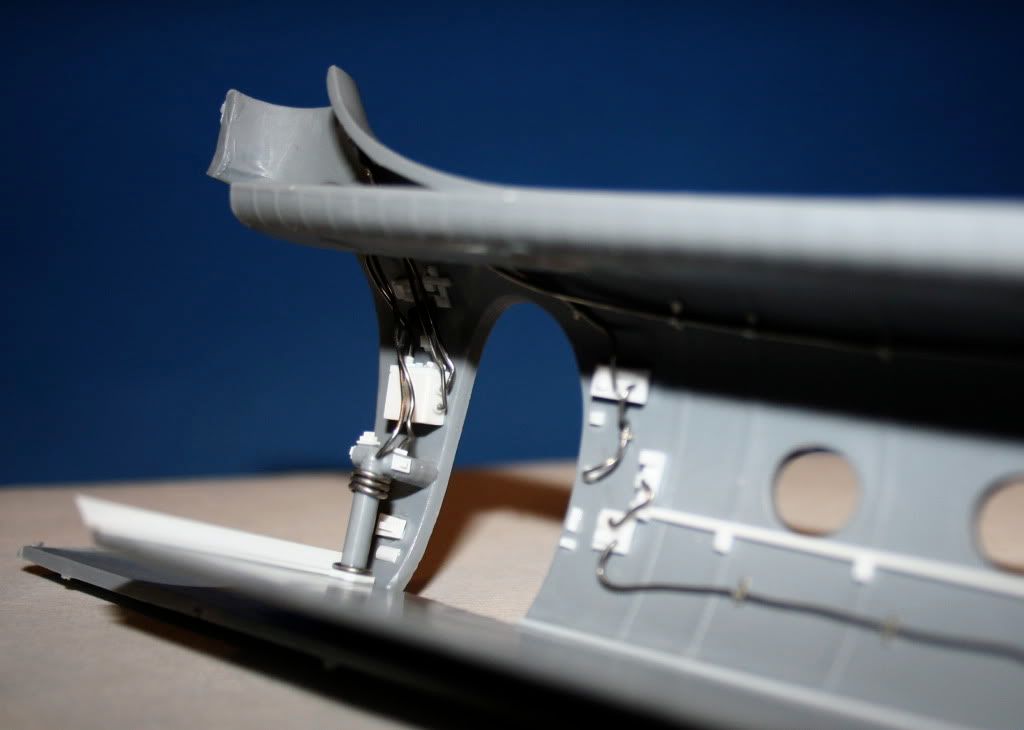
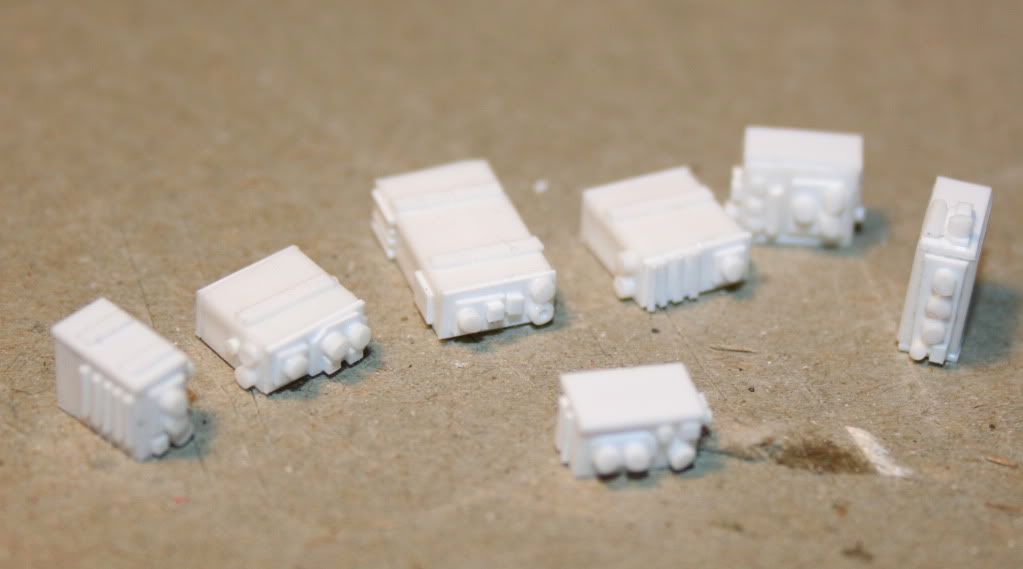
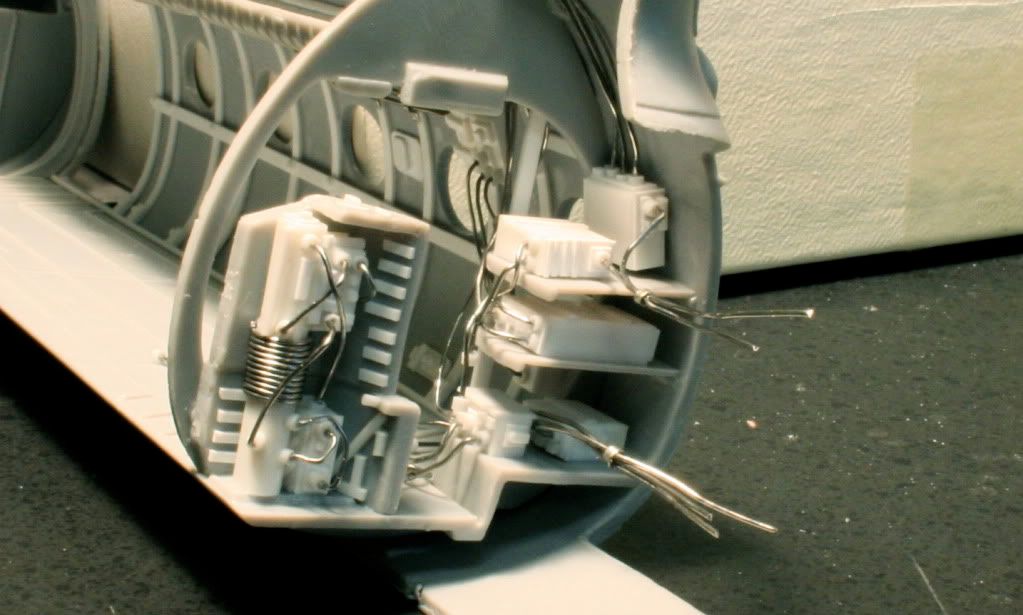
some stuff needs to go in the engine compartment also like a fuel oil heat exchanger and such.
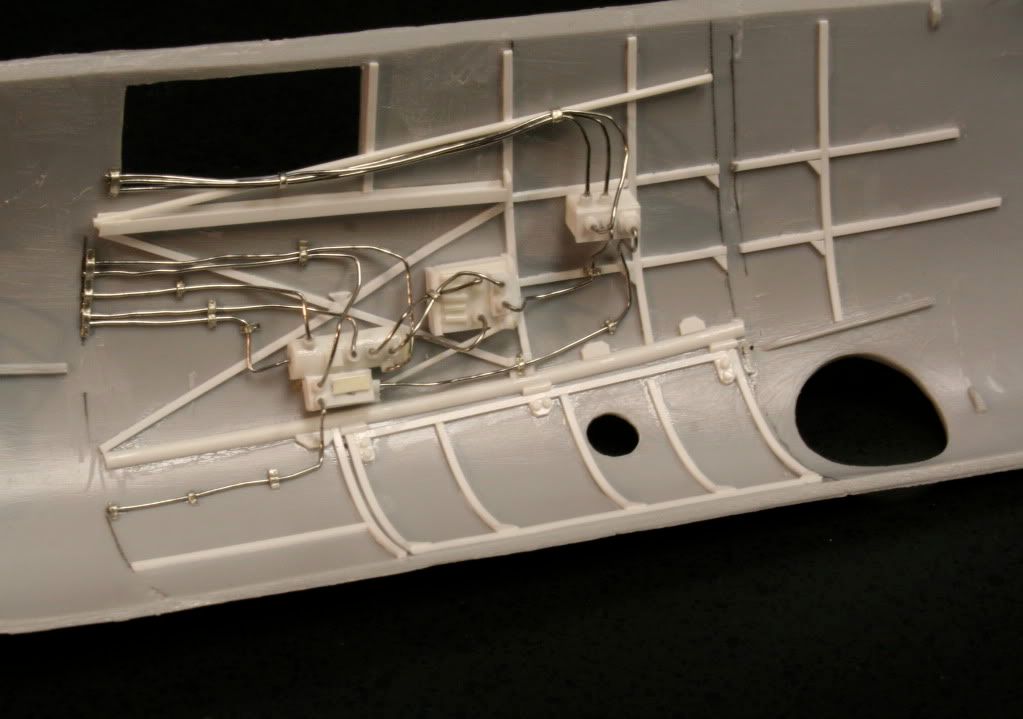
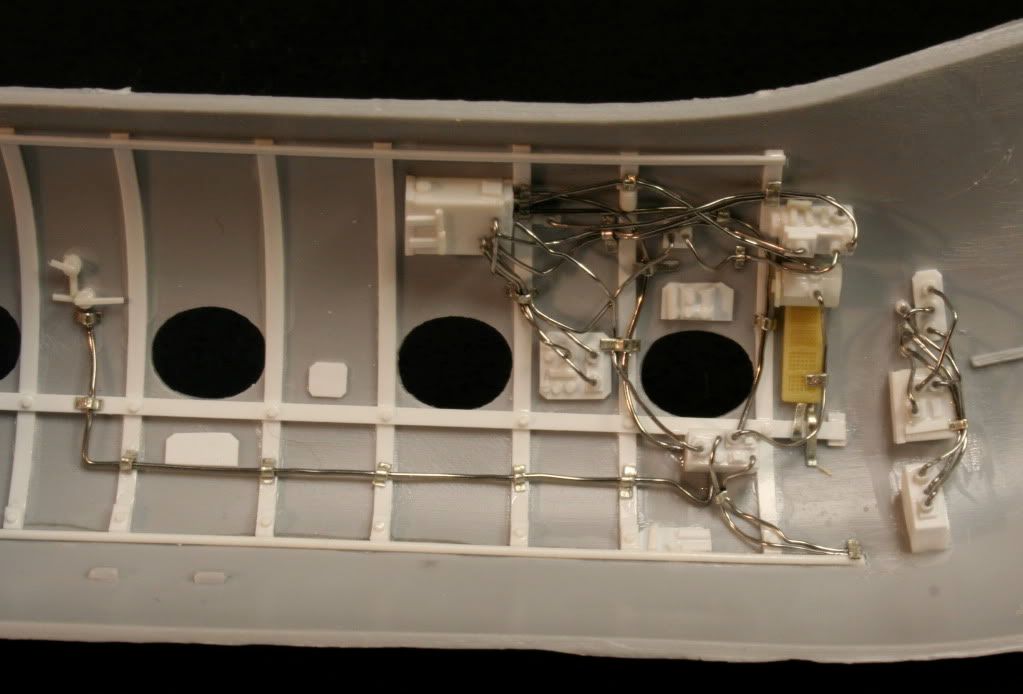
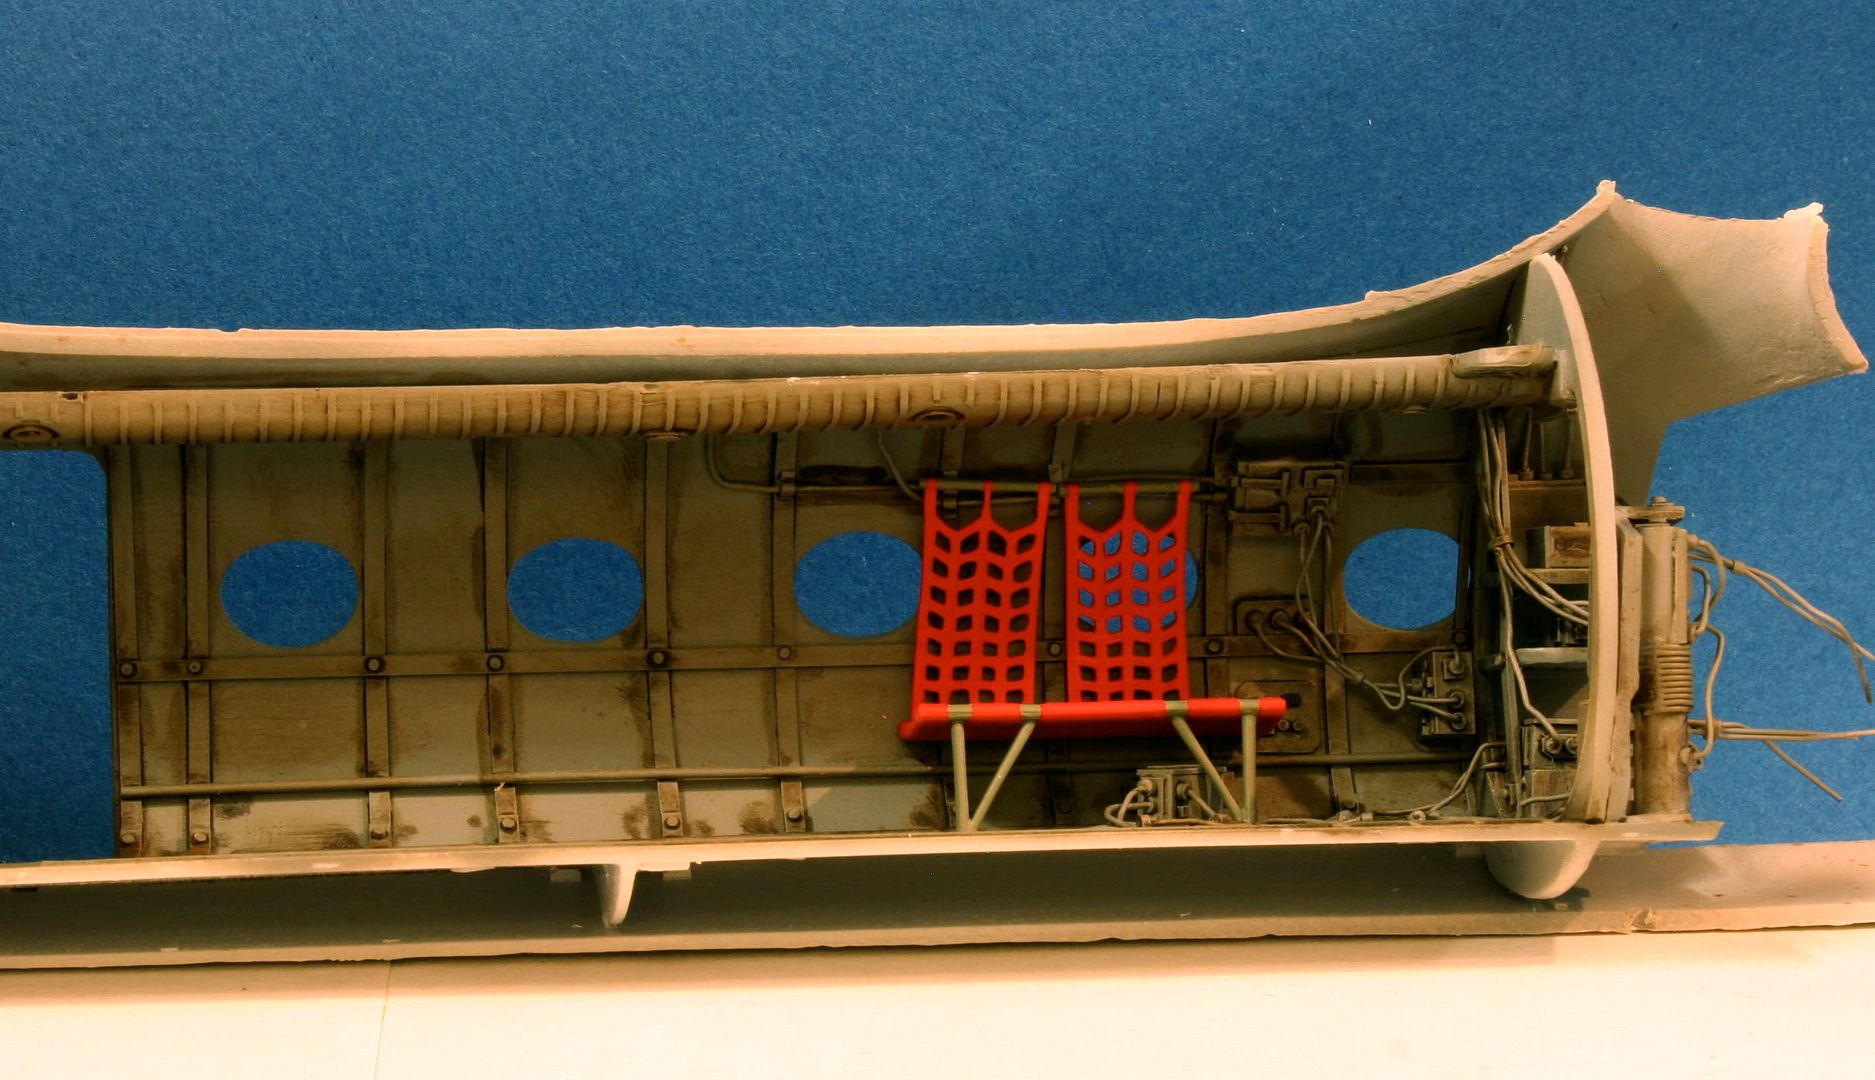
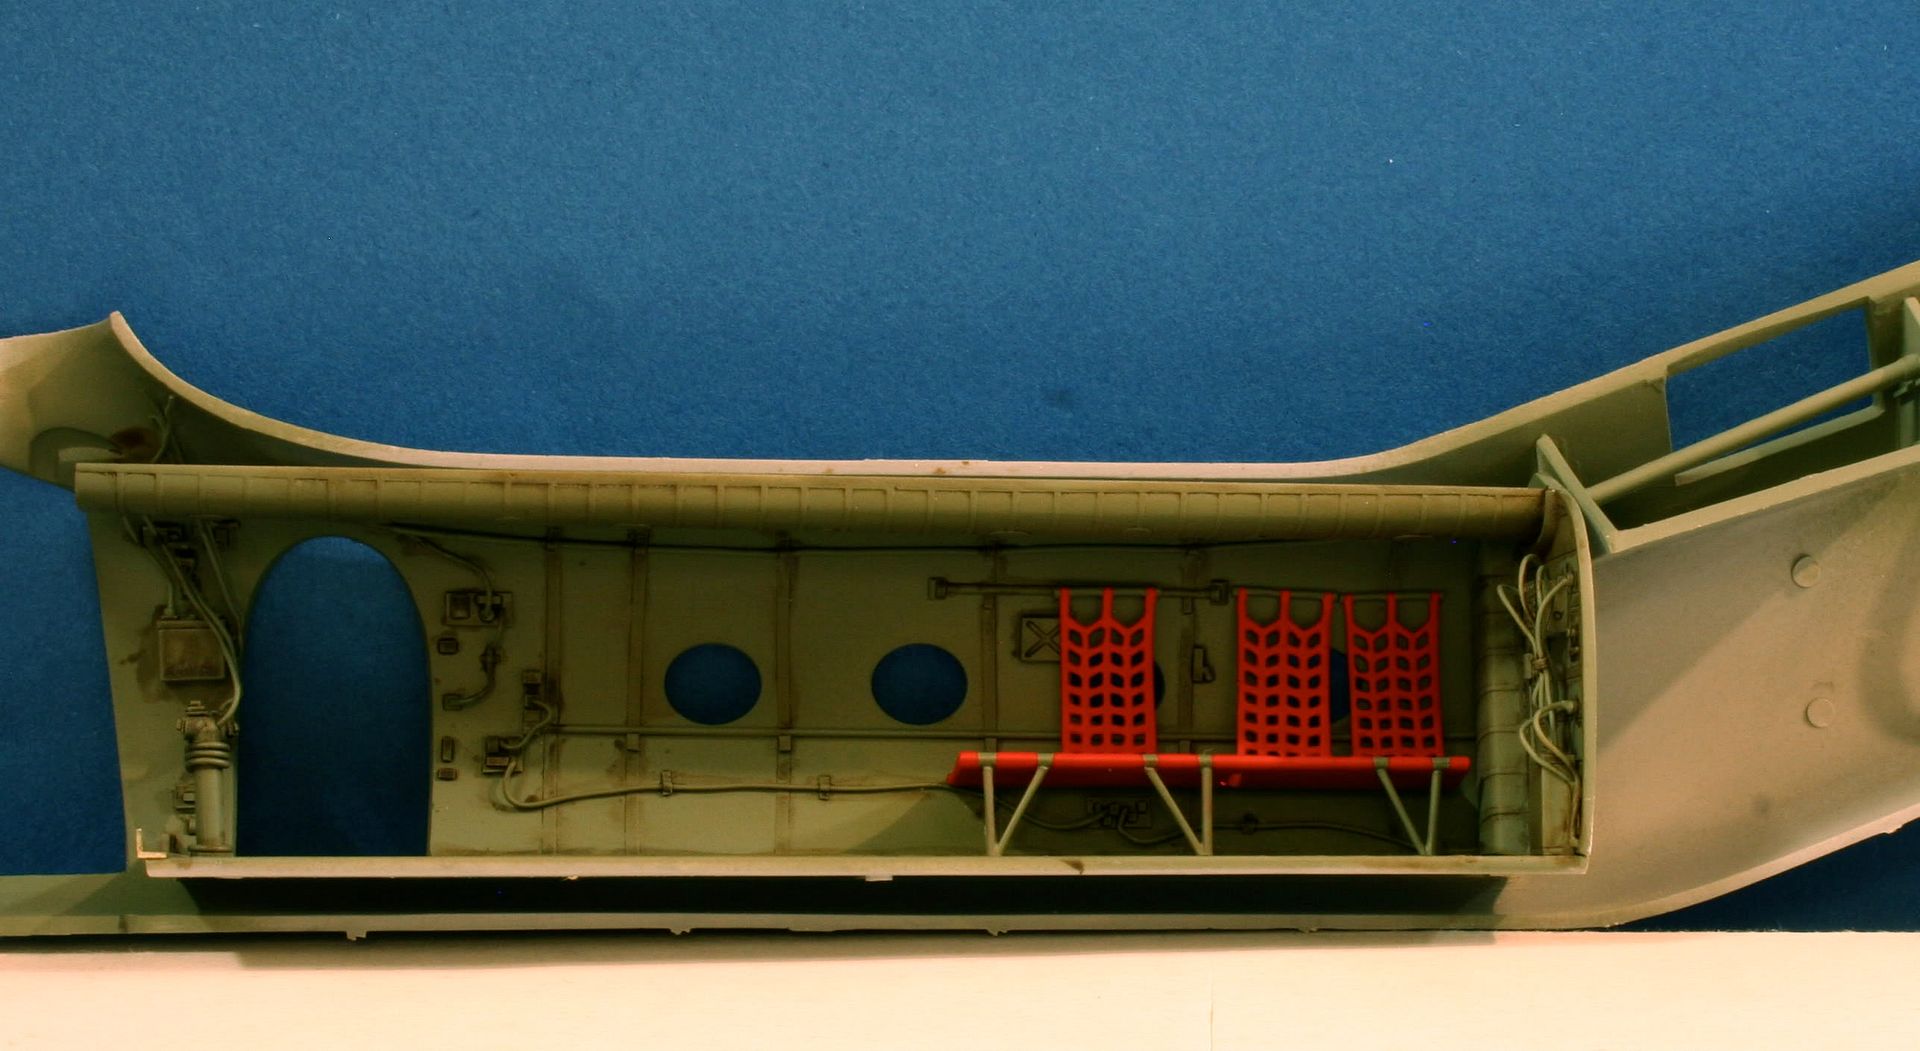
The aft cabin area gets some detail also, lots of solder and plastic bits.

#439
Washington, United States
Joined: November 05, 2005
KitMaker: 4,950 posts
AeroScale: 3,192 posts
Posted: Monday, February 15, 2010 - 06:07 AM UTC
WOW!

That's a lot of details, I guess a cavern like the fuselage screams for them. I assume you're using solder for the conduits. Ehat are you using for the conduit clamps?
Hanger Queens in Waiting:
Monogram 1/72 F8F-1
Corsair the Sky Pirate - 1/72 Ace A-7D
Century Series - Airfix 1/72 F-105G
Anti Shipping - Academy 1/72 PBJ-1D
Academy 1/72 F-84E
Texas, United States
Joined: May 27, 2009
KitMaker: 1,293 posts
AeroScale: 1,072 posts
Posted: Monday, February 15, 2010 - 07:38 AM UTC
Quoted Text
WOW!
That's a lot of details, I guess a cavern like the fuselage screams for them. I assume you're using solder for the conduits. Ehat are you using for the conduit clamps?
The clamps are just sheet lead cut to thin strips and glued on with CA.
Texas, United States
Joined: May 27, 2009
KitMaker: 1,293 posts
AeroScale: 1,072 posts
Posted: Tuesday, February 16, 2010 - 04:13 PM UTC
United Kingdom
Joined: March 08, 2009
KitMaker: 719 posts
AeroScale: 691 posts
Posted: Tuesday, February 16, 2010 - 09:23 PM UTC
Beautiful! Really model making going on here! Love all the extra detail you're adding.
Roma, Italy
Joined: March 10, 2006
KitMaker: 302 posts
AeroScale: 112 posts
Posted: Sunday, February 21, 2010 - 08:36 PM UTC
A M A Z I N G ! !
The interior is awesome amd the idea to make an abandoned aircraft is great.
I'll follow with great interest.
Klaus
----------------------------------
Don't worry about the world coming to an end today. It is already tomorrow in Australia. (C.Schulz)
Flying is learning how to throw yourself at the ground and miss. (D.Adams)
Texas, United States
Joined: May 27, 2009
KitMaker: 1,293 posts
AeroScale: 1,072 posts
Posted: Tuesday, March 09, 2010 - 01:54 PM UTC
The painting on the F.M. H 21 is starting with Tamiya paint and a oil wash of burnt umber to bring out the detail.


Texas, United States
Joined: May 27, 2009
KitMaker: 1,293 posts
AeroScale: 1,072 posts
Posted: Tuesday, March 09, 2010 - 01:57 PM UTC
The engine for the F.M. kit, just a random resin radial part as it will only be partially seen.
Removed by original poster on 03/10/10 - 01:58:52 (GMT).
Texas, United States
Joined: May 27, 2009
KitMaker: 1,293 posts
AeroScale: 1,072 posts
Posted: Friday, March 12, 2010 - 01:19 PM UTC
engine now painted and installed in the FM kit.

Texas, United States
Joined: May 27, 2009
KitMaker: 1,293 posts
AeroScale: 1,072 posts
Posted: Friday, March 12, 2010 - 02:52 PM UTC
A few seats installed in the FM kit.
and the SH kit gets some also.
California, United States
Joined: November 28, 2007
KitMaker: 817 posts
AeroScale: 729 posts
Posted: Thursday, April 15, 2010 - 03:38 AM UTC
Well, Doug- all I can say is that this is a remarkable thread! I've got both these kits as well, and am buoyed up to see the level of care and detail you're giving them. The engine mount looks to be a ferocious bit of building- cheers! Tell me- do you have personal experience with the H-21, or just good references?
Thanks for posting all these great pics-
chuk
[url]http://chukw.blogspot.com/[/url]
#439
Washington, United States
Joined: November 05, 2005
KitMaker: 4,950 posts
AeroScale: 3,192 posts
Posted: Thursday, April 15, 2010 - 05:16 AM UTC
Amazing is't enough, this is really great.
Hanger Queens in Waiting:
Monogram 1/72 F8F-1
Corsair the Sky Pirate - 1/72 Ace A-7D
Century Series - Airfix 1/72 F-105G
Anti Shipping - Academy 1/72 PBJ-1D
Academy 1/72 F-84E
Texas, United States
Joined: May 27, 2009
KitMaker: 1,293 posts
AeroScale: 1,072 posts
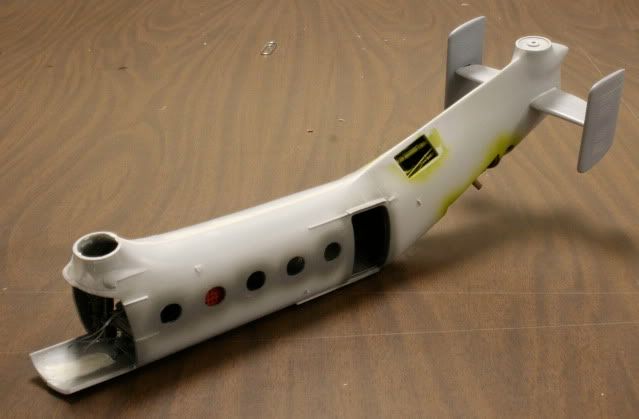
Posted: Wednesday, July 28, 2010 - 01:23 PM UTC
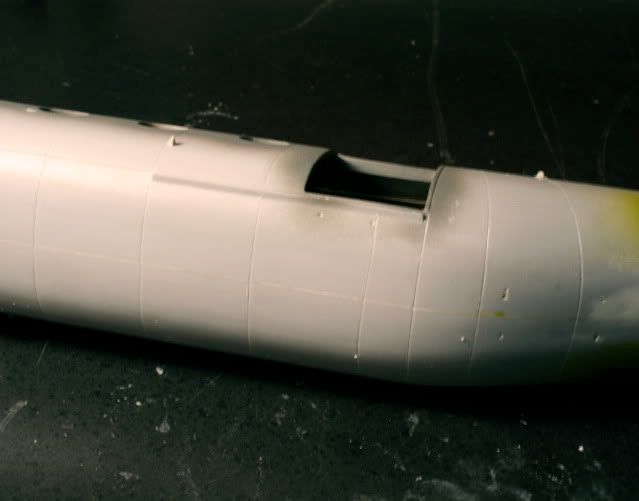
More progress finally on the FM kit. I have not posted much on it for a while as it was a bear to get the fuse together. A lot of sanding and filling went into the seam and at long last it is ready to show to you guys. All I can say about it is take your time and od some other things in between the sanding so you dont get burned out.

Texas, United States
Joined: May 27, 2009
KitMaker: 1,293 posts
AeroScale: 1,072 posts
Posted: Wednesday, July 28, 2010 - 01:25 PM UTC
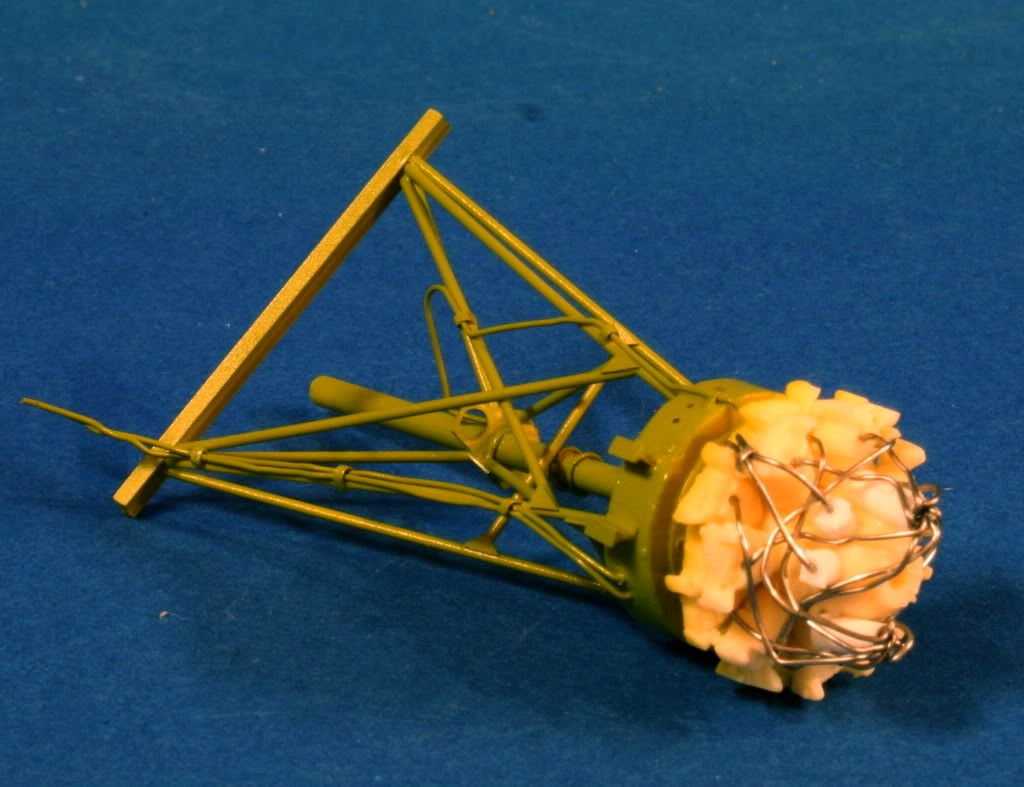
The rear rotor lump was a real chore but it is coming together now.
Texas, United States
Joined: May 27, 2009
KitMaker: 1,293 posts
AeroScale: 1,072 posts
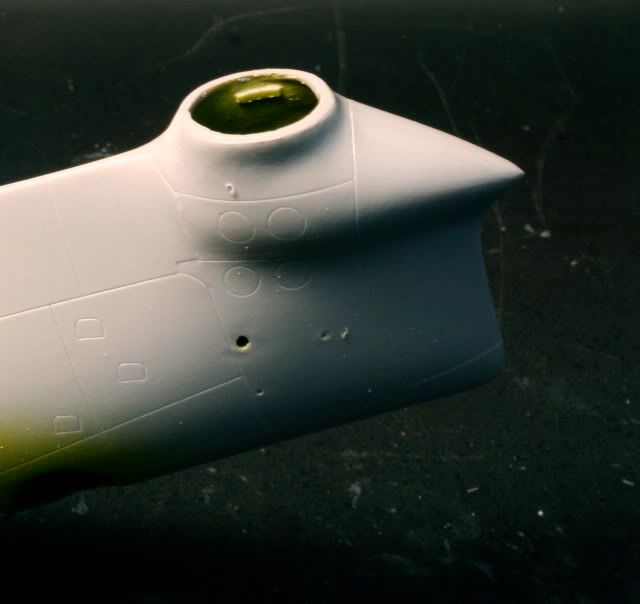
Posted: Wednesday, July 28, 2010 - 01:26 PM UTC
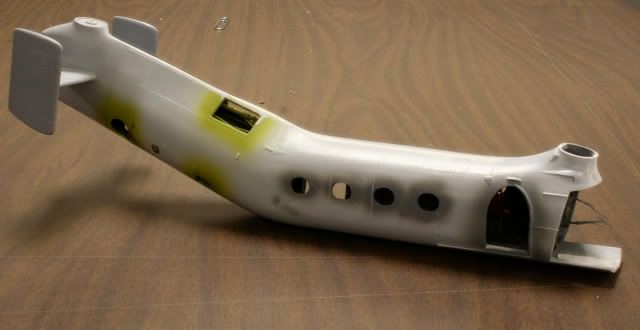
Now I am in the middle of replacing all the panel lines that were removed while sanding and filling.

Texas, United States
Joined: May 27, 2009
KitMaker: 1,293 posts
AeroScale: 1,072 posts
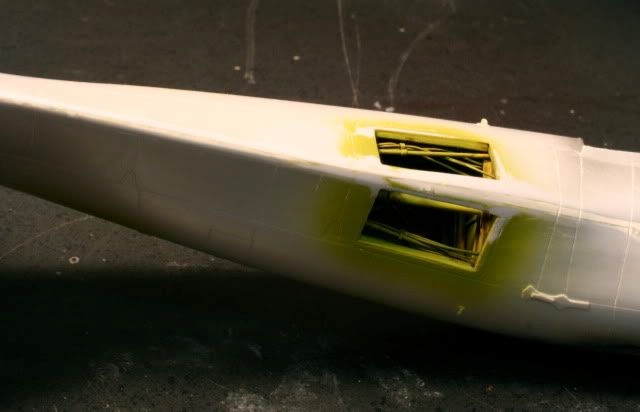
Posted: Wednesday, August 04, 2010 - 03:21 PM UTC
The vertical and horizontal stabs are now on, I used the horizontals from the FM kit but the verticals came from the SH kit as I needed the larger ones for this helo and they were extra parts in the other kit.