_GOTOBOTTOM
Modern (1975-today)
Discuss the modern aircraft age from 1975 thru today.
Tamiya 1/48 "Arctic Viper" F-16C
eclarson
_VISITCOMMUNITY
Ohio, United States
Joined: February 22, 2010
KitMaker: 171 posts
AeroScale: 166 posts
Posted: Thursday, February 25, 2010 - 07:51 AM UTC
I started this project a month or so ago, as part of a group build over on the AgapeModels forum. Since I just joined this forum a couple days ago, I thought I'd begin a build blog here as well.

Lots of aftermarket goodies are going into this one, including the dreaded Aires cockpit. I say "dreaded" because it is really their set designed for the Hasegawa F-16 family with a few minor tweaks making it a little (very little) more adaptable to the Tamiya kit. As such, much surgery, grinding, cutting, fitting, etc. is required to get it to fit. There will still need to be some putty work at the front and rear ends but nothing too hideous. Of course, I learned about the Hasegawa thing AFTER I bought the set.

So, here are a bunch of photos to get you caught up to where I am now. Mostly work on the cockpit and the intake.

First, the real life inspiration:


and the goodies!


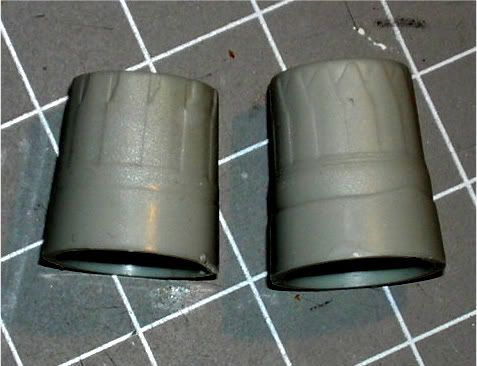
Prepare to cut (with apologies to Rocky fans.)..


You know, I think it will all fit after all!


Painted pit pieces...


My secret seamless intake tools - sandpaper wrapped around a piece of egg carton foam and held with angled cross-locking tweezers. It really lets you get in there to clean up the inside seams. Then, a couple thick coats of Rustoleum Semi-gloss white enamel. I just poured the stuff into the intake sections and let dry. Very messy but cleanup is easy with mineral spirits. Also takes a while to dry but it does make for a smooth surface.


I'm just about ready to wedge the cockpit into the fuselage. I've got a little more work on the main instrument panel to finish first. I wasn't satisfied with the look of the instrument faces, which Aries does with an acetate sheet backing a photo-etch panel. Even with the back of the acetate painted white, the dial faces don't show very well. Therefore, I'm using some of Mike Grant's excellent Jet gaugu decals for the larger dials.

That's it for now! The next post I make will be after I get the cockpit in and the fuselage together.

OH! I forgot to mention...the seat I'm using is the Quickboost F-16 seat. In case you don't know, Quickboost is Aires and the QB seat is identical to the one in the Aires set except that the seat belts are cast in instead of a bazillion separate tiny p/e parts that Aires does. Also, there are a couple of detail parts (the things that stick out from the head rest and the center pull handle) which are resin for the QB seat but p/e in the Aires. I prefer painting the cast belts and using the resin parts. More realistic looking in my opinion.

Cheers,
Eric
md72
#439
_VISITCOMMUNITY
Washington, United States
Joined: November 05, 2005
KitMaker: 4,950 posts
AeroScale: 3,192 posts
Posted: Thursday, February 25, 2010 - 09:36 AM UTC
Eric,

Nice build. The Artic agressor scheme really lights up the F-16. It's my favorite bird, but gray over grey is boring. I'm working on a 1/72 F-16C and trying to scratch some of the cockpit details. Those 'thingies' on the headrest are pitot tubes for the ejection seat system. They sense how fast the pilot is going and sequence the parachute deployment accordingly.

Thanks for bringing them up, I'd forgotten that I was going to try to do something to make it look like my seat had them.
james84
_VISITCOMMUNITY
Roma, Italy
Joined: January 28, 2006
KitMaker: 1,368 posts
AeroScale: 377 posts
Posted: Friday, February 26, 2010 - 02:23 AM UTC
Great job with the intake and the cockpit!
BE CAREFUL when attaching the two upper halves of the fuselage!
eclarson
_VISITCOMMUNITY
Ohio, United States
Joined: February 22, 2010
KitMaker: 171 posts
AeroScale: 166 posts
Posted: Tuesday, March 02, 2010 - 03:57 AM UTC

Quoted Text

Great job with the intake and the cockpit!
BE CAREFUL when attaching the two upper halves of the fuselage!


Thanks for the warning! I've already noticed that I will have some significant gaps to fill along the forward underside side edges, and at the front of the wing roots. I don't know how I managed to end up with that but leave it to me to find a way to screw up a Tamiya kit! I know I didn't trim anything too much and I can't see how I misaligned the sections.

Oh well, it's just a model!

Eric
james84
_VISITCOMMUNITY
Roma, Italy
Joined: January 28, 2006
KitMaker: 1,368 posts
AeroScale: 377 posts
Posted: Tuesday, March 02, 2010 - 06:57 AM UTC

Quoted Text


Quoted Text

Great job with the intake and the cockpit!
BE CAREFUL when attaching the two upper halves of the fuselage!


Thanks for the warning! I've already noticed that I will have some significant gaps to fill along the forward underside side edges, and at the front of the wing roots. I don't know how I managed to end up with that but leave it to me to find a way to screw up a Tamiya kit! I know I didn't trim anything too much and I can't see how I misaligned the sections.

Oh well, it's just a model!

Eric


You're welcome!
Tamiya's is an almost perfect kit, but there are a bit of things to be careful of!
These are the joint on the upper half of the fuselagel, mine ended up with a slight step between the two parts which is not very visible but causes an ugly shadow when saw in counterlight!
I also noticed some non-very precise adjustments with the 3 front panels, just besides the radome. Maybe it was my fault, as I was a bit hurrying, or maybe the kit was a bit faulty but... be careful and you'll avoid bad surprises!
Be also careful when glueing together the parts of the air intake, there are a bit of gaps to fill.
Just a question: did you pour the paint in the intakes and let it flow away?
eclarson
_VISITCOMMUNITY
Ohio, United States
Joined: February 22, 2010
KitMaker: 171 posts
AeroScale: 166 posts
Posted: Tuesday, March 02, 2010 - 08:35 AM UTC

Quoted Text


You're welcome!
Tamiya's is an almost perfect kit, but there are a bit of things to be careful of!
These are the joint on the upper half of the fuselagel, mine ended up with a slight step between the two parts which is not very visible but causes an ugly shadow when saw in counterlight!
I also noticed some non-very precise adjustments with the 3 front panels, just besides the radome. Maybe it was my fault, as I was a bit hurrying, or maybe the kit was a bit faulty but... be careful and you'll avoid bad surprises!
Be also careful when glueing together the parts of the air intake, there are a bit of gaps to fill.
Just a question: did you pour the paint in the intakes and let it flow away?


I haven't glued the forward upper half to the rest of the fuselage yet but when dry fitting I saw where that joint could be tricky. I will be taking great care when it comes time to glue it on!

I know what you mean about the nose panels too. I have the top one glued on but not the side ones. The engineering is really impressive on this kit but there is very little margin for error!

Yes, I did pour the paint into the intakes. Certainly not an original idea as I think I read at least three different posts about doing that.

It is rather messy and I ended up with a thick build up at one end but once the paint was well cured I was able to carve down the "bulge" with a #11 blade and it is not visible once the intake is all together. There is still a slightly visible seam between the front and back sections of the intake but you really have to look hard to see it up in there.

james84
_VISITCOMMUNITY
Roma, Italy
Joined: January 28, 2006
KitMaker: 1,368 posts
AeroScale: 377 posts
Posted: Tuesday, March 02, 2010 - 08:51 AM UTC

Quoted Text


Yes, I did pour the paint into the intakes. Certainly not an original idea as I think I read at least three different posts about doing that.

It is rather messy and I ended up with a thick build up at one end but once the paint was well cured I was able to carve down the "bulge" with a #11 blade and it is not visible once the intake is all together. There is still a slightly visible seam between the front and back sections of the intake but you really have to look hard to see it up in there.


Nice idea, I gotta try it, I have an F-22 and a Super Hornet waiting to be built!
In the worst case, I'll invent something to cover the intakes!
eclarson
_VISITCOMMUNITY
Ohio, United States
Joined: February 22, 2010
KitMaker: 171 posts
AeroScale: 166 posts
Posted: Tuesday, March 02, 2010 - 03:31 PM UTC
Little update here. The Aires cockpit tub has been installed and Magic Sculp 2-part epoxy putty used to fair in the front and rear areas. Upper and lower fuselage sections have been glued together though the intake section has not been installed. I want to paint it separately due to the camo pattern.

Also shown are rather significant gaps along the underside edges on the forward fuselage. I thought I might have caused them when I fit the cockpit tub in the upper section, causing it to act as a spreader, but it wasn't that tight a fit. Also, the forward joints lined up perfectly. I've not heard of other builders of this kit having this issue but I'm stumped as to how I might have caused it. Oh well, that's what putty is for!


Cheers,
Eric
ViperEnforcer
_VISITCOMMUNITY
Alabama, United States
Joined: December 05, 2007
KitMaker: 204 posts
AeroScale: 202 posts
Posted: Thursday, March 11, 2010 - 08:57 AM UTC
Nice work, especially on the intake ducts. Any idea on how you're going to approach the "mid-seam" joint when the intake assembly is completely installed?

Wow, it's obvious Aires made the same short cut as Black Box; using the "made for Hasegawa" cockpit as the basis for the Tamiya one. The Hasegawa pit span is shorter. Look at the "unusual" spacer between the front o the glare shield to the canopy sill. That's not tsuppose to be there and hence places the glare shield and instro panel too far back.

Are you going to load it with the same compliment of stores from the real photo posted?

Mike V

eclarson
_VISITCOMMUNITY
Ohio, United States
Joined: February 22, 2010
KitMaker: 171 posts
AeroScale: 166 posts
Posted: Friday, March 12, 2010 - 03:39 AM UTC

Quoted Text

Nice work, especially on the intake ducts. Any idea on how you're going to approach the "mid-seam" joint when the intake assembly is completely installed?

Wow, it's obvious Aires made the same short cut as Black Box; using the "made for Hasegawa" cockpit as the basis for the Tamiya one. The Hasegawa pit span is shorter. Look at the "unusual" spacer between the front o the glare shield to the canopy sill. That's not tsuppose to be there and hence places the glare shield and instro panel too far back.

Are you going to load it with the same compliment of stores from the real photo posted?

Mike V


Hi Mike,

Thanks! To answer your questions:

I'm going to just live with the intake mid-joint seam. I thought of trying to assemble the entire intake before installing it but couldn't see a way of doing so without creating bigger problems later on. Once it is all together, that joint is rather hard to see anyway, so leaving it is the lesser of several evils. :-)

I learned about the glare shield front space issue shortly after I got the set but decided that I could live with it in exchange for the improved detail. It's a shame Aires didn't make the effort to do it right. I tried to think of a way to correct it but could see no way that wouldn't make things worse. It was enough of a chore getting the pit to fit as it was. Also, I figure only someone who is really familiar with the F-16 would even notice!

Good question on the load-out. Tamiya's instructions would have you build it stripped down to nothing but a Sidewinder on one wing tip and an ACMI pod on the other, and the ALQ-188 pod on the centerline position. Perhaps this is all they carry when doing actual training? On the other hand, all the photos I can find are more like the one I posted. Tanks, missles, pods..the whole works. Right now I'm leaning towards somewhere in between the two extremes - maybe mounting the training pods as per the instructions but also attaching the outer wing pylons (positions 2 and 8?) and hanging a couple additional missiles on them.

Cheers,
Eric


ViperEnforcer
_VISITCOMMUNITY
Alabama, United States
Joined: December 05, 2007
KitMaker: 204 posts
AeroScale: 202 posts
Posted: Friday, March 12, 2010 - 06:41 AM UTC
I found it was less effort to build up the entire intake duct by first mating the upper and lower halves and working the mid seams. I then joined the upper intake duct half to the lower intake duct half and worked the side seams. Next came the intake mouth, then the inside was blended to the duct. Once the duct was free of seams and dipped in future (with taped off the wheel wells) I added the NLG well and outside assembly and most of the main wheel well ribbing/bulkheads. I did make one modification; I cut the side tabs off the main wheel well sides. The intake/wheel well assembly can then be inserted to the lower wheel well with little fuss. I performed the same procedure for the 32nd scale Tamiya F-16 and that worked out fine as well.

Yeah, there’s pretty much nothing you can do about the Aires (or Black Box) F-16 pits. They will be a “made for Tamiya” F-16A cockpit coming out in late Spring though. Hopefully a true Tamiya F-16C cockpit will eventually come as well.

Understand that the load you see in the pic is of the jet when it was still stationed at Kunsan, soon before it was transferred to Eielson. I recognize the HASs in the background, as I was stationed there twice when I was AD. The WolfPack used the jets for standard operational missions before it left; the reason for the load configuration. When it was transferred to Eielson, it then went into the aggressor mission, taking on the standard ACMI and ALQ-188 configuration. In the aggressor role, pylons and tanks are typically (if at all) not used. I can count on one hand how many times I’ve seen pylons and/or tanks on our Aggressors when I was at Nellis. Even then, that was for TDY or cross country flights. Of course you can depict the configuration either way, though I’d suggest not mixing the two configurations, as you’re considering. That’s just not practical or accurate for an Aggressor configuration.

The one I plan to build will be a “WP” Aggressor, when the other A Kunsan Aggressor jets were still sporting the WP flash.

Looking forward to the rest of the build.

Mike V
eclarson
_VISITCOMMUNITY
Ohio, United States
Joined: February 22, 2010
KitMaker: 171 posts
AeroScale: 166 posts
Posted: Friday, March 12, 2010 - 08:18 AM UTC
Mike,

Thanks for the great tips and information on the load configuration!

If I ever build another Tamiya Viper, I'll definitely try your approach with the intake. I've been contemplating doing one of their Thunderbirds boxings.

Sounds like Tamiya got it right on the configuration then. I'll stick with that as I want mine to appear as it should for an Aggressor mission. Also, that saves me from having to assemble and clean up a bunch of extra stuff! :-)

Speaking of Aggressors, I thought you might like to see a model I built a couple of decades ago. When were you stationed at Nellis? This one may have been before your time there. :-)

Hasegawa's 1/32 F-5E:


Thanks again for taking the time to share that valuable information.

Cheers,
Eric


ViperEnforcer
_VISITCOMMUNITY
Alabama, United States
Joined: December 05, 2007
KitMaker: 204 posts
AeroScale: 202 posts
Posted: Friday, March 12, 2010 - 08:50 AM UTC


No problem, just drop me a line if you ever need any help. I may not be able to answer all your questions, but being a CC on the jet (even now in my Civilian career) I can usually help out.

Nice F-5 and looks really good for being over 20 years old. I built two of them over the years, though my Aggressor variant was based on a Clark F-5E I saw when I was stationed there as an F-4E/G CC. I've always liked the Hasegawa Big F-5E. I have another started, though I threw a Black Box cockpit in it. I'll have to finish it one of these days.

I was at Nellis 91-94. I was in the 57th Falcon AMU (FWS) as well as Viper SQ, where I worked the Aggressors for about 10 months. I really like my Nellis tour and still visit from time to time.


Mike V
Tojo72
_VISITCOMMUNITY
North Carolina, United States
Joined: June 06, 2006
KitMaker: 4,691 posts
AeroScale: 238 posts
Posted: Friday, March 12, 2010 - 09:40 AM UTC
Looking good Eric !!
eclarson
_VISITCOMMUNITY
Ohio, United States
Joined: February 22, 2010
KitMaker: 171 posts
AeroScale: 166 posts
Posted: Tuesday, March 16, 2010 - 02:07 AM UTC
Progress on my Viper is slow but I guess any progress is better than none!

I've got the airframe gaps and seams pretty well taken care of. As you can see, I've also attached some of the reinforcing plates and the RAM panels on either side of the nose. Those are stainless steel photo-etch bits included with Tamiya's extra detail set. Being stainless steel made forming a curve in the nose pieces a little tricky! I don't know why they couldn't have made them from brass.


I'm using a Royale Resin nose cone and have got it cleaned up and prepared for attachment. It is a beautiful piece of resin but to make use of the kit's attachment pegs, some careful drilling and grinding is required....and this only after VERY careful sanding down of the casting plug. I used a sheet of medium grit (120/150) sand paper placed flat on a sheet of glass to provide a flat sanding surface. Then holding the nose cone, I moved it back and forth on the sand paper, rotating the cone often, to get an even base. Don't sand enough and the cone will not fit flush against the fuselage. Sand too far and you end up with a step between the cone and the fuselage. As can be seen in the last photo below, I think I got it just right. The cone has not been permanently attached here, it's just loosely fit in place for the picture, but you can see that the joint seam is tight. Whew!!


That's it 'til next time!

Cheers,
Eric
md72
#439
_VISITCOMMUNITY
Washington, United States
Joined: November 05, 2005
KitMaker: 4,950 posts
AeroScale: 3,192 posts
Posted: Tuesday, March 16, 2010 - 02:16 AM UTC
Looks good! I may have to treat myself to a quality kit of the Viper soon.
eclarson
_VISITCOMMUNITY
Ohio, United States
Joined: February 22, 2010
KitMaker: 171 posts
AeroScale: 166 posts
Posted: Wednesday, March 24, 2010 - 02:24 AM UTC
This project is exhausting! Sorry...I couldn't resist.

These are the various parts of the Shull24 engine exhaust set I'll be installing. I still have some weathering and staining to do on the inside of the nozzle.

The rear engine face is a combination of Alclad Jet Exhaust, a black watercolor wash, various colors of pastel dust (black-brown, umber, and gray), and the edges rubbed with graphite dust. The flame holder was painted Floquil Weathered Gray and over coated with a mix of Tamiya Clear Blue/Green clear to give it the odd color seen in photographs.

The other parts are a combination of Floquil enamels and Alclad.


Cheers,
Eric
md72
#439
_VISITCOMMUNITY
Washington, United States
Joined: November 05, 2005
KitMaker: 4,950 posts
AeroScale: 3,192 posts
Posted: Wednesday, March 24, 2010 - 04:01 AM UTC
Looks like you're at the tail end of this project.
eclarson
_VISITCOMMUNITY
Ohio, United States
Joined: February 22, 2010
KitMaker: 171 posts
AeroScale: 166 posts
Posted: Wednesday, March 24, 2010 - 07:16 AM UTC

Quoted Text

Looks like you're at the tail end of this project.


LOL!

Tail end, yes...but not the finish of the project! I still have a lonnggg way to go.

md72
#439
_VISITCOMMUNITY
Washington, United States
Joined: November 05, 2005
KitMaker: 4,950 posts
AeroScale: 3,192 posts
Posted: Wednesday, March 24, 2010 - 08:23 AM UTC
Speaking of tail ends Is there a noticable difference between the tail feathers on an F-16A and a small mouth F-16C? My Kitech kit has 2 tail cones and since I've clipped them off of the sprue I'm not sure which one is correct.
eclarson
_VISITCOMMUNITY
Ohio, United States
Joined: February 22, 2010
KitMaker: 171 posts
AeroScale: 166 posts
Posted: Wednesday, March 24, 2010 - 09:24 AM UTC

Quoted Text

Speaking of tail ends Is there a noticable difference between the tail feathers on an F-16A and a small mouth F-16C? My Kitech kit has 2 tail cones and since I've clipped them off of the sprue I'm not sure which one is correct.


The small mouth intake implies the Pratt and Whitney engine. The cone in my photo is the GE engine (requiring the large mouth intake) so you would use the cone that does not look like mine!

I describe the GE tail cone as having a bulged appearance whereas the P&W one is more conical.

Cheers,
Eric
Merlin
Staff MemberSenior Editor
AEROSCALE
#017
_VISITCOMMUNITY
United Kingdom
Joined: June 11, 2003
KitMaker: 17,582 posts
AeroScale: 12,795 posts
Posted: Wednesday, March 24, 2010 - 11:15 AM UTC
Hi Eric

Sorry - catching up a bit here! Lovely work so far. The seat and cockpit look superb!

I'm a definite fan of using paint as a filler. Is there something special about Rustoleum for this application? - we don't have that brand in the UK.

All the best

Rowan
md72
#439
_VISITCOMMUNITY
Washington, United States
Joined: November 05, 2005
KitMaker: 4,950 posts
AeroScale: 3,192 posts
Posted: Wednesday, March 24, 2010 - 11:47 AM UTC
I don't think the Rust-oleum brand is critical. For my 1/72 plane I used a cheap white latex from one of our home improvement wharehouse store. Got a decent result.
eclarson
_VISITCOMMUNITY
Ohio, United States
Joined: February 22, 2010
KitMaker: 171 posts
AeroScale: 166 posts
Posted: Thursday, March 25, 2010 - 12:51 AM UTC

Quoted Text

Hi Eric

Sorry - catching up a bit here! Lovely work so far. The seat and cockpit look superb!

I'm a definite fan of using paint as a filler. Is there something special about Rustoleum for this application? - we don't have that brand in the UK.

All the best

Rowan


Hi Rowan,

Thank you for those kind words!

No, nothing special about Rustoleum. It's just a good enamel appliance paint that is readily available in hardware and home improvement stores here. I'm also experimenting with airbrushing it. It thins well with lacquer thinner and mineral spirits. A quart can costs about $8 so is much more economical than hobby paints!

Cheers,
Eric

P.S. Just found these.

http://www.rustoleumdirect.co.uk/
http://www.rustoleum.co.uk/
md72
#439
_VISITCOMMUNITY
Washington, United States
Joined: November 05, 2005
KitMaker: 4,950 posts
AeroScale: 3,192 posts
Posted: Thursday, March 25, 2010 - 03:26 AM UTC
The kit claims to be an F-16A, but all of the marking options are for Block 25 F-16C's. Since the Big mouth didn't come in until Block 30/32, I sure it;s the P&W engine.

Here are the 2 ends:


Till I cleand up this picture, I was leaning towards the long one, but I noticed the slighest bulge near the front end that hints at the GE engine. Any thoughts?

D'oh, I didn't catch that the Rust-Oleum was enamel, I used latex and it worked well enough, but it doesn't bite into the plastic, so I might have a problem down the line.
 _GOTOTOP