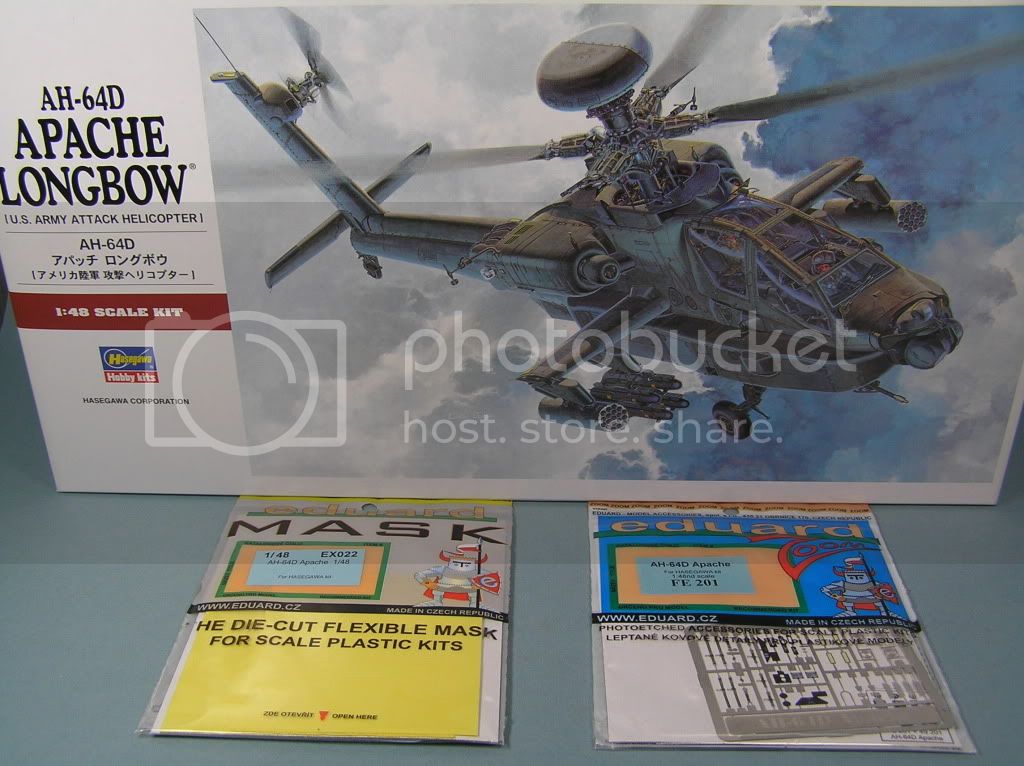
1/48 Apache Longbow (Hasegawa)
United Kingdom
Joined: December 15, 2008
KitMaker: 246 posts
AeroScale: 47 posts
Posted: Wednesday, March 10, 2010 - 09:08 AM UTC
Hi there,
Well, this is my first ever helicopter build. I have always loved the look of this beast and have decided it's now or never.
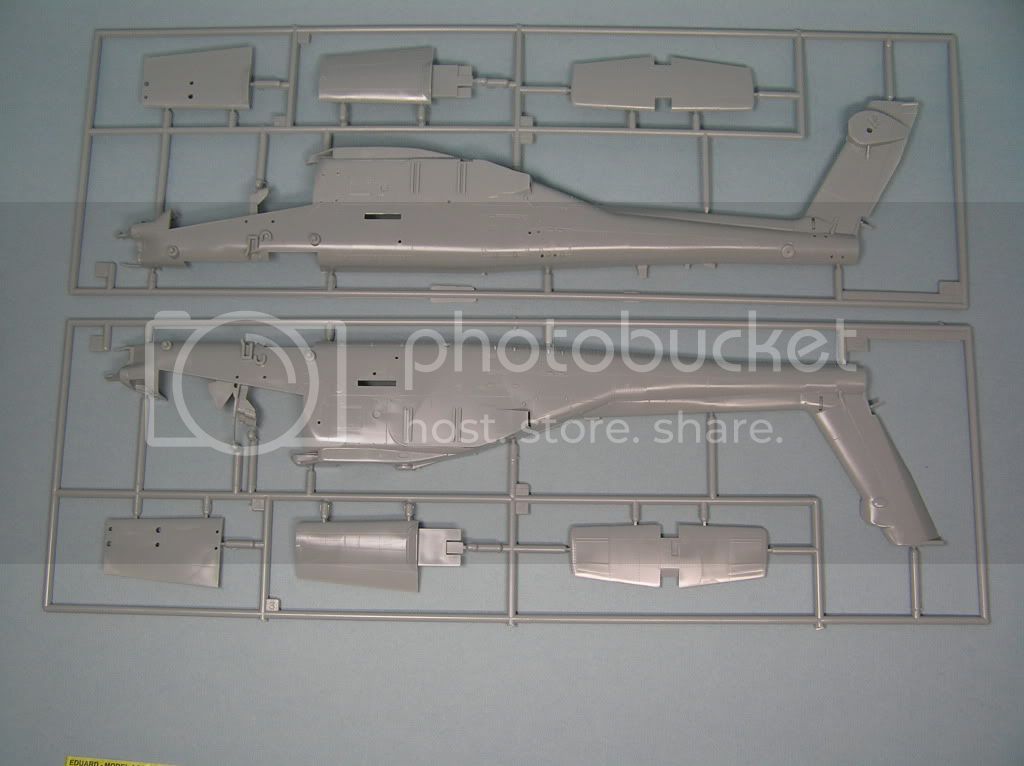
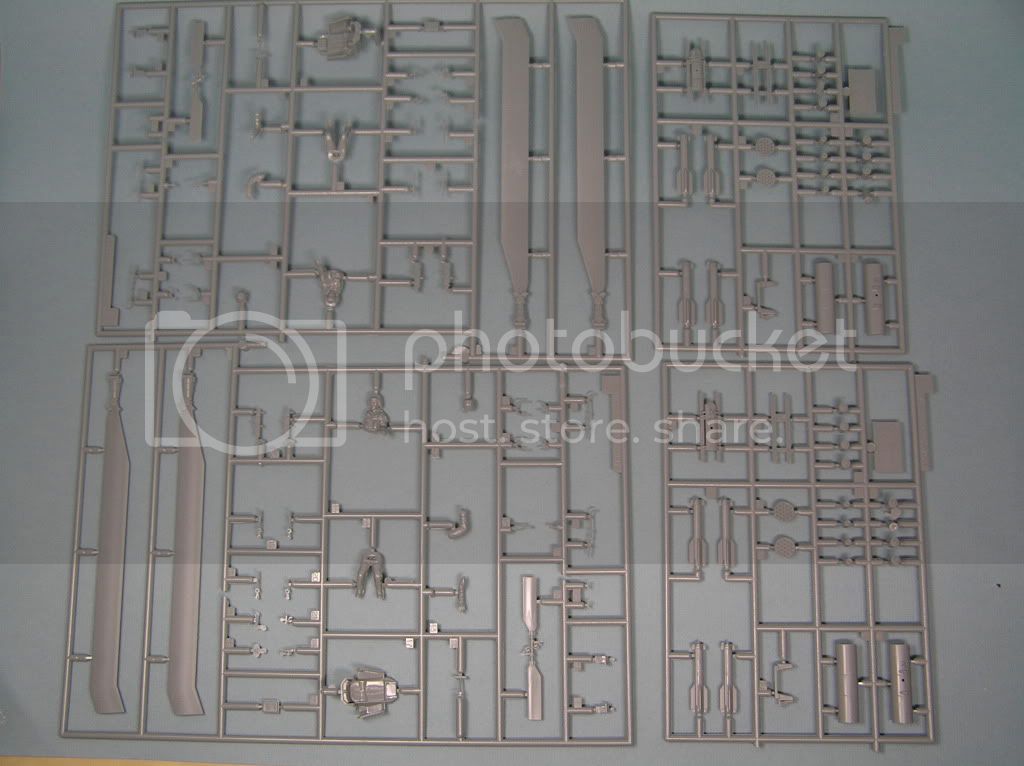
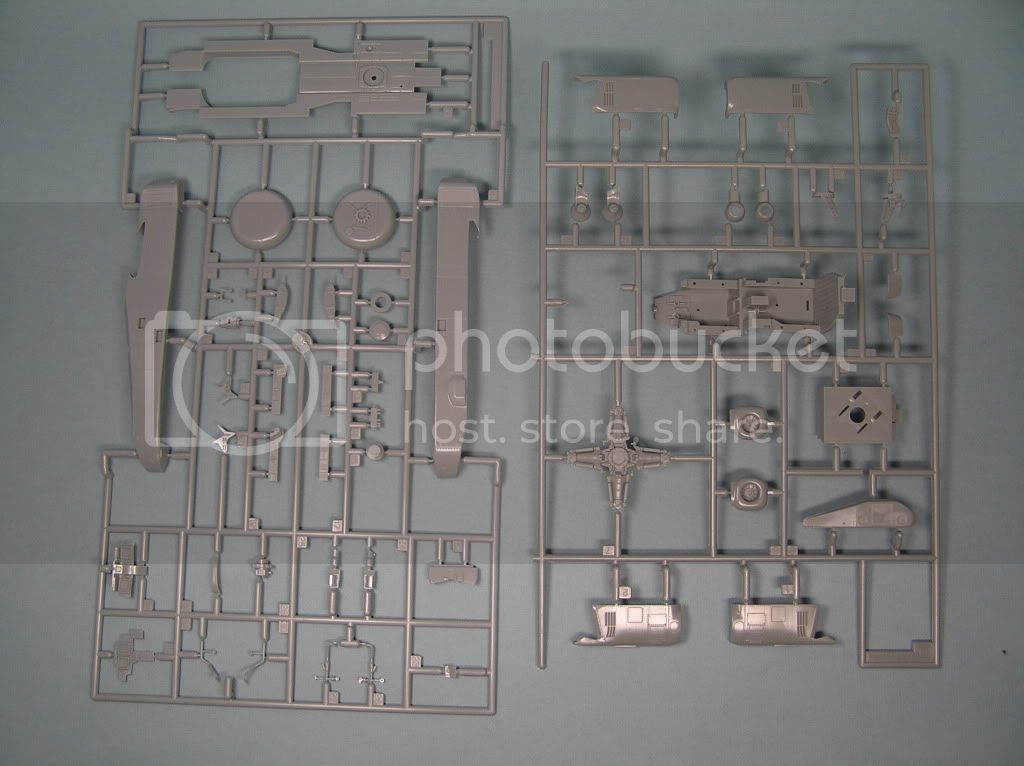
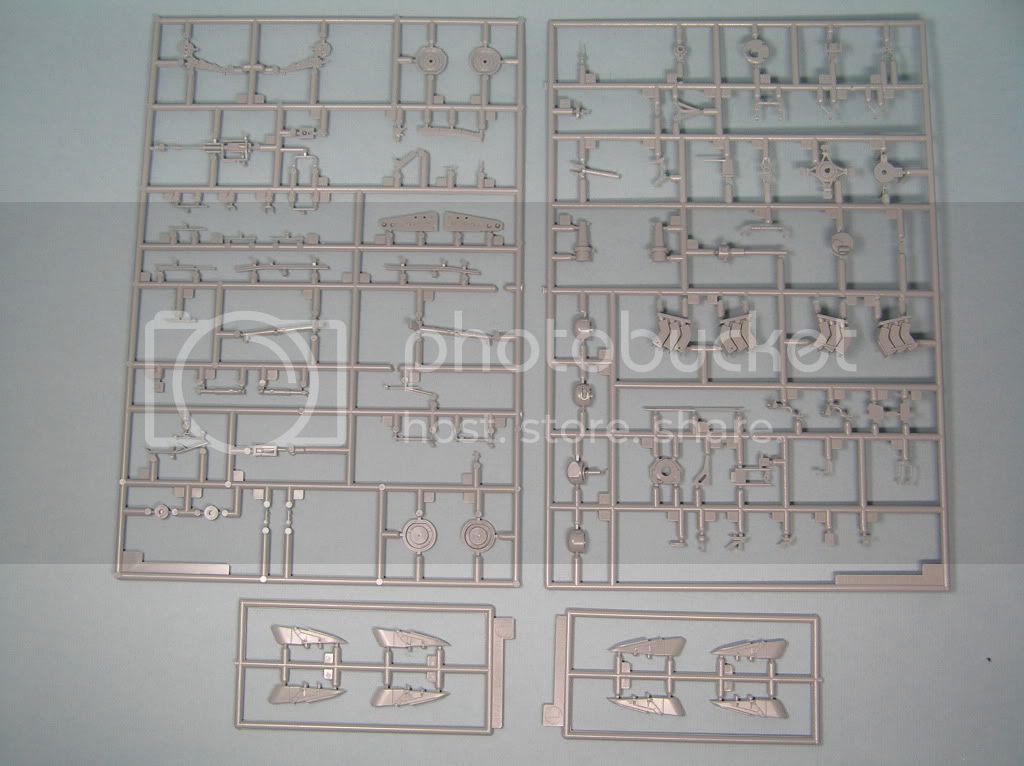
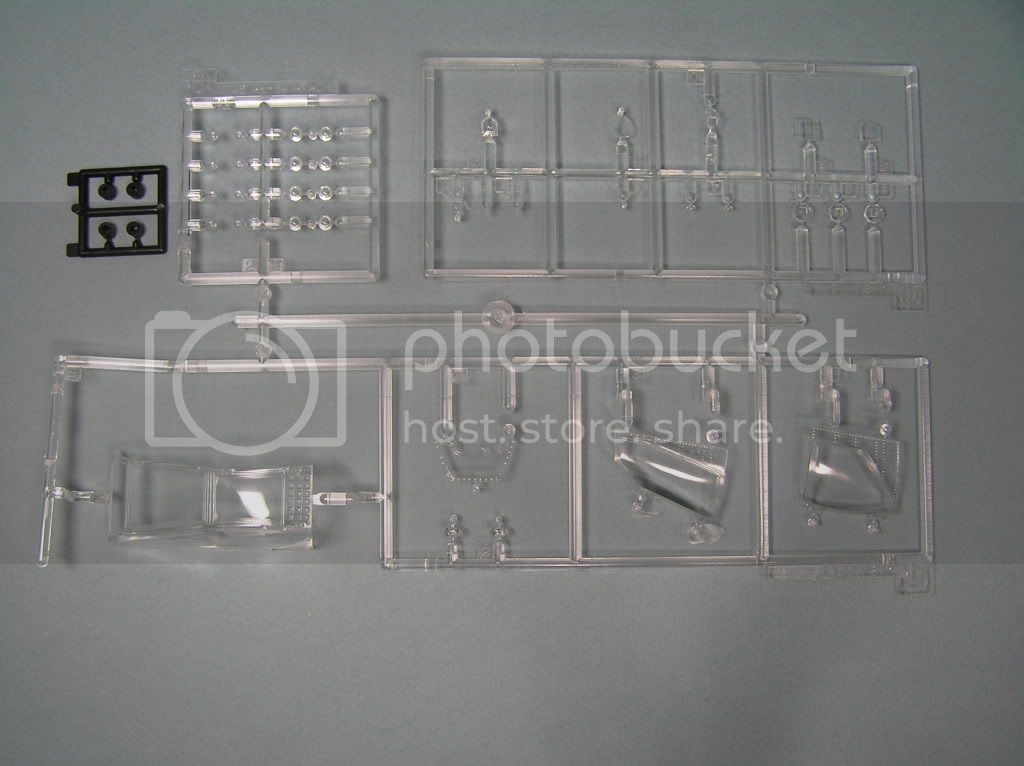
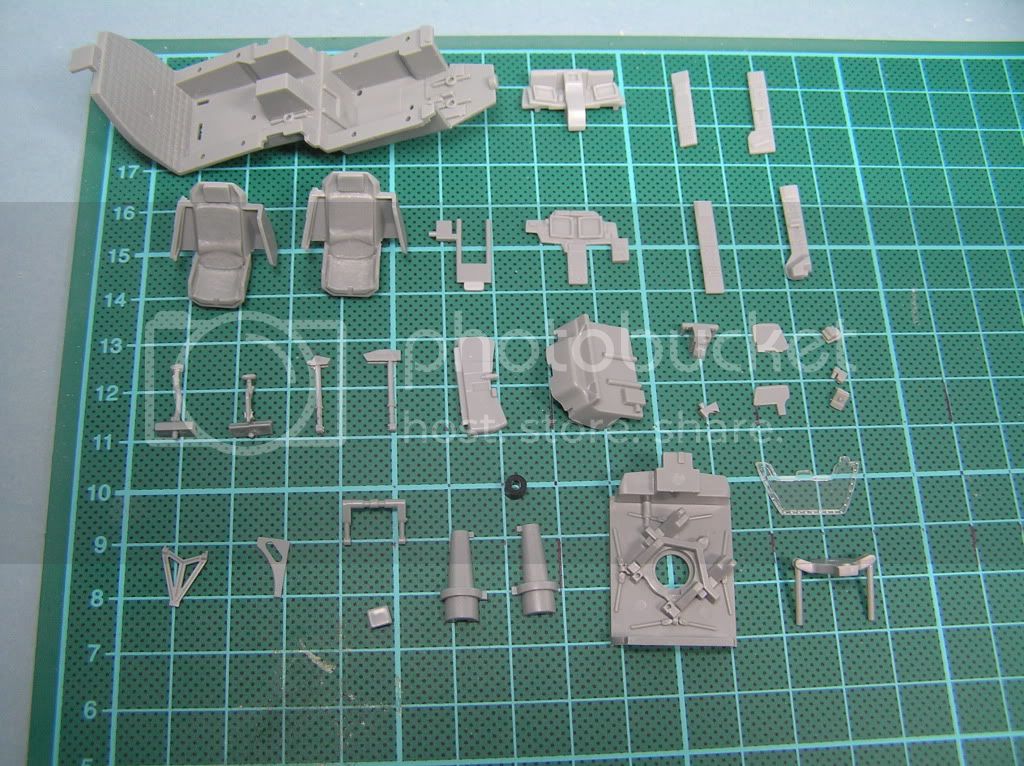
The box is full to the brim with sprues holding 296 pieces(I didnt count them, info printed on side of box!) and the details look nice and crisp with just a little bit of flash on some parts. It is going to be rather large finished at 367mm long with 305mm rotor diameter.
I also have the eduard zoom set FE201 and eduard mask EX022.
Anyway, here are some pics of the kit and I will post my progress as I go. All contributions are more than welcome.
Cheers, Jim.

#439
Washington, United States
Joined: November 05, 2005
KitMaker: 4,950 posts
AeroScale: 3,192 posts
Posted: Wednesday, March 10, 2010 - 10:21 AM UTC
Well, I'm not much on Spinny top things

But this one looks like an interesting build. Good luck with it.

Hanger Queens in Waiting:
Monogram 1/72 F8F-1
Corsair the Sky Pirate - 1/72 Ace A-7D
Century Series - Airfix 1/72 F-105G
Anti Shipping - Academy 1/72 PBJ-1D
Academy 1/72 F-84E
European Union
Joined: September 28, 2004
KitMaker: 2,186 posts
AeroScale: 1,587 posts
Posted: Thursday, March 11, 2010 - 10:39 AM UTC
it is very nice and very detailed. only the instructions can be a bit difficult to interprete sometimes
have fun
The mission: Beat the stash.
Almost conquered: MIG-29, Blackhawk, Skyray, Skyraider, fouga
Main battle:Demon, Skyhawk, F-14, CH-53
Stash reserve:Blackhawk, CH-46, 47 en 53; SU-7, Eurofighter, mohawk, hellcat, F-16D, 6x Fouga Magister, Voodoo
Ohio, United States
Joined: February 22, 2010
KitMaker: 171 posts
AeroScale: 166 posts
Posted: Friday, March 12, 2010 - 08:34 AM UTC
Built that kit myself a few years ago. Makes up into a nice model! One thing I want to point out - the instructions would have you install a circuit breaker panel on the inside of the canopy in the rear cockpit (pilot's). Don't. That is a "left-over" from their AH-64A kit. On the AH-64D, that panel was moved out of sight behind the pilot's seat.
I had it installed when I showed my model to a friend of mine's son, who happens to be a Longbow Apache pilot who's served several tours in Iraq. He was quick to point out that error! Fortunately, the panel was easily removed.

Cheers,
Eric
United Kingdom
Joined: December 15, 2008
KitMaker: 246 posts
AeroScale: 47 posts
Posted: Friday, March 12, 2010 - 09:09 AM UTC
Hi there guys,
Mark, thanks for the encouragement. My background is more in armour modelling and this is not a million miles away from that.
Dradslab, I see what you mean about the instructions. I guess good old google will be coming in handy for reference images. Thanks for dropping in.
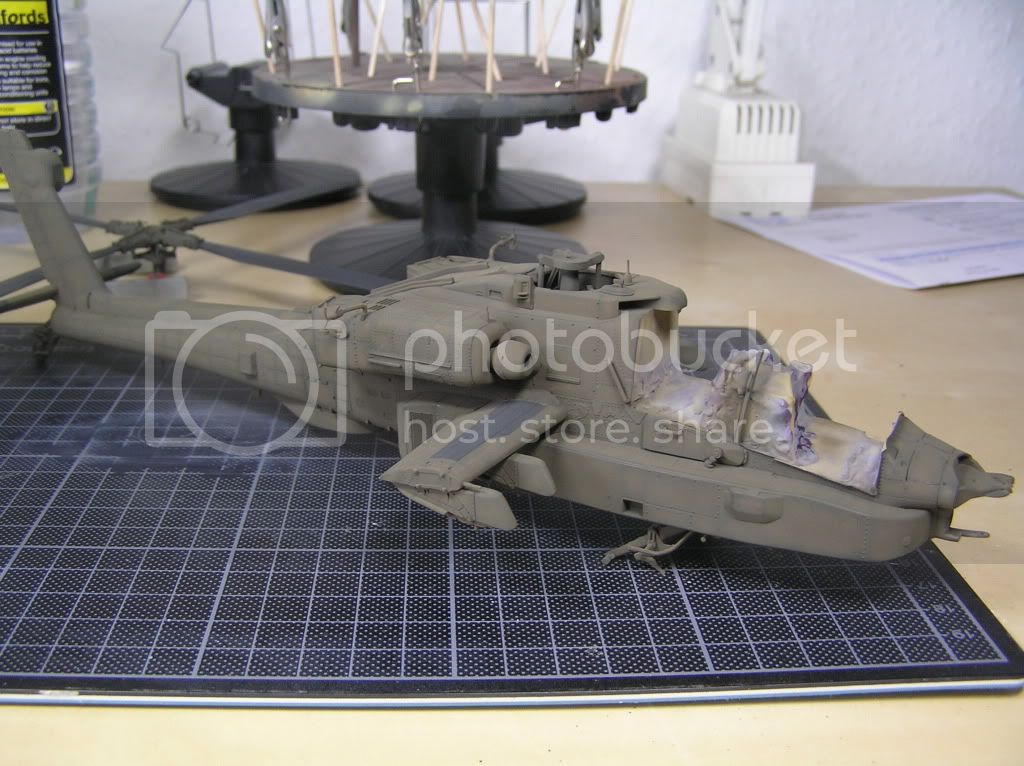
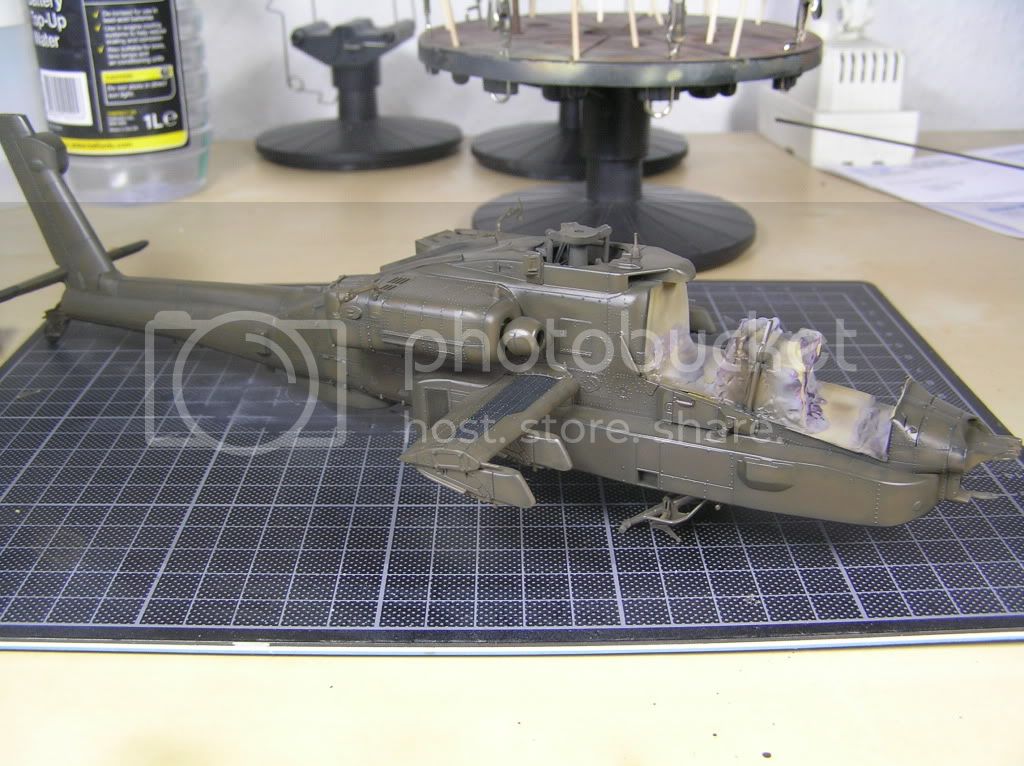
Eric, thanks for the heads-up on the circuit breaker. Not sure what part you mean though. Maybe you could have a look at these pictures and enlighten me further please. It's great to get this type of info, really appreciated.
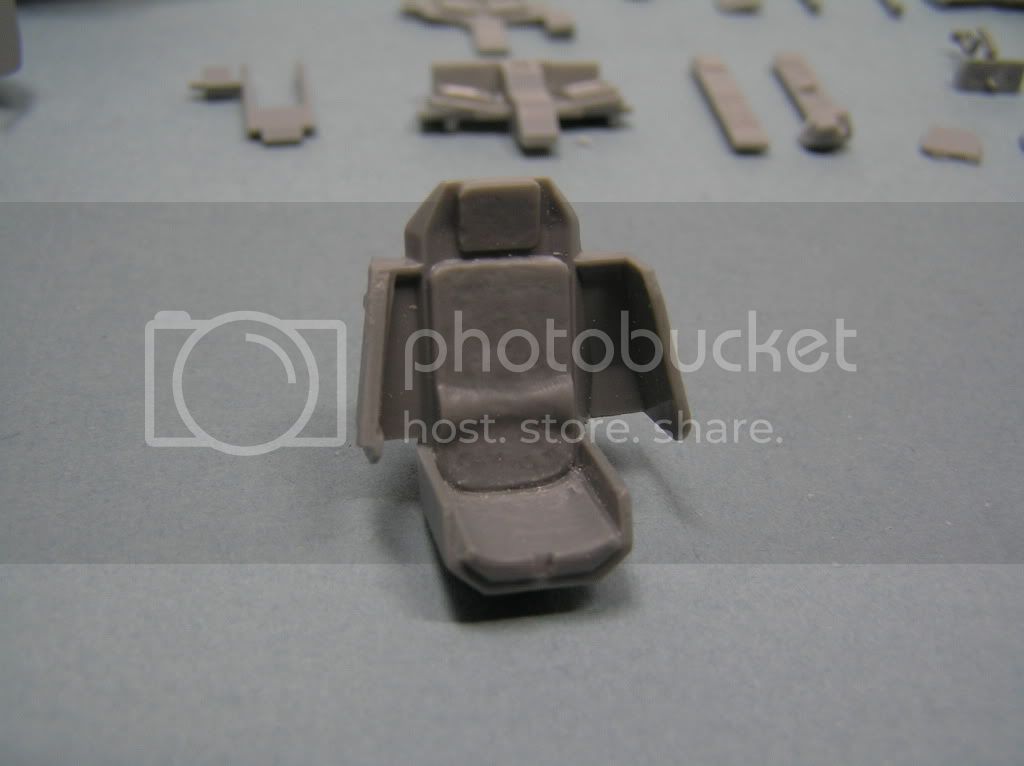
I know from looking at pics of the actual seats that they have fabric type padding covers, but when I was removing the moulded on seatbelts as I'll be using the eduard ones I decided to try to get some texture into them. Not factually accurate but better than smooth plastic maybe.
Thanks for looking in.
Cheers, Jim.
Cockpit instructions
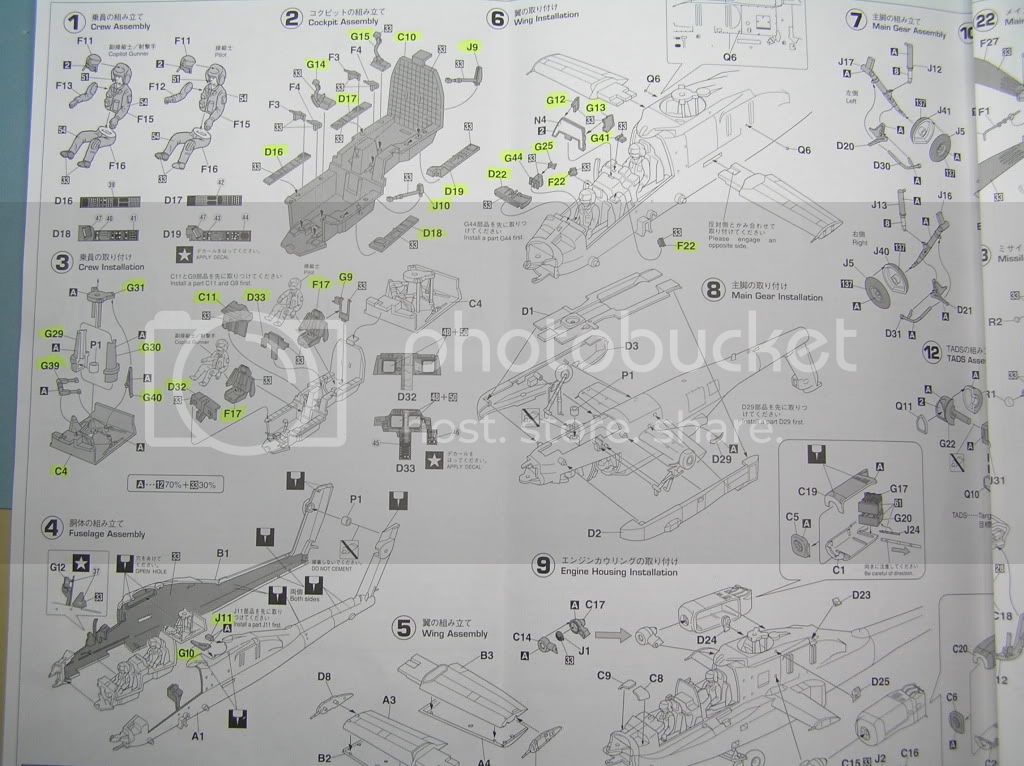
Cockpit and rotor base parts.
Textured seat.
South Australia, Australia
Joined: April 26, 2008
KitMaker: 84 posts
AeroScale: 1 posts
Posted: Wednesday, March 31, 2010 - 04:57 PM UTC
a great reference book is the apache walk around from squadron i have it my self in anticipation of my 1:32 revell apache that is sitting in the stash screaming at me for me to build it
Missouri, United States
Joined: November 24, 2008
KitMaker: 564 posts
AeroScale: 510 posts
Posted: Thursday, April 01, 2010 - 12:23 AM UTC
Mark Im in the same boat!
Nothing quite like getting lost in plastic
On the bench:Revell 1/48 P-38 Lightning built as an F-5B
Next:??
United Kingdom
Joined: December 15, 2008
KitMaker: 246 posts
AeroScale: 47 posts
Posted: Monday, April 25, 2011 - 09:36 AM UTC
Hi there,
Well, over a year has gone by and I have finally rescued this from the dreaded shelf of doom and completed the build process! Just the paint to go! Will post pics of primed model and miscellaneous parts soon.
Have had some fit problems but nothing too major although the fit of the canopy is what made me put this project on the shelf of doom in the first place! Still not perfect but shouldn't be too noticable when finished.
Now for the question of colour. Does anyone have some suggestions for a good match from mixing Tamiya paints as these are easiest for me to obtain.
Thanks ,Jim.
United Kingdom
Joined: December 15, 2008
KitMaker: 246 posts
AeroScale: 47 posts
Posted: Wednesday, August 31, 2011 - 07:48 AM UTC
Well, another 6 months went by and I decided to resurrect this beast!
I may have gone slightly over the top with the pre-shading but what the hey, it was a good work out for the airbrush.
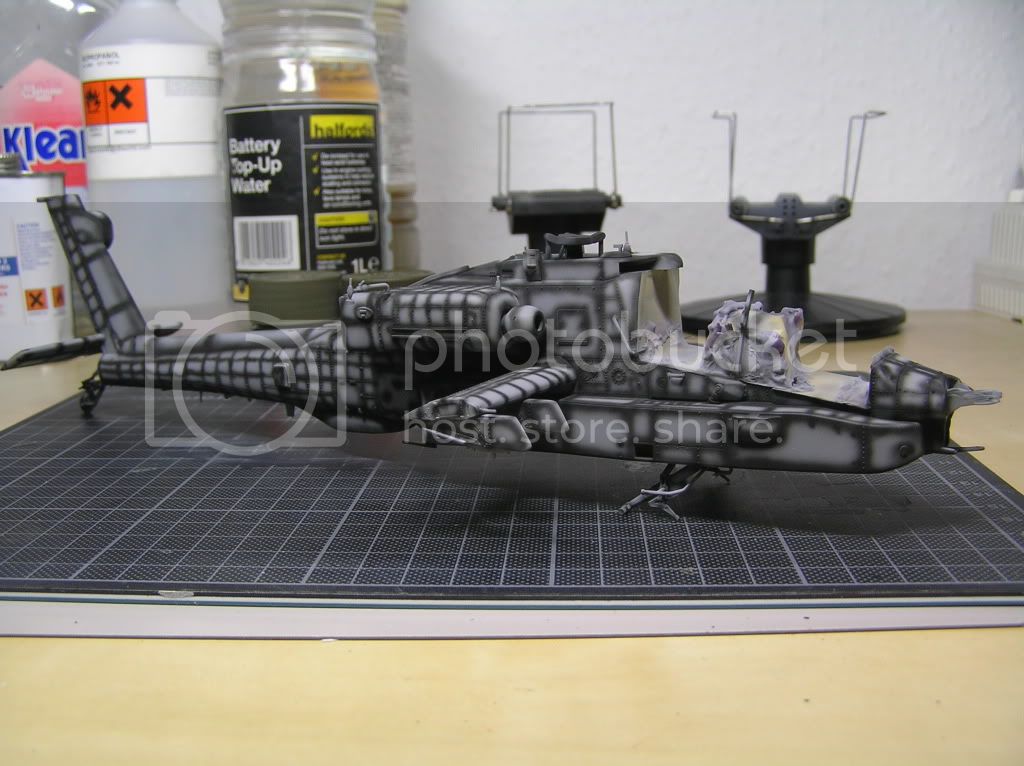
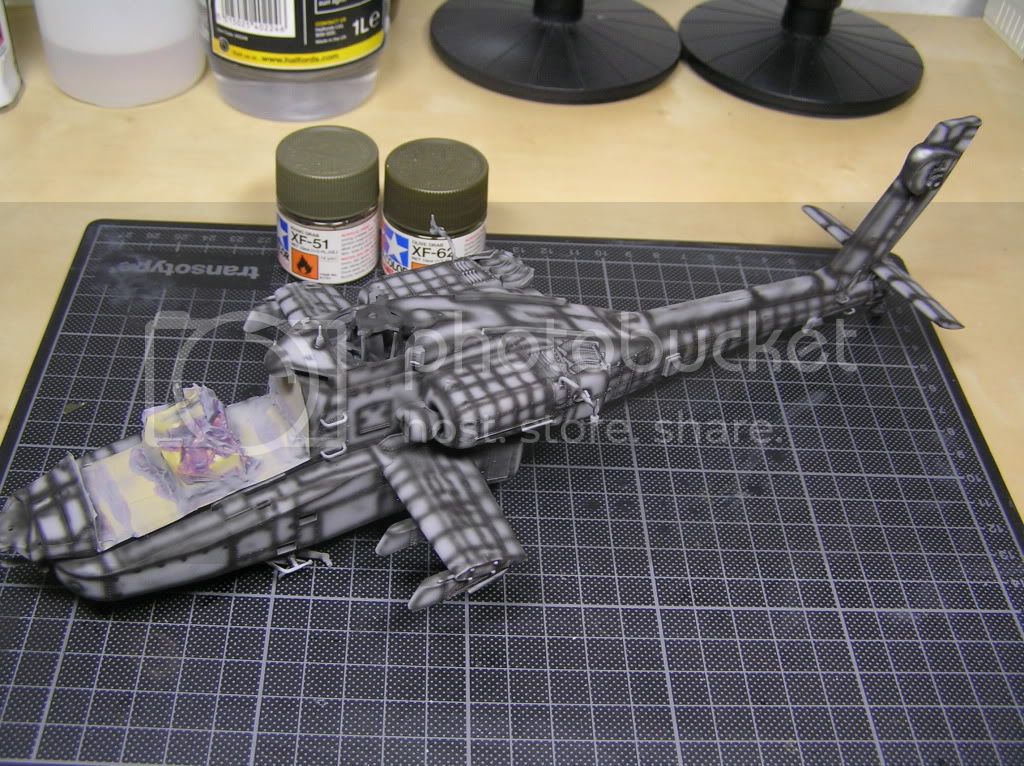
I have decided on a 50:50 mix of tamiya olive drab xf-62 and khaki-drab xf-51 for the overall colour. Maybe not strictly accurate but after weathering should look ok.
Thanks for looking in,
Jim.
Ohio, United States
Joined: May 02, 2010
KitMaker: 596 posts
AeroScale: 197 posts
Posted: Wednesday, August 31, 2011 - 08:01 AM UTC
Hey that's looking good! I've been thinking about building an Apache for a while now...how's Hasegawa's kit? I hear it's one of the better ones available. Looks like you've got a clean build so far, and the preshading (though "slightly over the top," as you said) will look really nice when covered by the main coat. I'll be following this one!
United Kingdom
Joined: December 15, 2008
KitMaker: 246 posts
AeroScale: 47 posts
Posted: Wednesday, August 31, 2011 - 08:36 AM UTC
Hi Robby,
Thanks buddy. The Hasegawa kit is quite good. The detail is fairly crisp and proportions look really good. Not the best fit when joining the fuselage halfs but nothing too bad. The canopy fit isn't great either but once again nothing major. The eduard zoom set really adds to the cockpit with the seatbelts and some other bits and pieces.
Tried out the colour on my sacrificial kit (ancient german armoured recon thingy with dozens of practice coats on it!) over the same preshading and it does come out fairly nice.
Cheers, Jim.
United Kingdom
Joined: December 15, 2008
KitMaker: 246 posts
AeroScale: 47 posts
Posted: Friday, September 02, 2011 - 06:06 AM UTC
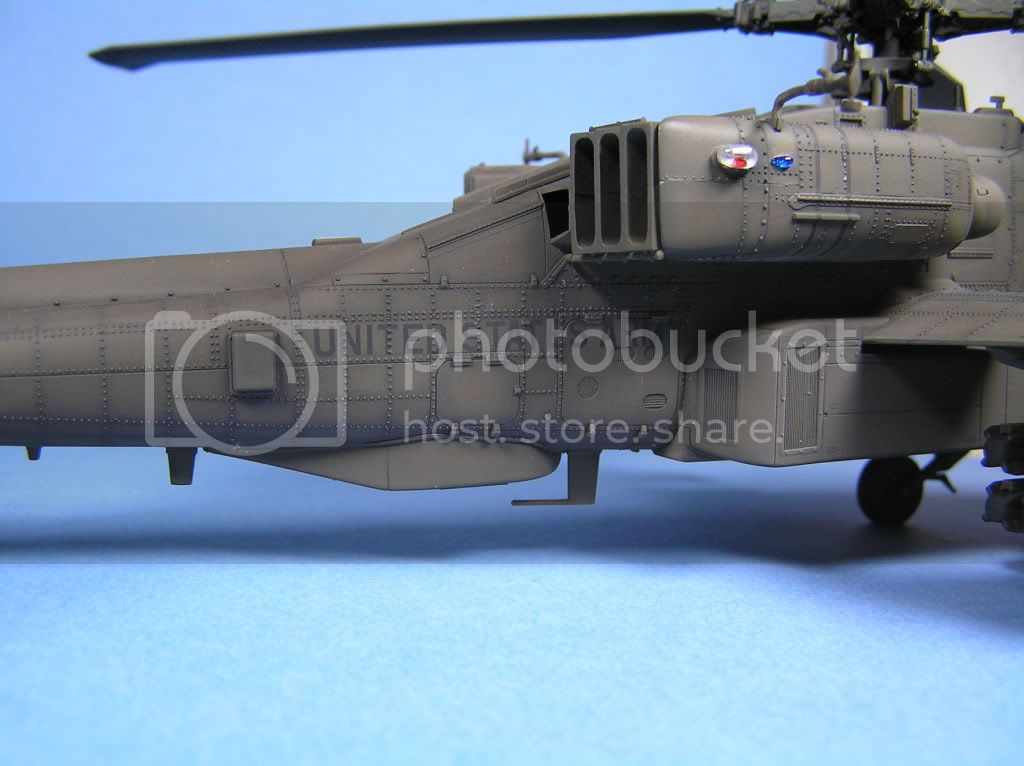
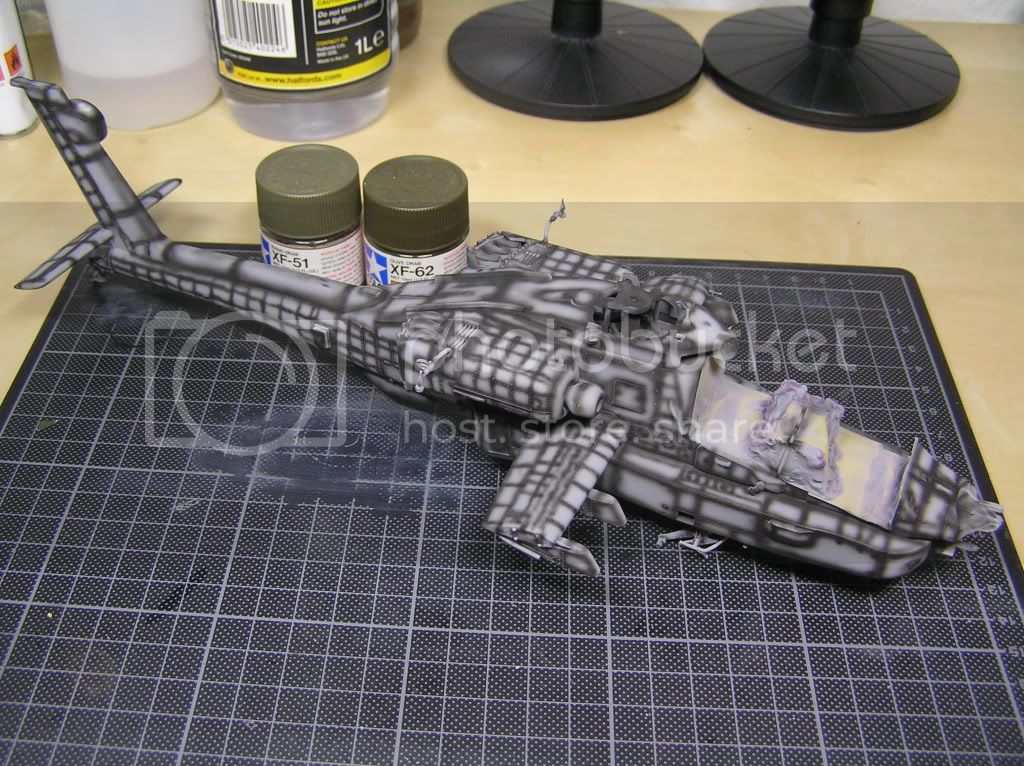
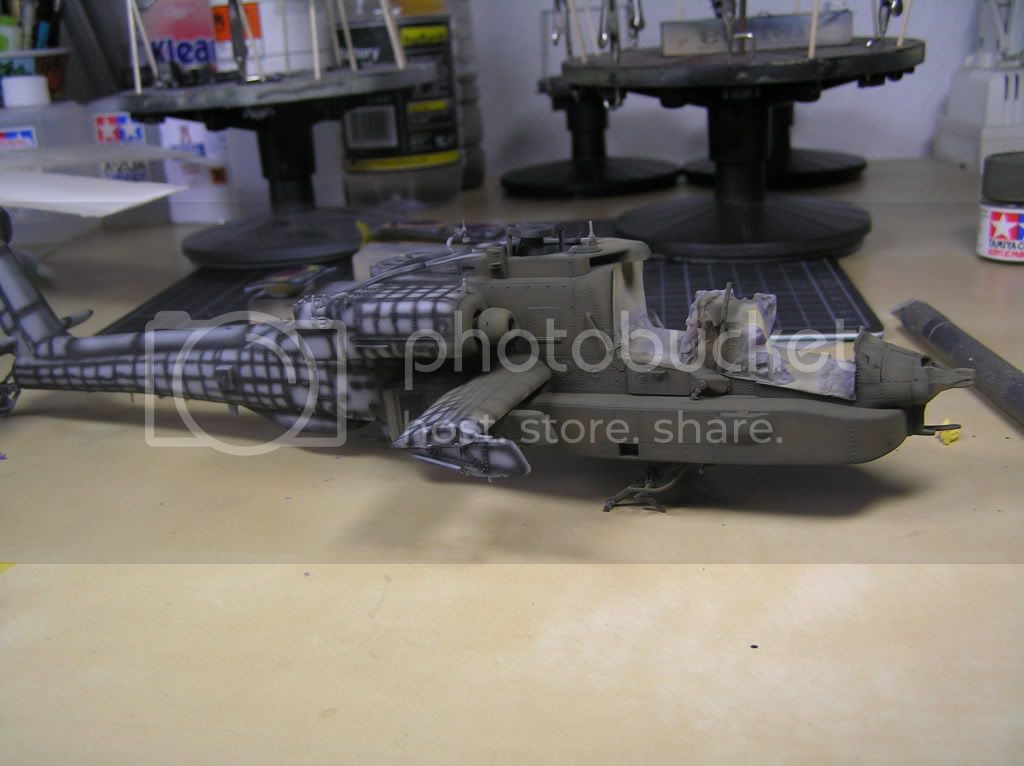
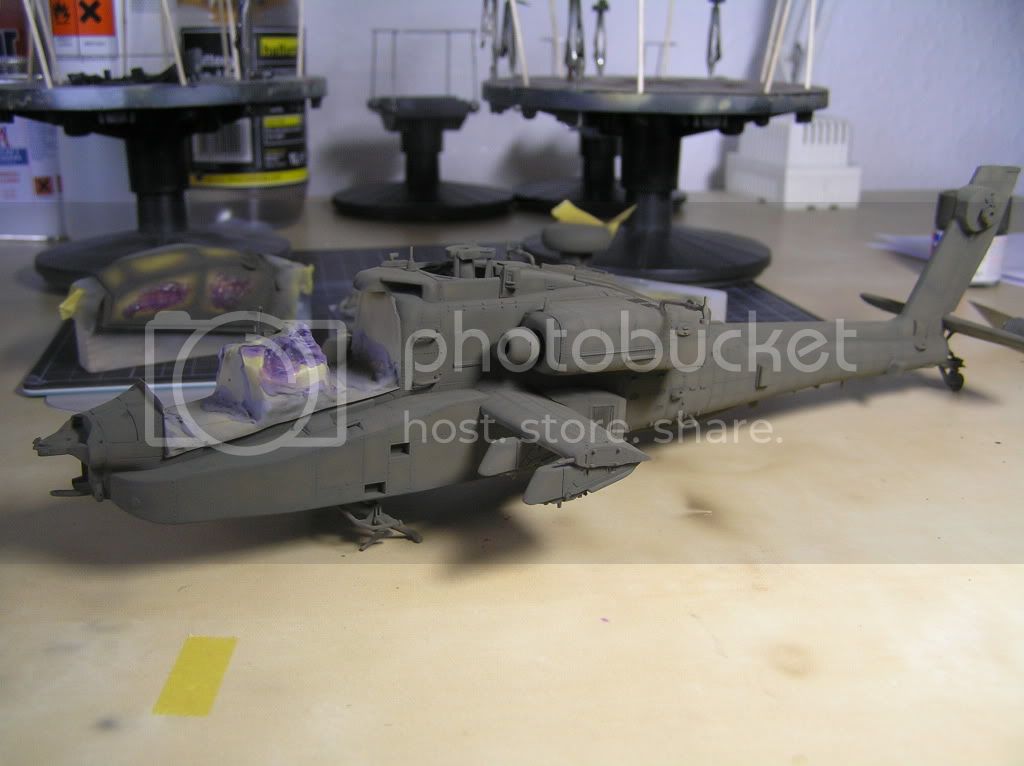
Some colour on. I went with 50:50 Tamiya olive drab and khaki drab. After gloss coat, washes, decals and flat coat it will darken.
Cheers, Jim.
United Kingdom
Joined: December 15, 2008
KitMaker: 246 posts
AeroScale: 47 posts
Posted: Friday, September 09, 2011 - 01:54 AM UTC
A quick update,
Painted black panels on "wings" rather than using decals. Masked then a black pre-shade followed by a coat of Tamiya Nato black. Then a coat of future ready for decals and washes.
Thanks for looking, Jim.
#065
Missouri, United States
Joined: March 30, 2002
KitMaker: 2,605 posts
AeroScale: 91 posts
Posted: Friday, September 09, 2011 - 02:18 AM UTC
Great looking work so far. I'm watching this intently. I have the same kit in my stash.
IPMS # 41155
Current Campaigns:
Ohio, United States
Joined: May 02, 2010
KitMaker: 596 posts
AeroScale: 197 posts
Posted: Friday, September 09, 2011 - 03:29 AM UTC
Looking solid, just as expected!
#047
England - East Anglia, United Kingdom
Joined: September 13, 2005
KitMaker: 2,016 posts
AeroScale: 475 posts
Posted: Saturday, September 10, 2011 - 11:53 PM UTC
Lovely Jim, Lovely

That preshading is spot on mate ,I've had my eye on this kit for a wee while now,time to buy one now methinks
Andy
Major Caryle,
"Shall we have a go at the far end now,sir?"
Lt Colonel "Johnny" Frost,
"Having a go,is hardly text book terminology Harry"
Major Caryle,
"But you'll let us try sir?"
A Bridge Too Far
Lottery Campaign "Oh de Vichy"
United Kingdom
Joined: December 15, 2008
KitMaker: 246 posts
AeroScale: 47 posts
Posted: Tuesday, September 13, 2011 - 01:05 AM UTC
Hi there,
Thanks for the support guys, it really helps with the motivation to keep going.
The decals are on. I put on another coat of klear but forgot to clean grease and decal residue first, not a disaster as smudges will hopefully disappear with the flat coat.! I also managed to spray too much klear onto the radar housing and have some runs. Micromesh to the rescue when it is fully dry(fingers crossed).
And finally the canopy fit is worse than I thought, must have been all the ham-fisted handling by me!!!
Other than that I have been really enjoying the build.
Thanks for looking, Jim.

#041
Kobenhavn, Denmark
Joined: July 20, 2006
KitMaker: 10,069 posts
AeroScale: 3,788 posts
Posted: Saturday, September 17, 2011 - 03:53 AM UTC
Great build so far, Jim.
Looking forward to see more.
Campaign'oholic - 252+ campaigns completed
United Kingdom
Joined: December 15, 2008
KitMaker: 246 posts
AeroScale: 47 posts
Posted: Thursday, October 13, 2011 - 02:12 AM UTC
Thanks SGTJKJ for the kind words.
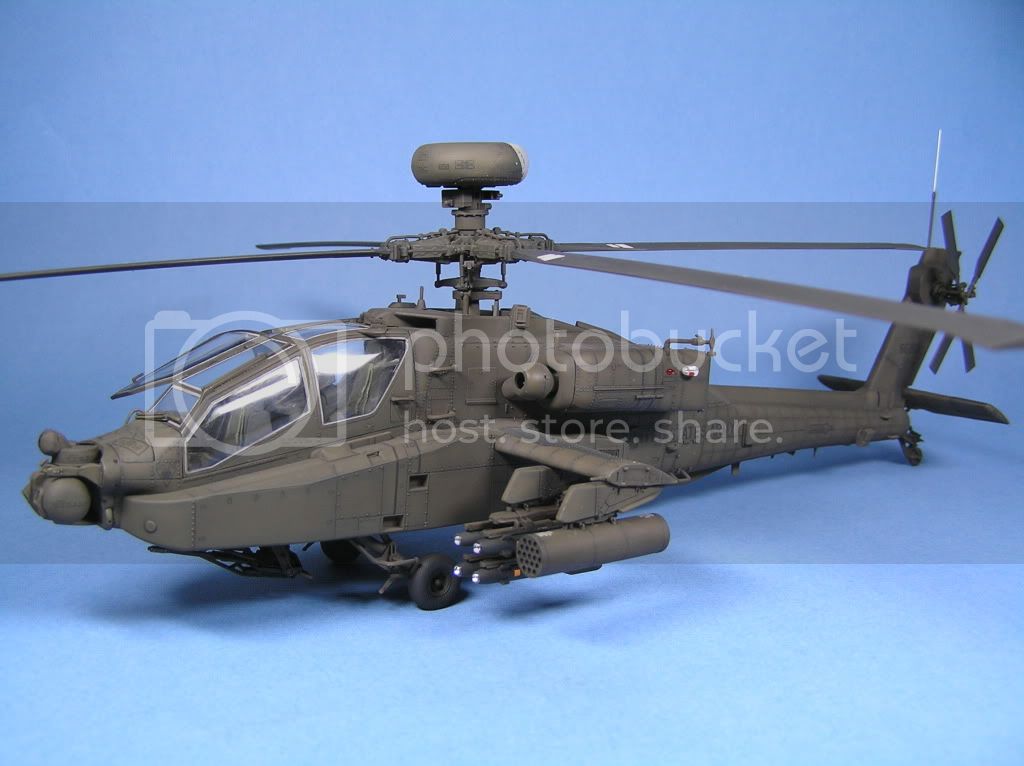
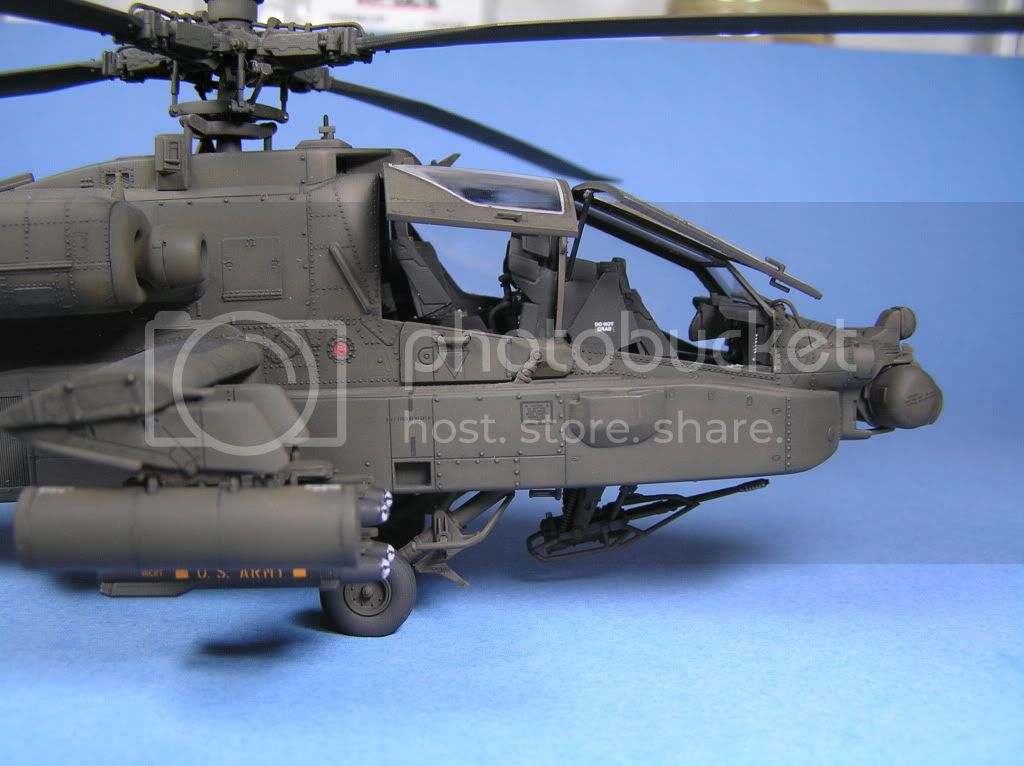
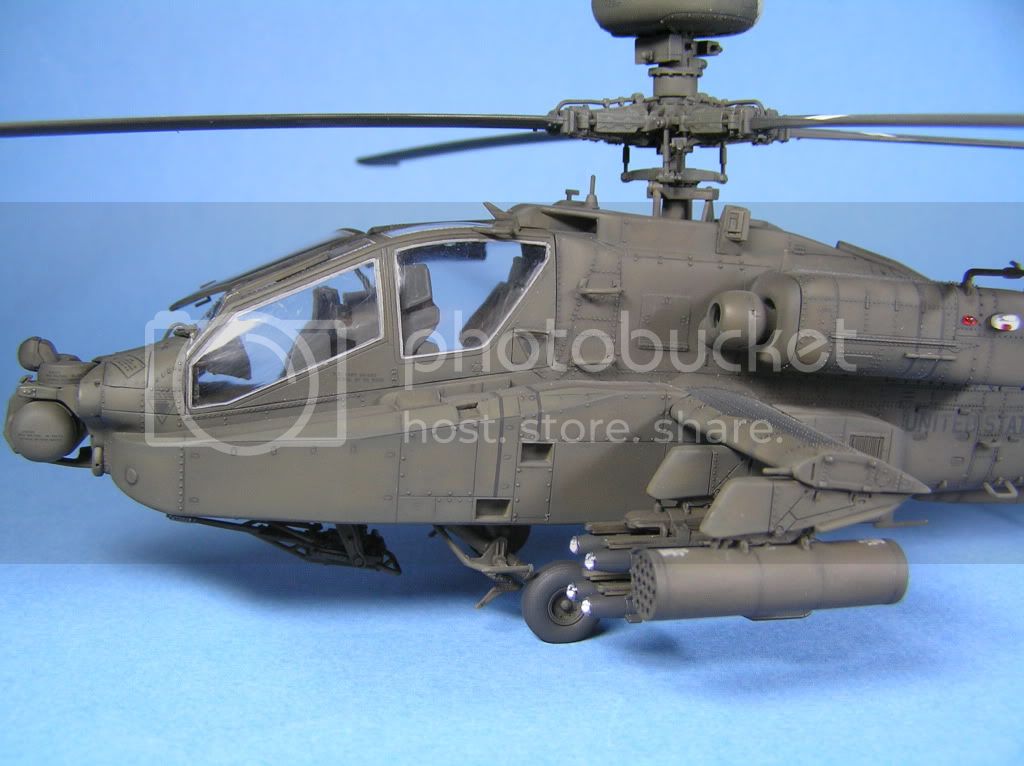
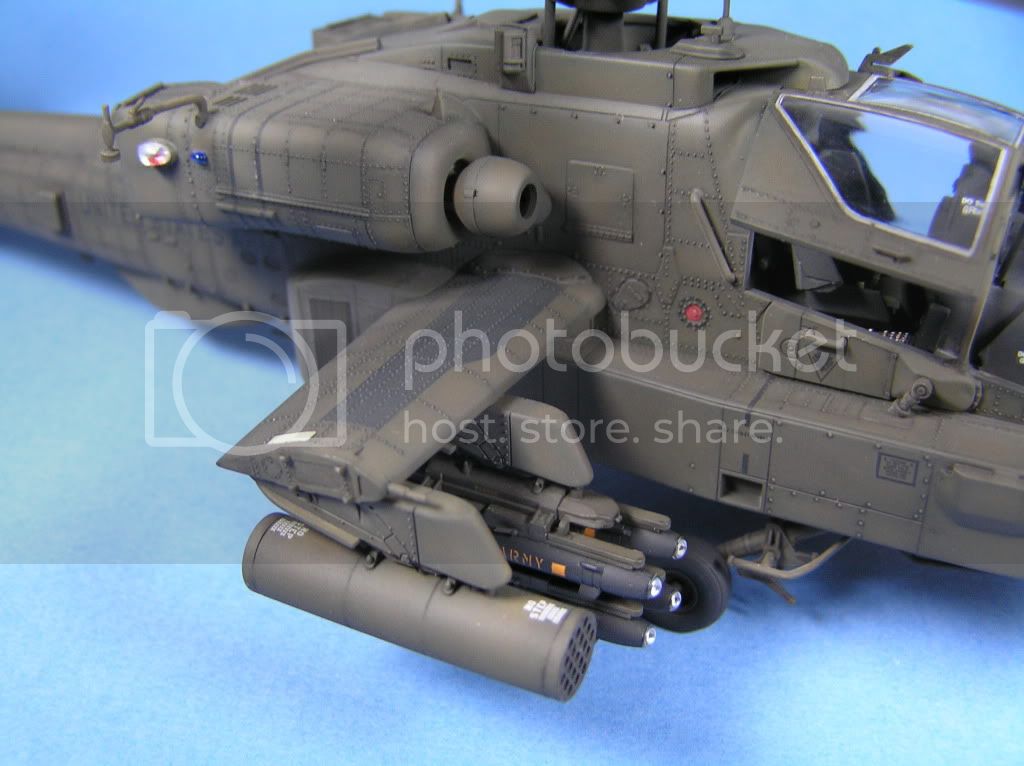
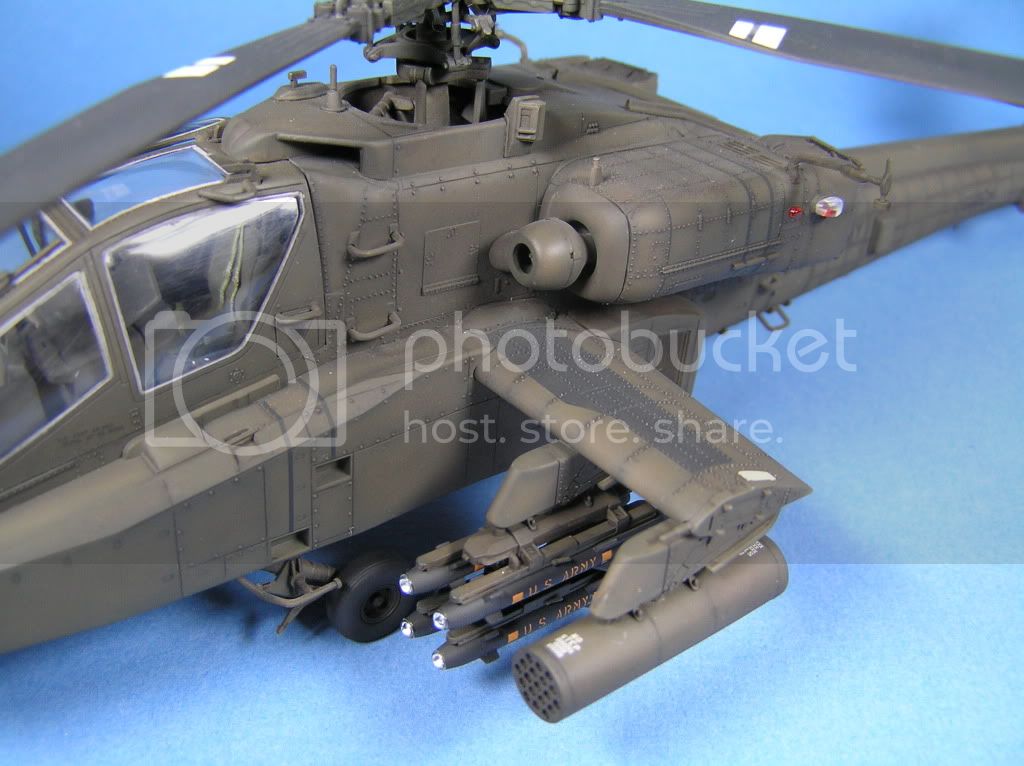
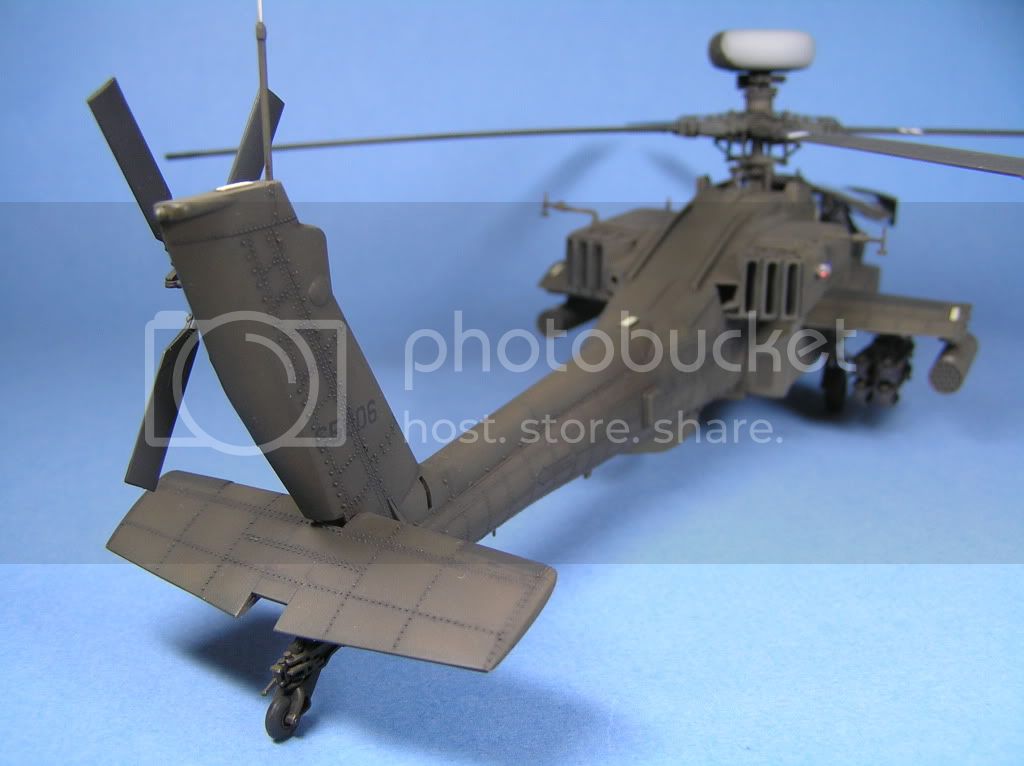
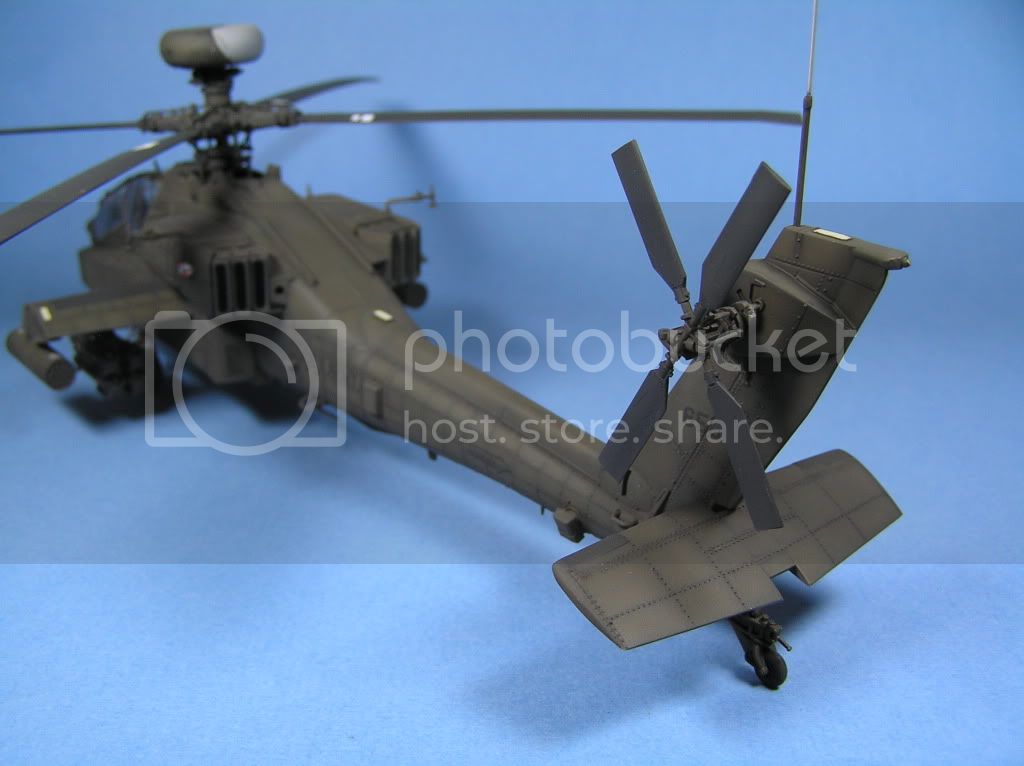
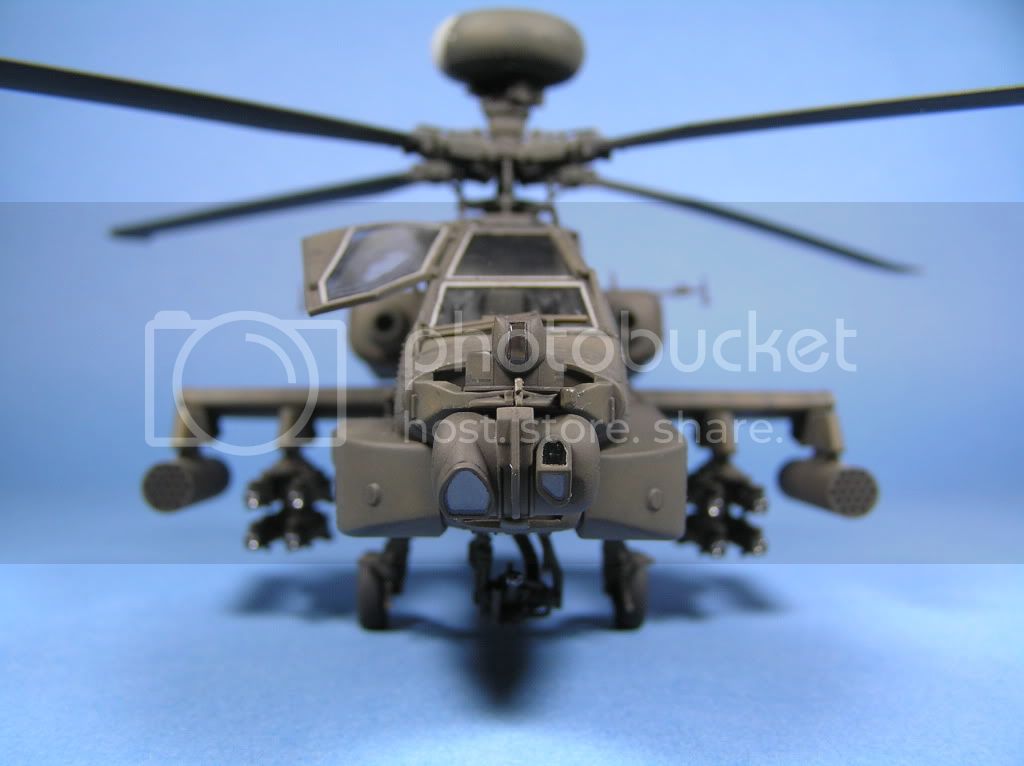
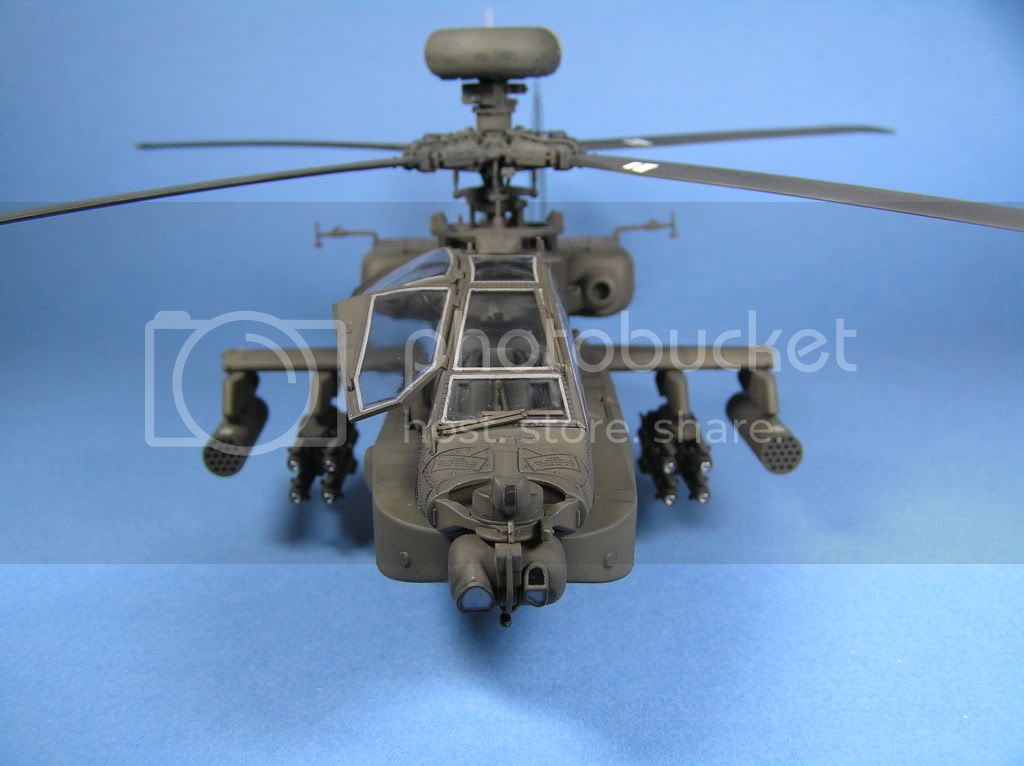
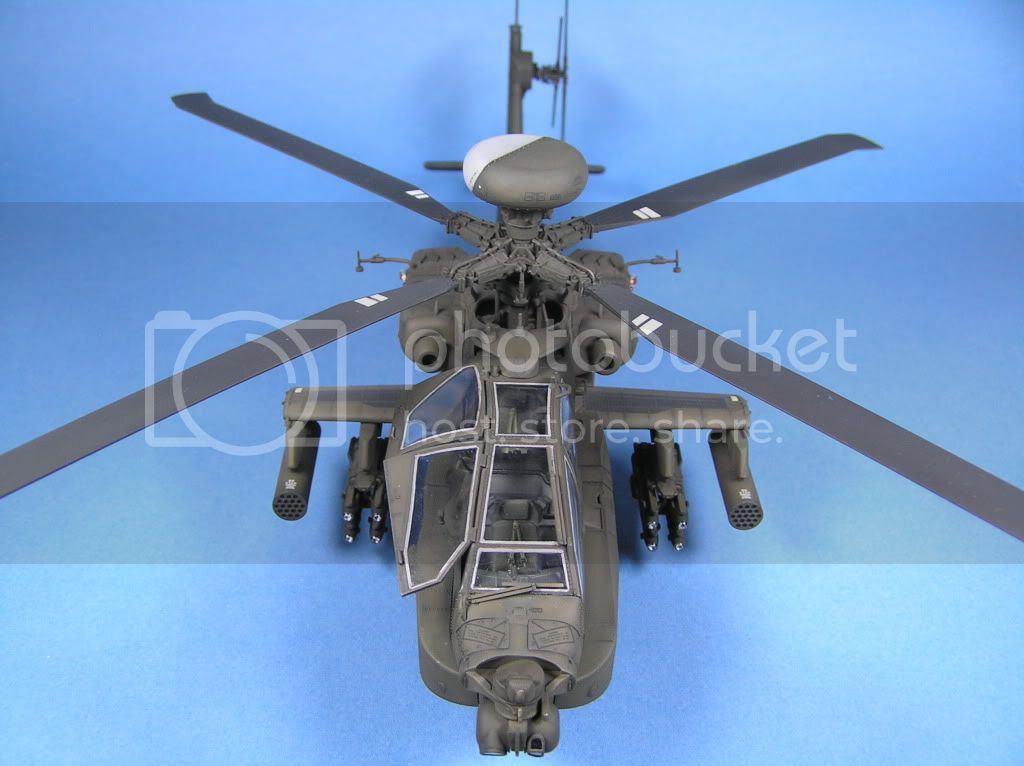
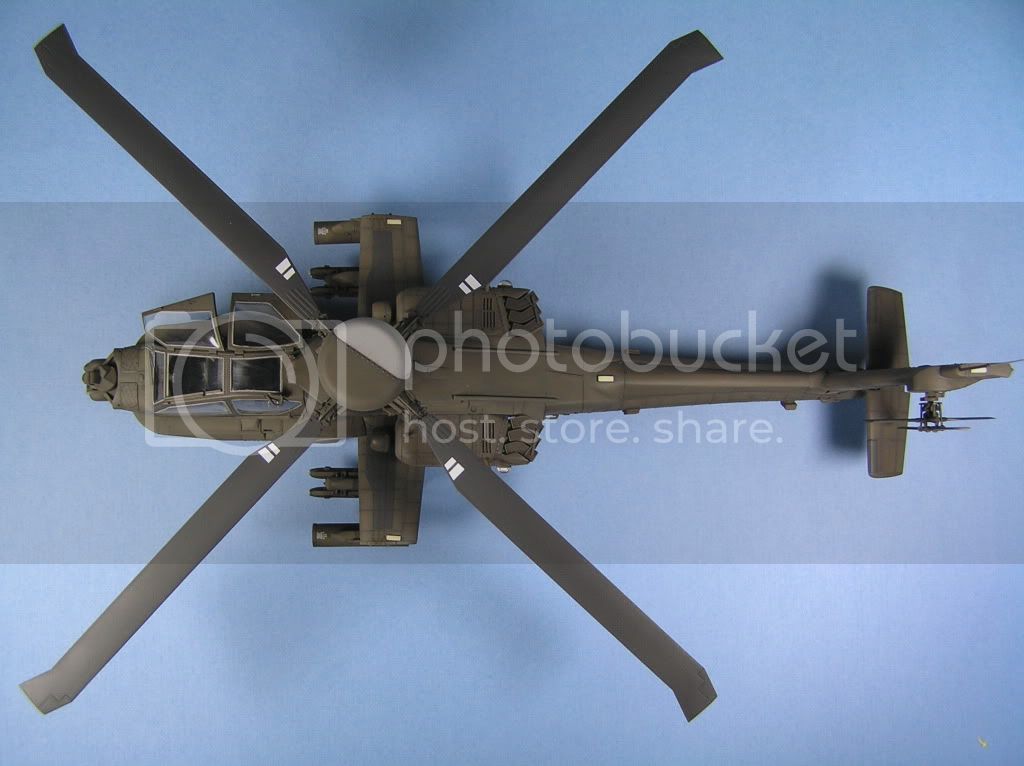
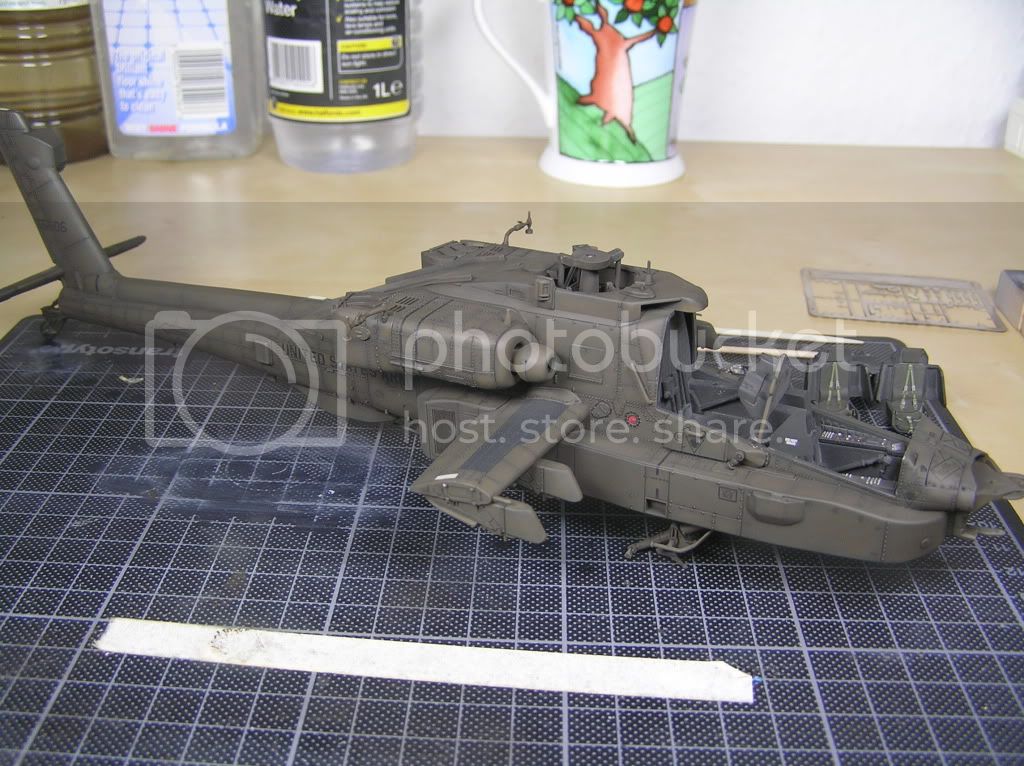
Been a while but a quick update. Pin wash done and matt coat on. Just the final assembly and some detail painting and the beast is done!
I hope you all like it
Cheers, Jim.
Florida, United States
Joined: May 16, 2002
KitMaker: 17,694 posts
AeroScale: 1,728 posts
Posted: Thursday, October 13, 2011 - 06:05 AM UTC
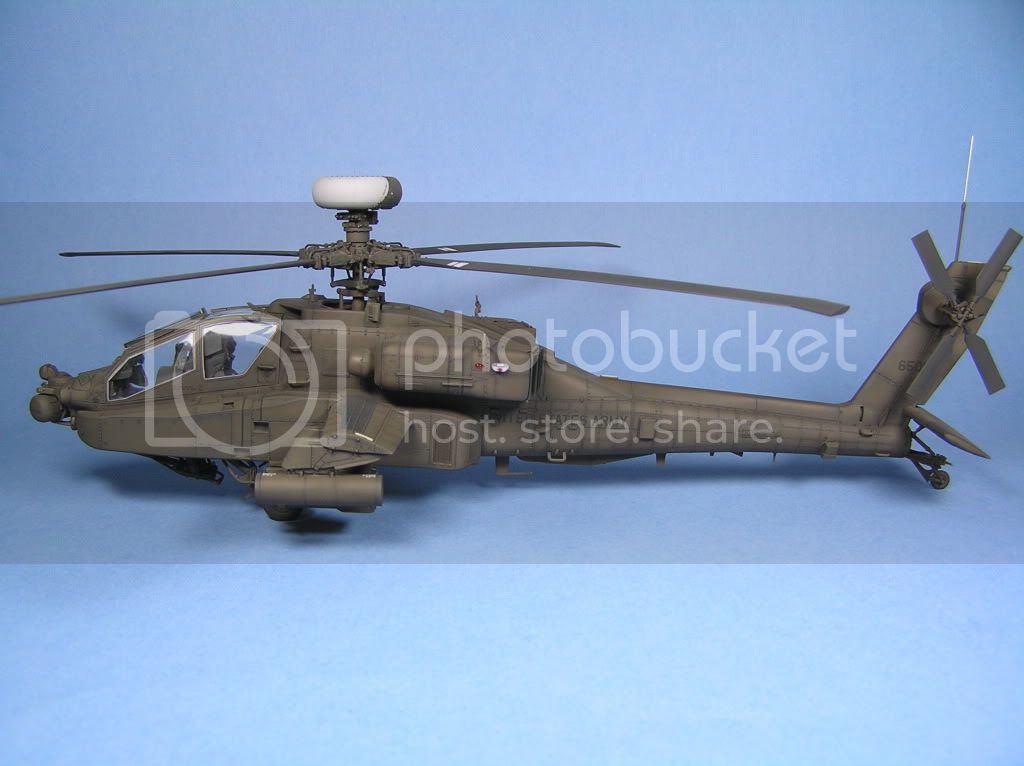
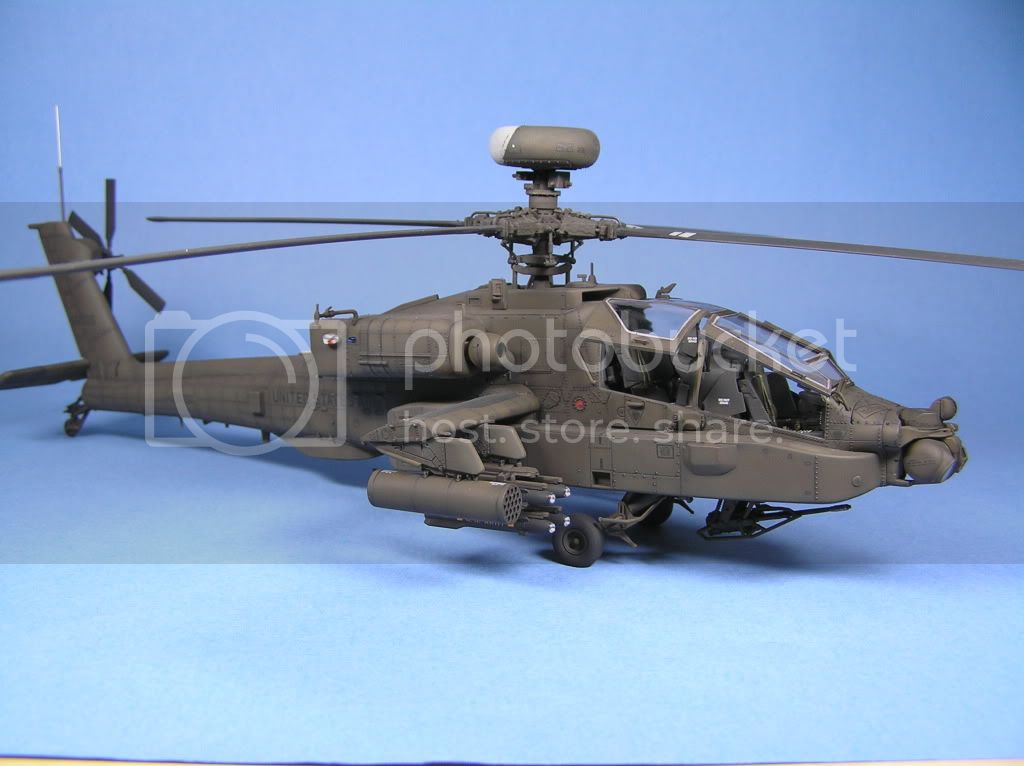
Looks like a great bld with lots of details. The color is off though. Modern US Army helos (since the late '70s to early '80s) are painted in Helo Drab Green, FS34031, which is dark geen-black color. OD Green was used on US Army helos prior to Helo Drab Green.
AH-64 Apache in Helo Drab Green:

You can see the one crewman closest to the fuselage (under the wing) is wearing an OD Green flight suit. The helo is much darker.
Testors Model Master has the exact Helo Drab Green color, FS34031, in both their enamal and acrylic lines. The acrylic color is closer to the actual color. The enamal one is a little too gray.
Field Artillery --- The KING of BATTLE!!!
"People sleep peaceably in their beds at night only because rough men stand ready to do violence on their behalf." -- George Orwell
Showcase
Removed by original poster on 10/13/11 - 19:45:46 (GMT).
United Kingdom
Joined: December 15, 2008
KitMaker: 246 posts
AeroScale: 47 posts
Posted: Sunday, October 16, 2011 - 05:16 AM UTC
Thanks for that Gino. Think I have ended up with closer to the British colour although it is darker in the "flesh". Difficult to get a hold of model master paints here. Just have to live with it now though.
Cheers, Jim.
Ohio, United States
Joined: May 02, 2010
KitMaker: 596 posts
AeroScale: 197 posts
Posted: Sunday, October 16, 2011 - 05:30 AM UTC
Quoted Text
Just have to live with it now though.
That's my school of thought...this helo could end up without a rotor or painted orange, but as long as it looks cool, you're on the right track! Looks fantastic though (especially to those of us who don't know the inaccuracies

)
United Kingdom
Joined: December 15, 2008
KitMaker: 246 posts
AeroScale: 47 posts
Posted: Monday, October 17, 2011 - 07:34 AM UTC
Thanks Robby,
Glad you like it. Must admit I don't try to be super accurate. Will usually go with what I think looks good rather than a perfect color match. Hell, I was going to do a three tone black, whiite and grey arctic camo "what if" paint job on it. Even contemplated a star wars x-wing themed finish!
As you say, If it looks cool I'm happy.
Cheers, Jim.
United Kingdom
Joined: December 15, 2008
KitMaker: 246 posts
AeroScale: 47 posts
Posted: Thursday, October 27, 2011 - 07:44 AM UTC