Suchoi Su-7BMK - Eduard 1/48
Germany
Joined: September 07, 2005
KitMaker: 5,609 posts
AeroScale: 5,231 posts
Posted: Friday, March 26, 2010 - 10:08 PM UTC
Hi all
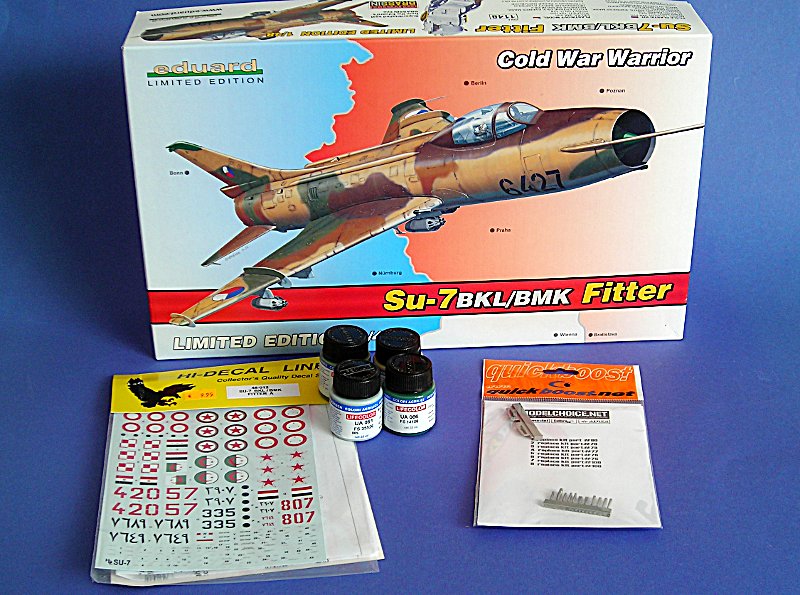
sometimes I just have fun in cutting and glueing plastic. Then I start a new project even if I have a hundred started projects on the pile. honestly I first wasn't all too enthusiastic about the Su-7 re-release, but when I did some research for the kitreport and had a look into the kit I was pretty happy with that and decided to give it a go. Today I got some stuff I ordered for this project: HiDecal decals for Su-7BMKs, fitting Lifecolor paint, and the scoop set by Quickboost:
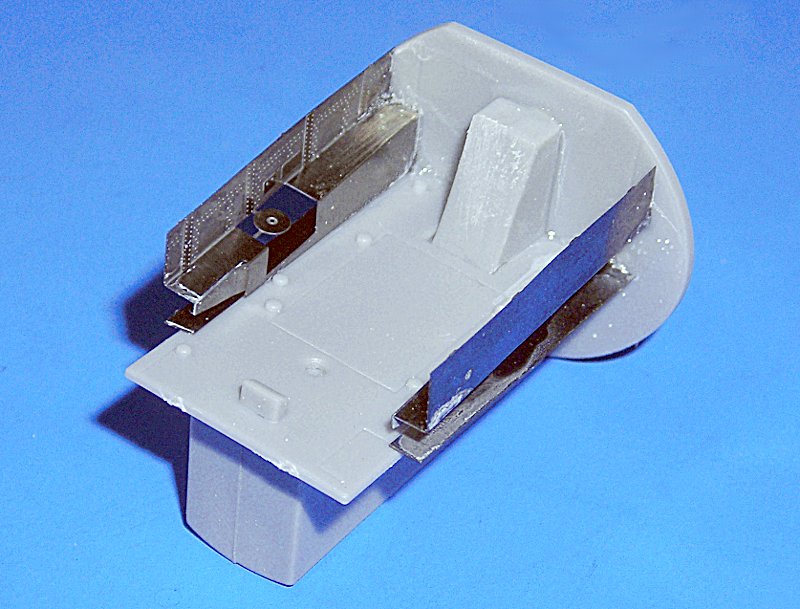
I started gluing some pieces in the cockpit:
and I used my motortool to grind away the unnecessary plastic on the fuselage. Furthermmore I removed the gills from the fuselage inserts and glued in PE parts:
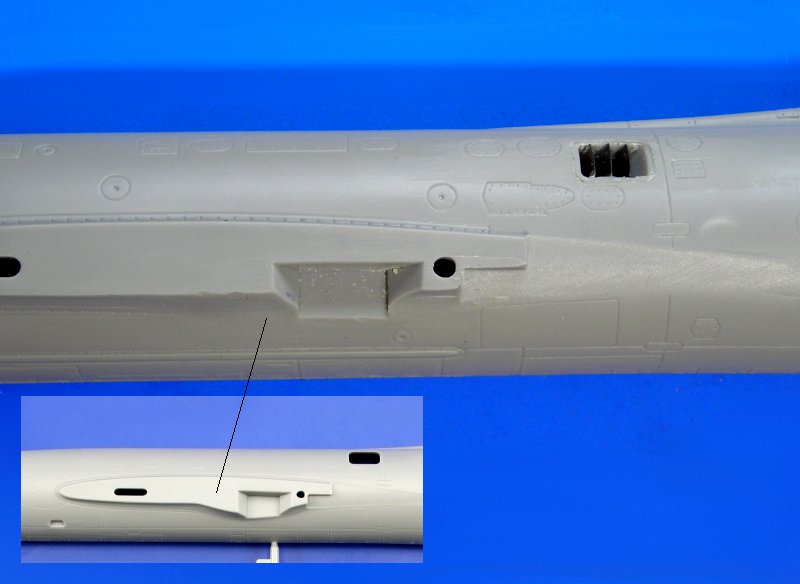
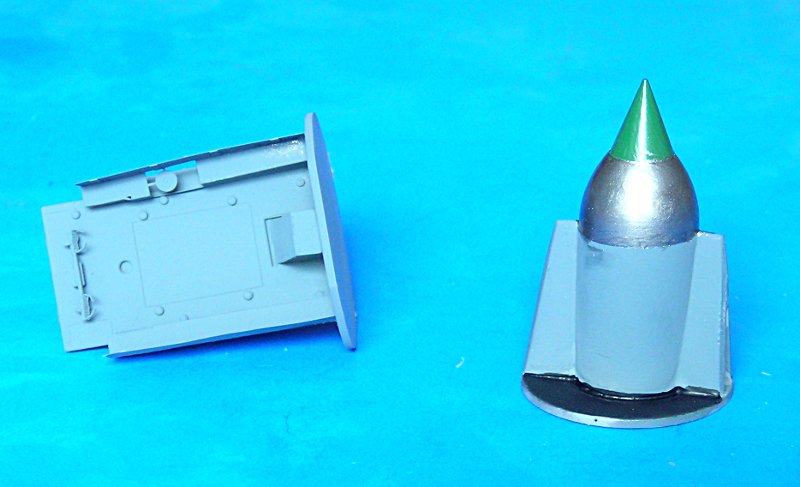
Not pictured is the nose cone and the exhaust pipe that I also glued together. I am not sure how well I will progress with this build, but it is fun so far...
all the best
Steffen
P.S. I used the German transliteration of the manufacturers name, which is Sukhoi in English
DULCE ET DECORUM EST PRO HOBBY MORI
Merlin
 Senior Editor
#017
United Kingdom
Joined: June 11, 2003
KitMaker: 17,582 posts
AeroScale: 12,795 posts
Posted: Friday, March 26, 2010 - 10:27 PM UTC
Hi Steffen
I wondered what the teaser was all about.

What markings are you going for on this one? Eduard already seem to offer a good selection, so it must be something unusual...
All the best
Rowan

BEWARE OF THE FEW...
As I grow older, I regret to say that a detestable habit of thinking seems to be getting a hold of me. - H. Rider Haggard
Germany
Joined: September 07, 2005
KitMaker: 5,609 posts
AeroScale: 5,231 posts
Posted: Friday, March 26, 2010 - 10:37 PM UTC
Hi Rowan
Well I wanted a camo scheme of the Ramadan/Yom Kippur war 1973 and I thought the Egyptian in the kit was. But I was unsure about the scheme in the kit because the Nile Valley Scheme looks a bit different, thus I checked the web and found this decal sheet which has 3 different Ramadan War markings: Egypt, Syria and Algeria.
The Algerian is probably the most interesting, but has "Europe style" arabic numbers the other two have arabic arabic numbers (does that make sense?) anyway I chose the Egypt scheme and ordered paint for that one (I thought it was 3 colour but it is only two colours for the upper side ) ...
Edit: wow I cannot edit my first post ... that is a pretty short time Jim has established now .... I just wanted to add a link to my in box review:
Eduard Su-7BKL/BMK 1/48all the best
Steffen
DULCE ET DECORUM EST PRO HOBBY MORI
Merlin
 Senior Editor
#017
United Kingdom
Joined: June 11, 2003
KitMaker: 17,582 posts
AeroScale: 12,795 posts
Posted: Saturday, March 27, 2010 - 03:40 AM UTC
Hi Steffen
Neat - it's always interesting to see the spotlight shone on less commonly modelled airforces.

All the best
Rowan

BEWARE OF THE FEW...
As I grow older, I regret to say that a detestable habit of thinking seems to be getting a hold of me. - H. Rider Haggard
Germany
Joined: September 07, 2005
KitMaker: 5,609 posts
AeroScale: 5,231 posts
Posted: Saturday, March 27, 2010 - 05:10 AM UTC
Hi Rowan
Well, I find those often more interesting because events and aircraft are often not very well known....
here is another picture as there was some colour involved today:
all the best
Steffen
DULCE ET DECORUM EST PRO HOBBY MORI
Merlin
 Senior Editor
#017
United Kingdom
Joined: June 11, 2003
KitMaker: 17,582 posts
AeroScale: 12,795 posts
Posted: Saturday, March 27, 2010 - 09:44 AM UTC
Hi again
There's some great subject matter for future Campaigns - have we ever done an African air forces, for instance?
Nice review, by the way.

Keep posting the links - my highschool German is improving... langsam.
All the best
Rowan

BEWARE OF THE FEW...
As I grow older, I regret to say that a detestable habit of thinking seems to be getting a hold of me. - H. Rider Haggard
Germany
Joined: September 07, 2005
KitMaker: 5,609 posts
AeroScale: 5,231 posts
Posted: Saturday, March 27, 2010 - 09:09 PM UTC
Hi Rowan
Well, I only provide the links to show the sprues and stuff you get in the box. I do not intend to lure people away from here! Sure there will be a review of the Su-7 soon on Aeroscale, that is much more readable for most of the visitors.
As for an African Campaign: cool idea, but what would you do with Swedish Tunnans deployed in the Kongo or Portugues Ginas? ... an Article about the latter and Olivers(Erlawerke) nicely built model made me want to build one ... luckily I was not able to find the proper box for that project (Heller boxing of the Occidental kit because of engraved panel lines).
but back on topic .... I do a bit of filling and sanding at the moment, as the speed brakes don't fit at all and I want them closed...
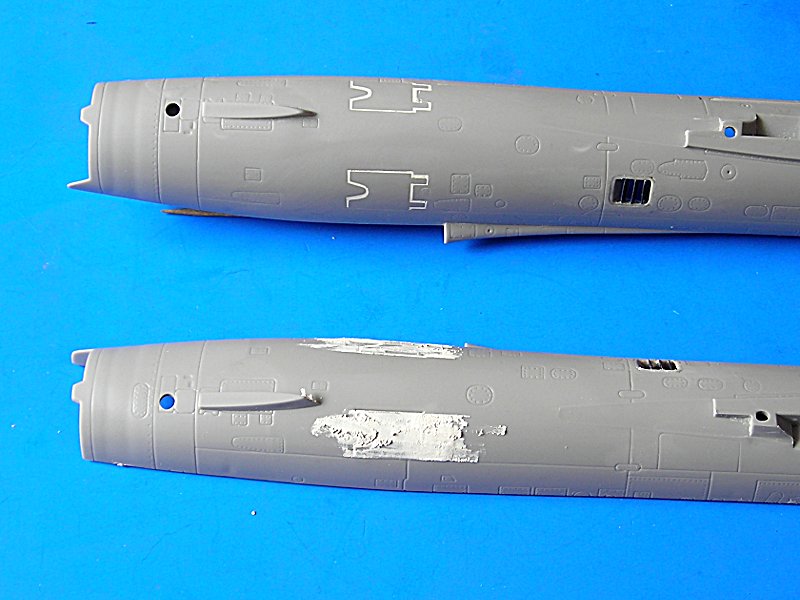
all the best
Steffen
DULCE ET DECORUM EST PRO HOBBY MORI
Roma, Italy
Joined: January 28, 2006
KitMaker: 1,368 posts
AeroScale: 377 posts
Posted: Saturday, March 27, 2010 - 11:59 PM UTC
Hmmm... very promising, but looks a bit difficult and skill-requiring to me!
Looking forward to the rest!
Germany
Joined: September 07, 2005
KitMaker: 5,609 posts
AeroScale: 5,231 posts
Posted: Sunday, March 28, 2010 - 12:31 AM UTC
Hi Giacomo
Well, it is no Tamiya "shake'n'bake"-kit, but it is not that difficult .... just take your time - and a motor tool helps to get the u/c bumps away for the BMK version .. or you just build a Soviet or Czechoslovak BLK.
Thanks for your coment!
all the best
Steffen
DULCE ET DECORUM EST PRO HOBBY MORI
Germany
Joined: September 07, 2005
KitMaker: 5,609 posts
AeroScale: 5,231 posts
Posted: Sunday, March 28, 2010 - 02:59 AM UTC
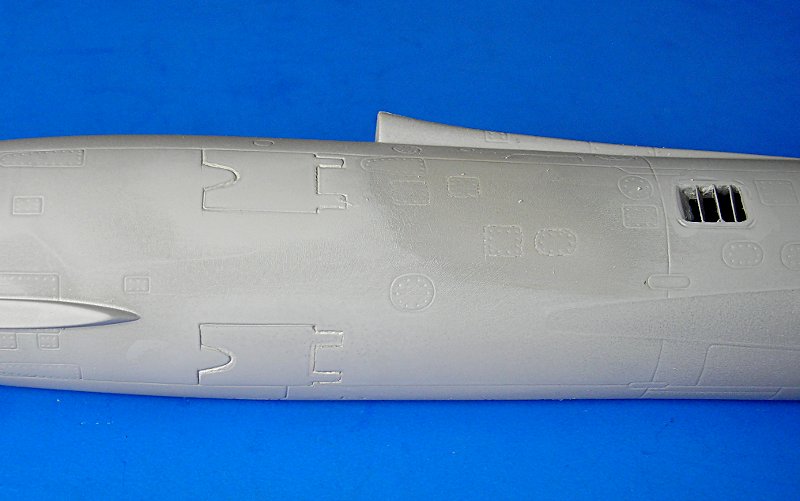
After some sanding and rescribing I put on a thin layer of primer. It is not perfect, but I am o.k. with it ... at least under a few layers of paint
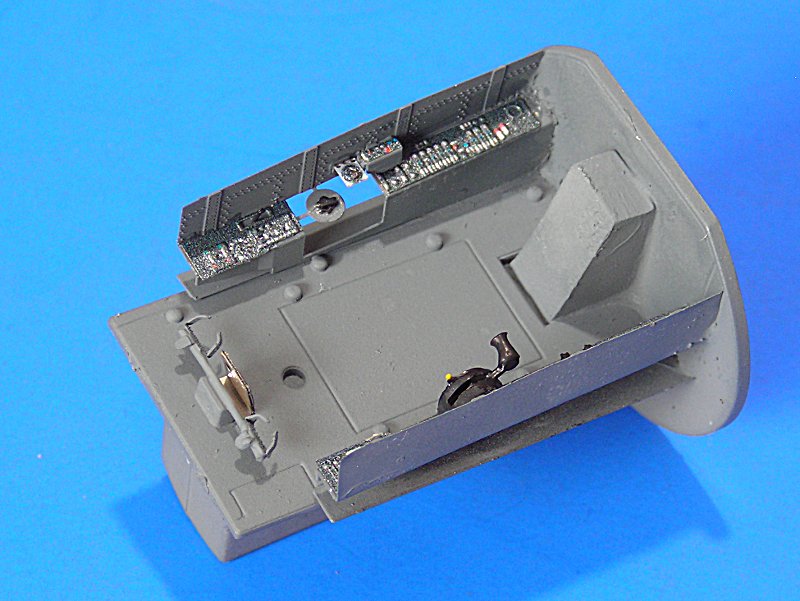
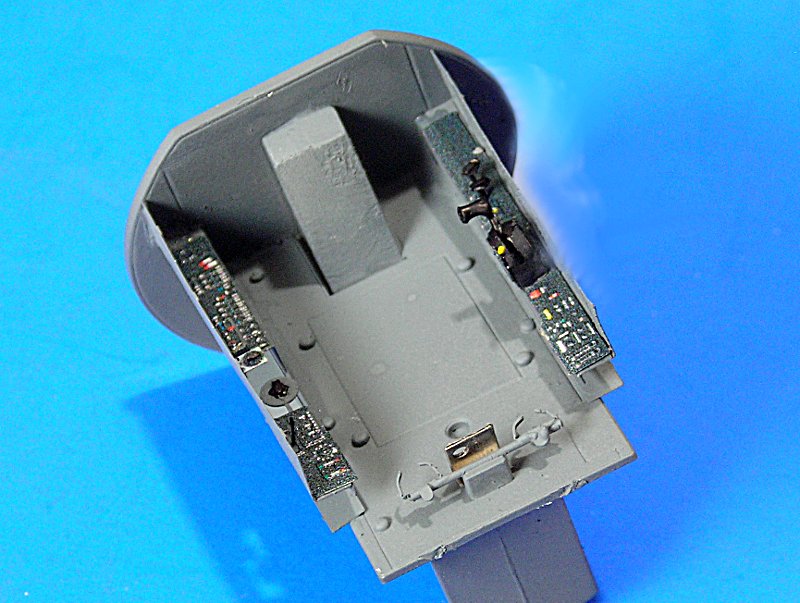
I also managed to add ssome more PE in the cockpit. As many will know this is something I do not really like to build ... and sometimes it shows. I'll keep this area pretty much oob.
all the best
Steffen
DULCE ET DECORUM EST PRO HOBBY MORI
Merlin
 Senior Editor
#017
United Kingdom
Joined: June 11, 2003
KitMaker: 17,582 posts
AeroScale: 12,795 posts
Posted: Sunday, March 28, 2010 - 03:56 AM UTC
Hi Steffen
Looking good. I must admit I know very little about postwar Soviet aircraft, but I always associate a sort of turquoise colour with the cockpits - was the Su-7's grey?
All the best
Rowan

BEWARE OF THE FEW...
As I grow older, I regret to say that a detestable habit of thinking seems to be getting a hold of me. - H. Rider Haggard
Germany
Joined: September 07, 2005
KitMaker: 5,609 posts
AeroScale: 5,231 posts
Posted: Sunday, March 28, 2010 - 04:22 AM UTC
Hi Rowan
the colour is correct maybe slightly on "the dark side", but o.k. I used Tamiya Neutral Grey. The green was introduce during the 1970ies (IIRC)...
all the best
Steffen
DULCE ET DECORUM EST PRO HOBBY MORI
Merlin
 Senior Editor
#017
United Kingdom
Joined: June 11, 2003
KitMaker: 17,582 posts
AeroScale: 12,795 posts
Posted: Sunday, March 28, 2010 - 04:49 AM UTC
Hi again
Cool - I just thought I'd better check before you go too far. I always pitied Soviet pilots having to face that weird colour - not my idea of an ideal working environment...
All the best
Rowan

BEWARE OF THE FEW...
As I grow older, I regret to say that a detestable habit of thinking seems to be getting a hold of me. - H. Rider Haggard
Germany
Joined: September 07, 2005
KitMaker: 5,609 posts
AeroScale: 5,231 posts
Posted: Sunday, March 28, 2010 - 10:03 PM UTC
Hi all
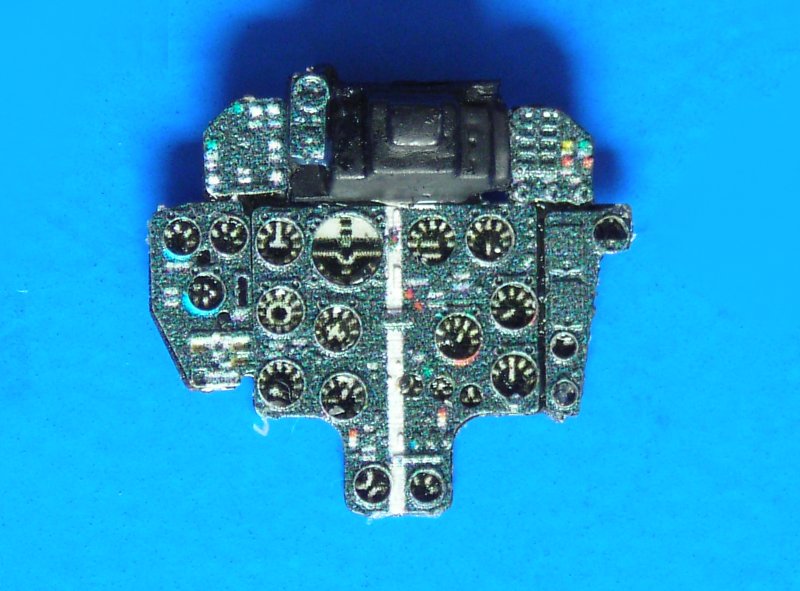
After glueing the tub to one fuselage half I turned to the dash .... it is not really fair to make such photos of so little parts, because the grainy surface is hugely overexposed. and yes I slightly misplaced the panels, but I still think it is o.k.
all the best
Steffen
P.S. Rowan just posted an English review to this very site.
DULCE ET DECORUM EST PRO HOBBY MORI
Germany
Joined: September 07, 2005
KitMaker: 5,609 posts
AeroScale: 5,231 posts
Posted: Monday, March 29, 2010 - 12:03 AM UTC
Hi Again
I just glued in the rhs upper console and attached the instrument panel to it (as per instructions). When this was strong enough I glued the whole fuselage together. The engine exhaust was already glued in for a few days and the fit improved and the nose was mounted yesterday so I could focus on the best possible fit to avoid putty ...
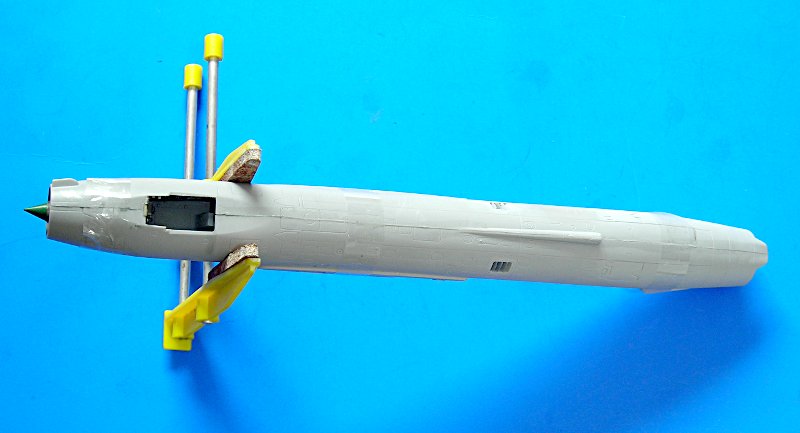
The line you see in the picture is not a step but oozed out plastic/glue .. hope this will help getting rid of the seam.
all the best
Steffen
DULCE ET DECORUM EST PRO HOBBY MORI
Västra Götaland, Sweden
Joined: February 23, 2005
KitMaker: 820 posts
AeroScale: 629 posts
Posted: Monday, March 29, 2010 - 12:05 AM UTC
Quoted Text
There's some great subject matter for future Campaigns - have we ever done an African air forces, for instance?
[ ]
@ Rowan - There has indeed been an African campaign ("Siya Africa") back in them olden days when all models sorted under "armorama". I participated with a shiny Ethiopian Saab B 17. I would love have another go at the continent. Maybe an Egyptian Suchoi 7??? Always wanted to build some adversaries to my Israeli fleet!
I'll be watching this build closely, Steffen!
Cheers! // PolarBear

Germany
Joined: September 07, 2005
KitMaker: 5,609 posts
AeroScale: 5,231 posts
Posted: Monday, March 29, 2010 - 12:48 AM UTC
Quoted Text
I'll be watching this build closely, Steffen!
Thank you, Björn! It is fun so far and the "sand & spinach" camo should look good too (even if I originally wanted the Nile Valley scheme)...
all the best
Steffen
DULCE ET DECORUM EST PRO HOBBY MORI
Germany
Joined: September 07, 2005
KitMaker: 5,609 posts
AeroScale: 5,231 posts
Posted: Monday, March 29, 2010 - 07:59 AM UTC
Just a bump to prevent this is being pushed on page two of LP
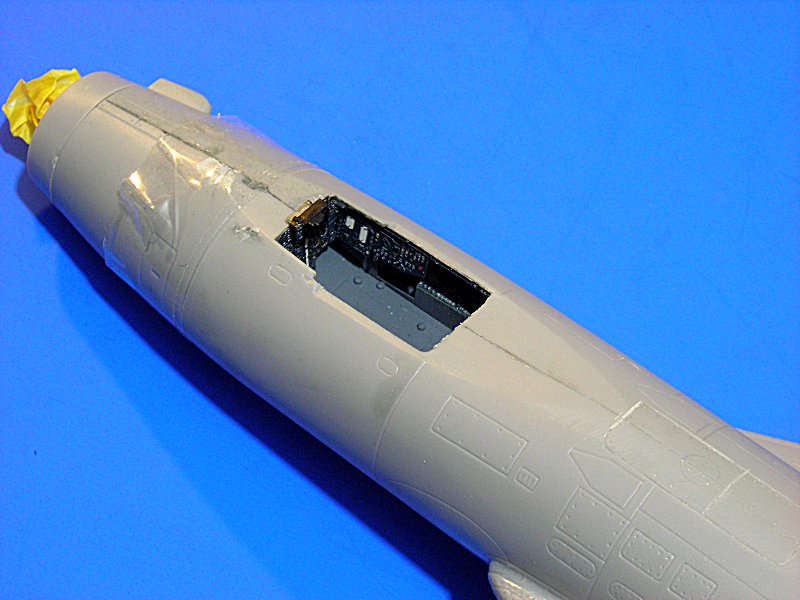
BTW it is difficult to get the wings straight without the rudderfin and vice versa too .... and to make it all look good together is a 4-dimensional problem

all the best
Steffen
DULCE ET DECORUM EST PRO HOBBY MORI
AussieReg
 Associate Editor
#007
Victoria, Australia
Joined: June 09, 2009
KitMaker: 8,156 posts
AeroScale: 3,756 posts
Posted: Monday, March 29, 2010 - 08:09 AM UTC
Quoted Text
.... and to make it all look good together is a 4-dimensional problem 
all the best
Steffen
Just the type of challenge we all love, right Steffen ?

Really nice work so far, I'm enjoying watching this build.
Cheers, D
ON the bench
Revell 1/24 '53 Corvette (building as '54)
Revell 1/24 BMW 507 Coupe and Cabrio
Italeri 1/48 Me262 B-1a/U1 Nightfighter
Monogram 1/24 '57 Chevy Nomad
Dragon 1/350 USS Frank Knox DD-742
Germany
Joined: September 07, 2005
KitMaker: 5,609 posts
AeroScale: 5,231 posts
Posted: Monday, March 29, 2010 - 08:23 AM UTC
Many thanks, Damian!
Quoted Text
Just the type of challenge we all love, right Steffen ? 
There must be a line between a challenge, masochism and insanity ... I do not think I would notice it

This project is faar more fun and much more straight forward, than I expected ... but better not praise the day before the evening ( just a translated German saying, not sure if it is valid in English too

)
cheers
Steffen
P.S. those of you that think about buying this kit (and the Quickboost scoops), maybe also want to check the wheels set by Resin Art. ...Hope to get that soon.
http://www.cmrmodels.co.uk/Resin-Art/4904.htmlDULCE ET DECORUM EST PRO HOBBY MORI
Florida, United States
Joined: July 29, 2008
KitMaker: 430 posts
AeroScale: 5 posts
Posted: Monday, March 29, 2010 - 09:41 AM UTC
but back on topic .... I do a bit of filling and sanding at the moment, as the speed brakes don't fit at all and I want them closed...

all the best
Steffen[/quote]
Steffen, I like closed airbrkes myself, but usually am unhappy with the result of closing them and trying to re-scribe.
A better idea may be to sand them flush them make a tape "mask" around the perimeter of the brake leaving it exposed and the surrounding plastic covered.
You then spray some paint onto the mask and slowly build up the paint so when the mask is removed you have nice clean edges and a nicely defined edge. The new (paint) airbrake will be slightly higher than the surrounding plastic, but it is a good trade off for nice tight edges.
Ryan
Merlin
 Senior Editor
#017
United Kingdom
Joined: June 11, 2003
KitMaker: 17,582 posts
AeroScale: 12,795 posts
Posted: Monday, March 29, 2010 - 10:06 AM UTC
Hi Steffen
Excellent progress - it's really coming together.

Ryan - that's a great tip. I'll certainly remember it for future builds.

All the best
Rowan

BEWARE OF THE FEW...
As I grow older, I regret to say that a detestable habit of thinking seems to be getting a hold of me. - H. Rider Haggard
Florida, United States
Joined: July 29, 2008
KitMaker: 430 posts
AeroScale: 5 posts
Posted: Monday, March 29, 2010 - 10:22 AM UTC
Happy to help Rowan.
You have to pick your battles when modeling! Usually kits that have positionable panels are not ment to be shown closed....they almost never fit right! After being frustrated myself with trying to rescribe them I came across this tip some where I don't remember.
Ryan
Germany
Joined: September 07, 2005
KitMaker: 5,609 posts
AeroScale: 5,231 posts
Posted: Monday, March 29, 2010 - 08:57 PM UTC
Hello ryan
many thanks for the hint, though that method does not fit my "working style". I do not mind that the edges look a bit wobbly .. it is just wear and tear. If I had planned a little ahead I would have made new ones from plastic sheet that fit better....

Rowan: yes it is comming together but still a loooong way to go.
Here is how the plane looks now. I did not really nail the angles, but for now it looks acceptable. We will really see it when the u/c is on. I need to fill a bit under the lhs rudderfin and wing root ... but all in all not much. Of course I put some work into the fit before I attached the parts! ---- especially the fin as a slightly upward angled part would never sit flush to a downward curved fuselage so better sand some plastic before you glue and you will save a lot of filler.
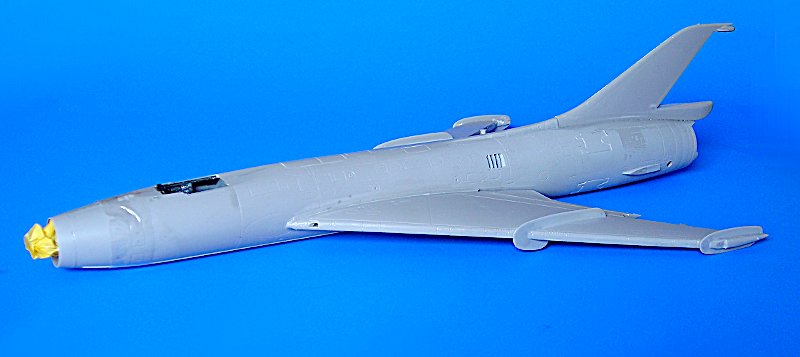
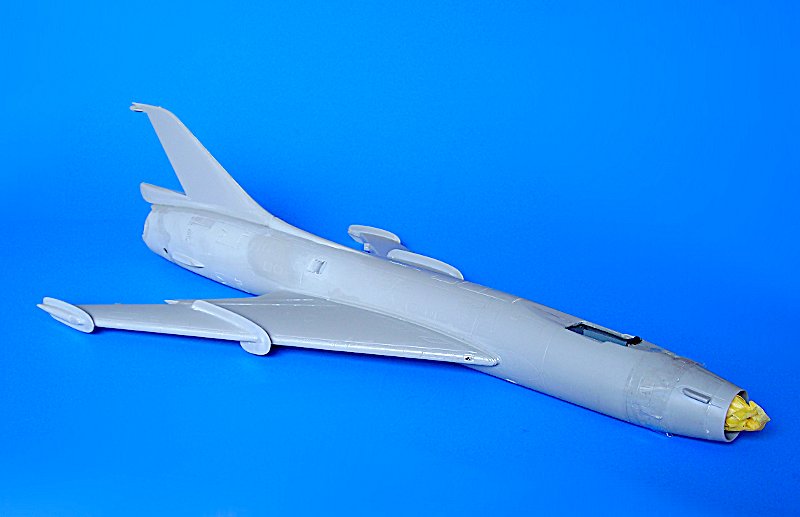
Ahh and the lhs fin part is a short shot. There is a bit material missing at the front, but it is not much and an easy fix.
all the best
Steffen
DULCE ET DECORUM EST PRO HOBBY MORI
Joined: December 23, 2007
KitMaker: 1,596 posts
AeroScale: 1,275 posts
Posted: Monday, March 29, 2010 - 11:24 PM UTC
In this pace you're gonna clear your stash before summer holiday...


