Florida, United States
Joined: January 14, 2009
KitMaker: 2,798 posts
AeroScale: 2,443 posts
Posted: Thursday, April 22, 2010 - 01:13 PM UTC
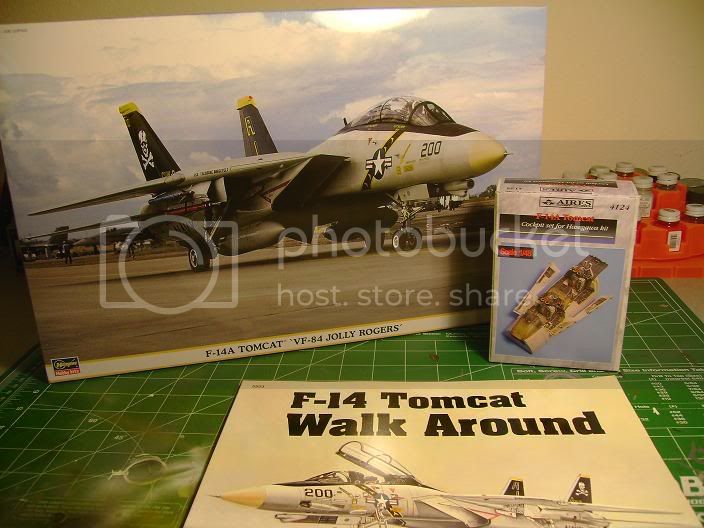
Well I am starting this because im to excited to not rip through the box and go nuts.I know everybody has seen the VF-84 but this will be mine and my first attempt at a few things Ive picked up so lets start.
I'll be building:
Hasegawa kit#09776 F-14A "VF-84 Jolly Rogers"in 1/48
1/48 Aires resin cockpit
1/48 eduard cockpit Pe and Gruz7 Pe sets
Hope you enjoy
Build On,
Justin

"From time to time, the tree of liberty must be watered with the blood of
tyrants and patriots."
- Thomas Jefferson
IPMS#47611
Florida, United States
Joined: January 14, 2009
KitMaker: 2,798 posts
AeroScale: 2,443 posts
Posted: Thursday, April 22, 2010 - 03:30 PM UTC
Work done tonight first I had to trim the aires cockpit and get it ready...
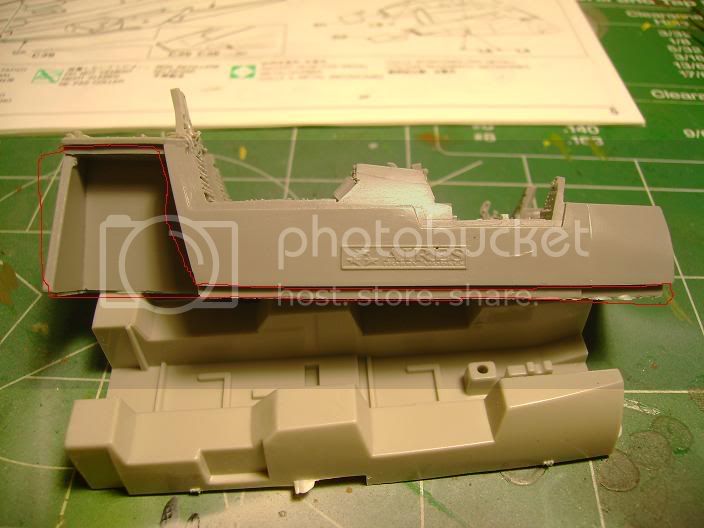
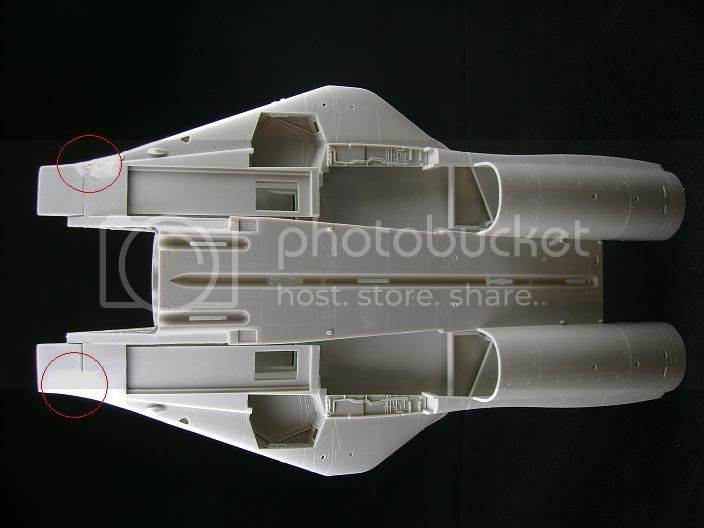
I then modified the kit halfs which had some flash and it look's like the mold is starting to show its age around the wheel well as this area is poorly molded and required sanding to get it right and tip top.The red indicates the areas that I had to remove or modify for the Aires cockpit to fit snuggly...
Here is the compleated modification.I will let the cockpit sit in soapy water tonight and begin painting soon.Thanks for Looking

Build On,
Justin
"From time to time, the tree of liberty must be watered with the blood of
tyrants and patriots."
- Thomas Jefferson
IPMS#47611
North Carolina, United States
Joined: November 28, 2005
KitMaker: 2,216 posts
AeroScale: 1,080 posts
Posted: Friday, April 23, 2010 - 02:31 PM UTC
Dude, you're a machine. Slow down a little so I can keep up with this one.

Hermon

"Those who would give up Essential Liberty
to purchase a little Temporary Safety,
deserve neither Liberty nor Safety."
Benjamin Franklin
Florida, United States
Joined: January 14, 2009
KitMaker: 2,798 posts
AeroScale: 2,443 posts
Posted: Saturday, April 24, 2010 - 04:31 PM UTC
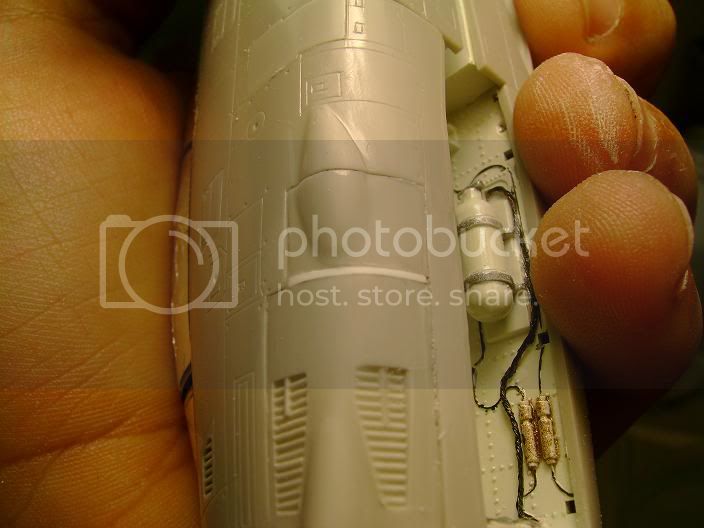
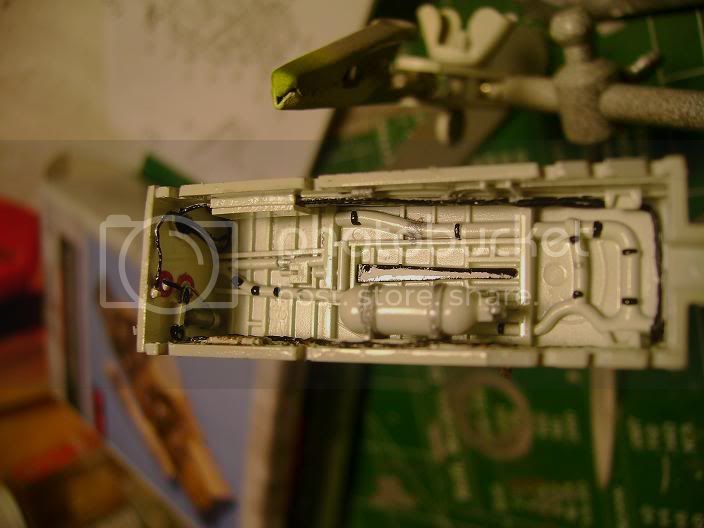
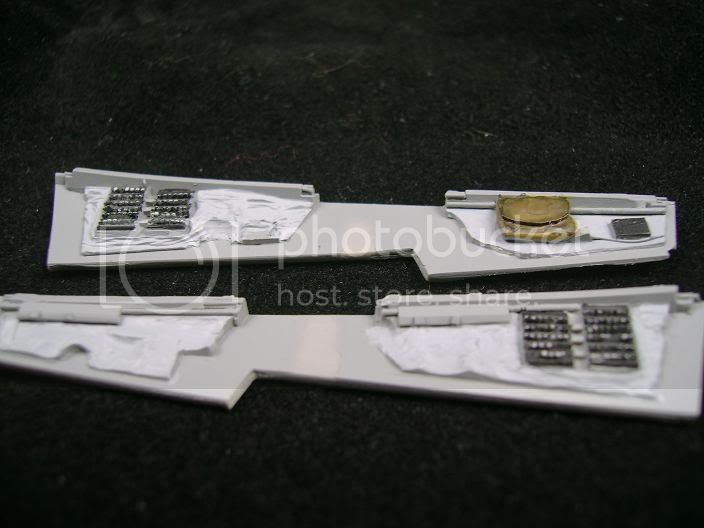
Well I got a little done today.cleaned out nose so aires cockpit would fit in the front deck.Started working on the front gear well. Hasegawas was a little lacking on detail so I scratch built my own front bulkhead and will start on the port side tomorrow.First pic is Hasegawas for comparison It was strange but for some reason there was a bottle on theres which isnt in any of my referance pics .........
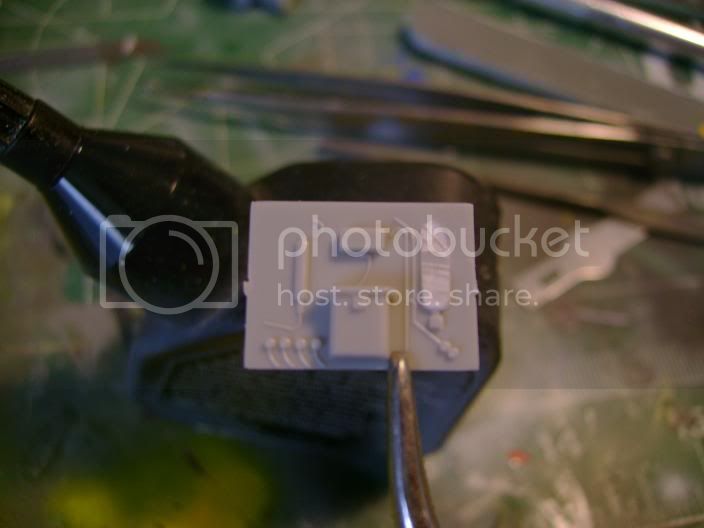
The long wires will run down the sides to various other components I will add.
@Cuda dont worry this isnt one of my speed builds this is going to take a while. this will be my most detailed model yet.Besides I had do something waiting for your campaign to roll around

Build On,
Justin
"From time to time, the tree of liberty must be watered with the blood of
tyrants and patriots."
- Thomas Jefferson
IPMS#47611
Florida, United States
Joined: January 14, 2009
KitMaker: 2,798 posts
AeroScale: 2,443 posts
Posted: Sunday, April 25, 2010 - 03:32 AM UTC
I would like to correct myself apparently my referance was for a F-14D and I will be scrapping that work and starting over.And I now know where the bottle came from.

Build On,
Justin
"From time to time, the tree of liberty must be watered with the blood of
tyrants and patriots."
- Thomas Jefferson
IPMS#47611
Illinois, United States
Joined: February 01, 2006
KitMaker: 853 posts
AeroScale: 137 posts
Posted: Sunday, April 25, 2010 - 04:49 AM UTC
Murphy's Law strikes us all.
Keep up the excellent post Justin.

Si Vis Pacem, Parabellum - If you want peace, Prepare for war.
Democracy - two wolves and a sheep voting on what to have for lunch.
Liberty - two wolves and a sheep with an assault rifle.
Florida, United States
Joined: January 14, 2009
KitMaker: 2,798 posts
AeroScale: 2,443 posts
Posted: Sunday, April 25, 2010 - 06:16 AM UTC
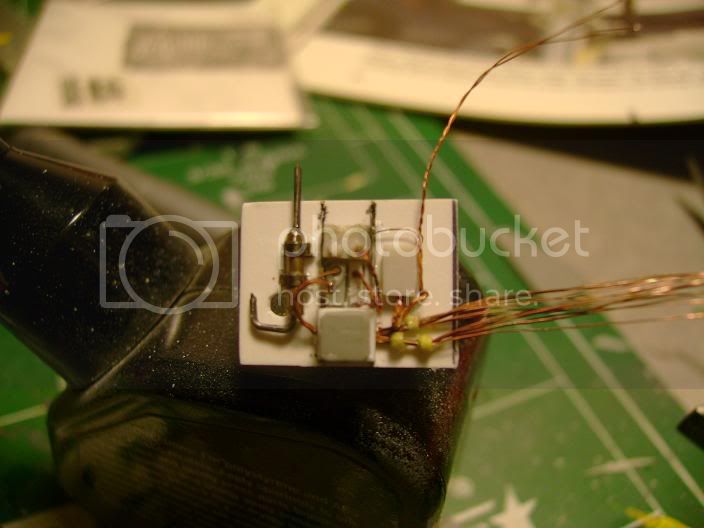
corrected bulkhead

as you can see the"A"didnt have anti-skid box or power brake mod.here.
Build On,
Justin
"From time to time, the tree of liberty must be watered with the blood of
tyrants and patriots."
- Thomas Jefferson
IPMS#47611
Florida, United States
Joined: January 14, 2009
KitMaker: 2,798 posts
AeroScale: 2,443 posts
Posted: Monday, April 26, 2010 - 01:03 PM UTC
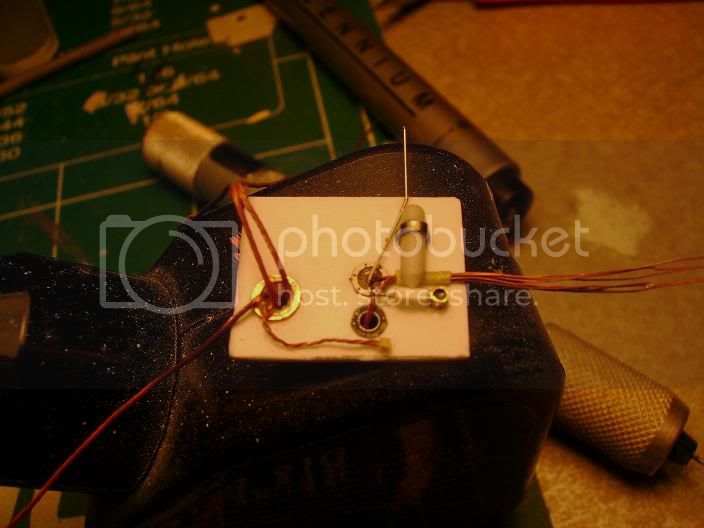
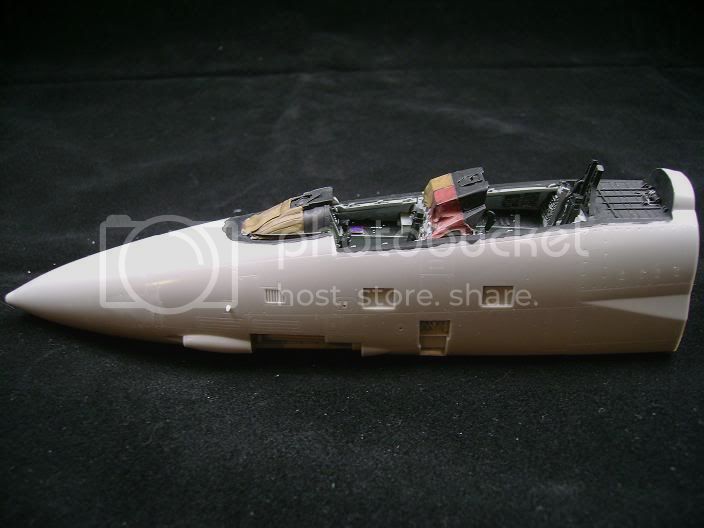
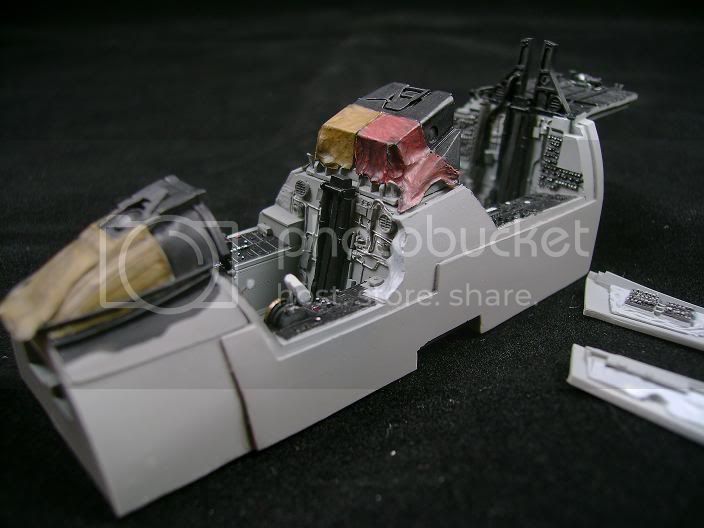
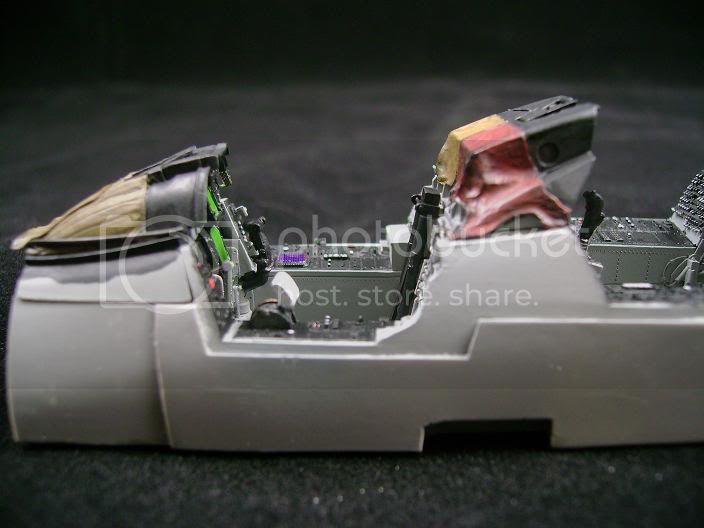
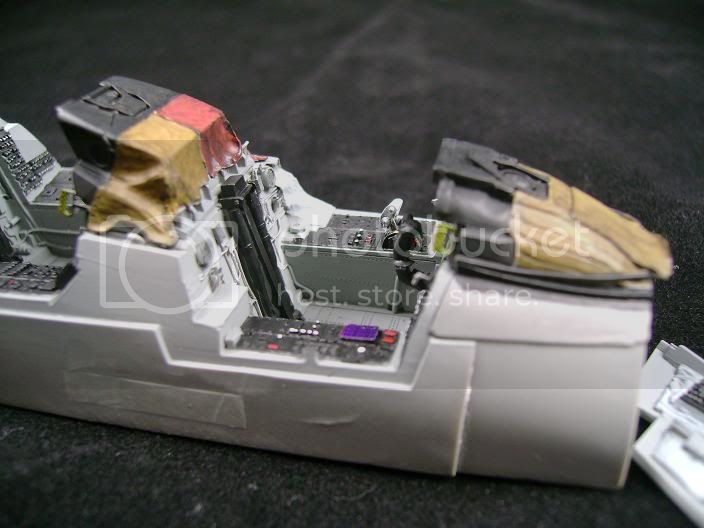
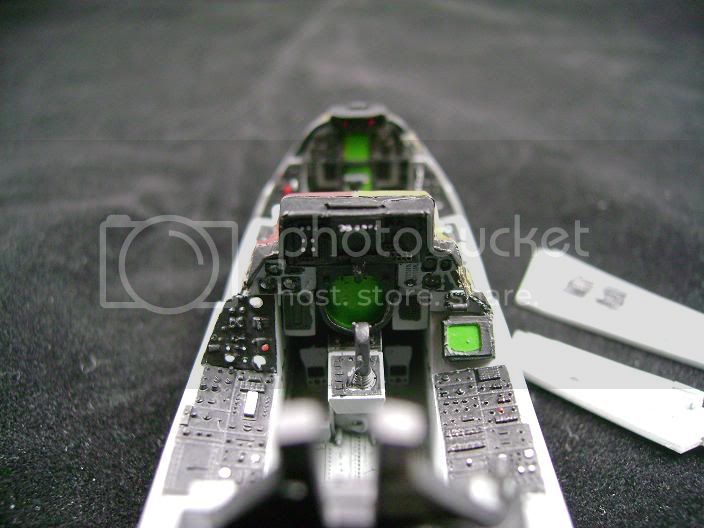
Heres some more progress from last night.I have compleated the nose gear well and will start to paint the cocpit tonight .thanks for looking.
Painted everything in white acryls and then added details.Afterwards I sprayed everything with clear gloss much easier this way as gloss white dosnt seem to spray well for me.
Build On,
Justin
"From time to time, the tree of liberty must be watered with the blood of
tyrants and patriots."
- Thomas Jefferson
IPMS#47611
Florida, United States
Joined: January 14, 2009
KitMaker: 2,798 posts
AeroScale: 2,443 posts
Posted: Wednesday, April 28, 2010 - 06:31 AM UTC
"From time to time, the tree of liberty must be watered with the blood of
tyrants and patriots."
- Thomas Jefferson
IPMS#47611
New York, United States
Joined: January 29, 2004
KitMaker: 3,836 posts
AeroScale: 1,036 posts
Posted: Wednesday, April 28, 2010 - 04:43 PM UTC
She's really looking good, love the cockpit painting and detail work. One of these days I need to finish mine.
Happy Modeling,
Joe
It feels like bible camp
Only Im not crying pretending Im somewhere else.
Happy Modeling
Joe
New Jersey, United States
Joined: May 24, 2008
KitMaker: 346 posts
AeroScale: 307 posts
Posted: Wednesday, April 28, 2010 - 05:02 PM UTC
Looks great. I can't wait to see more

#042
England - North East, United Kingdom
Joined: November 18, 2006
KitMaker: 2,828 posts
AeroScale: 1,720 posts
Posted: Thursday, April 29, 2010 - 12:52 AM UTC
Wow. This build sure is inspiring.
I like the fact the you noticed that the canvas cover on the RIO's instruments are normally two different colours, not many people pick up on this

I must clear my bench and finish the one I started many moons ago (I think I got to the decalling stage)
Keep up the good work
Modellers Creed: This is my toolbox. There are many like it, but this one is mine. My toolbox is my best friend. It is my life. I must master it as I must master my life. My toolbox, without me, is useless. Without my toolbox, I am useless.
Florida, United States
Joined: January 14, 2009
KitMaker: 2,798 posts
AeroScale: 2,443 posts
Posted: Thursday, April 29, 2010 - 03:16 AM UTC
Thanks guys I will post pics of last night's progress tonight.It might take less time to build this than I thought.
It will make a nice adition to my collection not having a F-14.
But I see many more coming and I will be ordering the Aires cockpit for my A-10 when the Ground support campaign rolls around.Being my first time using one the detail is just amazing.
Build On,
Justin
"From time to time, the tree of liberty must be watered with the blood of
tyrants and patriots."
- Thomas Jefferson
IPMS#47611
North Carolina, United States
Joined: November 28, 2005
KitMaker: 2,216 posts
AeroScale: 1,080 posts
Posted: Thursday, April 29, 2010 - 08:02 AM UTC
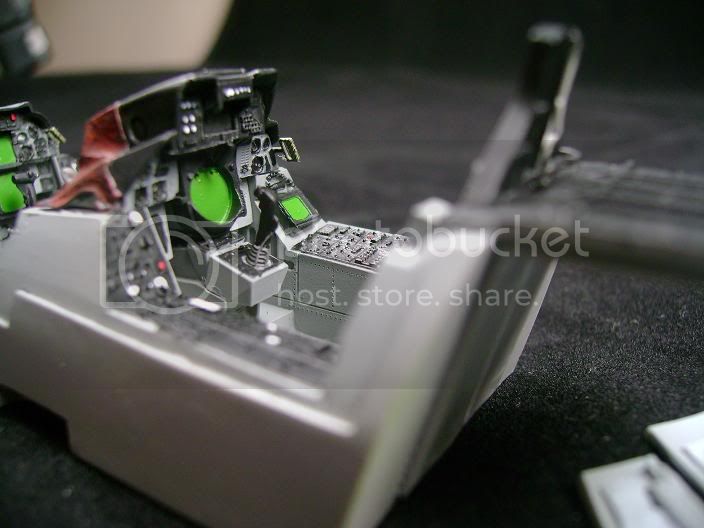
Looks amazing Justin! If I may make one small suggestion....on the radar screen try painting it silver, then when it's dried coat it with some Tamiya clear green and finish it off with a drop of Future. This will give it a super realistic look and more depth. That's just a suggestion, keep in mind I think what you've done to this point is an A++.
Hermon
"Those who would give up Essential Liberty
to purchase a little Temporary Safety,
deserve neither Liberty nor Safety."
Benjamin Franklin
Florida, United States
Joined: January 14, 2009
KitMaker: 2,798 posts
AeroScale: 2,443 posts
Posted: Thursday, April 29, 2010 - 01:55 PM UTC
Thanks for the tip cuda I have some on order as we speak.Anything to improve my modeling skills I appreciate any and all input.
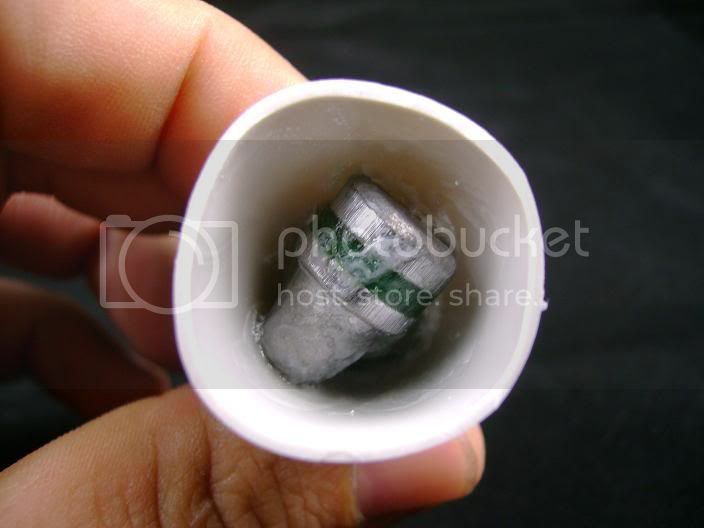
First off I installed .45 bullets in the nose and CA them in place and blasted that with some accelerator why because these are my weights and bullets of choice.The contours make them easy to fit in most noses and engine booms.....
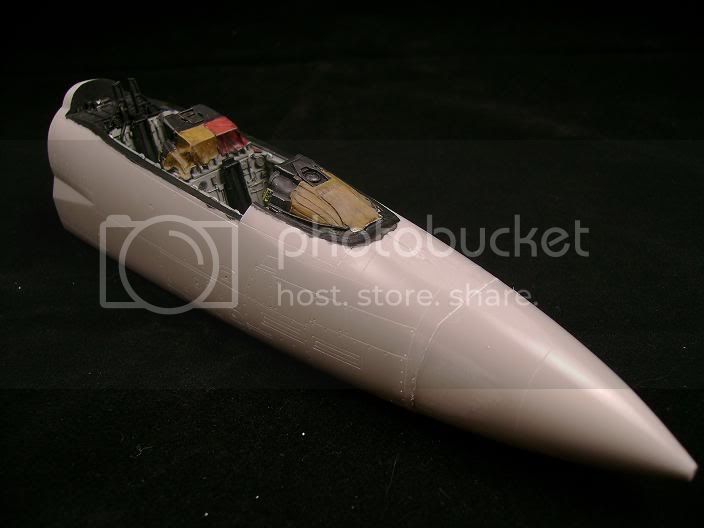
Here is the Aires cocpit sittig in the fusalage and ready to be cleaned up and installed onto the main body....
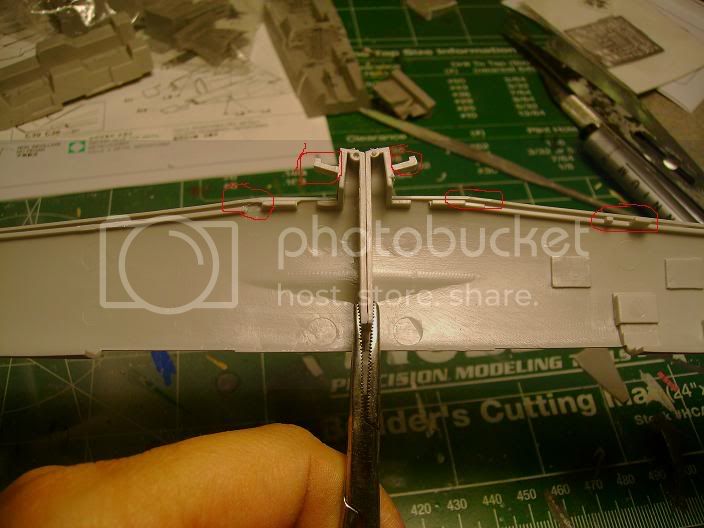
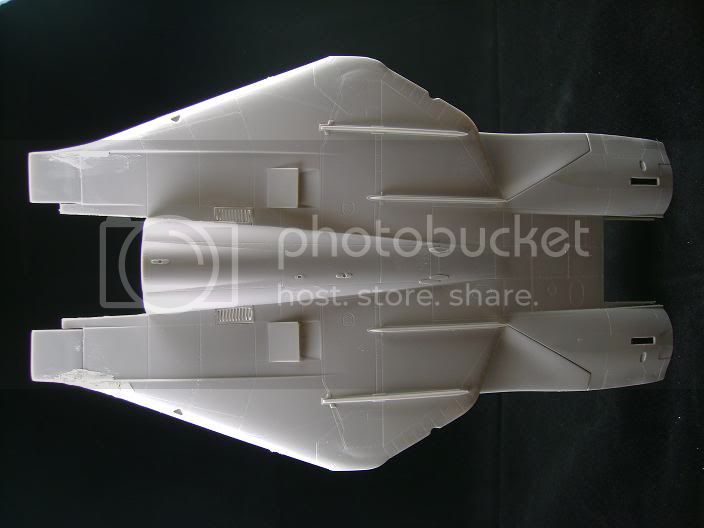
I then got a few of the rear wheel well parts installed and the two main body halfs joined together taped and let dry over night.The circles represent where I had to use some putty as the forward fins were molded in two seperate parts and my CORRECT referance's clearly show them as one...
More work tonight post pic's tommorrow..
Build On,
Justin
P.s.Thanks again cuda
"From time to time, the tree of liberty must be watered with the blood of
tyrants and patriots."
- Thomas Jefferson
IPMS#47611
Florida, United States
Joined: January 14, 2009
KitMaker: 2,798 posts
AeroScale: 2,443 posts
Posted: Sunday, May 02, 2010 - 04:35 AM UTC
Heres my next update.Have a lot done actually and have been snapping pictures along the way.Heres a few to keep you updated.....
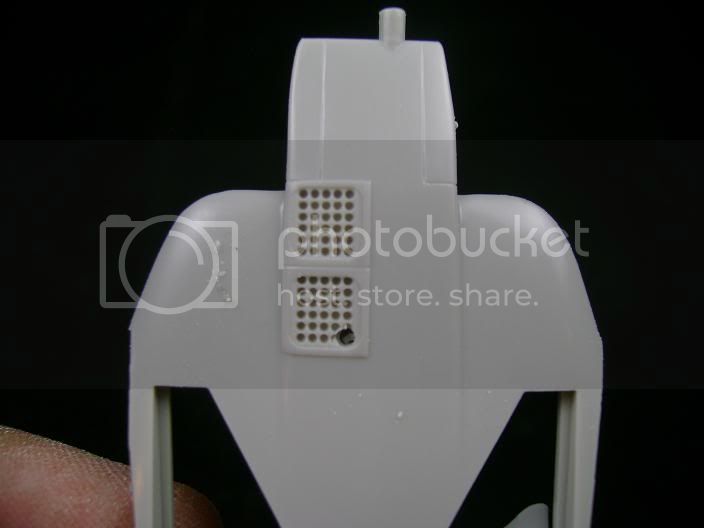
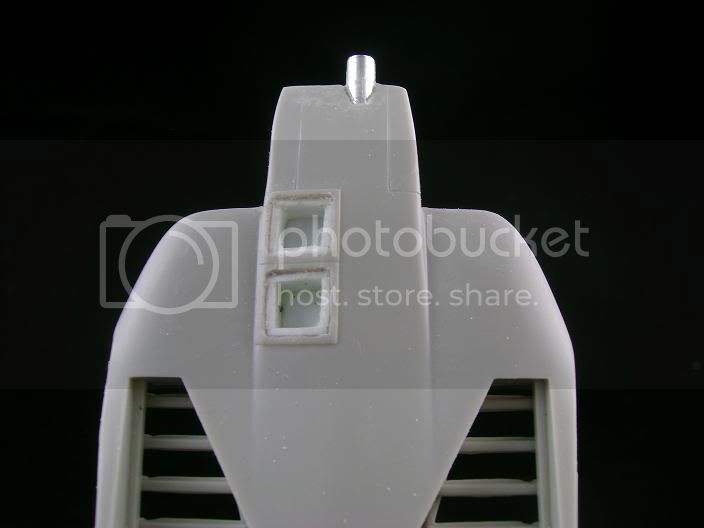
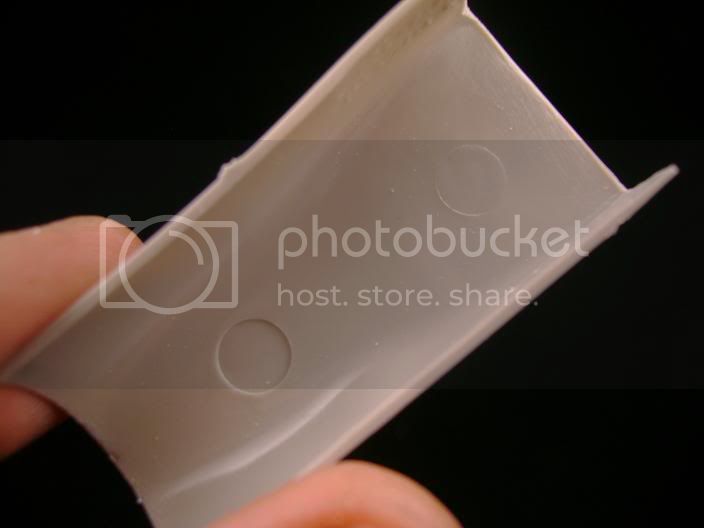
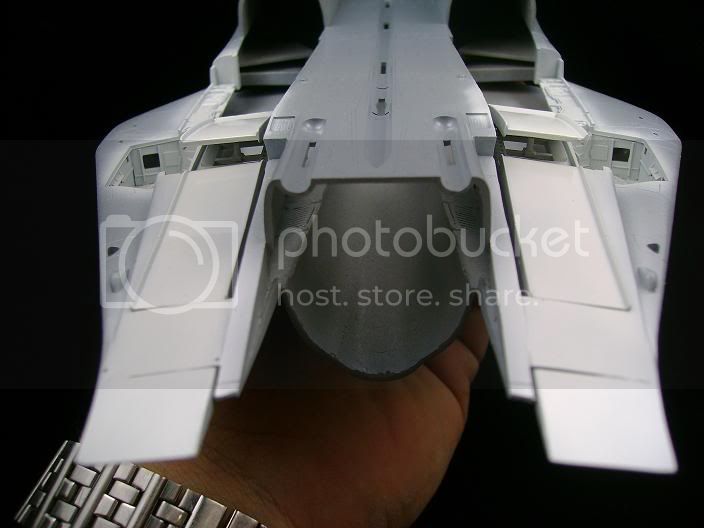
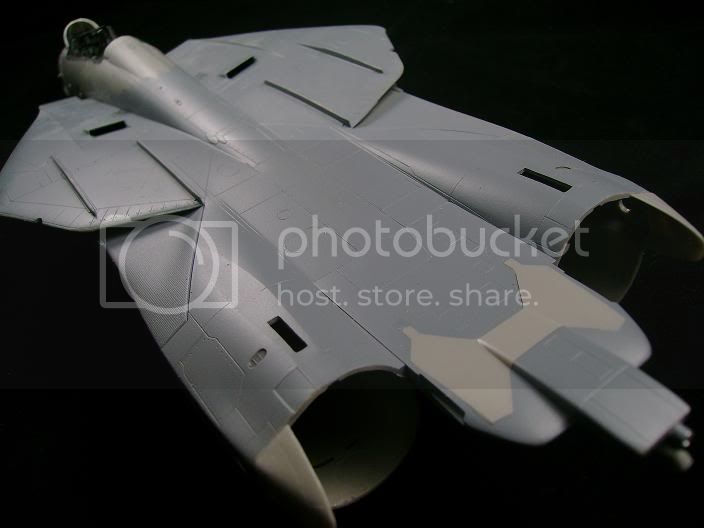
I looked at the boat tail and have read that they didnt install flare packs unless absolutely needed.So I removed mine and scratch built the openings which will be painted yellow later.I also removed the kit fuel releaf tube and installed a pc.of aluiminum tube that I flared at the end for more realism....
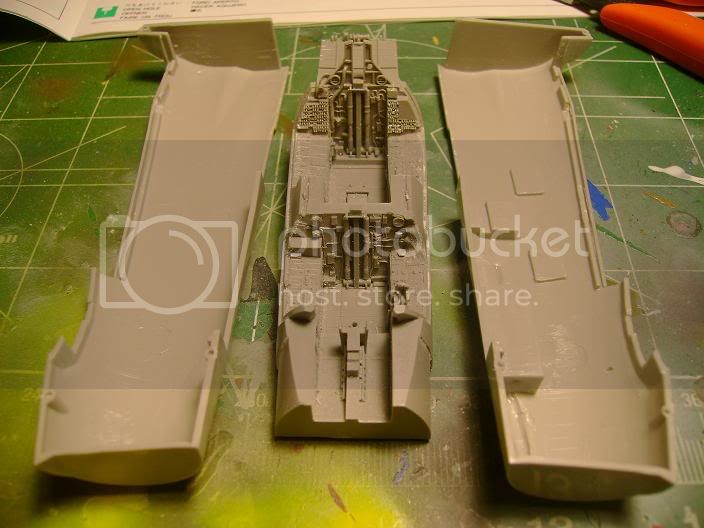
Next I started working on seam lines and and rescribing and the air intakes.Im currently in the process of making the intakes seamless and getting them ready to install.They didnt make it easy though.this is what I had to deal with...
Post more progress soon thanks for looking.
Build On,
Justin
"From time to time, the tree of liberty must be watered with the blood of
tyrants and patriots."
- Thomas Jefferson
IPMS#47611
Florida, United States
Joined: January 14, 2009
KitMaker: 2,798 posts
AeroScale: 2,443 posts
Posted: Sunday, May 02, 2010 - 02:22 PM UTC
Here's an update since I have to wait for the glue to dry.
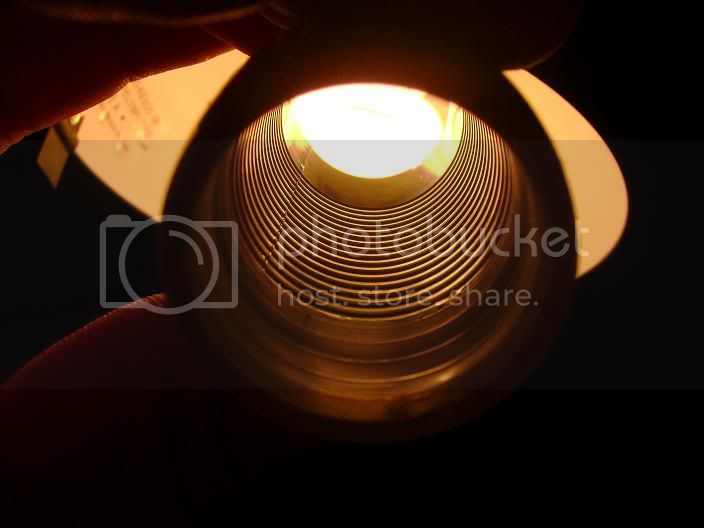
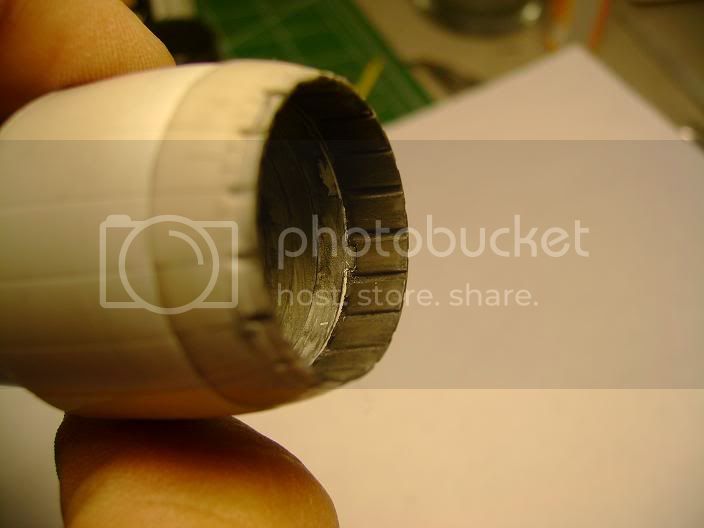
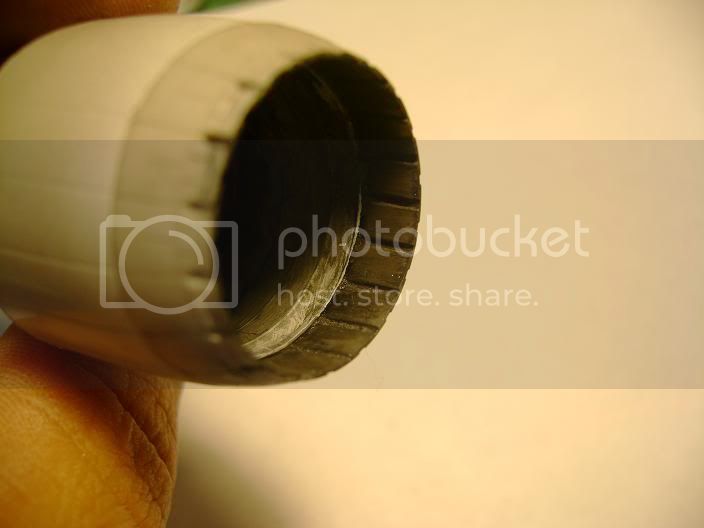
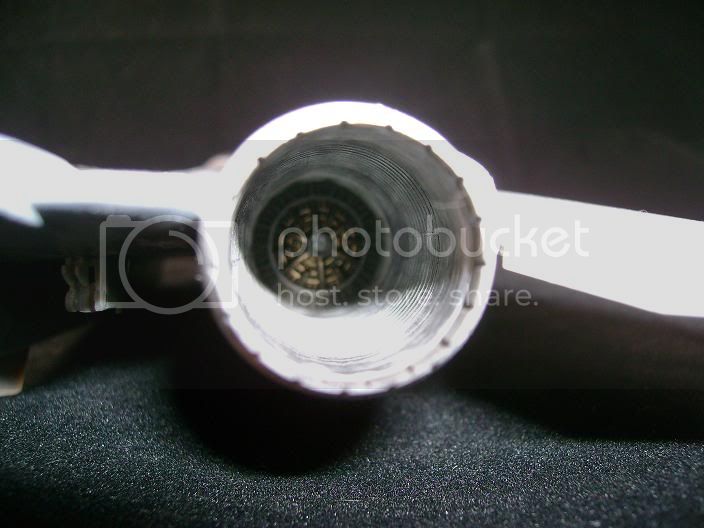
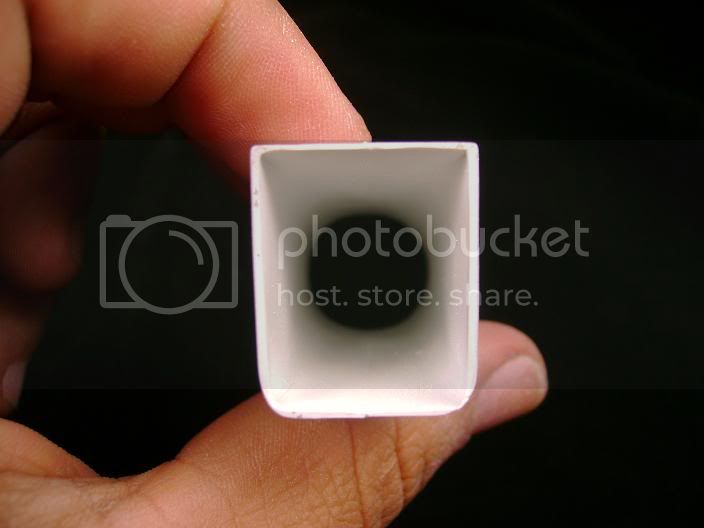
After sanding.....sanding....and yes more sanding I got the mold marks out of the intakes and glued together.I then sprayed in flat white and dipped in future.....To get this result....
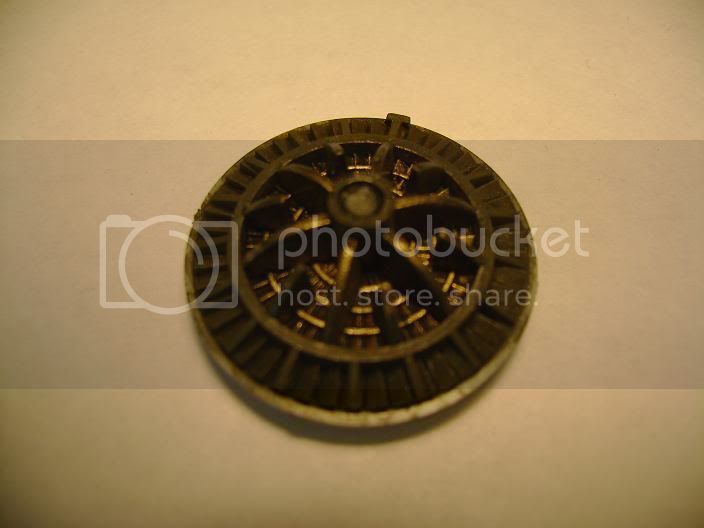
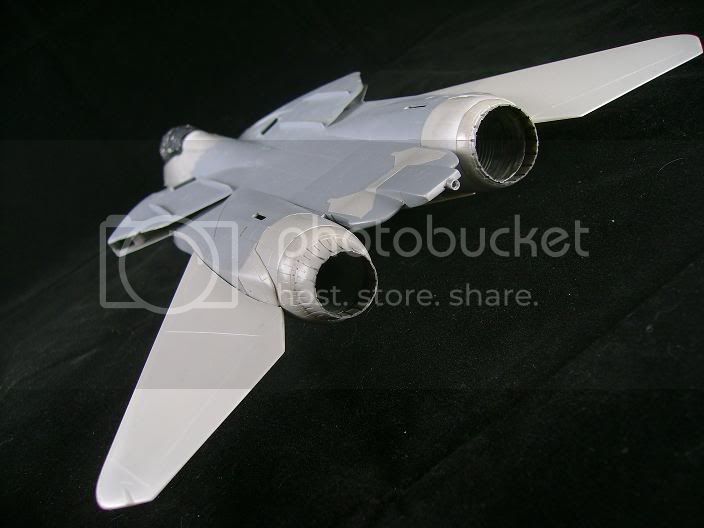
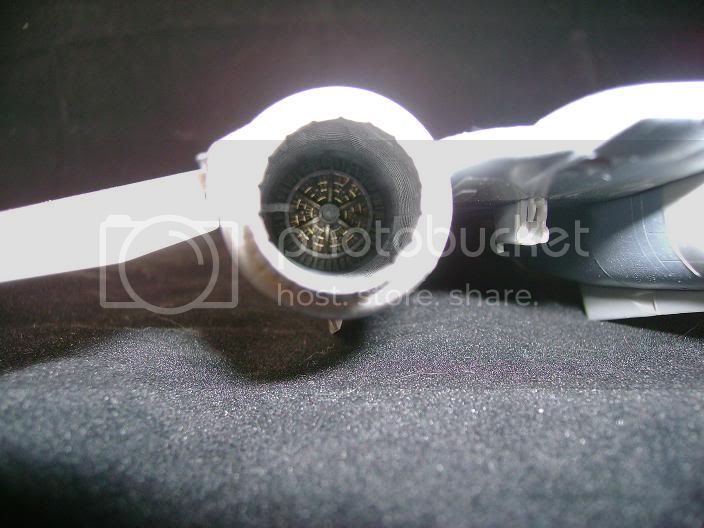
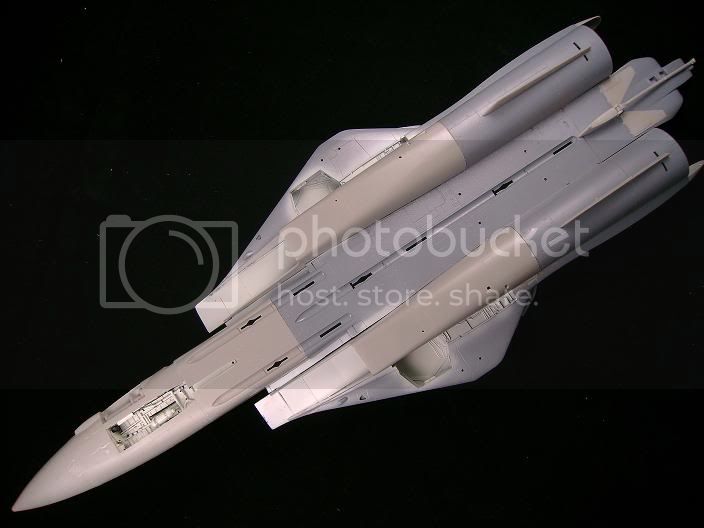
After being satisfied with the end result I painted up the intake fans first with aluiminum then a wash of tamiya gray metallic and then a wash of smoke to and installed in the intakes.....
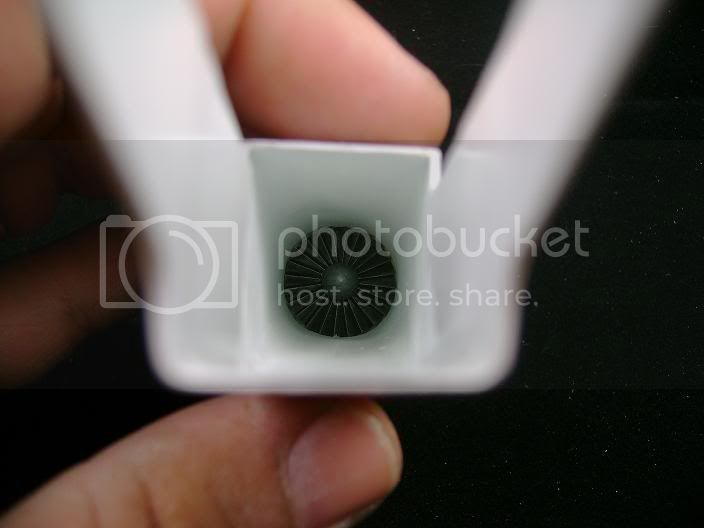
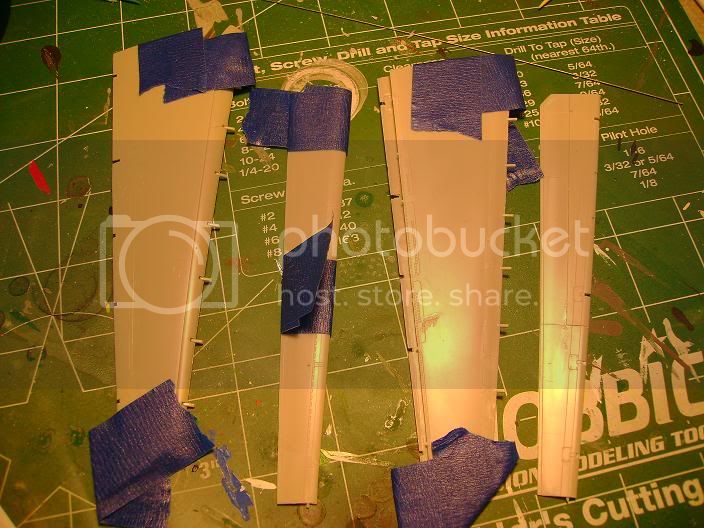
I also got the intake fins installed.Hasegawa has them set for when the plane is at supersonic speeds I adjusted since mine will look like its in pre-flight on the pad...
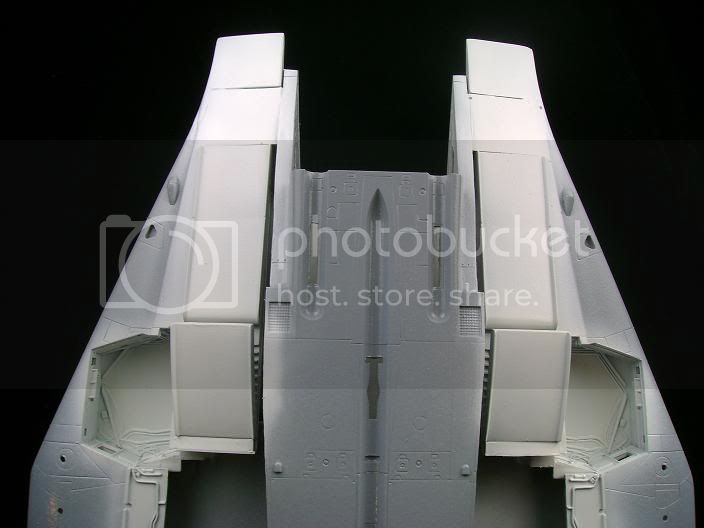
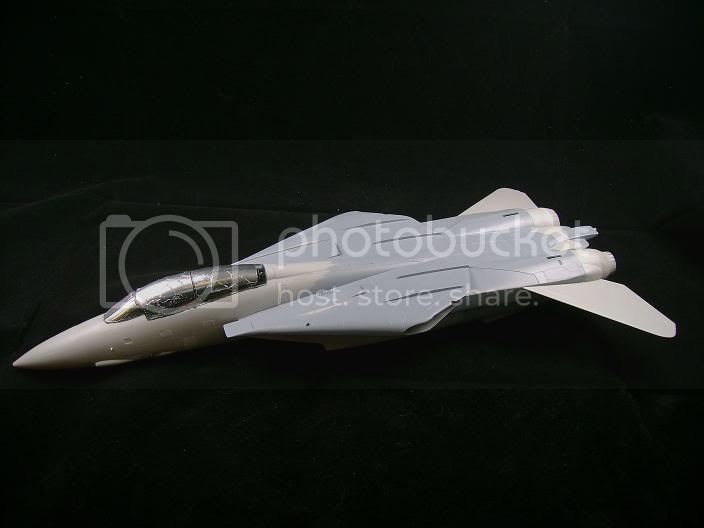
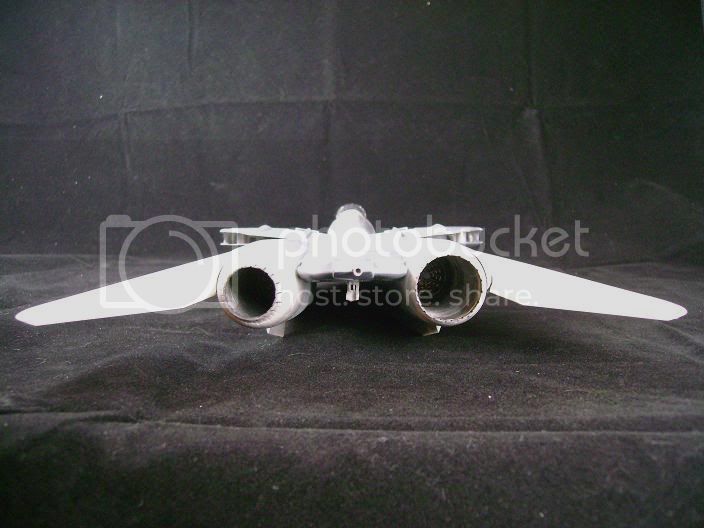
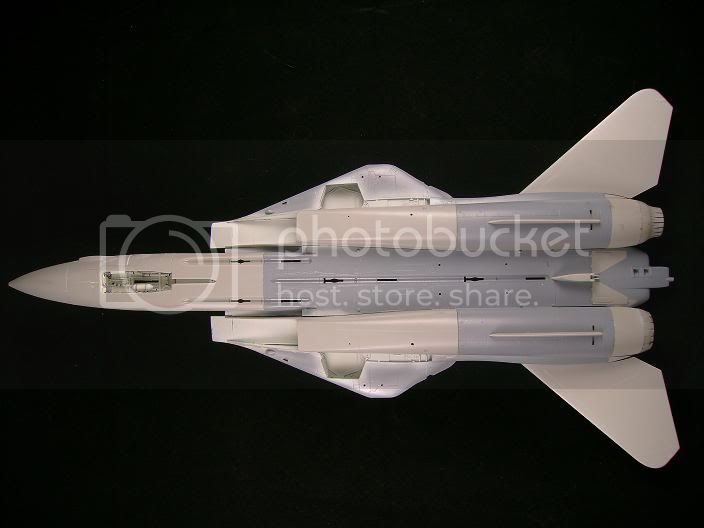
Then I installed the intakes onto the fusalage and discovered everything was going crazy all over the place so with out further ado I give you the monster I created....
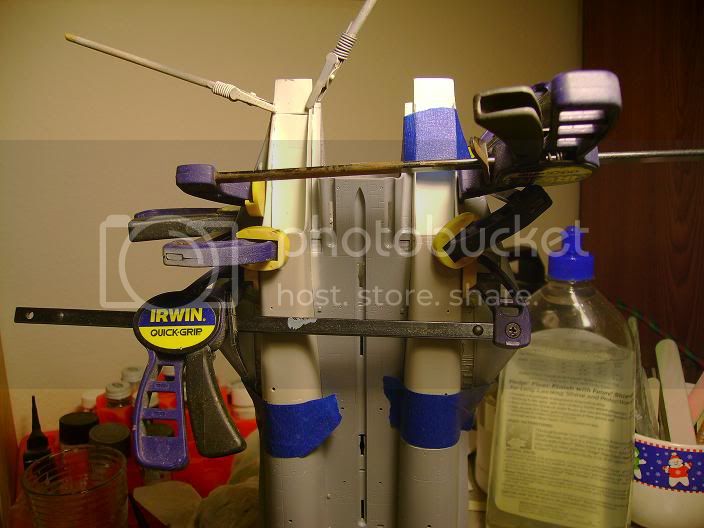
Crazy man crazy.....
Had to stop because that is definetly going to need to dry before I atempt to touch it.More later...
Build On,
Justin
"From time to time, the tree of liberty must be watered with the blood of
tyrants and patriots."
- Thomas Jefferson
IPMS#47611
North Carolina, United States
Joined: November 28, 2005
KitMaker: 2,216 posts
AeroScale: 1,080 posts
Posted: Wednesday, May 05, 2010 - 07:03 AM UTC
Looks a bit like an F-14 Ninja Transformer.
Still looking great though. Can't get over how nice those intake runners turned out. Please proceed!
Hermon
"Those who would give up Essential Liberty
to purchase a little Temporary Safety,
deserve neither Liberty nor Safety."
Benjamin Franklin
Florida, United States
Joined: January 14, 2009
KitMaker: 2,798 posts
AeroScale: 2,443 posts
Posted: Wednesday, May 05, 2010 - 09:25 AM UTC
Now that I look at it your right.I have a lot of clean up and rescribing to do as nothing fits properly.I attached the cockpit to the fusalge and got a few panels installed its drying behind me
it dosnt sit right either.I will post pic's later.Oh and I have to order missiles since they didnt include any

and there is no painting guide for the plane on the box just a few other squads like the Sundowners.Kinda the most expencive kit ive bought Besides the new Raptor and im let down.I will just stick with aftermarket decals from now on.
Build On,
Justin
"From time to time, the tree of liberty must be watered with the blood of
tyrants and patriots."
- Thomas Jefferson
IPMS#47611
Florida, United States
Joined: January 14, 2009
KitMaker: 2,798 posts
AeroScale: 2,443 posts
Posted: Wednesday, May 05, 2010 - 12:18 PM UTC
Alright progress pic's and I must correct my self I found the painting guide buried in the box my bad...

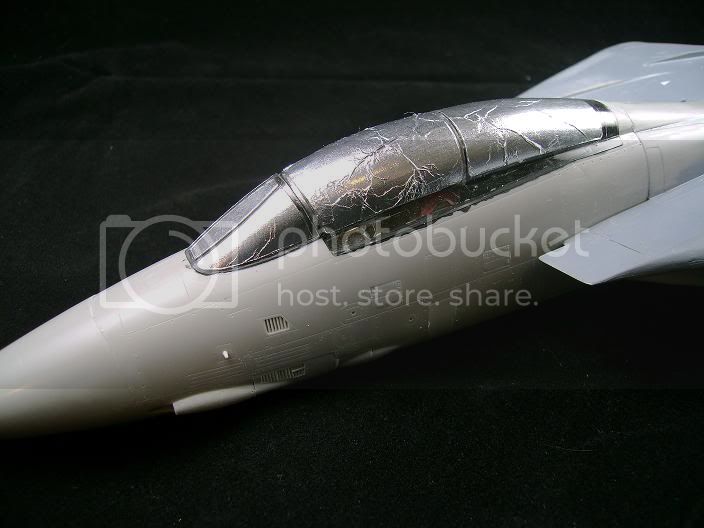
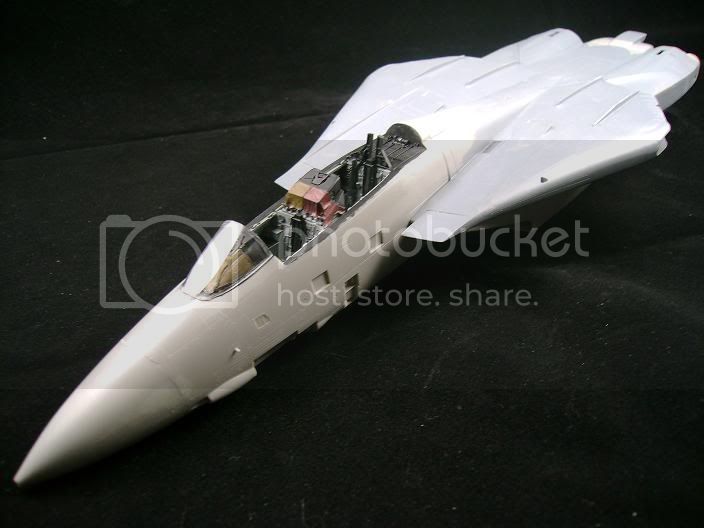
joined the fuselage with the cockpit and it has dried.I also mounted the front canopy and started work on the rear canopy removing the seam line down the center dipped it in future and is drying now.....
more soon...
Build On,
Justin
"From time to time, the tree of liberty must be watered with the blood of
tyrants and patriots."
- Thomas Jefferson
IPMS#47611
litespeed
 News Reporter
England - North West, United Kingdom
Joined: October 15, 2009
KitMaker: 1,976 posts
AeroScale: 1,789 posts
Posted: Friday, May 07, 2010 - 09:17 PM UTC
Hi Justin
Just found this thread and I have to say the tomcat is looking fantastic. Your doing justice to one of the best looking fighter aircraft ever produced.
tim
Florida, United States
Joined: January 14, 2009
KitMaker: 2,798 posts
AeroScale: 2,443 posts
Posted: Sunday, May 09, 2010 - 10:11 AM UTC
"From time to time, the tree of liberty must be watered with the blood of
tyrants and patriots."
- Thomas Jefferson
IPMS#47611
North Carolina, United States
Joined: November 28, 2005
KitMaker: 2,216 posts
AeroScale: 1,080 posts
Posted: Sunday, May 09, 2010 - 11:36 AM UTC
Nope, no questions. I'm just enjoying the show. You've made some really good progress and she's starting to take shape. I'm taking mental notes as you go so I'll know what to look for when I get around to building mine.
Great work!
Hermon
"Those who would give up Essential Liberty
to purchase a little Temporary Safety,
deserve neither Liberty nor Safety."
Benjamin Franklin
litespeed
News Reporter England - North West, United Kingdom
Joined: October 15, 2009
KitMaker: 1,976 posts
AeroScale: 1,789 posts
Posted: Sunday, May 09, 2010 - 12:37 PM UTC
Hi Justin
Great work so far, always enjoy seeing people problem solving. That cockpit looks stunning.
tim
Florida, United States
Joined: January 14, 2009
KitMaker: 2,798 posts
AeroScale: 2,443 posts
Posted: Sunday, May 09, 2010 - 12:57 PM UTC
Thanks guys,
Just a note Cuda none of the panals on the nose fit right
Build On,
Justin
"From time to time, the tree of liberty must be watered with the blood of
tyrants and patriots."
- Thomas Jefferson
IPMS#47611


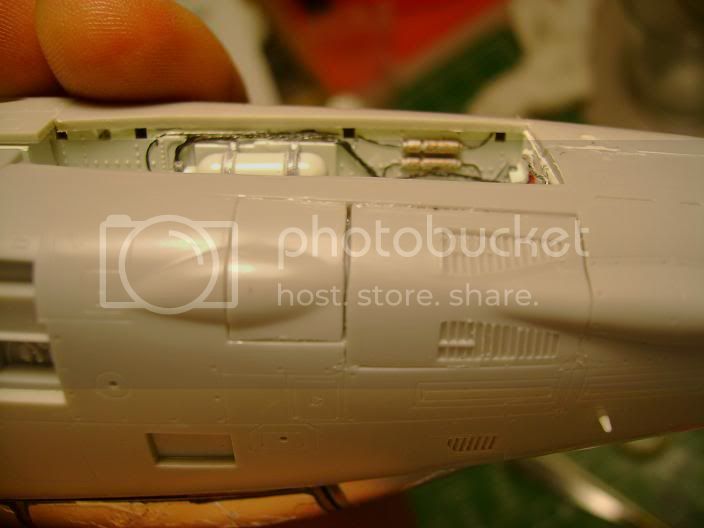
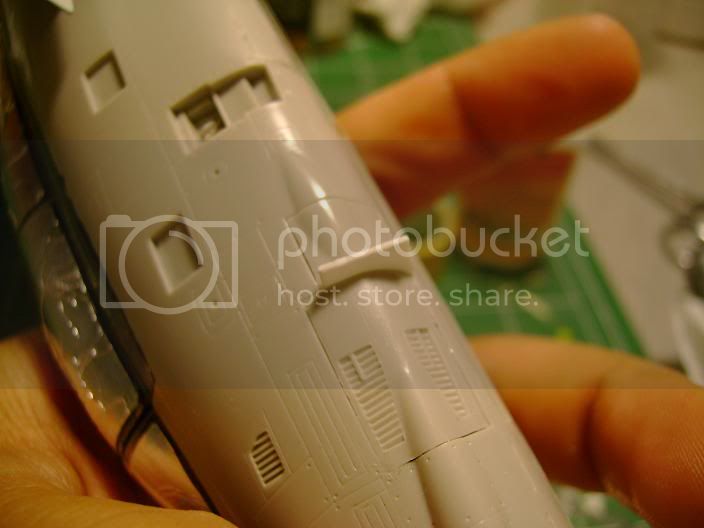
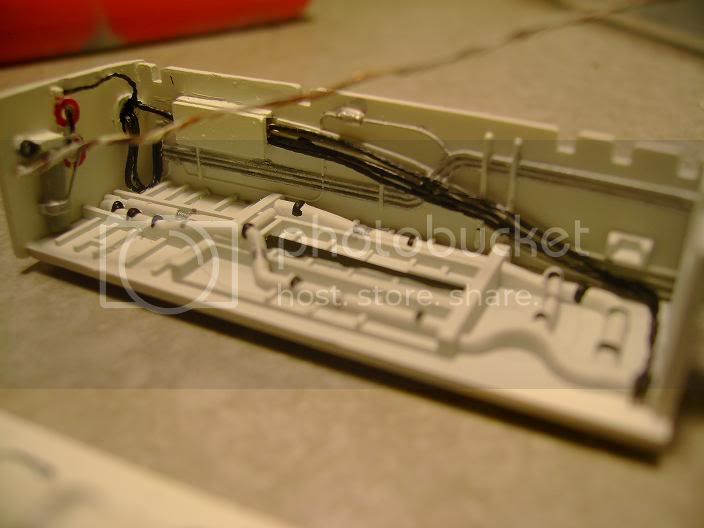
 I installed all the panel's on the nose and found a nasty gap I had to contend with so I filled it with plastic card and sanded it down...