#439
Washington, United States
Joined: November 05, 2005
KitMaker: 4,950 posts
AeroScale: 3,192 posts
Posted: Tuesday, May 25, 2010 - 03:22 AM UTC
Doing good.
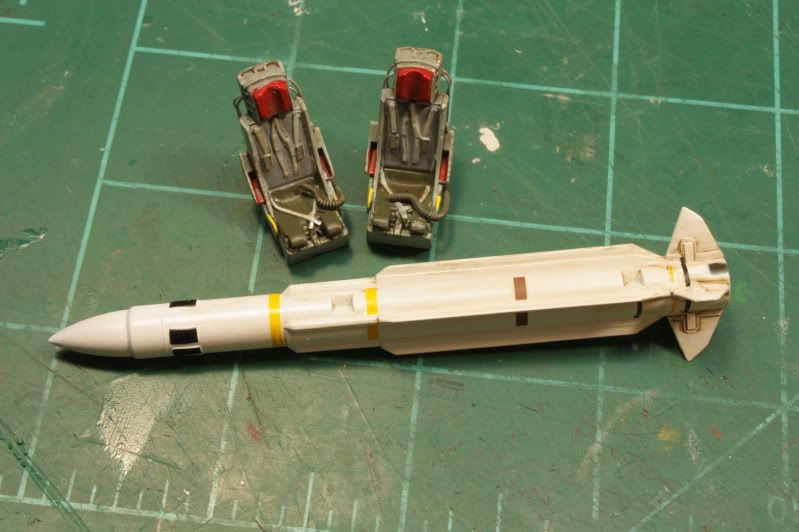
Walk Around only had 1 color shot of the bang seat and it didn't have a cushion along the back. You got it right, now I have to go fix mine....
I've got a couple of dedicated RR hobby shops here, I'll track them down sooner or later, and see if they have some mesh.

Hanger Queens in Waiting:
Monogram 1/72 F8F-1
Corsair the Sky Pirate - 1/72 Ace A-7D
Century Series - Airfix 1/72 F-105G
Anti Shipping - Academy 1/72 PBJ-1D
Academy 1/72 F-84E
California, United States
Joined: April 01, 2002
KitMaker: 4,287 posts
AeroScale: 1,164 posts
Posted: Tuesday, May 25, 2010 - 04:07 AM UTC
Thanks for the kuods all. Paints used were Model Master and Floquil Military colors enamels cut with lacquer thinner. Don't ask me a ratio cause I just eyeball it..

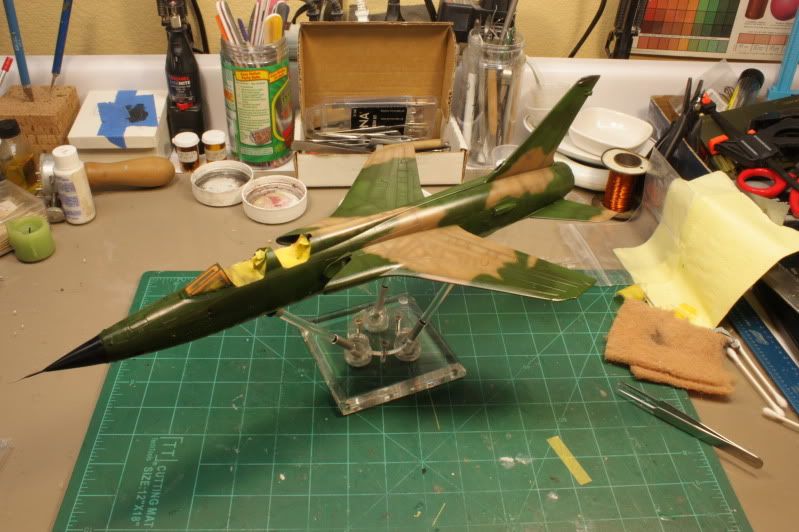
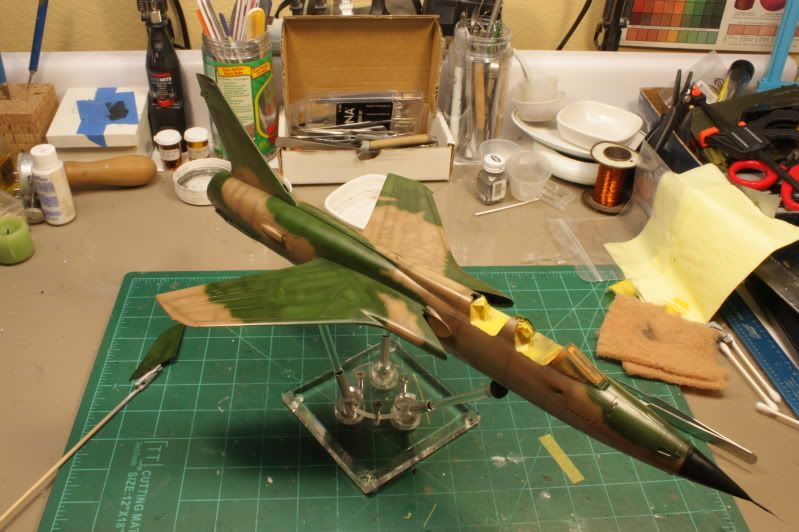
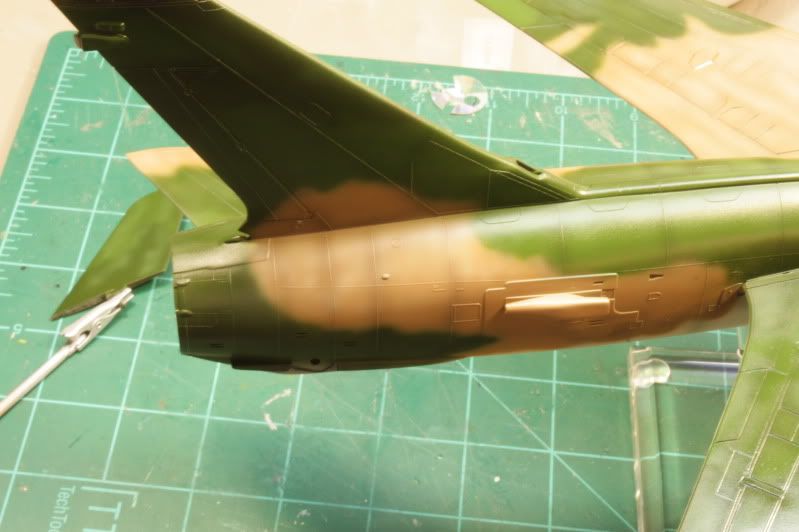
No masks used. I kept the painting/decal guide close by during the painting session and laid the colors in free hand. I started with the bottom color using Floquil U.S. Gray. Once this had dried for a few hours, I laid in the MM Light Tan, followed by the Medium Green, and finally the Dark Green. I kept the nozzle necked down really small to lay in the initial outline of where the color would go, then progressively opened it up once that line was established and filled the remaining area in with color. Will be adding the post shading and panel fading today.
What isn't in the pics is the orange/yellow seal I painted around the windscreen following the SEA camo. The framing for it is molded on the clear pieces so I masked it and shot it using Floquil Soviet Brown, which is actually orange in color rather than the Brown it claims to be. Looks good in the scale too. Thanks for watching. More to come soon.
"Q"


"Don't fear the night, fear what hunts at night"
California, United States
Joined: April 01, 2002
KitMaker: 4,287 posts
AeroScale: 1,164 posts
Posted: Tuesday, May 25, 2010 - 11:05 AM UTC
"Don't fear the night, fear what hunts at night"
California, United States
Joined: April 01, 2002
KitMaker: 4,287 posts
AeroScale: 1,164 posts
Posted: Wednesday, May 26, 2010 - 11:11 AM UTC
"Don't fear the night, fear what hunts at night"
litespeed
 News Reporter
England - North West, United Kingdom
Joined: October 15, 2009
KitMaker: 1,976 posts
AeroScale: 1,789 posts
Posted: Wednesday, May 26, 2010 - 11:23 AM UTC
Hi Matthew.
This realy is a great build, great stuff so far. I am sooooooooo tempted to acquire one. The level of detail of the kit is a pleasant surprise to me.
tim
California, United States
Joined: April 01, 2002
KitMaker: 4,287 posts
AeroScale: 1,164 posts
Posted: Wednesday, May 26, 2010 - 11:55 AM UTC
Glad you like it Tim. The kit, while dated, is nice. Just takes a little TLC in some areas. Thanks again for the kudos, much appreciated. "Q"
"Don't fear the night, fear what hunts at night"
California, United States
Joined: April 01, 2002
KitMaker: 4,287 posts
AeroScale: 1,164 posts
Posted: Thursday, May 27, 2010 - 04:51 PM UTC
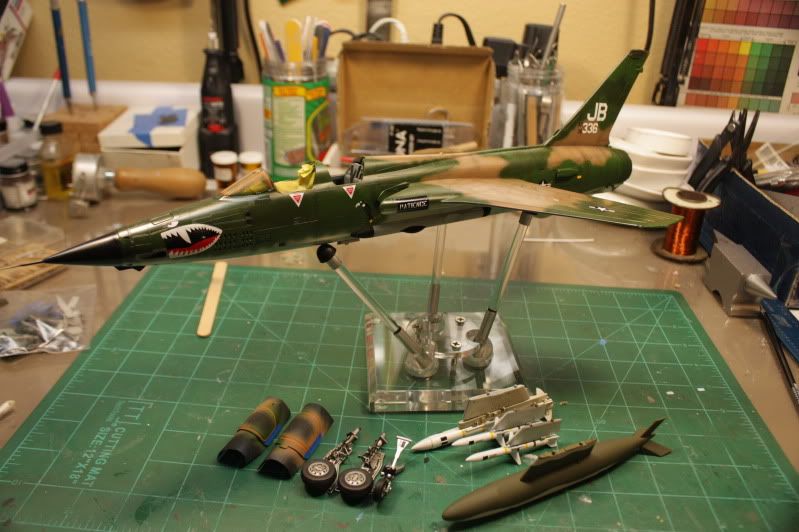
The Thud is just about complete. I added the decals tonight, and spent some time dressing up the weapons with some decals as well. Added some subtle weathering with some oils to the recessed panel lines around the flaps and leading edges of the wings. I will flat coat everything tomorrow, and then install all the remaining pieces. That should bring the Thud build to a close. Thanks for following along. "Q"
"Don't fear the night, fear what hunts at night"
#439
Washington, United States
Joined: November 05, 2005
KitMaker: 4,950 posts
AeroScale: 3,192 posts
Posted: Thursday, May 27, 2010 - 04:55 PM UTC
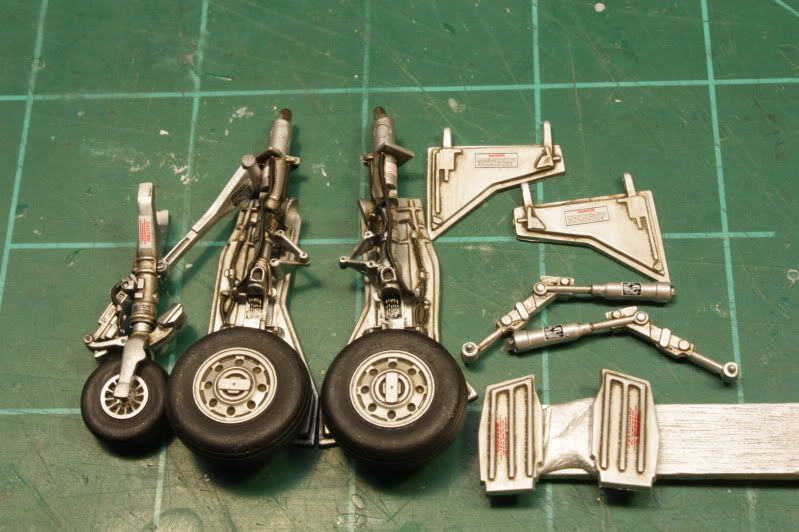
Looks great. The LG look like real metal parts.

Hanger Queens in Waiting:
Monogram 1/72 F8F-1
Corsair the Sky Pirate - 1/72 Ace A-7D
Century Series - Airfix 1/72 F-105G
Anti Shipping - Academy 1/72 PBJ-1D
Academy 1/72 F-84E
Tennessee, United States
Joined: September 20, 2005
KitMaker: 1,747 posts
AeroScale: 1,673 posts
Posted: Thursday, May 27, 2010 - 05:10 PM UTC
Your work is outstanding Matt! You really pump out the models. Russell
To Thine Own Self Be True
Siderius
A.K.A., RTA
California, United States
Joined: April 01, 2002
KitMaker: 4,287 posts
AeroScale: 1,164 posts
Posted: Friday, May 28, 2010 - 05:26 AM UTC
"Don't fear the night, fear what hunts at night"
#439
Washington, United States
Joined: November 05, 2005
KitMaker: 4,950 posts
AeroScale: 3,192 posts
Posted: Friday, May 28, 2010 - 05:45 AM UTC
I'm inspired. I will build that Airfx 1/72 F-105G for the century series campaign.
Hanger Queens in Waiting:
Monogram 1/72 F8F-1
Corsair the Sky Pirate - 1/72 Ace A-7D
Century Series - Airfix 1/72 F-105G
Anti Shipping - Academy 1/72 PBJ-1D
Academy 1/72 F-84E
Texas, United States
Joined: February 22, 2008
KitMaker: 5,026 posts
AeroScale: 2,811 posts
Posted: Friday, May 28, 2010 - 08:25 AM UTC
Matt, nice work and fast also. Do you have a spread sheet on the time spent
? It seems such a fast build, but the outcome is great.
Bob
If it aint broke dont fix it.
California, United States
Joined: April 01, 2002
KitMaker: 4,287 posts
AeroScale: 1,164 posts
Posted: Friday, May 28, 2010 - 09:11 AM UTC
Quoted Text
Matt, nice work and fast also. Do you have a spread sheet on the time spent ? It seems such a fast build, but the outcome is great. Bob
Hi Bob, Thanks for the kind words. I tried to keep a timeline on builds in the past and I always forget to stay with it. I'm retired and have plenty of time to tinker with these these as it were. I would guess I have somewhere in the neighorhood of 48 hours into it, give or take a few.
Thanks again for the kudos, much appreciated.
"Q"
"Don't fear the night, fear what hunts at night"
betheyn
Senior Editor #019
England - South East, United Kingdom
Joined: October 14, 2004
KitMaker: 4,560 posts
AeroScale: 2,225 posts
Posted: Friday, May 28, 2010 - 10:48 AM UTC
Excellent work Matt, it would look even better on the front page as a feature.
Andy
It's not the same, better, but not the same...
New South Wales, Australia
Joined: March 18, 2008
KitMaker: 347 posts
AeroScale: 223 posts
Posted: Friday, May 28, 2010 - 11:19 AM UTC
Mate, that is a brilliant job! I'm sure I have one in the stash and if not, well, another trip to the LHS! Love it!!
Assumption is the mother of all f*#k ups.
AussieReg
Associate Editor #007
Victoria, Australia
Joined: June 09, 2009
KitMaker: 8,156 posts
AeroScale: 3,756 posts
Posted: Friday, May 28, 2010 - 12:16 PM UTC
You need to go straight back to the bench with that one Q, theres a spot of paint missing from the bottom of the starboard wheel. I don't know WHY you thought you could call that finished !!
Kidding mate, it's superb. I'm loving the effect of your post-shading method and will be giving it a try very soon.
Looking forward to the next one, what's on the list ??
Cheers, D
ON the bench
Revell 1/24 '53 Corvette (building as '54)
Revell 1/24 BMW 507 Coupe and Cabrio
Italeri 1/48 Me262 B-1a/U1 Nightfighter
Monogram 1/24 '57 Chevy Nomad
Dragon 1/350 USS Frank Knox DD-742
California, United States
Joined: April 01, 2002
KitMaker: 4,287 posts
AeroScale: 1,164 posts
Posted: Friday, May 28, 2010 - 04:44 PM UTC
Thanks for the kudos all. I was asked to submit a photo feature on this one, so I will be getting pics together to do so here in the near future.
Quoted Text
Looking forward to the next one, what's on the list ??
I had my on an RB-66 or B-66 in 1/72. Would compliment this one very well as they were often being escorted by Thuds. More to follow.
Thanks again for the kind words all, much appreciated.
"Q"
"Don't fear the night, fear what hunts at night"
Texas, United States
Joined: February 22, 2008
KitMaker: 5,026 posts
AeroScale: 2,811 posts
Posted: Friday, May 28, 2010 - 07:20 PM UTC
Matt, I personally would love to see you do a spread on the B-66/RB-66. There has not been enough on that bird.
Bob
If it aint broke dont fix it.
Amazonas, Colombia
Joined: November 10, 2005
KitMaker: 2 posts
AeroScale: 1 posts
Posted: Saturday, May 29, 2010 - 12:34 AM UTC
Regards
Wonderful work accomplished, congratulations.
California, United States
Joined: April 01, 2002
KitMaker: 4,287 posts
AeroScale: 1,164 posts
Posted: Saturday, May 29, 2010 - 10:22 AM UTC
Thanks for all the kind words folks, much appreciated.
Quoted Text
Matt, I personally would love to see you do a spread on the B-66/RB-66. There has not been enough on that bird.
Thanks Bob. I have a couple kits here and an EB-66 from Italeri that may just get the nod. Something about all those blade antennas adorning it that just looks cool to me. More to follow, stay tuned.
"Q"
"Don't fear the night, fear what hunts at night"