Slovenia
Joined: August 23, 2007
KitMaker: 86 posts
AeroScale: 75 posts
Posted: Saturday, June 12, 2010 - 01:29 AM UTC
Hi everyone

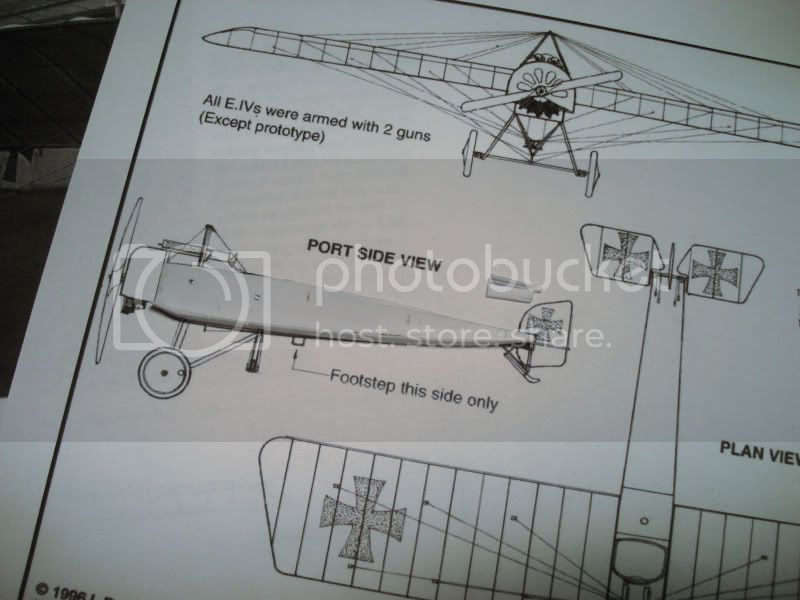
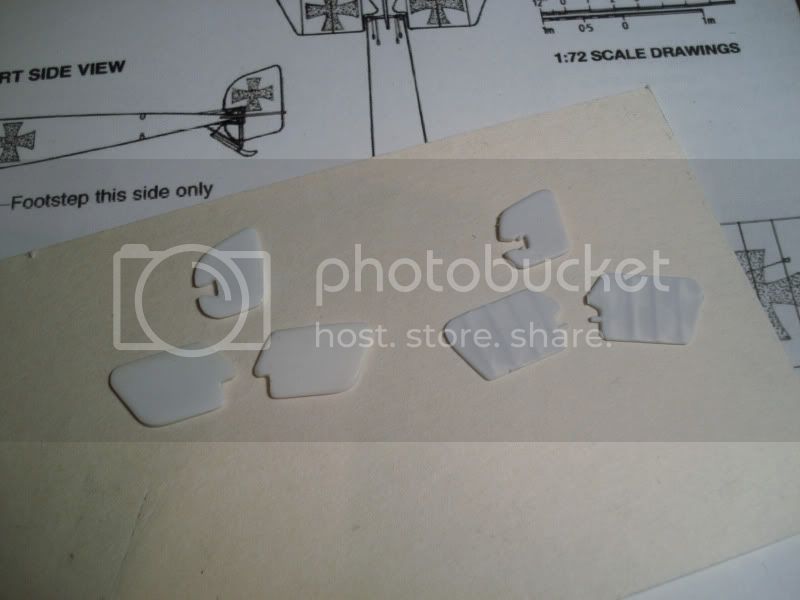
My current project is ICM's 1/72 Pfalz E.IV. I also bought some PE parts form Part to add some more detail to the kit.
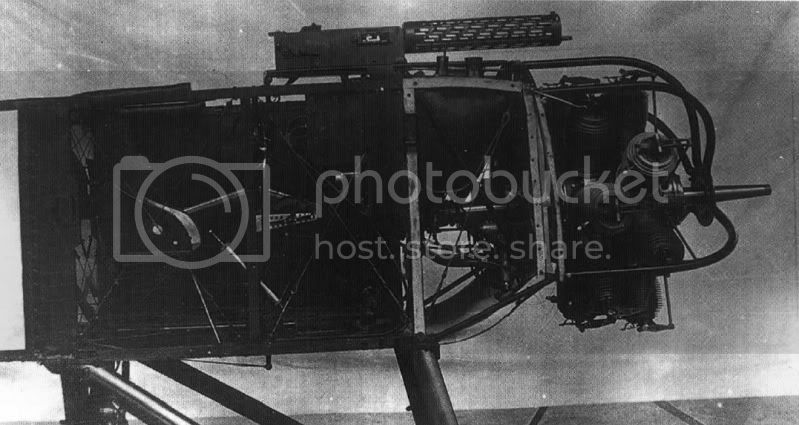
I'm not sure if the aircraft had seatbelts, because there were none on the PE sheet and I only saw this image of the cockpit:
Stockholm, Sweden
Joined: November 11, 2008
KitMaker: 25 posts
AeroScale: 24 posts
Posted: Saturday, June 12, 2010 - 07:13 PM UTC
Hej Zoran,
Intresting project as I have the same model on my bench too. Unfortunately the Pfalz model is totally wrong in all dimensions. Main parts as the fuselage and the wings are based on the pretty correct Fokker E.IV kit from ICM. Even PART did a bad job because they fitted the PE sheet to the bad ICM kit. Finally the project went out to a nightmare for me and I have to fight to finish this project.
http://www.modellboard.net/index.php?topic=30414.0Good luck with the project!
Öcsi
Slovenia
Joined: August 23, 2007
KitMaker: 86 posts
AeroScale: 75 posts
Posted: Sunday, June 13, 2010 - 10:52 AM UTC
Hi Ocsi,
I know that this kit has a lot of problems but I dont thik ist going to be too hard to fix everything. I will be using some parts from ICMs fokker e.IV that I had build a few years ago, but had an accident and I dont feel like fixing it.
Thanks for the link to your build its very helpful.

Stockholm, Sweden
Joined: November 11, 2008
KitMaker: 25 posts
AeroScale: 24 posts
Posted: Sunday, June 13, 2010 - 08:26 PM UTC
Didn't say that's impossible to build this model and most of my problems with this are self caused
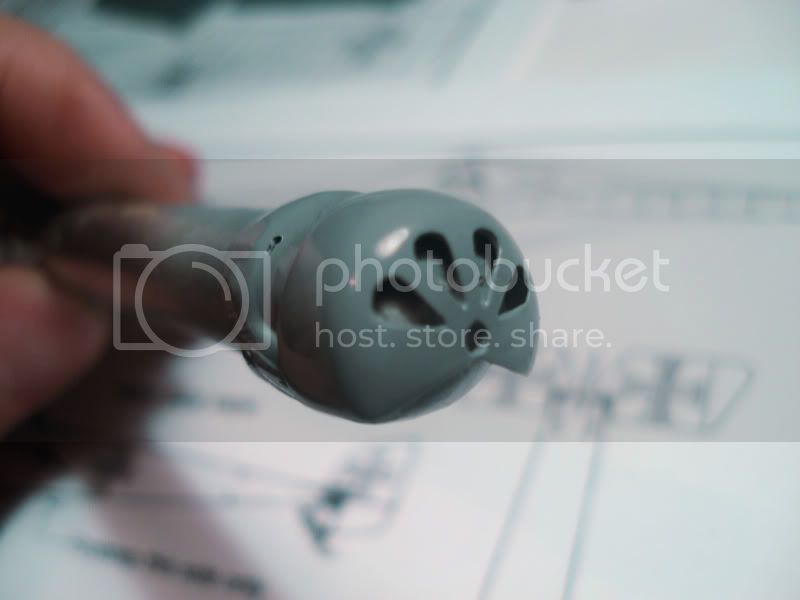
But I'm not that much a scratchbuilder and for this there are quite a lot corrections necessary. Most problems I got with the shape of the cowling. Check out, there are only four holes (not six as shown in the drawings!) !
Did you already made a decission for the markings?
Regards
Öcsi
Colorado, United States
Joined: January 25, 2004
KitMaker: 11,669 posts
AeroScale: 11,011 posts
Posted: Monday, June 14, 2010 - 06:35 AM UTC
Also for a longer lasting build you may want to replace the plastic mounting studs in the wing with a connecting brass rod in the front and simple brass studs in the rear. Minor bumbs will not be build killers.
". . .The most important thing is to know why you build and then get the most that you can out of building." via D.D.
Slovenia
Joined: August 23, 2007
KitMaker: 86 posts
AeroScale: 75 posts
Posted: Wednesday, June 16, 2010 - 11:39 PM UTC
Quoted Text
...most problems I got with the shape of the cowling. Check out, there are only four holes (not six as shown in the drawings!) !
Did you already made a decission for the markings?
Regards
Öcsi
hi,
The cowling was the first thing I noticed when I was looking at the photos. I will cut away some of the fokker e.IV cowling and glue it on this one to make it longer. Im still thinking about how to change the front side to make it look more like the original

I think the cross wheel covers look nice so Im going to build this aircraft

Small update

Slovenia
Joined: August 23, 2007
KitMaker: 86 posts
AeroScale: 75 posts
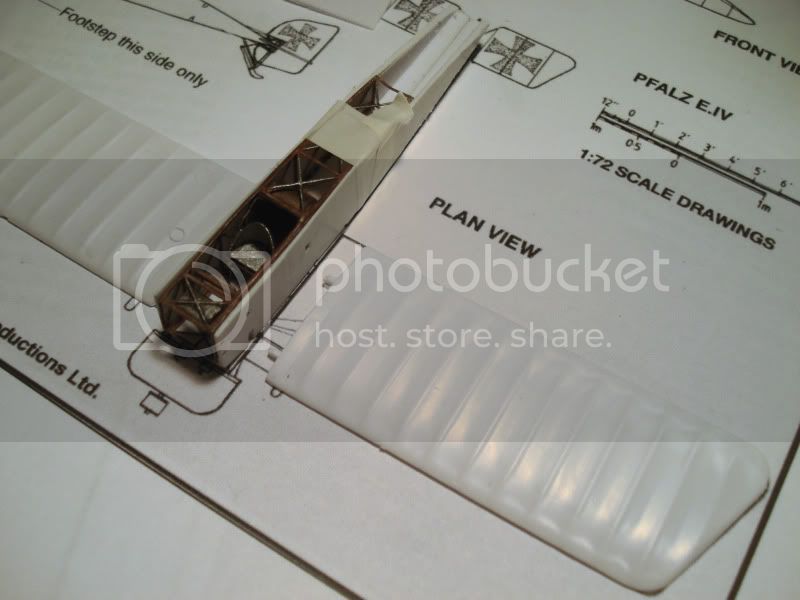
Posted: Saturday, July 03, 2010 - 08:30 AM UTC
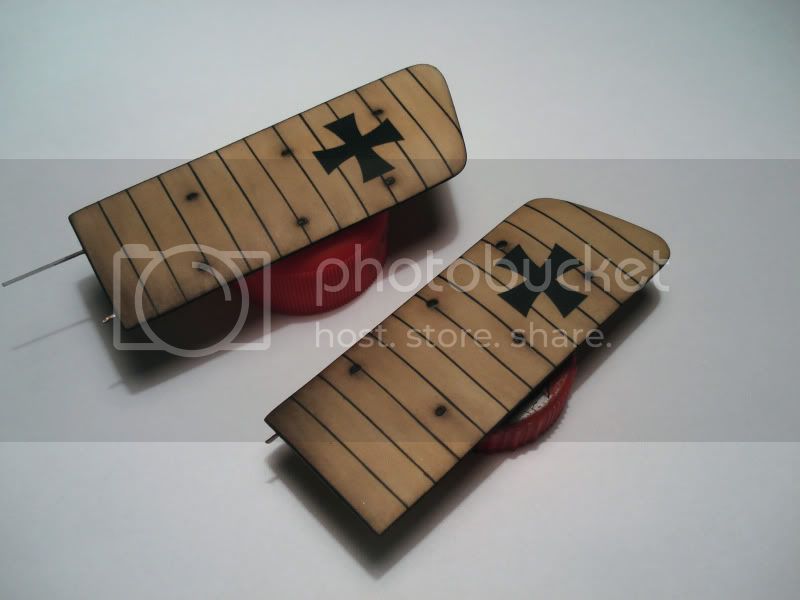
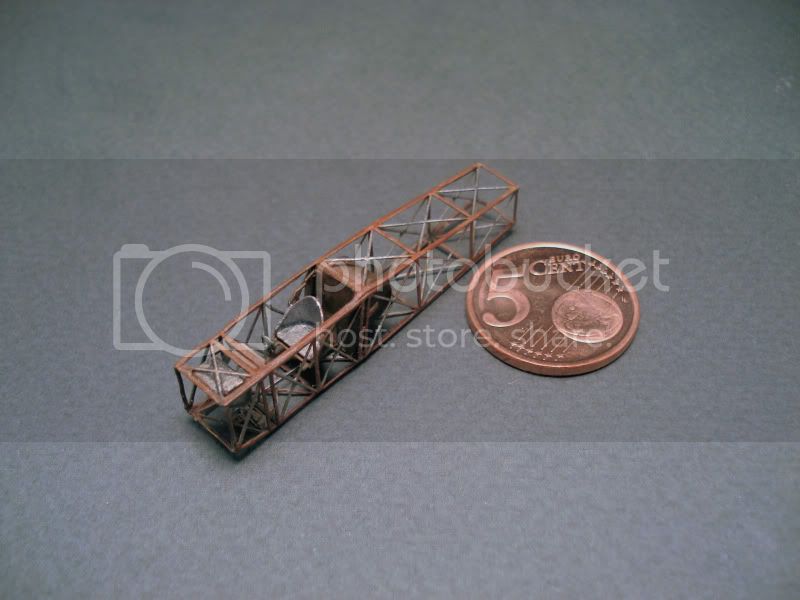
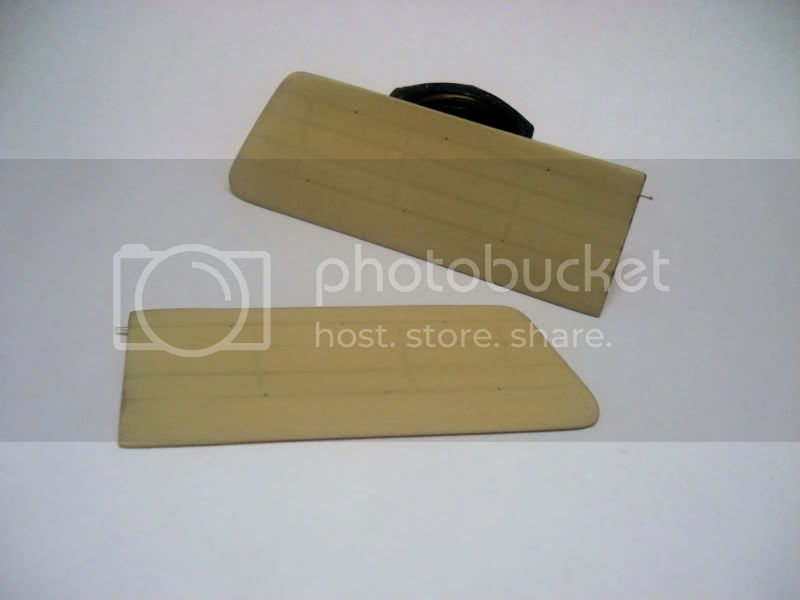
The wings are finished and ready for paint. I fixed the lenght and thinned them to the right thickness.
I used aluminium foil to add some detail to the exterior.
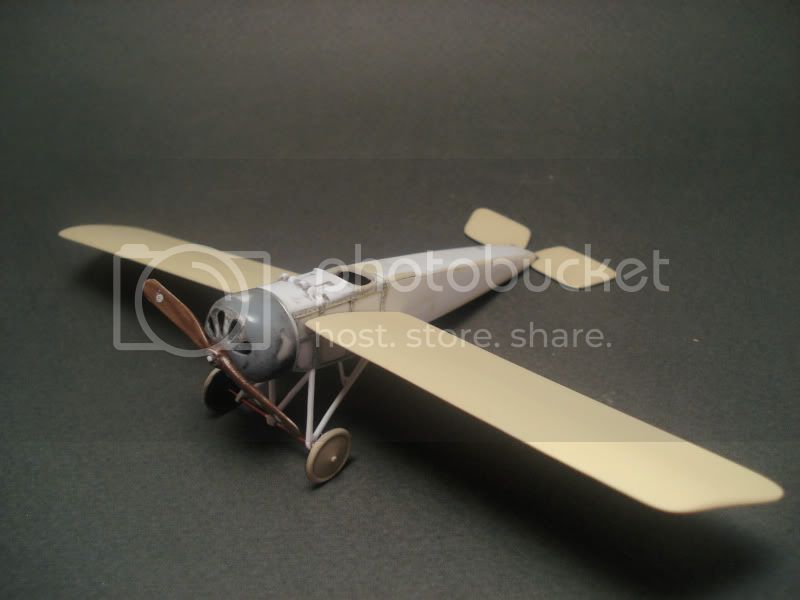
Finished and painted motor.
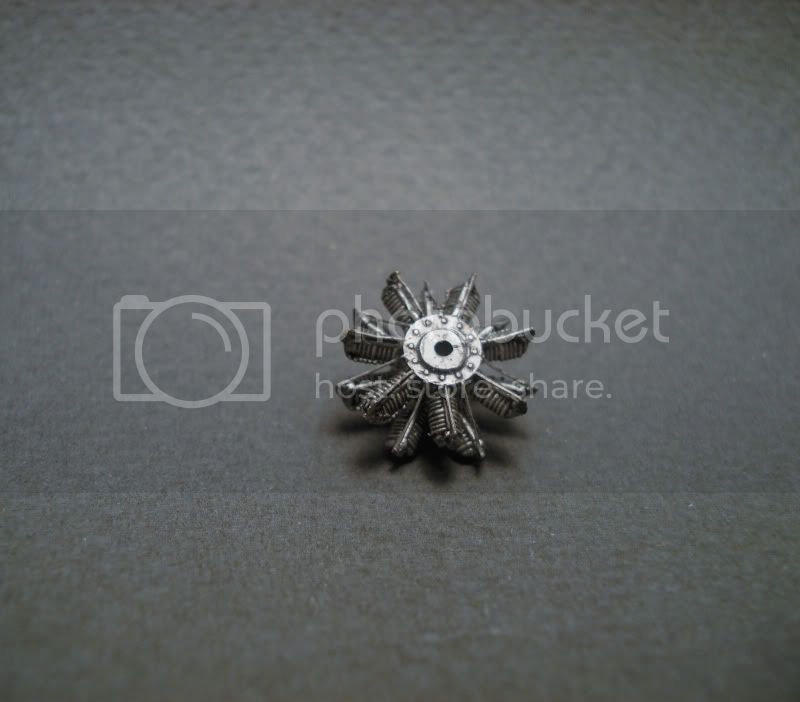
I also scratcbuild the prop out of wood because the one from the kit was not accurate and a bit strange looking.

Kentucky, United States
Joined: July 02, 2010
KitMaker: 175 posts
AeroScale: 174 posts
Posted: Saturday, July 03, 2010 - 11:08 AM UTC
Superb work.
My tip of the hat to those who can generate such detail in so small a scale.
"I took German in school...but I can't understand the way these foreigners speak it." The Dawn Patrol (1938)
Dennis O'C
Alberta, Canada
Joined: January 19, 2008
KitMaker: 6,743 posts
AeroScale: 6,151 posts
Posted: Sunday, July 04, 2010 - 04:59 AM UTC
Coming along very well so far
Slovenia
Joined: August 23, 2007
KitMaker: 86 posts
AeroScale: 75 posts
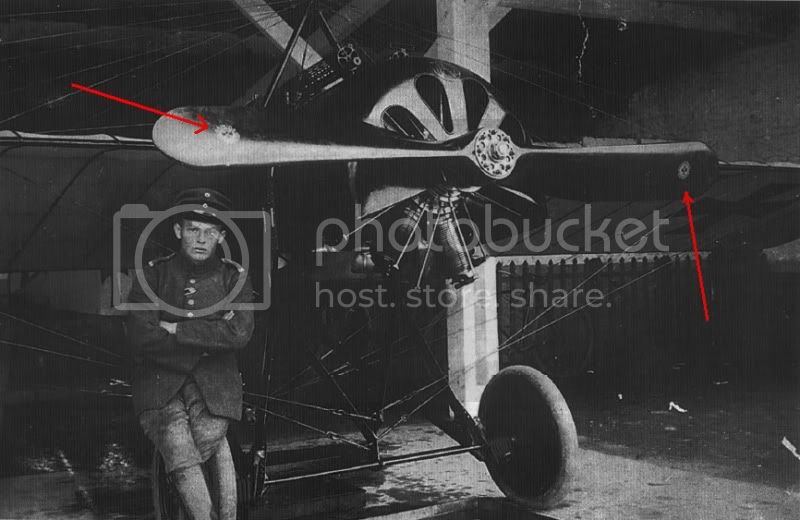
Posted: Sunday, July 04, 2010 - 07:16 AM UTC
Thanks Dennis and Terri.
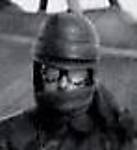
I have a small problem with the prop markings. I accidently lost the kit decals and now I want to print my own. I am desperately looking for some information about the markings shown on the photo below.
If anyone has any info about this I would be very thankful.
Stockholm, Sweden
Joined: November 11, 2008
KitMaker: 25 posts
AeroScale: 24 posts
Posted: Monday, July 05, 2010 - 02:18 AM UTC
As far as I know it's a Garuda propellor.
The propellor from the kit isn't that bad, because the this propellortype was "a little bit strange looking".
Funny linkGood progress with the model (Some details look familiar
)
Regards
Öcsi
Slovenia
Joined: August 23, 2007
KitMaker: 86 posts
AeroScale: 75 posts
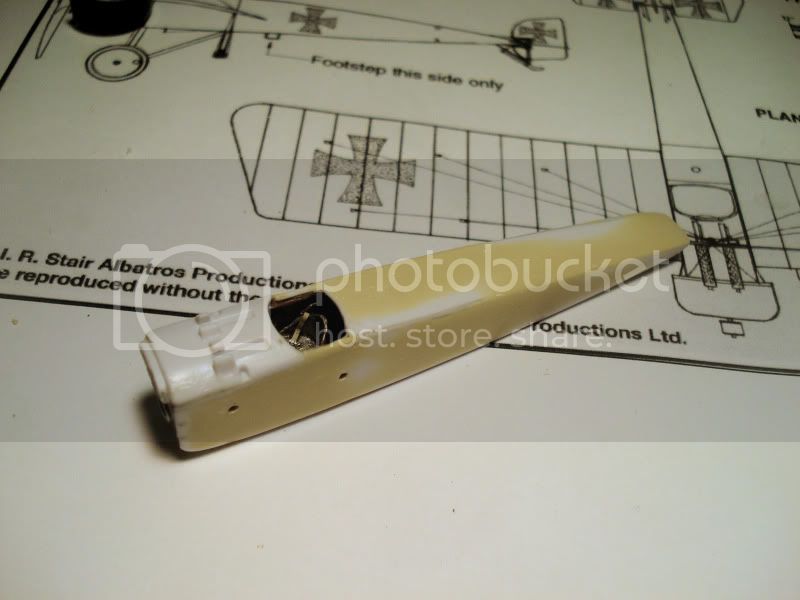
Posted: Tuesday, July 06, 2010 - 10:59 AM UTC
Thank you so much Ocsi.
lol, I had to use youre alu foil trick its awesome
I finshed the cowling today and sprayed over a coat of primer.
I also scratch build the rear wings and the ruder (on right side the original ICM parts).
Stockholm, Sweden
Joined: November 11, 2008
KitMaker: 25 posts
AeroScale: 24 posts
Posted: Wednesday, July 07, 2010 - 09:32 AM UTC
Pretty good job on the cowling, Zoran!
How did you do it?
/öcsi
Slovenia
Joined: August 23, 2007
KitMaker: 86 posts
AeroScale: 75 posts
Posted: Friday, July 09, 2010 - 01:45 AM UTC
Quoted Text
Pretty good job on the cowling, Zoran!
How did you do it?
/öcsi
Thanks
The first thing I did was I cut away some of the ICM fokker e.IV cowling and glued it on the pfalz cowling to make it longer. Than I held the cowling over an open flame to give it a slightly rounded shape. Insted of regular putty I used cianokol super glue because its easier to sand and it dries out quickly. Very simple and effective technique
Slovenia
Joined: August 23, 2007
KitMaker: 86 posts
AeroScale: 75 posts
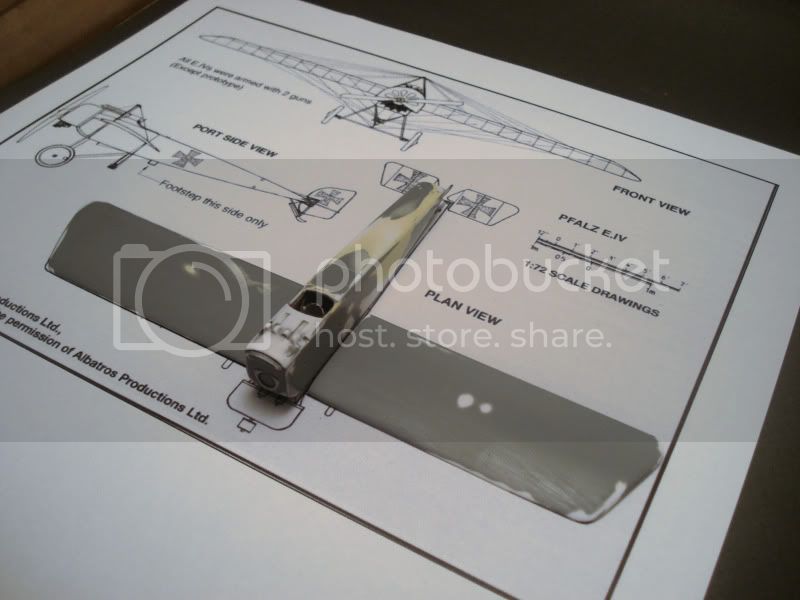
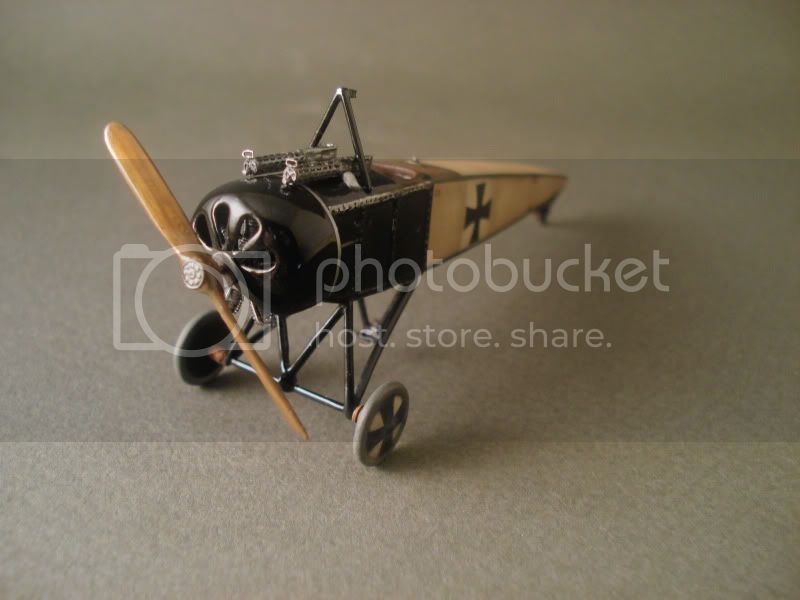
Posted: Saturday, July 17, 2010 - 04:26 AM UTC
Small update
I finished all the exterior detailing on the fuselage and prepared it for paint.

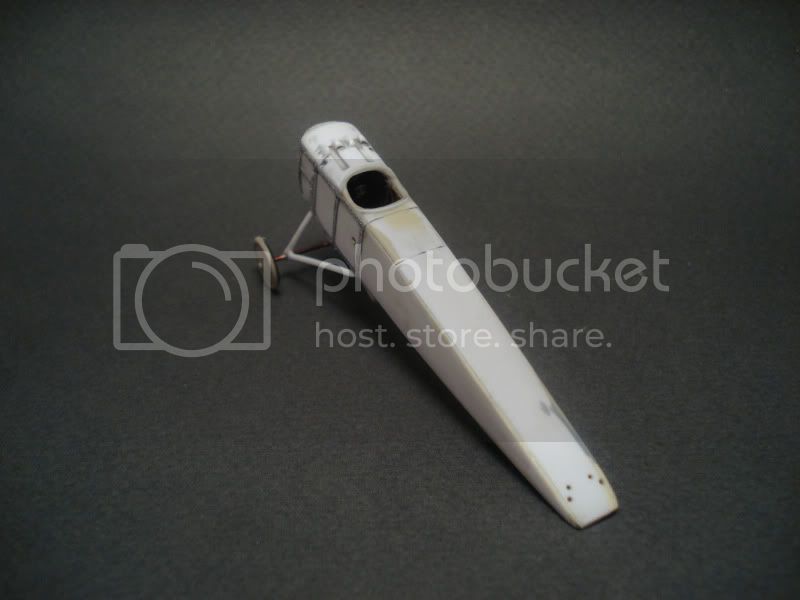
The underside of the wings was painted to slightly show the wing construction (pre shading technique).
I put all the parts together to see how the model would look like when finally assembled.
Alberta, Canada
Joined: January 19, 2008
KitMaker: 6,743 posts
AeroScale: 6,151 posts
Posted: Saturday, July 17, 2010 - 02:35 PM UTC
Very nice detailing to the fuselage ! She's going to look awesome when done

Slovenia
Joined: August 23, 2007
KitMaker: 86 posts
AeroScale: 75 posts
Posted: Sunday, July 18, 2010 - 05:22 AM UTC
Quoted Text
Very nice detailing to the fuselage ! She's going to look awesome when done
Thanks Terri
United Kingdom
Joined: March 08, 2009
KitMaker: 719 posts
AeroScale: 691 posts
Posted: Monday, July 19, 2010 - 12:15 AM UTC
Superb work! And in the one true scale as well
What are your plans for the guns?
Slovenia
Joined: August 23, 2007
KitMaker: 86 posts
AeroScale: 75 posts
Posted: Tuesday, July 20, 2010 - 12:24 AM UTC
Quoted Text
Superb work! And in the one true scale as well
What are your plans for the guns?
Thanks Ben
I will modify the guns from the kit with PE parts.
Colorado, United States
Joined: January 25, 2004
KitMaker: 11,669 posts
AeroScale: 11,011 posts
Posted: Tuesday, July 20, 2010 - 08:12 AM UTC
Quoted Text
Quoted Text
Superb work! And in the one true scale as well
What are your plans for the guns?
Thanks Ben
I will modify the guns from the kit with PE parts.
Remember the 1915 - 1916 Spandaus on these aircraft were retangular /block shaped on the upper rear breech access hatch area. Later types had the step down rear access hatch
". . .The most important thing is to know why you build and then get the most that you can out of building." via D.D.
Slovenia
Joined: August 23, 2007
KitMaker: 86 posts
AeroScale: 75 posts
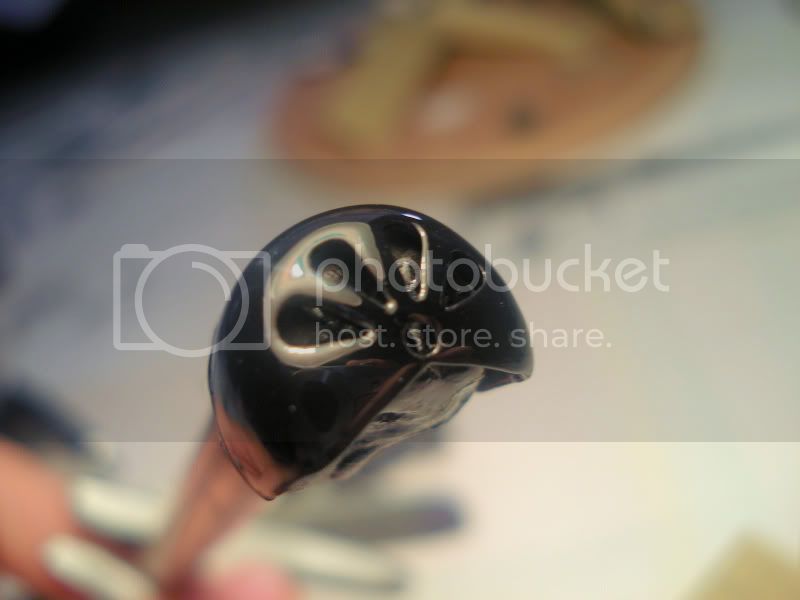
Posted: Tuesday, July 20, 2010 - 08:42 AM UTC
Thanks for the info Stephen.
Here is some eye candy. I painted the cowling with alclad gloss black base and protected it with 2K HS automotive lacquer.
Slovenia
Joined: August 23, 2007
KitMaker: 86 posts
AeroScale: 75 posts
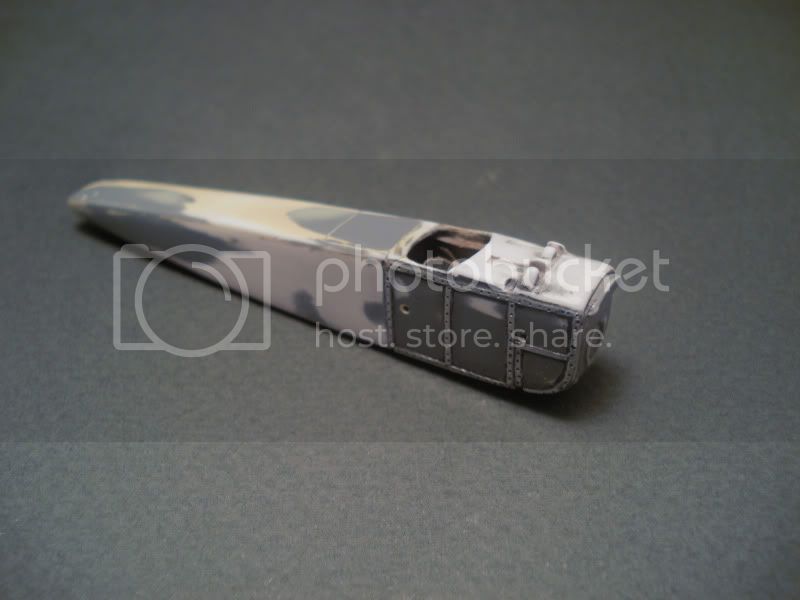
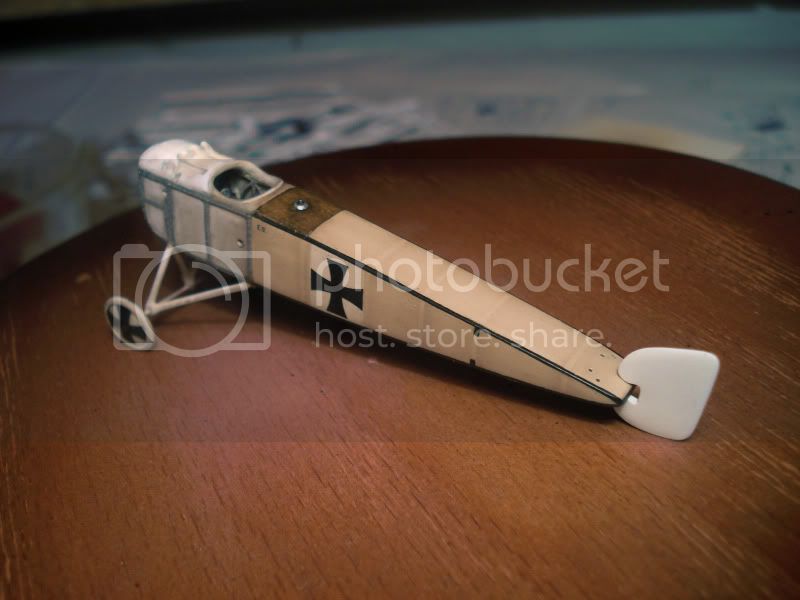
Posted: Tuesday, July 27, 2010 - 10:11 AM UTC
Here is some progress on the fuselage. Weathering was done with oil wash and post shading.
Colorado, United States
Joined: January 25, 2004
KitMaker: 11,669 posts
AeroScale: 11,011 posts
Posted: Tuesday, July 27, 2010 - 10:20 AM UTC
". . .The most important thing is to know why you build and then get the most that you can out of building." via D.D.
Alberta, Canada
Joined: January 19, 2008
KitMaker: 6,743 posts
AeroScale: 6,151 posts
Posted: Tuesday, July 27, 2010 - 04:09 PM UTC
I really like how this project is turning out so far , the weathering is very well done and the cowl is a work of art !
Looking forward to your next up-date
Slovenia
Joined: August 23, 2007
KitMaker: 86 posts
AeroScale: 75 posts
Posted: Friday, August 27, 2010 - 07:51 AM UTC
Last update before finishing the model
The fuselage is nearly finsihed. I still have to improve the weathering.

And the finsihed wings.