Florida, United States
Joined: January 14, 2009
KitMaker: 2,798 posts
AeroScale: 2,443 posts
Posted: Tuesday, June 29, 2010 - 03:26 PM UTC
"From time to time, the tree of liberty must be watered with the blood of
tyrants and patriots."
- Thomas Jefferson
IPMS#47611
Florida, United States
Joined: January 14, 2009
KitMaker: 2,798 posts
AeroScale: 2,443 posts
Posted: Tuesday, June 29, 2010 - 03:29 PM UTC
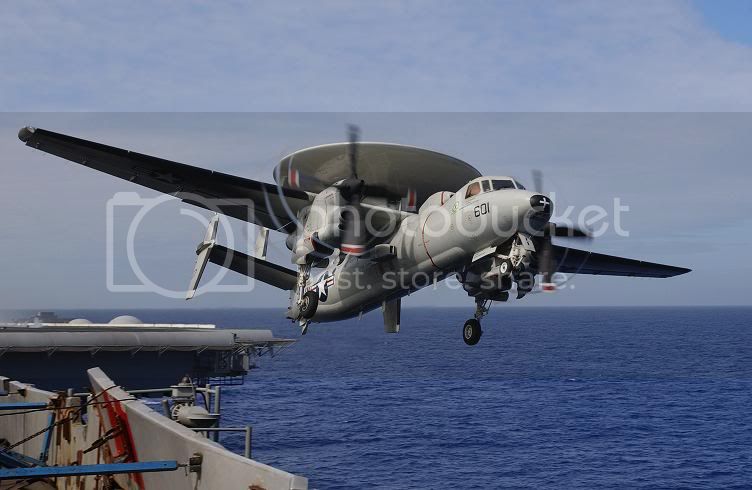
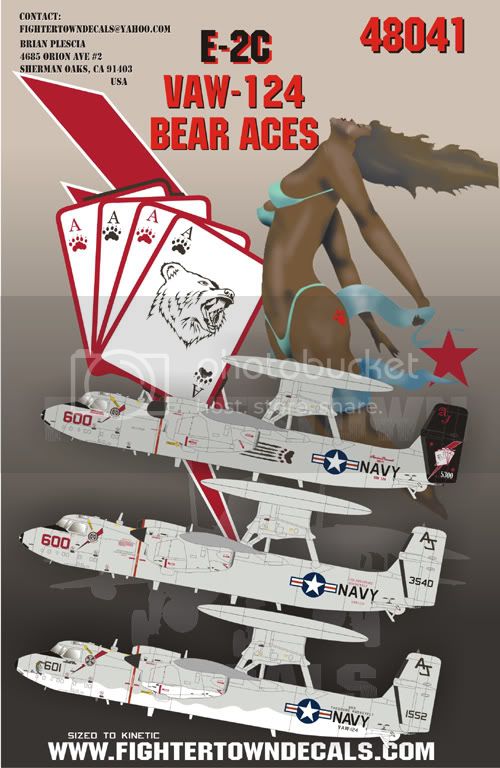
sorry I will be using modex#601

Its got chick on the nose

"From time to time, the tree of liberty must be watered with the blood of
tyrants and patriots."
- Thomas Jefferson
IPMS#47611
New York, United States
Joined: January 29, 2004
KitMaker: 3,836 posts
AeroScale: 1,036 posts
Posted: Tuesday, June 29, 2010 - 03:52 PM UTC
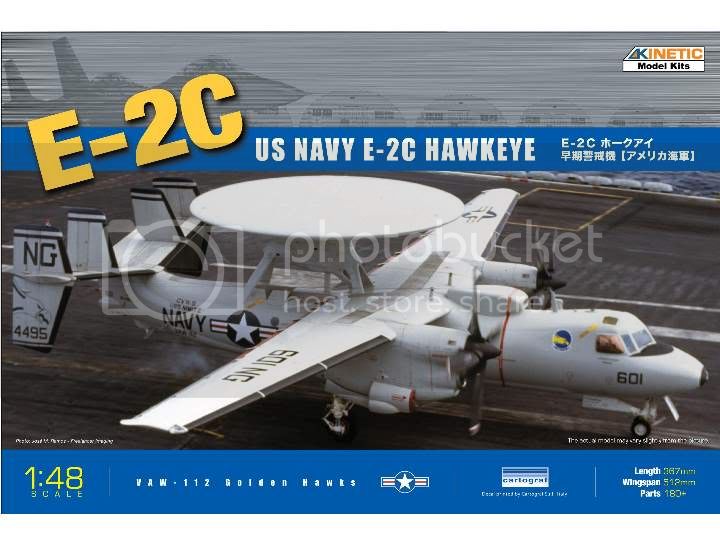
Super choice Justin,it's a great kit. I just finished one 2 weeks ago using the box decals. If you have any questions I can do my best to answer. What plans do you have for the cockpit, I went and scratchbuilt new seats and detailed the cockpit bay...I wish I hadn't, you really don't see the work that went into it. Looking forward to seeing your progress postings.
Happy Modeling,
Joe
It feels like bible camp
Only Im not crying pretending Im somewhere else.
Happy Modeling
Joe
litespeed
 News Reporter
England - North West, United Kingdom
Joined: October 15, 2009
KitMaker: 1,976 posts
AeroScale: 1,789 posts
Posted: Tuesday, June 29, 2010 - 09:09 PM UTC
Hi Justin
Fantastic, I am very interested in watching your progress with this build as I really like this aircraft. Enjoy.
tim
Florida, United States
Joined: January 14, 2009
KitMaker: 2,798 posts
AeroScale: 2,443 posts
Posted: Wednesday, June 30, 2010 - 05:42 AM UTC
Joe I planned on tinting the windows like the real deal.can you see anything at all if not I won't put any effort into the cockpit?need to know before I start.
"From time to time, the tree of liberty must be watered with the blood of
tyrants and patriots."
- Thomas Jefferson
IPMS#47611
New York, United States
Joined: January 29, 2004
KitMaker: 3,836 posts
AeroScale: 1,036 posts
Posted: Wednesday, June 30, 2010 - 04:19 PM UTC
Not really, the glass is pretty thick and the side windows being bulged distorts looking through it. If you want I could take a pic of mine for you to look over.
Happy Modeling,
Joe
It feels like bible camp
Only Im not crying pretending Im somewhere else.
Happy Modeling
Joe
Florida, United States
Joined: January 14, 2009
KitMaker: 2,798 posts
AeroScale: 2,443 posts
Posted: Thursday, July 01, 2010 - 01:18 PM UTC
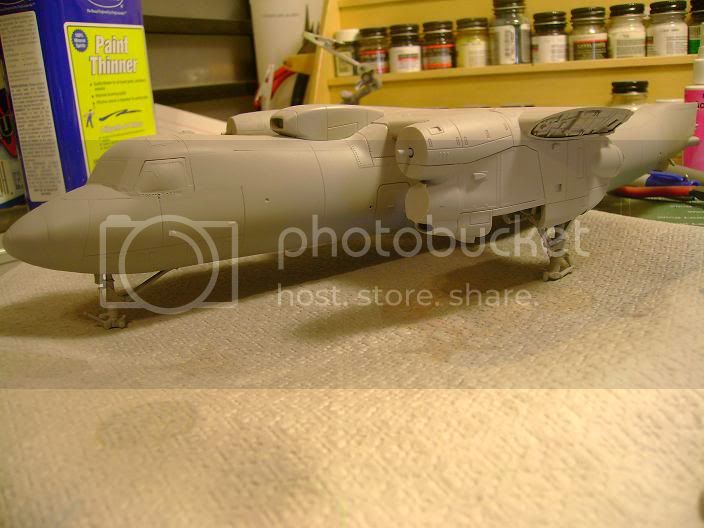
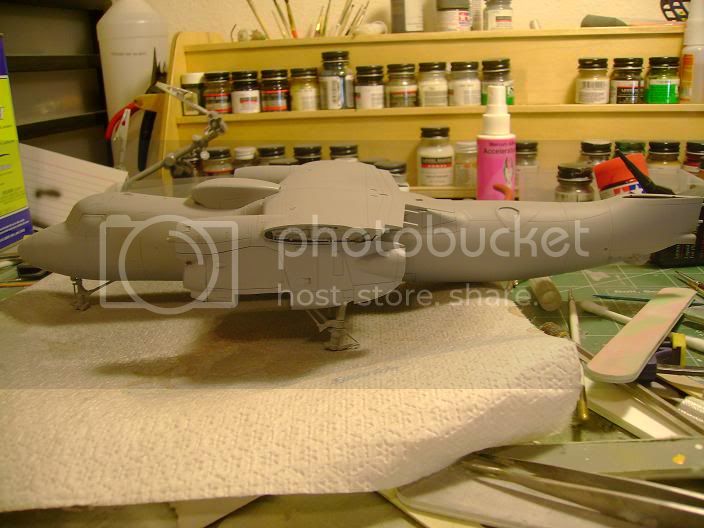
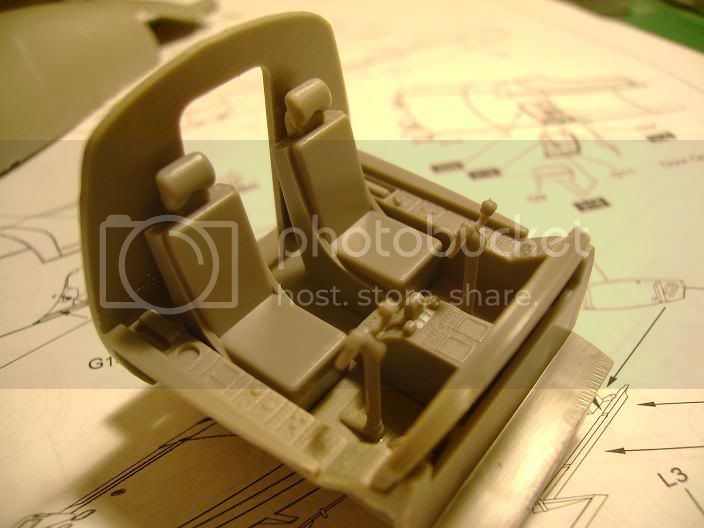
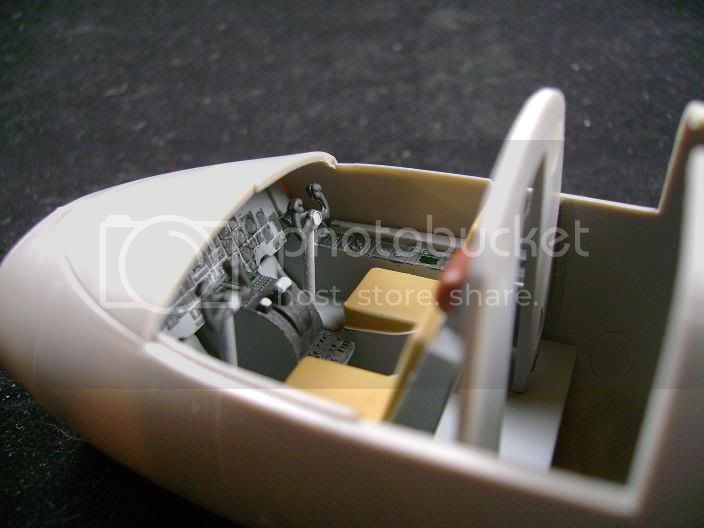
Progress for those who are watching.Joe Thanks as you will see in the pictures nothing special in the cockpit area.After test fitting canopy I can see theres not going to be alot showing.I started with the cockpit in the nose gear bay there are two deep injection marks to deal with so I filled them and moved on completing the cockpit.I sprayed with testors neutral Grey and painted the seats and picked out details on the controls.Lets face it I'm a modeler and just cant leave it blank....
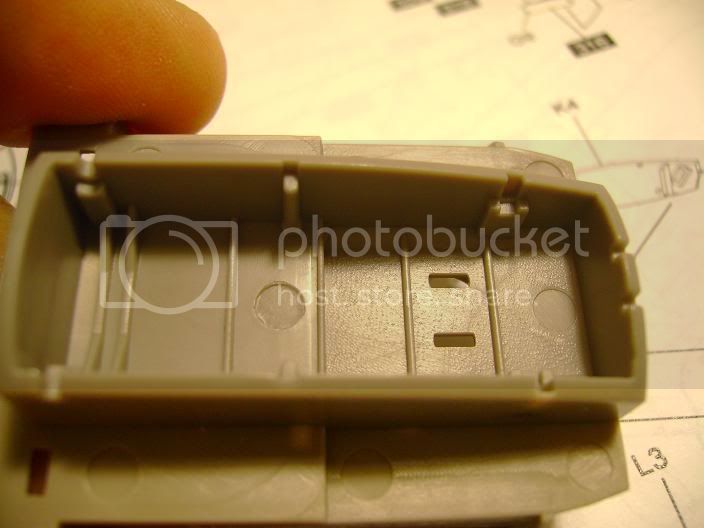
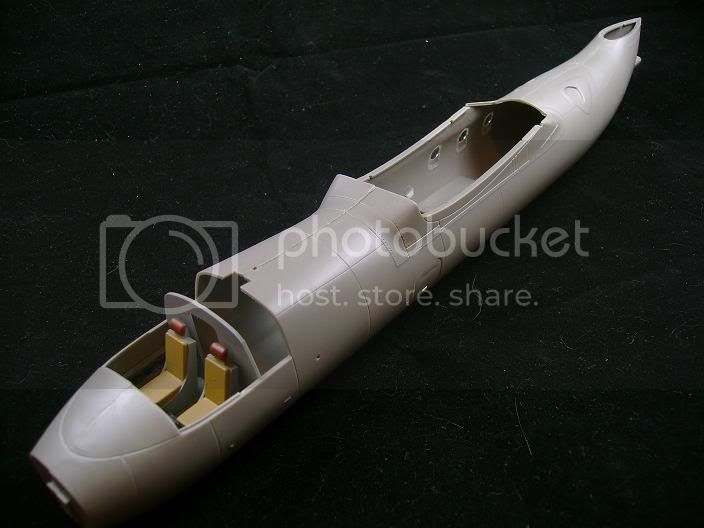
After letting it dry I installed it between the fuselage half's and installed two .45 bullets in the nose for weight.I will end up installing more behind the bulkhead later just to make sure
The kit comes with the option to open the side door but the part that goes inside this cavity doesn't look like a walkway more like something out of ghost busters so I chose to close mine.I have now glued the fuselage half's together and let dry over night.After removing all the tape the seam lines are going to take awhile.

......
To give Tim an idea on size here it is next to a Hasegawa 1/48th P-51D....

More to come....
"From time to time, the tree of liberty must be watered with the blood of
tyrants and patriots."
- Thomas Jefferson
IPMS#47611
New York, United States
Joined: January 29, 2004
KitMaker: 3,836 posts
AeroScale: 1,036 posts
Posted: Thursday, July 01, 2010 - 03:05 PM UTC
Cockpit looks great Justin. Um one thing...will you be doing the folded wing option, if so you'll need a ton of weight. I ended up using two top post car battery posts
really I had two. I used two part epoxy to glue them in behind the cockpit. The weight they suggest just isnt enough. As to the landing gear well Im having no problems. I might have gone overboard but it works. Just wanted you to beware
Happy Modeling,
Joe
It feels like bible camp
Only Im not crying pretending Im somewhere else.
Happy Modeling
Joe
Florida, United States
Joined: January 14, 2009
KitMaker: 2,798 posts
AeroScale: 2,443 posts
Posted: Thursday, July 01, 2010 - 03:39 PM UTC
thanks for the heads up i was wandering that.I will make shure i double up my weight.Thanks Joe
"From time to time, the tree of liberty must be watered with the blood of
tyrants and patriots."
- Thomas Jefferson
IPMS#47611
litespeed
News Reporter England - North West, United Kingdom
Joined: October 15, 2009
KitMaker: 1,976 posts
AeroScale: 1,789 posts
Posted: Friday, July 02, 2010 - 01:43 AM UTC
Thanks Justin, thats great. Man that fuselage is a gorgeous shape. Looks like the upper fuselage shape of some of the Supermarine flying boats. I can feel urge to take the plastic out of my wallet.
tim
Florida, United States
Joined: January 14, 2009
KitMaker: 2,798 posts
AeroScale: 2,443 posts
Posted: Tuesday, July 06, 2010 - 01:37 PM UTC
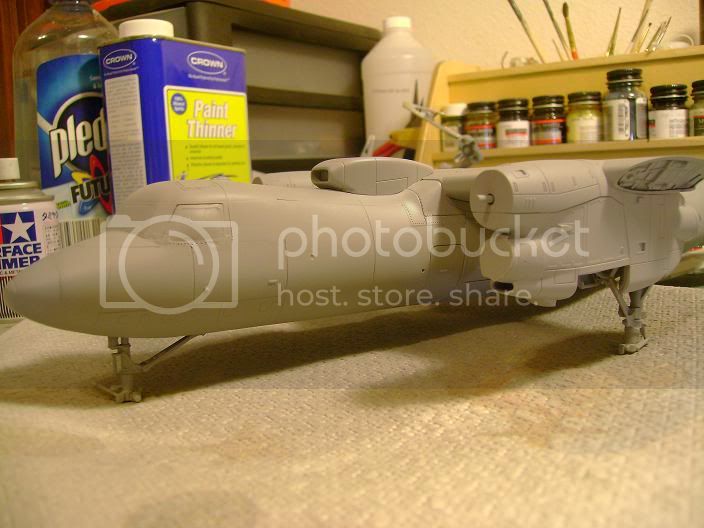
Here's a small update.I have mounted the main wing section and canopy.
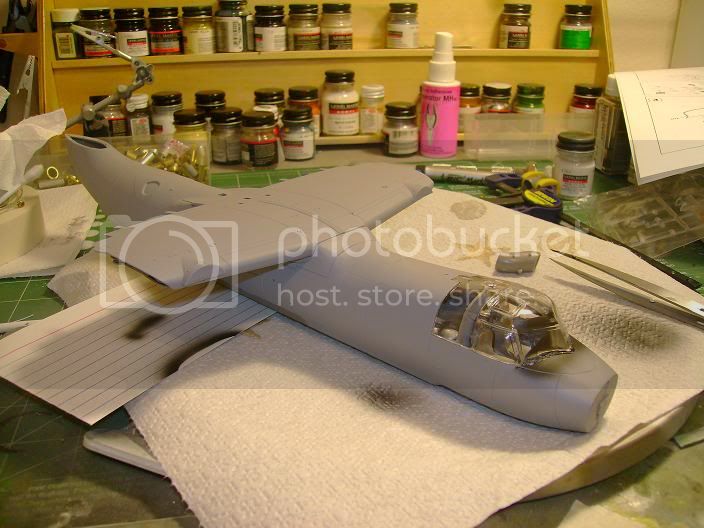
The canopy came in five sections and went together beautifully.
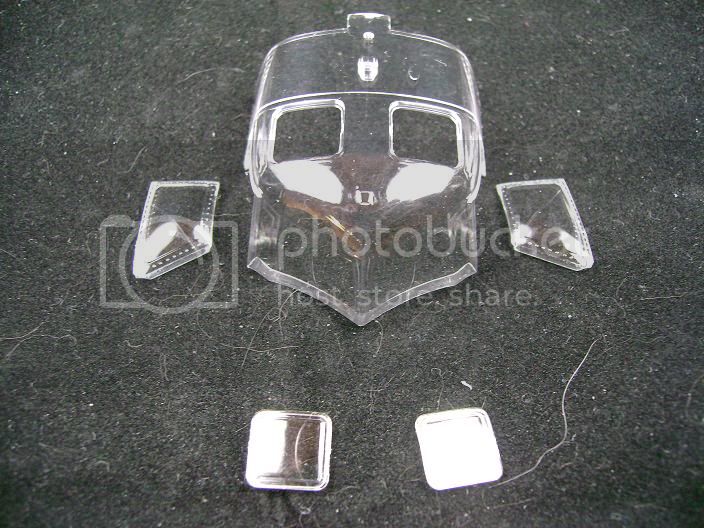
So far no major fit issues.first time Ive built a kinetic kit and I am loving it.I see an EA-6B in my future.working on engines right now post pic's soon.
"From time to time, the tree of liberty must be watered with the blood of
tyrants and patriots."
- Thomas Jefferson
IPMS#47611
Germany
Joined: September 07, 2005
KitMaker: 5,609 posts
AeroScale: 5,231 posts
Posted: Tuesday, July 06, 2010 - 07:17 PM UTC
Great build Justin!
Take care with the nacelles. I have read elsewhere that the fit to the wing is pretty "challenging". I will do a few fun builds before I attempt this project...
all the best
Steffen
DULCE ET DECORUM EST PRO HOBBY MORI
New York, United States
Joined: January 29, 2004
KitMaker: 3,836 posts
AeroScale: 1,036 posts
Posted: Tuesday, July 06, 2010 - 07:41 PM UTC
Quoted Text
Take care with the nacelles. I have read elsewhere that the fit to the wing is pretty "challenging".
Yes indeed they were challenging. Theres a large step up where the engine meets the wing. I had to sand, cut, sand and fill to get it to match up. In the end everything worked out well.
She's really taking shape Justin, can't wait to see the decaling.
Happy Modeling,
Joe
It feels like bible camp
Only Im not crying pretending Im somewhere else.
Happy Modeling
Joe
Florida, United States
Joined: January 14, 2009
KitMaker: 2,798 posts
AeroScale: 2,443 posts
Posted: Wednesday, July 07, 2010 - 06:06 AM UTC
Thanks for the heads up guys.we will see how the dry fitting goes.
"From time to time, the tree of liberty must be watered with the blood of
tyrants and patriots."
- Thomas Jefferson
IPMS#47611
Attica, Greece / Ελλάδα
Joined: May 01, 2008
KitMaker: 1,437 posts
AeroScale: 1,241 posts
Posted: Wednesday, July 07, 2010 - 07:12 AM UTC
Wow, I loved it!

Cheers Nick

Florida, United States
Joined: January 14, 2009
KitMaker: 2,798 posts
AeroScale: 2,443 posts
Posted: Wednesday, July 07, 2010 - 02:51 PM UTC
Joe and Alpha I have fitted the engines to the wing with just a little bit of sanding.Its drying right now but while doing so I can see where you might run into a problem.One of the locater pins on the front inside part of the wing is in the wrong spot.Remove this and everything goes together like butter
"From time to time, the tree of liberty must be watered with the blood of
tyrants and patriots."
- Thomas Jefferson
IPMS#47611
Noord-Holland, Netherlands
Joined: October 11, 2009
KitMaker: 30 posts
AeroScale: 2 posts
Posted: Thursday, July 08, 2010 - 06:09 AM UTC
same here, engines fit perfect after removing the peg. Minimal use of putty and sanding necessary. this is the best fitting kit i have ever made.
Australia
Joined: July 09, 2010
KitMaker: 2 posts
AeroScale: 1 posts
Posted: Thursday, July 08, 2010 - 02:23 PM UTC
It's not so much that there are fit issues with the kit - it's just that so many of the locator pins are either too long, too thick or in the wrong position that they PREVENT the parts from fitting. It's just a little frustrating.
So far I've had to shorten or remove the vast majority of the locator pins.
Rob
AussieReg
Associate Editor 
#007
Victoria, Australia
Joined: June 09, 2009
KitMaker: 8,156 posts
AeroScale: 3,756 posts
Posted: Friday, July 09, 2010 - 04:55 AM UTC
Looking great Justin, but you're going a bit slow mate. I was expecting primer by now

ON the bench
Revell 1/24 '53 Corvette (building as '54)
Revell 1/24 BMW 507 Coupe and Cabrio
Italeri 1/48 Me262 B-1a/U1 Nightfighter
Monogram 1/24 '57 Chevy Nomad
Dragon 1/350 USS Frank Knox DD-742
Florida, United States
Joined: January 14, 2009
KitMaker: 2,798 posts
AeroScale: 2,443 posts
Posted: Friday, July 09, 2010 - 09:25 AM UTC
wait till I post pics tonight
"From time to time, the tree of liberty must be watered with the blood of
tyrants and patriots."
- Thomas Jefferson
IPMS#47611
Florida, United States
Joined: January 14, 2009
KitMaker: 2,798 posts
AeroScale: 2,443 posts
Posted: Friday, July 09, 2010 - 09:27 AM UTC
Oh almost forgot its easy to blow through the wwII stuff aussie but the modern stuff takes a little longer
"From time to time, the tree of liberty must be watered with the blood of
tyrants and patriots."
- Thomas Jefferson
IPMS#47611
AussieReg
Associate Editor #007
Victoria, Australia
Joined: June 09, 2009
KitMaker: 8,156 posts
AeroScale: 3,756 posts
Posted: Friday, July 09, 2010 - 12:26 PM UTC
Quoted Text
Oh almost forgot its easy to blow through the wwII stuff aussie but the modern stuff takes a little longer
No excuses Justin, stop typing and start building
ON the bench
Revell 1/24 '53 Corvette (building as '54)
Revell 1/24 BMW 507 Coupe and Cabrio
Italeri 1/48 Me262 B-1a/U1 Nightfighter
Monogram 1/24 '57 Chevy Nomad
Dragon 1/350 USS Frank Knox DD-742
Florida, United States
Joined: January 14, 2009
KitMaker: 2,798 posts
AeroScale: 2,443 posts
Posted: Friday, July 09, 2010 - 04:34 PM UTC
"From time to time, the tree of liberty must be watered with the blood of
tyrants and patriots."
- Thomas Jefferson
IPMS#47611
New Hampshire, United States
Joined: November 09, 2008
KitMaker: 615 posts
AeroScale: 459 posts
Posted: Saturday, July 10, 2010 - 07:44 AM UTC
Looking excellent Justin

I have learned to expect nothing less from you
Show me more show me more
P-61 Black Widows, the Group Build
Veni, Vidi, Velcro; I came, I saw, I stuck around
Florida, United States
Joined: January 14, 2009
KitMaker: 2,798 posts
AeroScale: 2,443 posts
Posted: Saturday, July 10, 2010 - 12:05 PM UTC
Thanks for the compliment
"From time to time, the tree of liberty must be watered with the blood of
tyrants and patriots."
- Thomas Jefferson
IPMS#47611