Lockheed P-38L - 1/48 Hasegawa
Germany
Joined: September 07, 2005
KitMaker: 5,609 posts
AeroScale: 5,231 posts
Posted: Thursday, July 22, 2010 - 01:43 AM UTC
Hi all
I am not sure if I already started a Blog but as Jim did not implement the BLOG feature yet and I could not find any using the search I just start this one. Yes another one

but time is tunning and if I want to make the dead line I should better start this thingie.
Looking at the 4 PE frames I get a pretty bad feeling in the stomach. At least I won't need it for the pit .. well I will use the dash board, but everything else comes from the KMC set. I started cutting and testfitting it and I painted it XF-5 ...
Here are two pix of the stuff I will use (forgot I already had one but the wheels are new):


all the best
Steffen
DULCE ET DECORUM EST PRO HOBBY MORI
Missouri, United States
Joined: November 24, 2008
KitMaker: 564 posts
AeroScale: 510 posts
Posted: Thursday, July 22, 2010 - 01:52 AM UTC
cool!
Love me some lightning action!
I look forward to your thoughts on this kit as well, I need another p-38 in the que.
Nothing quite like getting lost in plastic
On the bench:Revell 1/48 P-38 Lightning built as an F-5B
Next:??
Germany
Joined: September 07, 2005
KitMaker: 5,609 posts
AeroScale: 5,231 posts
Posted: Thursday, July 22, 2010 - 04:11 AM UTC
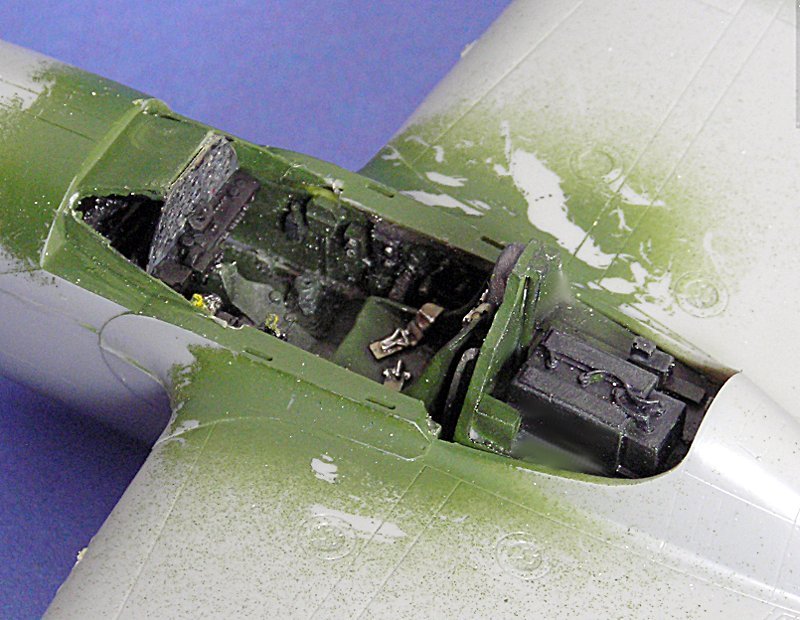
Starting with the pit:
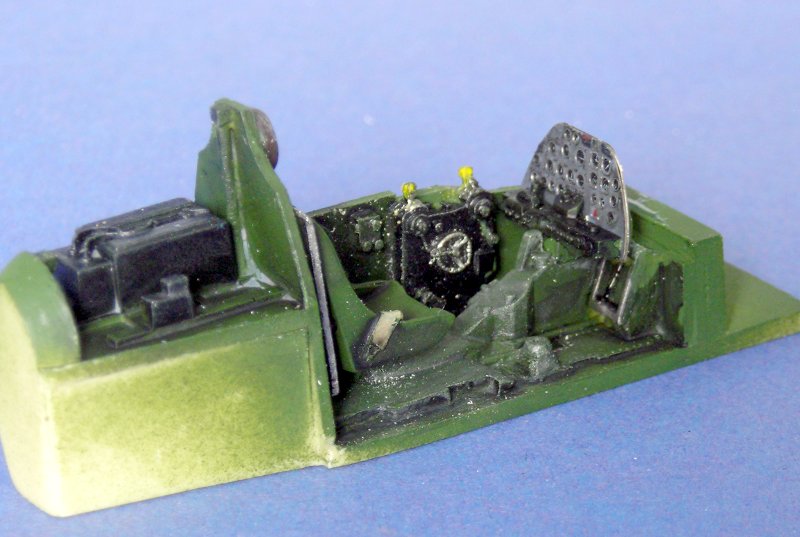
sorry for the dust... wo gehobelt wird da fallen Späne.
all the best
Steffen
DULCE ET DECORUM EST PRO HOBBY MORI
Wisconsin, United States
Joined: March 17, 2009
KitMaker: 156 posts
AeroScale: 153 posts
Posted: Thursday, July 22, 2010 - 05:39 AM UTC
Hi Steffen-
Nice job so far.
I'm building a Hasegawa P-38H for the Pin-Ups campaign, so will follow yours with interest. Due to the deadline and my terrible slowness, mine is OOB. The only problem I've had so far was with warped tail booms - and it turned into a HUGE problem because I ruined one trying to unwarp it in boiling water.

Good luck!
On the workbench:
WNW 1/32 Fokker E.II for Canvas Falcons III
Trumpeter 1/32 MiG-21F-13 for 2nd Gen Jets Campaign
Attica, Greece / Ελλάδα
Joined: May 01, 2008
KitMaker: 1,437 posts
AeroScale: 1,241 posts
Posted: Thursday, July 22, 2010 - 06:44 AM UTC
That's really interesting

The cockpit is good

Clean the wash in some areas.
Keep going

Cheers Nick

Germany
Joined: September 07, 2005
KitMaker: 5,609 posts
AeroScale: 5,231 posts
Posted: Thursday, July 22, 2010 - 07:00 AM UTC
Hi Tom and Nick
Tom: the booms look straight in my kit, what I have read is that the F/G/H kit is more critical in that area.
Nick: no need to do so, but thanks for the hint!
@all: any Idea where I have to cut to separate the canvas cover for the instrument panel?
all the best
Steffen
DULCE ET DECORUM EST PRO HOBBY MORI
Germany
Joined: September 07, 2005
KitMaker: 5,609 posts
AeroScale: 5,231 posts
Posted: Friday, July 23, 2010 - 11:38 PM UTC
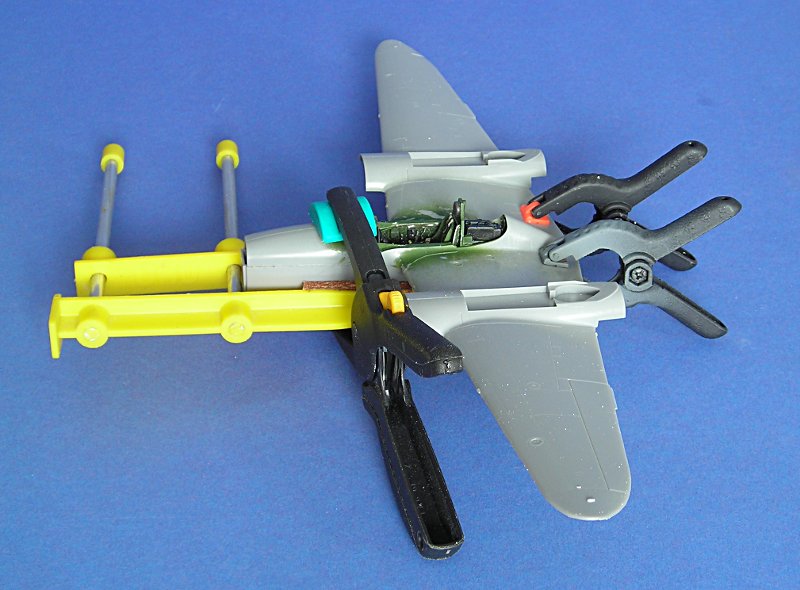
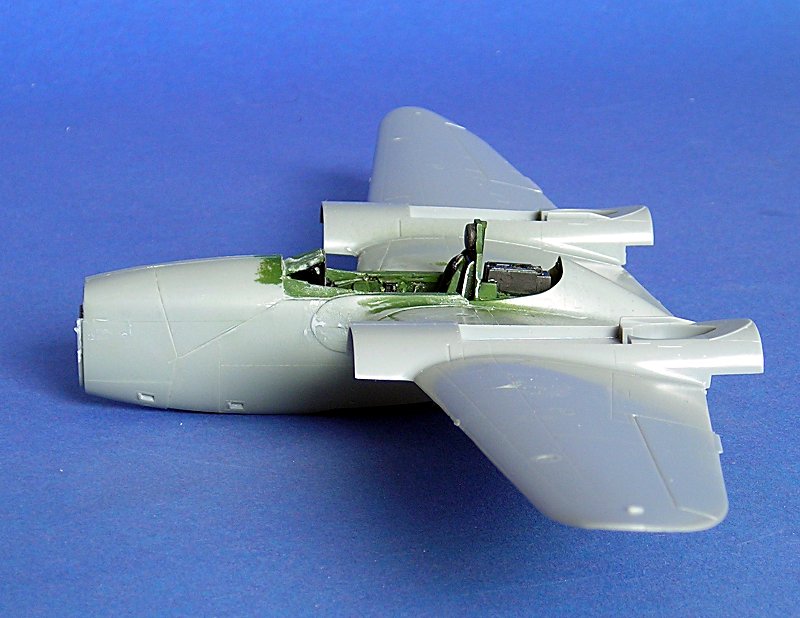
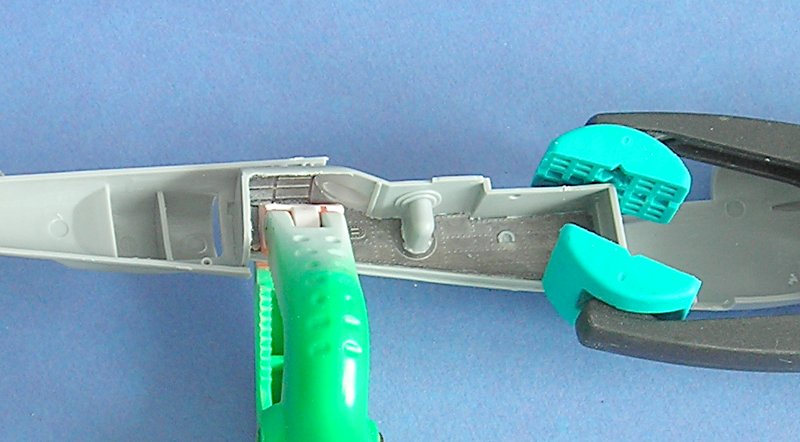
I posted the question on Hyperscale and luckily there were a few people that shared their knowledge. So I cut that part of the Hasegawa Kit away. While I was at it i fit in the pit and then all the joy began to fit the two fuselage parts together. Sanding resin, grinding, sanding plastic, check .... and again ... and again... and again ... you get the picture.
Well finally I got it fit. The clamps you see in the picture are only there to ensure that the kit sticks together in the right position. There is almost no pressure on them just enough to keep everything in place while the glue sets
all the best
Stefen
DULCE ET DECORUM EST PRO HOBBY MORI
AussieReg
 Associate Editor
#007
Victoria, Australia
Joined: June 09, 2009
KitMaker: 8,156 posts
AeroScale: 3,756 posts
Posted: Saturday, July 24, 2010 - 01:18 AM UTC
Great work Steffen, as Shawn said earlier you gotta love the Lightning action !!
How do you think you'll go with the August 31 checquered flag ??
Keep the progress pics coming, you know I love your threads mate !!!
Cheers, D
ON the bench
Revell 1/24 '53 Corvette (building as '54)
Revell 1/24 BMW 507 Coupe and Cabrio
Italeri 1/48 Me262 B-1a/U1 Nightfighter
Monogram 1/24 '57 Chevy Nomad
Dragon 1/350 USS Frank Knox DD-742
Germany
Joined: September 07, 2005
KitMaker: 5,609 posts
AeroScale: 5,231 posts
Posted: Saturday, July 24, 2010 - 01:30 AM UTC
Hi Damian
Well, I am not sure yet. It all depends how the PE parts fit and how fiddly these are... also the decals look really bad and I will have to find a solution for that problem. The last campaign project went very well (FM-2) .. but that is rather the exception than the rule with my projects .....
so we'll see in a few weeks
all the best
Steffen
DULCE ET DECORUM EST PRO HOBBY MORI
Germany
Joined: September 07, 2005
KitMaker: 5,609 posts
AeroScale: 5,231 posts
Posted: Saturday, July 24, 2010 - 06:14 AM UTC
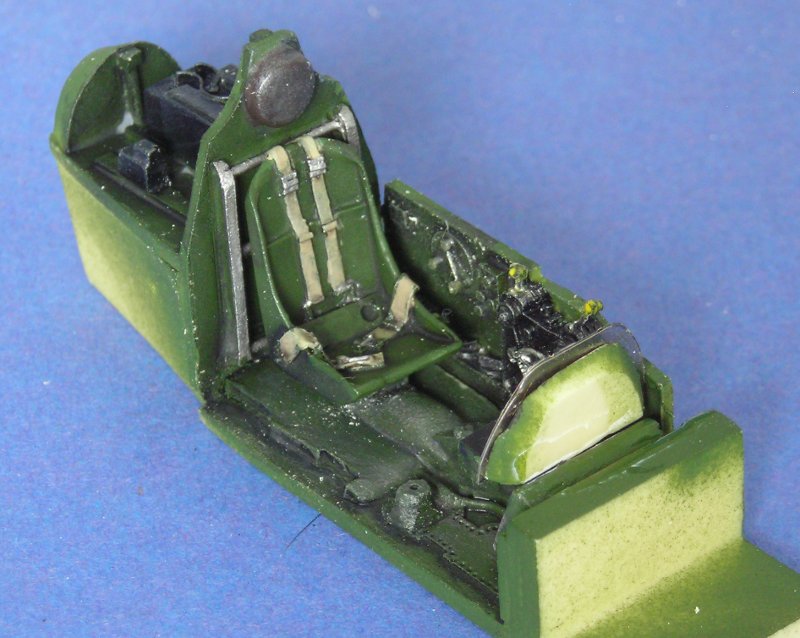
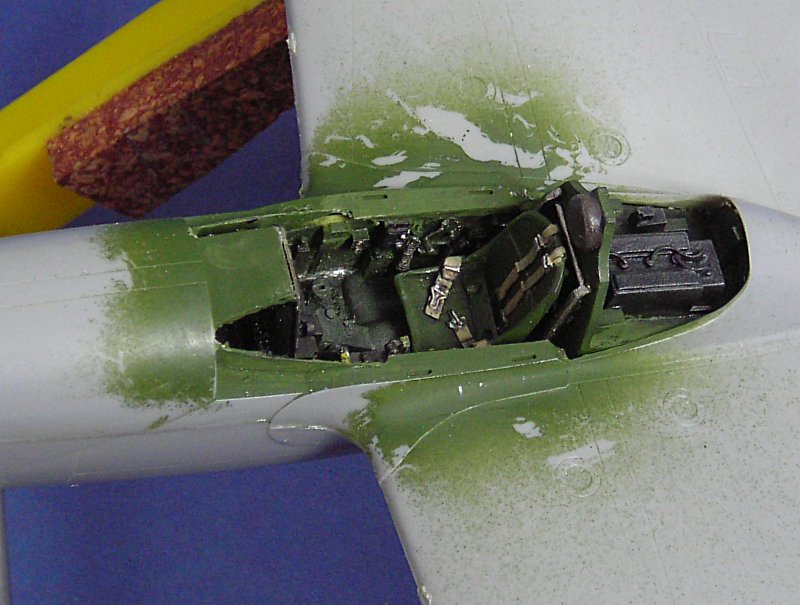
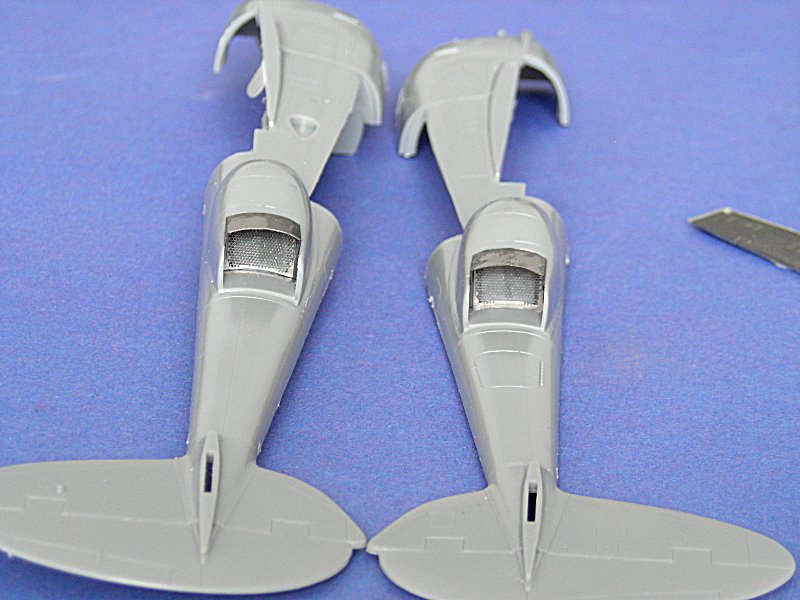
More pix .. control column still missing, but the cockpit is starting to look the part
all the best
Steffen
DULCE ET DECORUM EST PRO HOBBY MORI
Florida, United States
Joined: January 14, 2009
KitMaker: 2,798 posts
AeroScale: 2,443 posts
Posted: Saturday, July 24, 2010 - 01:41 PM UTC
looking good steffen I watch with a close eye
"From time to time, the tree of liberty must be watered with the blood of
tyrants and patriots."
- Thomas Jefferson
IPMS#47611
Germany
Joined: September 07, 2005
KitMaker: 5,609 posts
AeroScale: 5,231 posts
Posted: Monday, July 26, 2010 - 01:34 AM UTC
Thanks Justin!
There went some work into this, but I am not sure if it is visible on the pictures. i glued in some weight, than it got some putty around all seams ... after that sanding and rescribing ...
all the best
Steffen
DULCE ET DECORUM EST PRO HOBBY MORI
#439
Washington, United States
Joined: November 05, 2005
KitMaker: 4,950 posts
AeroScale: 3,192 posts
Posted: Monday, July 26, 2010 - 04:01 AM UTC
Steffan, that wing glove (large sheetmetal piece on LE / fuselage joint) sure looks like a challenge.
Hanger Queens in Waiting:
Monogram 1/72 F8F-1
Corsair the Sky Pirate - 1/72 Ace A-7D
Century Series - Airfix 1/72 F-105G
Anti Shipping - Academy 1/72 PBJ-1D
Academy 1/72 F-84E
Wisconsin, United States
Joined: March 17, 2009
KitMaker: 156 posts
AeroScale: 153 posts
Posted: Monday, July 26, 2010 - 06:47 AM UTC
Looks good, Steffan, especially the seams. We're about at the same point on our builds, but you will pass me now, as I am waiting on a replacement boom.
Tenax was my friend while gluing the fuselage halves, and I think helped minimize seams.
I had to use a spreader bar at the front end of the fuselage section in order to get the fuselage to match up with the nose cone diameter. Unlike you, I was not brave enough to cut away the instrument shroud (although I do plan to cover it with some tissue to make it look more canvas-y.
On the workbench:
WNW 1/32 Fokker E.II for Canvas Falcons III
Trumpeter 1/32 MiG-21F-13 for 2nd Gen Jets Campaign
Germany
Joined: September 07, 2005
KitMaker: 5,609 posts
AeroScale: 5,231 posts
Posted: Monday, July 26, 2010 - 06:59 AM UTC
Thanks Mark and Tom!
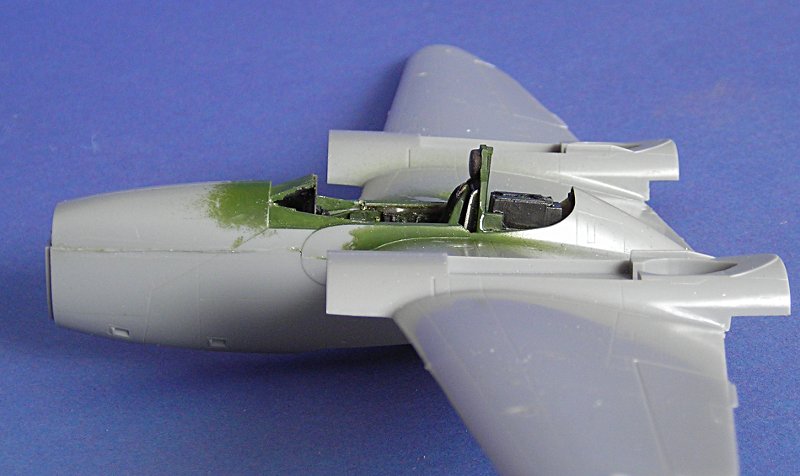
I did not check the nose befor but I just did it. It sits very well! I have a slightly larger gap on top, but way below a mm so not a problem at all and if ther yould be a sloght overhang It will be easily polished away.
I mounted the PE in the front wheel bay today and it went all well

one done but two more and also a bit more difficult

Also testfit the booms, but they are a bit flimsy without the u/c bays..
all the best
Steffen
DULCE ET DECORUM EST PRO HOBBY MORI
Germany
Joined: September 07, 2005
KitMaker: 5,609 posts
AeroScale: 5,231 posts
Posted: Monday, July 26, 2010 - 09:01 PM UTC
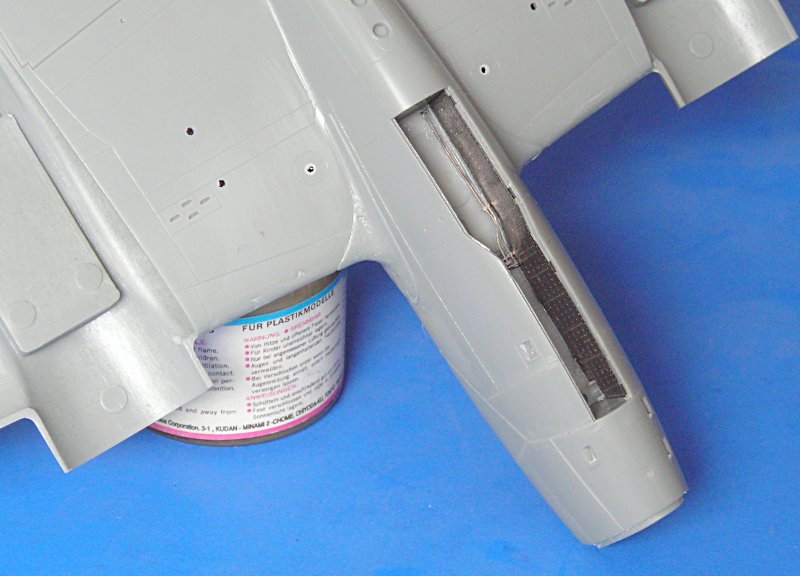
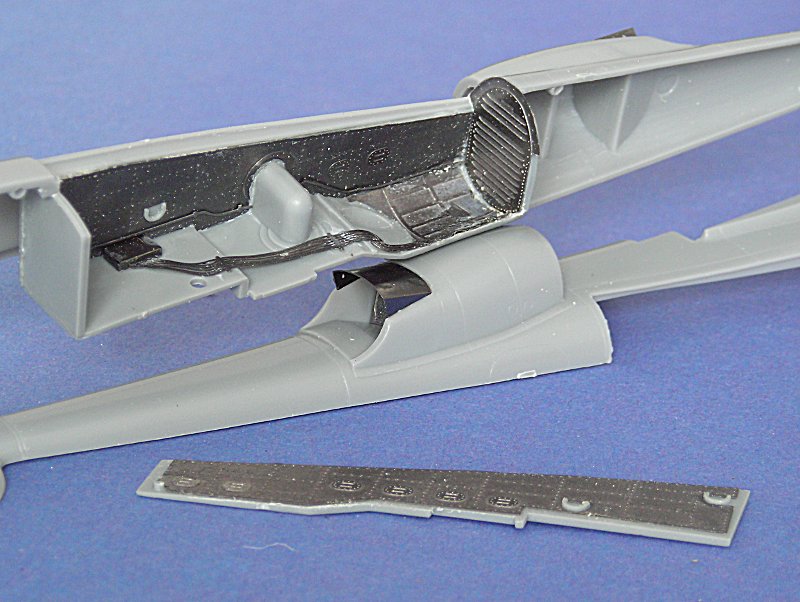
Here is a picture of the nose wheel bay:
all the best
Steffen
DULCE ET DECORUM EST PRO HOBBY MORI
Germany
Joined: September 07, 2005
KitMaker: 5,609 posts
AeroScale: 5,231 posts
Posted: Wednesday, August 18, 2010 - 03:45 AM UTC
Today I finally found some courage to do some cutting at the booms and start working on the wheel wells .... lots of PE parts here
I hope I can show a bit more of those tomorrow ...
all the best
Steffen
DULCE ET DECORUM EST PRO HOBBY MORI
Germany
Joined: September 07, 2005
KitMaker: 5,609 posts
AeroScale: 5,231 posts
Posted: Wednesday, August 18, 2010 - 08:12 PM UTC
Hi again
not much to comment. I am working my way through the Eduard instructions. Luckily these are mostly larger parts. I am using Gators glue with some CA here and there for some extra strength:
all the best
Steffen
DULCE ET DECORUM EST PRO HOBBY MORI
AussieReg
Associate Editor #007
Victoria, Australia
Joined: June 09, 2009
KitMaker: 8,156 posts
AeroScale: 3,756 posts
Posted: Wednesday, August 18, 2010 - 10:16 PM UTC
Looking good Steffen, I was wondering how you were going with this build. The PE additions are time-consuming but well worth the extra effort.
Cheers, D
ON the bench
Revell 1/24 '53 Corvette (building as '54)
Revell 1/24 BMW 507 Coupe and Cabrio
Italeri 1/48 Me262 B-1a/U1 Nightfighter
Monogram 1/24 '57 Chevy Nomad
Dragon 1/350 USS Frank Knox DD-742
Germany
Joined: September 07, 2005
KitMaker: 5,609 posts
AeroScale: 5,231 posts
Posted: Wednesday, August 18, 2010 - 10:25 PM UTC
Cheers D.
Not sure I will make it, but at least I want to try. And yes the PE is really worth it. This is one of the sets from Eduard that mostly has necessary or at least useable parts and does not only replace similar kit parts.
At the moment I see the biggest problem with the gun sight mount, because it is sooo close to the clear part .. we'll see
all the best
Steffen
DULCE ET DECORUM EST PRO HOBBY MORI
United Kingdom
Joined: March 08, 2009
KitMaker: 719 posts
AeroScale: 691 posts
Posted: Wednesday, August 18, 2010 - 10:47 PM UTC
Nice work with all the PE- getting the curves in the radiator exit flaps looks tricky.
Will you be using the kit's markings?
Germany
Joined: September 07, 2005
KitMaker: 5,609 posts
AeroScale: 5,231 posts
Posted: Wednesday, August 18, 2010 - 10:50 PM UTC
Hi Ben
Yes I have to, but I got myself the latest Bombshell decals so I will only use a few of the badly yellowed kit stuff and take the insignia and stencils from the nice BS sheet .
all the best
Steffen
DULCE ET DECORUM EST PRO HOBBY MORI
#439
Washington, United States
Joined: November 05, 2005
KitMaker: 4,950 posts
AeroScale: 3,192 posts
Posted: Thursday, August 19, 2010 - 03:50 AM UTC
Looking good!
Hanger Queens in Waiting:
Monogram 1/72 F8F-1
Corsair the Sky Pirate - 1/72 Ace A-7D
Century Series - Airfix 1/72 F-105G
Anti Shipping - Academy 1/72 PBJ-1D
Academy 1/72 F-84E
Germany
Joined: September 07, 2005
KitMaker: 5,609 posts
AeroScale: 5,231 posts
Posted: Thursday, August 19, 2010 - 04:23 AM UTC
Thanks Mark!
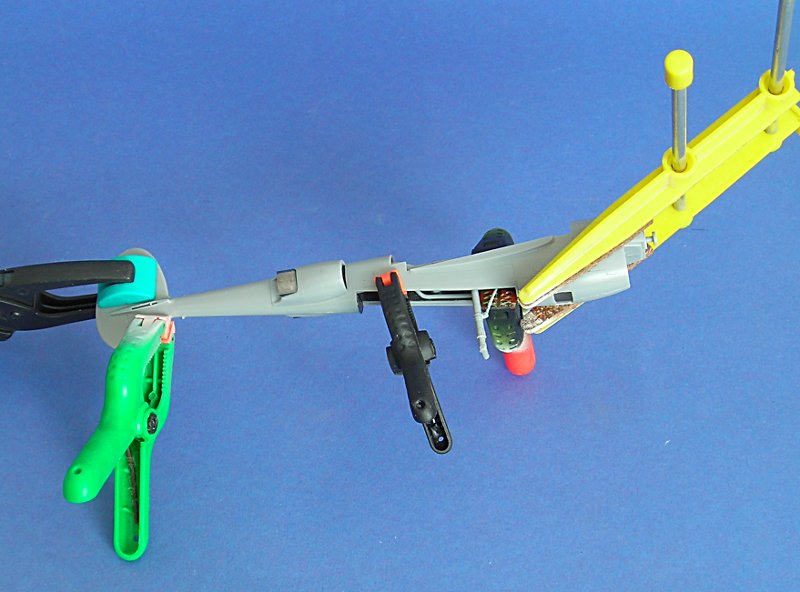
This is the lhs boom maybe 80% done .. the other is at about 40% and will hopefully get in this state tomorrow (I have not enought clamps to do both

)
all the best
Steffen
DULCE ET DECORUM EST PRO HOBBY MORI
#439
Washington, United States
Joined: November 05, 2005
KitMaker: 4,950 posts
AeroScale: 3,192 posts
Posted: Thursday, August 19, 2010 - 04:38 AM UTC
Quoted Text
I have not enought clamps to do both
One of the problems with planes like the P-38 is it's sort of like having to build 3 fuselages to get one plane.

Hanger Queens in Waiting:
Monogram 1/72 F8F-1
Corsair the Sky Pirate - 1/72 Ace A-7D
Century Series - Airfix 1/72 F-105G
Anti Shipping - Academy 1/72 PBJ-1D
Academy 1/72 F-84E


