_GOTOBOTTOM
World War II: Great Britain
Aircraft of Great Britain in WWII.
Hosted by Rowan Baylis
1:32 Revell+MDC Typhoon
robot_
_VISITCOMMUNITY
United Kingdom
Joined: March 08, 2009
KitMaker: 719 posts
AeroScale: 691 posts
Posted: Tuesday, August 17, 2010 - 10:36 PM UTC
Although I have not really completed the 1:72 build of my firebomber tiffie, I am starting a 1:32 version!

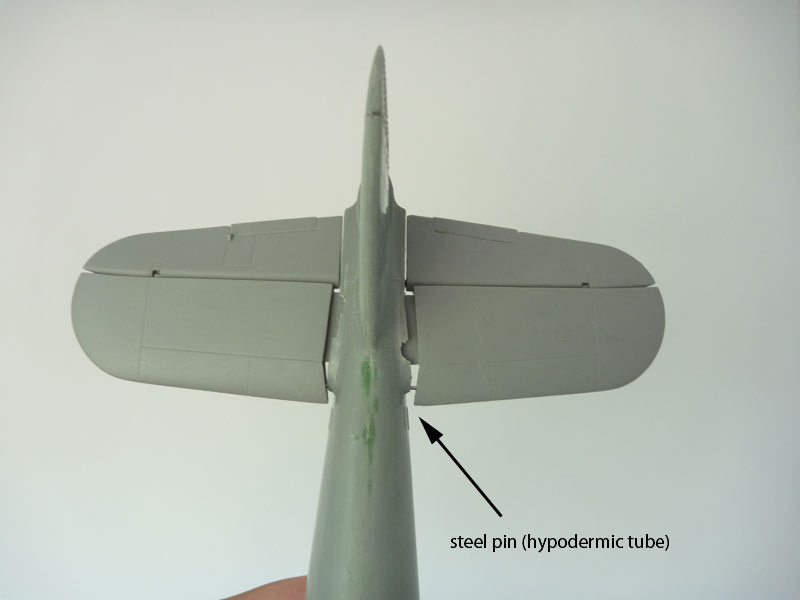
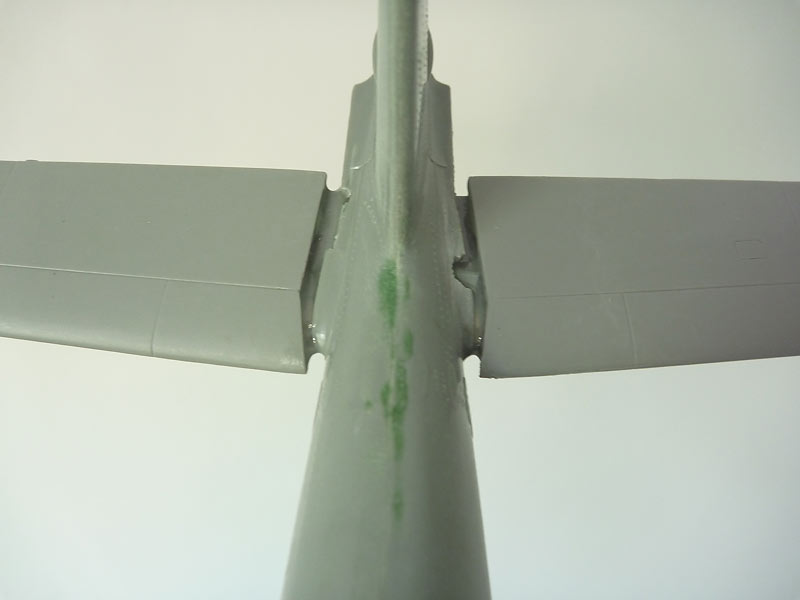
The first stages have been strange- working backwards from a completed model. Initially I was just going to re-paint it, but I have to correct a few things first... It is the car-door Revell release, with a home-made metal 4 blade prop and vac canopy. I stripped the paint with Mr. Muscle oven cleaner, then removed the wings for access to the cockpit. I shall be upgrading it with MDC bits (thanks to Bob for supplying a strange assortment of parts!).


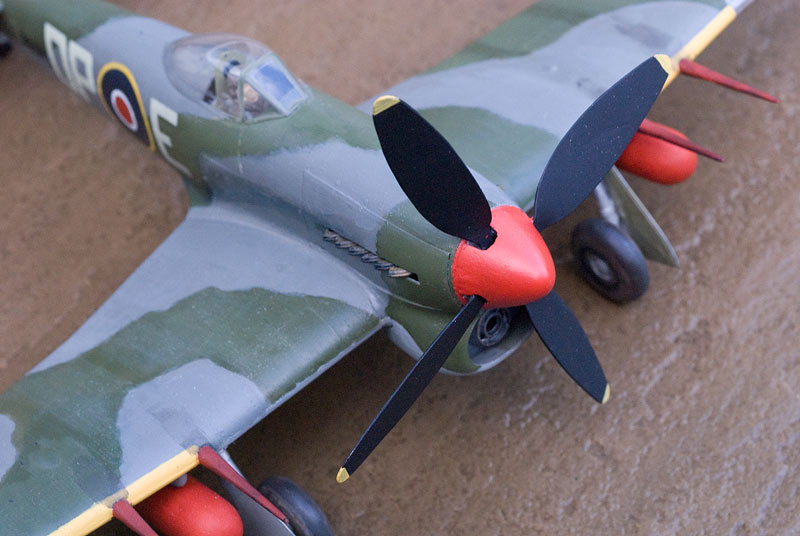
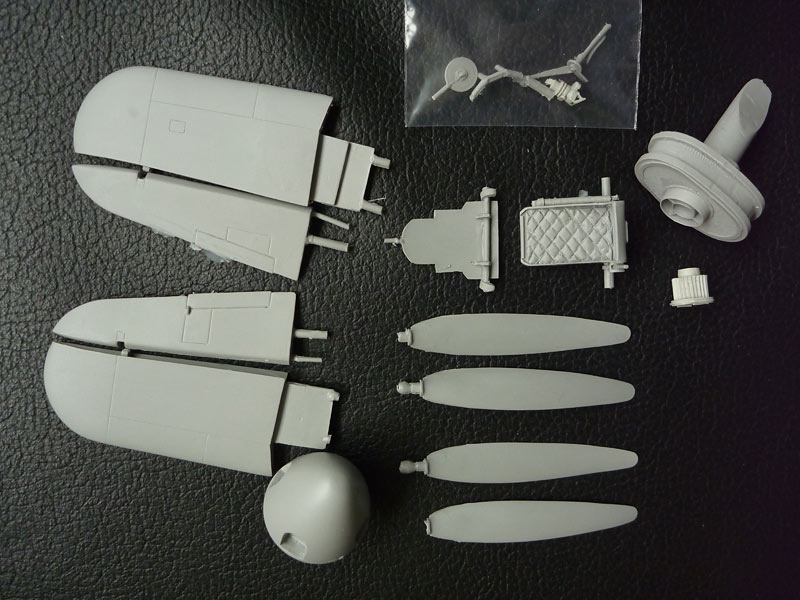
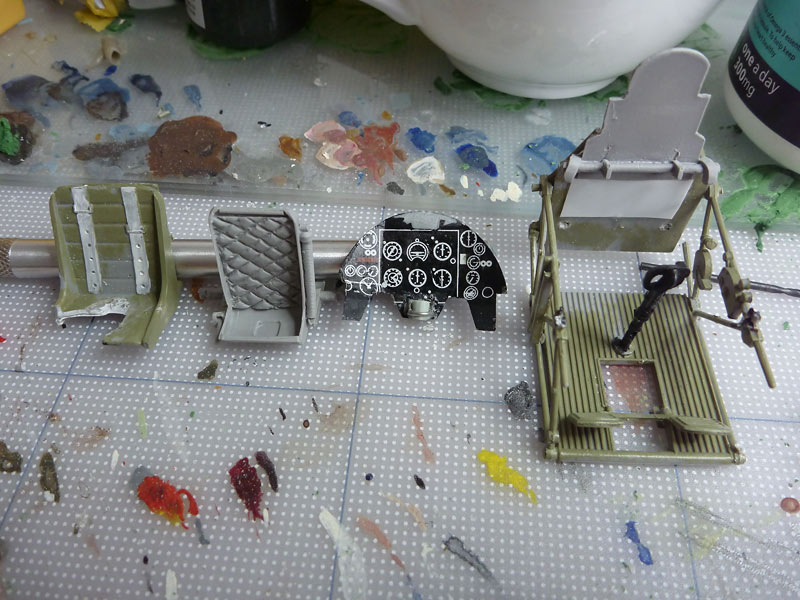
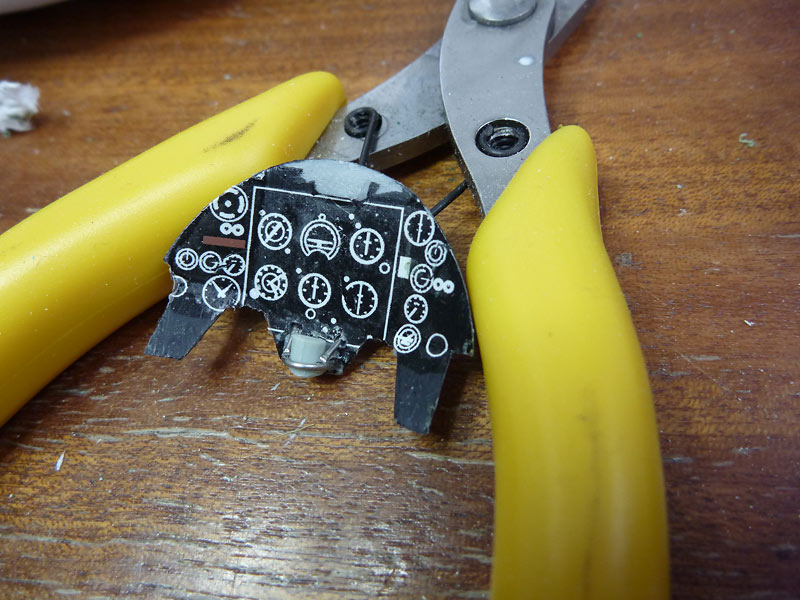
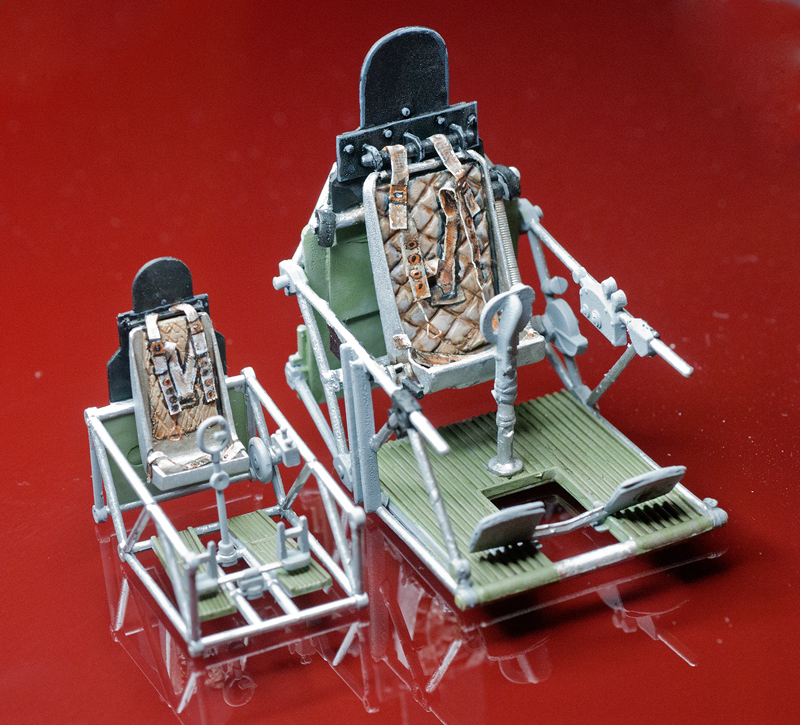
MDC goodies- tailplanes, seat and headrest, 4 blade prop, radiator, radiator filter, gunsight and its framework


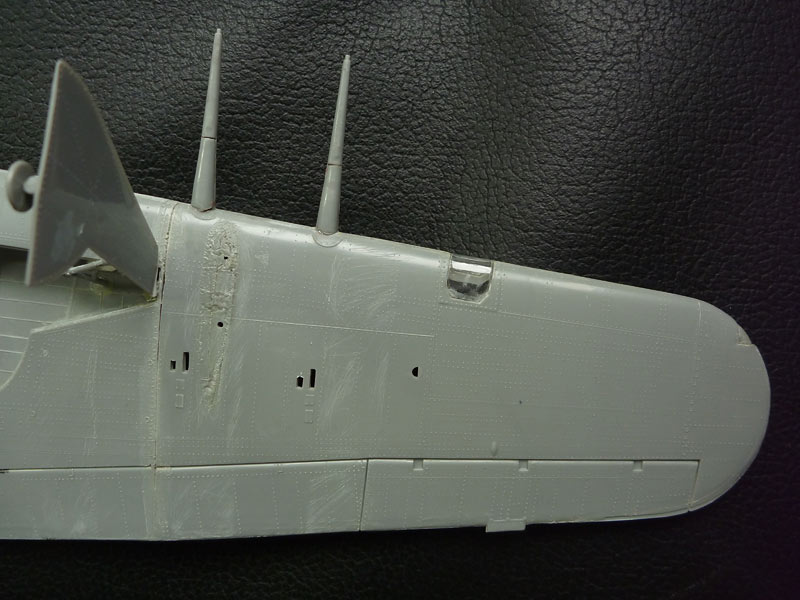
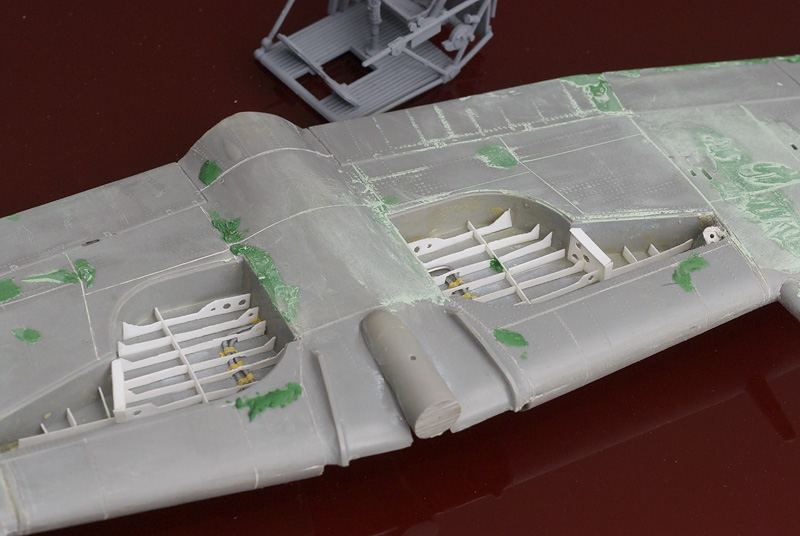
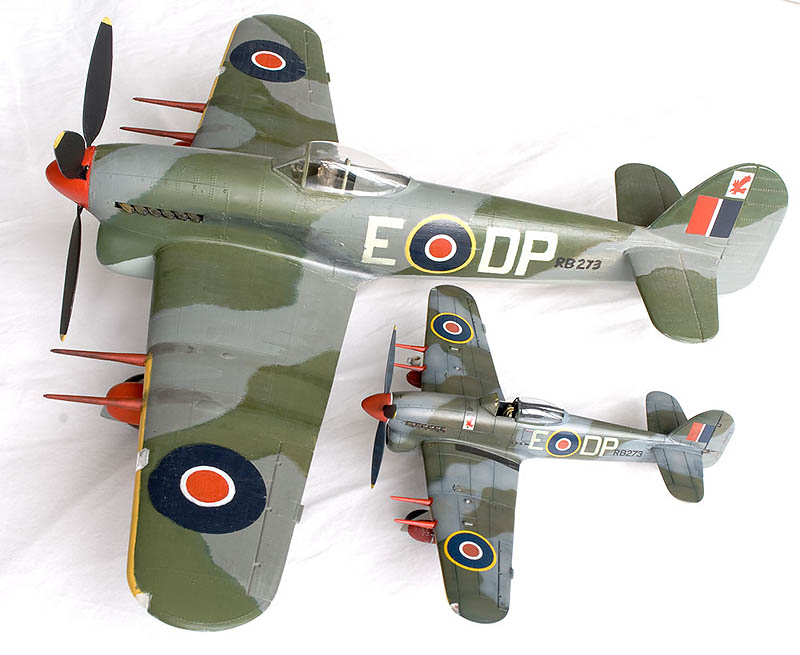
The model's napalm tanks were mounted on racks in the earlier location- the later bomb rack location was more outboard- almost mid-way between the cannons- which was a stronger part of the wing, and enabled the carriage of 1000 lb bombs. The inboard position could still be used for long-range 44 gal fuel tanks with the outboard bomb racks still in place (without anything attached though).


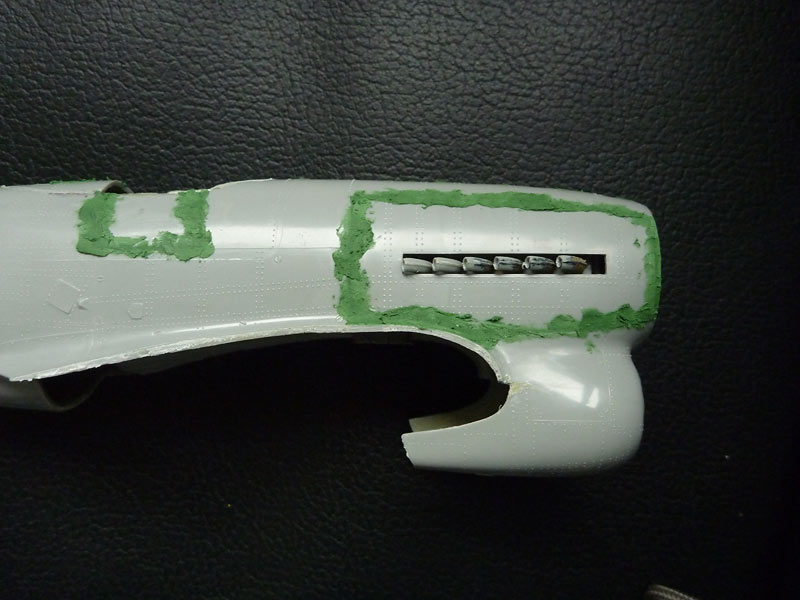
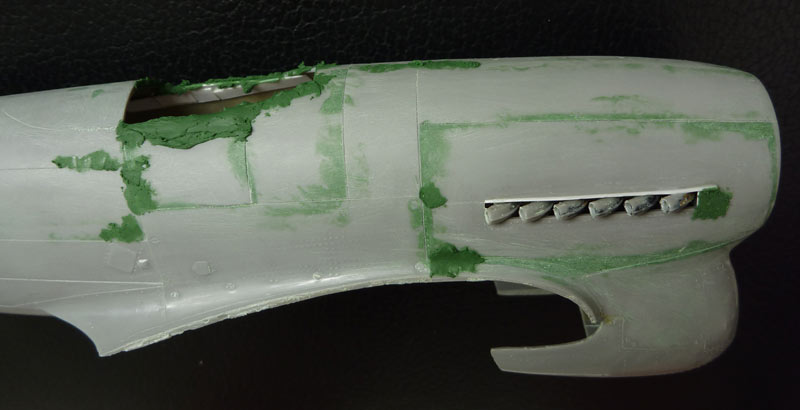
Drilled out the exhausts.


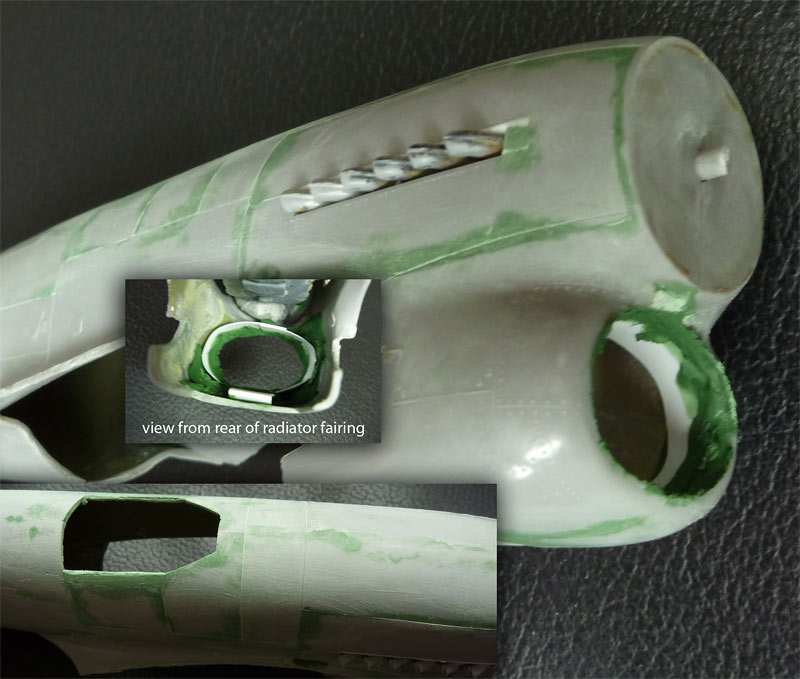
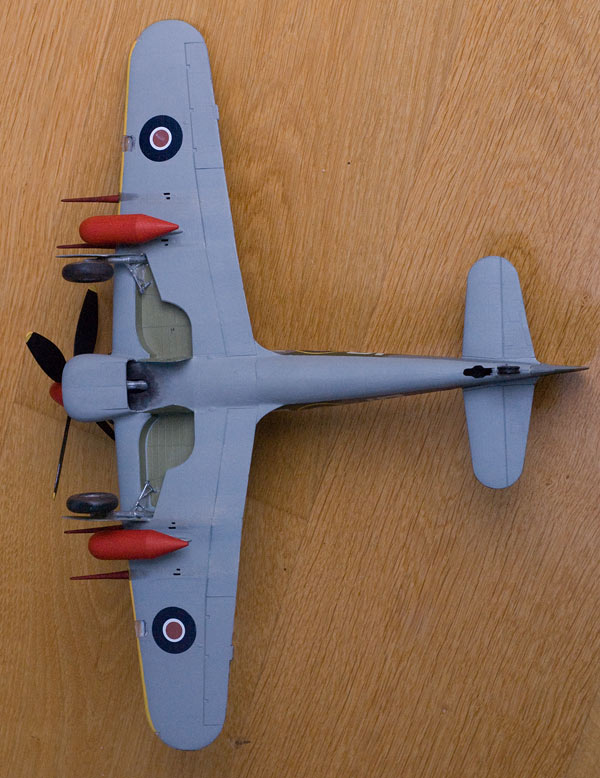
Radiator flap has been cut out.


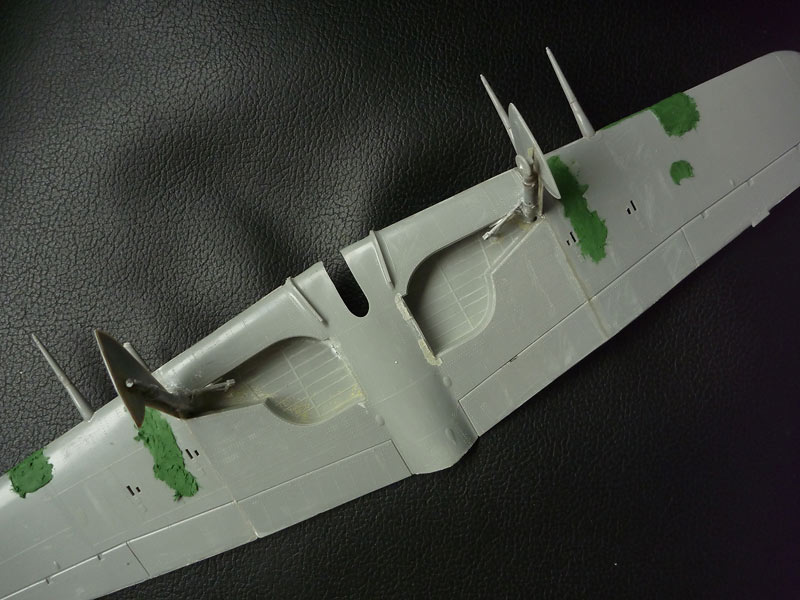
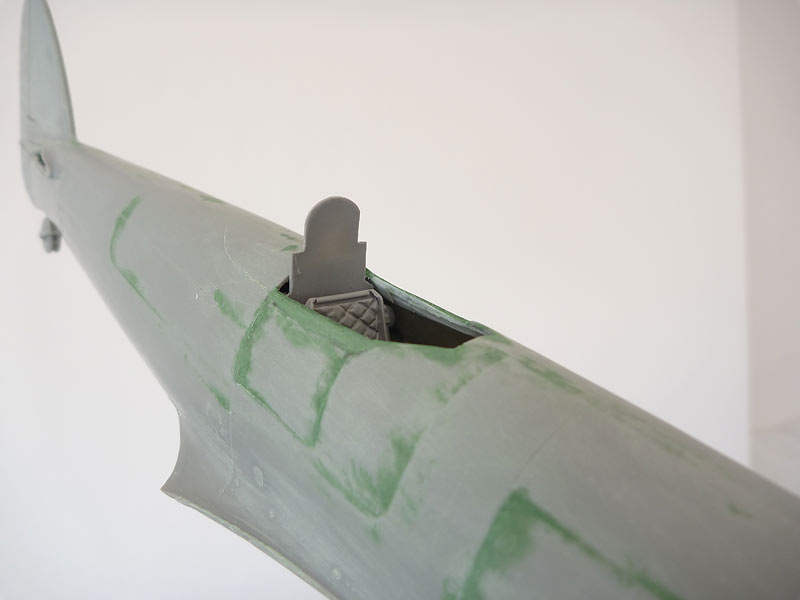
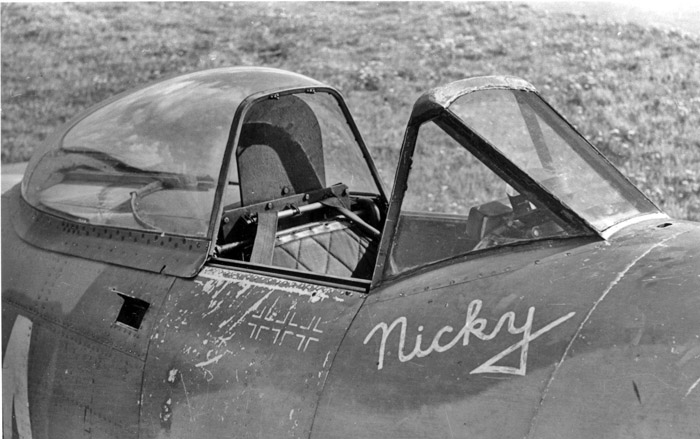
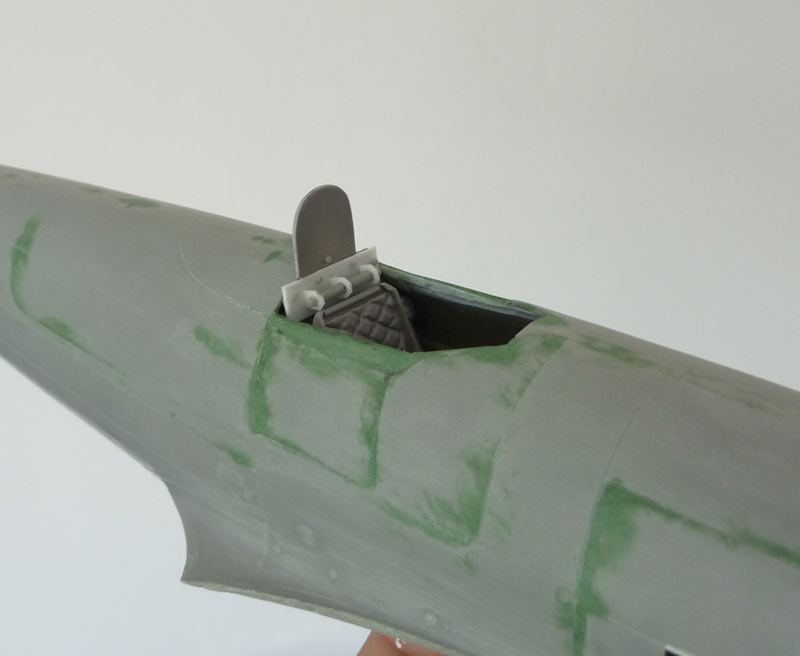
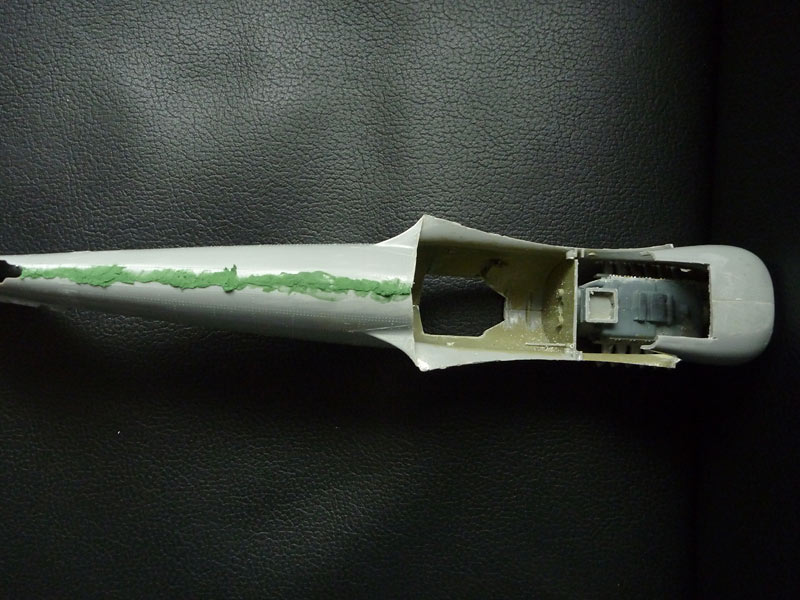
Front edges of the cockpit have been re-cut at a different angle- the front part of the bubble canopy was deeper than the steep windscreen of the car-door canopy.

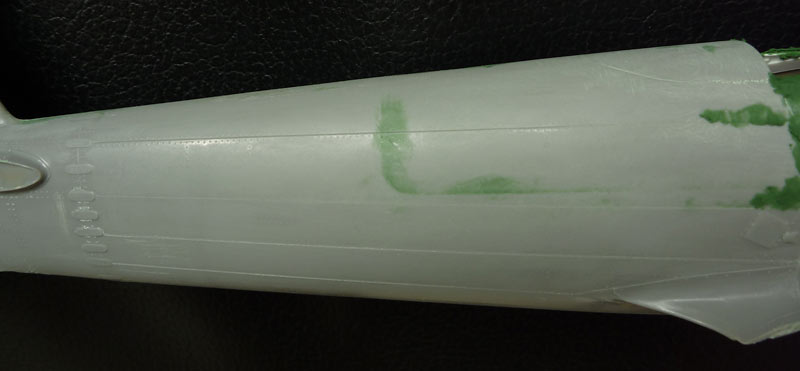
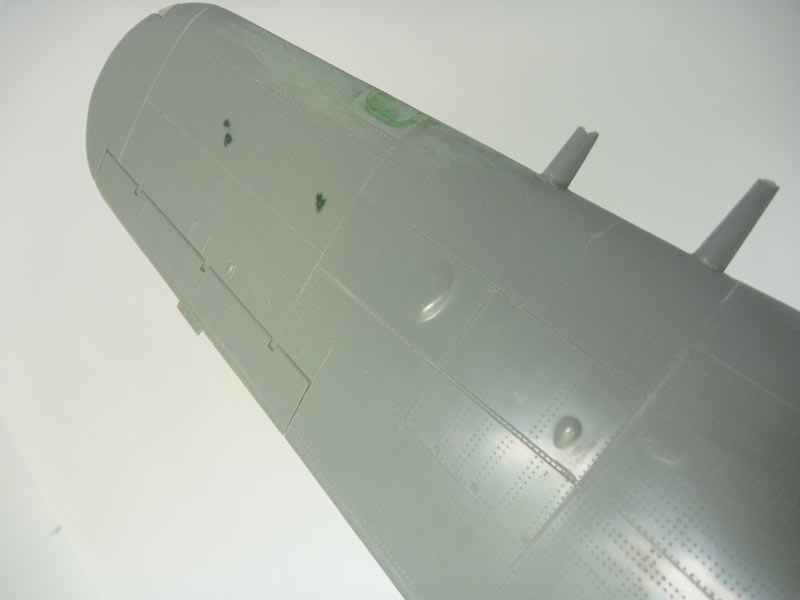
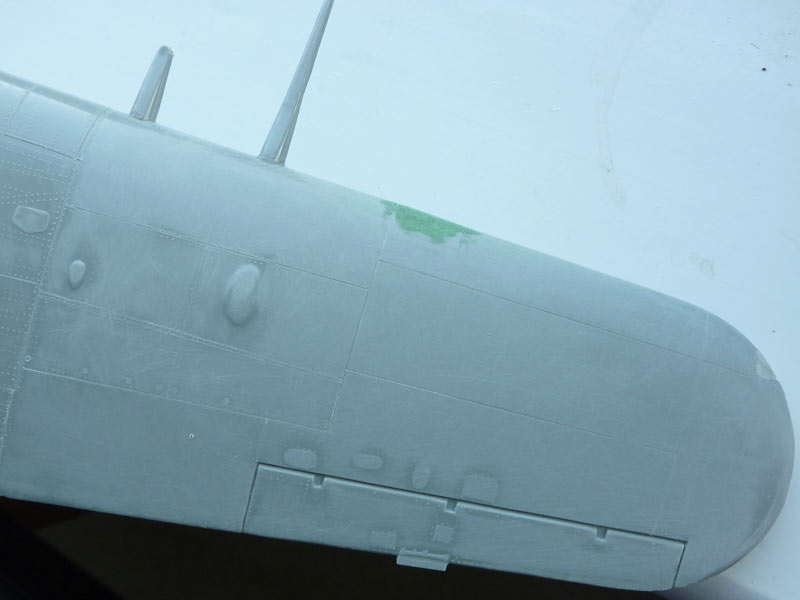
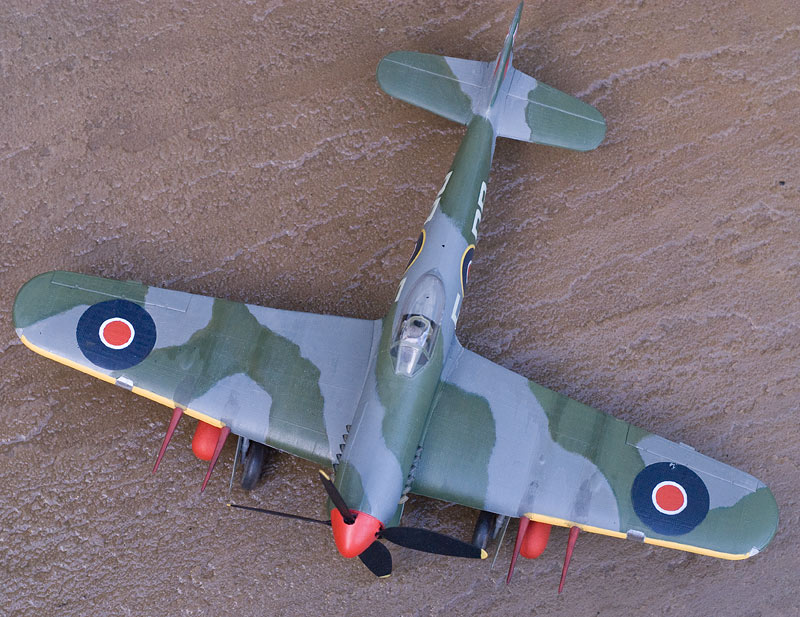
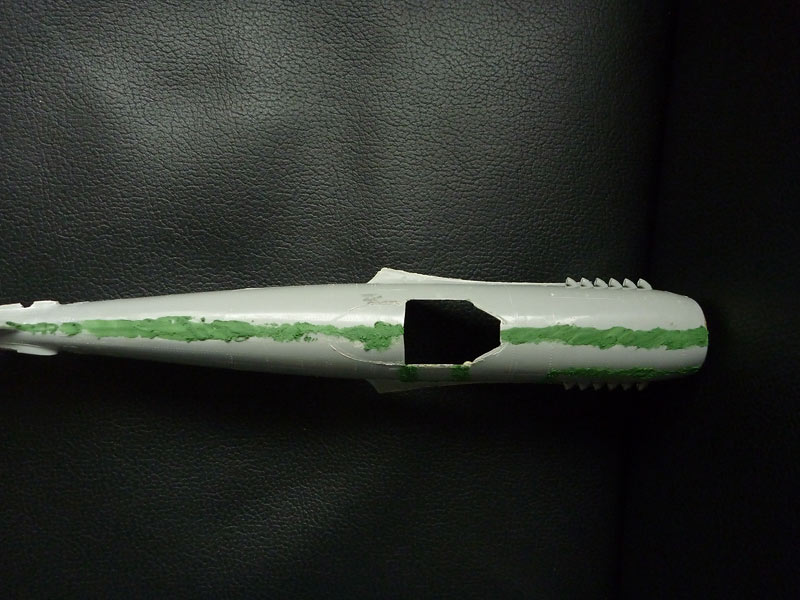
This will be my first attempt at re-scribing an entire model! The markings will be painted with Miracle Masks, a couple of home-printed transfers for small details. I might have a go at printing stencil transfers too. This is hopefully going to be a bit of a speed build, as I want to get it back to its owner ASAP.
robot_
_VISITCOMMUNITY
United Kingdom
Joined: March 08, 2009
KitMaker: 719 posts
AeroScale: 691 posts
Posted: Wednesday, August 18, 2010 - 10:11 PM UTC
Sanding and filling and scribing. I am using the RB scribing tool, which is very, very easy to use. Even so, I have made a few mistakes, and had to fill panel lines that went off course. I have discovered that you can get quite nice smooth curves by using the back of the tool (which is serrated- originally designed for re-scribing around wing leading edges and fuselage spines). Once you have the shallow path scored with the back, you can deepen it with scriber as usual.

I have reduced the size of the cockpit opening, as the canopy is not wide enough (this was previously filled with a large amount of glue holding the canopy on). Also filled gaps around the exhausts, as the exhausts are under sized (as is the whole sabre engine).


After I am happy with the fuselage, I will need to work on fairing the larger tailplanes in, and creating an inner lining for the radiator intake (currently you can see up into the engine bay). Right now the MDC kit looks a lot easier than updating this one!
Merlin
Staff MemberSenior Editor
AEROSCALE
#017
_VISITCOMMUNITY
United Kingdom
Joined: June 11, 2003
KitMaker: 17,582 posts
AeroScale: 12,795 posts
Posted: Thursday, August 19, 2010 - 08:56 PM UTC
Nice one Ben

This looks a pretty massive undertaking! The old paint came off very well with Mr. Muscle though - was it enamel or acrylic?

All the best

Rowan
robot_
_VISITCOMMUNITY
United Kingdom
Joined: March 08, 2009
KitMaker: 719 posts
AeroScale: 691 posts
Posted: Thursday, August 19, 2010 - 09:04 PM UTC
Hi Rowan,

It was enamel. The only few spots left were under the decals- I'm sure with a second soak they would come off, but I knew I would be sanding, so didn't bother. The glue used was the thick poly cement type, and the Mr Muscle weakened it a lot- I've had to re-glue the wings parts and fuselage in a few places.
robot_
_VISITCOMMUNITY
United Kingdom
Joined: March 08, 2009
KitMaker: 719 posts
AeroScale: 691 posts
Posted: Friday, August 20, 2010 - 08:48 PM UTC
Fitted the inner liner for the radiator intake last night. I tacked the plastic sheet to the front of the MDC radiator with four spots of superglue so it kept the exact shape I needed. Then I splodged a lot of green squadron putty all over the place. I then cut/pulled free the radiator. I think I will back-fill with milliput before sanding, and the plastic sheet was thin.

Holdfast
Staff MemberPresident
IPMS-UK KITMAKER BRANCH
#056
_VISITCOMMUNITY
England - South West, United Kingdom
Joined: September 30, 2002
KitMaker: 8,581 posts
AeroScale: 4,913 posts
Posted: Saturday, August 21, 2010 - 03:14 AM UTC
Hi Ben,
Some nice work going on there, and an interesting scheme.
robot_
_VISITCOMMUNITY
United Kingdom
Joined: March 08, 2009
KitMaker: 719 posts
AeroScale: 691 posts
Posted: Wednesday, September 01, 2010 - 07:03 AM UTC
Thanks Mal, I can't wait to get painting, and try out the masks. A lot more work on the surface needed before that unfortunately...


After a few rounds of filling and sanding. I still have to make the bulge in the centre of the upper part of the opening. I'll probably make a stack of styrene card and smooth with green filler.


This wing has been scribed, but the surface has not been sanded yet.


This has been sanded. I will have to re-build the bulge over the cannon bay, as in reality they were quite steep-sided.


Cockpit was removed in (almost) one peice. Compare the MDC seat with the Revell one. I think the MDC quilting could have been better- you can see the tool marks in the putty used to make the master. Also the diamond pattern ran with the diamonds longest side downwards, not sideways (though that is being very picky!). The pattern could also have been a bit shallower- the padding was in fact quite thin. The MDC headrest has been attached.


You can see the instrument panel has a decal of the instruments- I don't have a punch and die set to make the dials, so I just opted for painting some improvements on the decal. I have removed the lame attempts by Revel at making a gunsight and compass from the top and bottom of the IP, and I have scratch built a new compass. The gunsight will be replaced with a resin one, on its own mounting frame attached to the fuselage.


Compass painted, and re-touched the instruments (not the most beautiful thing in the world, but the canopy is closed).


The MDC headrest doesn't look right....


This is what it is supposed to look like- the top is much rounder, the sides longer, and the step is nearer the bottom and is proud of the surface. There is also a bar, over which the shoulder straps run.


Resin part re-shaped, bar made from stretched sprue, with styrene card supports. slices of stretched sprue used to form the bolts that look quite prominent in the photos.


Dry-fitting of the resin larger (Tempest) tailplanes.


Glued with Araldite Rapid. I began trying to use masking tape to hold them in the right place, but the epoxy goes stiff fast enough to just hold it in the right position (and I also couldn't get enough pieces of tape in place to control all the possible axes of movement).


Looks reasonably square and equally spaced each side- now to fill those fillets without trashing the super-smooth resin....
robot_
_VISITCOMMUNITY
United Kingdom
Joined: March 08, 2009
KitMaker: 719 posts
AeroScale: 691 posts
Posted: Friday, September 10, 2010 - 12:54 AM UTC
Does anyone have a favorite way of engraving cowling fasteners? I basically want to engrave a circle about 1mm or slightly smaller in diameter. I have tried a hypodermic tube, but it didn't work (not sharp enough).

The only thing I can come up with is to drill holes, and fill them with little punched disks (which would require me purchasing an expensive punch and die set)...
jaypee
_VISITCOMMUNITY
Scotland, United Kingdom
Joined: February 07, 2008
KitMaker: 1,699 posts
AeroScale: 1,384 posts
Posted: Friday, September 10, 2010 - 08:12 AM UTC
Nice work on the instruments. Much better than the decal.
As for fasteners get a brass tube of the right internal diameter, and sand the outside till its sharp. That should do.
It's easier to sharpen brass than the steel of a hypo.

Oh you'll love the masks. Only one problem. Decals are not good enough anymore

Was that your own model to begin with?
robot_
_VISITCOMMUNITY
United Kingdom
Joined: March 08, 2009
KitMaker: 719 posts
AeroScale: 691 posts
Posted: Monday, September 13, 2010 - 01:30 AM UTC
Hi J-P,


Quoted Text

Was that your own model to begin with?


No, I didn't make it originally. I'm not sure who built and painted it. The first time it was painted it had invasion stripes (I discovered while stripping it). The model belongs to David Ince, the pilot who flew the real DP-E.

I tried your suggestion with the brass tubing (I only have one size, which was luckily spot on), and it works really well!

When you make the ring impression in the plastic, there are raised edges around the circle, inside it and outside it. After sanding these back with very fine sandpaper, there is the problem of cleaning out all the dust from the circle. I found that using a stiff brush (that normally cleans straight panel lines really well) doesn't get everything out, and the edges are a little rough. So I used a tiny amount of liquid cement to smooth it out, and it looks good!
jaypee
_VISITCOMMUNITY
Scotland, United Kingdom
Joined: February 07, 2008
KitMaker: 1,699 posts
AeroScale: 1,384 posts
Posted: Monday, September 13, 2010 - 04:49 AM UTC
Reduce-reuse-recycle. I like it.
Glad the tip worked.
More big tiffie action please.

It's probably harder to do this than a new kit, but I'm sure you'll finish with a great result.
robot_
_VISITCOMMUNITY
United Kingdom
Joined: March 08, 2009
KitMaker: 719 posts
AeroScale: 691 posts
Posted: Monday, October 29, 2012 - 10:10 AM UTC
Only a couple of year late... I'm still working on this. I've not done much since the last photos, except the wheel well detailing.


I didn't use references for the internals, I was caught up in the making of things, and for some reason wasn't concentrating on accuracy- at least it should look OK with some paint and weathering.


Also primed the cockpit. Need to do a bit more rubbing down, fix a few panel lines, then get down to painting the cockpit before closing her up.
Siderius
_VISITCOMMUNITY
Tennessee, United States
Joined: September 20, 2005
KitMaker: 1,747 posts
AeroScale: 1,673 posts
Posted: Monday, October 29, 2012 - 10:13 AM UTC
Really like the little Typhoon! Good looking model there. Russell
magnusf
_VISITCOMMUNITY
Stockholm, Sweden
Joined: May 02, 2006
KitMaker: 1,953 posts
AeroScale: 1,902 posts
Posted: Monday, October 29, 2012 - 09:28 PM UTC
Keeping an eye on progress !


Magnus
robot_
_VISITCOMMUNITY
United Kingdom
Joined: March 08, 2009
KitMaker: 719 posts
AeroScale: 691 posts
Posted: Friday, January 11, 2013 - 08:43 AM UTC
Thanks guys.

Seat belts done.


Made from paper, cut with a knife from a print-out of a scaled photograph of a 1/24 photo-etch fret.
AussieReg
Staff MemberAssociate Editor
AUTOMODELER
#007
_VISITCOMMUNITY
Victoria, Australia
Joined: June 09, 2009
KitMaker: 8,156 posts
AeroScale: 3,756 posts
Posted: Friday, January 11, 2013 - 10:13 AM UTC
Loving your work here Ben, this thread is full of really good detailing techniques. Can't wait for the next instalment!

Cheers, D
magnusf
_VISITCOMMUNITY
Stockholm, Sweden
Joined: May 02, 2006
KitMaker: 1,953 posts
AeroScale: 1,902 posts
Posted: Friday, January 11, 2013 - 07:21 PM UTC
Apart from the beautiful cockpits, I appreciate that the good-idea-department has been hard at work: I have a problematic relation to photo etched seat belts and will surely try your printed approach!

It took a bit of detective work to figure out why there are two cockpits in the photos...


Magnus
 _GOTOTOP