


It has been a while since I was last at the bench... this has been due to a number of things like being overseas for a while... all in all it has been light on modelling wise since end of May... anyways I decided to start back afresh with something straight out of the box and thought I would share some progress pics. I chose the Mirage 1/48 Halberstadt CL.II - the kit is very comprehensive and highly detailed - reminiscent of Eduard kits in terms of all of the goodies you get inside the box.... should be a fun build.
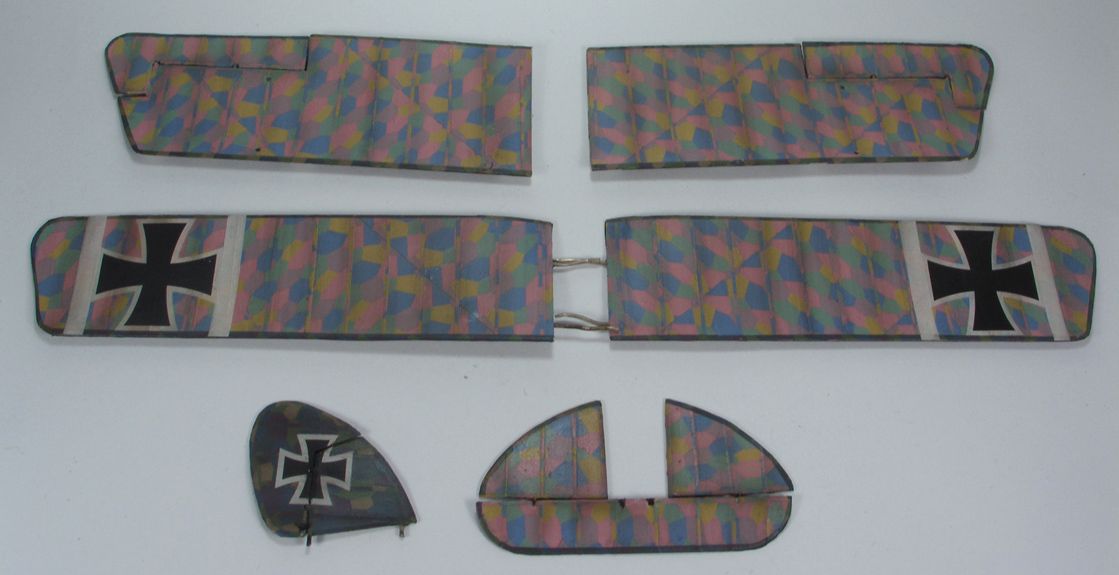
I decided to start this one a little more backwards than I usually do - instead of tackling the interior first I decided to lozenge the wings, as I finally managed to get hold of some Future floor polish to try as a clear gloss (and yes, the stuff is made of liquid awesome). I chose the kit scheme that I wanted, and got straight into it.
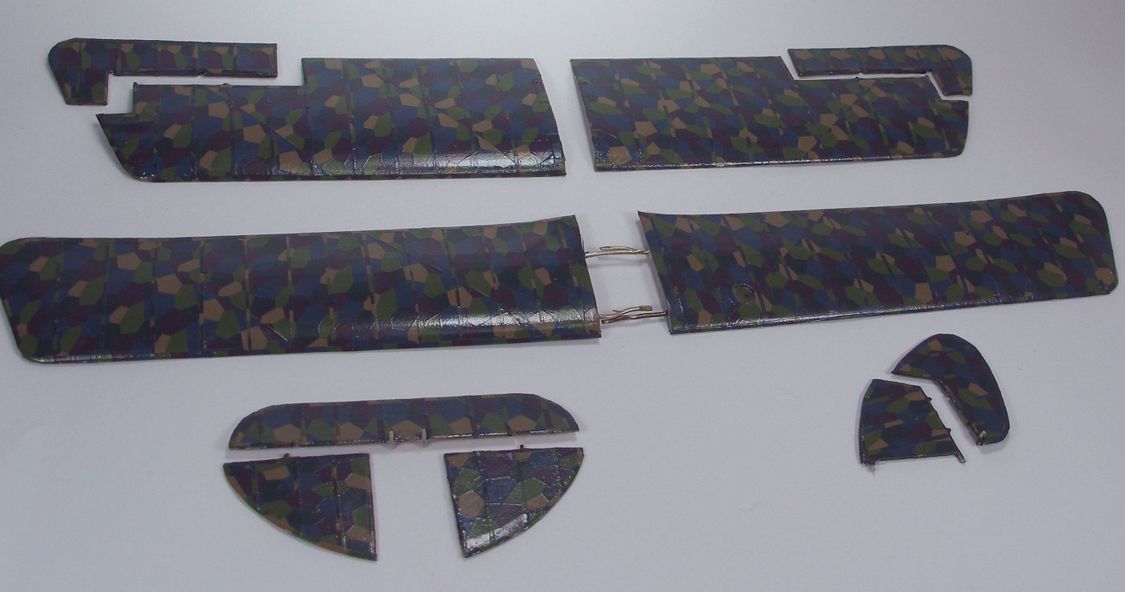
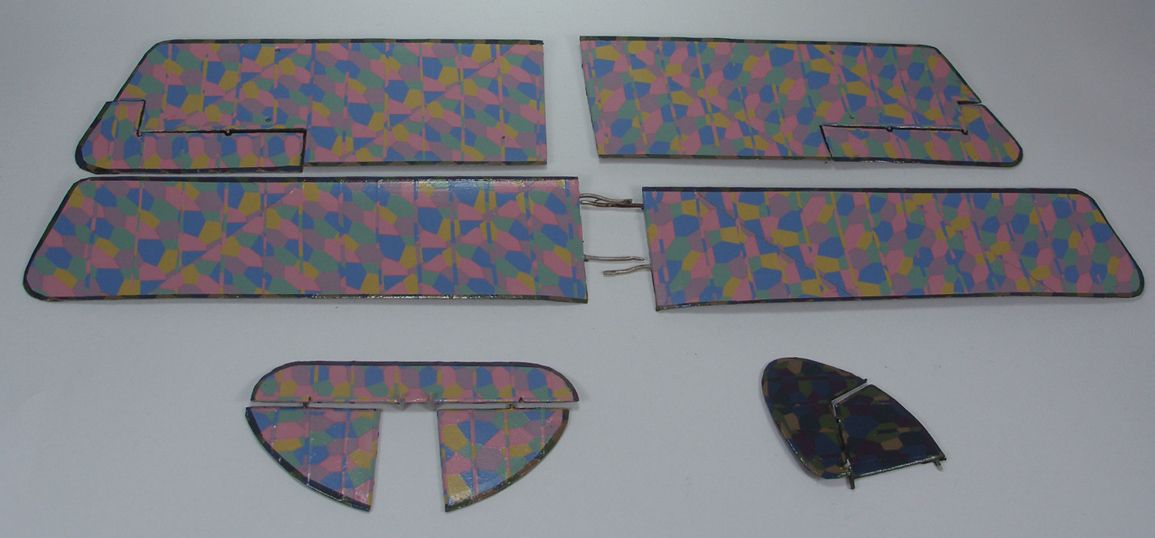
First up was cleaning and glossing the wings in preparation for the lozenge decals. I decided to use a combination of Eagle Strike lozenge for the upper surfaces, and Microsculpt for the lower (I could have used microsculpt for the uppers, but I think the colours are a little too light and a little off, I much prefer the Eagle Strike stuff).
CL.II's had their lozenge applied at a 45 degree angle. Careful measuring and cutting helped here. The rib tapes were also cut individually and applied over the ribs. Edging around the flying surfaces was also done with individually cut slices of lozenge and applied with lots of patience and lots of decal softener! All in all this process took about a week with a couple of hours a night. It was all sealed in with a coat of future.
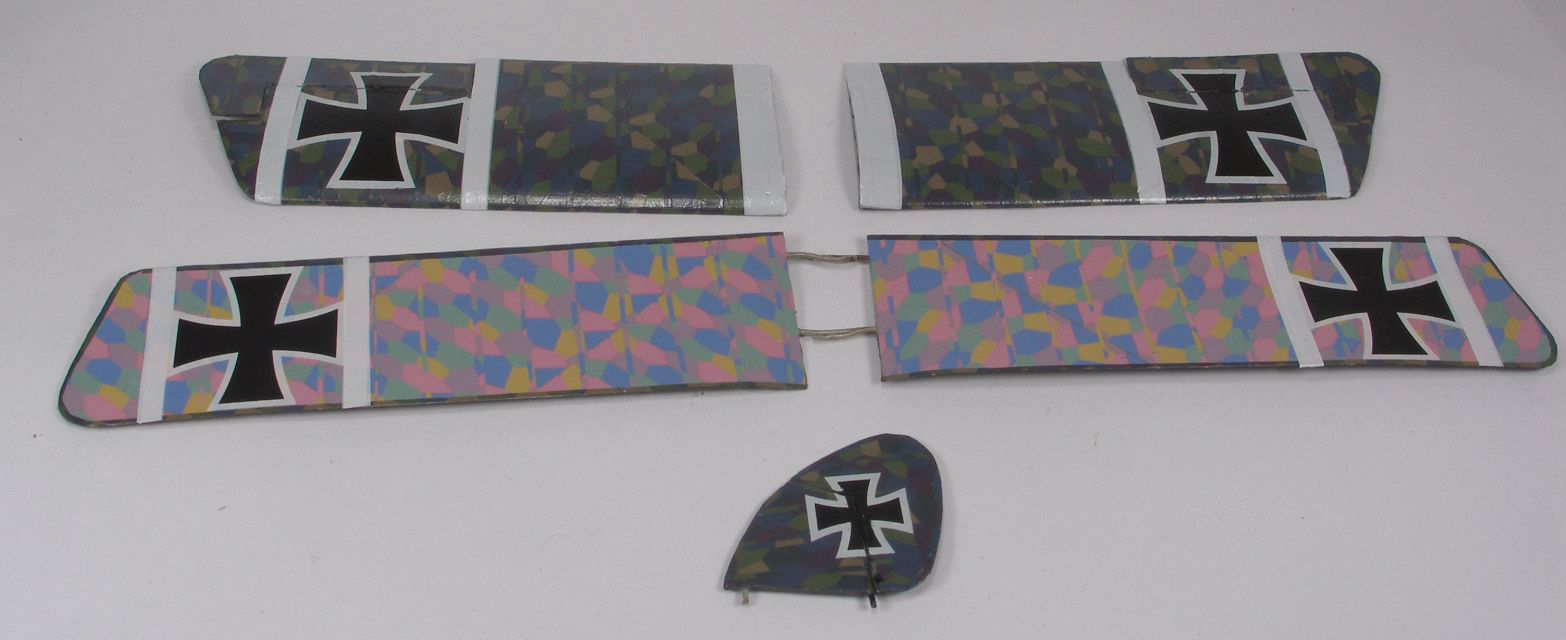
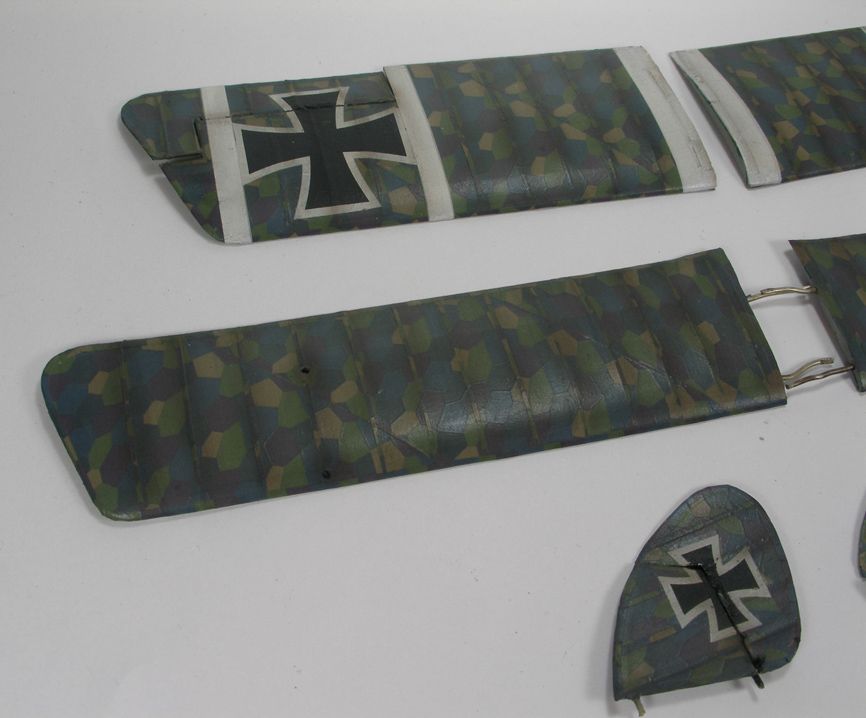
Next came application of national / personal markings. The kit decals are VERY thin, and the white stripes were translucent, so I applied another white decal over the top of them. Again another coat of future to seal.
Then the fun part - texturing. I oversprayed the flying surfaces with highly thinned gunze "sail colour", in order to tone down the bright colours. Then I applied Tamiya "smoke" over the rib positions. I followed this with a light oil filter, streaked in the direction of the airflow to add some extra texture. This was the first time I tried it and it came out ok. Sealed it all in with a coat of clear flat.


So far, so good! Feedback and criticisms always welcomed!
BC


