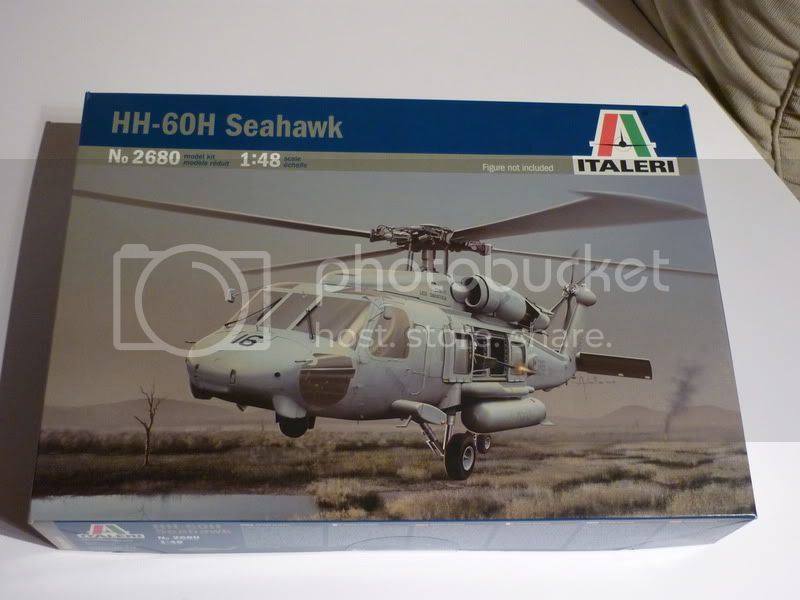
HH-60H Rescue Hawk, Italeri 1:48
England - West Midlands, United Kingdom
Joined: March 21, 2009
KitMaker: 379 posts
AeroScale: 75 posts
Posted: Wednesday, October 20, 2010 - 08:09 AM UTC
Hi Folks
After my Super Cobra i decided to build another chopper.
Choice wasn't easy, but after a lot of thinking i decided to go wit this one:
Now, it will not be out of the box build, i will fold tail and pardon my ignorance, how do you properly call this vertical piece on the tail that look like a wing?
Main rotor again it will be folded and detalised a bit more, nose FLIR and whatever i will find more.
Progress so far:
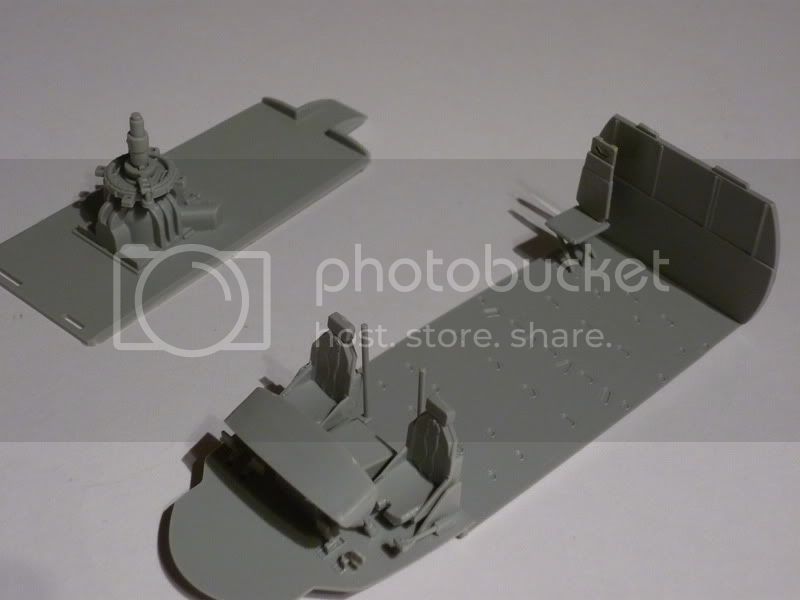
Now as a all doors will be closed i will not work on interior at all, only whatever Italeri provides inside.
I am counting for some good help from more experienced lads with this build.
Stay tuned for more.

[url=http://photobucket.com/Ratatouille-collection?albumview=slideshow][img]http://i.imgur.com/kFPfg.jpg[/img][/url]
Florida, United States
Joined: May 16, 2002
KitMaker: 17,694 posts
AeroScale: 1,728 posts
Posted: Wednesday, October 20, 2010 - 01:36 PM UTC
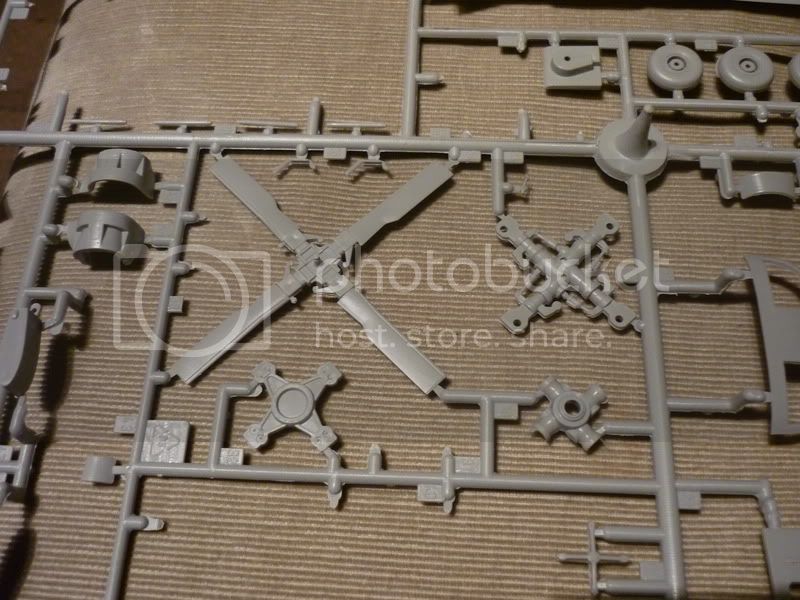
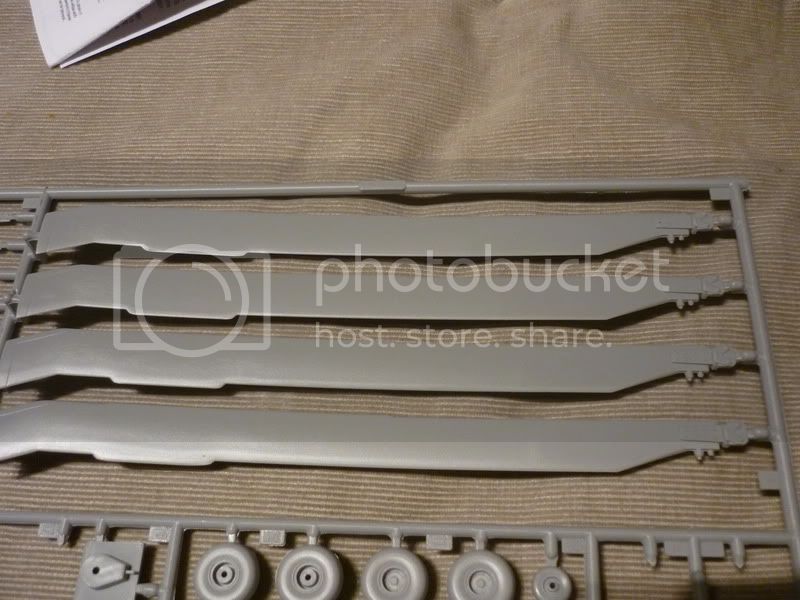
Looks like a good start. The horizontal tail plane is called a stabilator, a combination of stabilizer and elevator. Can you post a pic of the rotor blades and rotor head? They look like the non-folding Army-type, not the folding Naval version.
Field Artillery --- The KING of BATTLE!!!
"People sleep peaceably in their beds at night only because rough men stand ready to do violence on their behalf." -- George Orwell
Showcase
Texas, United States
Joined: October 13, 2010
KitMaker: 29 posts
AeroScale: 28 posts
Posted: Wednesday, October 20, 2010 - 02:05 PM UTC
England - West Midlands, United Kingdom
Joined: March 21, 2009
KitMaker: 379 posts
AeroScale: 75 posts
Posted: Thursday, October 21, 2010 - 09:03 AM UTC
Quoted Text
Looks like a good start. The horizontal tail plane is called a stabilator, a combination of stabilizer and elevator. Can you post a pic of the rotor blades and rotor head? They look like the non-folding Army-type, not the folding Naval version.
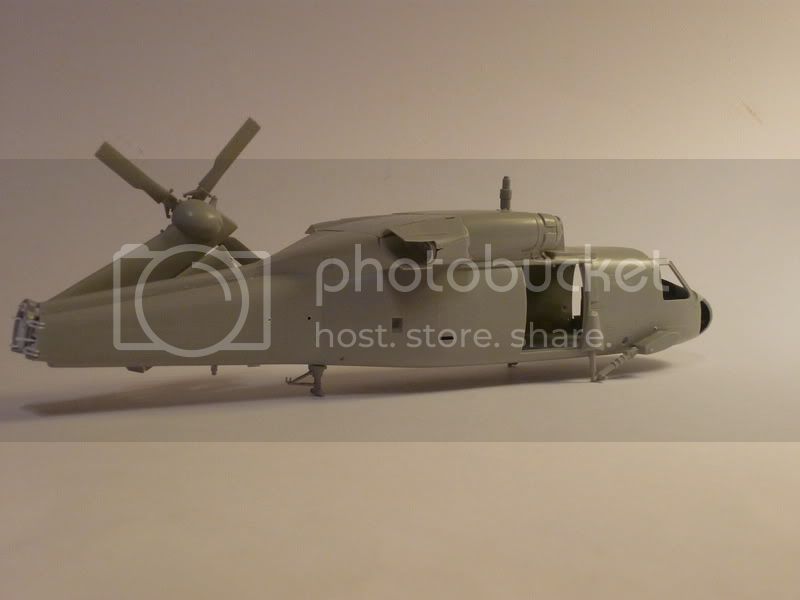
Not sure about details, and correct is what Italeri propose, but here are the pictures:
Scott:
I already follow your album, when i was looking for a good walkaround, you had only good one were i can see all details of folded tail.
[url=http://photobucket.com/Ratatouille-collection?albumview=slideshow][img]http://i.imgur.com/kFPfg.jpg[/img][/url]
Florida, United States
Joined: May 16, 2002
KitMaker: 17,694 posts
AeroScale: 1,728 posts
Posted: Thursday, October 21, 2010 - 09:21 AM UTC
Yes, they are the correct, folding Naval rotors. The pic on the bix top doesn't look like they are. Good deal. Have fun with it.
Field Artillery --- The KING of BATTLE!!!
"People sleep peaceably in their beds at night only because rough men stand ready to do violence on their behalf." -- George Orwell
Showcase
New York, United States
Joined: January 29, 2004
KitMaker: 3,836 posts
AeroScale: 1,036 posts
Posted: Thursday, October 21, 2010 - 10:23 AM UTC
Great little kit and builds up nicely. I did a few myself awhile back. There are some nice resin and photo-etch sets out there. Small model tip, in the third photo there in the center of the sprue is a cone shaped piece. You should save that as a add in for a future, it can be made into one of those orange safety cone.
Happy Modeling,
Joe
It feels like bible camp
Only Im not crying pretending Im somewhere else.
Happy Modeling
Joe
England - West Midlands, United Kingdom
Joined: March 21, 2009
KitMaker: 379 posts
AeroScale: 75 posts
Posted: Saturday, October 23, 2010 - 09:23 AM UTC
Thanks for the tip mother, i generally do not use PE, as they are to delicate for me, and i usualy end up throwing them in to then bin.
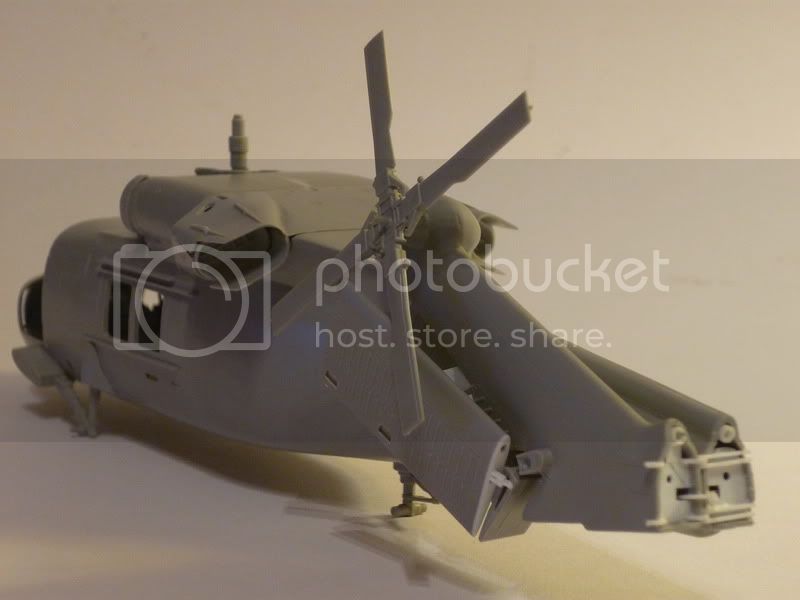
I made small progress, cut out tail in 2 pieces, added few details inside, and some sensors on the back.
Fold stabilator.
Once i will get better (toncillitis) i will start painting inerior so i can move on with main hull.
[url=http://photobucket.com/Ratatouille-collection?albumview=slideshow][img]http://i.imgur.com/kFPfg.jpg[/img][/url]
Florida, United States
Joined: May 16, 2002
KitMaker: 17,694 posts
AeroScale: 1,728 posts
Posted: Monday, October 25, 2010 - 03:17 AM UTC
Very nice. The folded tail is looking good.
Field Artillery --- The KING of BATTLE!!!
"People sleep peaceably in their beds at night only because rough men stand ready to do violence on their behalf." -- George Orwell
Showcase
England - West Midlands, United Kingdom
Joined: March 21, 2009
KitMaker: 379 posts
AeroScale: 75 posts
Posted: Sunday, October 31, 2010 - 08:30 AM UTC
Hello Folks.
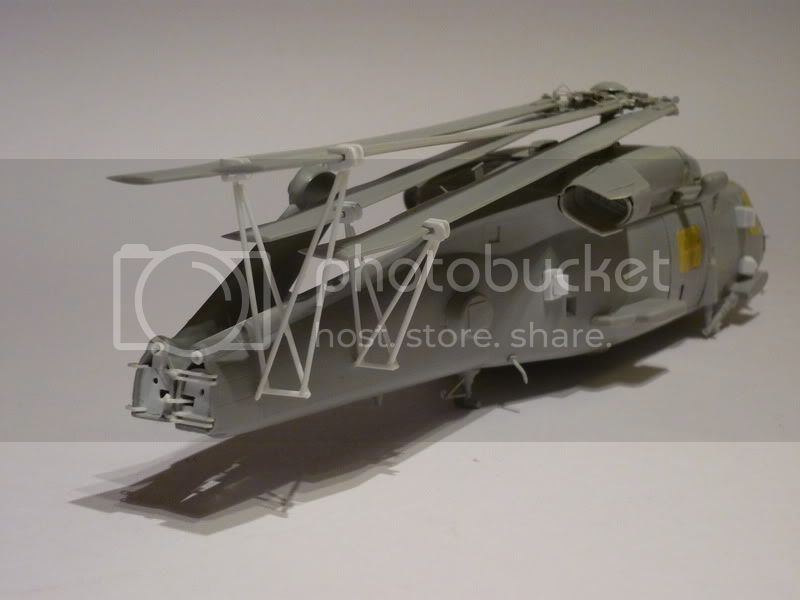
I managed to get some work done this weekend.
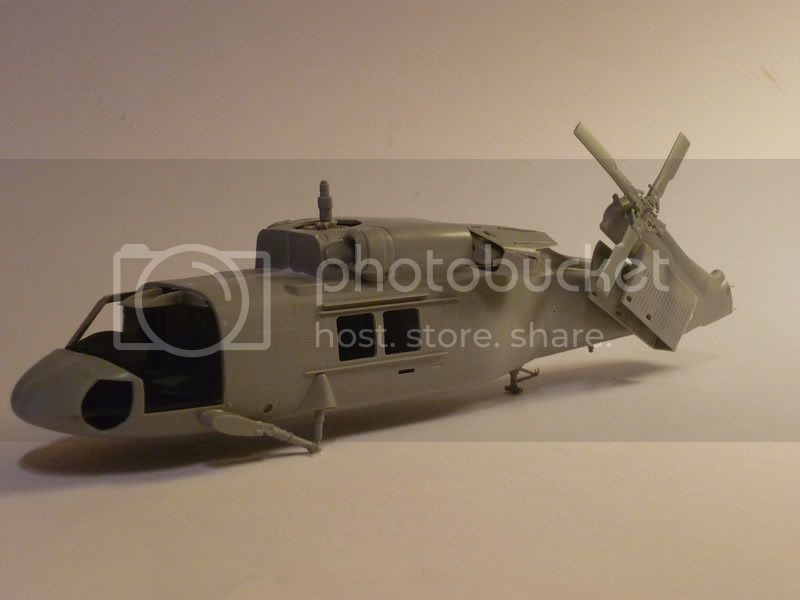
Folded tails is finished, i haven't glue in the stabilazor yet, as it will be much easier to paint everything.
Now the fitting of all parts it is a bit off, air intakes and exhaust will see some putty and sanding.

[url=http://photobucket.com/Ratatouille-collection?albumview=slideshow][img]http://i.imgur.com/kFPfg.jpg[/img][/url]
Florida, United States
Joined: May 16, 2002
KitMaker: 17,694 posts
AeroScale: 1,728 posts
Posted: Sunday, October 31, 2010 - 11:27 AM UTC
It looks great Adam. I love the tail and stabilator folds. Excellent scratch-building.
Field Artillery --- The KING of BATTLE!!!
"People sleep peaceably in their beds at night only because rough men stand ready to do violence on their behalf." -- George Orwell
Showcase

#041
Kobenhavn, Denmark
Joined: July 20, 2006
KitMaker: 10,069 posts
AeroScale: 3,788 posts
Posted: Wednesday, November 17, 2010 - 02:45 AM UTC
Great details, Adam. It really adds interesting to "fold it up".
Looking forward to see more.

Campaign'oholic - 252+ campaigns completed
England - West Midlands, United Kingdom
Joined: March 21, 2009
KitMaker: 379 posts
AeroScale: 75 posts
Posted: Saturday, November 20, 2010 - 09:27 AM UTC
Quoted Text
Great details, Adam. It really adds interesting to "fold it up".
Looking forward to see more.
Thx mate, if this will turn up alright i have some plans for more "folded" ones.
Well there is small progress, mainly due to a fact how bad this kit is, parts do not exactly fit together, and glazing is TRAGIC.
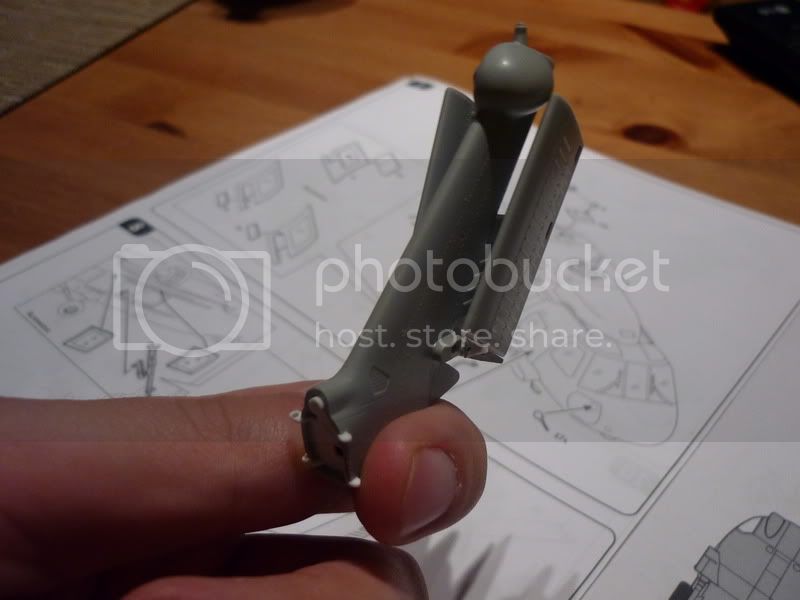
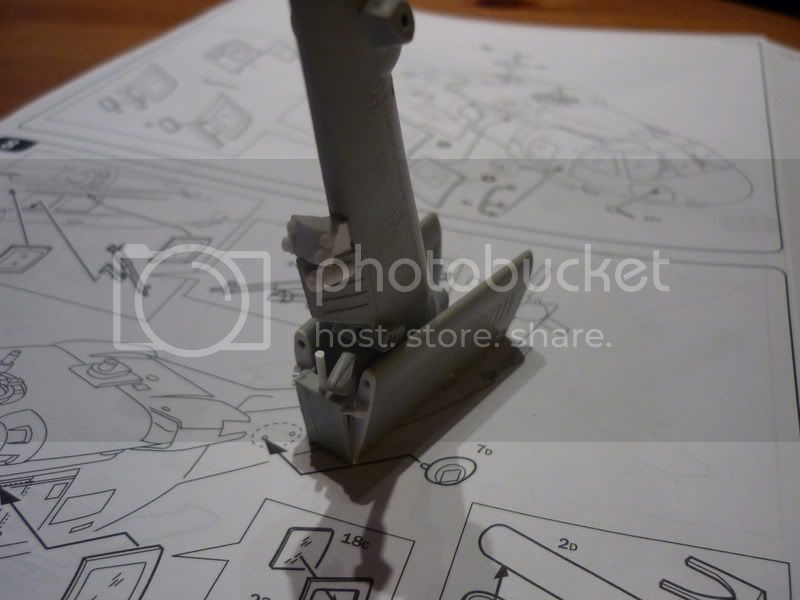
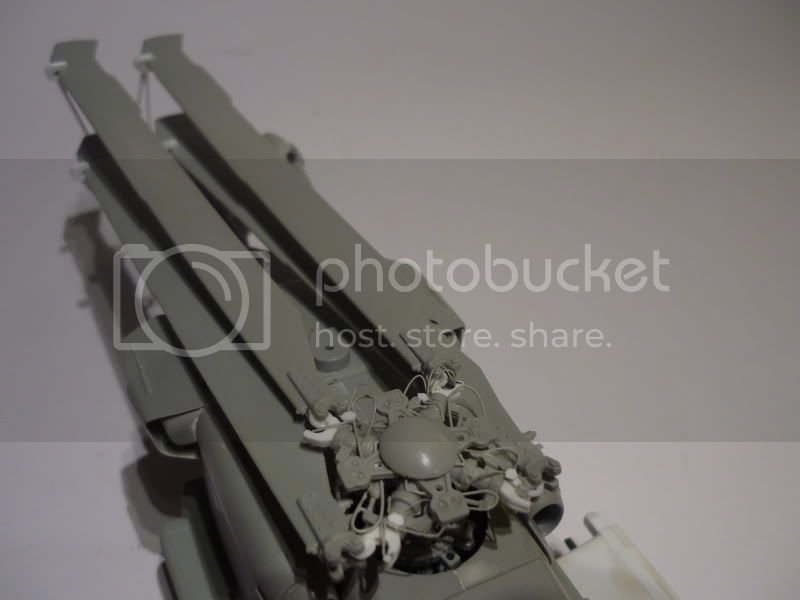
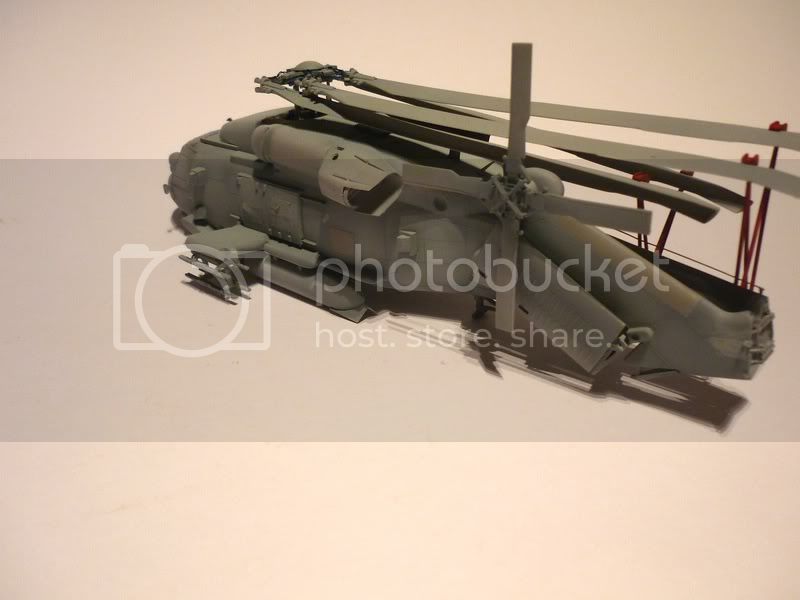
I am not giving up, so i decided to add a pylon for Helfire launcher. Luncher itself is from Academy Apache in 1:48 scale.
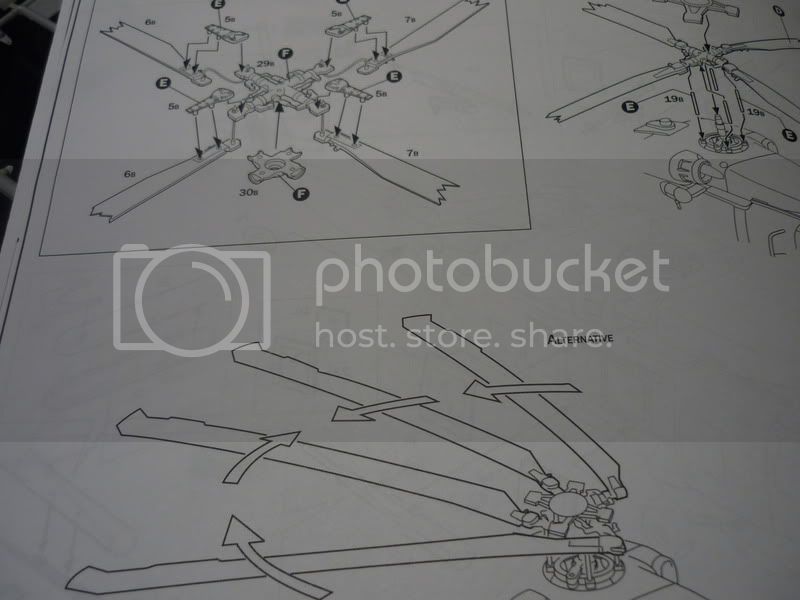
I also continue work on main rotor head, i now that Italeri added folding option, but the mechanism itself is nowhere near as it should be, so i will try to scrachbuild few bits and bobs to make it right.
Enough talking, here are 2 pictures:

[url=http://photobucket.com/Ratatouille-collection?albumview=slideshow][img]http://i.imgur.com/kFPfg.jpg[/img][/url]
England - West Midlands, United Kingdom
Joined: March 21, 2009
KitMaker: 379 posts
AeroScale: 75 posts
Posted: Sunday, November 28, 2010 - 02:37 AM UTC
Welcome everybody.
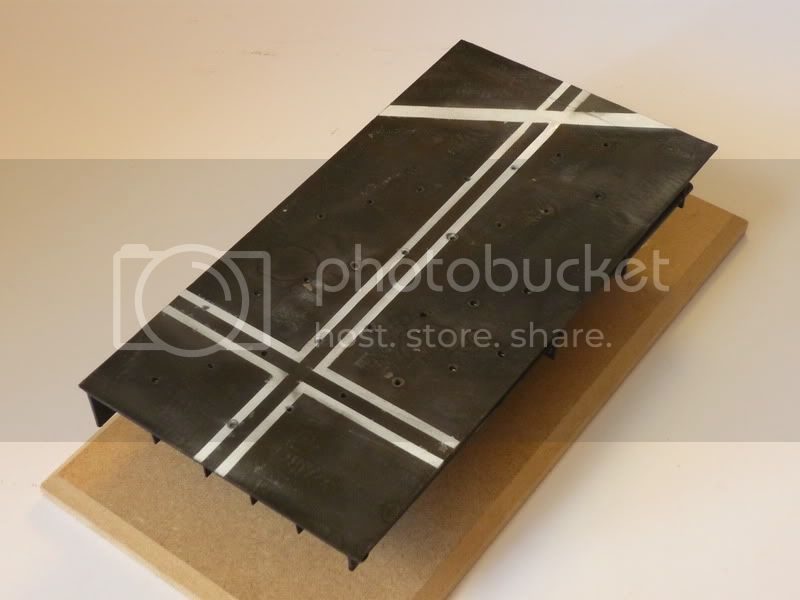
Because i keep avoiding work on rotor as much as i can, i decided to start building base.
I sprayed some base color and few white stripes, so there is more work to be done.

[url=http://photobucket.com/Ratatouille-collection?albumview=slideshow][img]http://i.imgur.com/kFPfg.jpg[/img][/url]
Florida, United States
Joined: January 14, 2009
KitMaker: 2,798 posts
AeroScale: 2,443 posts
Posted: Sunday, November 28, 2010 - 10:10 AM UTC
Wow most impressive
"From time to time, the tree of liberty must be watered with the blood of
tyrants and patriots."
- Thomas Jefferson
IPMS#47611
England - West Midlands, United Kingdom
Joined: March 21, 2009
KitMaker: 379 posts
AeroScale: 75 posts
Posted: Friday, December 10, 2010 - 11:52 AM UTC
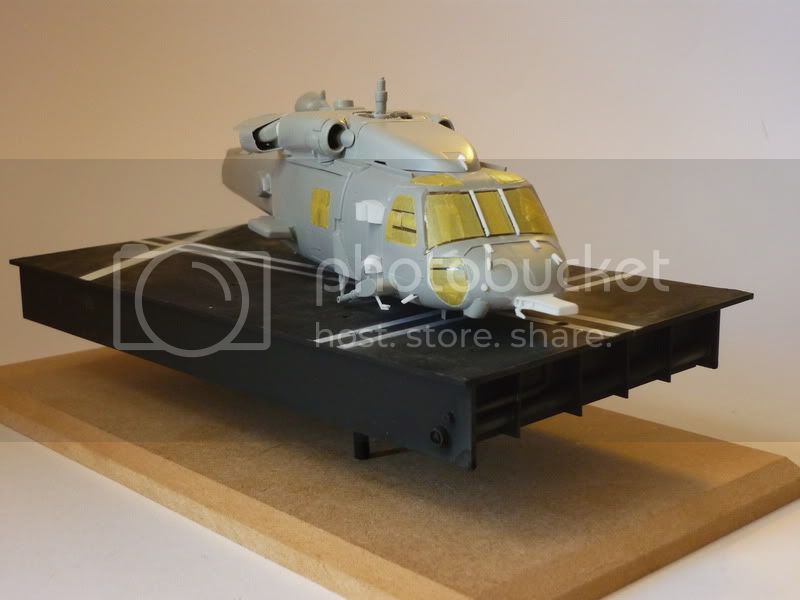
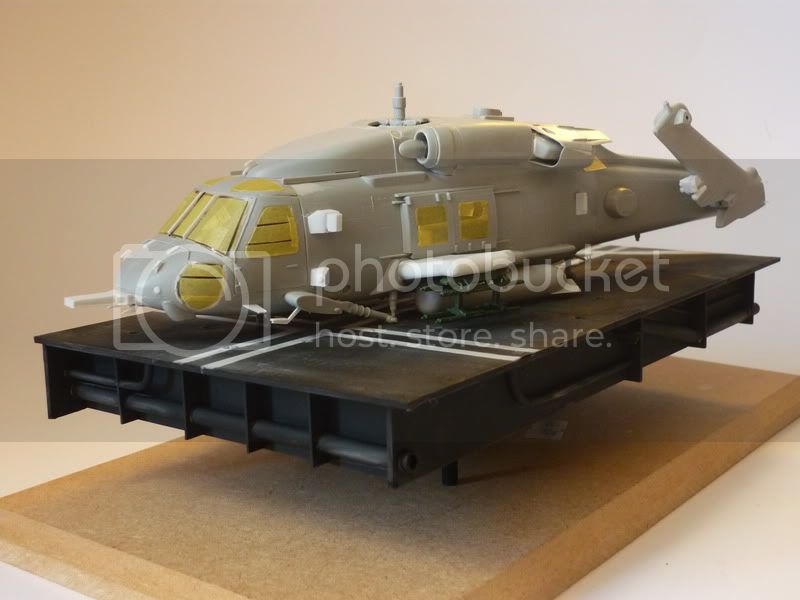
Hello
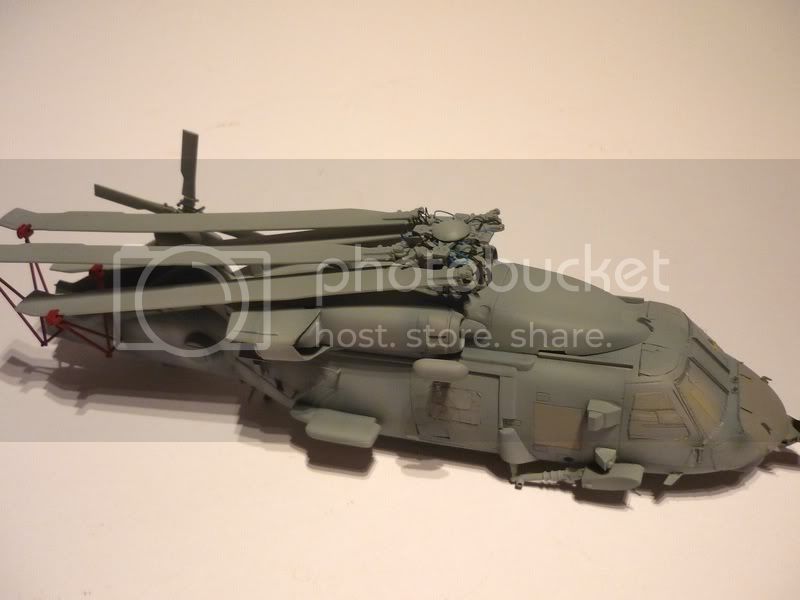
I have nearly finished assembly stage. It is 98% done.
Few more bits left to do and final touches.
Next update will be probably during pating:
[url=http://photobucket.com/Ratatouille-collection?albumview=slideshow][img]http://i.imgur.com/kFPfg.jpg[/img][/url]
Florida, United States
Joined: May 16, 2002
KitMaker: 17,694 posts
AeroScale: 1,728 posts
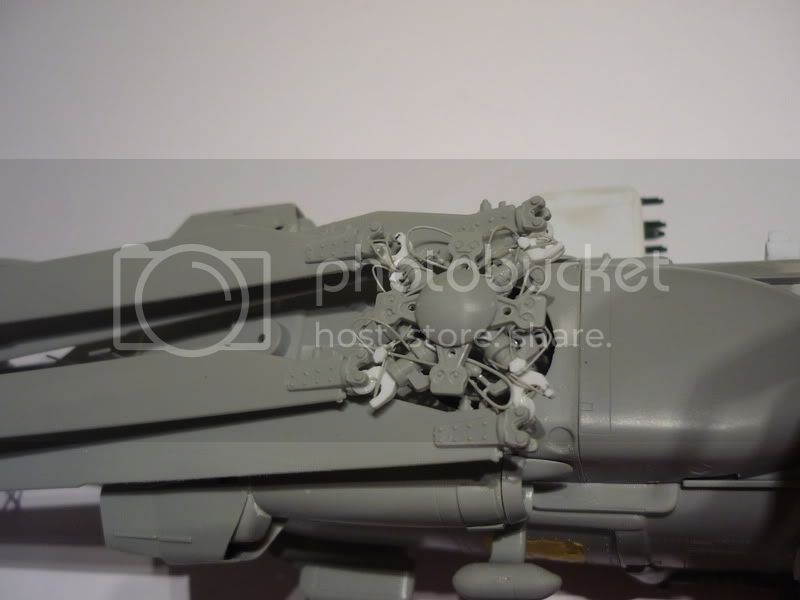
Posted: Saturday, December 11, 2010 - 03:12 AM UTC
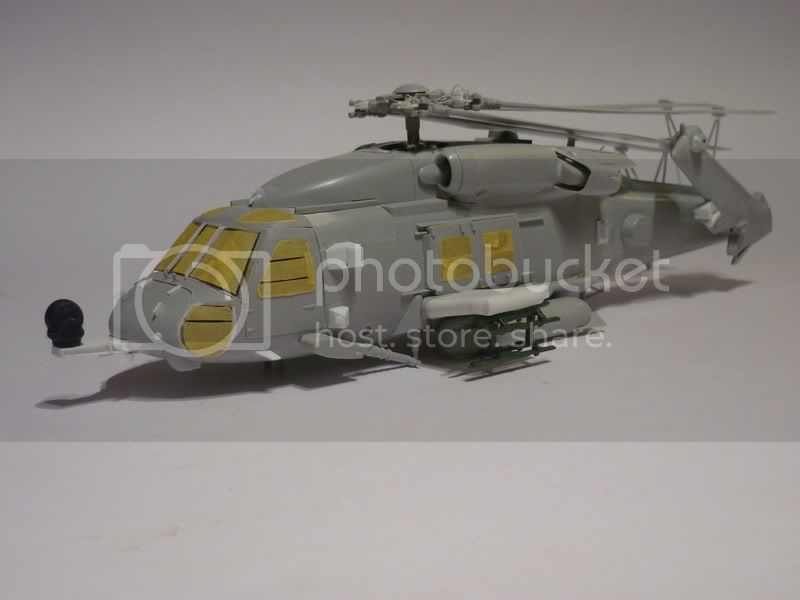
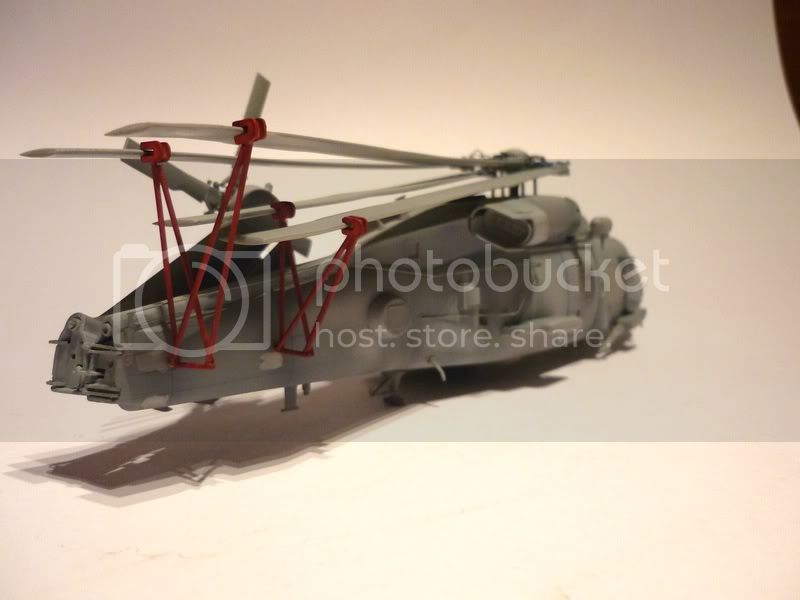
Great work. The scratch work is great. There is only one thing out of place. The rotor blade in the below pic is placed incorrectly. The green dot should be attached to the post you now have the other side attached. In the position it is in, the blade will not slide out and attach to the rotor head. An easy fix.

Keep up the great work and I can't wait to see it painted up.
Field Artillery --- The KING of BATTLE!!!
"People sleep peaceably in their beds at night only because rough men stand ready to do violence on their behalf." -- George Orwell
Showcase
England - West Midlands, United Kingdom
Joined: March 21, 2009
KitMaker: 379 posts
AeroScale: 75 posts
Posted: Saturday, December 11, 2010 - 04:43 AM UTC
Yes you are right mate, i don't know what happened over here.
It is not gonna be an easy fix, as these rotor blades are not glued in place and correcting this issue might not be possible without braking everything apart.
I will try anyway, if not i will have to live with this.
Thanks for looking and pointing this out.
[url=http://photobucket.com/Ratatouille-collection?albumview=slideshow][img]http://i.imgur.com/kFPfg.jpg[/img][/url]
England - West Midlands, United Kingdom
Joined: March 21, 2009
KitMaker: 379 posts
AeroScale: 75 posts
Posted: Thursday, December 16, 2010 - 10:15 AM UTC
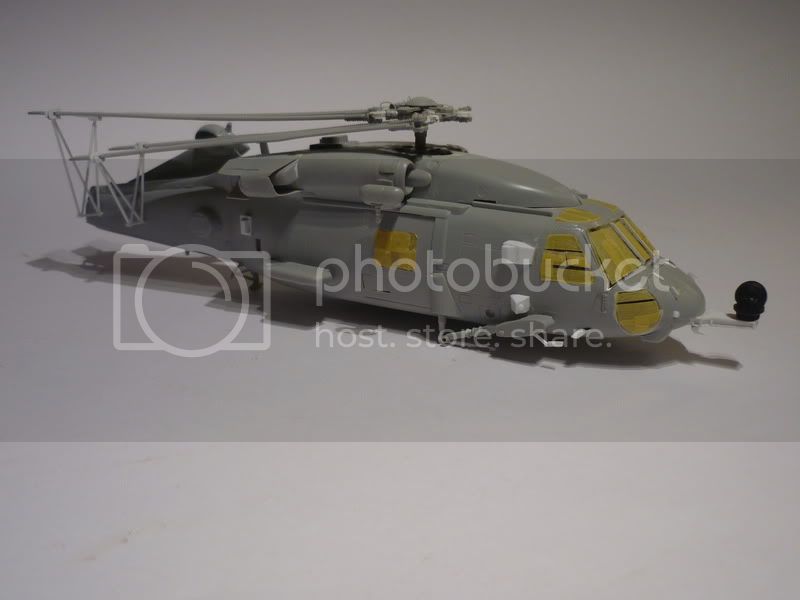
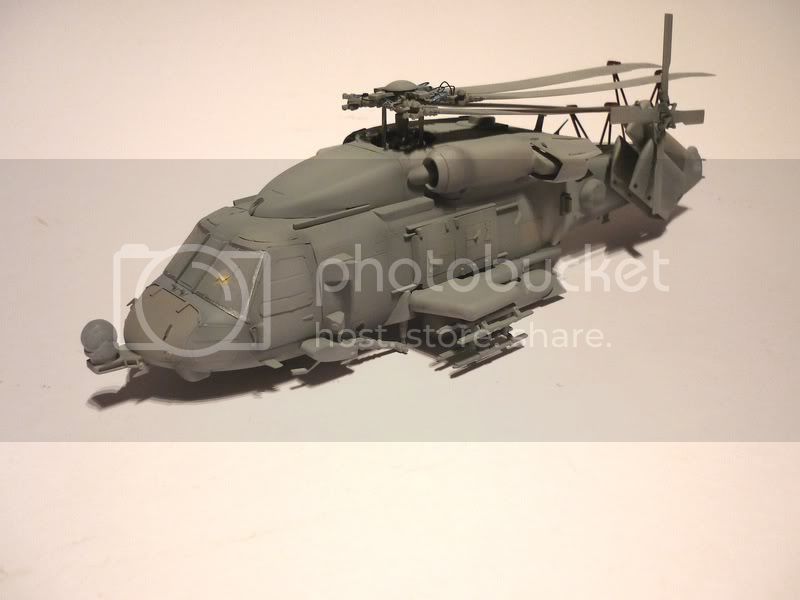
Hello
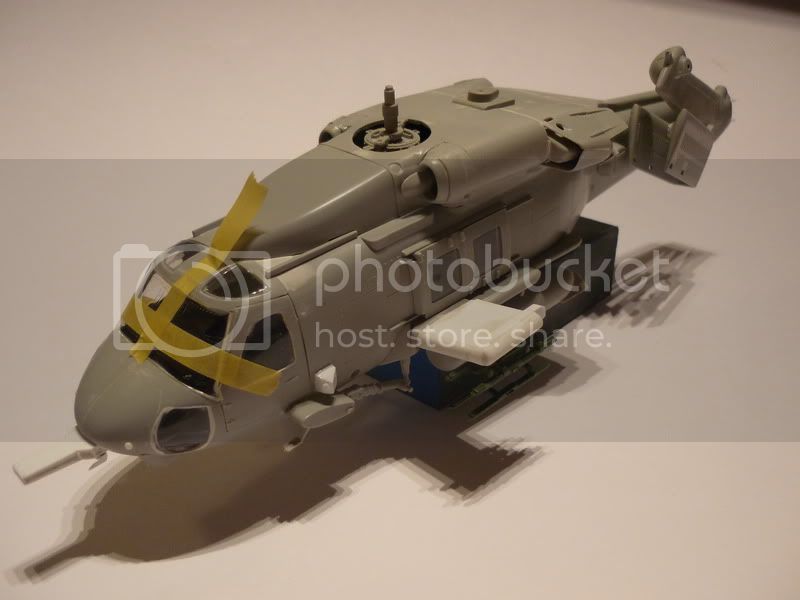
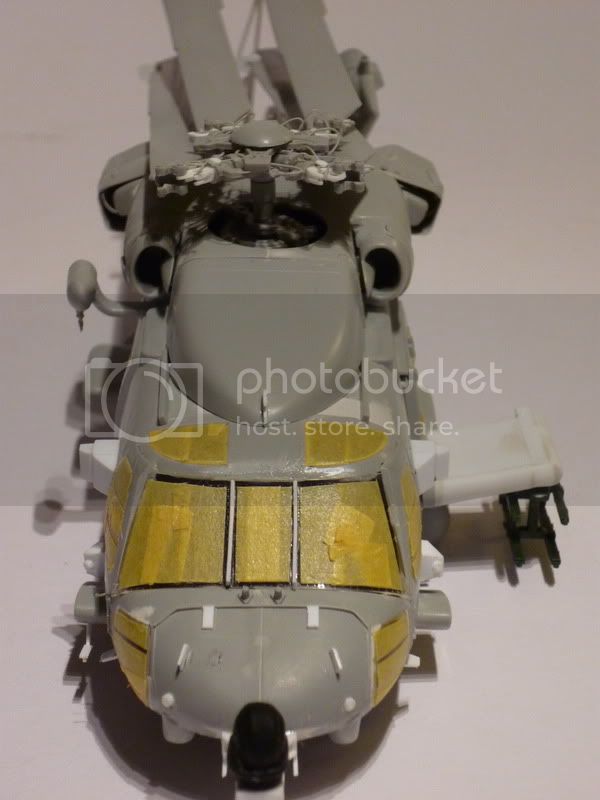
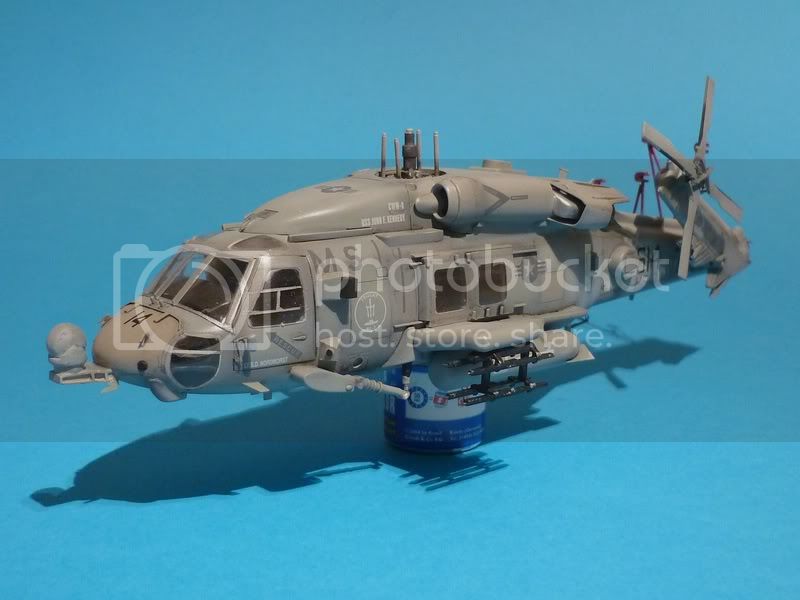
I have started painting, 4 different shades of gray.
Few panels are different colour as i wan't "brake" monotony of single color scheme.
I took pictures with table lamp, so colours a bit too dark than real.
[url=http://photobucket.com/Ratatouille-collection?albumview=slideshow][img]http://i.imgur.com/kFPfg.jpg[/img][/url]
Florida, United States
Joined: January 14, 2009
KitMaker: 2,798 posts
AeroScale: 2,443 posts
Posted: Thursday, December 16, 2010 - 01:52 PM UTC
very inspiring build
"From time to time, the tree of liberty must be watered with the blood of
tyrants and patriots."
- Thomas Jefferson
IPMS#47611
England - West Midlands, United Kingdom
Joined: March 21, 2009
KitMaker: 379 posts
AeroScale: 75 posts
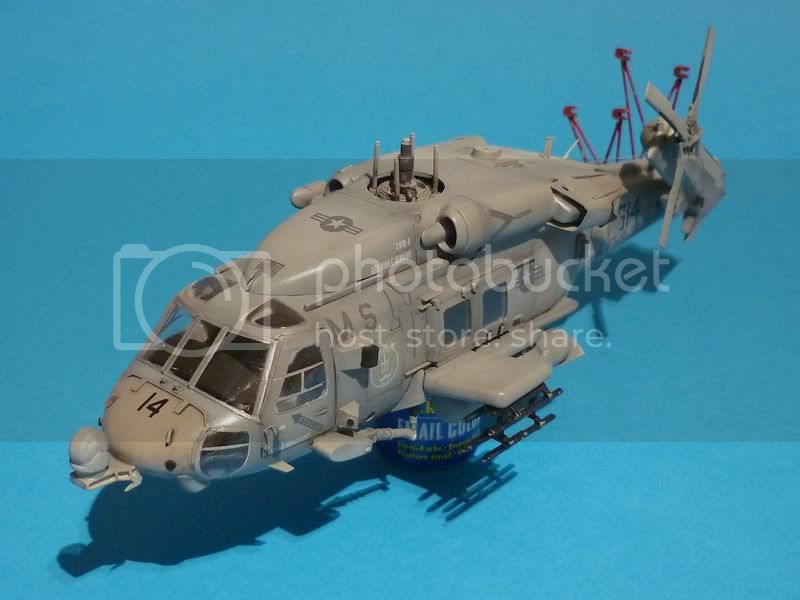
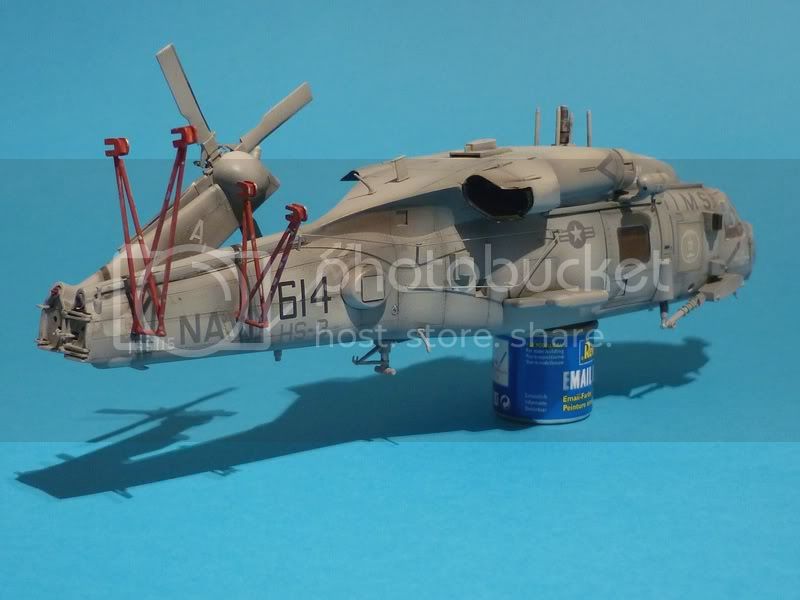
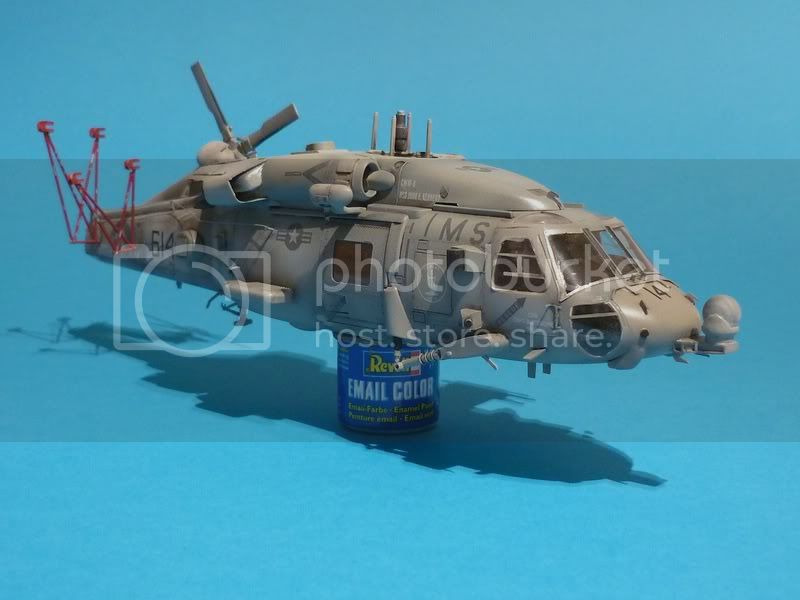
Posted: Sunday, December 19, 2010 - 07:15 AM UTC
Hello everybody
Thanks for looking.
I have nearly finished this project, probably after christmas i post final pictures.
In general i am not happy with result of my painting, somehow i cannot get to next step, always something wrong (well kit itself didn't help at all).
Maybe on next project will be better.
[url=http://photobucket.com/Ratatouille-collection?albumview=slideshow][img]http://i.imgur.com/kFPfg.jpg[/img][/url]
Florida, United States
Joined: November 13, 2005
KitMaker: 189 posts
AeroScale: 129 posts
Posted: Monday, December 20, 2010 - 03:14 PM UTC
Looks good to me. If your not happy with this build I would love to see the builds your satisfied with.
Florida, United States
Joined: May 16, 2002
KitMaker: 17,694 posts
AeroScale: 1,728 posts
Posted: Tuesday, December 21, 2010 - 09:30 AM UTC
I agree with Jim. It looks great to me. Good job so far.
Field Artillery --- The KING of BATTLE!!!
"People sleep peaceably in their beds at night only because rough men stand ready to do violence on their behalf." -- George Orwell
Showcase
Florida, United States
Joined: January 14, 2009
KitMaker: 2,798 posts
AeroScale: 2,443 posts
Posted: Wednesday, December 22, 2010 - 01:22 PM UTC
I third that if you can do that

"From time to time, the tree of liberty must be watered with the blood of
tyrants and patriots."
- Thomas Jefferson
IPMS#47611
England - South East, United Kingdom
Joined: September 20, 2007
KitMaker: 240 posts
AeroScale: 3 posts
Posted: Thursday, December 23, 2010 - 03:08 AM UTC
A great build Adam, very inspiring! Looking forward to seeing the final pictures.
Cheers,
Ian
Newbury Scale Model Club -- http://www.newburyscalemodelclub.org.uk/
NewMod 2013 -- http://www.newmod.co.uk/
Attica, Greece / Ελλάδα
Joined: May 01, 2008
KitMaker: 1,437 posts
AeroScale: 1,241 posts
Posted: Wednesday, December 29, 2010 - 01:22 AM UTC