_GOTOBOTTOM
Cold War (1950-1974)
Discuss the aircraft modeling subjects during the Cold War period.
Hosted by Tim Hatton
1/48 KP Su-17M4R
IronMark
_VISITCOMMUNITY
Texas, United States
Joined: December 27, 2009
KitMaker: 71 posts
AeroScale: 69 posts
Posted: Friday, January 28, 2011 - 04:10 PM UTC
Good day everyone,

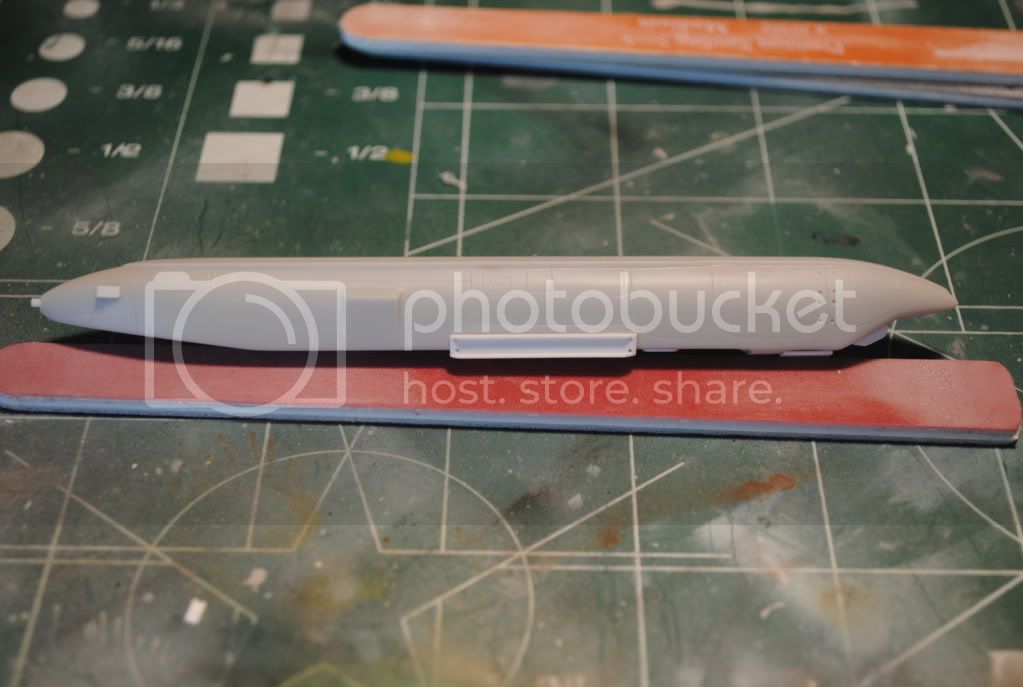
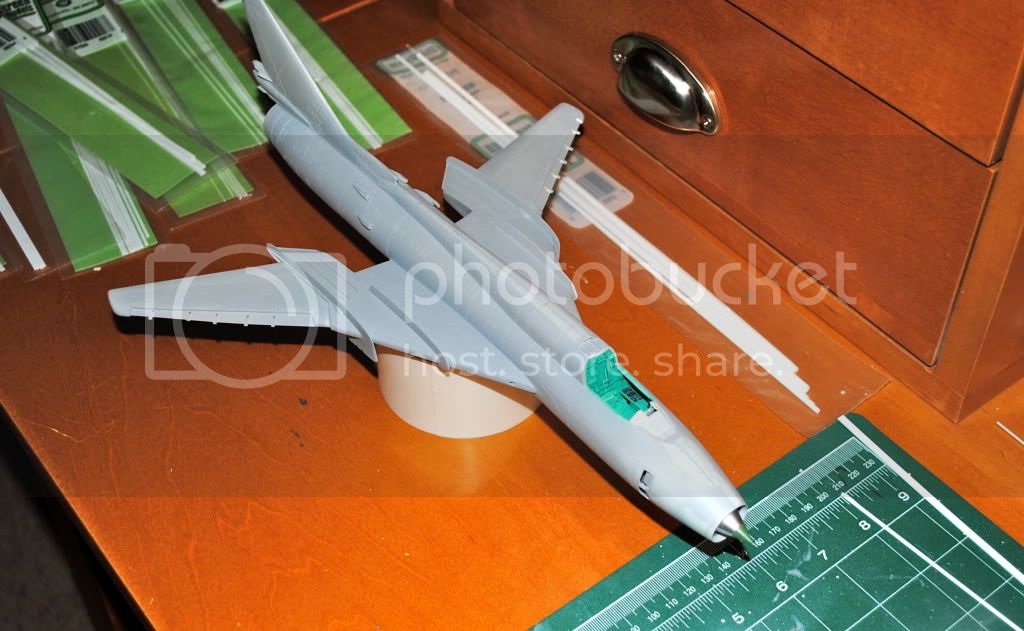
As a long-time enthusiast of Russian aircraft, I was delighted to see KP's 1/48 Su-22M4 turn up at my local modeling club's semi-annual auction back in 2009. The swing-wing variant has been my personal favorite in the "Fitter" series, so the opportunity to get my hands on one was too good to pass up.

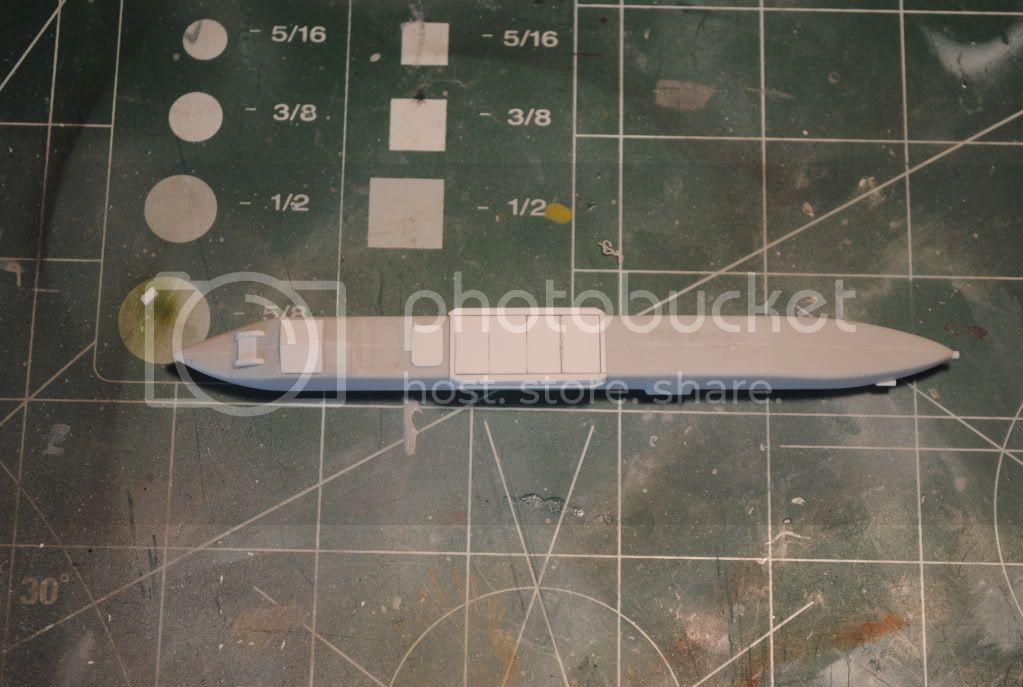
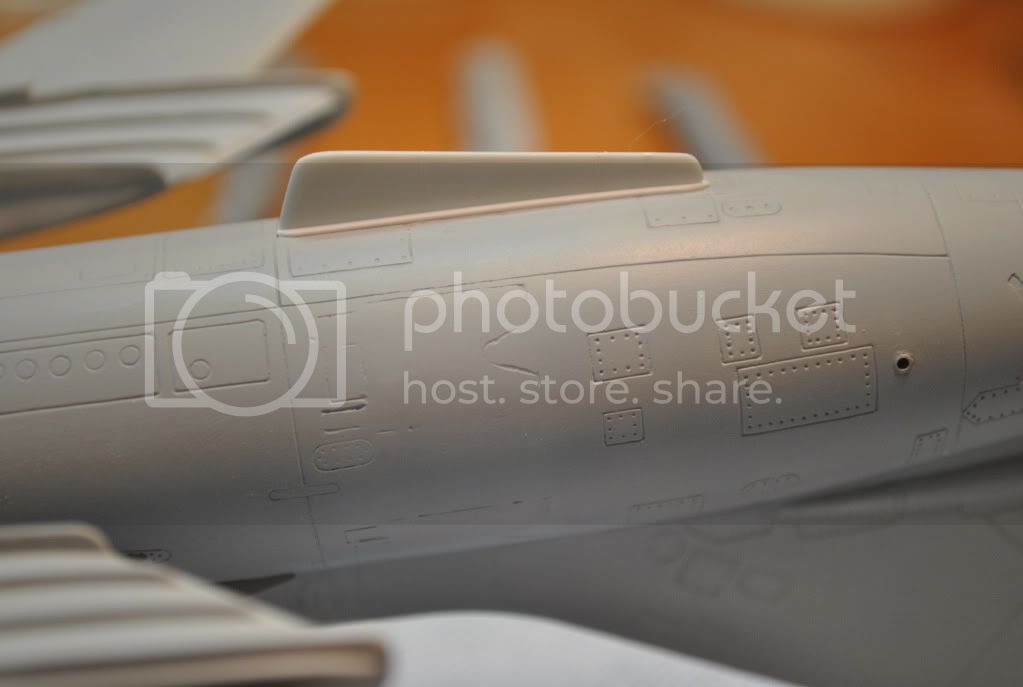
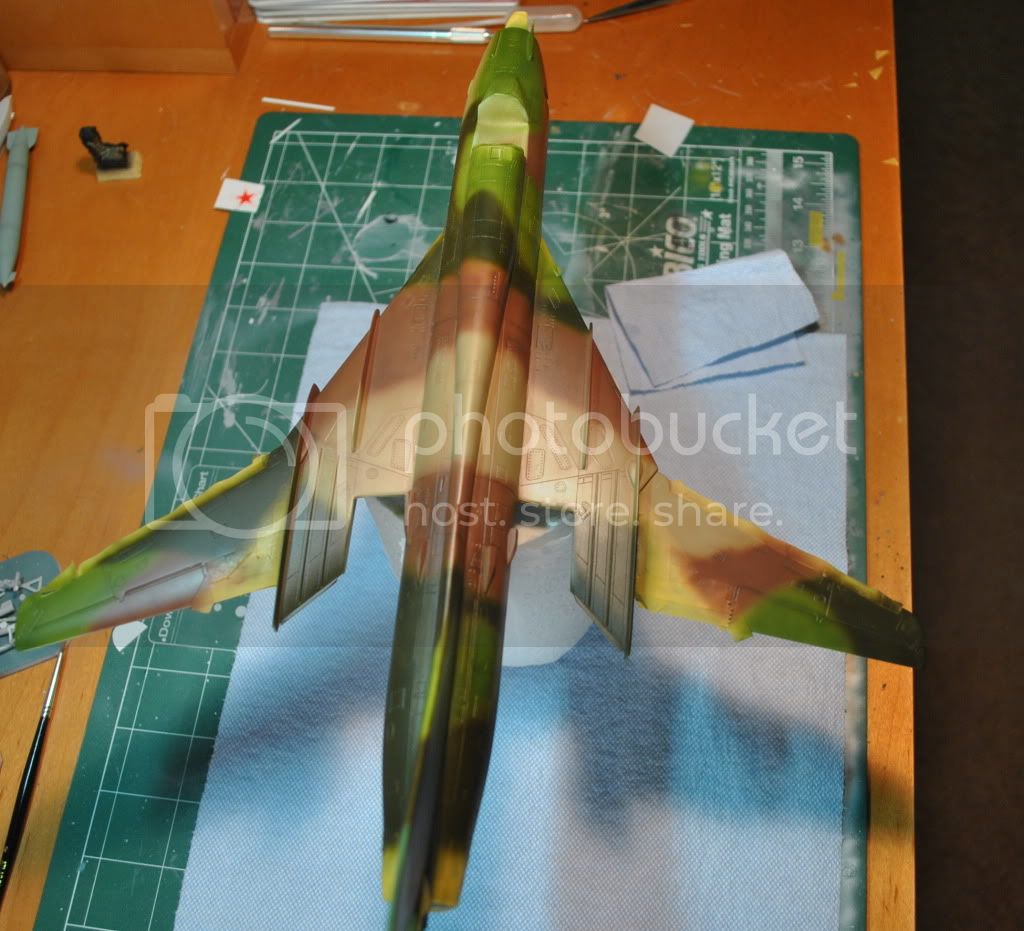
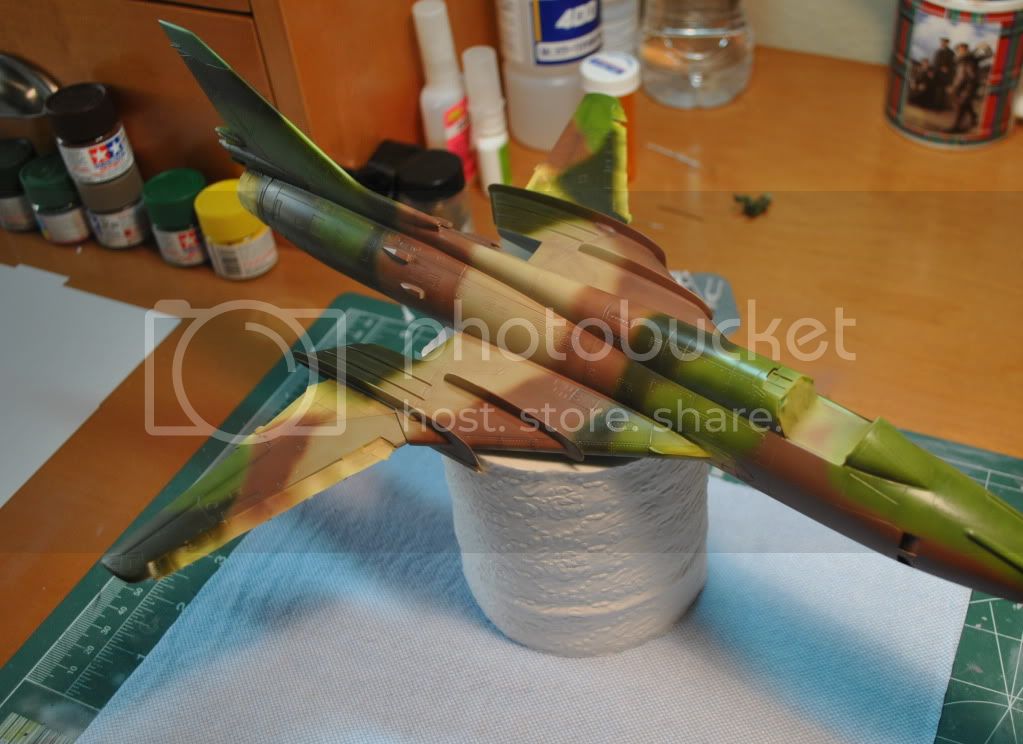
I will keep my commentary about the kit to a minimum as there are many reviews available on the web. Suffice it to say the KP mold-makers have given us a pretty accurate shape and panel line arrangement. I will build it up as a reconnaissance bird in the Soviet Air Force (which changes the callout to Su-17M4R) and will scratch build much of the details. So without further ado, let's get started.

In the beginning..

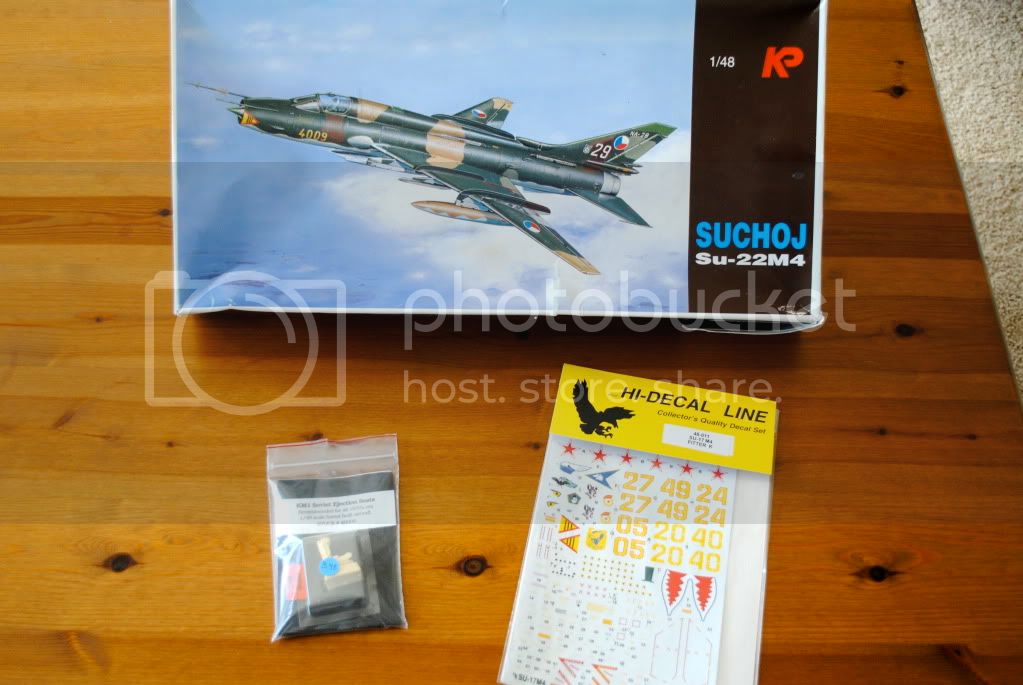
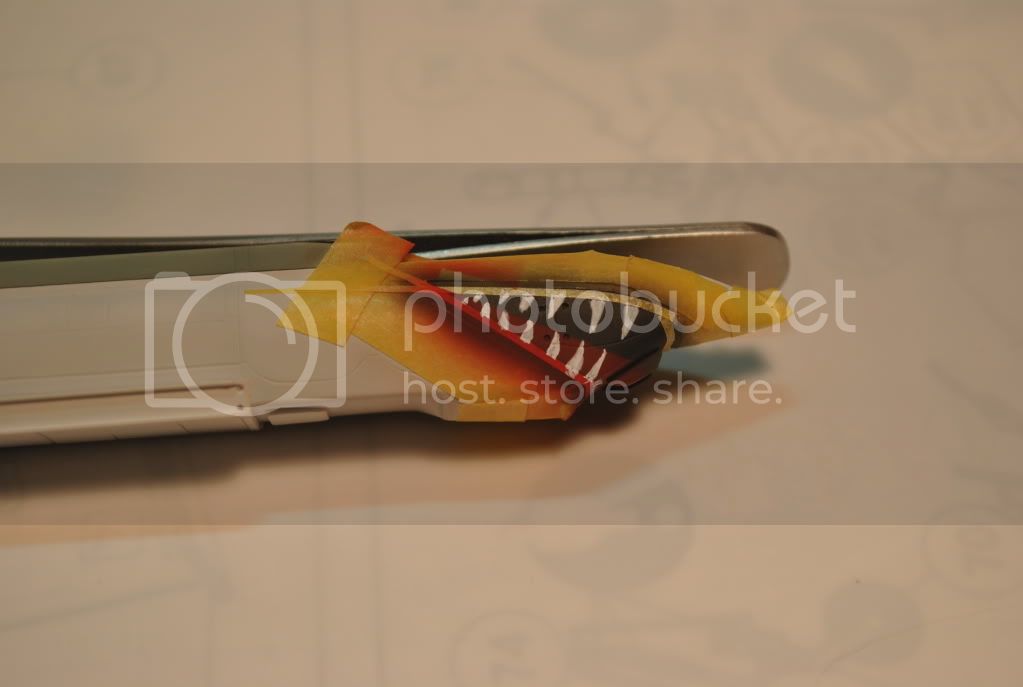
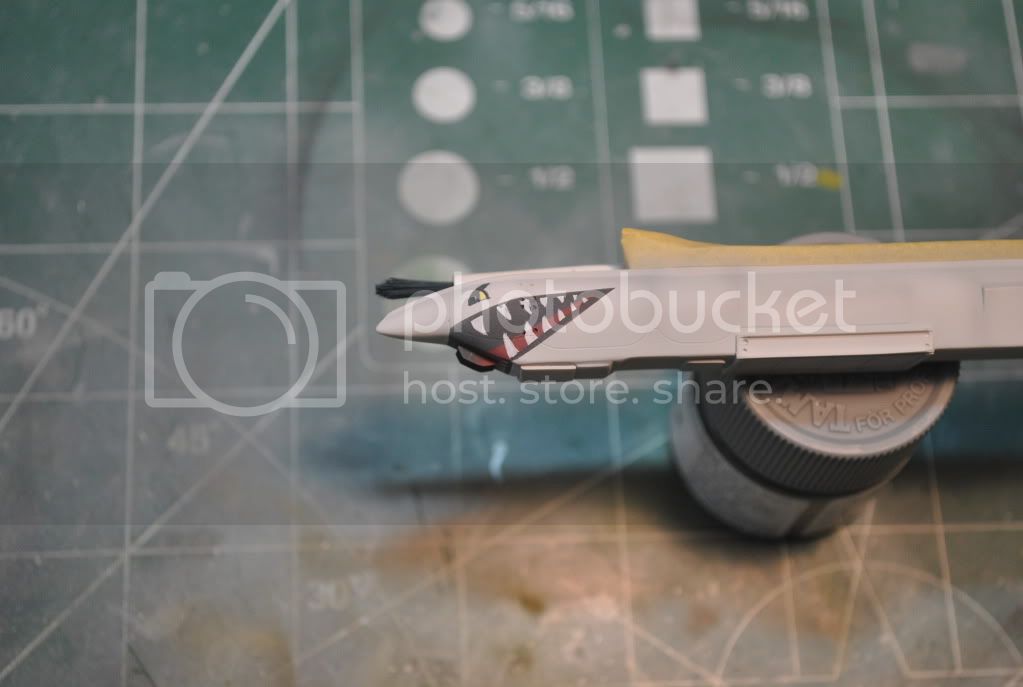
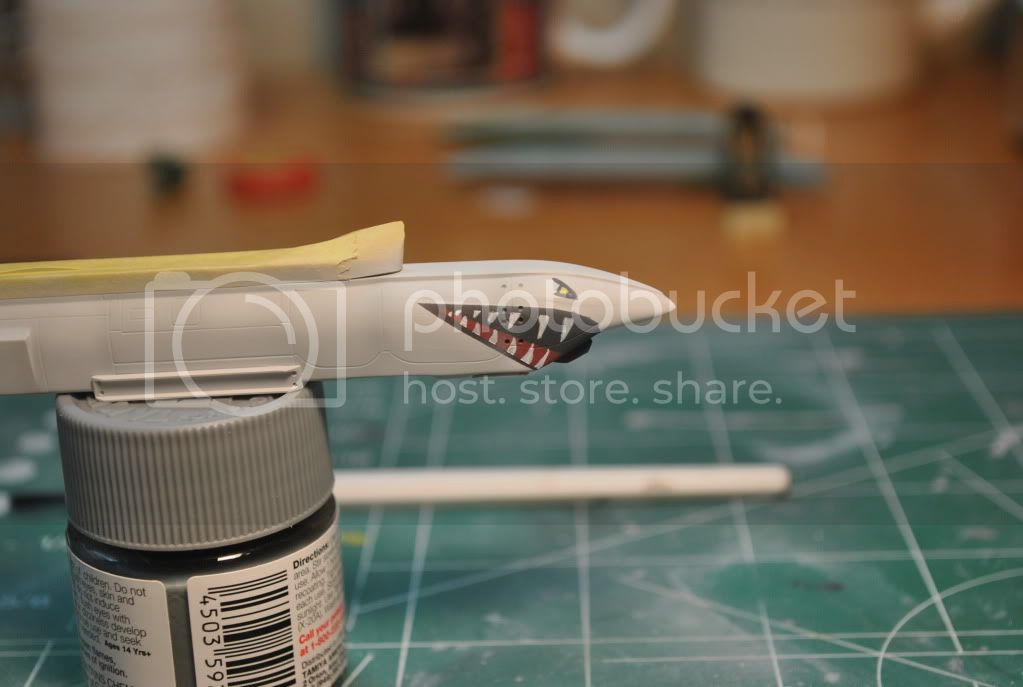
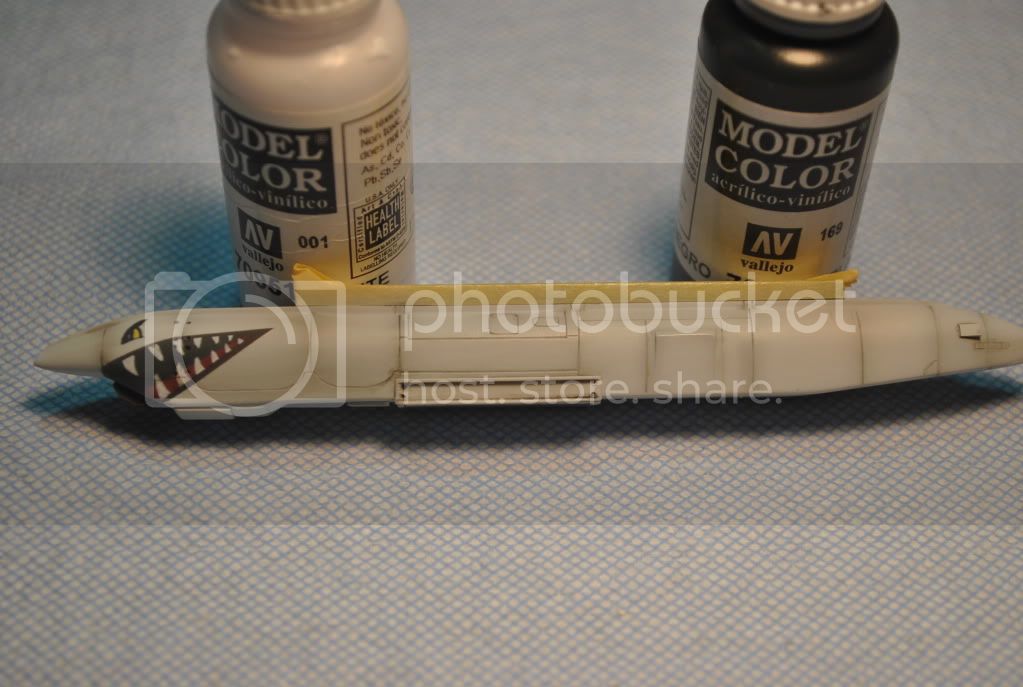
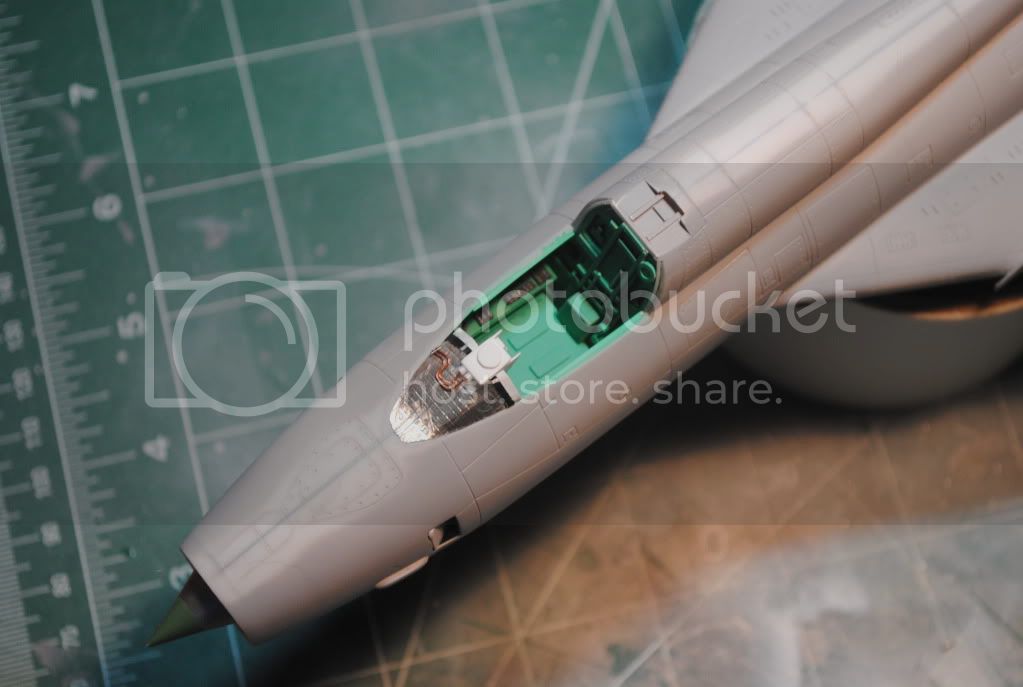
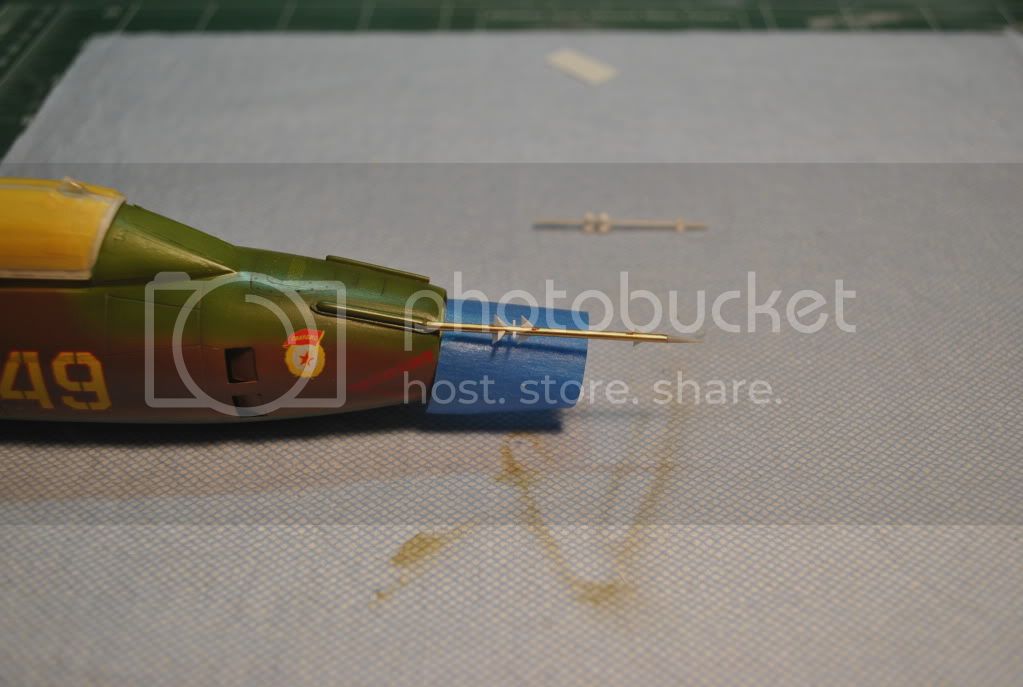
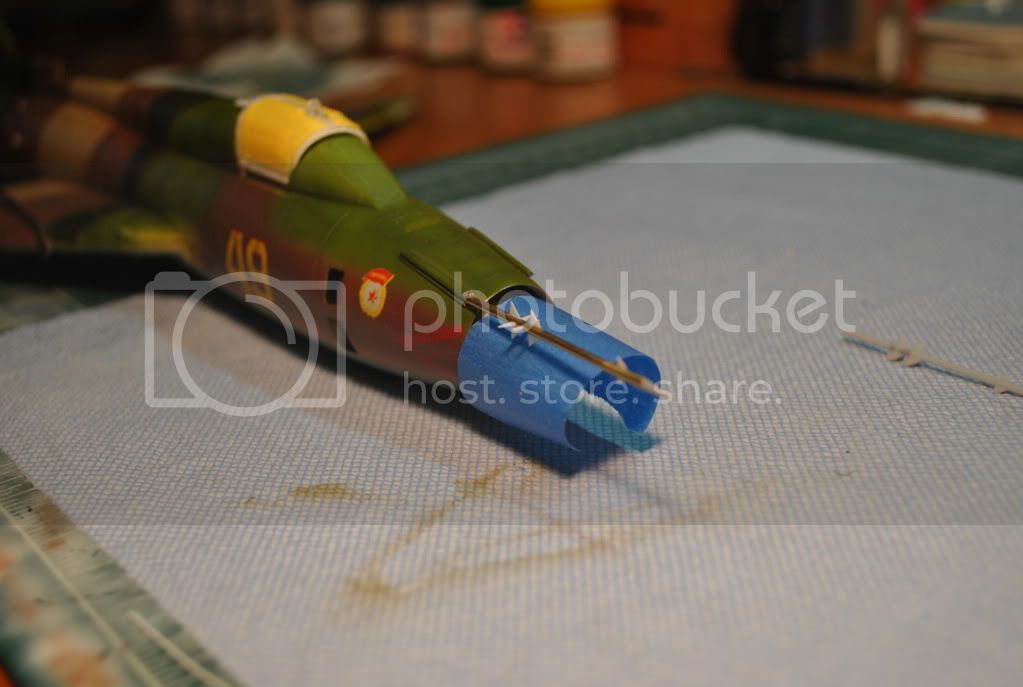
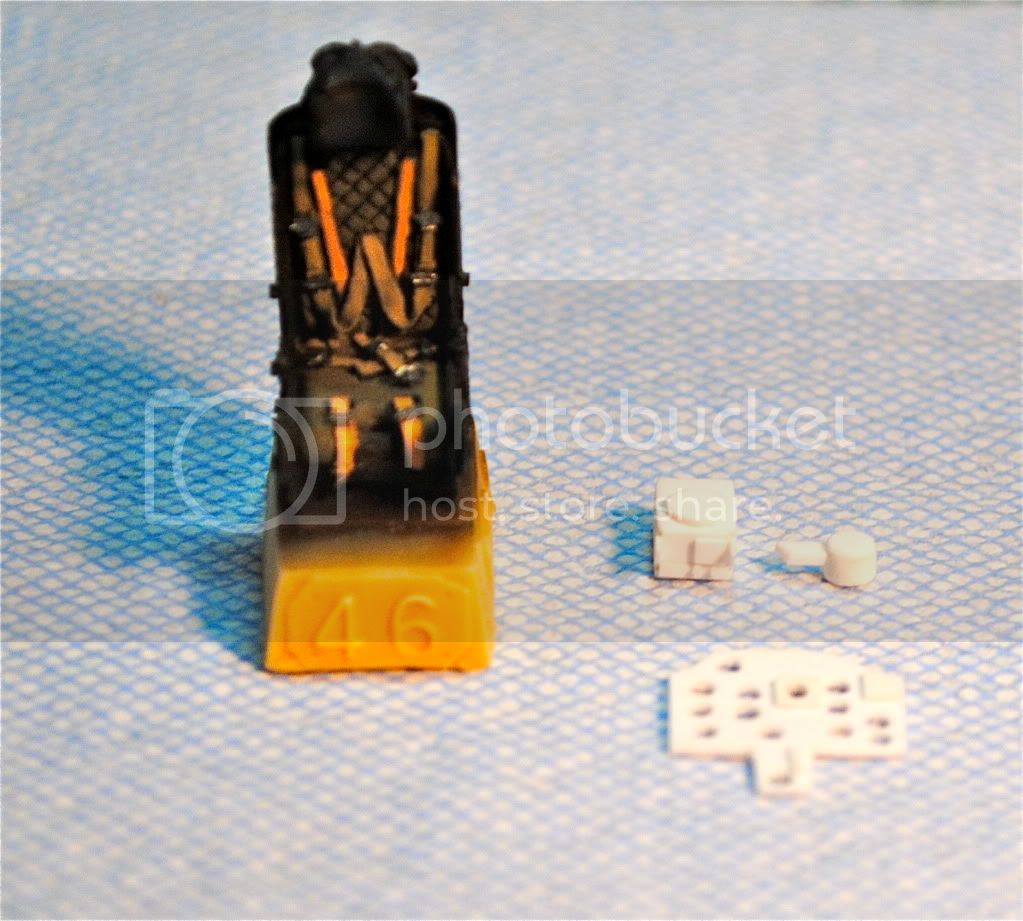
The beautiful KM1 ejection seat by True Details came with the kit (an addition made by the previous owner) and my research pointed me to Hi-Decal Line for markings.

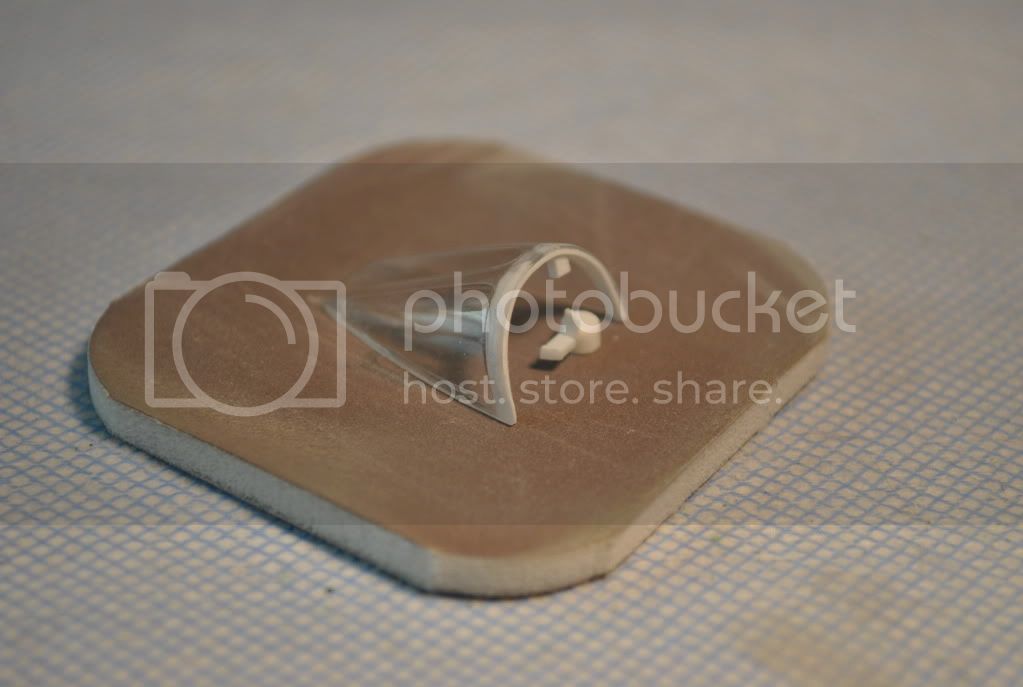
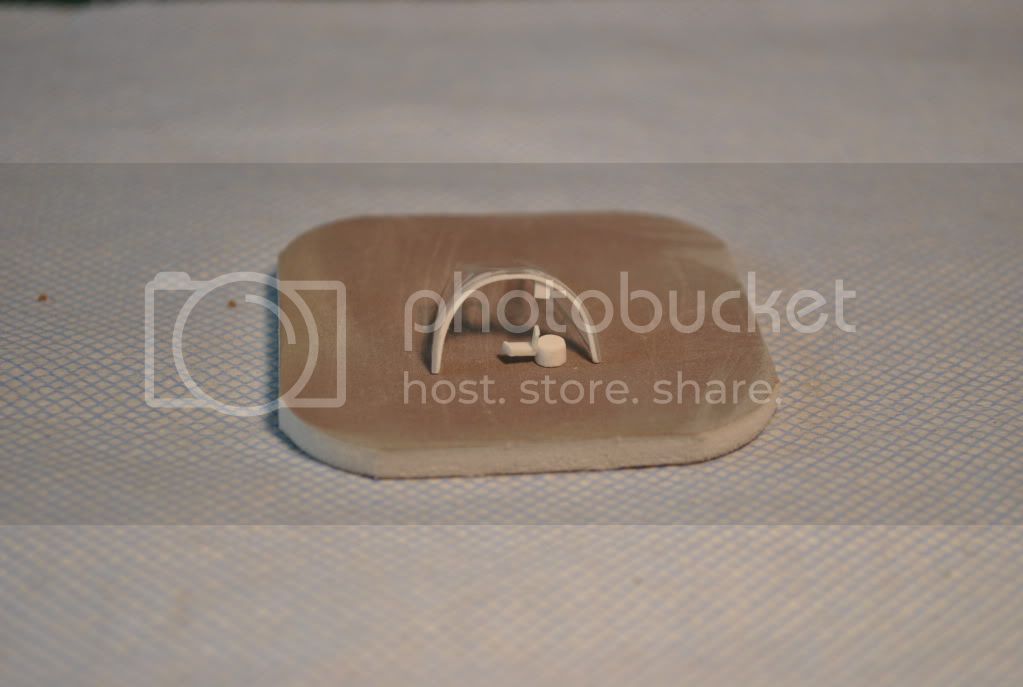
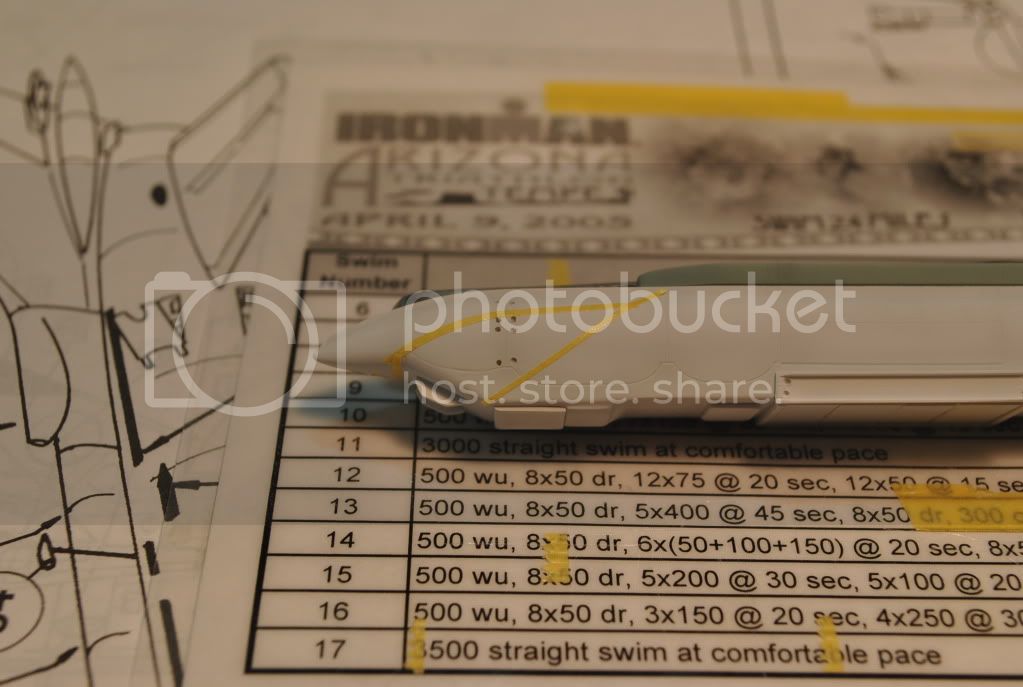
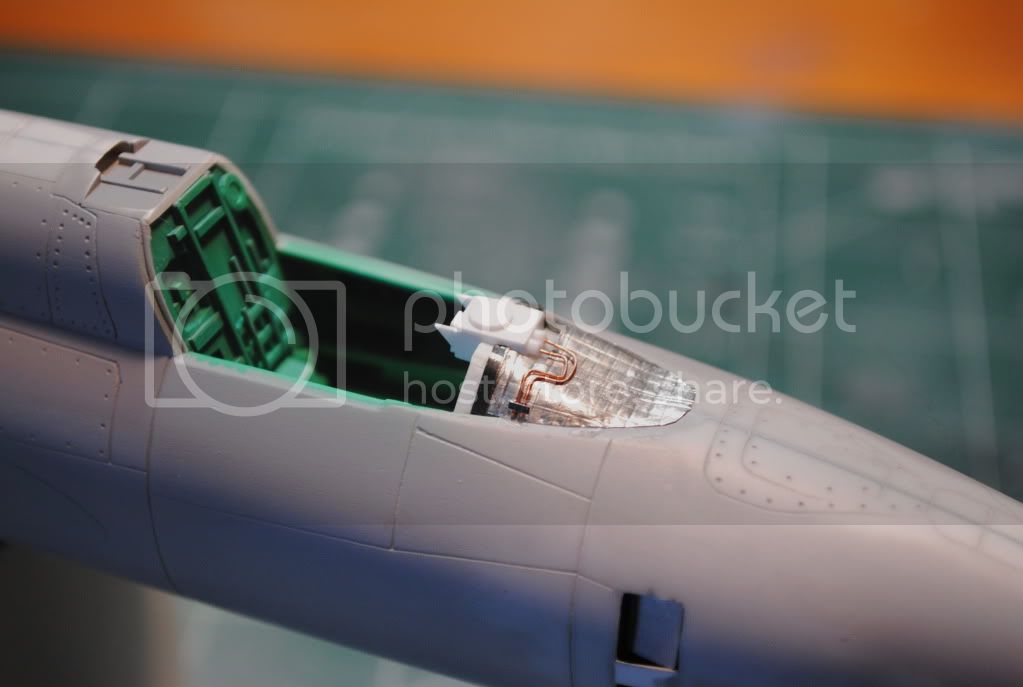
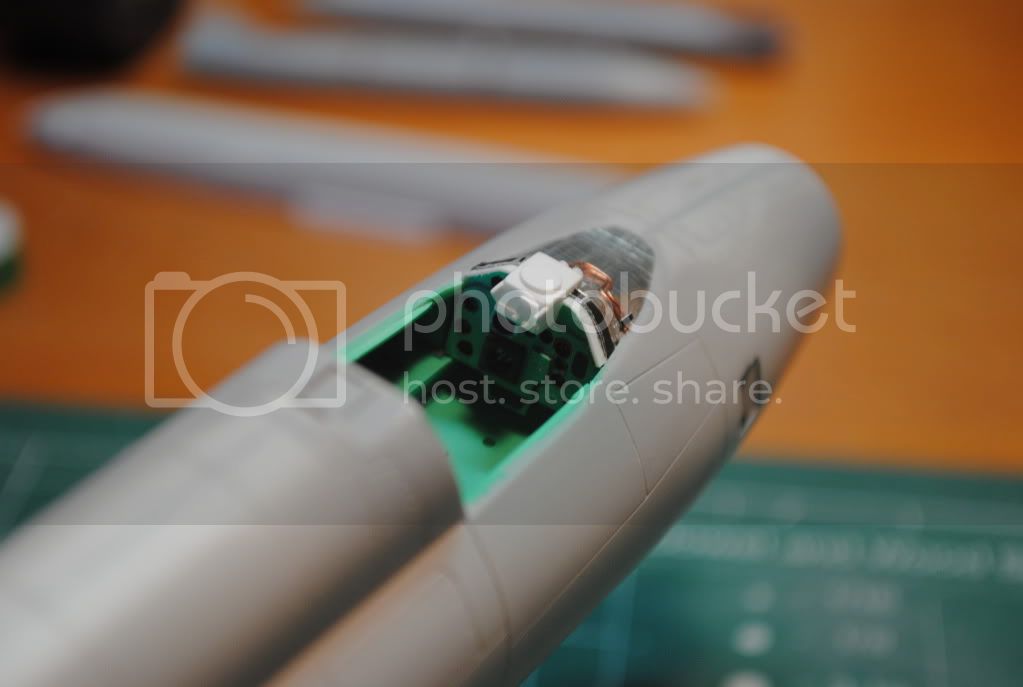
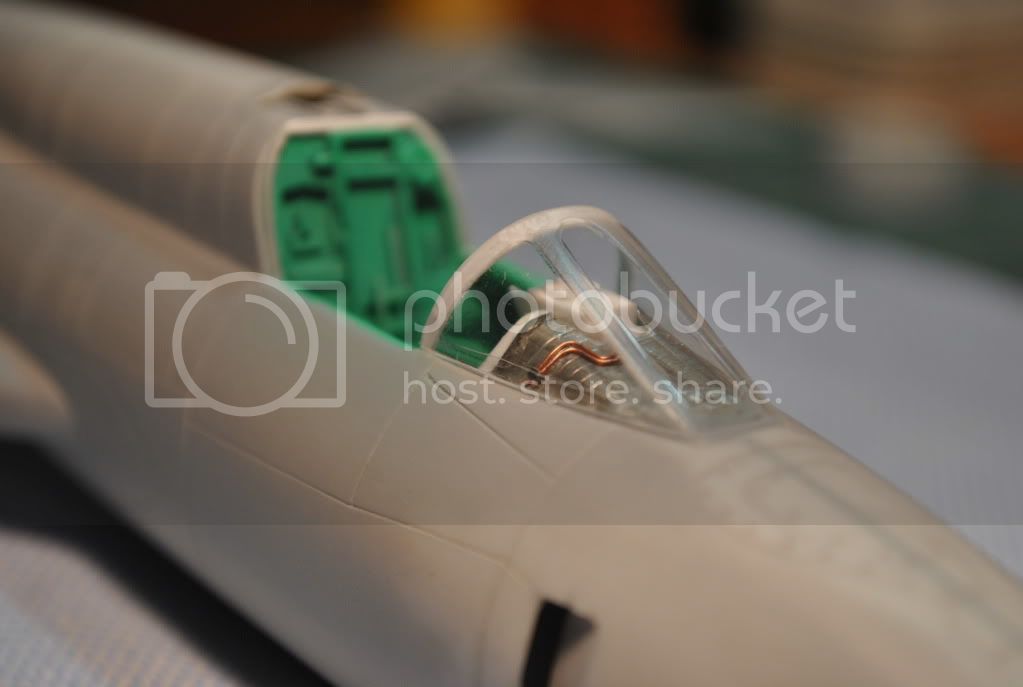
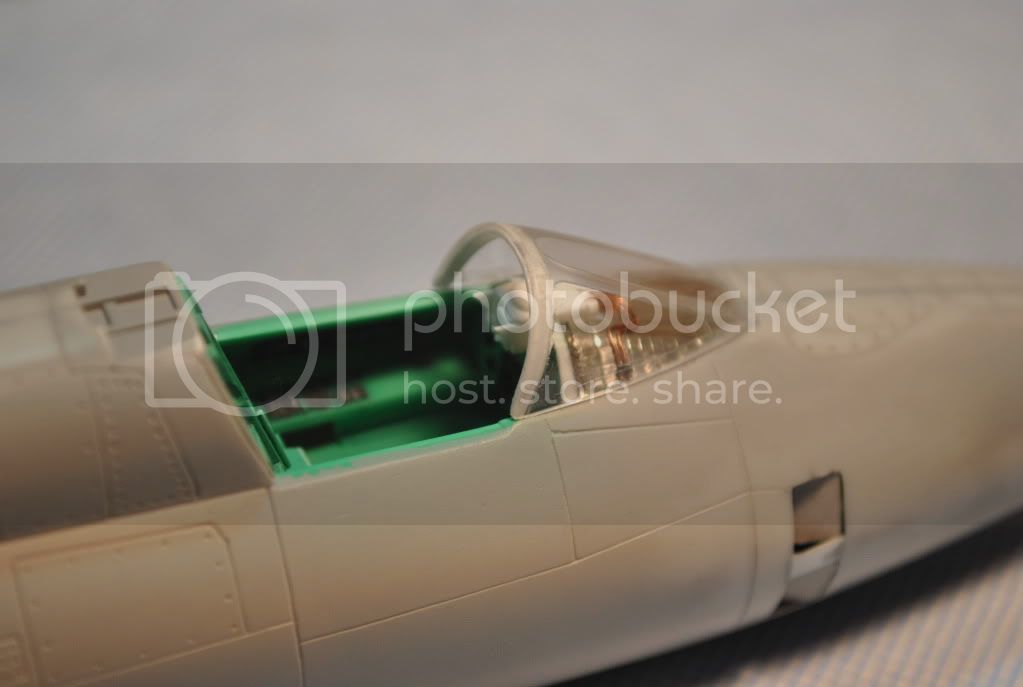
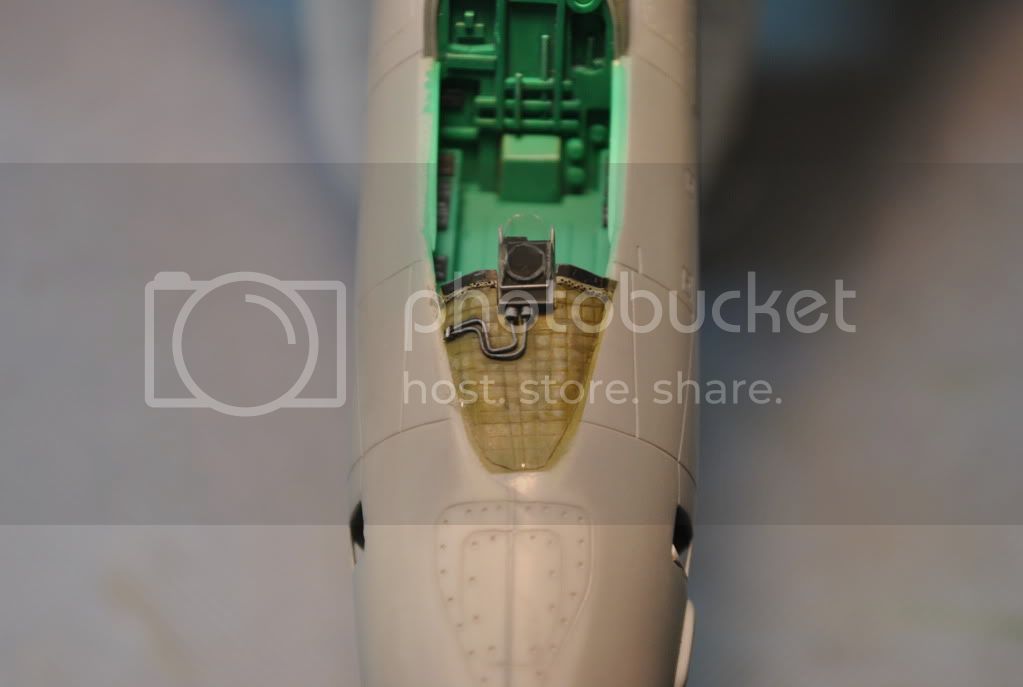
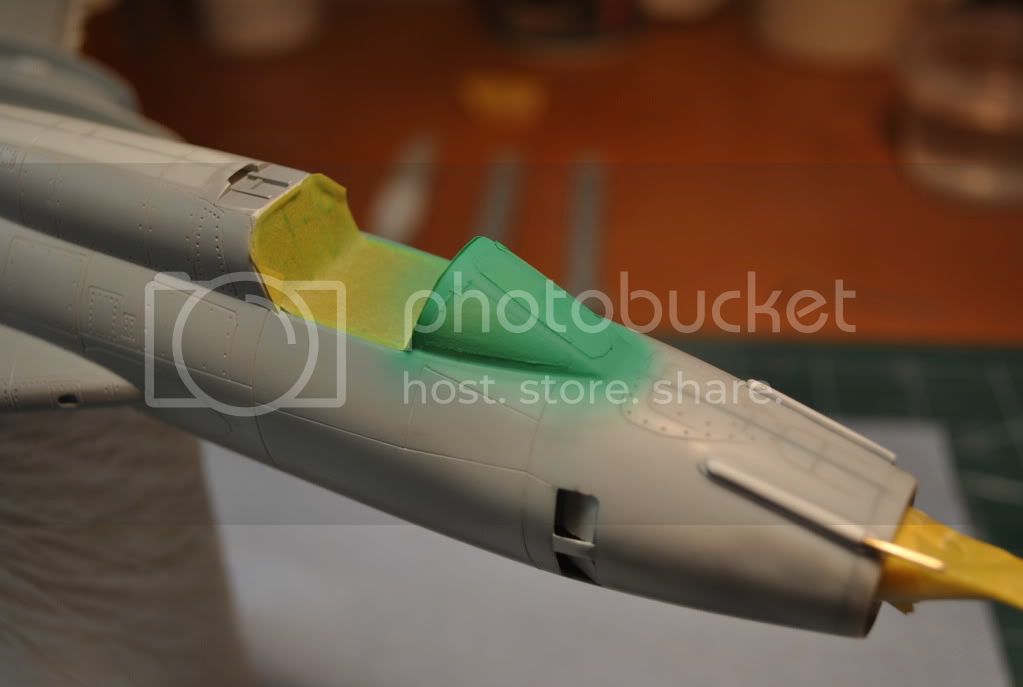
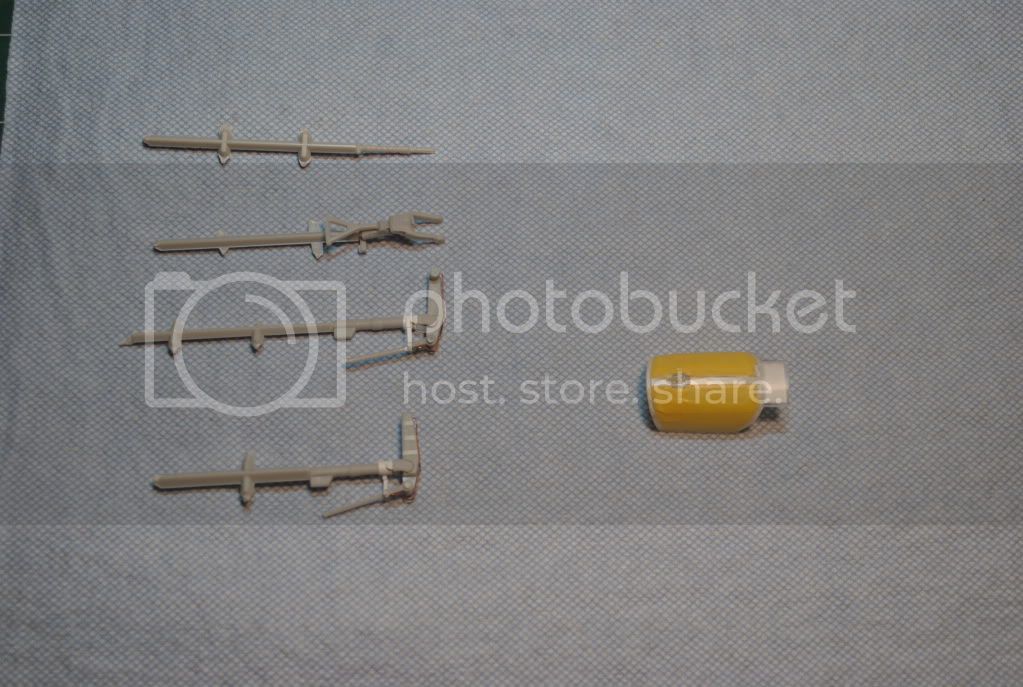
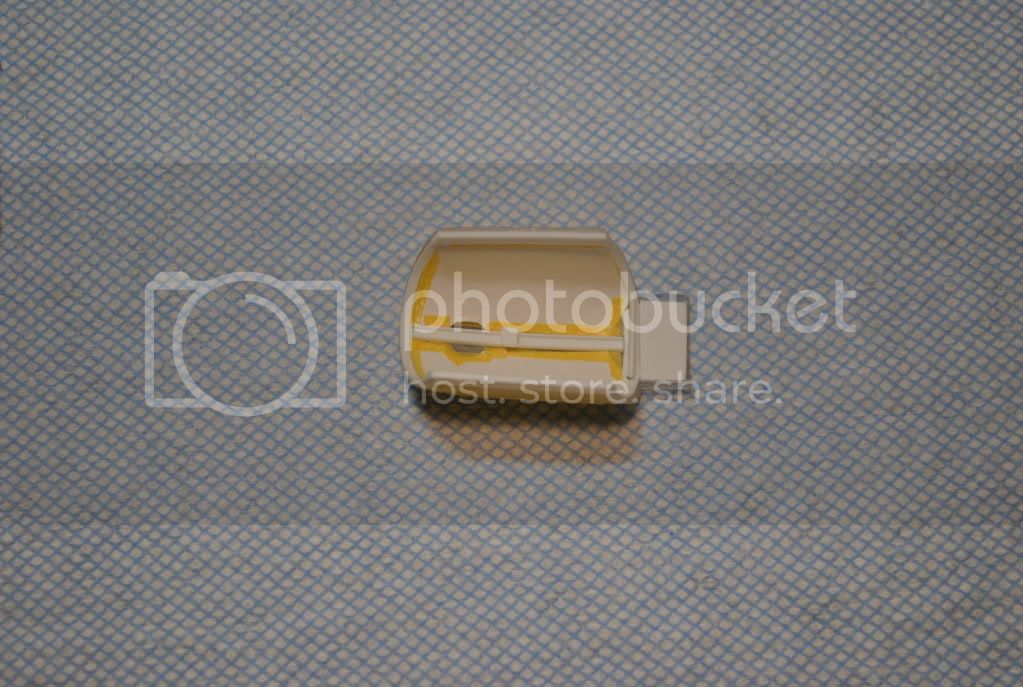
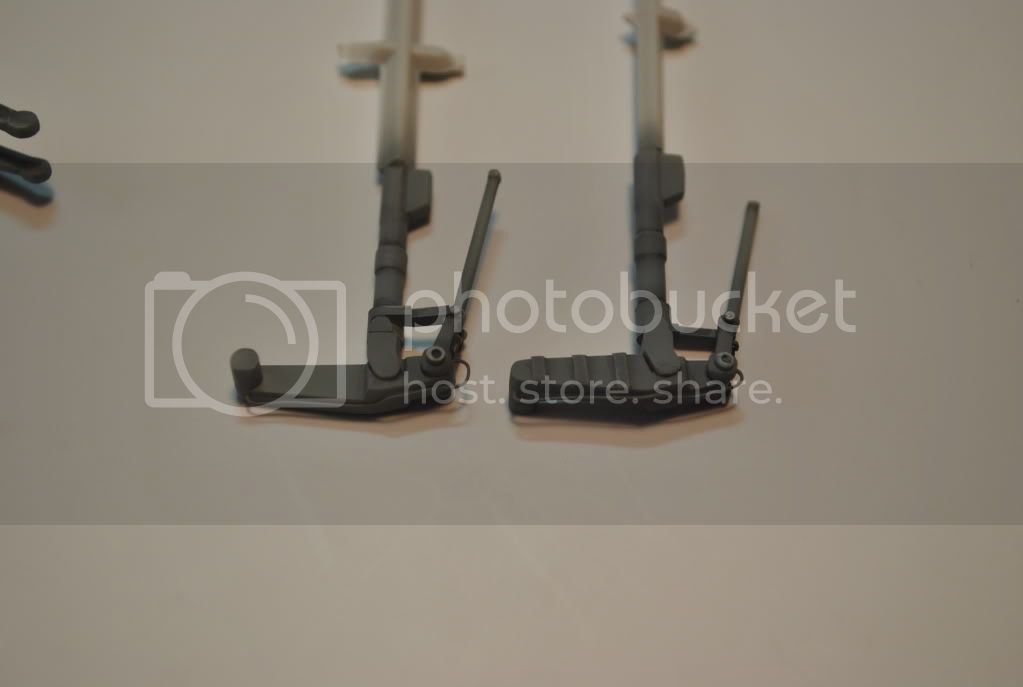
I began my work in the cockpit by scratch building the instrument panel, HUD projector and control unit.


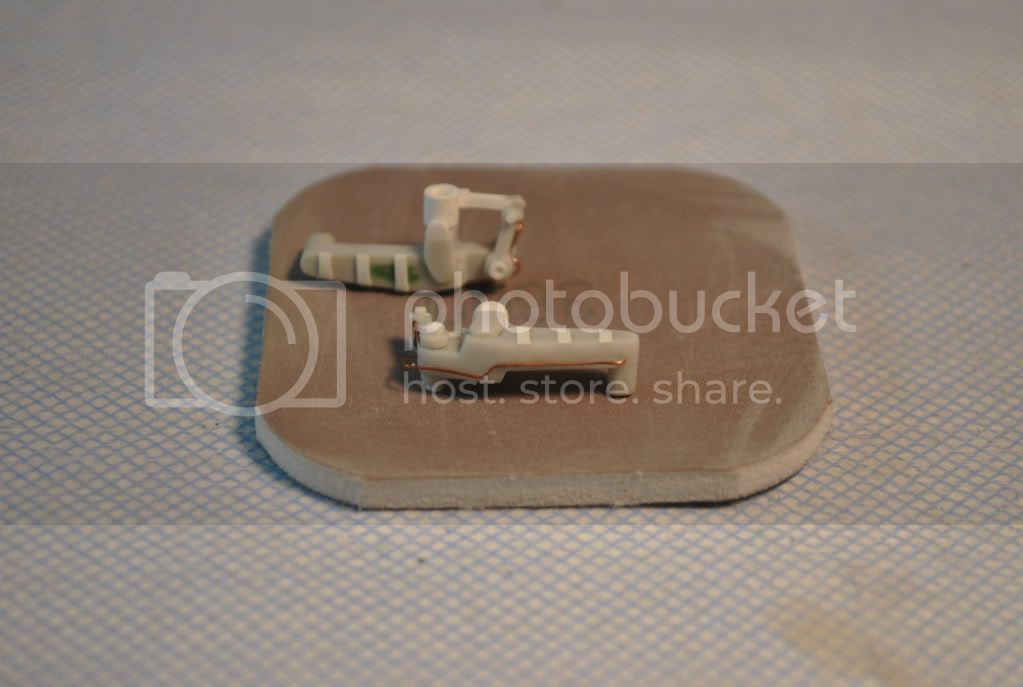
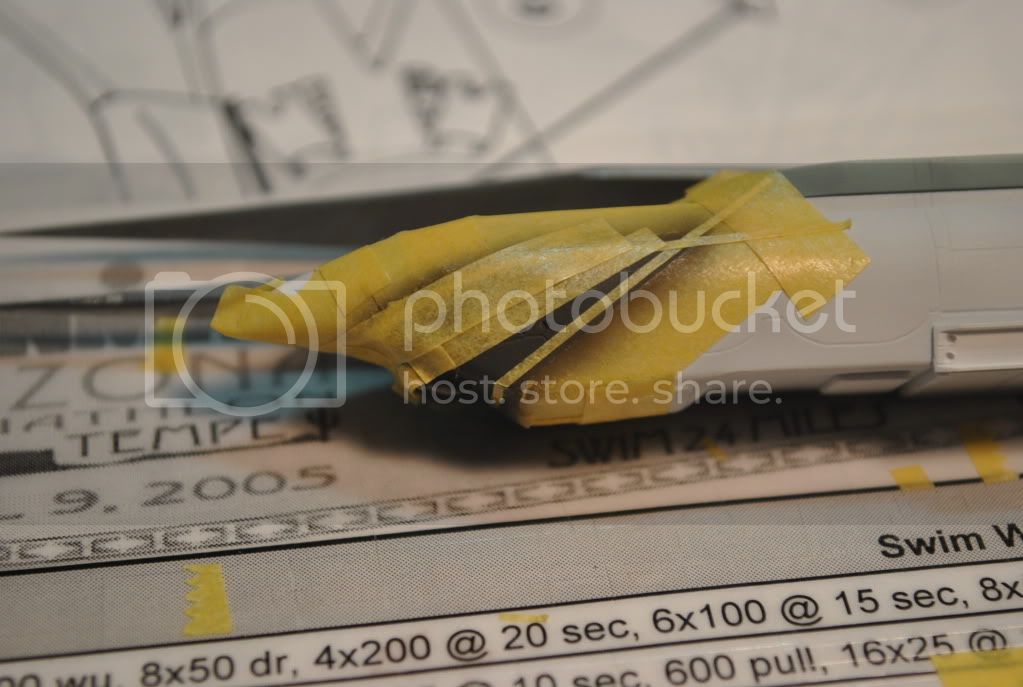
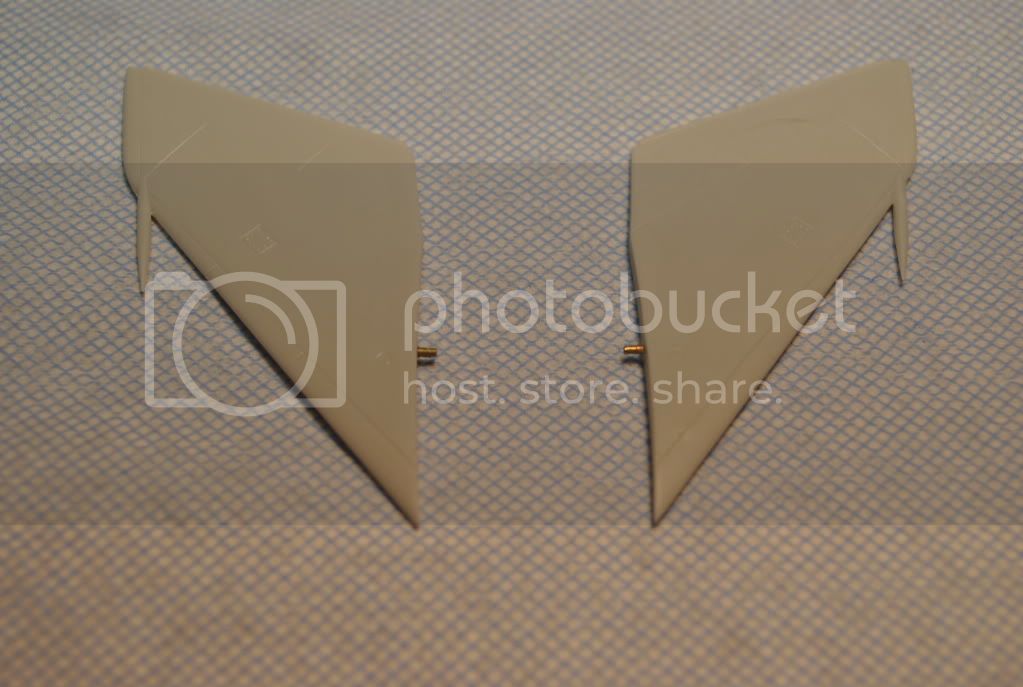
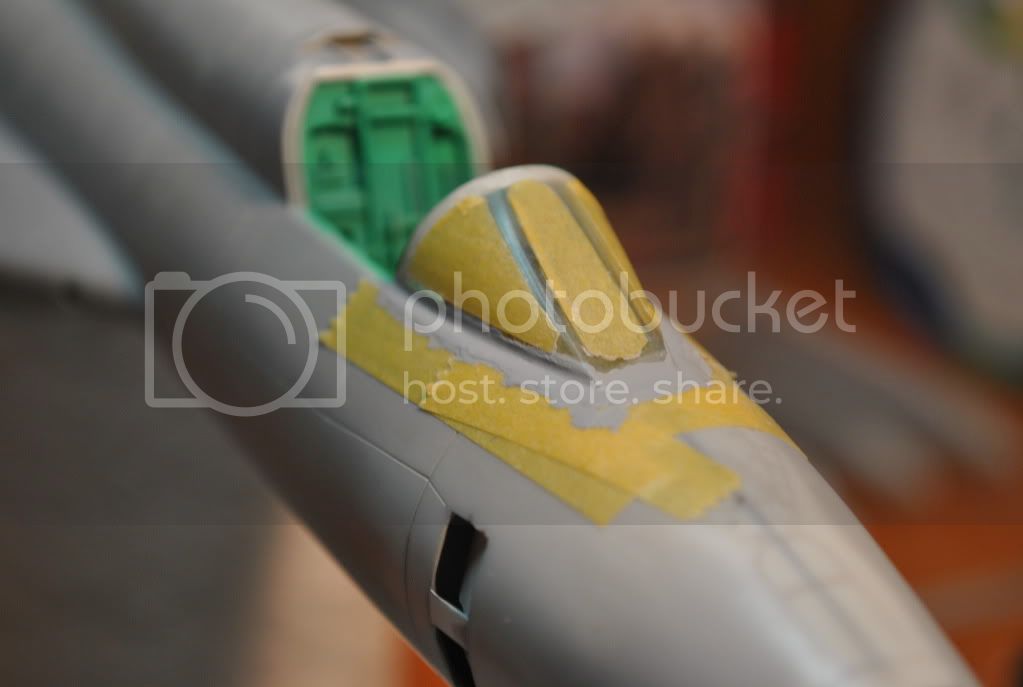
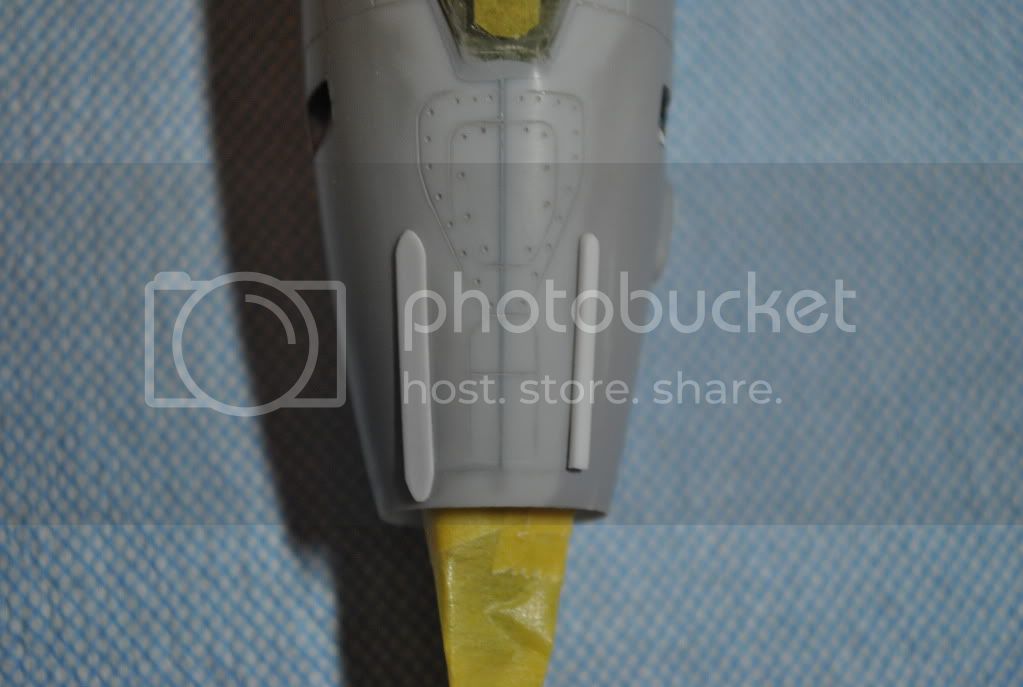
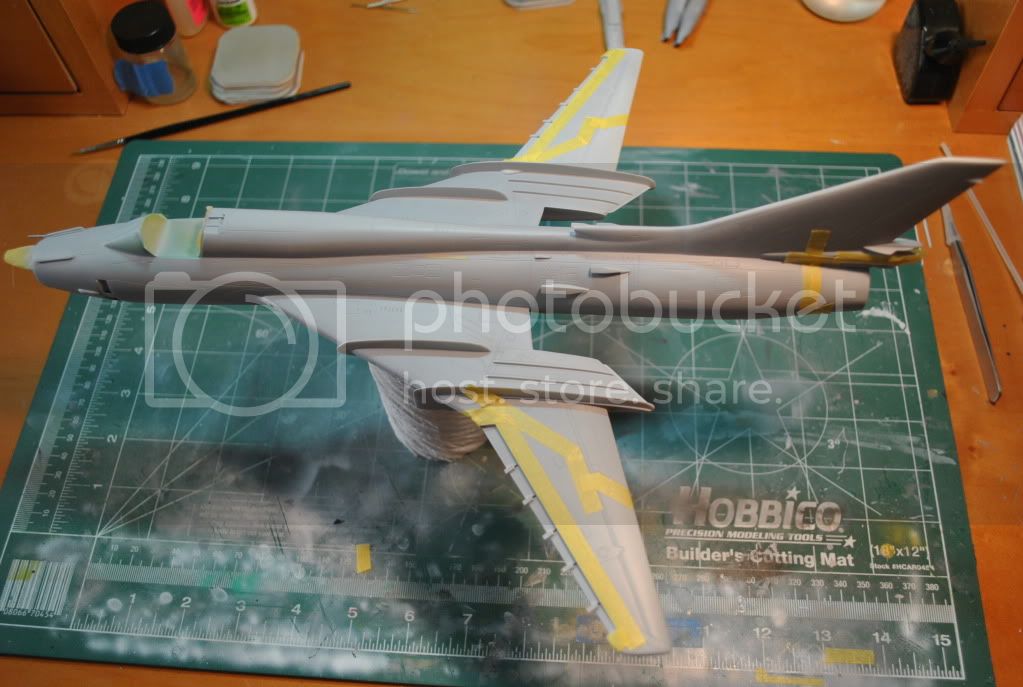
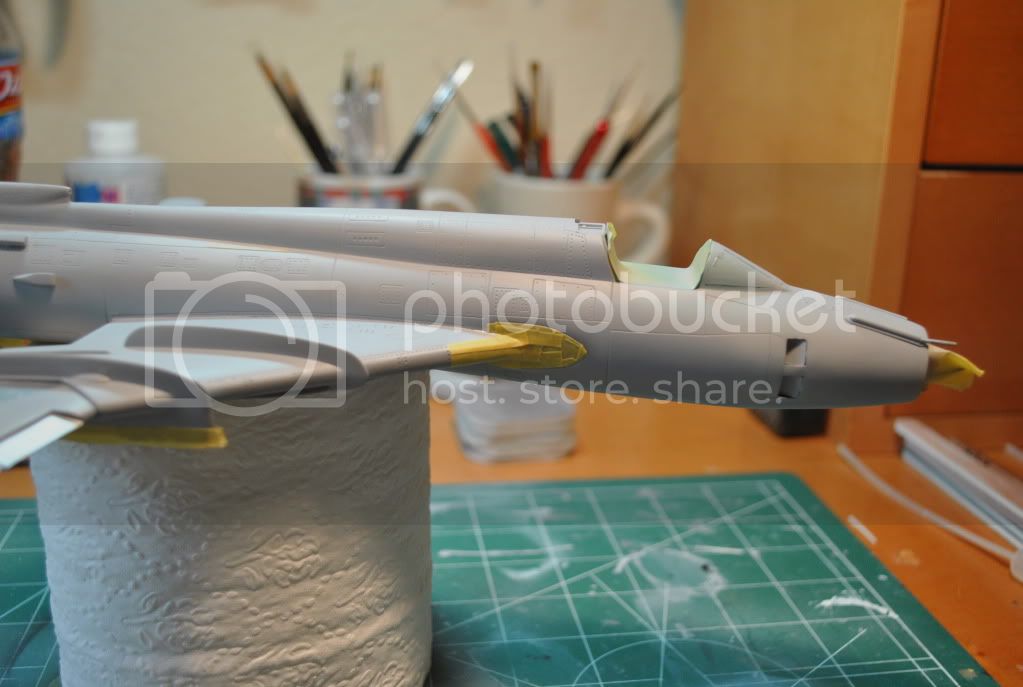
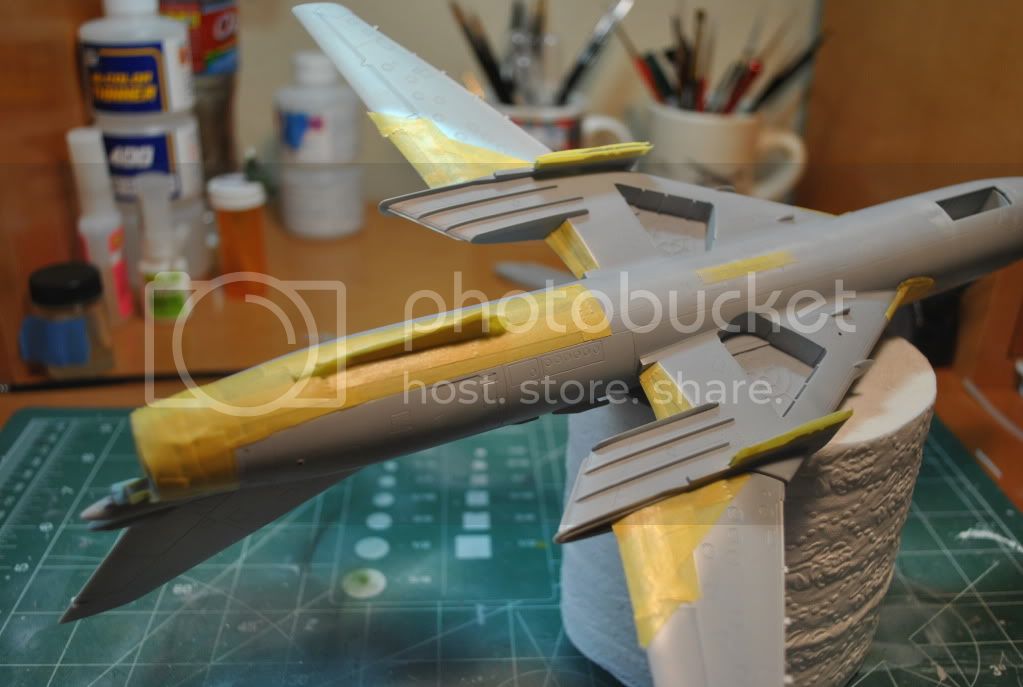
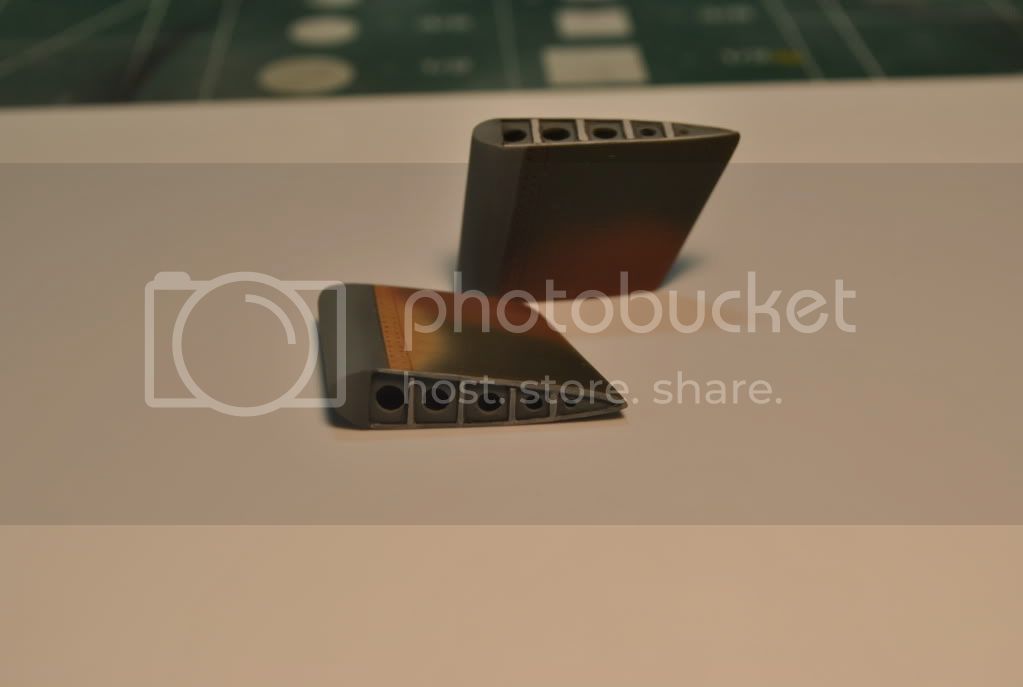
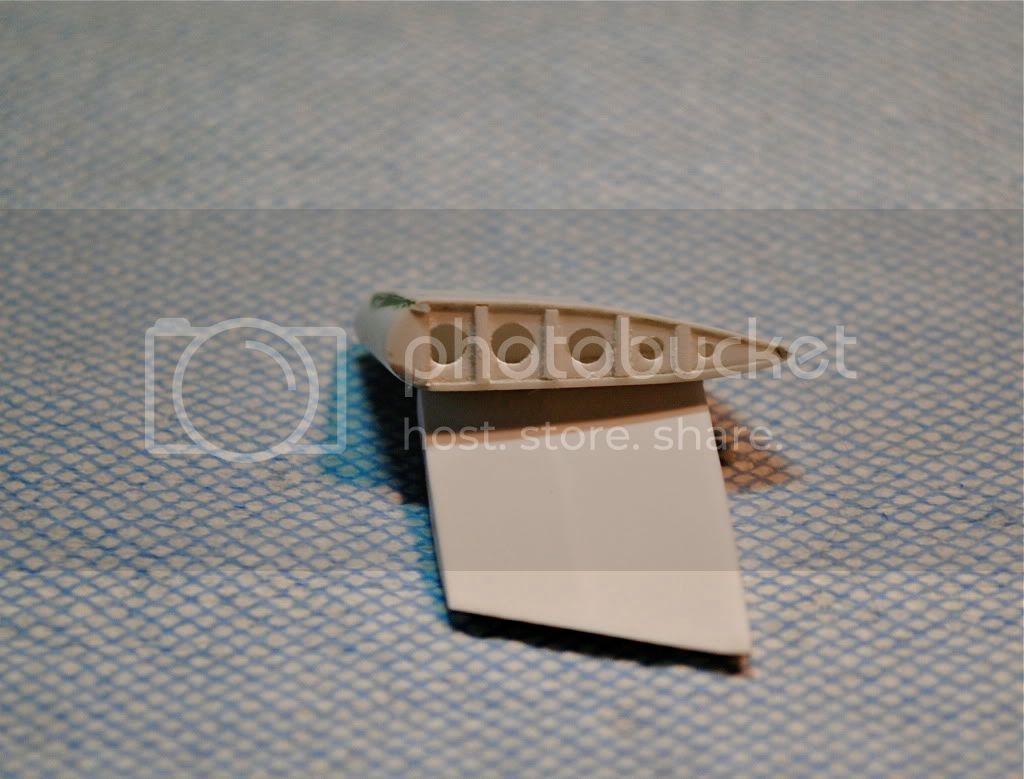
Simultaneously, commenced work on the flaps:


Many thanks for stopping by,
Mark

litespeed
Staff MemberNews Reporter
AEROSCALE
_VISITCOMMUNITY
England - North West, United Kingdom
Joined: October 15, 2009
KitMaker: 1,976 posts
AeroScale: 1,789 posts
Posted: Saturday, January 29, 2011 - 07:03 AM UTC
Excellent, nice one Mark. Looking forward to your build.
All the best.
tim
IronMark
_VISITCOMMUNITY
Texas, United States
Joined: December 27, 2009
KitMaker: 71 posts
AeroScale: 69 posts
Posted: Sunday, January 30, 2011 - 10:25 AM UTC
Merci, Tim.
Je vous remercie de vos compliments.

Progress continues on the Mighty Sukhoi. I found the main landing gear structures supplied by the kit were over simplified and needed a little love.


The completed gear: most of my time was dedicated to preserving the correct geometry on both sides as incorrect measurements at this stage would have undesirable consequences on the finished model.


Building up the structures in the windscreen frame to support the HUD projection system. Forward visibility out of the Fitter was certainly a bit compromised.


Many thanks again for checking us out!
Mark
Gundam-Mecha
_VISITCOMMUNITY
England - South East, United Kingdom
Joined: August 05, 2009
KitMaker: 1,019 posts
AeroScale: 66 posts
Posted: Sunday, January 30, 2011 - 10:52 AM UTC
Hi Mark, I have the Eduard SU-17/22 set on my shelf at home and I'll be building that up soon.

I'll be really interested to see how things go with your kit!
IronMark
_VISITCOMMUNITY
Texas, United States
Joined: December 27, 2009
KitMaker: 71 posts
AeroScale: 69 posts
Posted: Tuesday, February 01, 2011 - 02:30 PM UTC
Hi Jon,

Thank you for your interest! So far the kit has not presented any unpleasant surprises. My progress was helped today by an ice storm that has my fair city at a standstill, so rather than risk my neck with my fellow drivers I've decided that my time would be better spent at the modeling bench. Progress continues with the KKR-1 recon pod.

KP did a good job capturing the basic shape of the pod but it was in need of additional details:


I believe the four sections in the center of the pod are chaff dispensers so I've represented these with plastic sheet and will drill many holes at a later stage:


And finally, a side view of the finished pod. I will finish this up with a static discharge wick fashioned from piano wire.


More updates to follow!
Mark
IronMark
_VISITCOMMUNITY
Texas, United States
Joined: December 27, 2009
KitMaker: 71 posts
AeroScale: 69 posts
Posted: Saturday, February 05, 2011 - 09:00 AM UTC
At this point I decided to take the KKR-1 recon pod to the finish line. During my research I discovered examples of these pods adorned with a shark mouth (touche to the ground crews - yes, even recon birds can look aggressive on the flight line) and elected to adorn this one in a similar fashion.

First step is to mask the outline of the mouth and paint it black.


Next, I masked and painted the red portion of the mouth:


Now comes the fun part, hand painted teeth:


And finally, I added the eyes and unmasked the dental work:


I used Tamiya paint for the black and red sections of the mouth and used Vallejo Model Color for the eyes and teeth:


Next up we'll tackle the fuselage. Thanks for stopping by and we'll see you soon.
Mark
IronMark
_VISITCOMMUNITY
Texas, United States
Joined: December 27, 2009
KitMaker: 71 posts
AeroScale: 69 posts
Posted: Wednesday, February 09, 2011 - 01:11 PM UTC
The big bird is beginning to take shape! The various pieces that comprise the cockpit were assembled along with the left and right halves of the intake cone. I added approximately 20 grams of weight to ensure she would not spend the rest of her days as a tail dragger. The fixed portions of the wings only needed minor modifications to snug up to the fuselage


To ensure a good fit and alignment of the horizontal stabilizers, I installed short pieces of brass tube. These will slide into a larger pieces installed in the fuselage.


It was at this point that I encountered my first snag. When the fuselage halves were joined, I noticed the aft fuselage terminated in an elliptical shape. This would not do! After giving it some thought I decided the simplest solution would be to remove the offending section and fashion a new one using two concentric discs joined by alternating trapezoid shapes cut from sheet stock. After much filling and sanding, I cut the discs open and voila, a new afterburner section:

And another view:


Now the fun begins - we'll scratch build the instrument panel shroud, add the HUD and fashion a fabric covering for the lot. I'm restocking my beer as we speak.

Many thanks for stopping by!
Mark
IronMark
_VISITCOMMUNITY
Texas, United States
Joined: December 27, 2009
KitMaker: 71 posts
AeroScale: 69 posts
Posted: Saturday, February 12, 2011 - 07:55 AM UTC
Progress continues in the front office:

The instrument panel cover provided with the kit was far from accurate so I scratch built my own using small segments of plastic strip arranged in planks. Gaps were filled and the HUD control system installed. Once I had everything in its proper place, I fashioned a fabric cover out of piece of foil donated by a bottle of my favorite Cabernet. I simulated the criss-cross weave pattern using the back of an Xacto blade and it was now ready for paint. The lot was finished off with copper wiring.


This view shows some of the details added to the aft cockpit bulkhead


A test fit of the windscreen. Fortunately, my test fits showed that only minor trimming of the metal foil was all that was necessary to allow it to sit correctly on the fuselage:


And finally, the fabricated afterburner section attached to the fuselage:

This will need some more work to make it conform to the fuselage but all-in-all, I'm happy with the finished result.


Next up we'll paint the HUD and related structures and mount the windscreen to the fuselage.

Many thanks for stopping by!
Mark
litespeed
Staff MemberNews Reporter
AEROSCALE
_VISITCOMMUNITY
England - North West, United Kingdom
Joined: October 15, 2009
KitMaker: 1,976 posts
AeroScale: 1,789 posts
Posted: Monday, February 14, 2011 - 12:19 PM UTC
Excellent stuff Mark, that has to be one of the meanest recon pods I have ever seen. Lovely cockpit as well. Keep up the outstanding work Mark.
All the best.
tim
IronMark
_VISITCOMMUNITY
Texas, United States
Joined: December 27, 2009
KitMaker: 71 posts
AeroScale: 69 posts
Posted: Tuesday, February 15, 2011 - 02:24 PM UTC
Hi Tim,

I certainly appreciate the kind words. I must confess that when I saw a KKR-1 adorned with a shark mouth I was impressed. Really, a recon pod with teeth?!? Then It occurred to me it might have been applied in a humorous spirit (at least I hope this is the case), much like the "Molar Marauder" that for a very short while adorned a USAF A-7 Corsair. I appreciate a good sense of humor, particularly as it applies to flying machines and the people who operate and maintain them.

Many thanks again!
Mark
IronMark
_VISITCOMMUNITY
Texas, United States
Joined: December 27, 2009
KitMaker: 71 posts
AeroScale: 69 posts
Posted: Sunday, February 20, 2011 - 03:27 AM UTC
Good Sunday everyone,

My work in the front office is almost complete. Details on top of the instrument panel have been painted and it's time to attach the windscreen.

After a failed attempt to fashion the HUD-glass support structures in plastic (I was unable to make the bugger thin enough for my taste), I borrowed a photo etched set designed to fit an early model F-15. While it fails the purists' test of fidelity, it solved a practical problem. I made the glass out of thin acetate.

and another view:


At this point it was time to mask the windscreen and attach it to the fuselage:

The blobs of "grey matter" surrounding the canopy is actually a slow build-up of Gunze's Mr. Surfacer 500. I masked the surrounding area on the fuselage to prevent damage during the sanding/ blending stage.

The Su-17/22 features two prominent probes extending from the nose into the clear, unperturbed air in front of the aircraft (jousting spears??). While the pieces included with the kit are shaped correctly, they come up short in accuracy at the attachment points on the fuselage. As a result, I've decided to scratch build my own. Let's start with the foundation:


Another view. Notice the dissimilarity between the left and right structures; the probe on the pilot's right-hand side is noticeably longer than the left-hand side and required a more substantial foundation.


And finally, I blended the new afterburner section into the fuselage with the help of files and fine sand paper.


Next step is one of my favorites: paint and decals. My intention is to represent an aircraft that served in the Afghanistan campaign w/ a four-tone upper surface over a blue-grey undersurface. This should be fun.

Thanks again for stopping by!
Mark
IronMark
_VISITCOMMUNITY
Texas, United States
Joined: December 27, 2009
KitMaker: 71 posts
AeroScale: 69 posts
Posted: Wednesday, March 02, 2011 - 02:39 PM UTC
Apologies for the delay - this past weekend was my home town's local marathon and my recovery took a bit longer than I anticipated.

A few details needed to be cleaned-up before we start shooting paint. First up is the mounting base for the left-hand probe. I made this with Evergreen 2mm rod, shaped with fine sandpaper:


Next, I fashioned the ventral fin out of sheet stock and attached it to a base made out of the same material.


On to our paint job: The first color on the bird is interior green applied to the canopy frame. In this case I used Glacier Green from Poly Scale's Model Railroad Color line.


At this point I took a bit of a detour and applied another primer coat after discovering a few rough spots I had not seen before. I sanded the model with progressively finer grades of sandpaper, starting with 2400 grit and progressing through 4000 grit before calling it complete. After a wash with water and mild soap, I let the model air dry for 24 hours before masking off the aircraft's metal surfaces. These will be painted with Alclad aluminum.


WIth the Alclad step complete, I masked the metal surfaces in preparation for the color coats.


And the ventral side:


At this point I will mix my color coats and dust off the trusty Iwata. Party time!!!

Many thanks for stopping by and don't forget to tip your bartenders and waitresses.
Mark
Lucky13
_VISITCOMMUNITY
Scotland, United Kingdom
Joined: June 01, 2006
KitMaker: 1,707 posts
AeroScale: 1,119 posts
Posted: Sunday, March 06, 2011 - 12:31 PM UTC
Great work mate!
IronMark
_VISITCOMMUNITY
Texas, United States
Joined: December 27, 2009
KitMaker: 71 posts
AeroScale: 69 posts
Posted: Thursday, March 24, 2011 - 12:34 PM UTC
Good day everyone,

@Jan - Many thanks for the kind words, sir.

I'm approaching that time of year when the weeds in my yard and tax season inflect themselves into my bench time and blah, blah, blah. Long story short, I've decide that I was in much need of some "fun time" and took to mixing colors for the exterior of the mighty Sukhoi. From the beginning of this project, my objective was to depict a warplane from the Afghanistan conflict. During this time Soviet tactical aircraft were painted in a 5-tone pattern; 2-green and 2-brown colors over blue-grey. Since written color references are scarce, I resorted to the vast photo reference available on the web. Let's get started:

I painted the top of the aircraft in the order of light to dark colors:


This shade of tan is a mix of Tamiya XF-57 and XF-59, while the light green is a mix of XF-5 and XF-3 in a 4:1 ratio:


Simultaneous with each base color, I shot the tint/ tones:


Two colors down, three more to go....

Thanks for stopping by and happy modeling!
Mark
IronMark
_VISITCOMMUNITY
Texas, United States
Joined: December 27, 2009
KitMaker: 71 posts
AeroScale: 69 posts
Posted: Monday, March 28, 2011 - 02:31 PM UTC
Good day everyone,

I'm happy to report that the Mighty Sukhoi is finally painted. This post will be short, unfortunately, as I got on to a bit of a roll and neglected to take any in-process shots beyond those posted above.

Here's what we have so far, taken from above:


And again from a different angle:

For the final touch, I covered the model with two coats of acrylic floor wax, thinned with Mr Color Thinner. Once the clear coat was dry, I used a small piece of soft flannel to polish it to a high gloss finish.

Now the fun begins. Decals and weathering have always been my favorite steps as they bring the model to life.

Many thanks for stopping by!
Mark
Gundam-Mecha
_VISITCOMMUNITY
England - South East, United Kingdom
Joined: August 05, 2009
KitMaker: 1,019 posts
AeroScale: 66 posts
Posted: Monday, March 28, 2011 - 09:37 PM UTC
Amazing work Mark!

The recon pod is great! I've seen lots of nice decals for this part but this painting is wonderful. Very well done!

Also the camo is looking brilliant.

What color did you use for the interior of the cockpit?
IronMark
_VISITCOMMUNITY
Texas, United States
Joined: December 27, 2009
KitMaker: 71 posts
AeroScale: 69 posts
Posted: Tuesday, March 29, 2011 - 01:03 PM UTC
Cheers Jon!

I appreciate the kind words. Your comments about decals bring up a good point which I failed to mention in my notes above: the decals which I intend to use for this project (Hi Decal Line) not only include a sheet of beautiful markings, the paint and marking reference material they provide is outstanding. I simply followed one of the camo patterns described therein and viola!

For the interior, I used "Glacier Green" from PolyScale's Model Railroad Color line. While I have seen Russian cockpits painted with bluer hues, this is close enough for me.

I appreciate your kind observations.
IronMark
_VISITCOMMUNITY
Texas, United States
Joined: December 27, 2009
KitMaker: 71 posts
AeroScale: 69 posts
Posted: Sunday, April 03, 2011 - 12:53 PM UTC
Good day everyone,

With the decals and clear coat steps behind me, the finish line is in sight. Next on the the task list is the construction of a suitable replacement for the two prominent structures protruding from the nose of Sukhoi. After consulting my reference material, I've elected to start with two measured pieces of brass tube. The probe on the pilots left-hand side will be pretty straightforward while the one on the right hand side is a different animal altogether. Let's begin with it.

the various structures were fashioned from .13mm sheet stock and attached to the brass tube with cyanoacrylate:


Another view: I used the tip of the kit supplied part to keep the shape as close to the real thing as possible.


And finally, a shot of the completed flaps:


Next up, I will turn my attention to the landing gear and chaff dispensers.

Many thanks for stopping by!
Mark
Gundam-Mecha
_VISITCOMMUNITY
England - South East, United Kingdom
Joined: August 05, 2009
KitMaker: 1,019 posts
AeroScale: 66 posts
Posted: Tuesday, April 05, 2011 - 09:43 PM UTC
Great work on the nose gear! Pitot tubes are always tough, plastic, resin, or metal... lot's of mediums to choose! Top job on mixing the mediums like that!

I've got some Quickboost resin ones for my MIG-29 but I may change them and make my own from brass rod.

Are the flaps parts from the kit or scratch built? Cutting edge did a great external detail set with all the flaps and parts, but sadly it's long OOP. Which is such a shame, I really miss their exhaust set too. Shame Aires haven't stepped up to fill the void, especially when you consider the recent Eduard re-releases. There would certainly be a market I think.
IronMark
_VISITCOMMUNITY
Texas, United States
Joined: December 27, 2009
KitMaker: 71 posts
AeroScale: 69 posts
Posted: Thursday, April 07, 2011 - 01:24 PM UTC
Hi Jon,

Many thanks for your compliments and feedback. I encourage you to try your hand at a pitot probe made from brass tube as it adds a level of versatility to your skills and contributes to a model's realism. As an example, if your subject calls for a pitot that is constructed of concentric tubes (terminating into a point), small, concentric pieces of brass looks very realistic while offering a level of structural integrity that stretched sprue cannot match. If your pitot is as "well-dressed" as in the example adorning our subject Sukhoi, small pieces of sheet styrene can be easily attached with cyanoacrylate. As for the flaps, I scratch built these guys early in the build and was quite happy to see them again.

Next up are the landing gear and canopy. To enhance the canopy, I added strip stock to the perimeter and built up the center structure on the canopy's interior.


A close-up of the canopy with masks in place:


The main gear doors supplied in the kit need to be modified in order to display the model with the landing gear extended. I replaced the portions of the doors I removed with sheet stock for a more realistic effect (a word of caution, the retraction - extension motion of the main gear doors on this aircraft are among the most complex I have seen. Study the drawings supplied in the instructions and reference photos carefully before permanently attaching anything!! More on this to follow).


The painted landing gear:


And finally, the completed fuel tanks: I replaced the fins with sheet stock (once again your reference material comes in handy as the front fins are attached at a negative angle of incidence relative to the body of the tank. This helped ensure a clean separation from the aircraft in flight).


Thanks for checking us out!
Mark
VolkerS
_VISITCOMMUNITY
Nordrhein-Westfalen, Germany
Joined: June 18, 2007
KitMaker: 120 posts
AeroScale: 6 posts
Posted: Thursday, April 07, 2011 - 09:32 PM UTC
Hi Mark,

whow, that's great work!! I esp. like your recce pod...

Two remarks:

1) the device fitted to the front part of the canopy isn't part of the HUD projection system, but a gun camera system. The projection device is located below the HUD-screen itself

2) the typical interieur color for SU17M3/4 is/was more of a light blue than the garish looking turqouise seen on many soviet fighters. It's more like SU-25/27 in that aspect. (unfortunatly hard to correct in this stage)

Best wishes

V
IronMark
_VISITCOMMUNITY
Texas, United States
Joined: December 27, 2009
KitMaker: 71 posts
AeroScale: 69 posts
Posted: Friday, April 08, 2011 - 02:53 AM UTC
Hi Volker,

Thank you for the clarifications. This project has been a learning experience in many regards and the Aeroscale membership have been very generous with their knowledge. A gunsight camera makes perfect sense!

You are also correct about the cockpit color. Long after I closed the fuselage I came across a color photo of a Su-17 that revealed the truth. I made a guess based on color photos of MiG-21's of the same era - I should have known better! At the end of the day these corrections add to what I know about the subject and I consider that a good thing!

Very Best Regards!
Mark
ReccePhreak
_VISITCOMMUNITY
Florida, United States
Joined: February 18, 2010
KitMaker: 34 posts
AeroScale: 22 posts
Posted: Saturday, May 21, 2011 - 11:44 AM UTC
I absolutely love the fine detailing job you are doing on this kit, especially the super-detailing of the recce pod. I have one of those kits in my stash, and I will use your photos as reference material, when I finally get around to starting on my kit.
Larry
Middle_Franconian
_VISITCOMMUNITY
Bayern, Germany
Joined: January 02, 2011
KitMaker: 279 posts
AeroScale: 239 posts
Posted: Wednesday, June 08, 2011 - 10:03 AM UTC
Mark,

tolle Arbeit! Great Job!
Perfect details and paint finish! Looking forward to seeing it when that Su is done!
BTW, what Iwata do you use? Especially for your (seems to be) free-hand camo? I use a HP-BR and I am very happy with it, especially due to easy cleaning.

Servus,

Sebastian
IronMark
_VISITCOMMUNITY
Texas, United States
Joined: December 27, 2009
KitMaker: 71 posts
AeroScale: 69 posts
Posted: Sunday, February 05, 2012 - 04:42 AM UTC
Good day everyone,

It seems like forever since my last post and I certainly apologize for the delay. I would to thank you for your interest in my project and am happy to inform you that the project is complete. I will share the last "in-process" photo's today and will post photo's of the completed bird later this week.

Hi Sebastian, Thank you for your question. I use Iwata's Eclipse HP-CS for all my color and detail work. I love it and would compare it to the high-end German airbrush products in terms of its construction quality and simplicity.

On to the jet: To break up the monochromatic tone of the afterburner area, I masked sections of it with Tamiya tape. I will apply thin coats of Tamiya's black XF-1 and blue X-4 (applied separately and thinned to a 1:9 ratio with Gunze's Mr. Color Thinner).


The finished result:


And finally, a shot of the completed starboard wing:


Happy Modeling!
Mark
 _GOTOTOP