_GOTOBOTTOM
Early Aviation
Discuss World War I and the early years of aviation thru 1934.
KotS GB 2011 Fokker EV BigRip74
Bigrip74
_VISITCOMMUNITY
Texas, United States
Joined: February 22, 2008
KitMaker: 5,026 posts
AeroScale: 2,811 posts
Posted: Tuesday, April 12, 2011 - 06:08 PM UTC
I chose the kit that looked the easiest for this GB Eduards 1/48 Fokker EV. This will be OOB and with your help I can learn the sequence of construction, painting, and that BAD THING call rigging. The photos were taken with minimal lighting so hopefully they are legible.

My entry if it is accepted to this campaign:
eduard Fokker EV 1/48

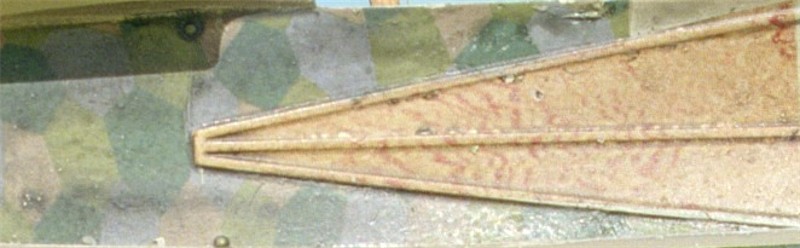
If you can make out the landing struts are broken, so that is the first thing on my agenda.
eduard Fokker EV 1/48

A question: why are their two wings to choose from, I cannot see the difference after much inspection for shape, panel, aileron, tip, length or any other difference. Call me dumb but I cannot see any.
eduard Fokker EV 1/48

Bob
Kornbeef
_VISITCOMMUNITY
England - South East, United Kingdom
Joined: November 06, 2005
KitMaker: 1,667 posts
AeroScale: 1,551 posts
Posted: Tuesday, April 12, 2011 - 07:47 PM UTC
Welcome Bob to the group and the build.

A nice choice to start, minimal rigging always helps

I think there two wings because I read (likely in Stephen's review on shows the panels stressed. I believe this had a plywood skinned wing as opposed to linen.

A shame about the landing strut though.

Keith
JackFlash
_VISITCOMMUNITY
Colorado, United States
Joined: January 25, 2004
KitMaker: 11,669 posts
AeroScale: 11,011 posts
Posted: Tuesday, April 12, 2011 - 08:48 PM UTC
There use to be a difference. One had a cupped effect on the surface representing the area between the ribs and spars. The original wing is 2 -3mm plywood. Check past threads on the subject and its usually mentioned. Anyway People at Eduard thought modelers were whining too much about the subtle differences and decised to resurface the 2nd wing and made them both the same.

Click here.


Here is a real bit of fun. Look closely . The "cupping" between the ribs and spars in the top surface of the wing does seem to be apparant. From the photo of the real machine it looks like Eduard got it very close in their most recent issue of this kit. This is a Fokker E.V post war in Belgian hands.
Bigrip74
_VISITCOMMUNITY
Texas, United States
Joined: February 22, 2008
KitMaker: 5,026 posts
AeroScale: 2,811 posts
Posted: Tuesday, April 12, 2011 - 09:00 PM UTC
@ Keith: thanks for the wing explanation, it helped.

@ Stephen: the photos and reviews were more than I expected, thanks for the help.

Now I see the wings with a different view.

Bob
JackFlash
_VISITCOMMUNITY
Colorado, United States
Joined: January 25, 2004
KitMaker: 11,669 posts
AeroScale: 11,011 posts
Posted: Wednesday, April 13, 2011 - 10:31 AM UTC
Here is a bit of fun on the subject. The first 15-20 Fokker E.V suffered from improper wing construction as moisture was present in the internal areas that degraded the glue used. After several front line deaths caused by wing failure the whole series was grounded and an inspection of these components was made ny Idflieg (inspectorate board of flying services). When it was discovered that the problem lay in the factory construction (webs and gussets were mislocated) and the method of storage, changes were ordered and the new wing tested and passed inspections the type was redesignated Fokker D.VIII. None of these aircraft were ever recorded to have lost their wings in either war or post war years, The USA purchased two Fok. D.VIII and tested them at McCook field with good results 1919-1921.


Bigrip74
_VISITCOMMUNITY
Texas, United States
Joined: February 22, 2008
KitMaker: 5,026 posts
AeroScale: 2,811 posts
Posted: Wednesday, April 13, 2011 - 12:24 PM UTC
Stephen,
Great photo and information on the EV/DVIII. I have accomplished my first step for the Eduard kit by giving it a good wash and have read up on several articles of wood grain techniques. I chose Terri's to start with after my own experiments did not go over too well

I finally had some time to work on my EV after giving up on trying to similate wood grain for now.

The landing struts after some Tamiya Thin Glue, hopefully they will be strong enough after a day of drying.
Eduard Fokker EV

The radial was much easier to work with than that wood grain. Insequence: 2&3 bare plastic parts, 4&5 Tamiya X-11 aplied, 6 mixed X-11 and XF7 to make brass color applied to intake, 7 radial glued together and given a black oil wash.
Eduard Fokker EV
Eduard Fokker EV
Eduard Fokker EV
Eduard Fokker EV
Eduard Fokker EV
Eduard Fokker EV

Now to tackle that wood grain again.
Bob
thegirl
_VISITCOMMUNITY
Alberta, Canada
Joined: January 19, 2008
KitMaker: 6,743 posts
AeroScale: 6,151 posts
Posted: Thursday, April 14, 2011 - 01:08 AM UTC
Hi Bob

Nice to here that Matt gaved you that extra push to try out a WW1 subject . Excellent choice for your first build .

Off to a nice start with the engine and your repair job on the landing strut should be okay once it has fully dried . If it does break again , drill a small hole in both parts and add a brass or steel pin and then reglue .
Bigrip74
_VISITCOMMUNITY
Texas, United States
Joined: February 22, 2008
KitMaker: 5,026 posts
AeroScale: 2,811 posts
Posted: Monday, April 18, 2011 - 10:28 AM UTC
I have been reading Terri's "Wood Grain for Dummies" and after some practice I was able to do a litttle to the fuselage. I know that more practice will be needed to accomplish a more realistic finish, but Hey you gotta start some where.

In sequence:

1. OCHRE BROWN
Eduard Fokker EV

2. NEW BROWN thinned and washed over the previous color.
Eduard Fokker EV

3. XF9 applied to formers/framing.
Eduard Fokker EV

4. After a coat of future, Tamiya tape applied over the wood.
Eduard Fokker EV

5. Masking tape applied to joining edges to keep excess paint off.
Eduard Fokker EV

6. XF55 a/b on for CDL.
Eduard Fokker EV

7. Hopefully something that looks like wood.
Eduard Fokker EV

Question, CDL has a sheen to it yes? So should I apply a little future to the CDL to give it the sheen?

Bob
JackFlash
_VISITCOMMUNITY
Colorado, United States
Joined: January 25, 2004
KitMaker: 11,669 posts
AeroScale: 11,011 posts
Posted: Monday, April 18, 2011 - 11:05 AM UTC
The interior would be reversed lozenge.

click here.

Bigrip74
_VISITCOMMUNITY
Texas, United States
Joined: February 22, 2008
KitMaker: 5,026 posts
AeroScale: 2,811 posts
Posted: Monday, April 18, 2011 - 11:54 AM UTC
So the camo that I will be applying would have been painted over the lozenge? Was the linen impregnated with or was the lozenge woven into the frabic?

Eduard Fokker EV


Bob
JackFlash
_VISITCOMMUNITY
Colorado, United States
Joined: January 25, 2004
KitMaker: 11,669 posts
AeroScale: 11,011 posts
Posted: Monday, April 18, 2011 - 12:10 PM UTC
Printed on the fabric at the factory level on rollers. See here:
Lozenge Camouflage 101 here.

Using decals:
Lozenge Camouflage 201 here.
 _GOTOTOP