_GOTOBOTTOM
Early Aviation
Discuss World War I and the early years of aviation thru 1934.
WNW Merc DIIIaü 180. Someone had to do it!
Kornbeef
_VISITCOMMUNITY
England - South East, United Kingdom
Joined: November 06, 2005
KitMaker: 1,667 posts
AeroScale: 1,551 posts
Posted: Wednesday, April 13, 2011 - 07:32 AM UTC
Well I suppose someone had to do it.

Had this left over from the Roland build, my DVa motor went into that. In between fiddling with PE on the DII I needed som less concentrative modelling so started this from what reference I have. I intend possibly incorporating it into the diorama planned for the stripdown DVa thats sitting half done. Well at least I suppose I'm finishing some half done builds thanks to the KotS campaign. There again the Fokker DVII might be released and I'm sure a panels off build would be just the thing for something like this. Hint Hint Mr Wingnut!


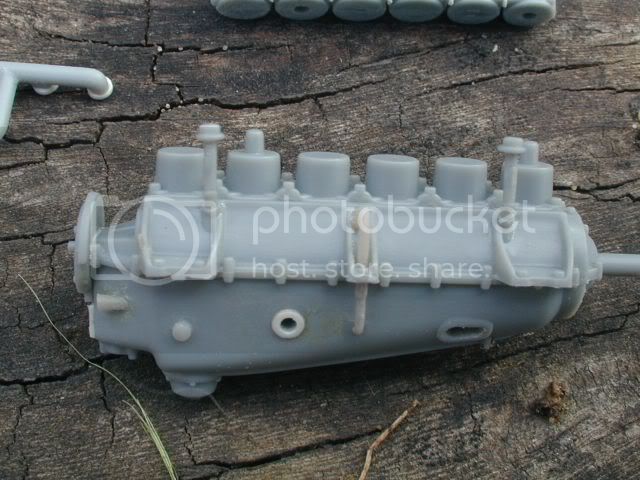
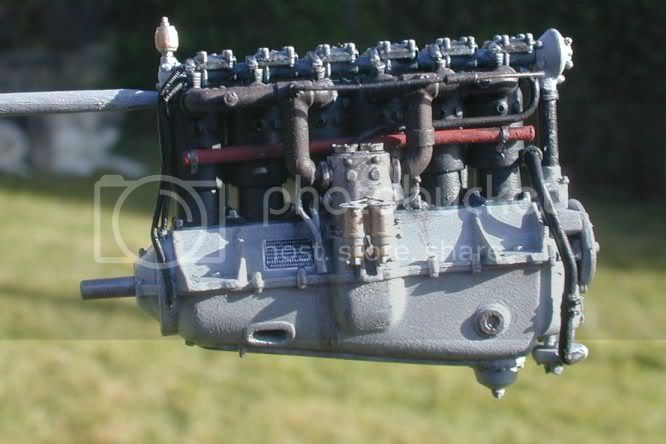
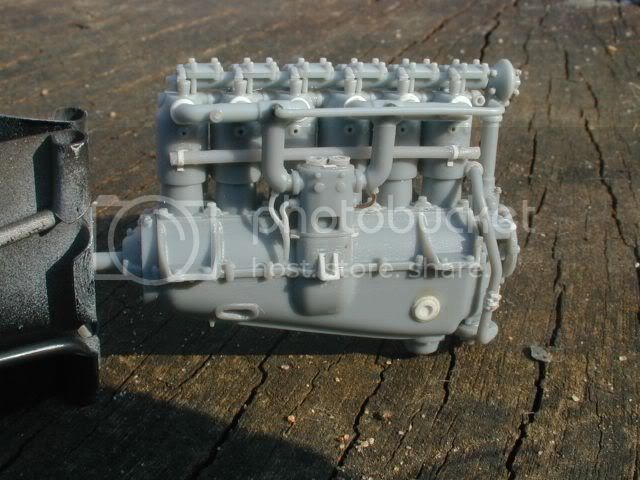
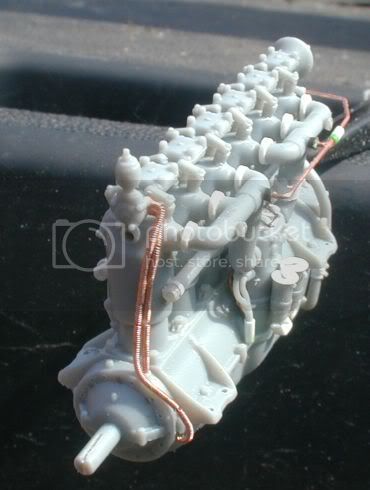
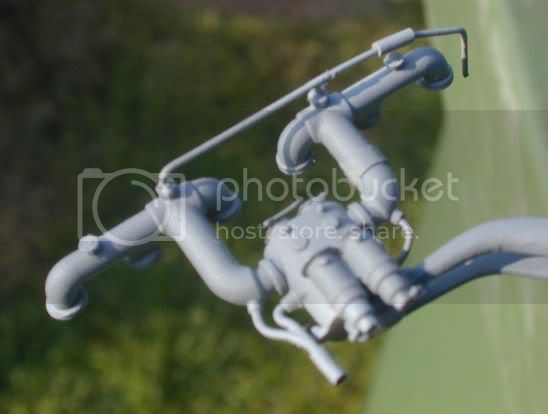
Added the plate at the rear of the lower case, the short stub just infront and the extra round opening, I opened up the front hole which is represented with a dimple. Its hard to see but on the rear mounting theres a round stub added. I even incorporated a bit of Roden pipework between the upper and lower crank case halfs. Still to do. thet I know of ... add the missing case bolts inside each of the mounts, try to represent the gap under the clamp bolts for the cylinders.


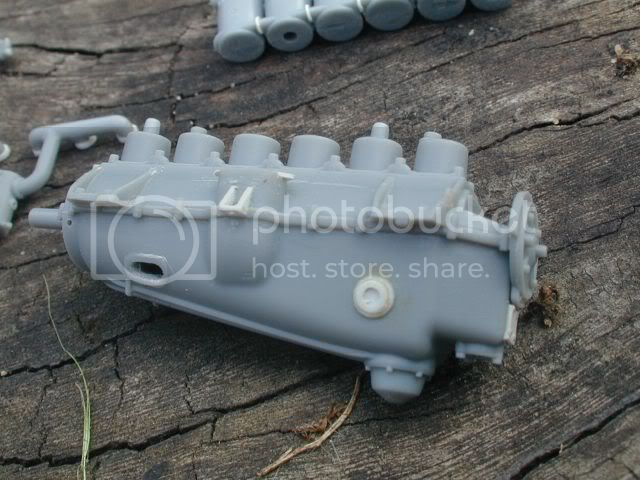
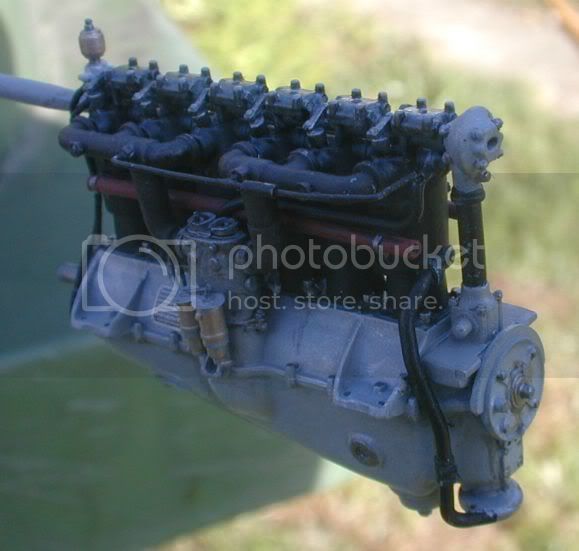
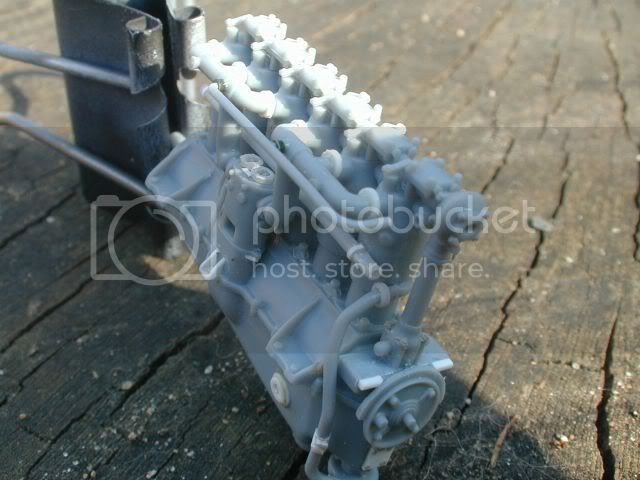
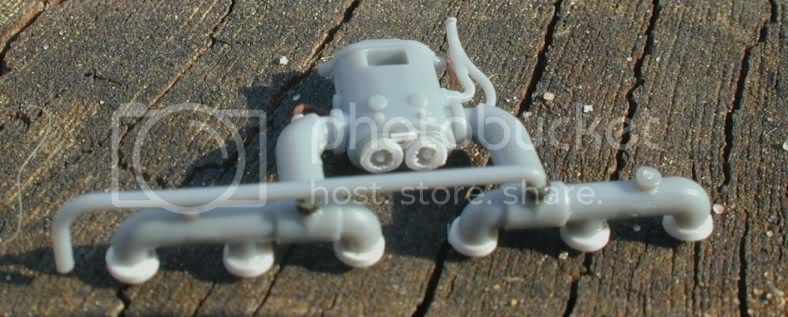
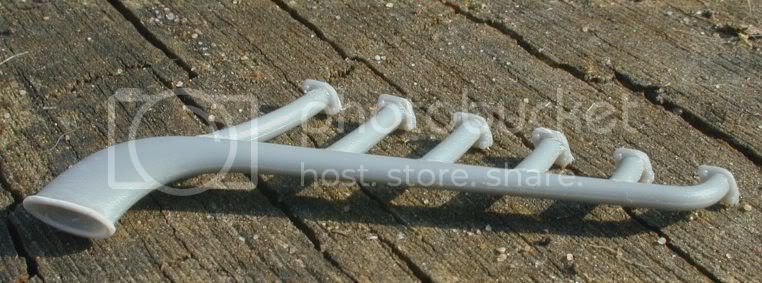
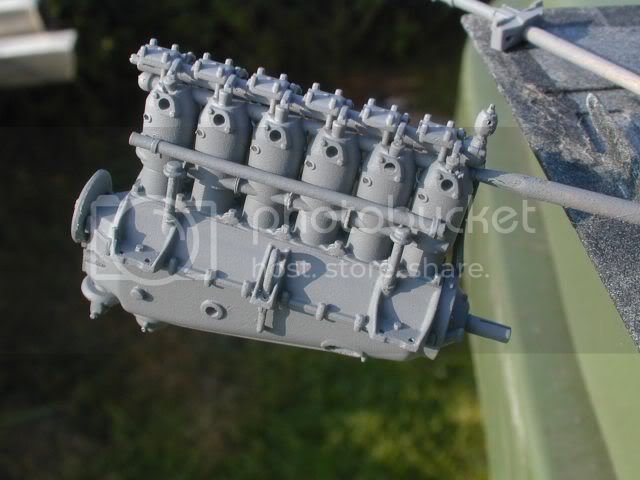
This side much the same added the round plug. the little stub on the rear mount (its for the mag timing mechanism spring I believe. Added the missing mount point on the carburettor flange/mounting thingy and the lugs to bolt the carb assy to. Behind the case you might see the cylinder assy and the manifold. On the latter I added the discs representing the round nuts, just tweaking the manifold pipes a little got a snug fit. Ive more to do to the carb, but more on that later. The cylinders, filled the location holes for the ignition wiring tubes, making new out of brass, or attempting to at least. I cut through between each cylinder, adding a disc of plastic to represent the joint seals. Now seeong Marc's (wing_nut) idea on the springs my thoughts are to follow suit and possibly cut off the rockers too and repos them. That crazy idea might yet pass, I was happy with the kit springs till i read his post.


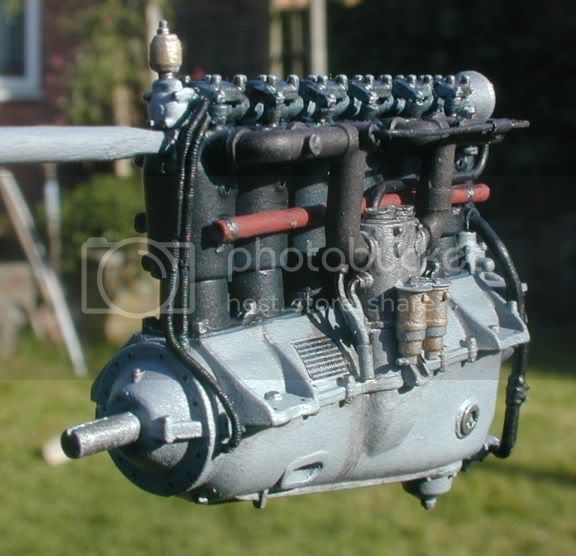
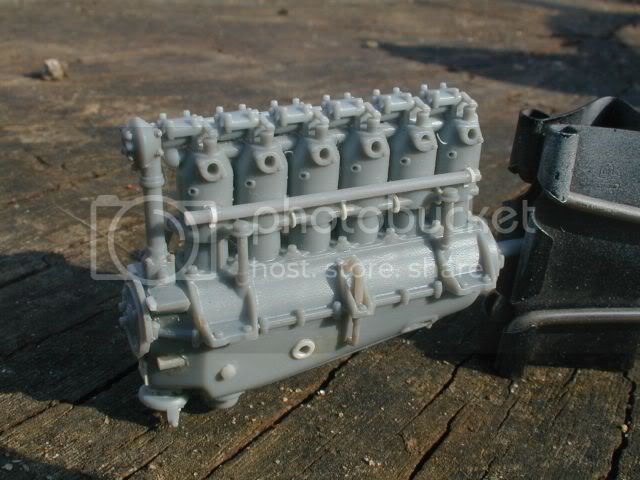
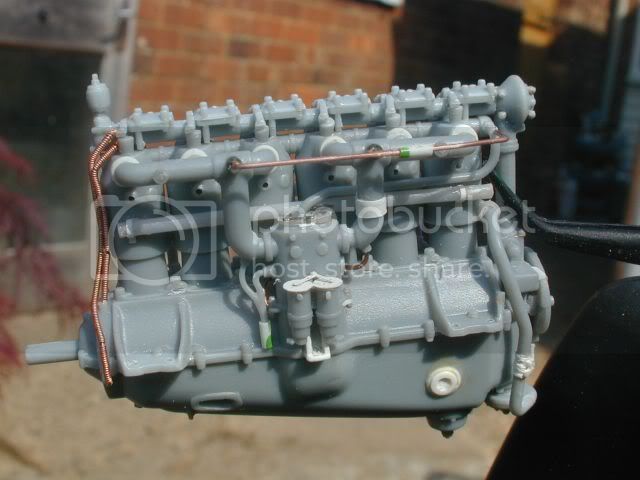
A start on the magnetos, I wonder how many builds there are with them on the wrong sides, I only just realised they are handed. Anyway first thing was to add the retaining strap. this will be thinned and the fastener added. lots of other little bits of detail to add though.


Thats all for now folks

Keith the mad
JackFlash
_VISITCOMMUNITY
Colorado, United States
Joined: January 25, 2004
KitMaker: 11,669 posts
AeroScale: 11,011 posts
Posted: Wednesday, April 13, 2011 - 09:19 AM UTC
Right on Keith! A little detail work is a beautiful thing.
OEFFAG_153
_VISITCOMMUNITY
Västra Götaland, Sweden
Joined: February 19, 2010
KitMaker: 1,473 posts
AeroScale: 1,450 posts
Posted: Wednesday, April 13, 2011 - 07:57 PM UTC
Excellent idea Keith – this is going to be fun to watch!

Mikael
wing_nut
_VISITCOMMUNITY
New Jersey, United States
Joined: June 02, 2006
KitMaker: 1,212 posts
AeroScale: 468 posts
Posted: Thursday, April 14, 2011 - 01:16 AM UTC
You know I'll be keeping an eye on this.

Hint Hint Mr Wingnut!

Because of me screen name I never know who someone is referring to. I think Wingnut Wings needs to change there name
thegirl
_VISITCOMMUNITY
Alberta, Canada
Joined: January 19, 2008
KitMaker: 6,743 posts
AeroScale: 6,151 posts
Posted: Thursday, April 14, 2011 - 01:27 AM UTC
Go Keith Go !

Will be watching this closely my friend Already you are off with an excellent start with the details .......
Mgunns
_VISITCOMMUNITY
Arizona, United States
Joined: December 12, 2008
KitMaker: 1,423 posts
AeroScale: 1,319 posts
Posted: Thursday, April 14, 2011 - 04:35 AM UTC
Hi Keith:

Maybe between you and Wing-nut you will come up with a working 1/32nd engine.
Seriously, both of you have done stellar work employing your AMS skills and sharing them here. Like Terri: I will be watching this closely as you progress on this engine.

Best

Mark
Kornbeef
_VISITCOMMUNITY
England - South East, United Kingdom
Joined: November 06, 2005
KitMaker: 1,667 posts
AeroScale: 1,551 posts
Posted: Wednesday, April 20, 2011 - 09:12 AM UTC
Hi all, I've made some progress with this, time I should be spending on the DII I know but, it's PE time there and I'm not in a PE frame of mind.

I've been adding bolts and nuts around the place, remade the float chamber tops, as they are not totally round in the kit. Added some detail to the carb body, this is very much WIP though. The engine block and cylinders are fixed, the rest are still in module form, after the sparkies are done and the main painting done I'll assemble all together.


Valve springs, well the jury is out as to how we show them, I am not wholly convinced replacing them is totally neccesary. (I'm kind of waiting to see others results )

Added bits and bobs, pipe joints and nuts, plugs on the manifold, I drilled out the airpump body for its various connections.

I remade the exhaust, I wonder if anyone can guess how? Free cookie to the first right answer.


So when the UK web finally wakes up I might get to post some pics... Have been waiting 30 mins to try to load them as far as photobucket...technology

Yay one reload and reupload and it worked.

TY for looking, comments always welcome

Keith
Mgunns
_VISITCOMMUNITY
Arizona, United States
Joined: December 12, 2008
KitMaker: 1,423 posts
AeroScale: 1,319 posts
Posted: Thursday, April 21, 2011 - 07:30 AM UTC
Hi Keith:

That tree stump surface looks familiar. Great job on the joints and ring on the exhaust. Is that the Tiger Models resin one or is it something else?

Best

Mark
Kornbeef
_VISITCOMMUNITY
England - South East, United Kingdom
Joined: November 06, 2005
KitMaker: 1,667 posts
AeroScale: 1,551 posts
Posted: Thursday, April 21, 2011 - 08:05 AM UTC

Quoted Text

Hi Keith:

That tree stump surface looks familiar. Great job on the joints and ring on the exhaust. Is that the Tiger Models resin one or is it something else?

Best

Mark


No Mark It's WNW's with a little work, the only add on is the lip around the bellmouth the rest is WNW.
OEFFAG_153
_VISITCOMMUNITY
Västra Götaland, Sweden
Joined: February 19, 2010
KitMaker: 1,473 posts
AeroScale: 1,450 posts
Posted: Thursday, April 21, 2011 - 09:42 PM UTC
Simply beautiful Kieth! 

– This will enhance the kit it ends up in – no doubt!

Mikael

thegirl
_VISITCOMMUNITY
Alberta, Canada
Joined: January 19, 2008
KitMaker: 6,743 posts
AeroScale: 6,151 posts
Posted: Friday, April 22, 2011 - 02:22 AM UTC
Excellent progress Keith !
Kornbeef
_VISITCOMMUNITY
England - South East, United Kingdom
Joined: November 06, 2005
KitMaker: 1,667 posts
AeroScale: 1,551 posts
Posted: Monday, April 25, 2011 - 05:45 AM UTC
Exciting times... paint..lol

A couple of pre paint shots, it's all just about done apart from the magneto's
No spark plugs, its an out of A/C engine so they've already been filched

I plan to display it on a maintenance stand, theres a pic of one in the Albi DI/DII Datafile, looks simple enough to copy.

so finally before priming I added the missing casing bolts within the engine mounts, used the mounting bolt heads themselves and drilled the holes instead. added the oil lines with their insulation/protection and the throttle linkage snaffled from the Encore DII etch.


Now primed, I know it looks a little lumpy, it was fresh out the can literally...its settled since, the magnification and strong light don't help... I hope


.
Yes I realised after, if I show it with no exhaust I'll have to drill out the flanges and add studs out of brass rod... thinks I might fit the zorst after all... watch this space

Runs to check the WNW website now easters almost over.

K
Kornbeef
_VISITCOMMUNITY
England - South East, United Kingdom
Joined: November 06, 2005
KitMaker: 1,667 posts
AeroScale: 1,551 posts
Posted: Wednesday, April 27, 2011 - 05:57 AM UTC
Okay, I know I should be doing something more productive (DII) but the call to basecoat was too strong to resist, so much so I got carried away.


Okay done a few adds to the mags Retaining strap, clips etc, defined them a bit between the bakelite and housings and splotched some paint on

I've the linkages to try and add but need brave pills for that. I will add the cables, before adding to the mountings and hopefully a trim to size and they'll fit...


So the painting is still basic, though the case itself is all but done apart from more weathering in. I tried to paint the black parts in varying shades of black (non-black black) to differentiate between parts/materials. The camshaft assembly is basecoated but will be high/low lighted more to bring out the form.


I'm not a lover of straight metallics, in my opinion it doesnt really give a scale effect especially alloys unless of course highly polished but would like opinions on my rendition of the alloy main casing look.

I've a few small details to add, taps and cocks and ignition wires etc but that's all for now folks, I made myself promise to work on the DII for a few days and try to get her ready for paint.

Coments good bad or indifferent always welcome

Keith
OEFFAG_153
_VISITCOMMUNITY
Västra Götaland, Sweden
Joined: February 19, 2010
KitMaker: 1,473 posts
AeroScale: 1,450 posts
Posted: Friday, April 29, 2011 - 05:54 AM UTC
Hi Keith,

I like your rendition of the "non shiny" metal – to me it does look good in scale, though if it was me, I'd probably do some drybrushing using metallics – but that is me (mayby you already did this???)

Whats the mix/paint you used for the block? Looking forward to more on t.he subject

Mikael
Kornbeef
_VISITCOMMUNITY
England - South East, United Kingdom
Joined: November 06, 2005
KitMaker: 1,667 posts
AeroScale: 1,551 posts
Posted: Friday, April 29, 2011 - 06:47 AM UTC
Mikael Thanks.

The block is painted as follows
grey primer.
then drybrushed with Citadel Boltgun metal (close to steel in colour)
then scrubbed with Lifecolour UA604 Mittelgrau
then drybrushed very lightly with a mix of Mittlegrau & Citadel Mithril silver,
final high shiny wear spots get a few strokes of a mithril silver drybrush

It does build into a multilayered non shiny metalic effect, I do similar for aluminuim sheet work but use a mix of Mittlegrau and silver to base coat before adding the final drybrushing.

The brass is a mix of Citadel burnished gold, chainmail and grey...to take that gold look out of it.

Tks Keith
JackFlash
_VISITCOMMUNITY
Colorado, United States
Joined: January 25, 2004
KitMaker: 11,669 posts
AeroScale: 11,011 posts
Posted: Wednesday, March 28, 2012 - 06:00 PM UTC
Just bringing this up for a fellow modeler.
 _GOTOTOP