England - West Midlands, United Kingdom
Joined: March 21, 2009
KitMaker: 379 posts
AeroScale: 75 posts
Posted: Monday, May 02, 2011 - 06:55 AM UTC
Hello
As my mh-53 is currently waiting for painting (which will not happen in next 2 or 3 weeks) i decided to start another project.
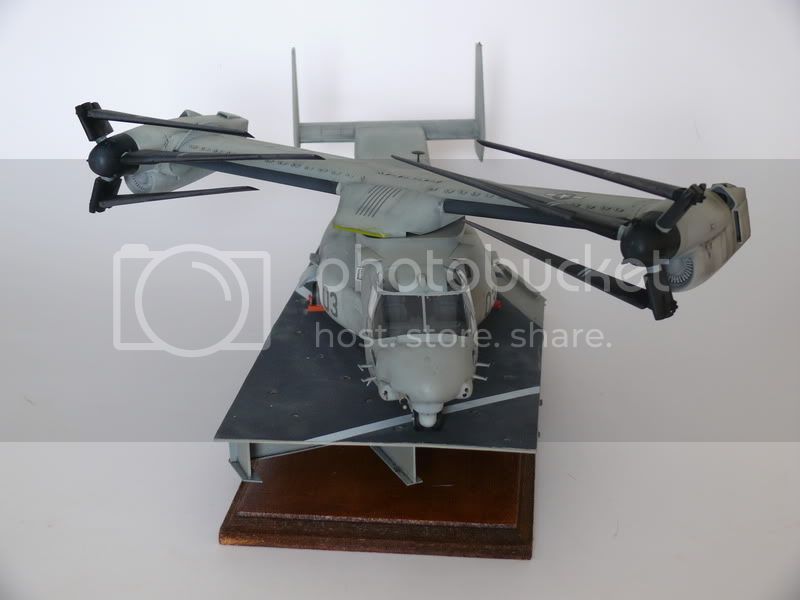
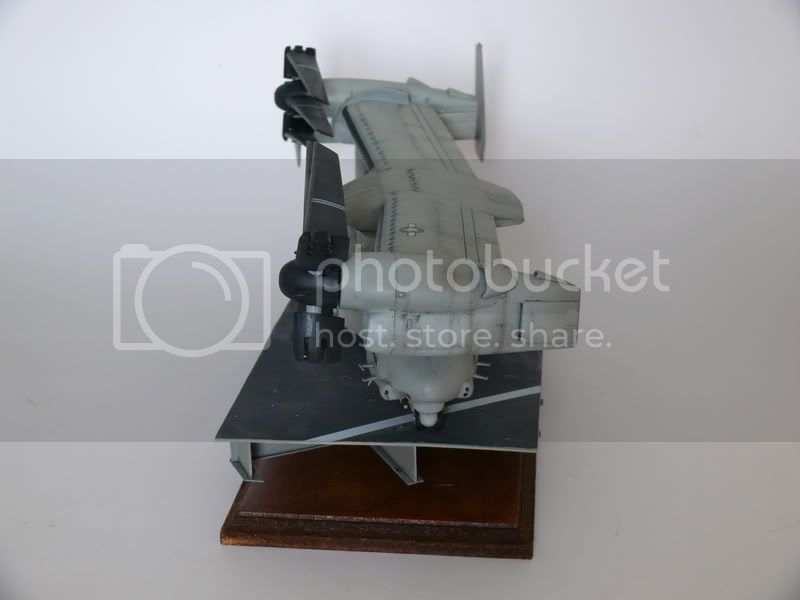
This time?... well no surprise, another transformer - MV-22 in stowage position
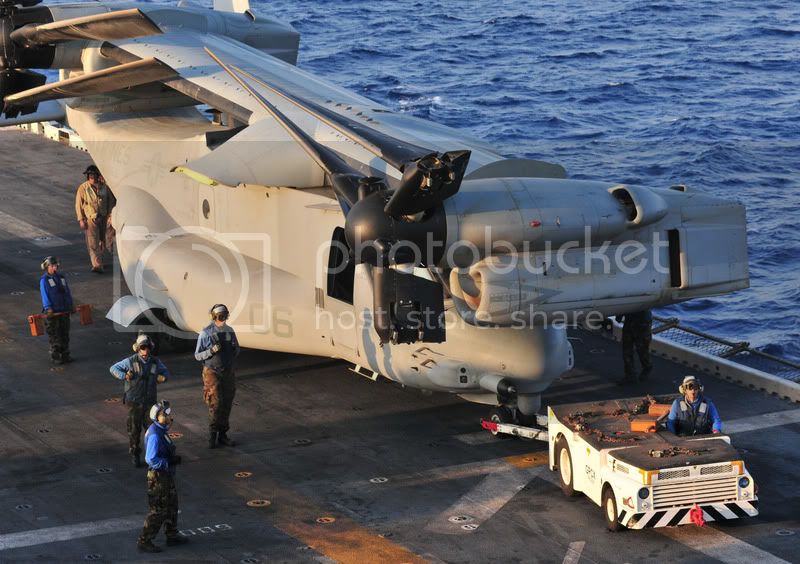
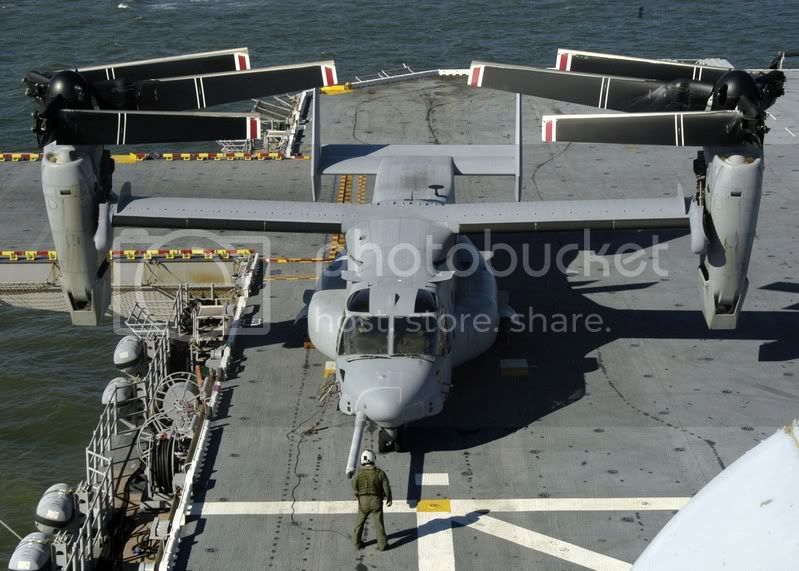
This is the target:
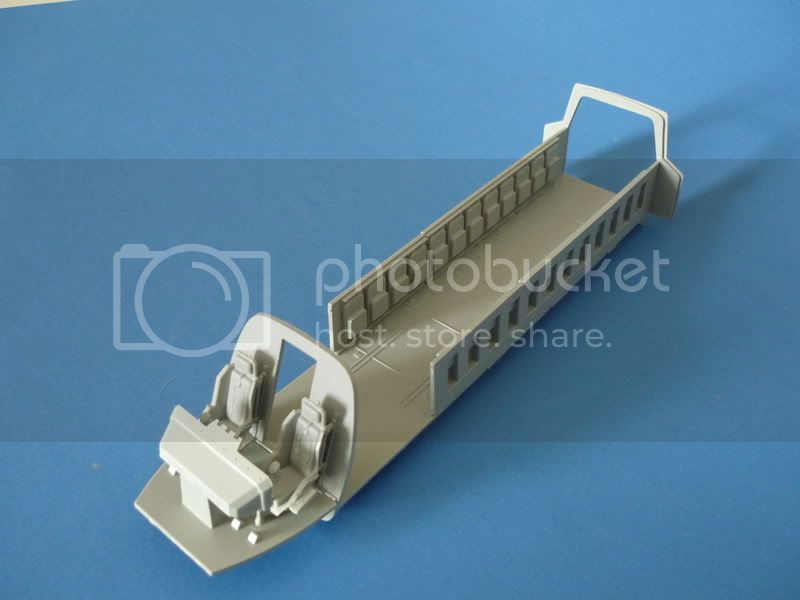
Progress so far:
[url=http://photobucket.com/Ratatouille-collection?albumview=slideshow][img]http://i.imgur.com/kFPfg.jpg[/img][/url]

#041
Kobenhavn, Denmark
Joined: July 20, 2006
KitMaker: 10,069 posts
AeroScale: 3,788 posts
Posted: Friday, May 06, 2011 - 02:52 AM UTC
Very interesting subject, Adam. It will be a challenge to build the MV-22 in a stowed position.
It will be great to follow your project.

Campaign'oholic - 252+ campaigns completed
European Union
Joined: September 28, 2004
KitMaker: 2,186 posts
AeroScale: 1,587 posts
Posted: Friday, May 06, 2011 - 07:22 AM UTC
interesting project, i will follow it with interest
The mission: Beat the stash.
Almost conquered: MIG-29, Blackhawk, Skyray, Skyraider, fouga
Main battle:Demon, Skyhawk, F-14, CH-53
Stash reserve:Blackhawk, CH-46, 47 en 53; SU-7, Eurofighter, mohawk, hellcat, F-16D, 6x Fouga Magister, Voodoo
England - West Midlands, United Kingdom
Joined: March 21, 2009
KitMaker: 379 posts
AeroScale: 75 posts
Posted: Sunday, May 08, 2011 - 07:10 AM UTC
Hello everybody
Some work done this weekend, folded rotor blades and cut off hump behind central part of wing as that was only on prototype:
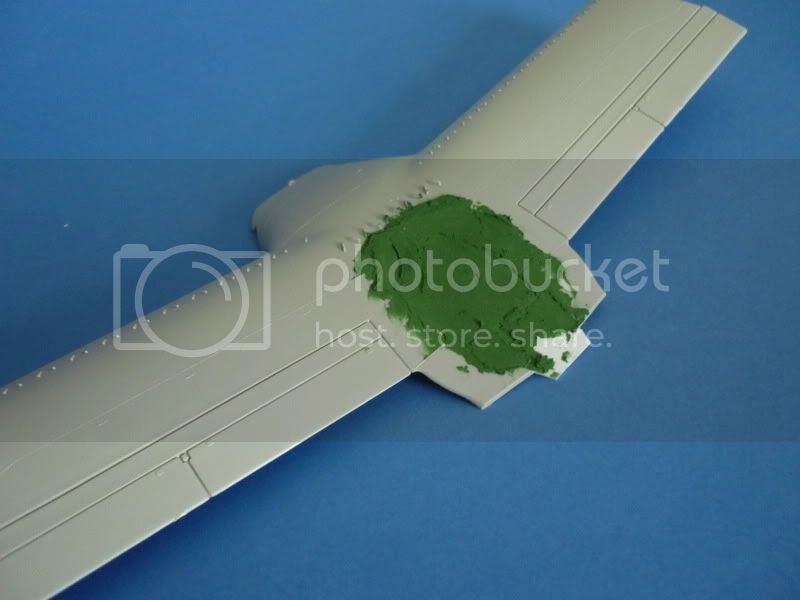

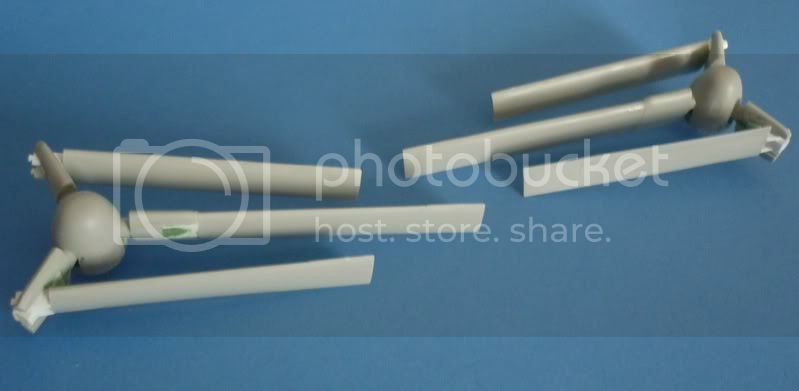
[url=http://photobucket.com/Ratatouille-collection?albumview=slideshow][img]http://i.imgur.com/kFPfg.jpg[/img][/url]
Missouri, United States
Joined: November 24, 2008
KitMaker: 564 posts
AeroScale: 510 posts
Posted: Sunday, May 08, 2011 - 07:13 AM UTC

nice work on the rotor folding!
Nothing quite like getting lost in plastic
On the bench:Revell 1/48 P-38 Lightning built as an F-5B
Next:??
England - West Midlands, United Kingdom
Joined: March 21, 2009
KitMaker: 379 posts
AeroScale: 75 posts
Posted: Thursday, May 12, 2011 - 10:53 AM UTC
Quoted Text

nice work on the rotor folding!
Thanks, it was a bit more tricky than i thought it be.
Dry fit:

And some addition to base i am planning:
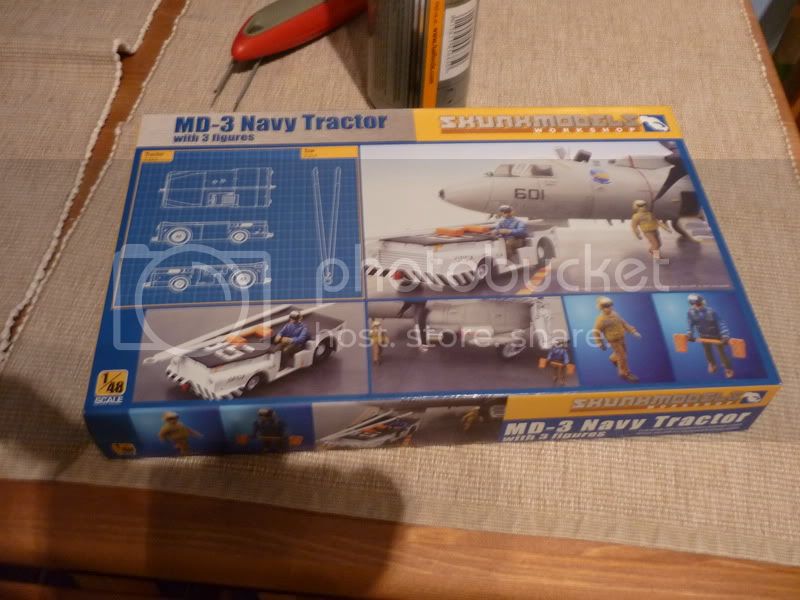
[url=http://photobucket.com/Ratatouille-collection?albumview=slideshow][img]http://i.imgur.com/kFPfg.jpg[/img][/url]
England - West Midlands, United Kingdom
Joined: March 21, 2009
KitMaker: 379 posts
AeroScale: 75 posts
Posted: Thursday, June 09, 2011 - 10:13 AM UTC
Hello everybody
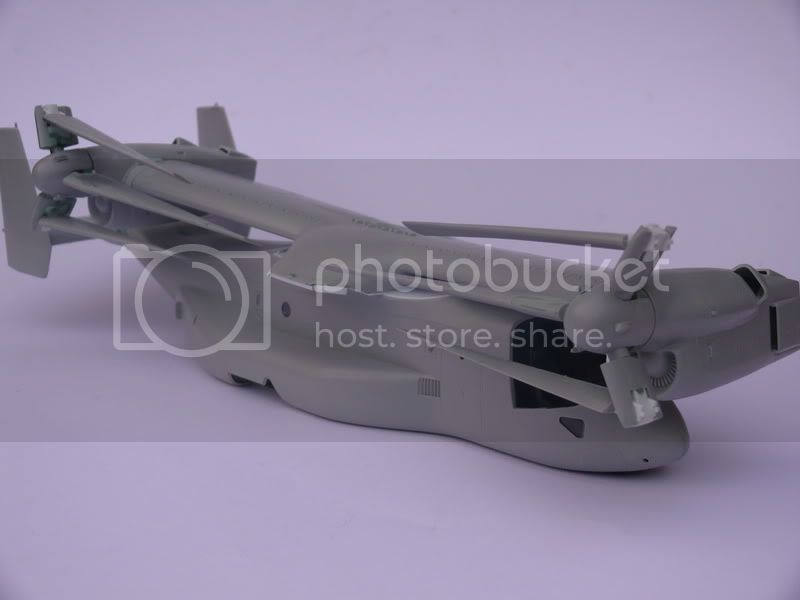
I am now pulling all the stops out and i will try to finish it shortly.
Almost done with assembly part, i will have to rescribe few panel lines that i lost with sanding, I never done it before so wish me luck.
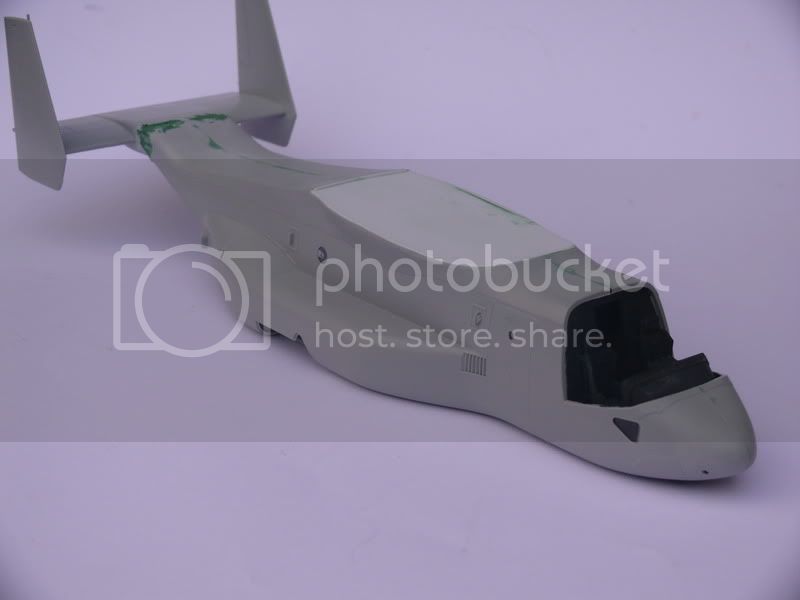
[url=http://photobucket.com/Ratatouille-collection?albumview=slideshow][img]http://i.imgur.com/kFPfg.jpg[/img][/url]
Florida, United States
Joined: May 16, 2002
KitMaker: 17,694 posts
AeroScale: 1,728 posts
Posted: Thursday, June 09, 2011 - 01:45 PM UTC
That is looking very good. Great job. I like how it looks all folded up.
Field Artillery --- The KING of BATTLE!!!
"People sleep peaceably in their beds at night only because rough men stand ready to do violence on their behalf." -- George Orwell
Showcase
Arizona, United States
Joined: October 17, 2002
KitMaker: 192 posts
AeroScale: 70 posts
Posted: Wednesday, June 15, 2011 - 11:57 AM UTC
Nice work....cant wait to see when it's completed.....

England - West Midlands, United Kingdom
Joined: March 21, 2009
KitMaker: 379 posts
AeroScale: 75 posts
Posted: Wednesday, July 20, 2011 - 08:15 AM UTC
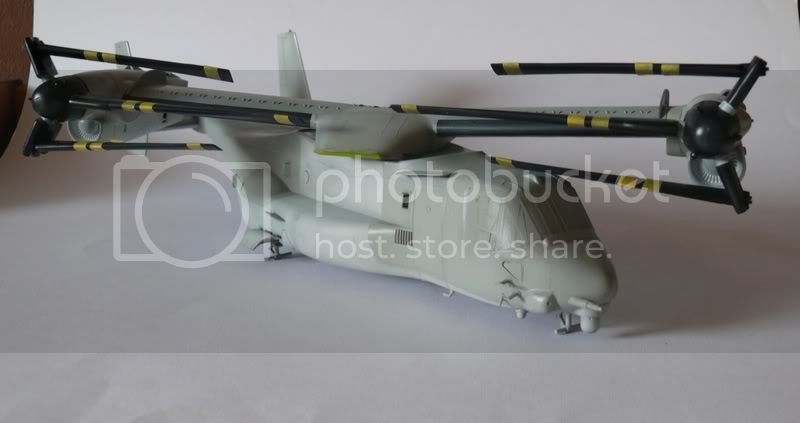
Hello
Small update:

[url=http://photobucket.com/Ratatouille-collection?albumview=slideshow][img]http://i.imgur.com/kFPfg.jpg[/img][/url]

#041
Kobenhavn, Denmark
Joined: July 20, 2006
KitMaker: 10,069 posts
AeroScale: 3,788 posts
Posted: Thursday, July 21, 2011 - 04:37 AM UTC
Looks great, Adam. A unique project and good scratchbuilding skills.
Looking forward to see more.

Campaign'oholic - 252+ campaigns completed
Texas, United States
Joined: March 20, 2005
KitMaker: 358 posts
AeroScale: 43 posts
Posted: Thursday, July 21, 2011 - 01:47 PM UTC
Nice. Myself and a friend both work on the V-22 Osprey project here at Bell Helicopter. I build the blades and he works on the rotor parts. The only metal part on the main blade is the leading edge and it's a steel color. The rest of the blade is composite. And for 2 years I helped overhaul and repair the blades. So in the field the leading edge does show through the paint. And the blades only have grey stripes. Also any primer you show is a very bright light green.
But she looks great.
Jerry

War is the insanity of sane men !
We who are about to die salute you ... WHOA....nobody said anything about dieing......hey watch that spear...... Gladatorius Chickenus
( Hey boss...I've cut this piece twice ......and it's still to short. )
England - West Midlands, United Kingdom
Joined: March 21, 2009
KitMaker: 379 posts
AeroScale: 75 posts
Posted: Thursday, July 21, 2011 - 08:41 PM UTC
Quoted Text
Nice. Myself and a friend both work on the V-22 Osprey project here at Bell Helicopter. I build the blades and he works on the rotor parts. The only metal part on the main blade is the leading edge and it's a steel color. The rest of the blade is composite. And for 2 years I helped overhaul and repair the blades. So in the field the leading edge does show through the paint. And the blades only have grey stripes. Also any primer you show is a very bright light green.
But she looks great.
Jerry 
Thanks for info, i will try to replicate this effect. I found this picture and i was planning to use as reference:
[url=http://photobucket.com/Ratatouille-collection?albumview=slideshow][img]http://i.imgur.com/kFPfg.jpg[/img][/url]
Texas, United States
Joined: March 20, 2005
KitMaker: 358 posts
AeroScale: 43 posts
Posted: Friday, July 22, 2011 - 11:31 AM UTC
Hello again. The old blades carried the red and white out on the tips. The new blades and recently overhauled blades only carry the grey stripes. I showed one of our engineers your pics. He was really impressed with the details. And he asked me to tell you that the interior is made of molded graphite as is most of the fuselage and wings. If you'd like I could round up a V-22 baseball cap to send your way.
Great job on the plane .
Just so you know. I've fixed bullet holes, 23mm holes,shapnel holes and pulled rocks out of V-22 blades. So they can really take a beating.
Jerry

War is the insanity of sane men !
We who are about to die salute you ... WHOA....nobody said anything about dieing......hey watch that spear...... Gladatorius Chickenus
( Hey boss...I've cut this piece twice ......and it's still to short. )
England - West Midlands, United Kingdom
Joined: March 21, 2009
KitMaker: 379 posts
AeroScale: 75 posts
Posted: Saturday, July 23, 2011 - 03:59 AM UTC
Quoted Text
Hello again. The old blades carried the red and white out on the tips. The new blades and recently overhauled blades only carry the grey stripes. I showed one of our engineers your pics. He was really impressed with the details. And he asked me to tell you that the interior is made of molded graphite as is most of the fuselage and wings. If you'd like I could round up a V-22 baseball cap to send your way.
Great job on the plane .
Just so you know. I've fixed bullet holes, 23mm holes,shapnel holes and pulled rocks out of V-22 blades. So they can really take a beating.
Jerry 
That is great info, as painting strips like that on blades is on of the things i hate, they never seems to be straight.
I am thinking about building a CV-22 also, do you now by any chance if they fold like Marine version to?, it saves a lot of space on shelf with this configuration.
One last question, do you by any chance have access to pictures of fuselage and mid part of wing when it is folded?, if i will go for CV-22 i would like to build it with option to fold and unfold whenever i need to.
[url=http://photobucket.com/Ratatouille-collection?albumview=slideshow][img]http://i.imgur.com/kFPfg.jpg[/img][/url]
Indiana, United States
Joined: July 31, 2003
KitMaker: 1,523 posts
AeroScale: 175 posts
Posted: Saturday, July 23, 2011 - 05:49 AM UTC
Yes the CV-22 Does fold like the MV-22. They have some different features as far as the interior. The Marines Version from what I hear does not have as much navigation stuff as the Air Force version....
Herky

England - West Midlands, United Kingdom
Joined: March 21, 2009
KitMaker: 379 posts
AeroScale: 75 posts
Posted: Sunday, July 24, 2011 - 06:34 AM UTC
Hello
Thanks for info Jeremy, i don't usually pay much attention for interiors of aircraft so that wouldn't be a problem, few additional sensors outside can be scratchbuild without any problems.
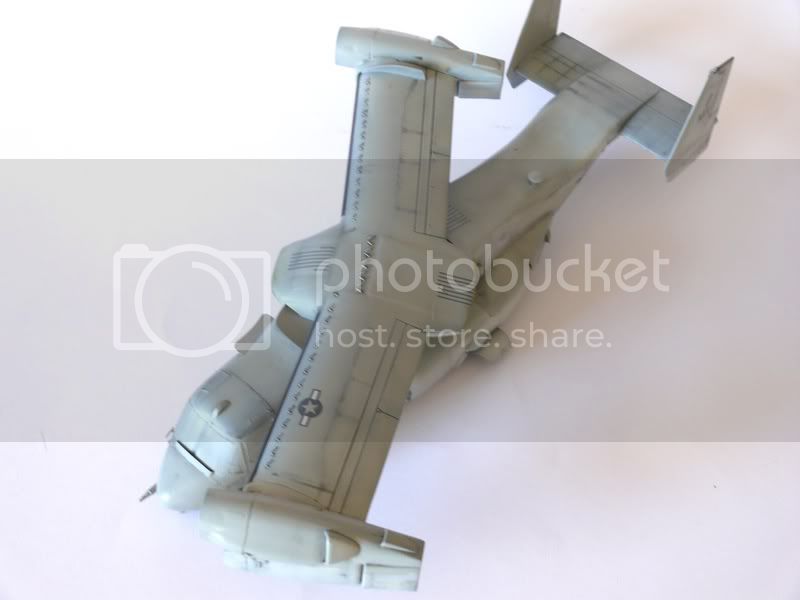
I managed to get some progress, all decals are done and dark grey wash applied.
I managed to get rid a bit of that big difference in colours with black oil filter.
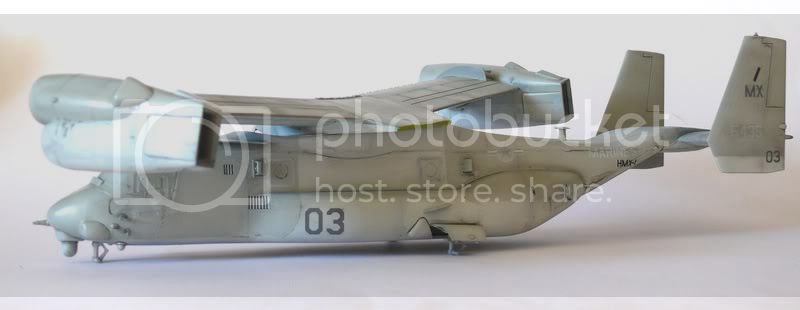
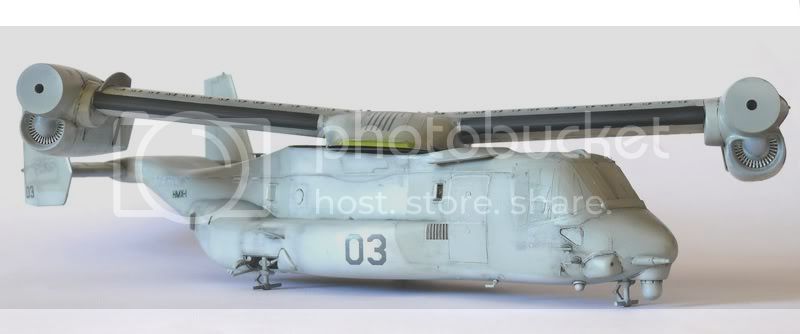
[url=http://photobucket.com/Ratatouille-collection?albumview=slideshow][img]http://i.imgur.com/kFPfg.jpg[/img][/url]
Texas, United States
Joined: March 20, 2005
KitMaker: 358 posts
AeroScale: 43 posts
Posted: Wednesday, July 27, 2011 - 04:10 PM UTC
Hey
I have sent you my friend Glens e-mail address. He wanted me to tell you that he has tons of pics of the Ospreys. Alot of detail shots that the engineers have shared with him. He told me he'd send you any shot he has that you ask for.
Jerry

War is the insanity of sane men !
We who are about to die salute you ... WHOA....nobody said anything about dieing......hey watch that spear...... Gladatorius Chickenus
( Hey boss...I've cut this piece twice ......and it's still to short. )
England - West Midlands, United Kingdom
Joined: March 21, 2009
KitMaker: 379 posts
AeroScale: 75 posts
Posted: Wednesday, July 27, 2011 - 08:14 PM UTC
Quoted Text
Hey
I have sent you my friend Glens e-mail address. He wanted me to tell you that he has tons of pics of the Ospreys. Alot of detail shots that the engineers have shared with him. He told me he'd send you any shot he has that you ask for.
Jerry 
Fantastic news my mate, thanks for all the help you offer. Great stuff.

[url=http://photobucket.com/Ratatouille-collection?albumview=slideshow][img]http://i.imgur.com/kFPfg.jpg[/img][/url]
Texas, United States
Joined: March 20, 2005
KitMaker: 358 posts
AeroScale: 43 posts
Posted: Thursday, August 04, 2011 - 11:38 AM UTC
Adam
Glen wanted me to tell you if you send him your mailing address he will send you a disk of all the pics he has of the Osprey. He tried sending them via e-mail but ran into problems that way. We are both looking forward to seeing the end product.
Jerry

War is the insanity of sane men !
We who are about to die salute you ... WHOA....nobody said anything about dieing......hey watch that spear...... Gladatorius Chickenus
( Hey boss...I've cut this piece twice ......and it's still to short. )
England - West Midlands, United Kingdom
Joined: March 21, 2009
KitMaker: 379 posts
AeroScale: 75 posts
Posted: Saturday, August 06, 2011 - 04:15 AM UTC
Quoted Text
Adam
Glen wanted me to tell you if you send him your mailing address he will send you a disk of all the pics he has of the Osprey. He tried sending them via e-mail but ran into problems that way. We are both looking forward to seeing the end product.
Jerry 
Hello mate, i have already replied to his email, thanks for all the effort to you and Glen, simply fantastic.
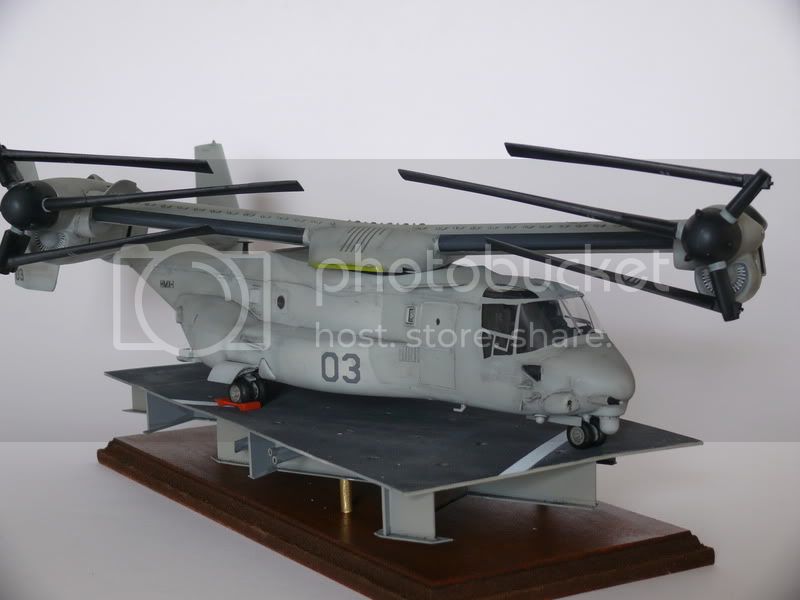
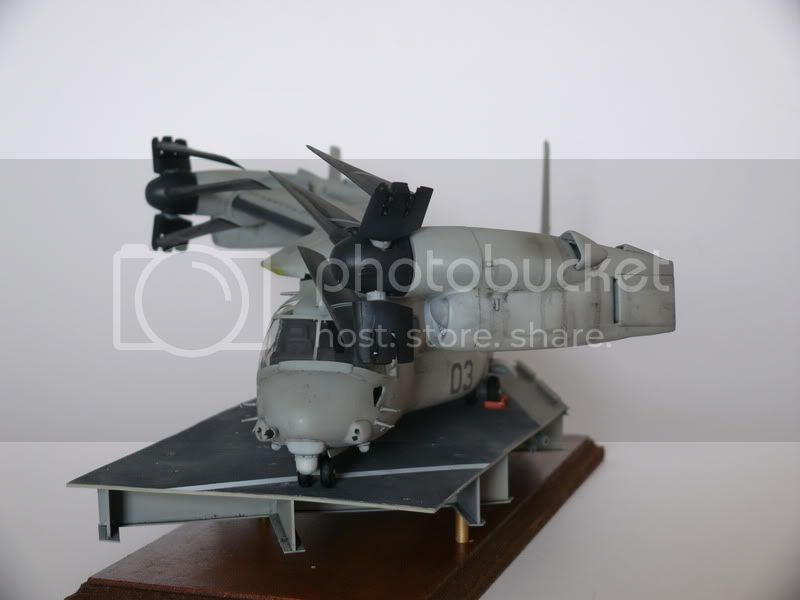
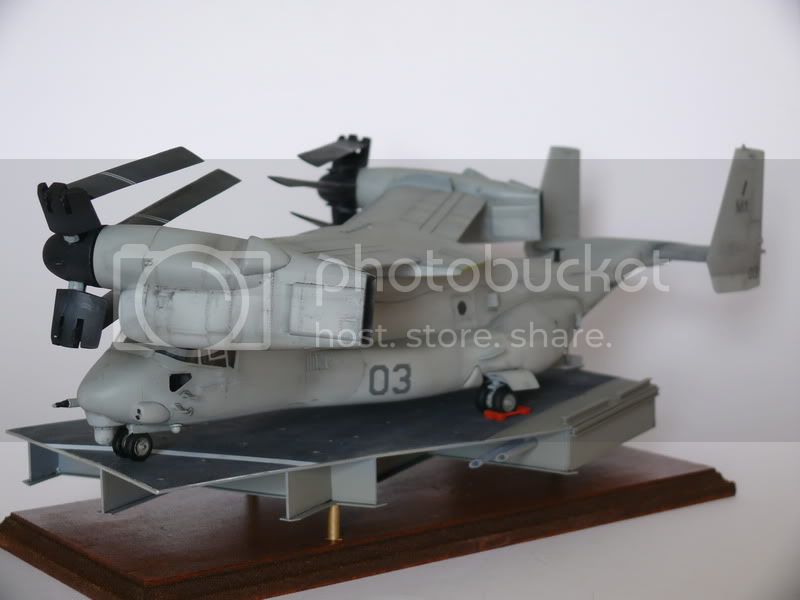
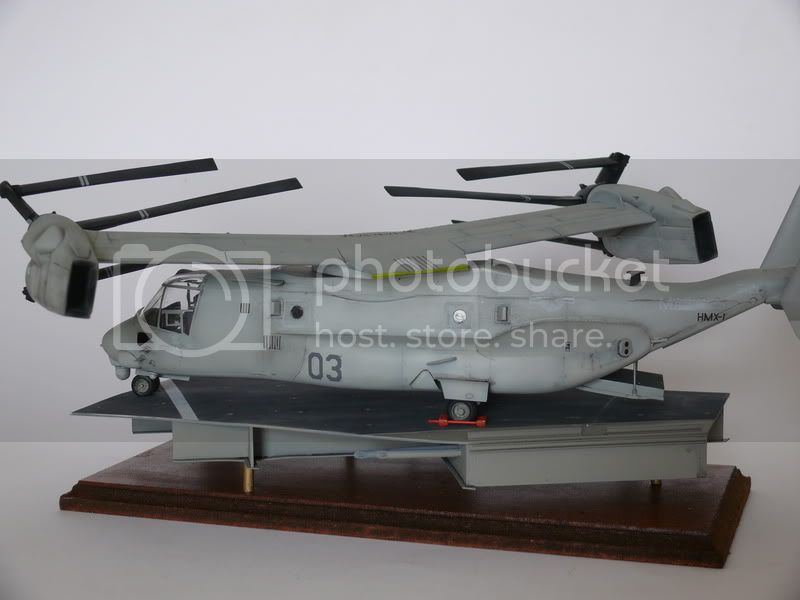
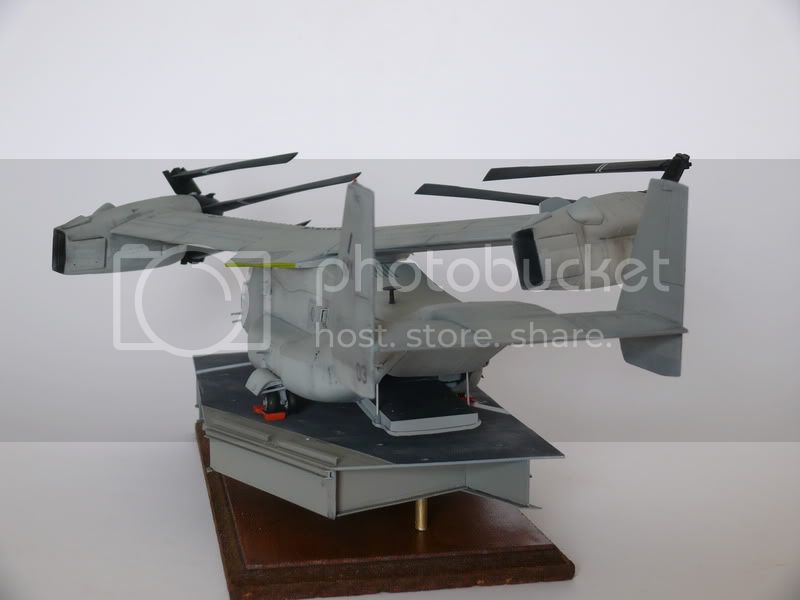
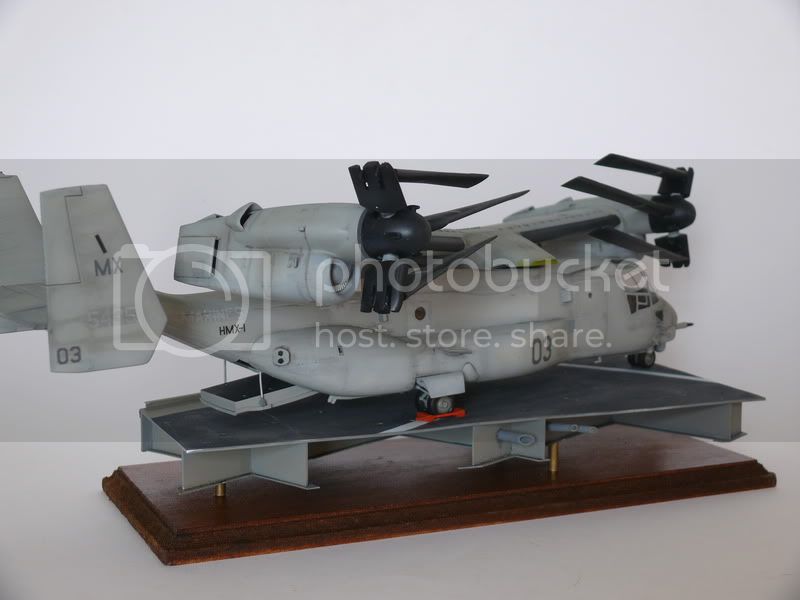
I nearly finished, well MV is finished, only base left, so very soon i will post some gallery pictures.
[url=http://photobucket.com/Ratatouille-collection?albumview=slideshow][img]http://i.imgur.com/kFPfg.jpg[/img][/url]
England - West Midlands, United Kingdom
Joined: March 21, 2009
KitMaker: 379 posts
AeroScale: 75 posts
Posted: Sunday, August 07, 2011 - 07:54 AM UTC
[url=http://photobucket.com/Ratatouille-collection?albumview=slideshow][img]http://i.imgur.com/kFPfg.jpg[/img][/url]
Florida, United States
Joined: May 16, 2002
KitMaker: 17,694 posts
AeroScale: 1,728 posts
Posted: Sunday, August 07, 2011 - 11:34 AM UTC
Very cool. It came out very nicely. Good job.
Field Artillery --- The KING of BATTLE!!!
"People sleep peaceably in their beds at night only because rough men stand ready to do violence on their behalf." -- George Orwell
Showcase
Texas, United States
Joined: March 20, 2005
KitMaker: 358 posts
AeroScale: 43 posts
Posted: Monday, August 08, 2011 - 01:34 PM UTC
Outstanding job. Looks like a couple of the ones we've had flying through here. Glen wanted me to tell you he's sent you a disk with about 385 pics on it of the Osprey.
My boss and our engineers all say that it looks real. And that you did an excellent job building and painting the Osprey. Great job.
Jerry

War is the insanity of sane men !
We who are about to die salute you ... WHOA....nobody said anything about dieing......hey watch that spear...... Gladatorius Chickenus
( Hey boss...I've cut this piece twice ......and it's still to short. )
England - West Midlands, United Kingdom
Joined: March 21, 2009
KitMaker: 379 posts
AeroScale: 75 posts
Posted: Monday, August 08, 2011 - 08:22 PM UTC
Quoted Text
Outstanding job. Looks like a couple of the ones we've had flying through here. Glen wanted me to tell you he's sent you a disk with about 385 pics on it of the Osprey.
My boss and our engineers all say that it looks real. And that you did an excellent job building and painting the Osprey. Great job.
Jerry 
Thanks for that, it's nice to hear opinion from the first hand, specially when it is positive.
I already have one picture form Glen that blow my mind, i can rest to check rest of them.
Thanks for everything
[url=http://photobucket.com/Ratatouille-collection?albumview=slideshow][img]http://i.imgur.com/kFPfg.jpg[/img][/url]


