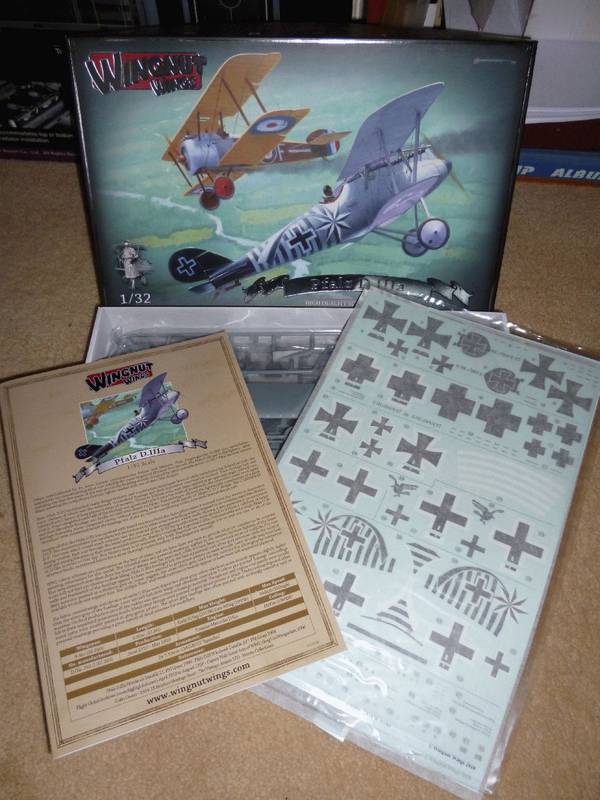
KotS GB 2011 Pfalz D.IIIa warreni
South Australia, Australia
Joined: August 14, 2007
KitMaker: 5,926 posts
AeroScale: 2,201 posts
Posted: Sunday, June 26, 2011 - 09:14 PM UTC
Greetings Everyone.
Just so you don't think I have been bludging for the last few days, here are some new shots of the next one in the series of WNW builds..
Using my near new vastly improved Wife Mk.2 markings picker she decided that the one on the box art was the way to go, and who am I to argue..?
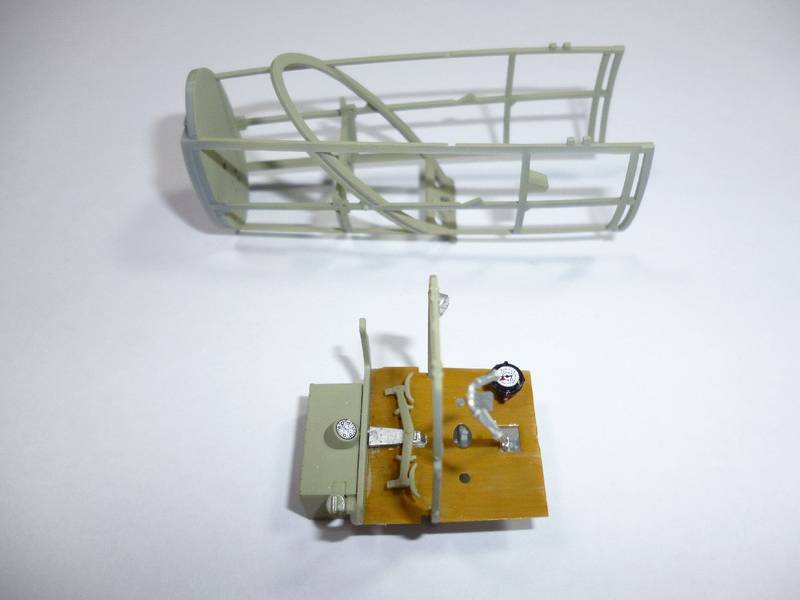
I got this much built in about an hour and painted all the insides of stuff that had to be Grey-green.
Catch you later.
You may be right, I may be crazy.
Alberta, Canada
Joined: January 19, 2008
KitMaker: 6,743 posts
AeroScale: 6,151 posts
Posted: Wednesday, June 29, 2011 - 12:32 PM UTC
You have really got my full attention now Warren !
I do advise you to stop the build , box it up and send it my way !


South Australia, Australia
Joined: August 14, 2007
KitMaker: 5,926 posts
AeroScale: 2,201 posts
Posted: Wednesday, June 29, 2011 - 12:40 PM UTC

If I could afford it I would Terri. Whta scheme do think I am going to do? My better half picked it...
You may be right, I may be crazy.
Alberta, Canada
Joined: January 19, 2008
KitMaker: 6,743 posts
AeroScale: 6,151 posts
Posted: Thursday, June 30, 2011 - 03:32 PM UTC
You know , you posted this answer to the choice already in another thread , you would think I would remember this !
I will have to go with the boxing

South Australia, Australia
Joined: August 14, 2007
KitMaker: 5,926 posts
AeroScale: 2,201 posts
Posted: Thursday, June 30, 2011 - 04:03 PM UTC
Did I? I don't remember that.. Oh well.. but you are correct.

I was going to do the red and white scheme but I think my Wife likes to get a little involved even though she will never build a model (no patience at all).
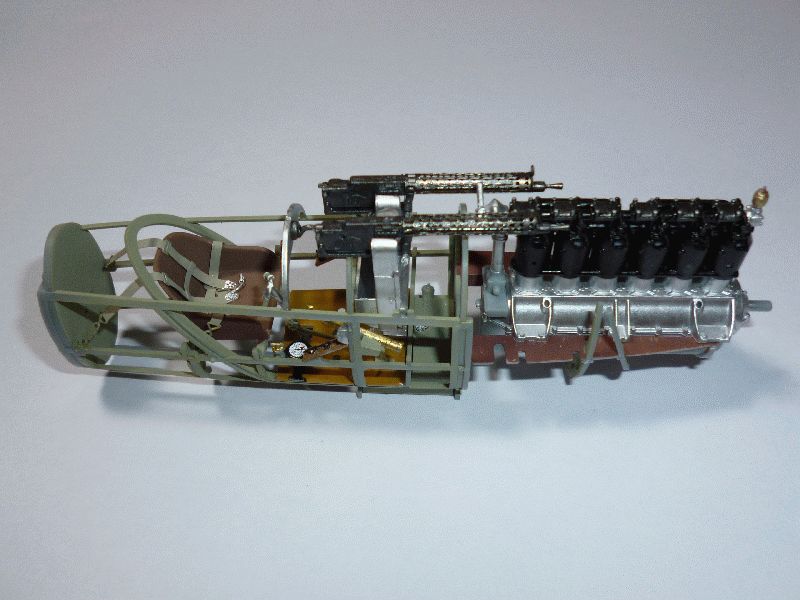
Well, I have made a bit more progress. Cockpit and engine are finished. Remember you can only see the top of the engine when the cowlings are in place so I do not worry about all the detail.
Then I finally remembered to drill out the holes for the control cables and put the cables in place BEFORE I buttoned up the fuselage. This will make rigging the control cables a breeze.
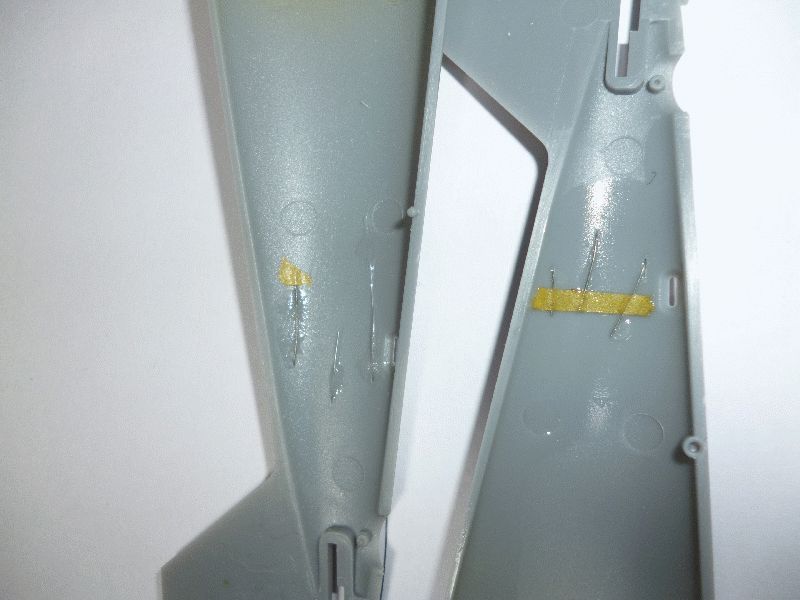
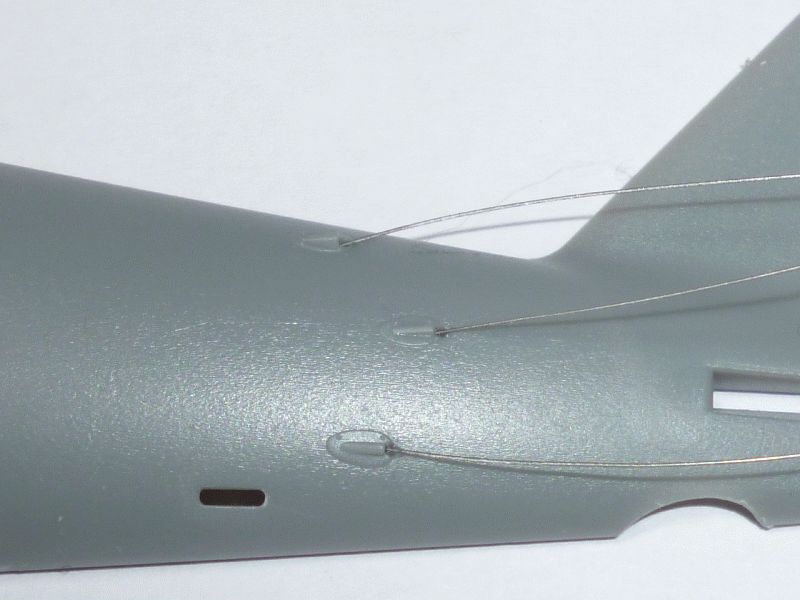
Super glue them in place and they SHOULD stay put for the life of the model. I can always paint the cables again later if they get painted when I paint the fuselage.
Cheers to you all!
You may be right, I may be crazy.
Alberta, Canada
Joined: January 19, 2008
KitMaker: 6,743 posts
AeroScale: 6,151 posts
Posted: Friday, July 01, 2011 - 03:25 AM UTC
Nice progress Warren , shape up nicely

I'm pretty sure you did , will have to see if i can find that post .
South Australia, Australia
Joined: August 14, 2007
KitMaker: 5,926 posts
AeroScale: 2,201 posts
Posted: Friday, July 01, 2011 - 08:05 AM UTC
Thanks Terri.
I was fondling plastic last night perusing my Roden DH-2 and Triphound and think I may wait for the WNW DH-2 to appear as the rigging, without any guide holes or anything, may be a bit too much hassle. Whereas the Triphound has very little rigging.
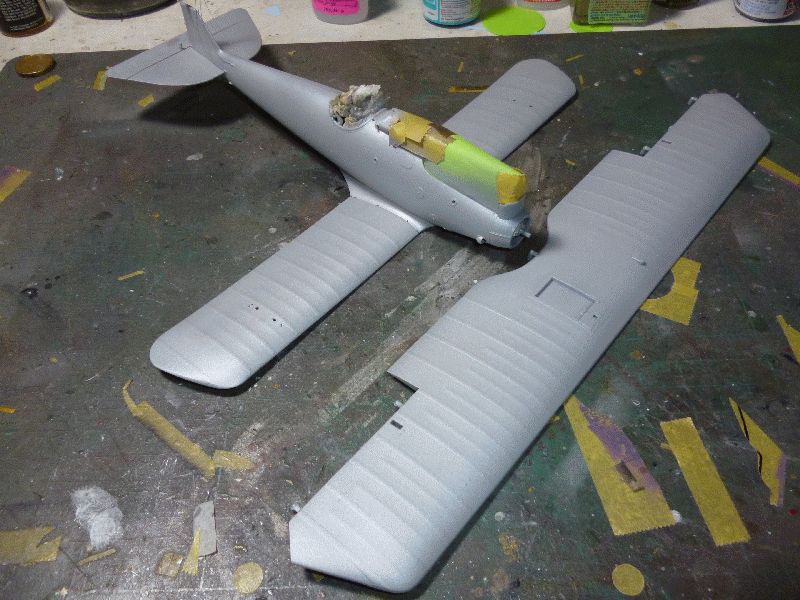
Got the fuselage together last night, but uncharacteristically for WNW it was a bit of a struggle and I ended up with some fairly big seams I had to fill.. strange... I might hazard a guess and say it was probably my fault.

Have a great weekend Everyone.
You may be right, I may be crazy.
New Jersey, United States
Joined: June 02, 2006
KitMaker: 1,212 posts
AeroScale: 468 posts
Posted: Friday, July 01, 2011 - 12:12 PM UTC
Drill the holes BEFORE gluing the fuselage!!!!!!!
Forgot to do that on the D.Va and what a PITA that was.
Looking good Warren.
South Australia, Australia
Joined: August 14, 2007
KitMaker: 5,926 posts
AeroScale: 2,201 posts
Posted: Friday, July 01, 2011 - 01:55 PM UTC
You forgot as well...
You may be right, I may be crazy.
South Australia, Australia
Joined: August 14, 2007
KitMaker: 5,926 posts
AeroScale: 2,201 posts
Posted: Friday, July 01, 2011 - 10:03 PM UTC
Hi All.
Some more progress!
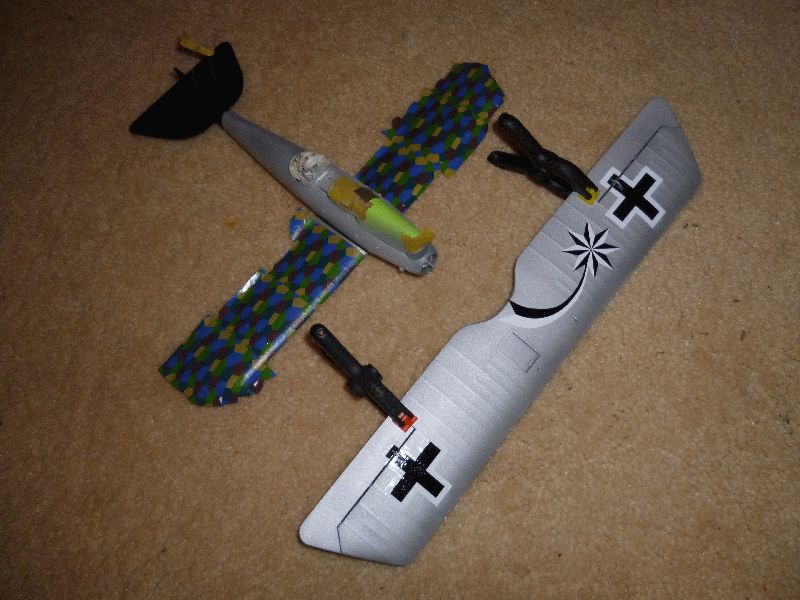
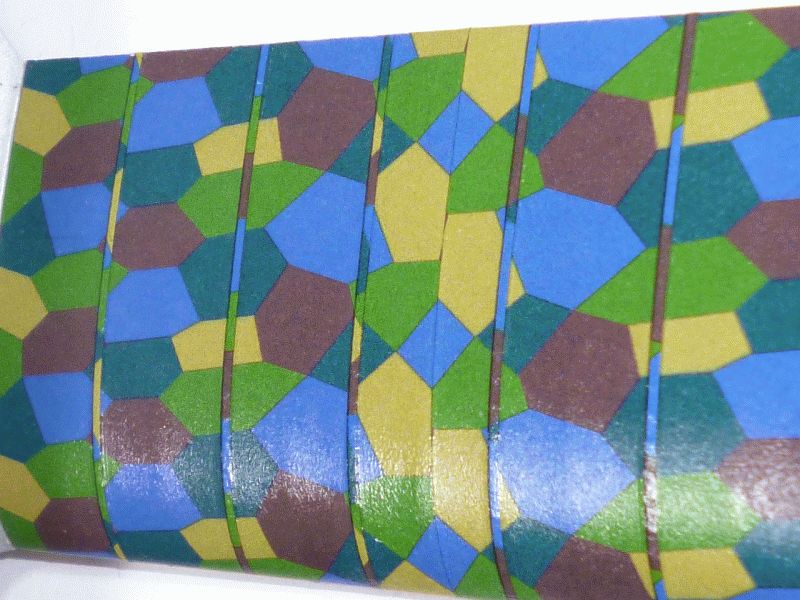
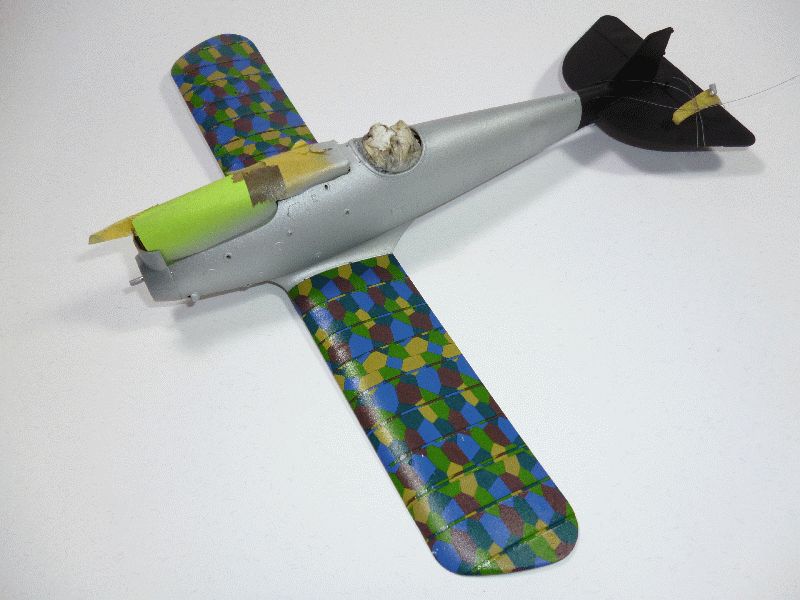
That is the buttoned up fuselage along with the upper wing in their first of the colours for the markings, silver grey. Only problem is that the Tamiya XF-16 always seems to come out very grainy for me and this one is no exception, even with 50% XF-19 it is still rough. Will need many coats of Future before I go decalling. Might put it on first thing in the morning then give it a day or so to harden.
Output of Warren's Model Factory will be slowing down as I start a new job on Monday which requires me to go to work for training for a few weeks before I can retire back to Casa Inman to work from after that. But then again one of the other jobs I applied for could come through and that idea will sink as well..
All to chase the almighty dllar to pay the almighty mortgage.. Sigh..

You may be right, I may be crazy.
Alberta, Canada
Joined: January 19, 2008
KitMaker: 6,743 posts
AeroScale: 6,151 posts
Posted: Saturday, July 02, 2011 - 02:33 AM UTC
Moving along very nicely Warren !
I have tried Tamiya alum and silver paint before and for the same reason , they are two grainy leaving a rough surface . Maybe once the light grey is mix with the alum it won't be so bad .
South Australia, Australia
Joined: August 14, 2007
KitMaker: 5,926 posts
AeroScale: 2,201 posts
Posted: Saturday, July 02, 2011 - 10:24 PM UTC
This forum software can be most annoying...

Lots of words typed and it does something weird and it goes back a page and you lose it all.
Thanks for that Terri.
Some progress

Well, not the best photo I have ever taken.. Oh well. It shows where I am up to. Next I will trim the lozenge and do the bottom of the wing. Not sure when though as I finally got a job last week and start tomorrow. My modelling for 14 hours a day are over for the moment.
I better stop now before I lose it all again...
You may be right, I may be crazy.
Alberta, Canada
Joined: January 19, 2008
KitMaker: 6,743 posts
AeroScale: 6,151 posts
Posted: Sunday, July 03, 2011 - 09:53 AM UTC
Your very welcome Warren , being have the same issue of late , but oh-well .......
Yes, congrats on starting the new job ! Are you looking forward to going back ?
She is looking really well so far Warren , how did the silver/grey turn out ? Is it rough .......
South Australia, Australia
Joined: August 14, 2007
KitMaker: 5,926 posts
AeroScale: 2,201 posts
Posted: Sunday, July 03, 2011 - 09:40 PM UTC
Hi Terri.
All I did today was induction stuff. I may not be there very long as I have some more interviews coming up. It is feast or famine!
The gray came out alright after a few coats of future. Decals are sticking well so far and no silvering.
But no progress as I started work at 7 and finished at 5... then the commute..
You may be right, I may be crazy.
South Australia, Australia
Joined: August 14, 2007
KitMaker: 5,926 posts
AeroScale: 2,201 posts
Posted: Thursday, July 07, 2011 - 10:07 PM UTC
Finally! Some progress!!
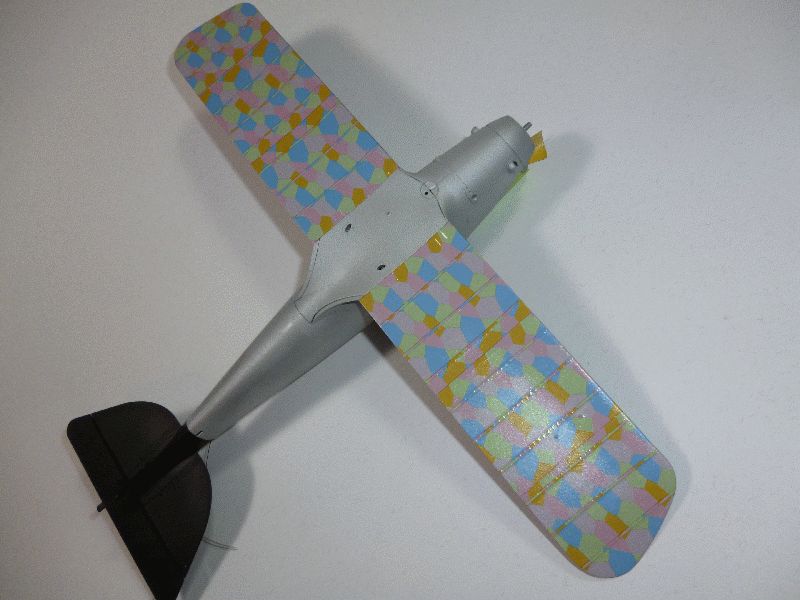
As you can see all the rib tapes are on now. I started using a new decal softener from Gunze and it works fabulously well. Mr Mark Softer is its Japlish name. But it works well.
Hopefully will get some more progress over the weekend.
You may be right, I may be crazy.
Alberta, Canada
Joined: January 19, 2008
KitMaker: 6,743 posts
AeroScale: 6,151 posts
Posted: Saturday, July 09, 2011 - 04:20 AM UTC
Nice job on the lozenge and rib taping Warren !
Looking forward to the next up-date !
Indiana, United States
Joined: May 14, 2007
KitMaker: 3,117 posts
AeroScale: 2,270 posts
Posted: Saturday, July 09, 2011 - 04:36 AM UTC
Wings look great. So does the rest of your build.
May I suggest you use texture decals over the loz? It really makes a big difference.
"Treat 'em Rough", Current Builds--Wingnut Rumpler
I am frequently seen with blood shot eyes from staying up past my nap time to get the right colour scheme on my latest WWI model?
South Australia, Australia
Joined: August 14, 2007
KitMaker: 5,926 posts
AeroScale: 2,201 posts
Posted: Saturday, July 09, 2011 - 09:40 AM UTC
Thanks Terri and Carl.
Where can I find out about this texturing, although I think it will be too much in 1/32. I mean to say you can't actually see the texturing in any photos I have seen from any scale distance.
You may be right, I may be crazy.
Alberta, Canada
Joined: January 19, 2008
KitMaker: 6,743 posts
AeroScale: 6,151 posts
Posted: Saturday, July 09, 2011 - 11:39 AM UTC
Quoted Text
Thanks Terri and Carl.
Where can I find out about this texturing, although I think it will be too much in 1/32. I mean to say you can't actually see the texturing in any photos I have seen from any scale distance.
Warren , the textureing decals which Carl is talking can be found at the Microsculpt web site . They produce lozenge and streaking decals as well .
http://www.microsculpt.com/ South Australia, Australia
Joined: August 14, 2007
KitMaker: 5,926 posts
AeroScale: 2,201 posts
Posted: Saturday, July 09, 2011 - 12:18 PM UTC
There is one slight problem, they are 1/48, this is 1/32... And being very short on cash at the moment...
You may be right, I may be crazy.
South Australia, Australia
Joined: August 14, 2007
KitMaker: 5,926 posts
AeroScale: 2,201 posts
Posted: Saturday, July 09, 2011 - 10:21 PM UTC
Greetings All.
A quick update...
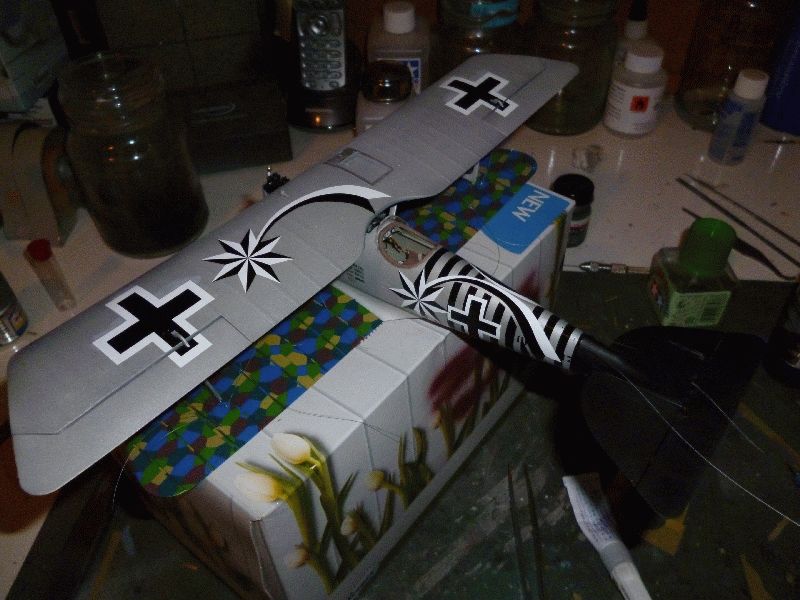
The decalling of the fuselage is finished. No real hassles there.
The struts are on (and fitted beautifully) but I did notice that the two inner struts are both numbered incorrectly in the instructions. I have found a few of these in this build and have told WNW about them but haven't got any reply yet). Well engineered struts make all the difference in biplane builds I think as it makes it so much faster not having to fiddle around trying to get struts to fit properly.
The undercarriage is on and it too fitted beautifully, well it did after I worked out which way up the axle wing went..
Will post some picks later this week, but after the SPAD disaster I might wait a little while..
Tuesday 12 July
Got the top wing on this morning. Evrything lined up and fitted beautifully. A tiny dot of Tamiya Extra Thin Cement to wick in and the wing should be rock solid and ready for the rest of the rigging this evening.
Cheers for now
Warren
You may be right, I may be crazy.
South Australia, Australia
Joined: August 14, 2007
KitMaker: 5,926 posts
AeroScale: 2,201 posts
Posted: Thursday, July 14, 2011 - 10:26 PM UTC
Hi Everyone.
A quick update on the Flatz...
Rigging is underway using Warren's patented empty tissue box stand.
Not far to go to finish it now.
Hopefully will have the alleged Flatz finished before I start watching the NRL games on tomorrow.
You may be right, I may be crazy.
Alberta, Canada
Joined: January 19, 2008
KitMaker: 6,743 posts
AeroScale: 6,151 posts
Posted: Friday, July 15, 2011 - 12:44 AM UTC
Looking really sweet Warren !
Nice stand to !
Arizona, United States
Joined: December 12, 2008
KitMaker: 1,423 posts
AeroScale: 1,319 posts
Posted: Friday, July 15, 2011 - 08:45 AM UTC
Hi Warren:
This is coming along nicely. You certainly are prolific. My basement flooded on the 4th of July weekend, so all work has come to a halt. I boxed up the albie. Your Pfalz is nice as is the rest of your models, too bad about the SPAD.
Best
Mark
We few, we happy few........
South Australia, Australia
Joined: August 14, 2007
KitMaker: 5,926 posts
AeroScale: 2,201 posts
Posted: Friday, July 15, 2011 - 08:55 AM UTC
Thanks Terri and Mark.
Sorry to hear your basement flooded Mark. Hopefully not too much damage. Was it from seepage or some other source? Not many houses in Australia have basements.
Is raining here today, first time for weeks. It is our dry season in Brisbane.
Anyway, I am off to the bench! Do the Pfalz rigging and work out how to progress with the Tripehound,, and maybe start my WNW Roland...
You may be right, I may be crazy.


