_GOTOBOTTOM
Early Aviation
Discuss World War I and the early years of aviation thru 1934.
KotS GB 2011 1/32 Albie D.III (OAW) warreni
warreni
_VISITCOMMUNITY
South Australia, Australia
Joined: August 14, 2007
KitMaker: 5,926 posts
AeroScale: 2,201 posts
Posted: Friday, July 29, 2011 - 08:37 PM UTC
Yessiree Bob I have started yet another model while I was waiting for the Roland's fuselage to dry..


And after a few hours I are up to here..
Cheers!
lcarroll
_VISITCOMMUNITY
Alberta, Canada
Joined: July 26, 2010
KitMaker: 1,032 posts
AeroScale: 1,025 posts
Posted: Saturday, July 30, 2011 - 04:25 AM UTC
Warren,
Keep a close eye on fit of the engine mount/forward frame assembly into the mated fuselage. I had to remove and re-install a couple of frame members on my DIII Early (Alb) version and never did get it just right due as well to a slightly warped fuselage half. I don't recall mine having other then parallel formers; I notice your photo has the #3 former canted back which could be where I started to go wrong.
Just a "head's up" so you don't fall into the same hole as did I, it's an ugly work-back that has a really nasty domino effect!

Lookin mighty good overall,
Cheers,
Lance
warreni
_VISITCOMMUNITY
South Australia, Australia
Joined: August 14, 2007
KitMaker: 5,926 posts
AeroScale: 2,201 posts
Posted: Saturday, July 30, 2011 - 07:40 AM UTC
Hi Lance.

Thanks for the info mate. That former is supposed to be canted back from what I can see in the instructions and it is the same in the D.V and D.Va from WNW. But you may be correct and I will keep an eye on things. So far it seems OK.
One thing I have noticed is that there are location points all along the fuselage, but nothing in the instructions to show what gets located there. Very big guess-work involved.. "Some modelling skills helpful"?
If I had not already built the two WNW Albies I would be all at sea at the moment.
Thanks again mate.
Kornbeef
_VISITCOMMUNITY
England - South East, United Kingdom
Joined: November 06, 2005
KitMaker: 1,667 posts
AeroScale: 1,551 posts
Posted: Saturday, July 30, 2011 - 09:13 AM UTC
Yes watch the fit of the engine bearers to fuselage, this is an area of...... say no more so be warned.

Keith
CaptainA
_VISITCOMMUNITY
Indiana, United States
Joined: May 14, 2007
KitMaker: 3,117 posts
AeroScale: 2,270 posts
Posted: Saturday, July 30, 2011 - 09:38 AM UTC
That #3 should be canted. Be sure to scrape the paint out of the slots on the fuselage where the formers and bearers go. It makes the fuselage join work much better.

Warren, what location points are you talking about?
lcarroll
_VISITCOMMUNITY
Alberta, Canada
Joined: July 26, 2010
KitMaker: 1,032 posts
AeroScale: 1,025 posts
Posted: Saturday, July 30, 2011 - 04:08 PM UTC
Warren,
I now have a better idea of where i went wrong! I totally missed the "canted " alignment of #3. I also agree with Carl; the effect of paint build-up alone could/would cause problems and your comment concerning " location points and what gets connected where" brings back memories of my recent struggles. I wish as well that I'd had a build ahead of me as you mention you had; a WNW DV/Va would have gone a long way in giving me a better appreciation of the basic structure and orientation of the various components. On the other hand, the V/Va are next on my build list so forewarned is hopefully forearmed..
As the road signs say "proceed with caution", it will undoubtedly be a beauty!

Cheers,
Lance
warreni
_VISITCOMMUNITY
South Australia, Australia
Joined: August 14, 2007
KitMaker: 5,926 posts
AeroScale: 2,201 posts
Posted: Saturday, July 30, 2011 - 09:30 PM UTC
@ Carl, the locations are the locations for all the fuselage formers around the cockpit, engine etc. The instructions are not clear on where they should go. And there are no slots in the fuselage to scrape the paint out of!!
@ Keith, it all seemed to go in with no trouble once I made sure they were secured in one half of the fuselage.
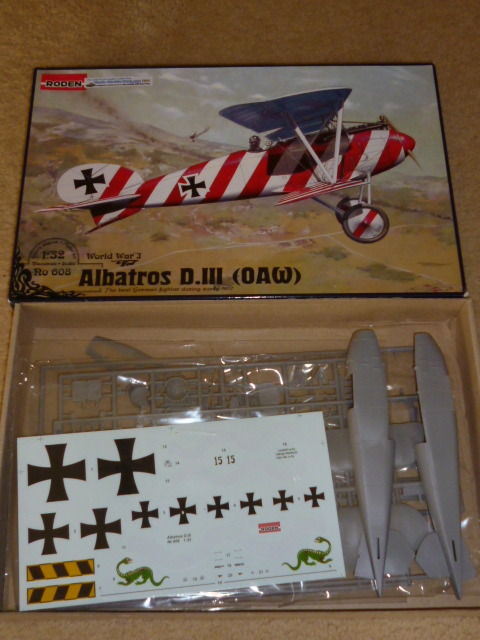
@ Lance, you will like the WNW kits.
I must be lucky though as my fuselage has gone together without so much as a wimper! No gaps etc.. but don't mention the deck over the engine and cockpit as it is taking a bit of phenagling, and will need a bit of putty, or gap filler.
Here are some more progress pics for you all...

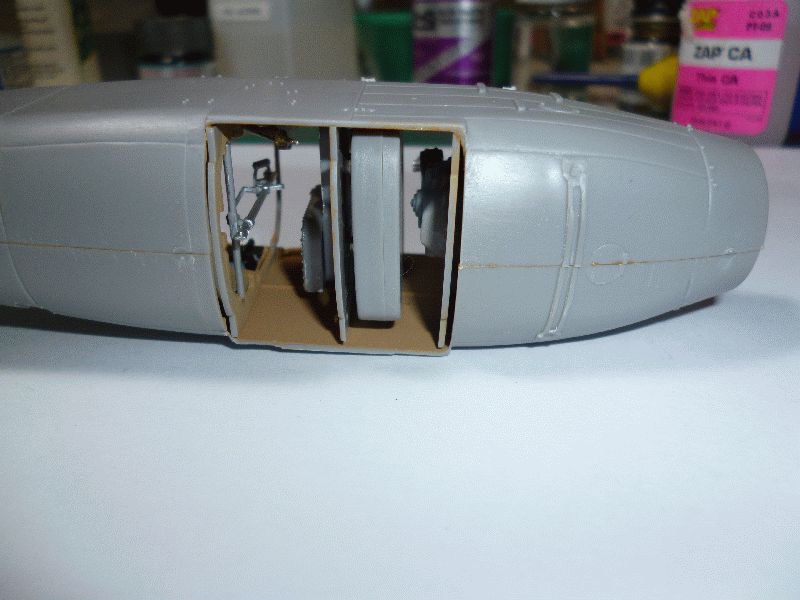
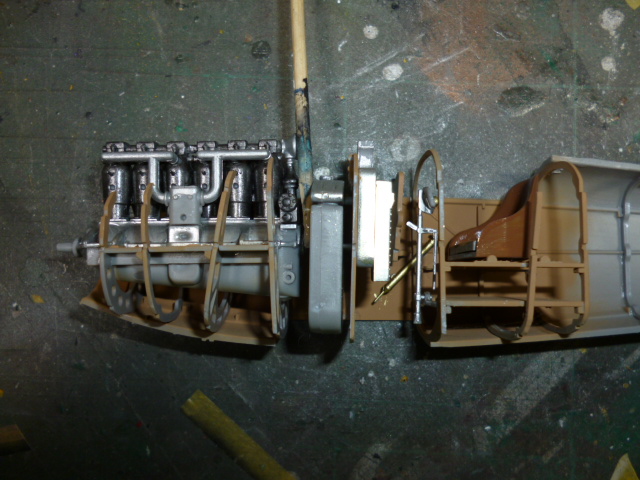
With this photo I tried to illustrate how good the lower seam was of the fuselage join. Only a little Mr Surfacer will be needed here. But it also shows how crappy the fit of the fuel tank halves was..

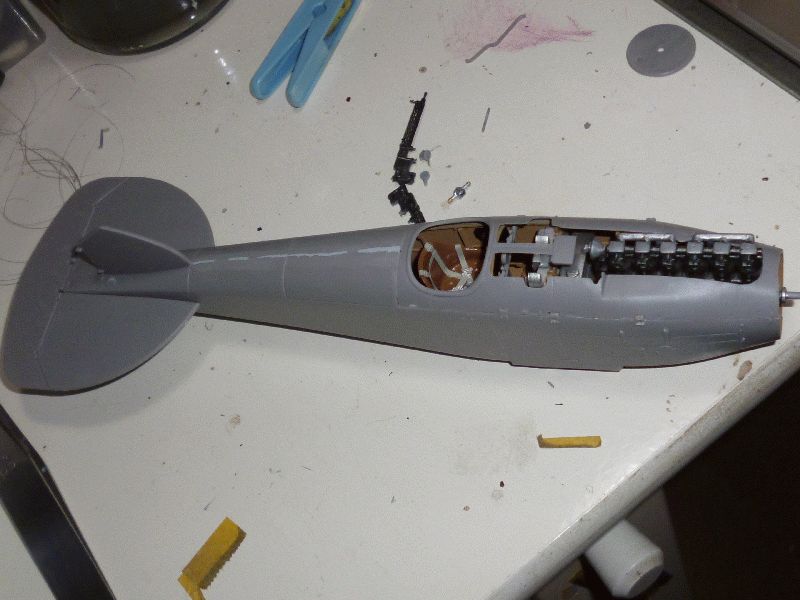
All buttoned up and drying away merrily. It took lots of small applications of thin liquid cement to work around the upper deck as the fit is pretty dire and required lots of adjustments.

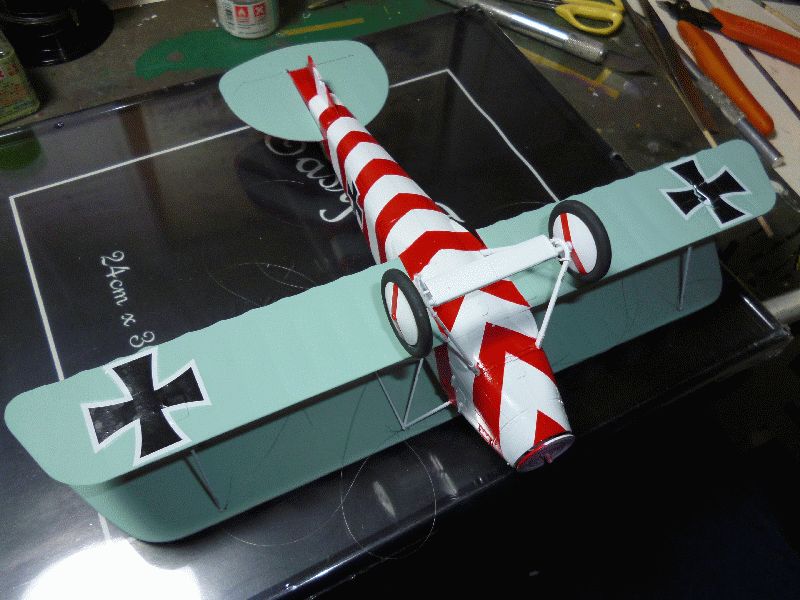
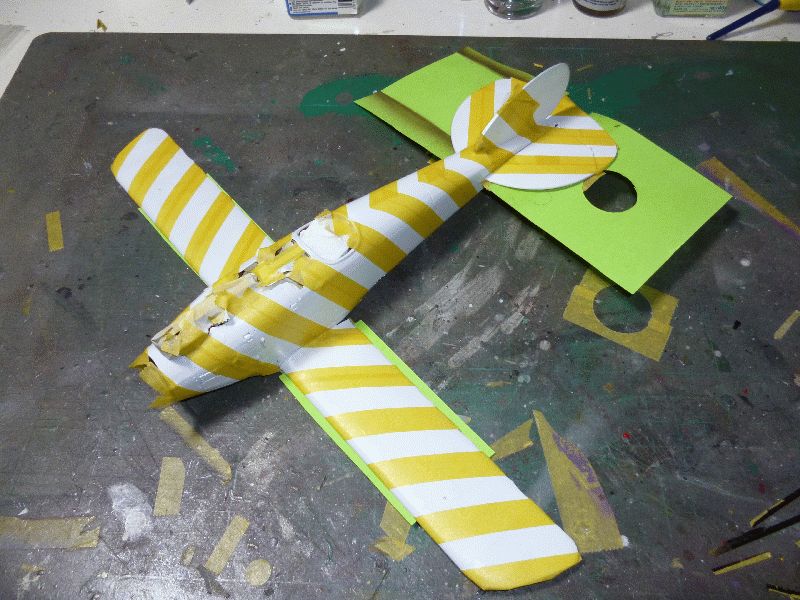
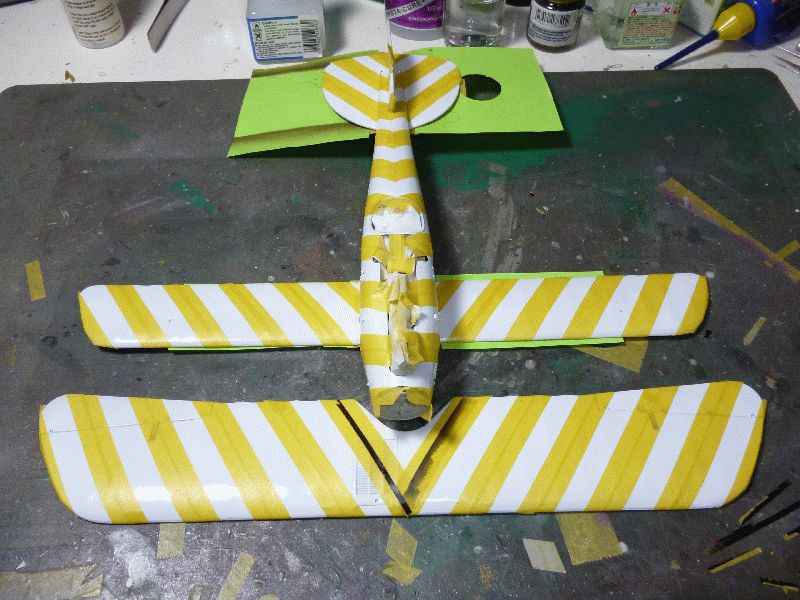
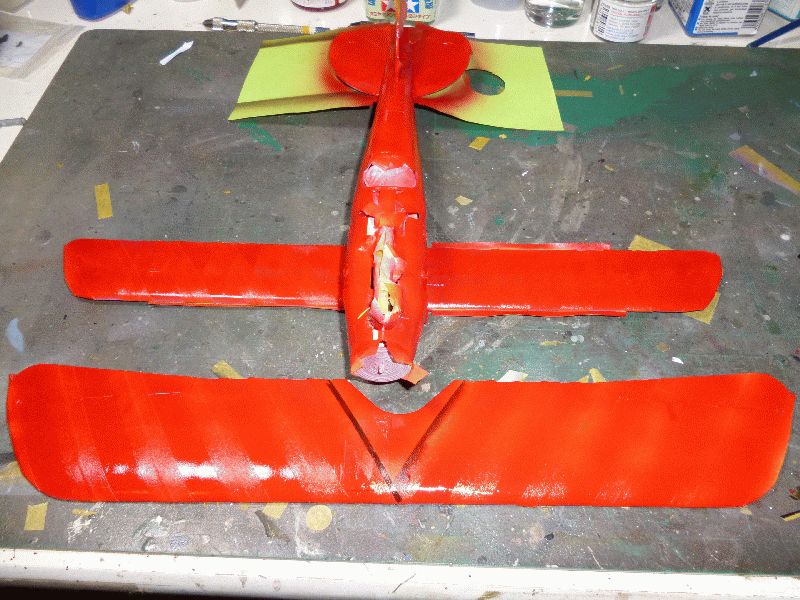
I had some white left over from spraying the fuselage of the Roland so I thought I may as well do some of the Albie.
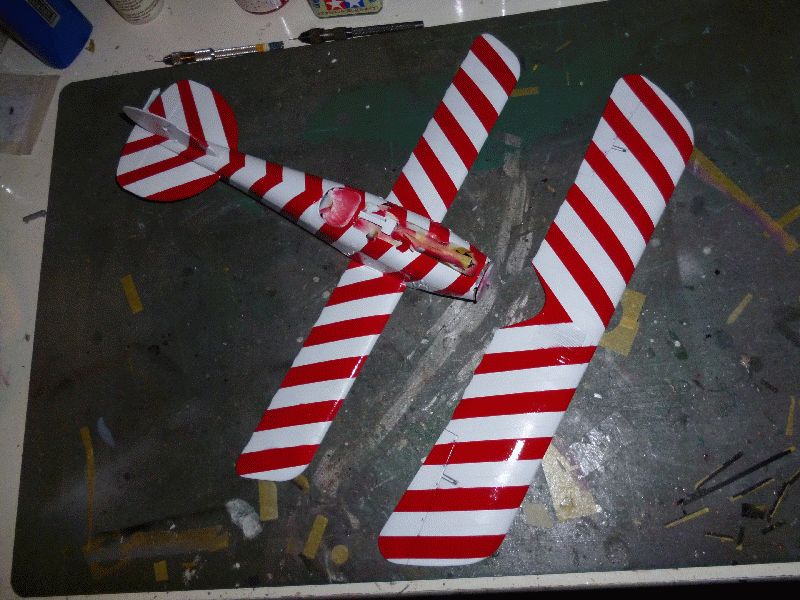
That's it for the moment. SHould have all the gaps done in the next few days then it is white all over, well except for the bottoms of the wings, in preparation for the red stripes of the Jasta 39 scheme like on the cover of the box. Hopefully no bleed through..
warreni
_VISITCOMMUNITY
South Australia, Australia
Joined: August 14, 2007
KitMaker: 5,926 posts
AeroScale: 2,201 posts
Posted: Saturday, August 06, 2011 - 10:04 PM UTC
Hi Everyone.
A bit of progress since the last update.


After spraying the fuselage and upper wing surfaces white I used a little masking tape to prepare for the next step.

E Viola!! Red stripes ... well after I remove the masking tape anyway.
One problem I did notice, even though I had given the Tamiya White paint more than 24 hours to dry the masking tape was marring the surface of the paint, basically looked like the paint wasn't dry yet even though it was.. Oh well. Clear coat will matt it all down soon enough.
warreni
_VISITCOMMUNITY
South Australia, Australia
Joined: August 14, 2007
KitMaker: 5,926 posts
AeroScale: 2,201 posts
Posted: Sunday, August 07, 2011 - 10:49 PM UTC
And after removing all that masking tape... et voila!!

Much better colour from my camera as well..
mtnflyer
_VISITCOMMUNITY
Alberta, Canada
Joined: March 08, 2009
KitMaker: 394 posts
AeroScale: 360 posts
Posted: Monday, August 08, 2011 - 02:33 AM UTC
Wow, Warren. You are building the same kit as me, but, yours is already in an advanced state of progress. You are extemely prolific in the hobby, and I find myself wondering if you are a working man or were born into royalty with all the time you seem to have.

I'm locked into real life adventures right now, and won't be able to sit at the desk for a couple more weeks at least. My Albatros lies idle.

Great job on the paint, bye the way. Keep up the great work.
gajouette
_VISITCOMMUNITY
Texas, United States
Joined: February 01, 2007
KitMaker: 365 posts
AeroScale: 356 posts
Posted: Monday, August 08, 2011 - 04:14 AM UTC
Warren,
Wow that's bright my friend.What shade of red are you using? Great build.
Highest Regards,
Gregory Jouette
warreni
_VISITCOMMUNITY
South Australia, Australia
Joined: August 14, 2007
KitMaker: 5,926 posts
AeroScale: 2,201 posts
Posted: Monday, August 08, 2011 - 08:43 AM UTC
@ Guy, I am but a humble worker, but I don't watch much TV or go out very much so maybe that is the reason for my productivity.

@ Gregory, that is Tamiya X-7 my friend.

Thanks for the compliments. Hopefully will get more done during the week.

Cheers
CaptainA
_VISITCOMMUNITY
Indiana, United States
Joined: May 14, 2007
KitMaker: 3,117 posts
AeroScale: 2,270 posts
Posted: Tuesday, August 09, 2011 - 12:10 AM UTC
Looking good. I love this scheme. Beware, the stripes will show through those Roden decals.
Mgunns
_VISITCOMMUNITY
Arizona, United States
Joined: December 12, 2008
KitMaker: 1,423 posts
AeroScale: 1,319 posts
Posted: Tuesday, August 09, 2011 - 05:45 AM UTC
Hi warren:

I did this scheme as well as Karl. The decals are thin and the red will bleed through. If you have some white decal paper, you may want to cut and place down first to prevent the bleed through.

Looking good.

Mark
Kornbeef
_VISITCOMMUNITY
England - South East, United Kingdom
Joined: November 06, 2005
KitMaker: 1,667 posts
AeroScale: 1,551 posts
Posted: Tuesday, August 09, 2011 - 07:42 AM UTC
Looking very nice so far Warren, braver man than I tackling the red humbug 
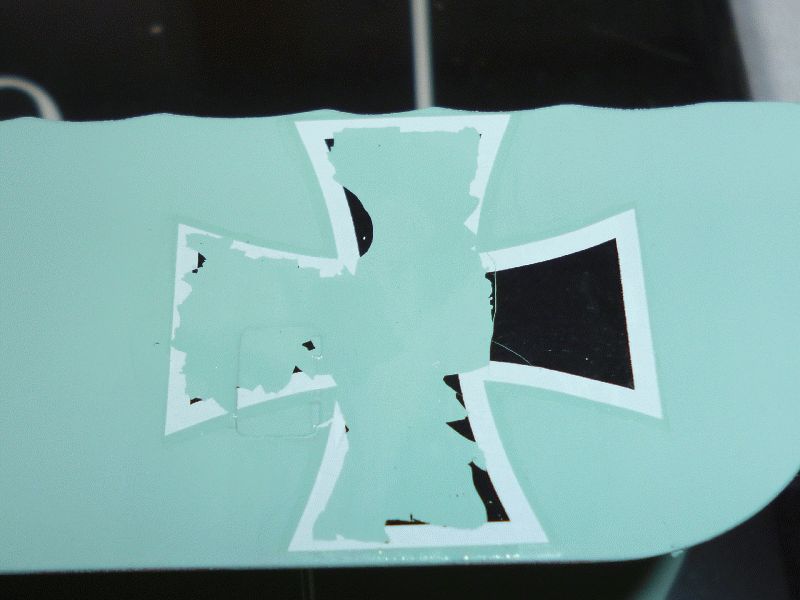
The decals are thin, On my OAW I filched the decals from a WNW DVa I wasnt using/
warreni
_VISITCOMMUNITY
South Australia, Australia
Joined: August 14, 2007
KitMaker: 5,926 posts
AeroScale: 2,201 posts
Posted: Tuesday, August 09, 2011 - 08:39 AM UTC
Thanks guys.

I had not even thought of the dangers of thin decals..

Keith, that is a good idea re the WNW decals as I have heaps of them laying around.. Only need maltese crosses in this scheme as well.

Got the blue painted on the undersurfaces last night, well the first coat anyway..
warreni
_VISITCOMMUNITY
South Australia, Australia
Joined: August 14, 2007
KitMaker: 5,926 posts
AeroScale: 2,201 posts
Posted: Tuesday, August 09, 2011 - 08:45 AM UTC
@ Guy, fundly enough I am a both a working man and royalty.. My Great-Grandmother was a Queen of Tonga and that makes me a Prince...

But I haven't even been back to my ancestral home for a look yet.
mtnflyer
_VISITCOMMUNITY
Alberta, Canada
Joined: March 08, 2009
KitMaker: 394 posts
AeroScale: 360 posts
Posted: Tuesday, August 09, 2011 - 11:44 AM UTC

Quoted Text

@ Guy, fundly enough I am a both a working man and royalty.. My Great-Grandmother was a Queen of Tonga and that makes me a Prince...


Hah!!! I knew it!!!! A Prince; the future King of Tonga modeling right here on Aeroscale. I'm on my knees and bowing to one of the finest and most prolific modelers i've seen on this site.

Keep up the outstanding effort. And, please, lots of pictures.

Bye the way, isn't Tonga just a litttle south of DogRib Creek. I'll google it in a-bit.
warreni
_VISITCOMMUNITY
South Australia, Australia
Joined: August 14, 2007
KitMaker: 5,926 posts
AeroScale: 2,201 posts
Posted: Tuesday, August 09, 2011 - 06:50 PM UTC
Lol.. Thanks for the effusive praise Guy even though it is not deserved!

Tonga is a tiny nation in the South Pacific Ocean. One day I will get there but it must wait till I have some more money!
wing_nut
_VISITCOMMUNITY
New Jersey, United States
Joined: June 02, 2006
KitMaker: 1,212 posts
AeroScale: 468 posts
Posted: Wednesday, August 10, 2011 - 01:37 AM UTC
Warren you are a modeling machine. Your abilities do not suffer from multiple projects. And thanks for the reminder that I need a haircut
warreni
_VISITCOMMUNITY
South Australia, Australia
Joined: August 14, 2007
KitMaker: 5,926 posts
AeroScale: 2,201 posts
Posted: Wednesday, August 10, 2011 - 07:35 AM UTC
Thanks guys.

Marc, how did I remind you you need a haircut?
warreni
_VISITCOMMUNITY
South Australia, Australia
Joined: August 14, 2007
KitMaker: 5,926 posts
AeroScale: 2,201 posts
Posted: Saturday, August 20, 2011 - 10:44 PM UTC
The Albie build continues!

Top wing attachment time. Notice the wires are already installed on the top wing. Also notice something strange about the decal on the left lower wing in the photo...

For some unknown reason it had cracked up while it was drying. It was the only Roden sourced decal I had used on this one and I am going to have to look for a WNW to replace it..
But enough of the negatives, it is almost finished!!
cheers
lcarroll
_VISITCOMMUNITY
Alberta, Canada
Joined: July 26, 2010
KitMaker: 1,032 posts
AeroScale: 1,025 posts
Posted: Sunday, August 21, 2011 - 05:21 AM UTC
Warren,
Now that is really ugly, a clear cut example of "Deja Vu" for me with the same kit. I've already resolved to "after-market" any and all decals for the several Roden kits I have, they are just hopeless!
Good luck with the replacement/fix.

Cheers,
Lance
warreni
_VISITCOMMUNITY
South Australia, Australia
Joined: August 14, 2007
KitMaker: 5,926 posts
AeroScale: 2,201 posts
Posted: Sunday, August 21, 2011 - 08:53 AM UTC
Yes, I think you are right Lance.. I only have four left in the stash but you are right about aftermarket decals for them.

Cheers
Warren
wing_nut
_VISITCOMMUNITY
New Jersey, United States
Joined: June 02, 2006
KitMaker: 1,212 posts
AeroScale: 468 posts
Posted: Monday, August 22, 2011 - 05:21 PM UTC

Quoted Text

Thanks guys.

Marc, how did I remind you you need a haircut?


Do a google of "barber pole"

If you can't find the decal I'll look in what's left from my D.Va. Must be something in there I can send you.
 _GOTOTOP