KotS GB 2011 WNW DH 9a Ninak warreni
South Australia, Australia
Joined: August 14, 2007
KitMaker: 5,926 posts
AeroScale: 2,201 posts
Posted: Saturday, August 06, 2011 - 10:10 PM UTC
Oh and I almost forgot..
I started this one late yesterday... (Sorry Stephen, another one to add to your list.)
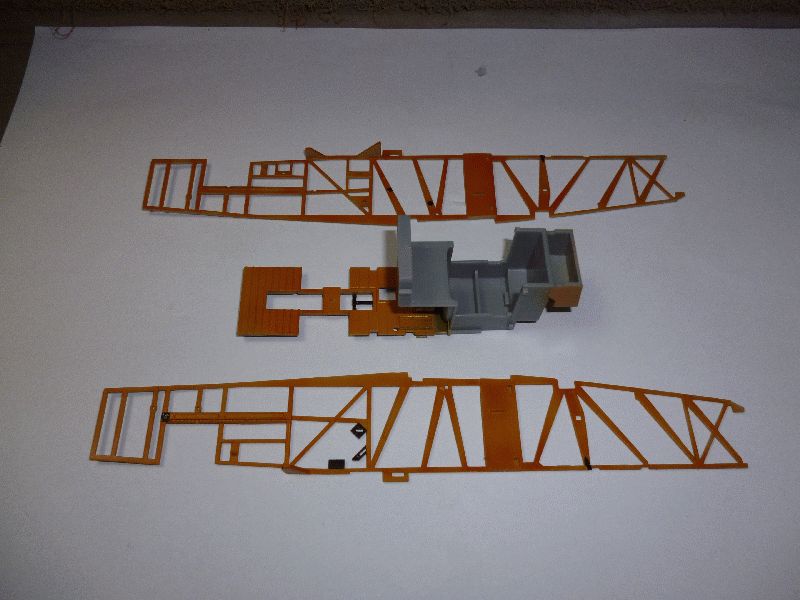
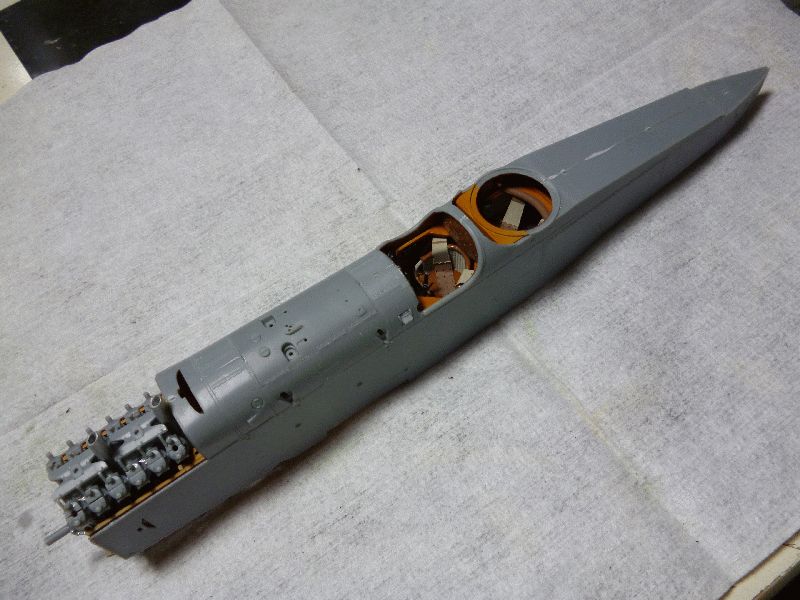
As you can see I have got all the wood-work painted and ready to go. Haven't painted the grey pieces in the cockpit yet, but they are grey already..

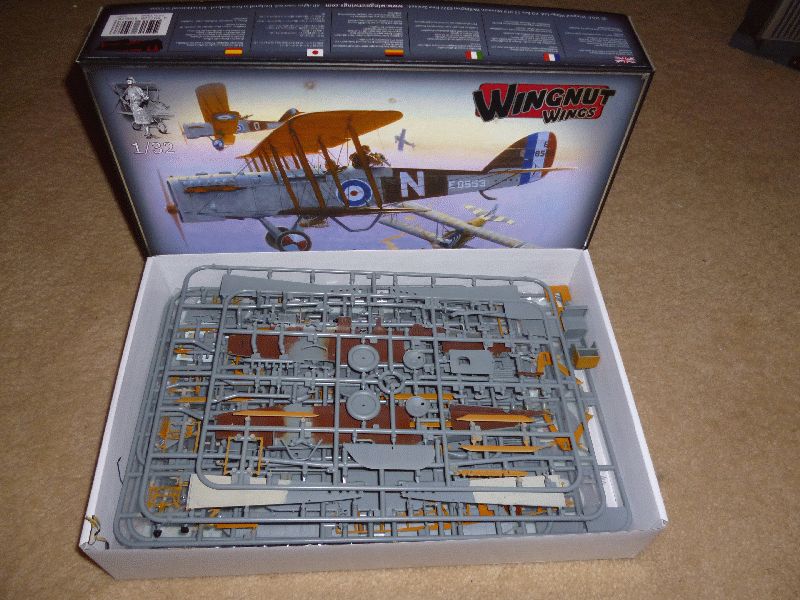
This one will be a bit more challenging than the glut of single seat fighters I have been building lately. Although the colour schemes of the fighters are much more intensive than this one. I am building Option B, the USMC machine as I don't have any WW1 USMC machines yet.
Fit is so good so far it is more like a smap-tite kit than one you have to glue together. Although the camera for the rear cockpit wasn't such a good fit and needed much sanding for the surfaces to mate well.
Waiting impatiently for the next release as I am running out of WNW kits!
Cheers and thanks for looking.

You may be right, I may be crazy.
Arizona, United States
Joined: December 12, 2008
KitMaker: 1,423 posts
AeroScale: 1,319 posts
Posted: Tuesday, August 09, 2011 - 02:36 AM UTC
Hi warren:
I am looking forward to seeing this unfold as well. I built this last winter and it is a great kit. I did the USMC markings as well.
Take care
Mark
We few, we happy few........
England - South East, United Kingdom
Joined: November 06, 2005
KitMaker: 1,667 posts
AeroScale: 1,551 posts
Posted: Tuesday, August 09, 2011 - 07:44 AM UTC
I remember that mark, a most beautiful build.
Warren I really wish I had time or energy to emulate your prolific building.
Keith
Still can't cure the AMS even with sausage finger implants & olde eyes.
South Australia, Australia
Joined: August 14, 2007
KitMaker: 5,926 posts
AeroScale: 2,201 posts
Posted: Tuesday, August 09, 2011 - 08:43 AM UTC
@ Mark, I think the USMC versions deserves to be built as it is a bit different from all those British roundeled planes I have on the shelf now..
@ Keith, it is easy when you don't have a life outside work and home..
You may be right, I may be crazy.
New Jersey, United States
Joined: June 02, 2006
KitMaker: 1,212 posts
AeroScale: 468 posts
Posted: Wednesday, August 10, 2011 - 01:38 AM UTC
Someone is off their meds

Arizona, United States
Joined: December 12, 2008
KitMaker: 1,423 posts
AeroScale: 1,319 posts
Posted: Wednesday, August 10, 2011 - 01:54 AM UTC
Quoted Text
I remember that mark, a most beautiful build.
Keith
Thanks Keith: That was the last model I built. I started the WNW Albatros but summer took over, and then my basement flooded and is still a mess, so all modeling has come to a halt. More this fall and winter.
Best
Mark
We few, we happy few........
Västra Götaland, Sweden
Joined: February 19, 2010
KitMaker: 1,473 posts
AeroScale: 1,450 posts
Posted: Wednesday, August 10, 2011 - 07:14 AM UTC
And the winner for most kits built ever in an Early Aviation GB goes to...
Great start to the kit I have it in my stash, so I'll follow this build with interest.
Mikael
_________________________________________________________
Just finished the Wingnut Wings Taube. On to the Junkers D.1
South Australia, Australia
Joined: August 14, 2007
KitMaker: 5,926 posts
AeroScale: 2,201 posts
Posted: Wednesday, August 10, 2011 - 07:38 AM UTC
Thanks Mikael..
I still have a few months to go so should be able to get a few more out.. and better still, I got a cryptic message from WNW the other day saying they MAY have something new released for the NZ IPMS Nationals next weekend... But don't tell anyone!! SSSSSHHHHH!!!!
You may be right, I may be crazy.
Västra Götaland, Sweden
Joined: February 19, 2010
KitMaker: 1,473 posts
AeroScale: 1,450 posts
Posted: Wednesday, August 10, 2011 - 06:58 PM UTC
Quoted Text
Thanks Mikael..
I still have a few months to go so should be able to get a few more out.. and better still, I got a cryptic message from WNW the other day saying they MAY have something new released for the NZ IPMS Nationals next weekend... But don't tell anyone!! SSSSSHHHHH!!!!
Ohhhhh I can hear my wallet groaning

I wander could it be....

_________________________________________________________
Just finished the Wingnut Wings Taube. On to the Junkers D.1
South Australia, Australia
Joined: August 14, 2007
KitMaker: 5,926 posts
AeroScale: 2,201 posts
Posted: Saturday, August 20, 2011 - 10:48 PM UTC
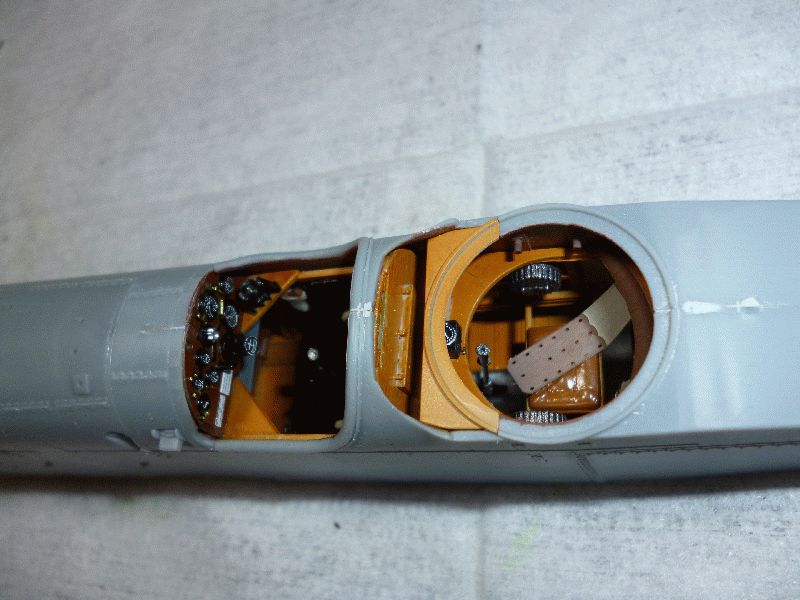
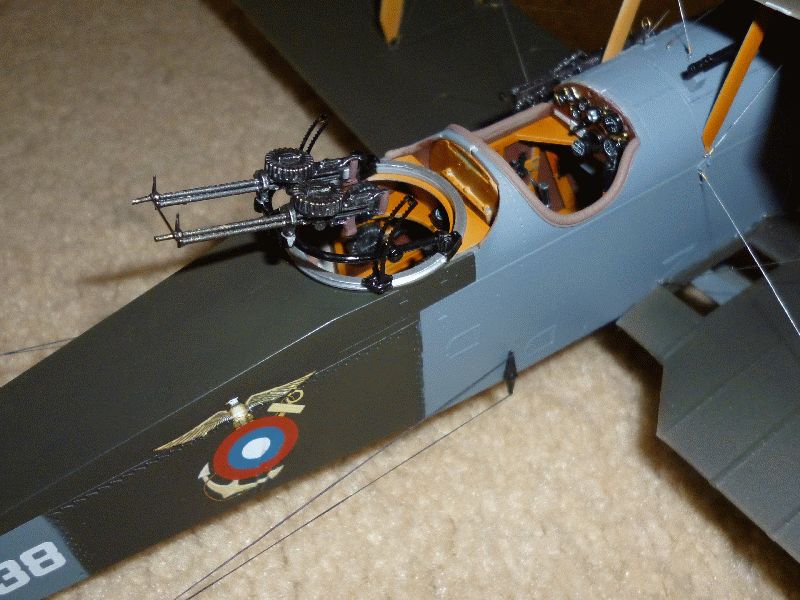
And finally, some more progress on the Ninak...
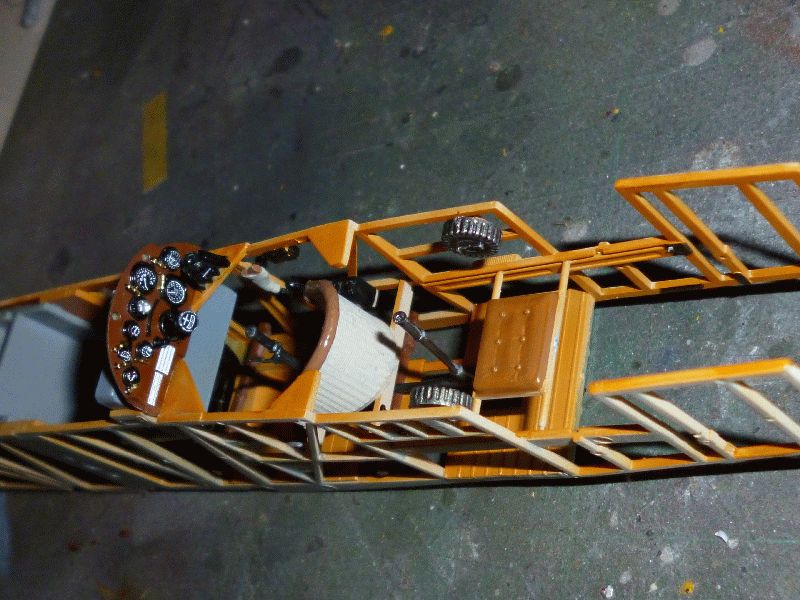
Apart from some touching up that is about the interior finished. Then I just have to get it to fit in the fuselage, but knowing WNW I am sure it will be a breeze! although the Roland wasn't quite as easy.. I actually had to fill some seams with that one!
Cheers
You may be right, I may be crazy.
Texas, United States
Joined: February 01, 2007
KitMaker: 365 posts
AeroScale: 356 posts
Posted: Sunday, August 21, 2011 - 05:19 AM UTC
Warren,
Excellent progress my friend.Thanks for sharing this and all your builds with us.
Highest Regards,
Gregory Jouette

New Jersey, United States
Joined: June 02, 2006
KitMaker: 1,212 posts
AeroScale: 468 posts
Posted: Monday, August 22, 2011 - 05:22 PM UTC
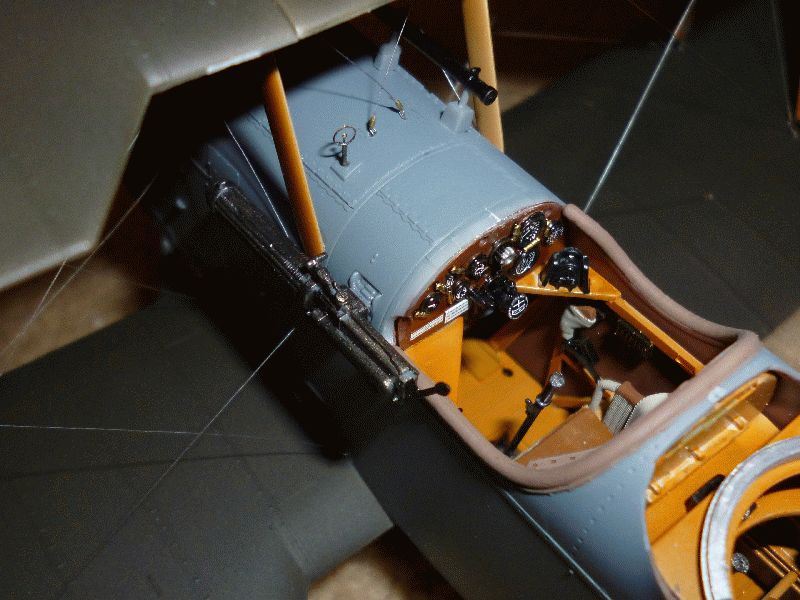
Interior looks great overall but the panel really stands out.
South Australia, Australia
Joined: August 14, 2007
KitMaker: 5,926 posts
AeroScale: 2,201 posts
Posted: Monday, August 22, 2011 - 06:48 PM UTC
Thanks guys. The panel did come out very well. I have come to the opinion that wood graining in these scales is not very realistic. I have looked at many photos of WW1 airceaft, and seen quite a few in the flesh, and from 1/32 scale distances it is very hard to see the grain in the fine-grained wood used in most aircraft. Plywood is a completely different prospect as some has very pronounced wood grain effect you can easily see from scale distances and then there is plywood with hardly any grain visible... All part of the artistic licence of our hobby..
You may be right, I may be crazy.
South Australia, Australia
Joined: August 14, 2007
KitMaker: 5,926 posts
AeroScale: 2,201 posts
Posted: Saturday, August 27, 2011 - 09:12 PM UTC
Greetings from Orstraylia.
Some more progress...
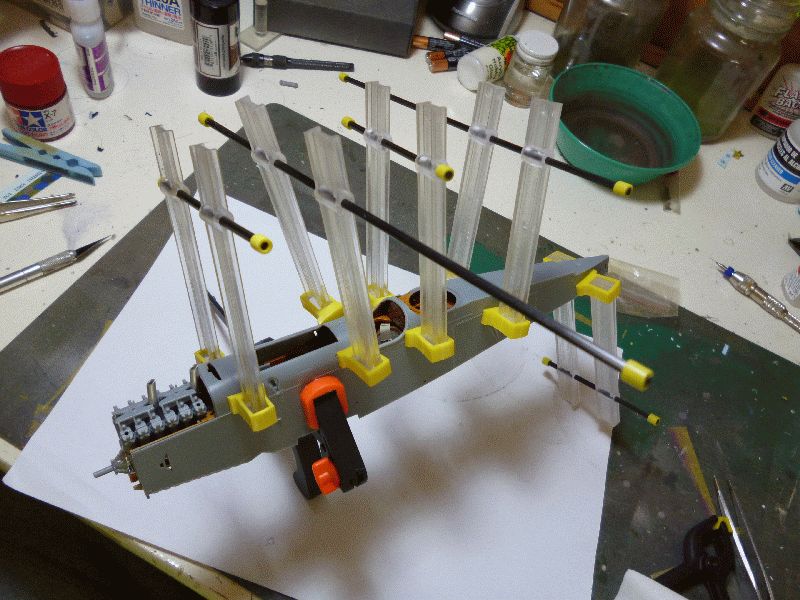
Lucky I bought some extra Burna clamps eh! It is not a reflection on the fit of the kit, which is snap-together in some places, but just wanting to make sure it stays together.
See that little bit of Mr Surface 500.. that is all the fuselage needed. And the panel in the middle forward of the pilot fitted so perfectly it didn't need any glue.
And here is the interior before any final touch-ups are done.
WIll be able to spend lots more time on this one now, but I did start cutting plastic on the RE.8 today by drilling some rigging holes. I think the rigging on the RE.8 is almost as over the top as a DH-2... Gulp...
You may be right, I may be crazy.
Texas, United States
Joined: February 01, 2007
KitMaker: 365 posts
AeroScale: 356 posts
Posted: Sunday, August 28, 2011 - 06:07 AM UTC
Warren,
Wow my friend you do build at a fast clip.The Ninak is really taking shape now,with an outstanding interior to boot.Thanks for such an enjoyable thread,Can't wait to see your next update.
Highest Regards,
Gregory Jouette
PS: I believe your right about the rigging on the RE-8 being very intricate,but in my IHO more so than the DH-2.
New Jersey, United States
Joined: June 02, 2006
KitMaker: 1,212 posts
AeroScale: 468 posts
Posted: Sunday, August 28, 2011 - 09:34 AM UTC
And the machine just keeps running'. And pretty darn smooth I might add.
Dig those clamps. Haven't seen those before but will be soon when I order them.
South Australia, Australia
Joined: August 14, 2007
KitMaker: 5,926 posts
AeroScale: 2,201 posts
Posted: Sunday, August 28, 2011 - 11:12 AM UTC
Thanks Guys!
@ Marc, they are actually Berna clamps. You can get them in three packs or as individual parts. You can actually build your own jigs out of them as the sets come with linking parts to let you join the rods together. The combinations would appear to be limitless and they should be handy for biplanes with less-than-cooperative wings.
I actually did a bit more this morning and glued the various fuel tank addenda and the bottom of the fuselage on. Yet another clamp fest!
You may be right, I may be crazy.
South Australia, Australia
Joined: August 14, 2007
KitMaker: 5,926 posts
AeroScale: 2,201 posts
Posted: Saturday, September 03, 2011 - 09:45 PM UTC
Greetings everyone.
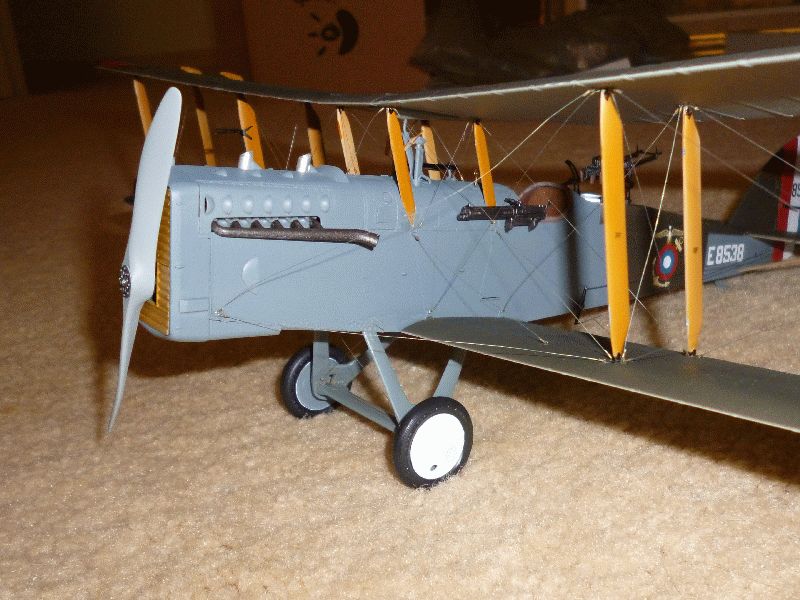
A quick update as the Ninak draws closer to the end.
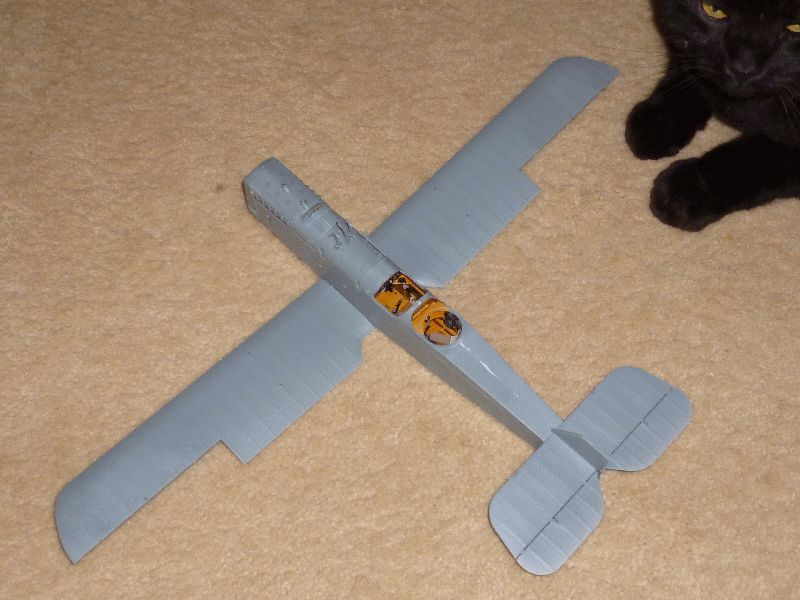
Here she is with the lower wings on ready for some paint before I attach the struts and upper-wing.
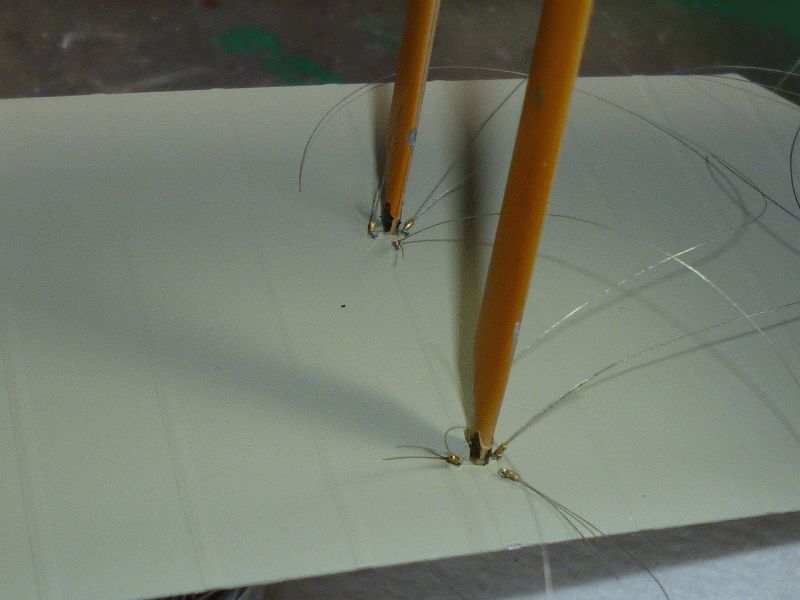
I will put all the eyelets in place before I paint her so there will be no troubles with them coming adrift if the CA Glue is only stuck to paint. When you spray it doesn't clog the eyelets as the paint is so thin.
More news next weekend.
Cheers
Warren
You may be right, I may be crazy.
New Jersey, United States
Joined: June 02, 2006
KitMaker: 1,212 posts
AeroScale: 468 posts
Posted: Sunday, September 04, 2011 - 01:51 AM UTC
WATCH OUT... There is a giant carpet monster coming to steal little parts.
South Australia, Australia
Joined: August 14, 2007
KitMaker: 5,926 posts
AeroScale: 2,201 posts
Posted: Sunday, September 04, 2011 - 07:42 AM UTC
Gordon the cat doesn't show much interest in anything except food and water..
You may be right, I may be crazy.
Västra Götaland, Sweden
Joined: February 19, 2010
KitMaker: 1,473 posts
AeroScale: 1,450 posts
Posted: Monday, September 05, 2011 - 07:40 AM UTC
Nice cat
Like the build too...
_________________________________________________________
Just finished the Wingnut Wings Taube. On to the Junkers D.1
South Australia, Australia
Joined: August 14, 2007
KitMaker: 5,926 posts
AeroScale: 2,201 posts
Posted: Saturday, September 10, 2011 - 10:24 PM UTC
Sorry but the star of the show, Gordon the cat. was away when these photos were taken. He will be in trouble when he gets home as he is supposed to come back for dinner but hasn't. No dinner and straight to bed naughty pussy!
Now back to the Ninak..
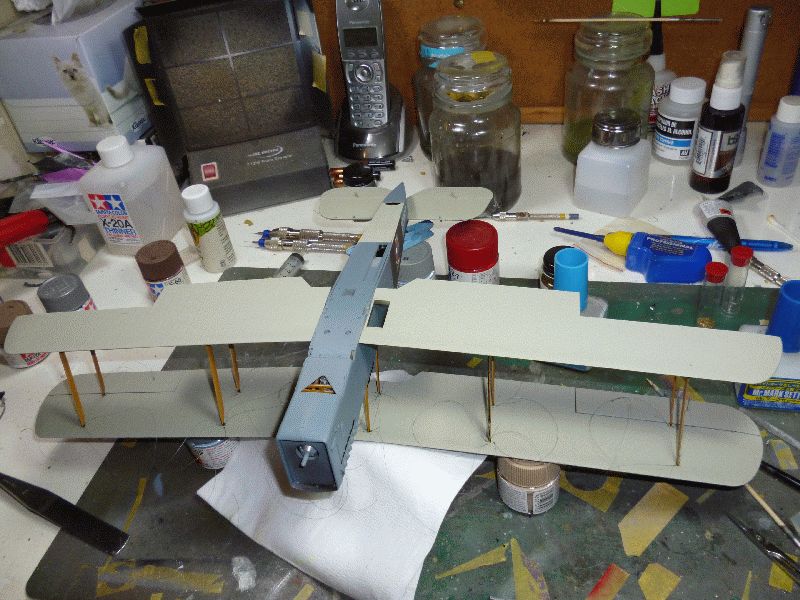
Please excuse the messy workbench, but the top wing is on!! Woohoo!! No need for a box when you have three paint jars and a bottle of liquid cement to support the whole thing.
Wing went on very easily. The only problem was caused by me when I was applying the Extra Thin cement and some of it wicked along one of the wires laying on the wing. Oh well, no harm done.
Painting is complete as is most of the decalling. Didn't want to put the wing decals on until rigging is complete so they do not get damaged when the model is flipped over. A bit of touching up on the struts needed. I painted them on the sprues and haven't got around to touching them up after removing them from said sprues.
And the wires (invisible mending thread painted with Tamiya XF-56 paint pen) need to be trimmed. Will give PVA glue holding the wires until tomorrow to totally cure first.
Thanks for looking..
You may be right, I may be crazy.
Alberta, Canada
Joined: January 19, 2008
KitMaker: 6,743 posts
AeroScale: 6,151 posts
Posted: Sunday, September 11, 2011 - 04:51 AM UTC
Looking nice Warren
Terri
South Australia, Australia
Joined: August 14, 2007
KitMaker: 5,926 posts
AeroScale: 2,201 posts
Posted: Saturday, September 17, 2011 - 09:21 PM UTC
Thanks Terri.
Well, it is all but finished. It is amazing how the last few percent of a build always takes 80% of the time. well with me anyway.
Most of the rigging is done. Most of it pretty straight forward although there are a few unusual wires.
Decals were fine except I found a few air bubbles under large roundels which I removed with a #11 knife slit and a little Mr Setter. As usual the white was impossible to brush and I ended up spraying the wheel covers. Hmm.. that wire in the foreground needs some tensioning. A little heat should fix it right up.
Some machine guns, a few more wires around the empennage and trimming that wire right across the whole plane in the picture (!!) and I will be calling it quits for a week or two as I am off to the big race at Bathurst. People in the USA will be able to see the greatest race on earth on Speed channel. Don't miss it!!
You may be right, I may be crazy.
South Australia, Australia
Joined: August 14, 2007
KitMaker: 5,926 posts
AeroScale: 2,201 posts
Posted: Saturday, September 24, 2011 - 04:37 PM UTC
Hi Everyone.
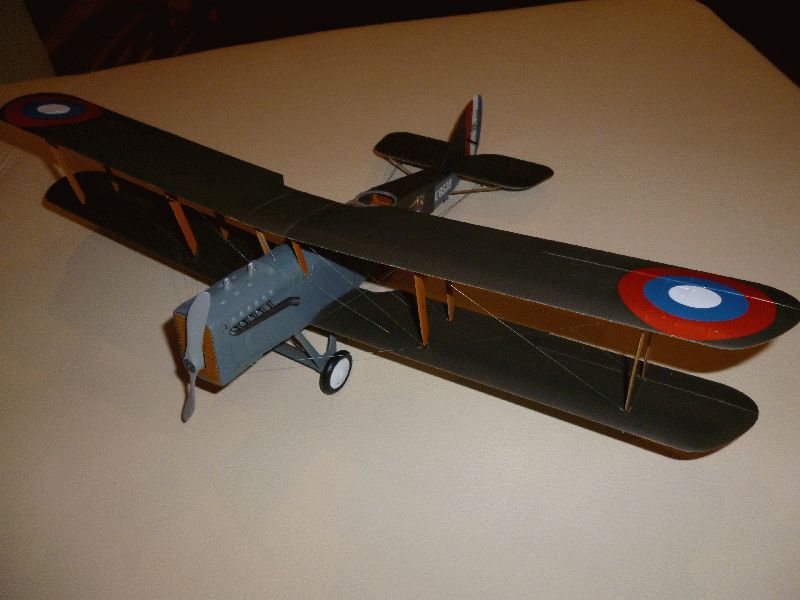
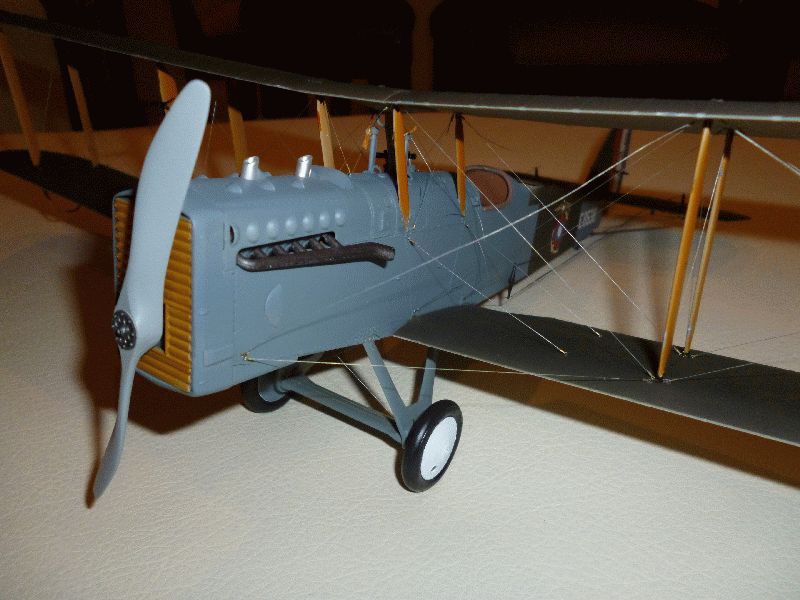
BG seems to have slowed down somewhat so here is the finished Ninak, warts and all..
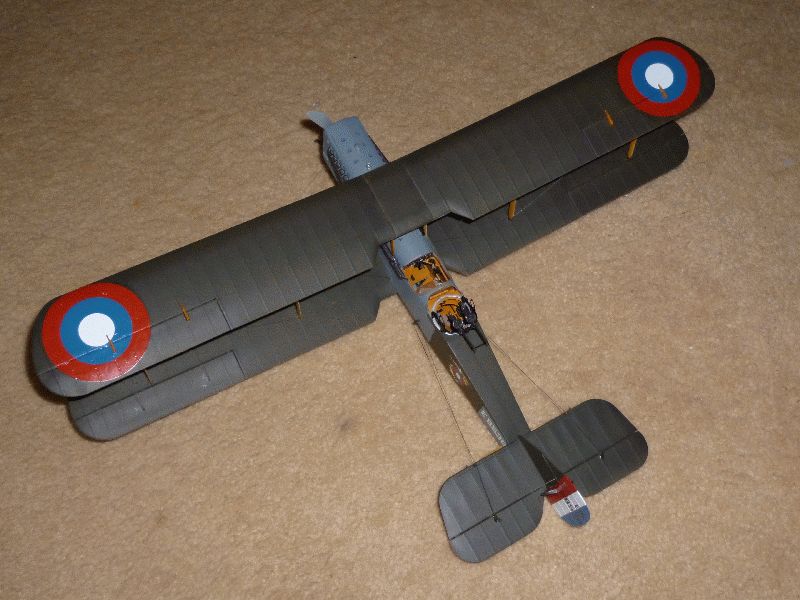
First an overhead shot showing the American cockaids...
I thought the twin machine guns would be a bit fiddly but they went together with no trouble at all. First wart, I forgot to paint the gun hand grips with a little clear to give the XF-68 some depth. Will add it to my list.

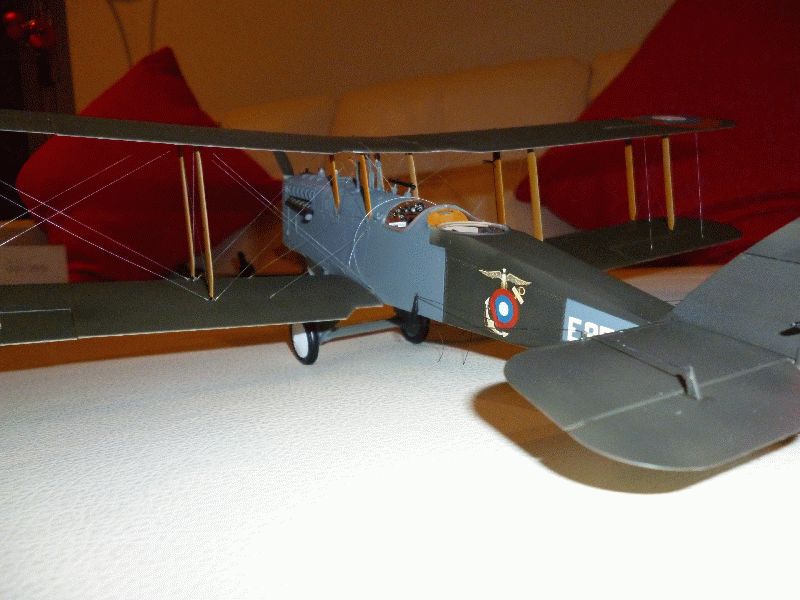
The tail. Warts 2 and 3. I forgot to touch up the rudder, and as I missed it before I got right to the end of the build I didn't drill out the slots for the rudder control wires. Will do that a little later.
Wart 4. Looks like I didn't line up the target site perfectly... sigh.. and
I knocked that wire just before I took the picture. Waiting for the return of my soldering iron before I tighten it up. Flash seems to have washed out the picture in a few places. Oh well.
I am calling this one finished for the moment. I may replace those forward wires with EZ Line if I can find some that is of uniform diameter. Mine seems all over the place, and that is with two reels.
Thanks for looking.
You may be right, I may be crazy.


