_GOTOBOTTOM
Early Aviation
Discuss World War I and the early years of aviation thru 1934.
1:48 Fokker D.III conversion
BradCancian
_VISITCOMMUNITY
Queensland, Australia
Joined: August 30, 2006
KitMaker: 285 posts
AeroScale: 281 posts
Posted: Tuesday, August 16, 2011 - 07:53 PM UTC
Hi all,

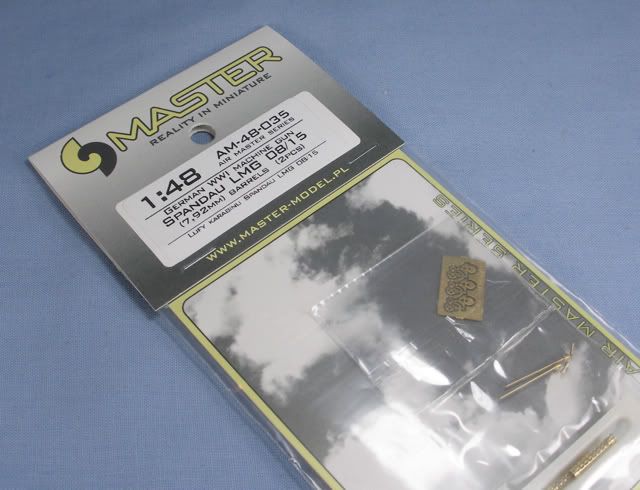
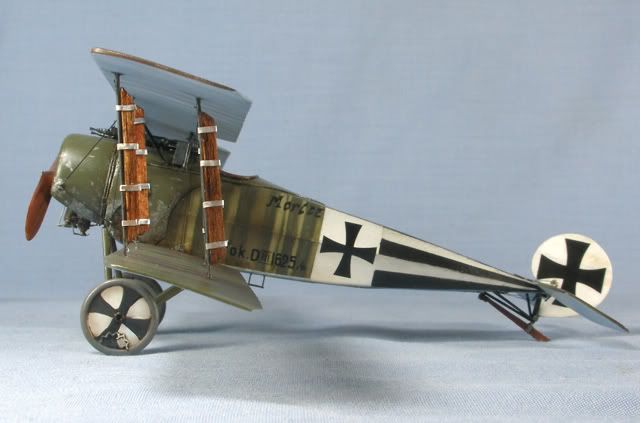
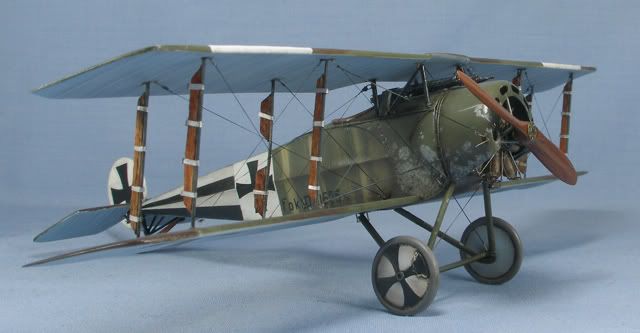
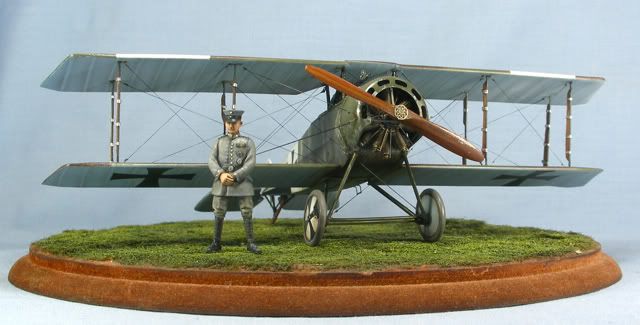
It has been quite a while since I was last at the bench. In the last couple of days I have been playing with converting the Special Hobby 1:48 Fokker B.II into a D.III. This kit contains most of the parts for their Fokker D.II kit, including the longer wings and extra struts. The main differences between the D.II and D.III is the 14-cylinder twin row rotary engine in the D.III and associated longer cowl, the extra Spandau machine gun, and the different undercarriage configuration. The early D-series Fokkers have always intrigued me as they are essentially a biplane version of the famous E-type monoplanes, but retaining the old technology like wing-warping (except for some of the later versions which had ailerons). They weren't very successful due to the extra weight, poor maneuverability (think big rotary engine and no ailerons), and sluggish performance. Though notably, Boelcke scored a number of victories in a D.III.

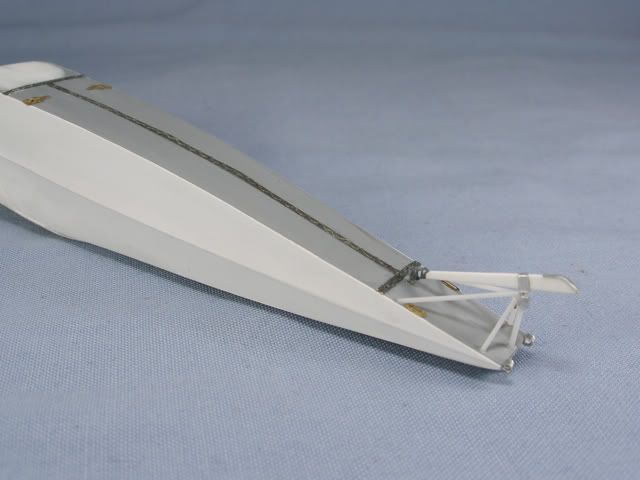
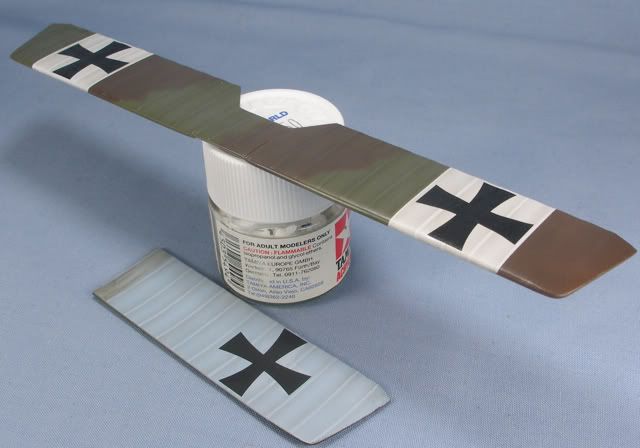
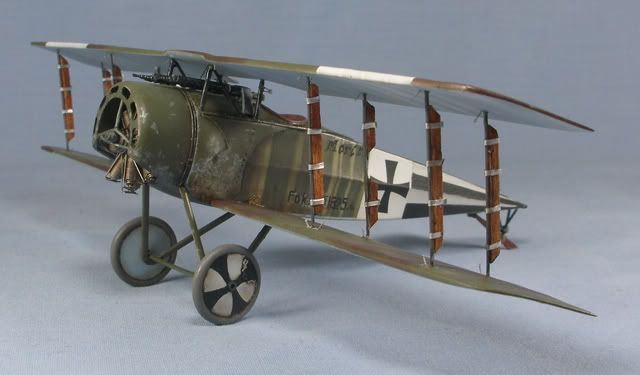
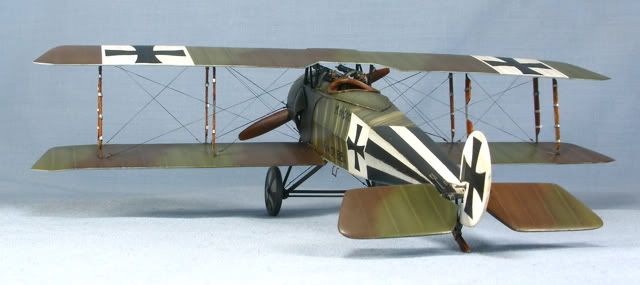
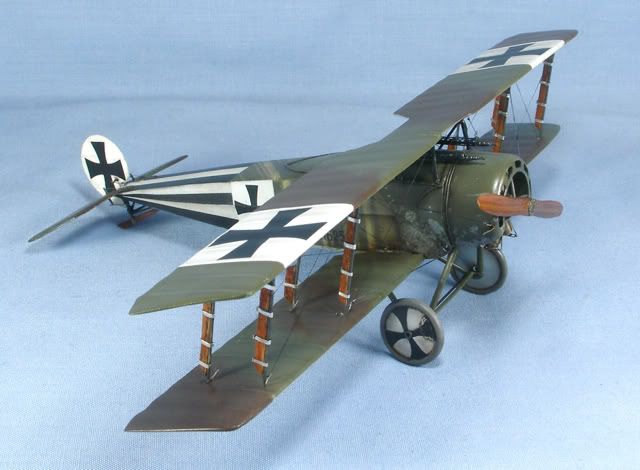
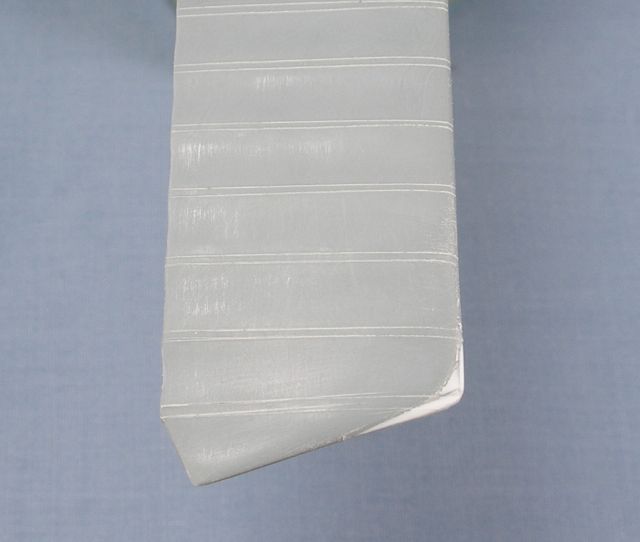
The special hobby kit has some shortcomings in shape for even the D.II. I had to add some section onto the wing tips to square them off and make them the right shape. I also re-scribed all of the rib-tapes.


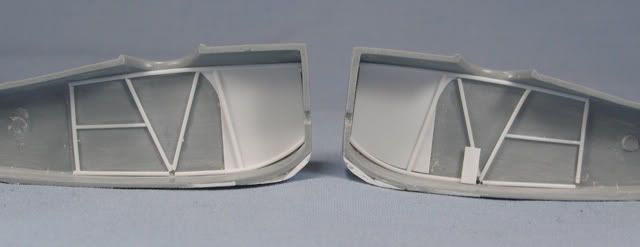
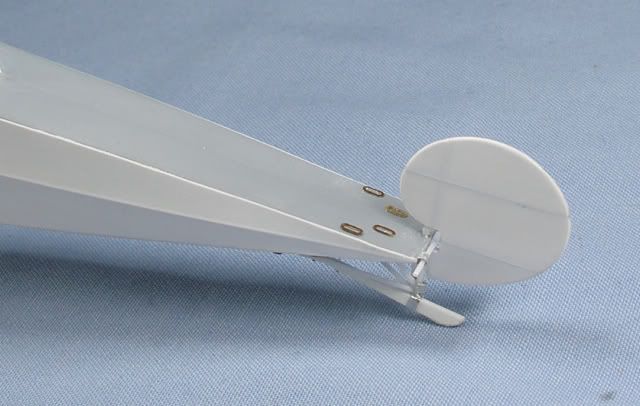
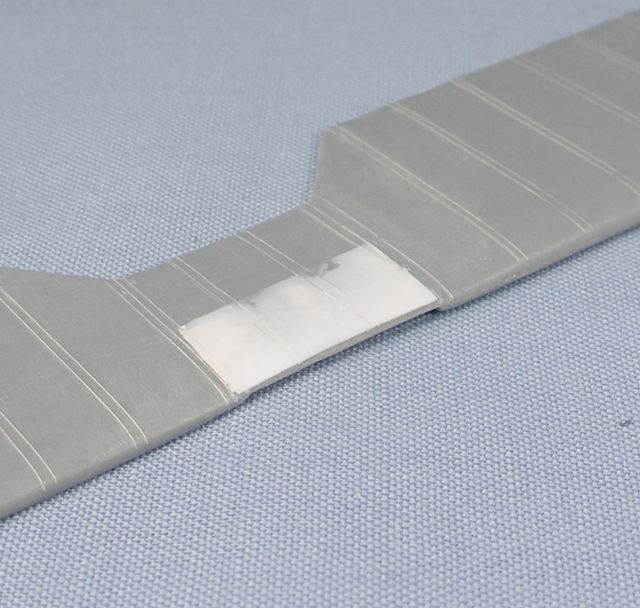
The centre section of the D.II wings is also incorrect for both the D.II and D.III variants. There was a characteristic "scoop" kind of shape to the centre section (they actually got this right for the B.II wings in the kit). So using a file I hollowed out the relevant part of the centre-section underside (to create the "inside" of the channel) and added some sheet plastic to the top (to create the "outside" of the channel and raise it above the rest of the wing section), then sanded it smooth.


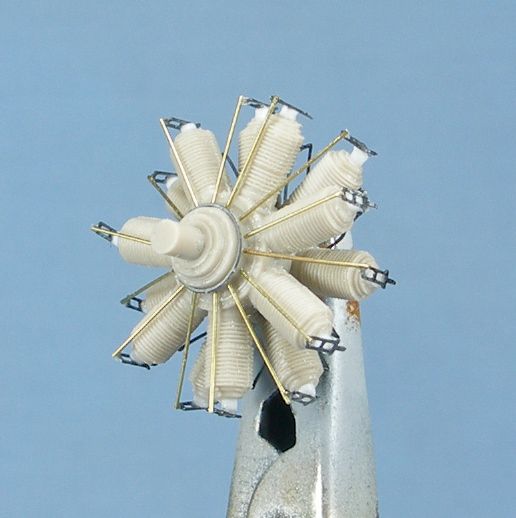
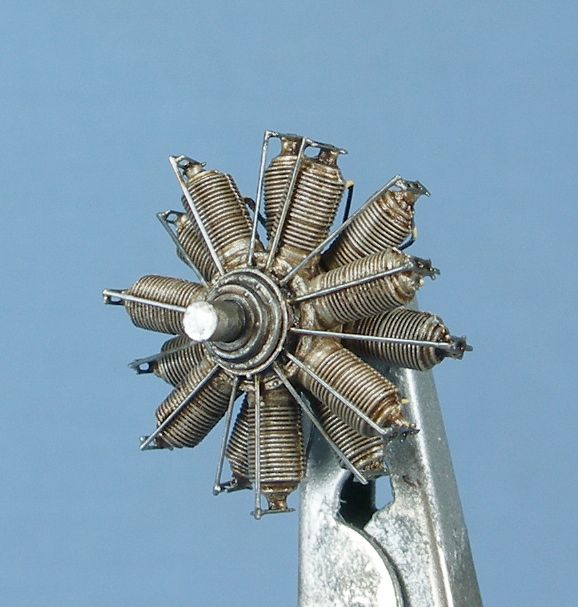
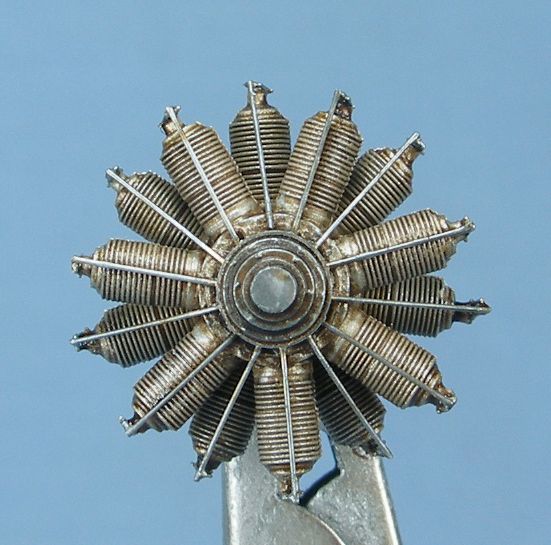
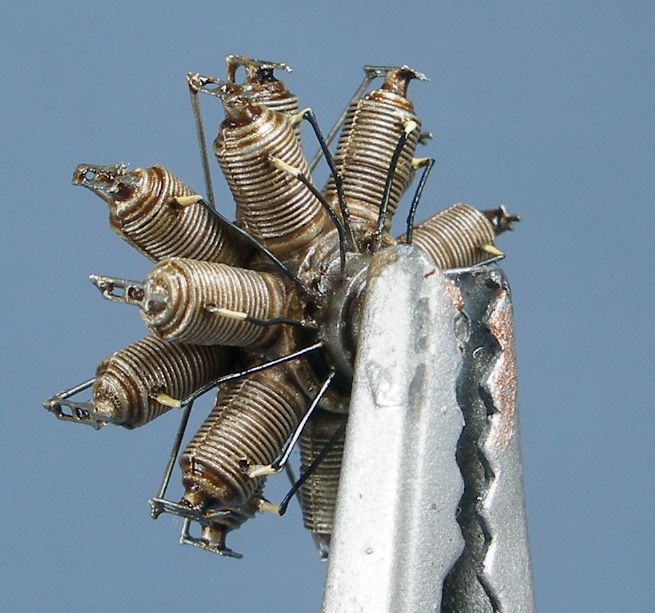
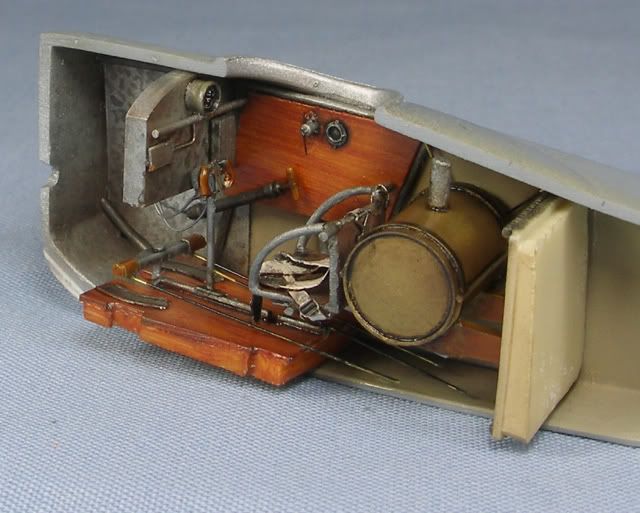
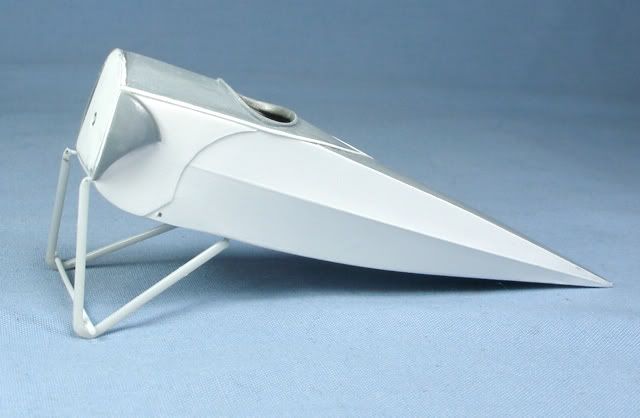
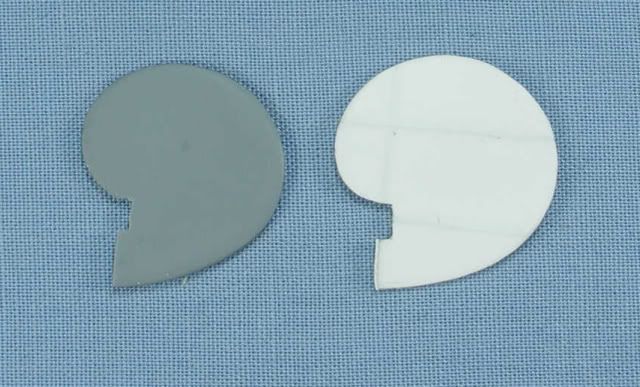
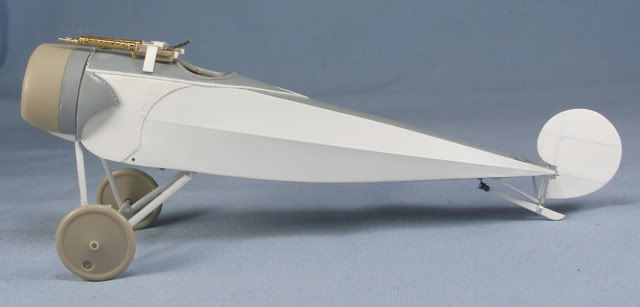
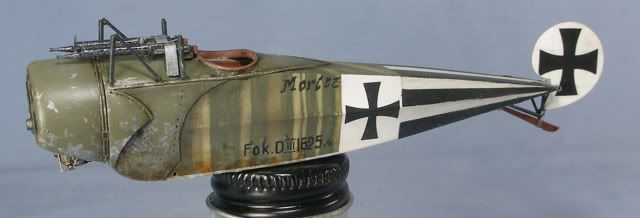
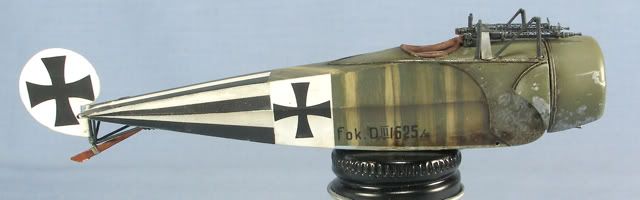
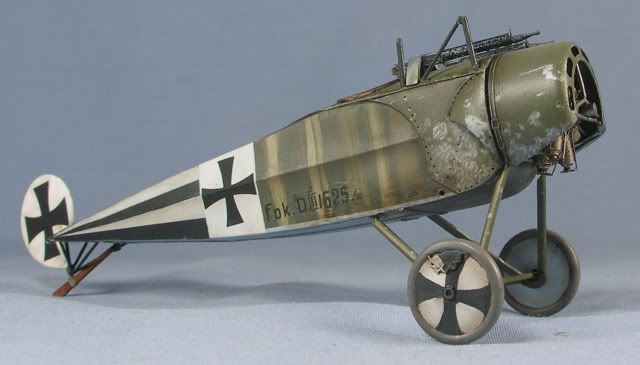
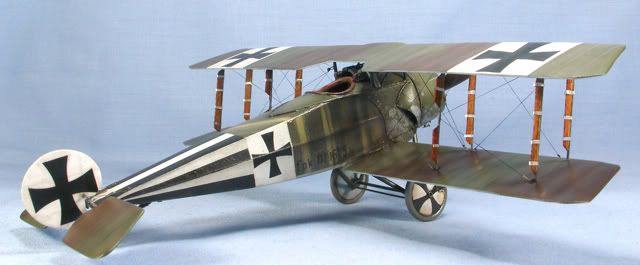
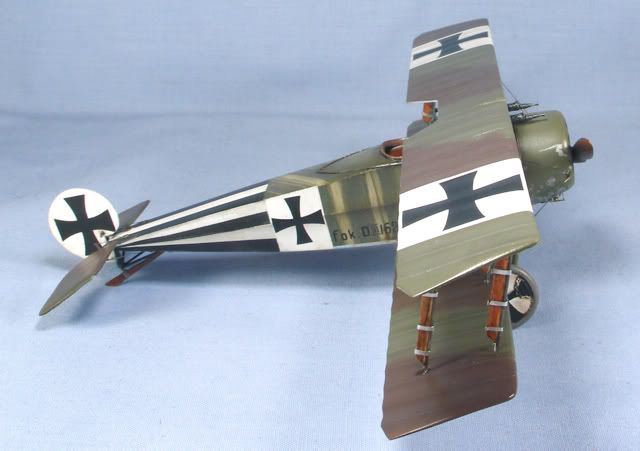
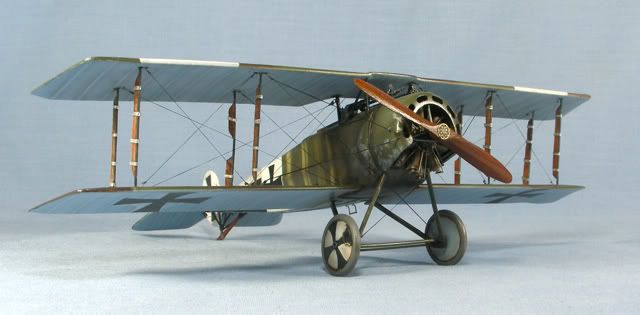
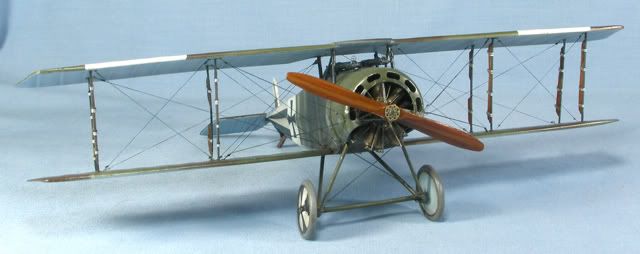
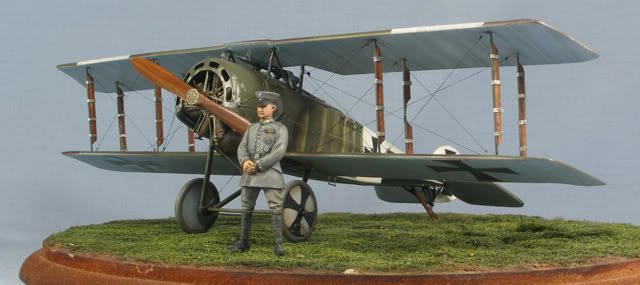
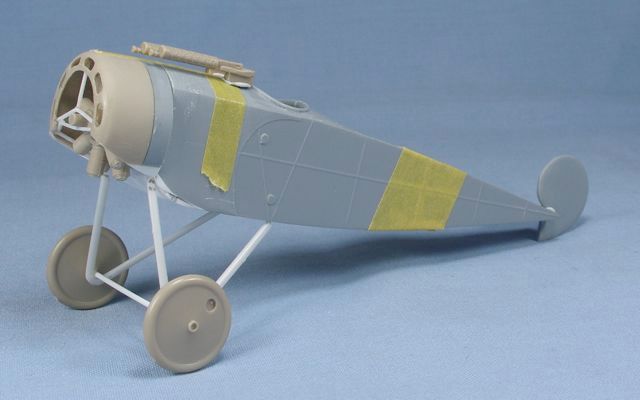
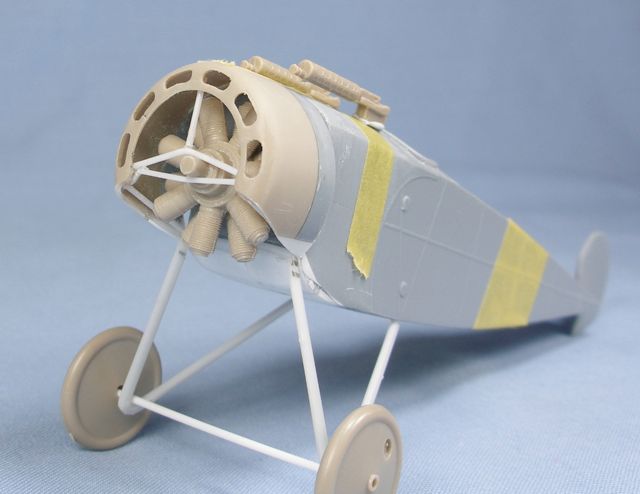
The wings were then done for all intents and purposes. Next came the engine and cowling. The cowling on the D.III was extended, the lower lip was at an angle from profile view, and cooling vents were cut in the front, like the Fokker E.IV cowl. I used the front cowl out of the Eduard Fokker E.III kit (which has a spare cowl with the cooling vents), and spliced this into the kit cowl. I also added some sheet to the lower "cheeks" of the cowl to get the angle correct for the DIII cowl. I also added some structure into the cowl (this structure was used to support the front end of the heavier twin-row rotary in the D.III). The rotary engine itself was made from two 7-cylinder rotaries, again from the Eduard Fokker E.III kit (two of them), and was done like the real thing by connecting two of them front to back (or back to back in my case - there is no aesthetic difference). I haven't detailed the engine in any way yet but am using it to get the cowl dimensions right. Then came some modifications to the front of the fuselage - namely shortening the nose slightly aft of the firewall, and adding more depth to the cheek cowls to match up with the deeper cowling. I also managed to scratch together some undercarriage legs from some old Eduard Pfalz D.III legs cut to size.


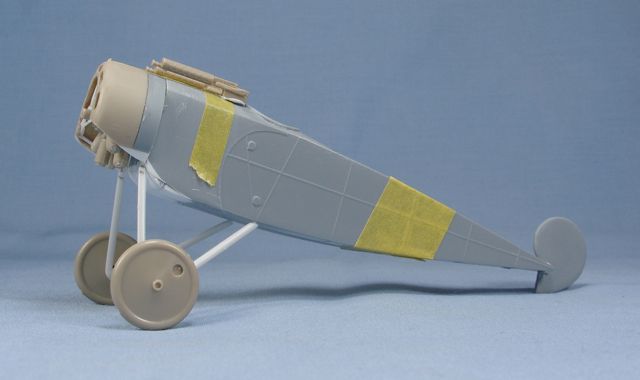
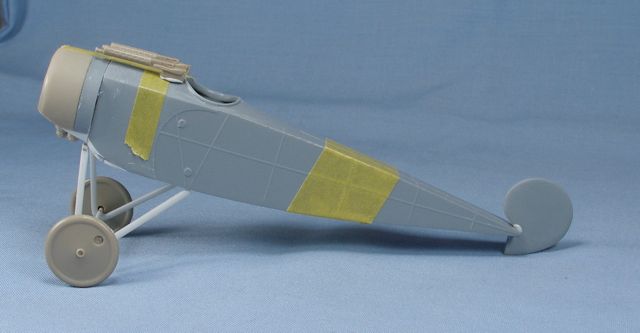
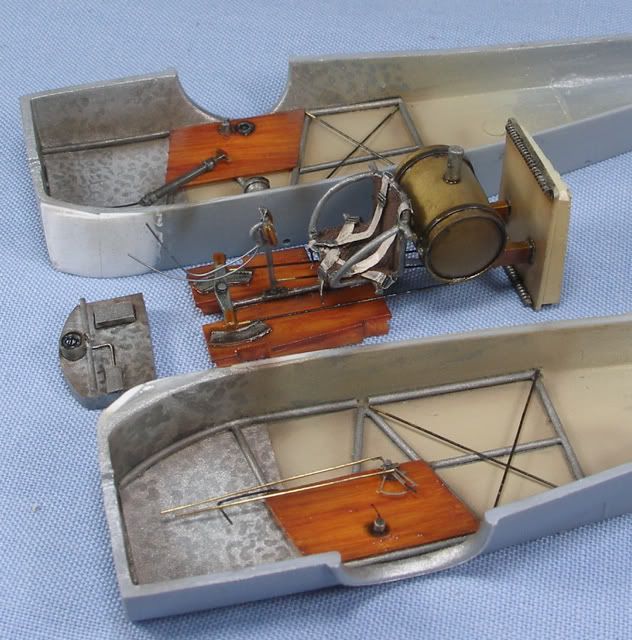
So, this is the bulk of the tricky bits of the mod done (though it is quite an easy mod to do). I am still yet to clean up the raised ribs on the fuselage but will do this once I build the interior and close the fuselage halves. Next is onto some details...

Comments and feedback always welcome!

BC
JackFlash
_VISITCOMMUNITY
Colorado, United States
Joined: January 25, 2004
KitMaker: 11,669 posts
AeroScale: 11,011 posts
Posted: Tuesday, August 16, 2011 - 09:33 PM UTC
Interesting work Brad! Very glad to see you at it again. we always enjoy your builds.
dolly15
_VISITCOMMUNITY
Quebec, Canada
Joined: May 20, 2004
KitMaker: 8,227 posts
AeroScale: 3,915 posts
Posted: Wednesday, August 17, 2011 - 04:58 AM UTC
Love it ! the scale,the conversion.Cool stuff.
BradCancian
_VISITCOMMUNITY
Queensland, Australia
Joined: August 30, 2006
KitMaker: 285 posts
AeroScale: 281 posts
Posted: Friday, August 19, 2011 - 05:07 PM UTC
Engine is now done.


modulla
_VISITCOMMUNITY
United Kingdom
Joined: July 13, 2008
KitMaker: 72 posts
AeroScale: 71 posts
Posted: Friday, August 19, 2011 - 07:42 PM UTC
Excellent work! But will the engine fit inside the cowl? I always have difficulty with that - a 1/48 cowl that is 0.5 mm thick scales up to 24 mm thick on a full-size plane, which rather squeezes the available space. To put it another way, a true-scale 1/48 cowl should be no more than 0.04 mm thick. How do you handle this?

Model on

Clive Mason
BradCancian
_VISITCOMMUNITY
Queensland, Australia
Joined: August 30, 2006
KitMaker: 285 posts
AeroScale: 281 posts
Posted: Friday, August 19, 2011 - 11:07 PM UTC
Hi Clive - there is no exact science, it's really a case of dry-fitting and knowing how much of a margin you have with the diameters of the inner cowl and the engine. In this case, there was around 2mm clearance around the edges of the cylinders (without the bits and bobs on the tops) so I knew what I had to play with when adding the details. The cowl itself is also on the thick side so I had some to play with should the engine be slighty too wide.

It's nothing but trial and error

Cheers,

BC
thegirl
_VISITCOMMUNITY
Alberta, Canada
Joined: January 19, 2008
KitMaker: 6,743 posts
AeroScale: 6,151 posts
Posted: Saturday, August 20, 2011 - 03:31 AM UTC
Two thumbs up Brad
dolly15
_VISITCOMMUNITY
Quebec, Canada
Joined: May 20, 2004
KitMaker: 8,227 posts
AeroScale: 3,915 posts
Posted: Tuesday, August 23, 2011 - 01:04 AM UTC
Wow ! nice work.
BradCancian
_VISITCOMMUNITY
Queensland, Australia
Joined: August 30, 2006
KitMaker: 285 posts
AeroScale: 281 posts
Posted: Saturday, October 01, 2011 - 10:27 PM UTC
FINALLY an update on this one :-[ .... sporadic burst at the work bench between actual work has led me to finally finish the cockpit. I didn't really do anything special here, mainly in the interests of progressing (that and I didn't have any references for the cockpit). I essentially followed the Special Hobby instructions here and used their parts (including the strange seat), though I did replace the side-walls as these were way too thick and didn't fit. Anyways, not too much is visible with the fuselage halves together, so that makes up for my poor painting!


The fuselage halves went together next. I did have to do some extra work though for the D.III conversion - in photos of the real D.III, there is a prominent "rib" line down the length of the fuselage, which was probably due to the fabric on the real thing being pulled over a rib / tube that ran outside the length of the fuselage. The Special Hobby D.II has a flat sided fuselage, so it is not accurate for a D.III. I thought about replicating this with shading on the final paint scheme, but this wouldn't really be satisfactory when the model is in different lighting. So I bit the bullet and re-skinned the fuselage sides, embossing the inside surface with a pencil to give the rib effect. The lighting in the below photo over-emphasises the effect, but you get the idea


Next, I scratch built a tail skid:


Next up, I scratch built a new rudder as the kit rudder was too small. I embossed the plastic similar to what I did for the fuselage, and made the rudder from three sheets thin plastic:


Next I tackled the guns, using these for the first time:


They come with pre-rolled barrels, and some beautifully detailed muzzles. All I can say is that they make the usually tedious task of putting Spandau's together a relative breeze...


I also shortened the undercarriage legs - I think I had them a bit too long to start with.


Next, I think I will scratch-build some wing struts...

BC
JackFlash
_VISITCOMMUNITY
Colorado, United States
Joined: January 25, 2004
KitMaker: 11,669 posts
AeroScale: 11,011 posts
Posted: Sunday, October 02, 2011 - 12:53 PM UTC
Hey Brad,

The Spandau cocking handles and front supports under the fretted jackets have to make me ask. . .?
BradCancian
_VISITCOMMUNITY
Queensland, Australia
Joined: August 30, 2006
KitMaker: 285 posts
AeroScale: 281 posts
Posted: Sunday, October 02, 2011 - 01:11 PM UTC
I just read your other thread on the handles - looks like every other kit I have made of this era of the war is now wrong I will remove the handles - easy done. As for the front supports, well.....
Roxter
_VISITCOMMUNITY
Rigas, Latvia
Joined: July 04, 2007
KitMaker: 268 posts
AeroScale: 245 posts
Posted: Thursday, October 20, 2011 - 02:54 AM UTC
Brad, looks just awesome! As always actually..

Brad, could you please advice what Evergreen (or other brand) plastic rods and sheets do you use for scratchbuilding? Thank you and I look forward to learn more from your in-progress builds.
rochaped
_VISITCOMMUNITY
Lisboa, Portugal
Joined: August 27, 2010
KitMaker: 679 posts
AeroScale: 669 posts
Posted: Thursday, October 20, 2011 - 01:00 PM UTC
Hi Brad,

Lovely work so far, expertly made namely those scratch parts.
In my humble opinion your painting techniques are more than a match to most, and I particulary enjoyed those wooden effects on the cockpit. May I ask what's your approach to deliver such fine results?

Best
Pedro
thehannaman
_VISITCOMMUNITY
New York, United States
Joined: April 04, 2006
KitMaker: 279 posts
AeroScale: 194 posts
Posted: Friday, October 21, 2011 - 04:34 AM UTC
Jaw-dropping work as usual, Brad. The building is great, but the paint-work is out of this world. I love the aluminum in the cockpit. I searched a few of your other threads but couldn't find your technique. How do you get that machined sworl look, oils?
BradCancian
_VISITCOMMUNITY
Queensland, Australia
Joined: August 30, 2006
KitMaker: 285 posts
AeroScale: 281 posts
Posted: Saturday, October 29, 2011 - 11:08 PM UTC
Thanks guys!

To answer some of your questions -

The styrene I use is evergreen. Always easy to use. The wood grain is done by streaking oil paints (usually a mix of burnt sienna, yellow ochre, and black), slightly thinned, over a buff base. I then go around the edges of the panels with some airbrushed Tamiya "smoke" - I find this helps to make the wood look "aged". As for the turned aluminum panels, well, these were painted with a brush. I am really not overly happy with it, but I have tried a few different ways and am still looking for the best way to do this.... anyone have any tips?

Anyways, she has some paint on her now. Not my best paint job, I must admit.... anyway, I decided to paint her in the markings of a D.III of Kesta 4, likely early 1917. From the photo I have, which shows a line up of these aircraft, a number of the D.IIIs look like they sported Fokker streaked camo on their fuselages, so I thought I would give this a go. The machine I chose to model is partially obscured in the line up, so I don't know the serial numbers, but I went with a random serial number from the third production batch of D.IIIs - this is pieced together from decals from the spares box. I could also see a name on the upper fuselage (common practice with this unit at this time), which I interpreted to read "Moritz", though it is hard to say from the photograph. It was hand painted (I only painted it on one side, as it was painful enough doing it once, and I only had a photo of this side of the aircraft so it could have been like that...) I went for moderate weathering - these aircraft seemed to lose the paint from their cowlings in a light breeze... Anyways, here are some pics with a few bits and pieces dry-fitted together.


Next, to scratch build some wing struts...

BC
USCHIvdROSTEN
_VISITCOMMUNITY
Bayern, Germany
Joined: December 11, 2010
KitMaker: 64 posts
AeroScale: 57 posts
Posted: Sunday, October 30, 2011 - 03:31 AM UTC
I´m a fan of your work, mate! Most inspiring!
Thanks for sharing!
thehannaman
_VISITCOMMUNITY
New York, United States
Joined: April 04, 2006
KitMaker: 279 posts
AeroScale: 194 posts
Posted: Sunday, October 30, 2011 - 07:48 AM UTC
Again, amazing paintwork!
lcarroll
_VISITCOMMUNITY
Alberta, Canada
Joined: July 26, 2010
KitMaker: 1,032 posts
AeroScale: 1,025 posts
Posted: Sunday, October 30, 2011 - 08:05 AM UTC
Brad,
As always, the quality of your work astounds me, very nice and thanks for sharing with us. The chipping is really nicely done and adds a lot to the overall impression.

Cheers,
Lance
JackFlash
_VISITCOMMUNITY
Colorado, United States
Joined: January 25, 2004
KitMaker: 11,669 posts
AeroScale: 11,011 posts
Posted: Sunday, October 30, 2011 - 11:14 AM UTC
Another show stopper Brad!
Rotebaron
_VISITCOMMUNITY
Jalisco, Mexico
Joined: August 10, 2010
KitMaker: 182 posts
AeroScale: 179 posts
Posted: Sunday, October 30, 2011 - 01:35 PM UTC
WOW!!! nice convertion, the details are superb!!!
the_kid
_VISITCOMMUNITY
United States
Joined: October 21, 2011
KitMaker: 5 posts
AeroScale: 4 posts
Posted: Sunday, October 30, 2011 - 02:09 PM UTC
haha great work as always!
OEFFAG_153
_VISITCOMMUNITY
Västra Götaland, Sweden
Joined: February 19, 2010
KitMaker: 1,473 posts
AeroScale: 1,450 posts
Posted: Monday, October 31, 2011 - 12:42 AM UTC
That is just beautiful!!!

Mikael
BradCancian
_VISITCOMMUNITY
Queensland, Australia
Joined: August 30, 2006
KitMaker: 285 posts
AeroScale: 281 posts
Posted: Tuesday, November 01, 2011 - 12:04 AM UTC
Thanks for the very kind words folks!

She now has some wings care of some scratchbuilt wing struts made of plastic rod, balsa wood and thin foil (which look awful in closeup photos...ungh...)


Time for some rigging....!

BC
Louis
_VISITCOMMUNITY
Bas-Rhin, France
Joined: May 21, 2006
KitMaker: 472 posts
AeroScale: 471 posts
Posted: Wednesday, November 02, 2011 - 09:25 AM UTC
Very very beautiful!!!
BradCancian
_VISITCOMMUNITY
Queensland, Australia
Joined: August 30, 2006
KitMaker: 285 posts
AeroScale: 281 posts
Posted: Friday, November 04, 2011 - 11:41 PM UTC
She's done


Comments, criticisms and feedback always welcomed!

Cheers,

BC
 _GOTOTOP