1/72 VF-2 F-14D "Bombcat"
Stockholm, Sweden
Joined: May 02, 2006
KitMaker: 1,953 posts
AeroScale: 1,902 posts
Posted: Wednesday, August 17, 2011 - 08:08 AM UTC
This blog is a bit of a late starter, I have been working on and off on this model since March. Not to mention that it was partially started a few years ago but that didn't go beyond glueing a few cockpit parts together

!
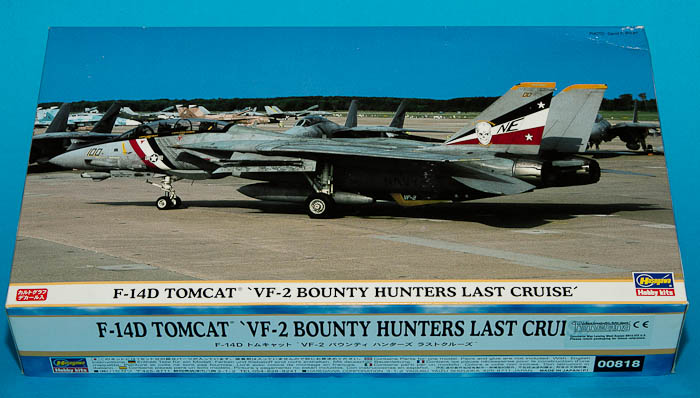
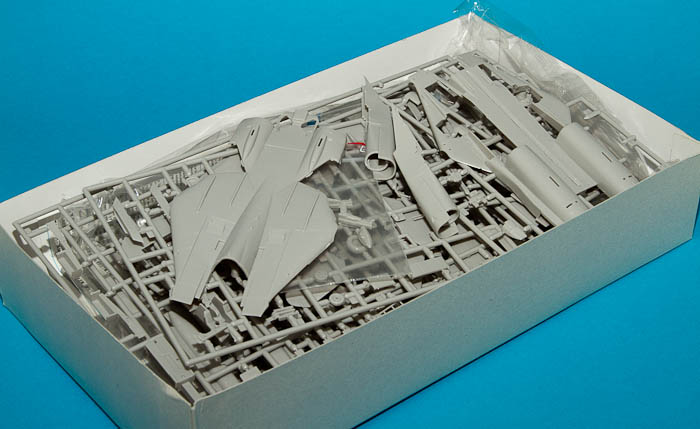
The kit! Another one of Hasegawa's 50+ boxings since 1987 or so of their excellent Tomcat kit. Almost 200 parts, that's a LOT for a 1/72 kit!
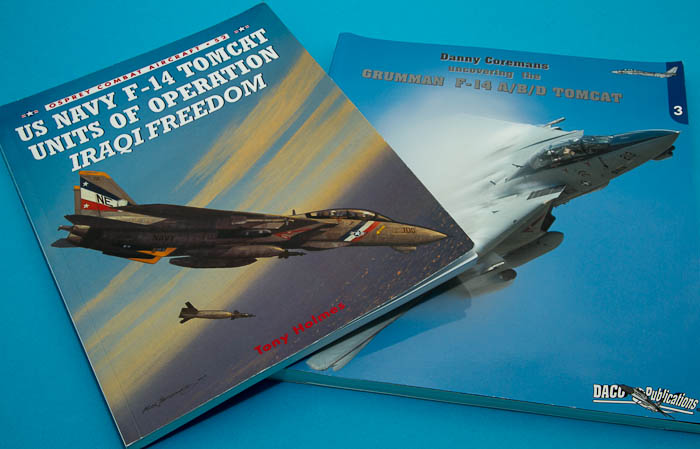
References... The Daco-book is excellent while the Osprey book provides quite a lot of useful information for a VF-2 bird. My chosen load option was found in this book.
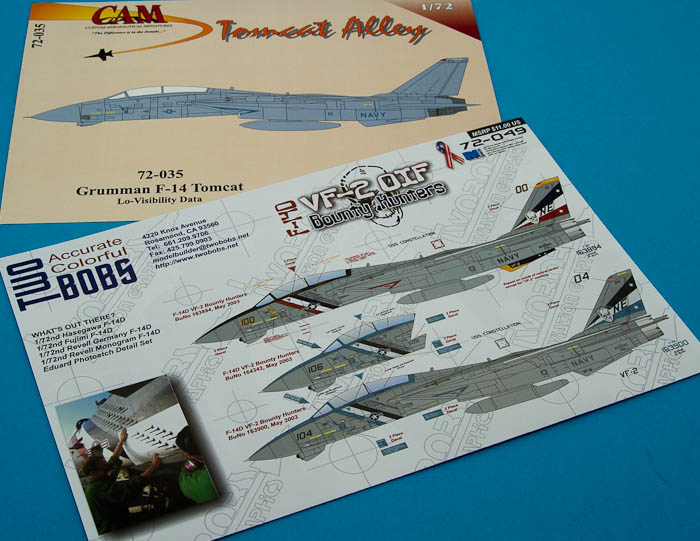
Decals. The same decals as in the kit but these are from TwoBobs and are printed by Microscale. Add a zillion of stencils from CAM and suddenly you have the stuff that nightmares are made of
!
The state of affairs on March 3, A.D. 2011!
I've done a
Tomcat earlier, some of the knowledge from that build might come in handy here!

Magnus
Press banner to the right to follow my trail to the new forums!
Stockholm, Sweden
Joined: May 02, 2006
KitMaker: 1,953 posts
AeroScale: 1,902 posts
Posted: Wednesday, August 17, 2011 - 08:23 AM UTC
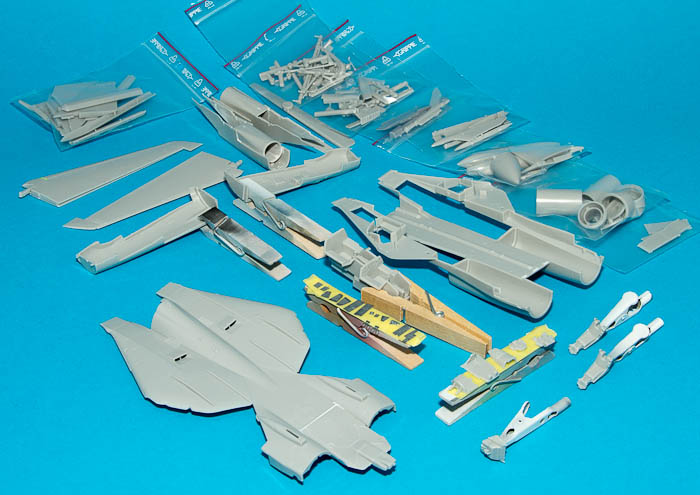
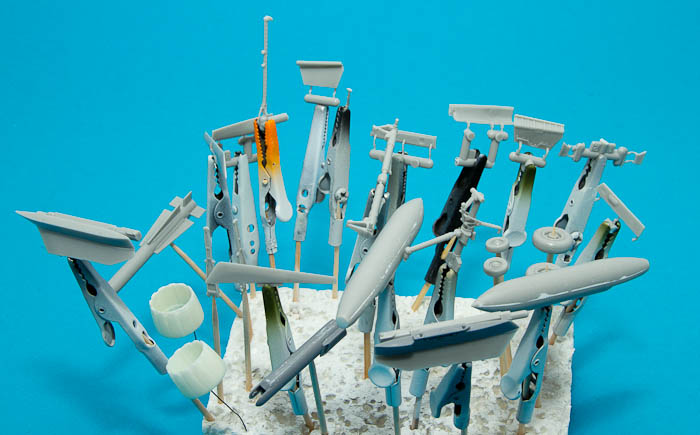
Lots of parts to clean up!
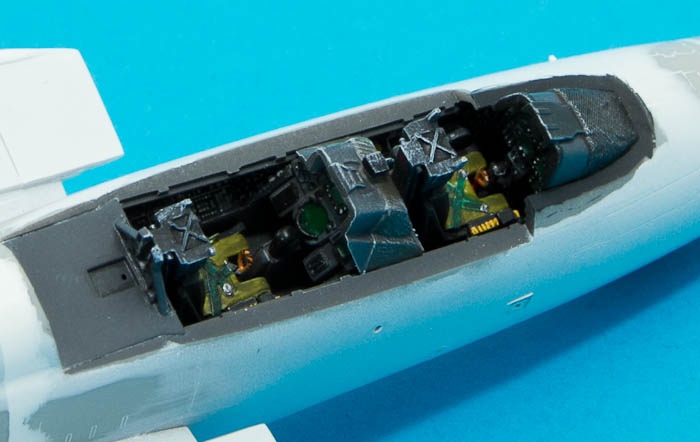
Interior parts primed...

...painted...
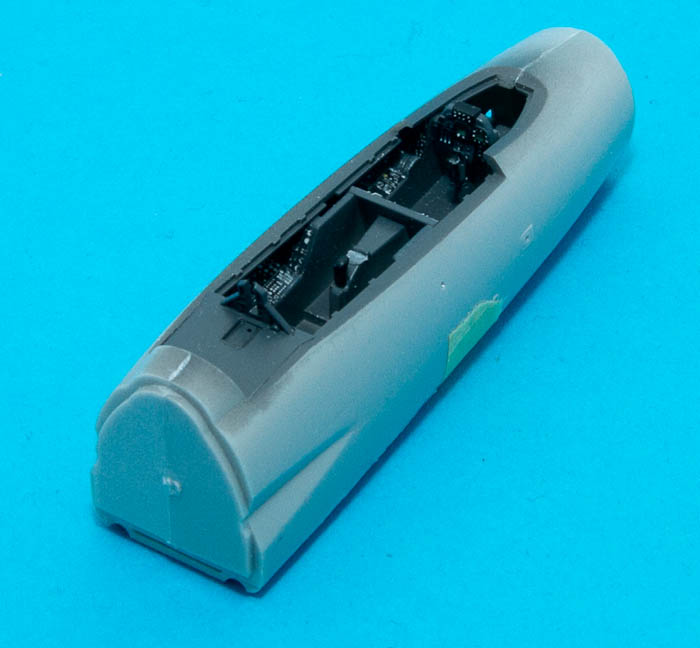
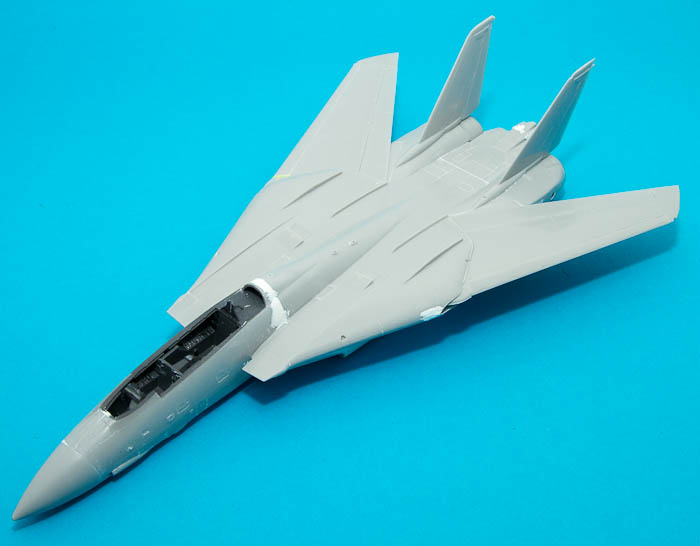
...and safely installed into the front fuselage!
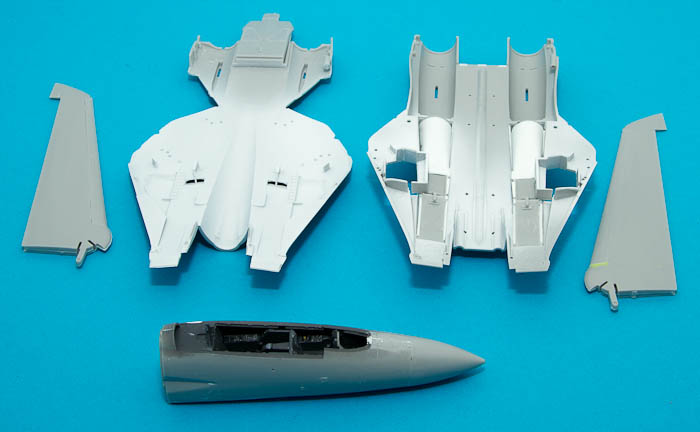
A few of the major sub-assemblies! Intakes have been installed in the lower fuselage half. They are rather troublesome, both sanding them smooth internally and getting them to fit is tricky.
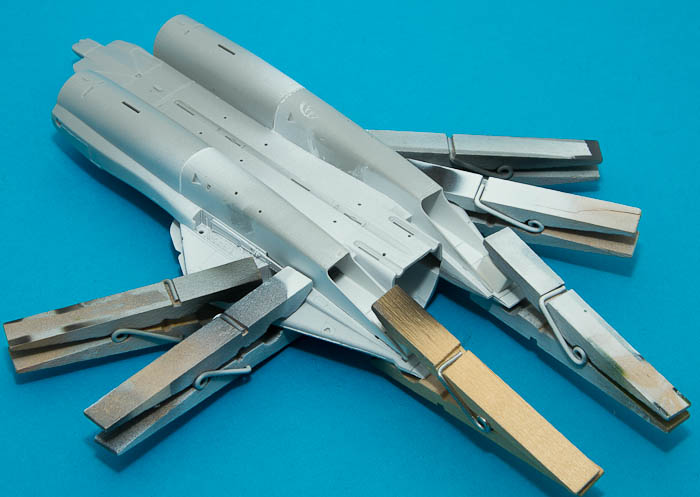
Fuselage halves buttoned up...
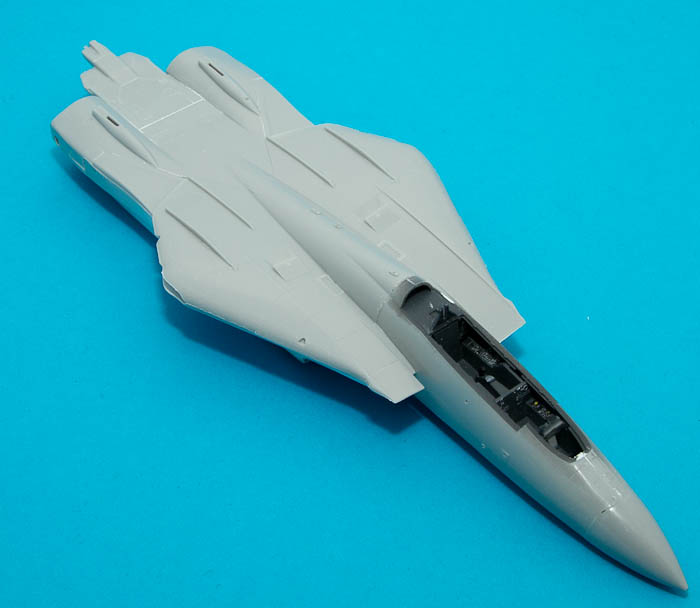
...and the cockpit section has been attached. On my
earlier build I had to adjust the fuselage for straightness at this joint and ended up with a major gap. That kit was from 1989 and the moulds have obviously been adjusted since then. Not that I achieved a perfect fit this time either but it is a lot better!
Magnus
Press banner to the right to follow my trail to the new forums!
Stockholm, Sweden
Joined: May 02, 2006
KitMaker: 1,953 posts
AeroScale: 1,902 posts
Posted: Wednesday, August 17, 2011 - 08:53 AM UTC
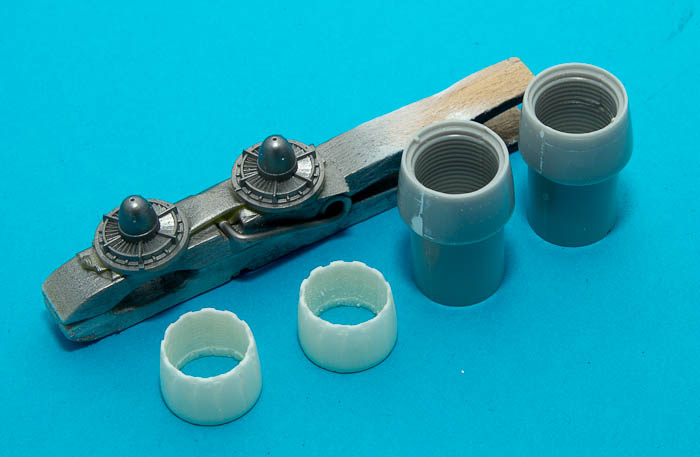
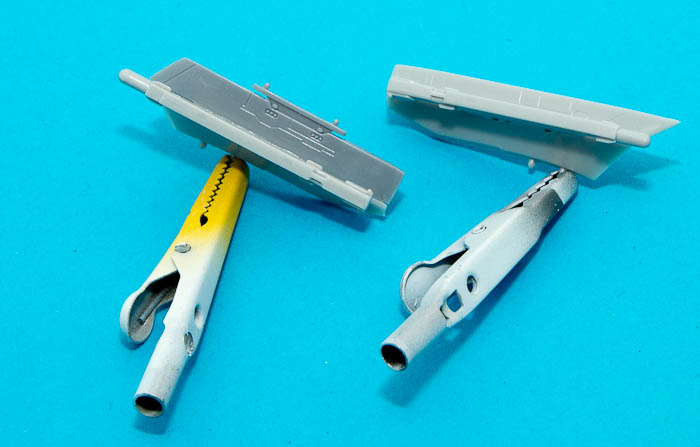
Except for the decals, engine outlets from Dr Pepper are the only aftermarket items I will use. The kit outlets are the only real let-downs of the kit.
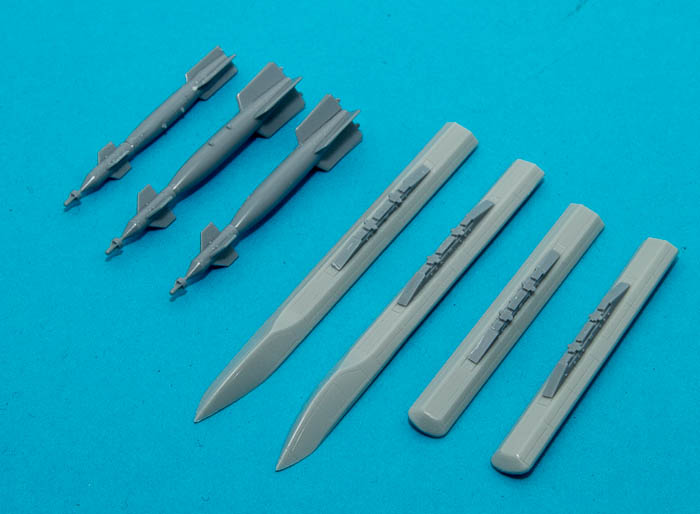
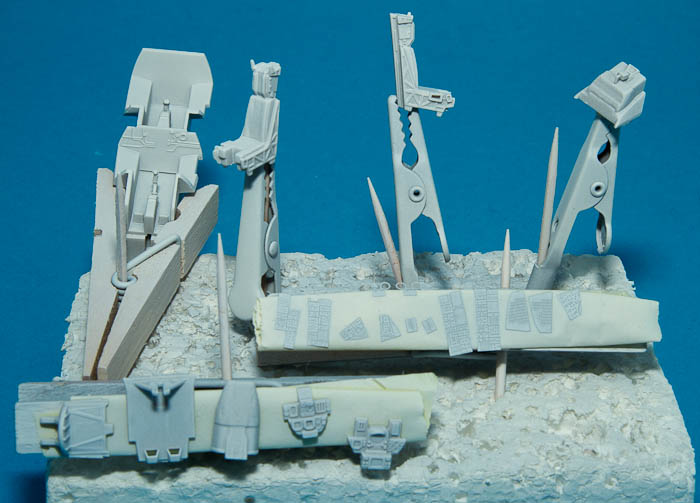
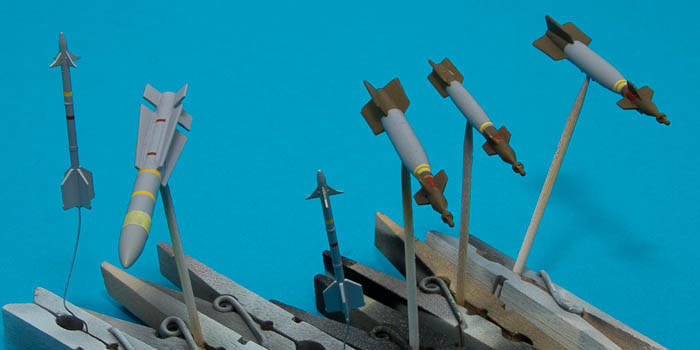
Fuselage pallets, used for Phoenix missiles when the Tomcat was the world's meanest fighter. The bombs are one GBU-12 and two GBU-16, an asymmetric load option that I found in the Osprey book. Bomb shackles and bombs come from a Hasegawa weapons set.
Wing glove pylons complete with LAU-138 launchers (made in Sweden by the way!). The LAU-138s also come from the weapons set.

Filling and sanding...
Magnus
Press banner to the right to follow my trail to the new forums!
Stockholm, Sweden
Joined: May 02, 2006
KitMaker: 1,953 posts
AeroScale: 1,902 posts
Posted: Thursday, August 18, 2011 - 09:32 AM UTC
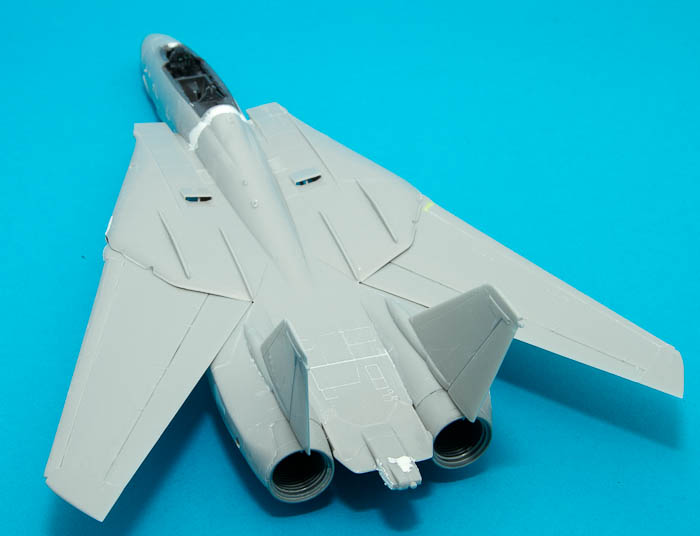
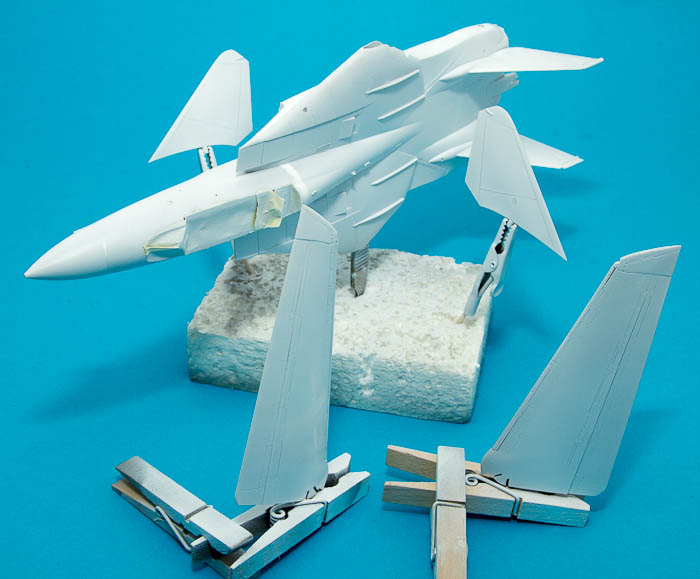
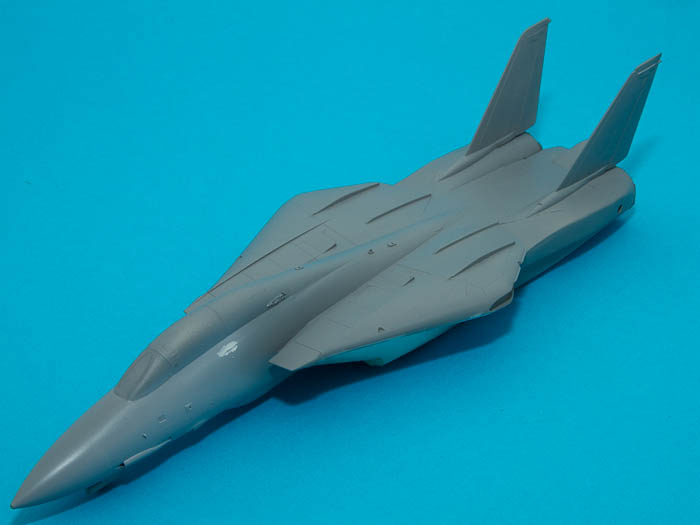
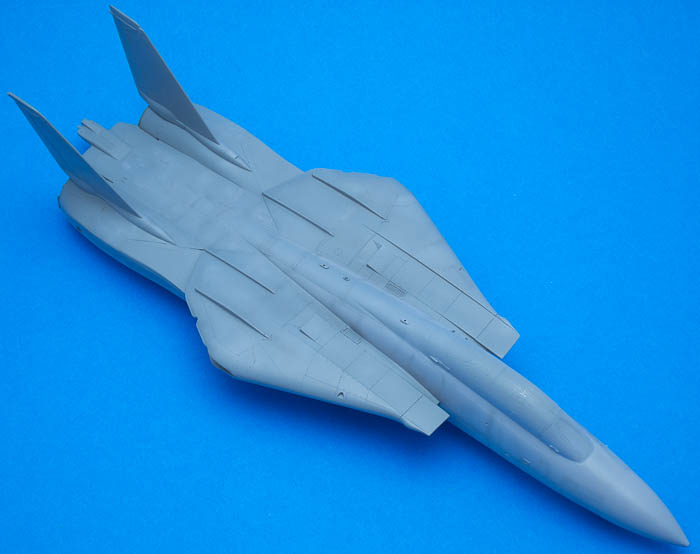
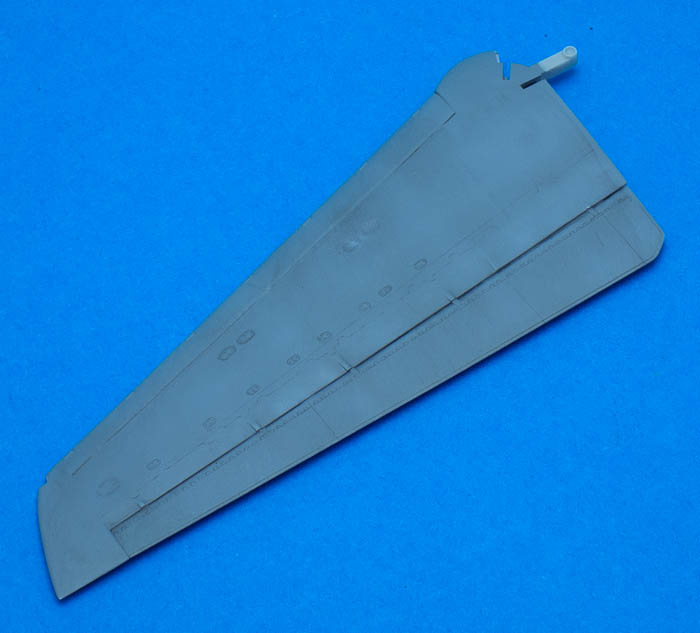
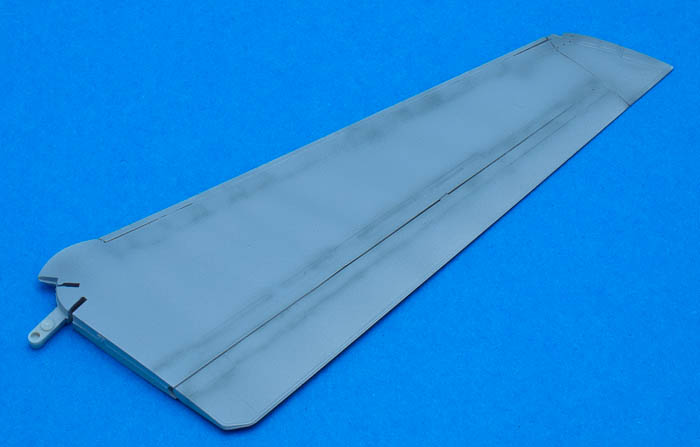
Project is really speeding up now, fins in place and wings test-fitted!
Magnus
Press banner to the right to follow my trail to the new forums!
Stockholm, Sweden
Joined: May 02, 2006
KitMaker: 1,953 posts
AeroScale: 1,902 posts
Posted: Monday, August 22, 2011 - 09:15 AM UTC
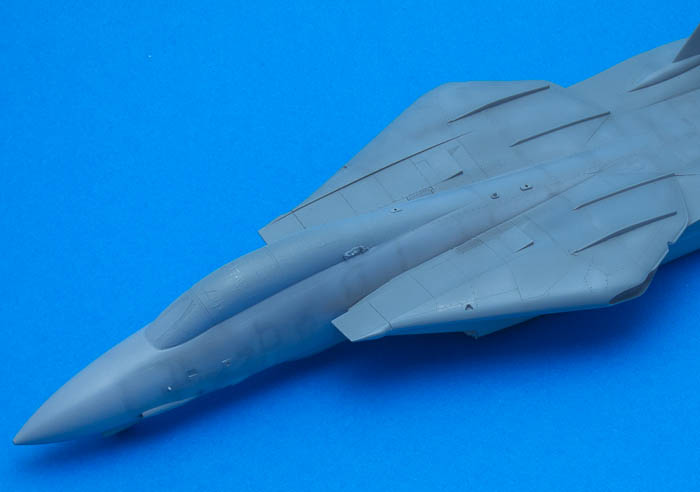
All the major parts have now been subject to a coat of primer! It usually only means a few more days of sanding and filling
!
Magnus
Press banner to the right to follow my trail to the new forums!
Stockholm, Sweden
Joined: May 02, 2006
KitMaker: 1,953 posts
AeroScale: 1,902 posts
Posted: Monday, August 29, 2011 - 09:23 AM UTC
I'm not a detailer, or rather I try to avoid it! In this case it was however very easy to add a few simple details to the kit seats. Painting does the rest, no need for resin seats in this case!
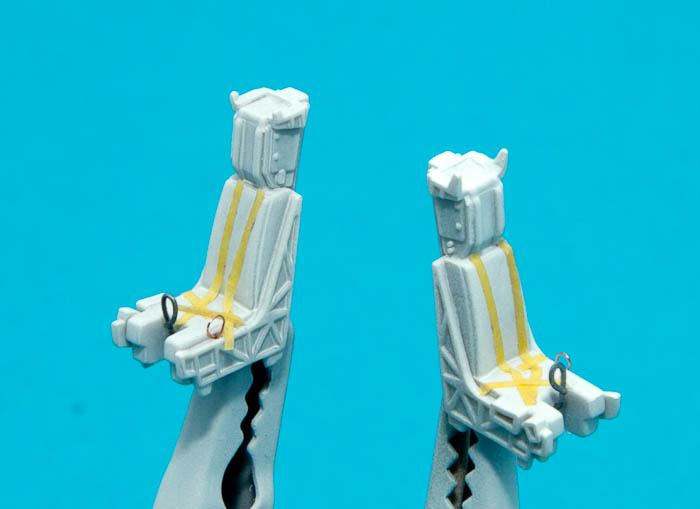
Belts, ejection handle and a wire loop that I don't know what it does but that can be seen in photos... All from thin metal wire that is easy to form and hard to break!
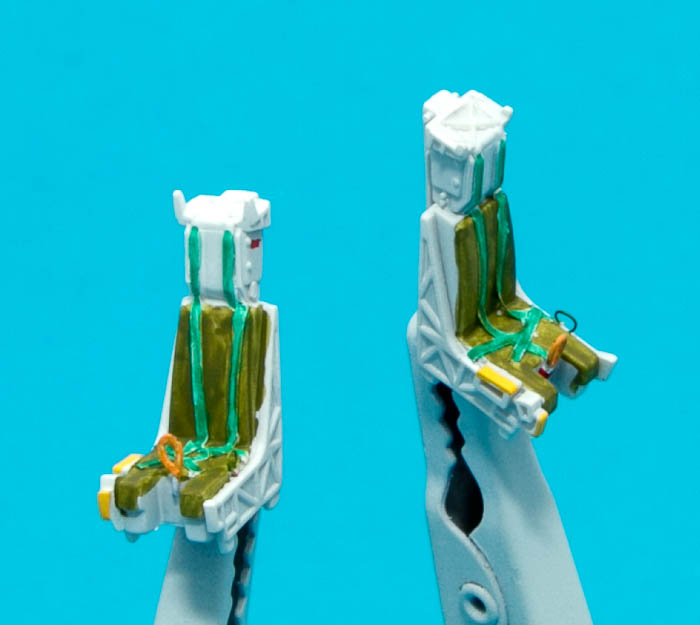
Painting "backwards", starting with the lighter colours and finishing with the black.
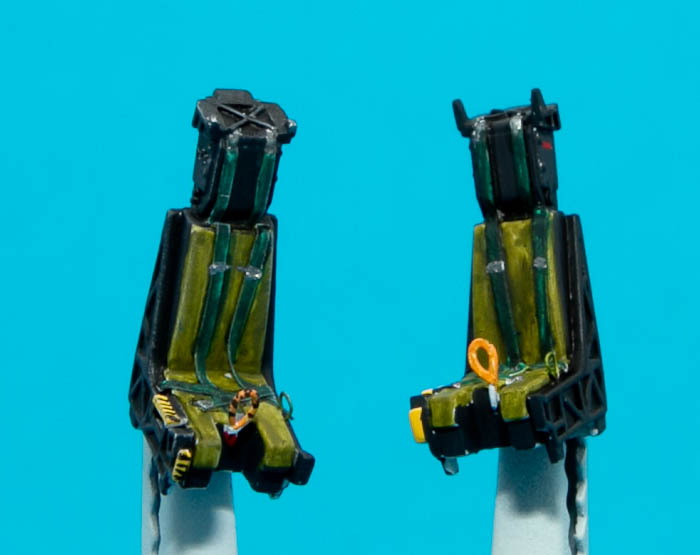
Almost there, just missing a drybrush to highlight the details.
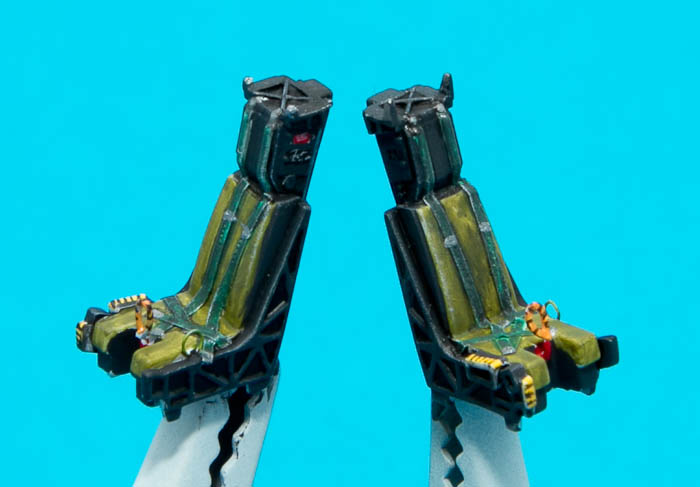
Two finished seats. Detail level is more than enough for a closed canopy.
Magnus
Press banner to the right to follow my trail to the new forums!
Stockholm, Sweden
Joined: May 02, 2006
KitMaker: 1,953 posts
AeroScale: 1,902 posts
Posted: Tuesday, August 30, 2011 - 09:31 AM UTC
Seats installed!
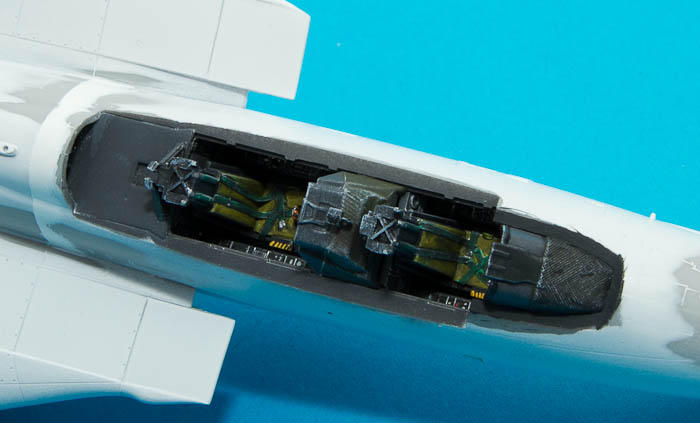
I'm working on the canopy now, I had decided for a closed cockpit this time but that might change...
Magnus
Press banner to the right to follow my trail to the new forums!
Stockholm, Sweden
Joined: May 02, 2006
KitMaker: 1,953 posts
AeroScale: 1,902 posts
Posted: Friday, September 02, 2011 - 07:24 PM UTC
Some more progress!
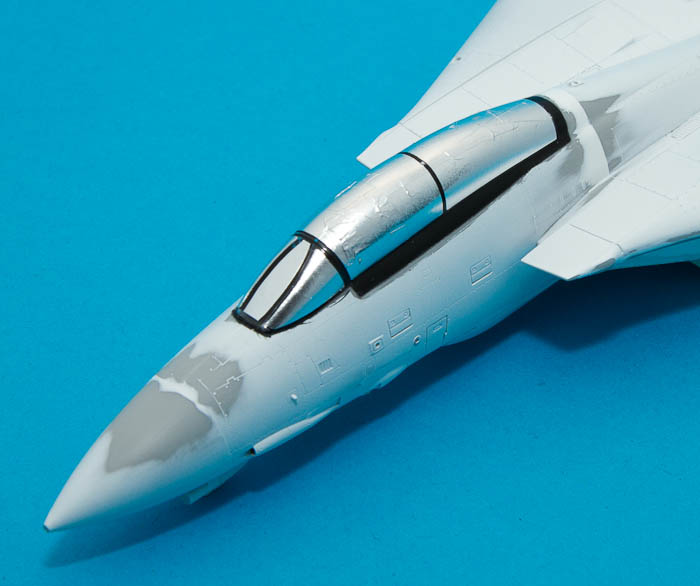
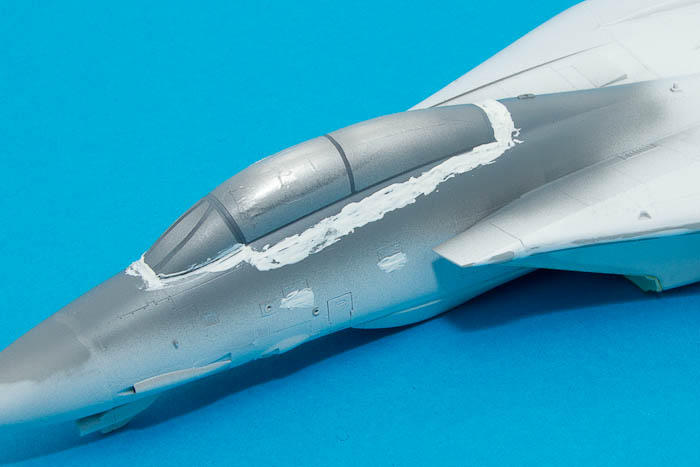
Canopy installed and masked.
The amount of parts preparation is massive for being in 1/72! Parts prepared for priming.
Magnus
Press banner to the right to follow my trail to the new forums!
Roma, Italy
Joined: April 15, 2010
KitMaker: 163 posts
AeroScale: 19 posts
Posted: Saturday, September 03, 2011 - 08:27 AM UTC
Hey Magnus,
Beautiful job with the seams (fuselage to pancake joint, nose to fuselage joint, etc.). Have you gone and rescribed all details lost in the process? That is what I am mostly scared of for my other tomcat on the bench (started during the last campaign but then dropped in an effort to at least finish one in time). Any insight would be greatly appreciated.
Yeah, tell me about those parts...it's 1/72 but it has got more parts than a 1/35 tank!
Keep it up, can't wait to see it finished.
Bayern, Germany
Joined: January 02, 2011
KitMaker: 279 posts
AeroScale: 239 posts
Posted: Saturday, September 03, 2011 - 08:28 AM UTC
Hi Magnus,
a nice clean and straightforward built! Looking forward to seeing it finished!
Servus,
Sebastian
LtCol Henry Blake: "Radar, whatever it is: sign it, cancel it or order five more!"
Stockholm, Sweden
Joined: May 02, 2006
KitMaker: 1,953 posts
AeroScale: 1,902 posts
Posted: Saturday, September 03, 2011 - 09:32 AM UTC
Sebastian! Thanks! I feel a lot better now when I know I have some followers!
Viper! Working on the panel lines right now. Apart from that, I try to be careful where I put the putty... A thin piece of plasticard works well as a straightedge when rescribing.
Magnus
Press banner to the right to follow my trail to the new forums!
Florida, United States
Joined: January 14, 2009
KitMaker: 2,798 posts
AeroScale: 2,443 posts
Posted: Sunday, September 04, 2011 - 04:13 AM UTC
I'm always watching your work Magnus and at the rate your going if you can still post in the gallery I will award you that ribbon

For rescribing I use a fret from a pc.of left over photo etch nice strait edge and it will contour to just about anything
"From time to time, the tree of liberty must be watered with the blood of
tyrants and patriots."
- Thomas Jefferson
IPMS#47611
Stockholm, Sweden
Joined: May 02, 2006
KitMaker: 1,953 posts
AeroScale: 1,902 posts
Posted: Saturday, September 10, 2011 - 09:03 AM UTC
Justin! Thanks for your offer but I won't do that out of fairness to the modellers who actually made it in time! With a bit of discipline (and maybe with some help from a less beautiful summer
) I could have done it so there is nobody else than me to blame!
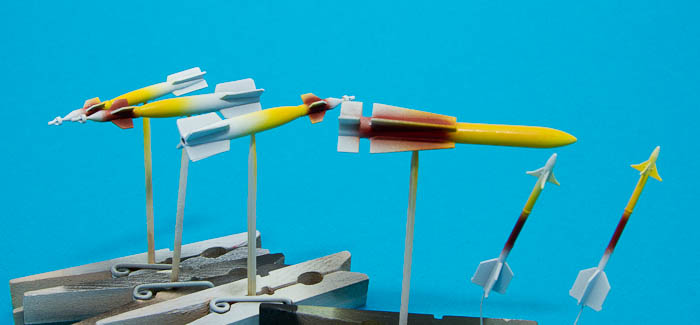
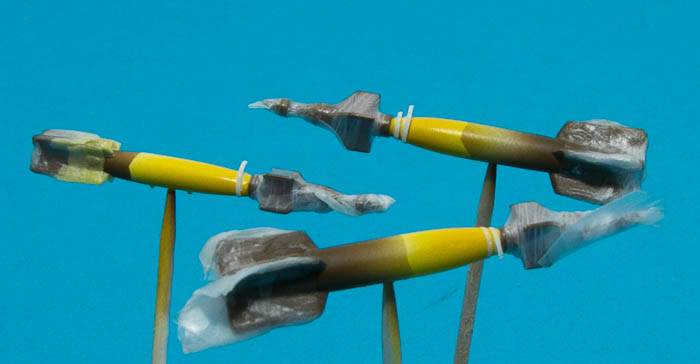
As usual I'm painting the armament "backwards", starting with the coloured parts that will end up as bands around the missile bodies.
Canopy fit is tricky. I'll have to fill and sand to get the seam more even.
Magnus
Press banner to the right to follow my trail to the new forums!
Stockholm, Sweden
Joined: May 02, 2006
KitMaker: 1,953 posts
AeroScale: 1,902 posts
Posted: Monday, September 12, 2011 - 09:47 AM UTC
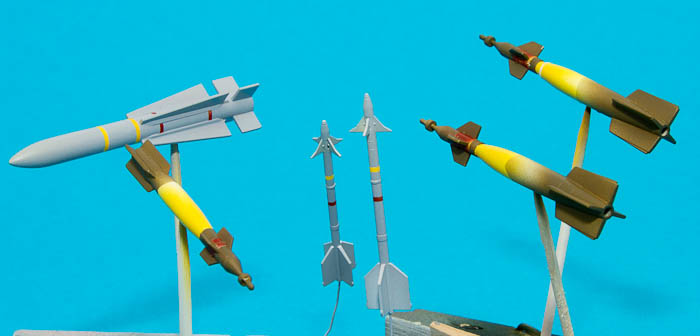
Armament under way...
I really really really really hate this. But there is nobody besides me who will fix it so I will have to do it anyway. Even if I really really really really hate it...
Magnus
Press banner to the right to follow my trail to the new forums!
Florida, United States
Joined: January 14, 2009
KitMaker: 2,798 posts
AeroScale: 2,443 posts
Posted: Tuesday, September 13, 2011 - 03:21 AM UTC
Very honorable Magnus I respect that

Hope to see in my future campaigns sir.can't wait to see the bird finished
"From time to time, the tree of liberty must be watered with the blood of
tyrants and patriots."
- Thomas Jefferson
IPMS#47611
Florida, United States
Joined: January 14, 2009
KitMaker: 2,798 posts
AeroScale: 2,443 posts
Posted: Tuesday, October 04, 2011 - 04:22 PM UTC
Hows it coming along magnus?
"From time to time, the tree of liberty must be watered with the blood of
tyrants and patriots."
- Thomas Jefferson
IPMS#47611
Stockholm, Sweden
Joined: May 02, 2006
KitMaker: 1,953 posts
AeroScale: 1,902 posts
Posted: Tuesday, October 04, 2011 - 06:16 PM UTC
Justin! Thanks for keeping an eye on me and my Tomcat!
I hope that I can spend more time at the building table during the next few weeks.
Magnus
Press banner to the right to follow my trail to the new forums!
Stockholm, Sweden
Joined: May 02, 2006
KitMaker: 1,953 posts
AeroScale: 1,902 posts
Posted: Sunday, October 23, 2011 - 09:07 AM UTC
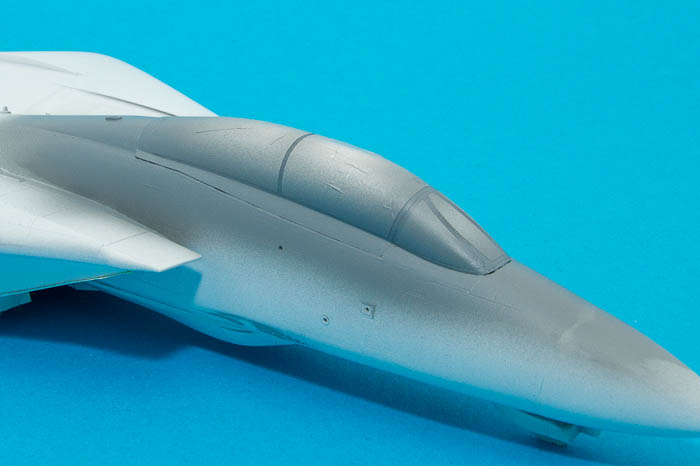
Finally a photo update! Not much have been done during the past few weeks, I'm in the middle of a period where I spend my creativity at work for the benefit of my customers. It feels great at work but leaves very little to spend on my hobby... Anyway, I've done a bit here and there and this weekend I finally got around to putting the first coat of paint on the fuselage.
Some tricky masking using Jammy Dog tape stripes and Parafilm.
Almost finished!
Fuselage. Looking very grey at the moment but soon the fun (the weathering!) will bring it to life. I hope
Magnus
Press banner to the right to follow my trail to the new forums!
Alvsborgs, Sweden
Joined: May 30, 2009
KitMaker: 13 posts
AeroScale: 5 posts
Posted: Friday, October 28, 2011 - 06:57 AM UTC
Snyggt jobbat!
This is excellent and rather timely for my part. I have JUST ordered a Hasegawa 1/72 F-14 that I'm going to turn into an F-14A from the Persian air force (IRIAF). I'm keeping an eye on this thread
Just a question, though. Why don't you pre-shade the panel lines? I'm asking this as a total air craft newbie. Are 1/72 kits too small or is it just personal preference?
Stockholm, Sweden
Joined: May 02, 2006
KitMaker: 1,953 posts
AeroScale: 1,902 posts
Posted: Friday, October 28, 2011 - 08:51 AM UTC
Trevligt med fler svenskar som hänger här men let's continue in english!
I have never been a fan of preshading, I prefer laying a solid coat of paint first and then work with shading, washes and highlights. Considering the look of the grey Tomcats when in service, this is going to be a most interesting part of this project!
Good luck with your Ali-cat, it would be nice to see it blogged here!
Magnus
Press banner to the right to follow my trail to the new forums!
Croatia Hrvatska
Joined: January 29, 2011
KitMaker: 977 posts
AeroScale: 263 posts
Posted: Friday, October 28, 2011 - 12:11 PM UTC
Very nice work Magnus,im watching carefully since i have the fujimi's Ali-cat in my stash too.
Kind regards,Sven.
http://svenharjacekmodels.blogspot.com/
Stockholm, Sweden
Joined: May 02, 2006
KitMaker: 1,953 posts
AeroScale: 1,902 posts
Posted: Sunday, October 30, 2011 - 10:24 PM UTC
Sven! After what I have heard, the Fujimi kit is supposed to be a bit less complicated than Hasegawa's. I have one as well in the stash but it will stay there for the foreseeable future, I need something relatively easy after this one
!
Magnus
Press banner to the right to follow my trail to the new forums!
Stockholm, Sweden
Joined: May 02, 2006
KitMaker: 1,953 posts
AeroScale: 1,902 posts
Posted: Saturday, November 19, 2011 - 09:15 PM UTC
Finally, the fun has started! After a few re-filling and re-sanding backlashes, I could start creating the characteristic grubby Tomcat-look.
Base colours are Gunze 308 and 337. Weathering is done with the base colours after addition of tire black or white.
I paint around the edges of the panels in the same way that is done for corrosion control in real life.
Since I always end up with models turning darker during weathering I really tried to go the opposite way this time, applying thin coats of very diluted base colour mixed with lots of white on the upper surfaces.
This is great fun, I keep an assortment of different shades in small cups so that I easily can change back or forth between them. Lower surface of wing after the first round, more will be added to adjust and deepen the effect.
With the amount of decals on one of these, I intend to use Tamiya TS-13 as a base coat before starting decalling. I am a little worried that the clear coat will take away the effect but I will have to weather in the decals afterwards so I can always go back and make the effects stronger then!
Magnus
Press banner to the right to follow my trail to the new forums!
Roma, Italy
Joined: April 15, 2010
KitMaker: 163 posts
AeroScale: 19 posts
Posted: Saturday, November 19, 2011 - 11:39 PM UTC
Magnus!
Looking great there in the paint shop. I am following your steps with great interest as my second Tomcat is almost ready for paint.
Keep it up!
Alvsborgs, Sweden
Joined: May 30, 2009
KitMaker: 13 posts
AeroScale: 5 posts
Posted: Sunday, November 20, 2011 - 12:33 AM UTC
Looks fantastic! My Hasegawa F-14 arrived last week and I'm waiting for you to finish so that I have a sort of mini-tutorial to follow when I do mine.
By the way, Magnus, on a totally unrelated note. Did you happen to do piping/construction technical CAD work during the 90's?