_GOTOBOTTOM
World War II: Japan
Aircraft of Japan in WWII.
Hosted by Rowan Baylis
Special Hobby 1/32 A5M4 Claude
DougN1
_VISITCOMMUNITY
Georgia, United States
Joined: August 08, 2011
KitMaker: 410 posts
AeroScale: 409 posts
Posted: Wednesday, September 07, 2011 - 09:46 AM UTC
I decided to get cracking on this kit for (hopefully) a quick build. I've always liked the colorful schemes carried by some Claudes, and this one will give me a chance to add one to my display case! Since I have not seen another one built yet, I thought I would do another WIP

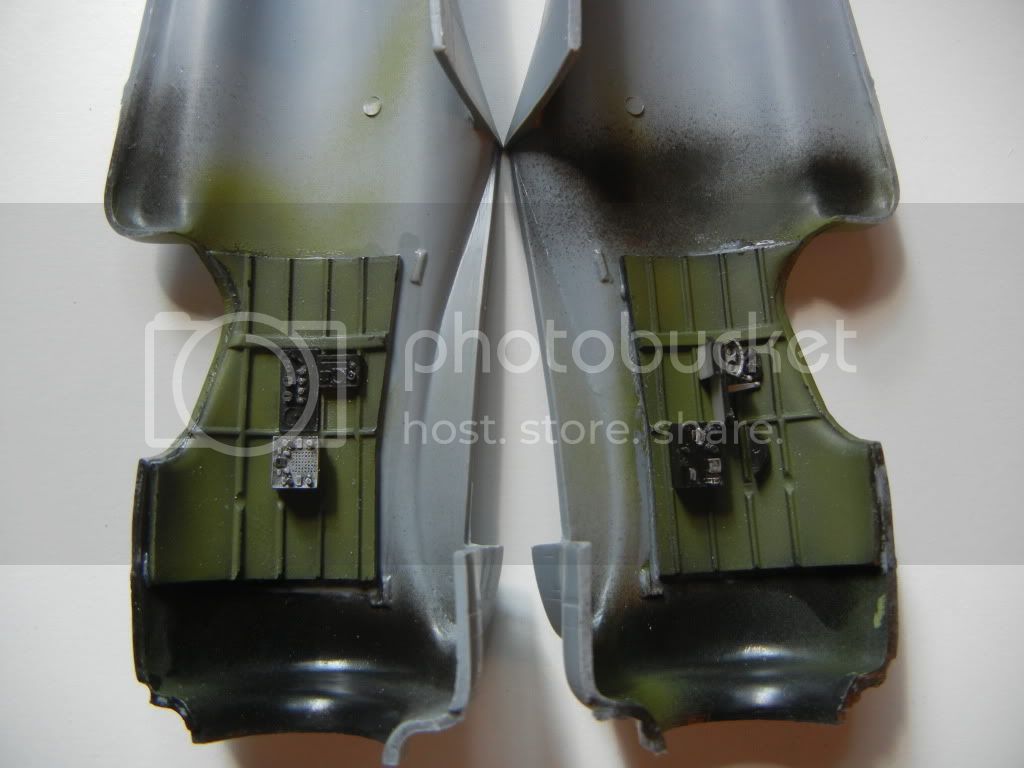
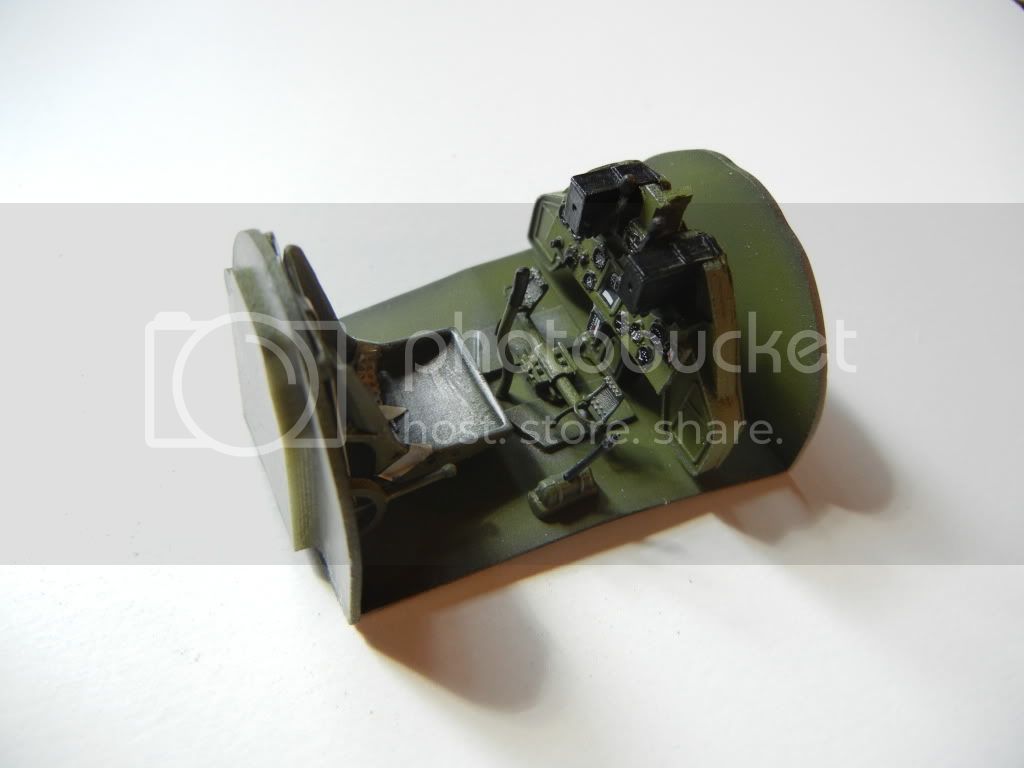
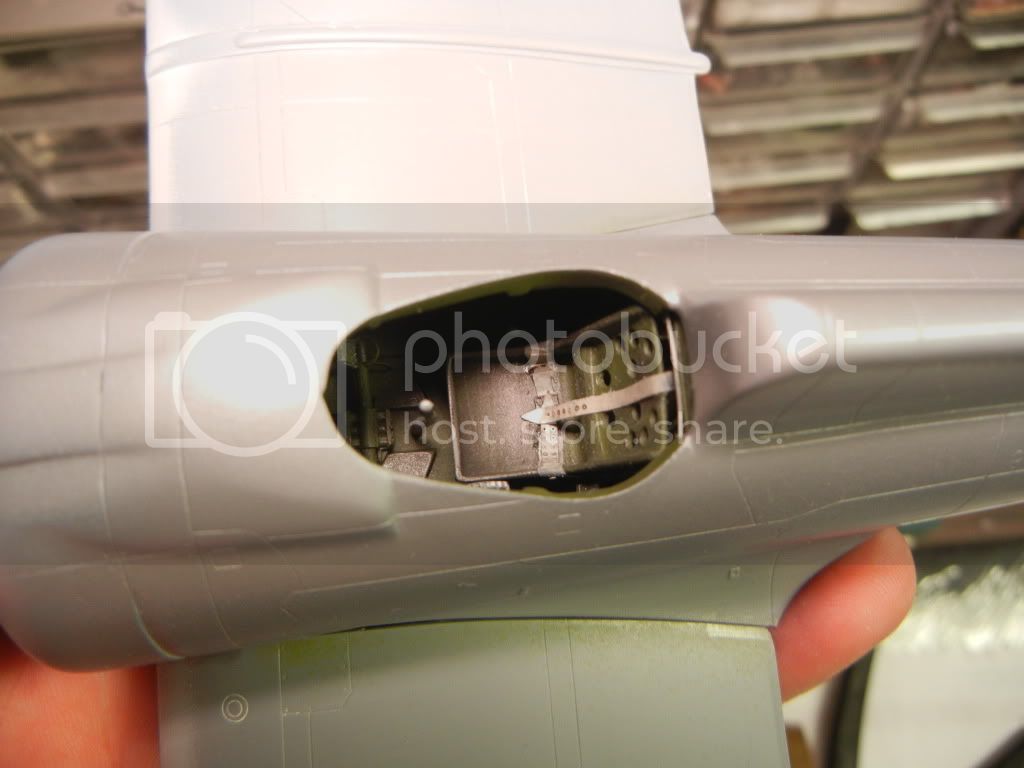
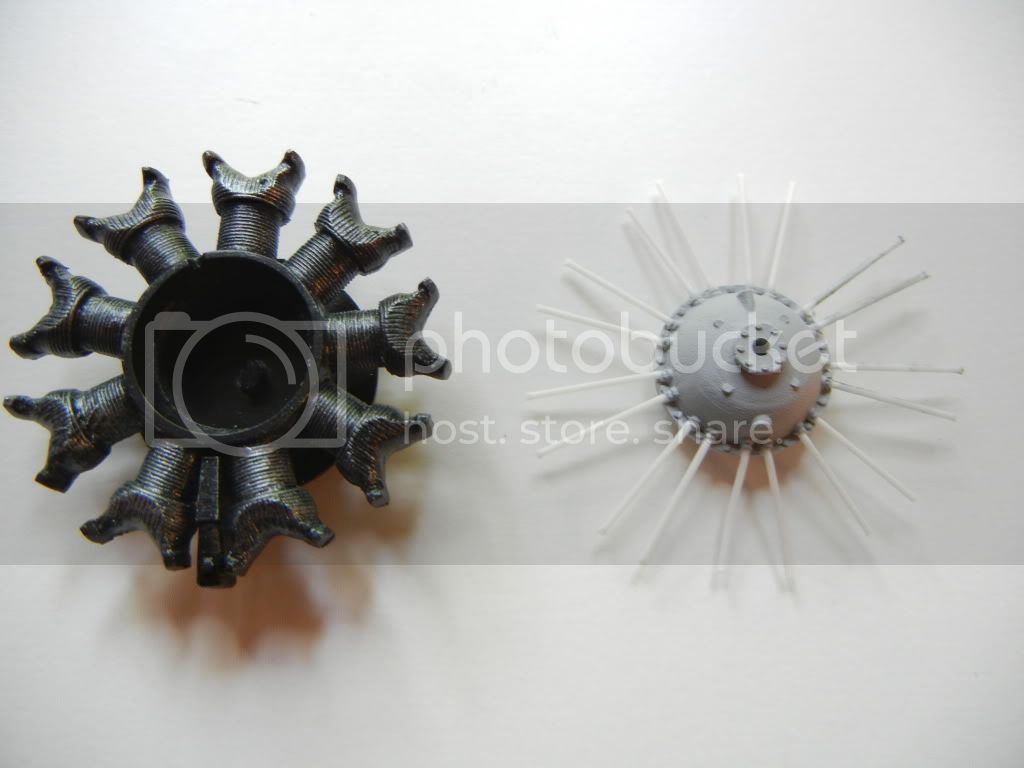
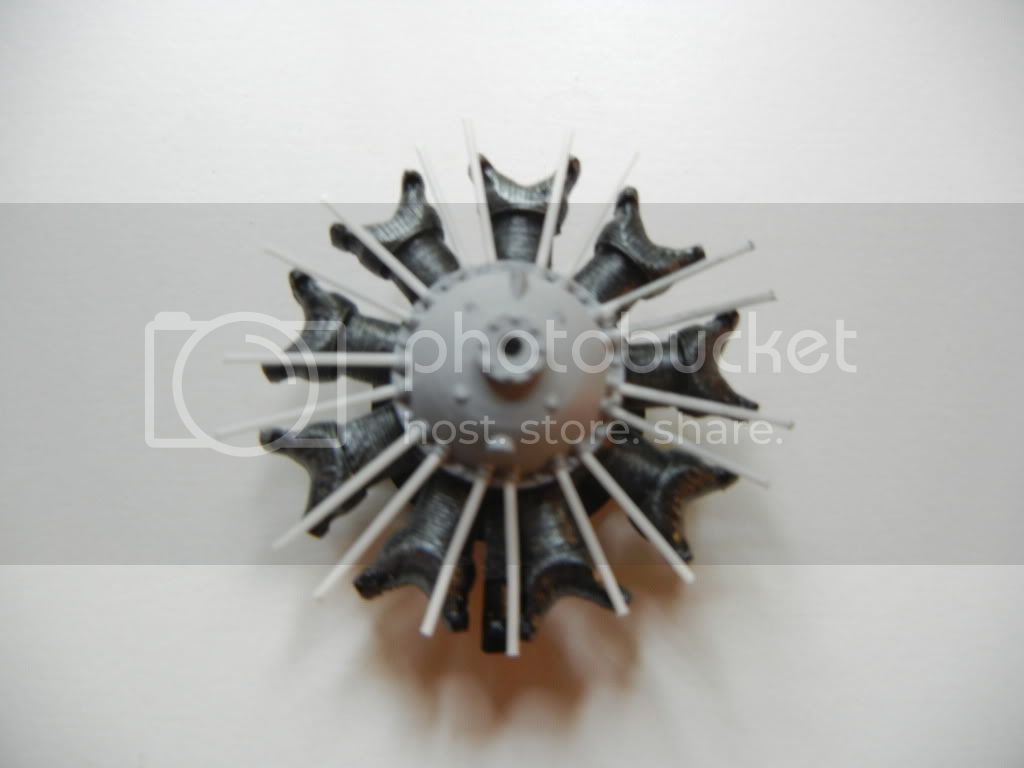
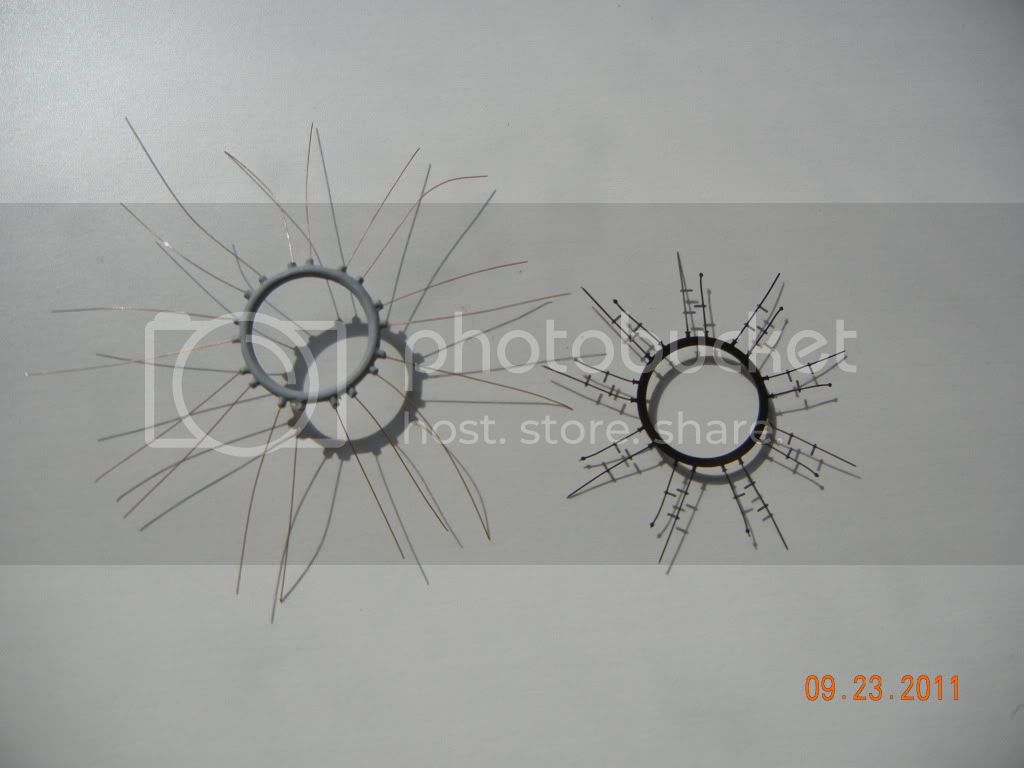
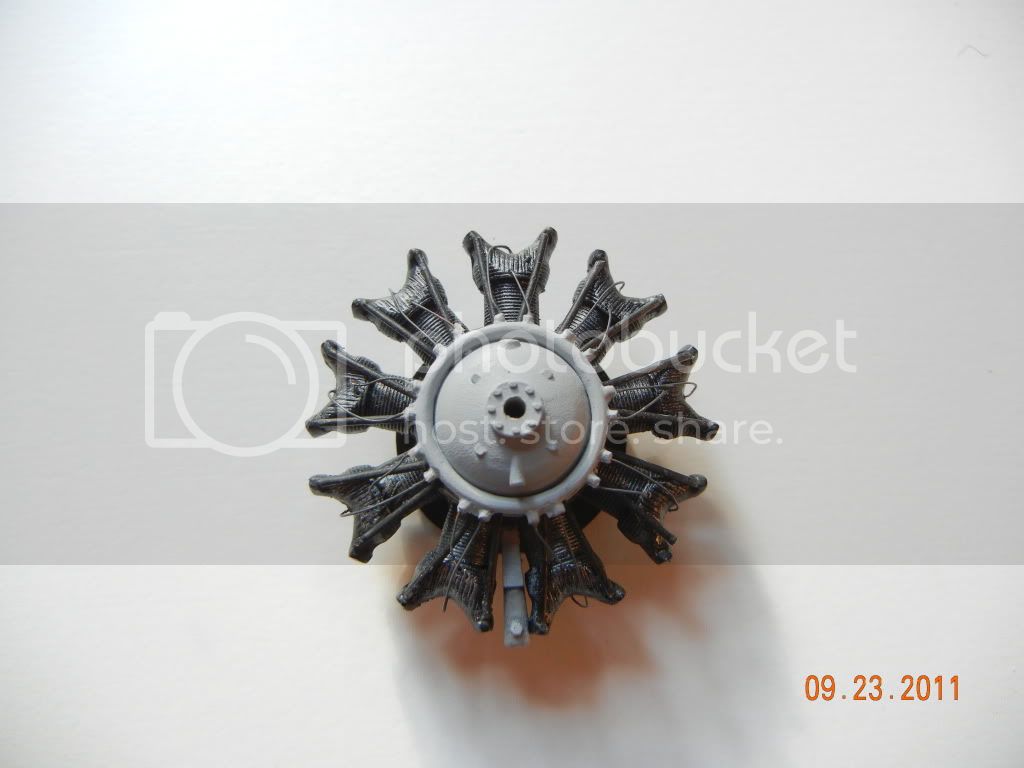
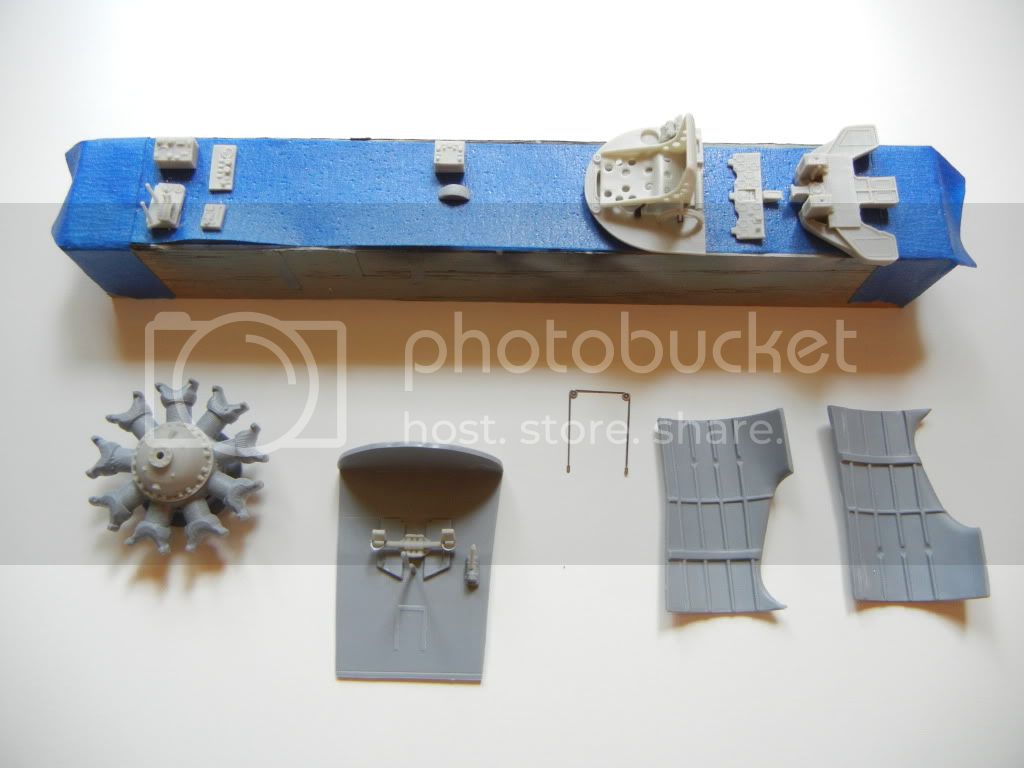
The A5M4 kit differs from the previously released A5M2 kit in that the -M4 has resin and PE parts included (also provided is the correct -M4 windscreen). The resin parts make up the instrument panel and it's associated gun breechs, ammo chutes, bulkhead; the rear bulkhead and seat (which has PE mounts and bungee cord), as well as the equipment boxes that go on either sidewall. The rudder pedals are also resin, with some PE added. For the engine, there is a new resin main housing, 2 resin intakes and a PE wiring harness.

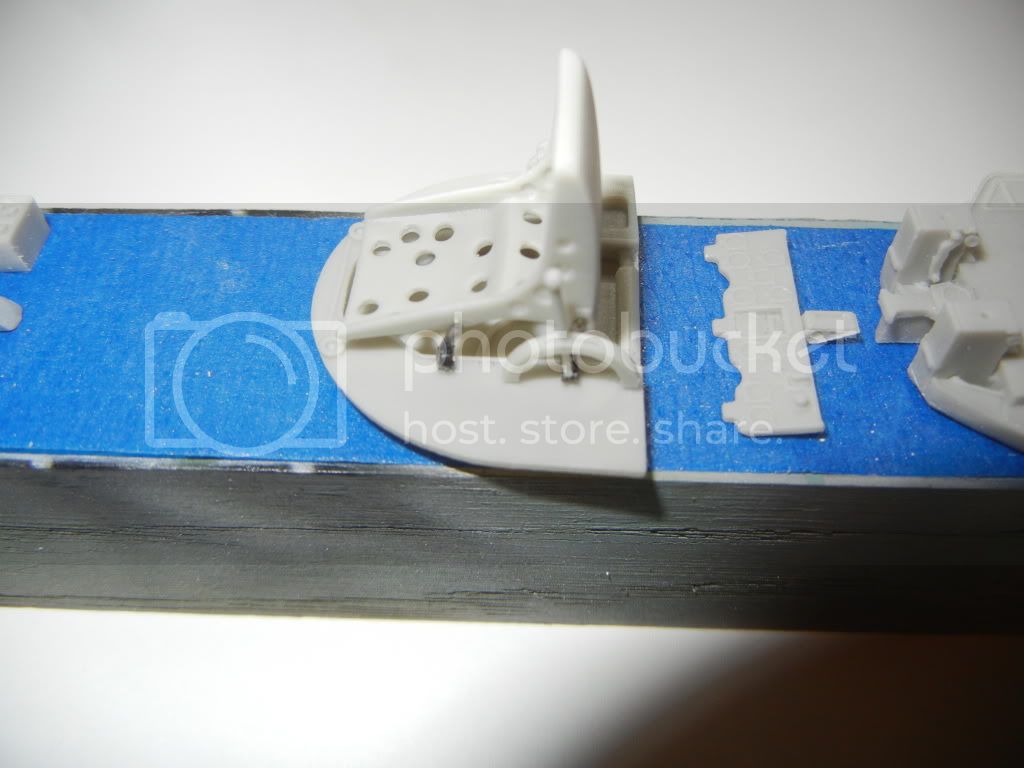
Here are a couple shots of the main cockpit components and intial engine assembled and awaiting painting:


By the way, there are some nice reference shots on this site (although of the -M2): A5M2 reference shots Unfortunately, they show that the kit parts while close, are not necessarily wholly accurate (but close enough for my purposes).
DougN1
_VISITCOMMUNITY
Georgia, United States
Joined: August 08, 2011
KitMaker: 410 posts
AeroScale: 409 posts
Posted: Wednesday, September 07, 2011 - 09:47 AM UTC
I painted the interior parts with Mitsubishi Interior Green and put all the components where the directions seemed to indicate:


And then attached the side walls to their respective fuselage halves:


I then assembled the floor and bulkheads:


Test fitting showed that the resin parts where a bit too wide for the fuselage, so I trimmed the rear bulkhead so that the sides were flush with the floor, and trimmed about 1/8" off either side of the instrument panel bulkhead as it was hitting the stringers on the side panels. Fortunately, the trimming cannot be seen as the boxes on the sidewalls obscure the view Once done, the floor and bulkheads will be able to be inserted from the bottom after the fuselage is assembled (more pics later).

I also glued the tailplanes together, and started working on the wings. I noticed that the uppersurface part had a strange blob on it (as does my -M2 kit in the same place) I am guessing from damage to the mold:


This was cleaned up with a sanding stick. Special Hobby has molded the wingtip formation lights as part of the wing. This is fine if you want to paint them silver, and then cover that with some clear red (port) and clear blue (starboard). Special Hobby also provides some clear parts that you can use to replace the molded in lights (and on the -M4 kit, they also give you clear lights for the wings (4) and a clear part for the tailcone light). However, since the wintip lights had colored covers I decided to cut them out and just use some colored plastic handles from some toothbrushes (purchased previously for things like this).


I also noted that the prop has some sink marks that will need filling, so I'll get started on that as well:


DougN1
_VISITCOMMUNITY
Georgia, United States
Joined: August 08, 2011
KitMaker: 410 posts
AeroScale: 409 posts
Posted: Wednesday, September 07, 2011 - 09:48 AM UTC
I'm finishing up the landing lights. Here, I have cut a chunk off each toothbrush, drilled a hole to represent a light bulb inside, and painted the back sides silver. I then attached them to each wing tip using superglue (as it gives a good bond and fills any gaps):


I then started sanding, and sanding, and then sanding some more, until I had this (after using the polishing sander):


You can see the "bulb" inside the light cover (as well as some superglue around the outside and in a cut I made by mistake). I've still got to replace the obliterated panel lines, and then I'll mask these off when ready for paint.

That's it for today, more again once I get some more photos ready!

Cheers,

Doug
NickZour
_VISITCOMMUNITY
Attica, Greece / Ελλάδα
Joined: May 01, 2008
KitMaker: 1,437 posts
AeroScale: 1,241 posts
Posted: Wednesday, September 07, 2011 - 09:49 AM UTC
I'll be watching this closely, as it is a very interesting build
Really nice job until now


Cheers Nick
warreni
_VISITCOMMUNITY
South Australia, Australia
Joined: August 14, 2007
KitMaker: 5,926 posts
AeroScale: 2,201 posts
Posted: Wednesday, September 07, 2011 - 04:42 PM UTC
Erm, I always thought it was Red for port and green for starboard, just like every plane I have ever flown or worked on... same with boats.. Maybe I am wrong about the rest of the world...
NickZour
_VISITCOMMUNITY
Attica, Greece / Ελλάδα
Joined: May 01, 2008
KitMaker: 1,437 posts
AeroScale: 1,241 posts
Posted: Wednesday, September 07, 2011 - 09:00 PM UTC

Quoted Text

Erm, I always thought it was Red for port and green for starboard, just like every plane I have ever flown or worked on... same with boats.. Maybe I am wrong about the rest of the world...


It is correct that it has blue color instead of green, in the right wingtip. That's how the Japanese in WW2 Had it


Cheers Nick
eseperic
_VISITCOMMUNITY
Croatia Hrvatska
Joined: November 06, 2009
KitMaker: 624 posts
AeroScale: 609 posts
Posted: Thursday, September 08, 2011 - 07:51 PM UTC
Hi Doug, very nice work so far. I like the lights tip... Isn't it interesting how many useful modeling materials we find in our everyday life... Wish you all the best with the build. I always liked the Hinomaru red...

Greets
Tomcat31
#042
_VISITCOMMUNITY
England - North East, United Kingdom
Joined: November 18, 2006
KitMaker: 2,828 posts
AeroScale: 1,720 posts
Posted: Thursday, September 08, 2011 - 11:17 PM UTC

Quoted Text


Quoted Text

Erm, I always thought it was Red for port and green for starboard, just like every plane I have ever flown or worked on... same with boats.. Maybe I am wrong about the rest of the world...


It is correct that it has blue color instead of green, in the right wingtip. That's how the Japanese in WW2 Had it


Cheers Nick

I think it may be something to do with the light bulbs used? I helped on one of the EE Lightnings for a local preservation group a few years back and the cover for the starboard light was blue but when the bulb was switched on it turned green.

I can only assume its someting to do with the yellow hue of the bulb mixed with the blue makes the required colour green.
DougN1
_VISITCOMMUNITY
Georgia, United States
Joined: August 08, 2011
KitMaker: 410 posts
AeroScale: 409 posts
Posted: Friday, September 09, 2011 - 08:47 AM UTC
Allen is correct the Japanese light bulbs tended to produce very yellowish light, so the blue covers make a green light when lit

Working on fitting the wing to the fuselage now, some photos when I get the chance to take them

Cheers,

Doug
JPTRR
Staff MemberManaging Editor
RAILROAD MODELING
#051
_VISITCOMMUNITY
Tennessee, United States
Joined: December 21, 2002
KitMaker: 7,772 posts
AeroScale: 3,175 posts
Posted: Sunday, September 11, 2011 - 11:06 AM UTC
Doug,

Great start! I'm really looking forward to this model.

Long ago I read of this Japanese green / blue thing. I was told that way back when that the Japanese call "blue" what the rest of the world calls "green".

FWIW, here's Wikipedia:

Quoted Text

Ao (hiragana あお; kanji 青; adjective form aoi (青い?)) is a Japanese color word that includes what English-speakers would call blue and green. For example, in Japan, green traffic lights are described as ao shingō (青信号?), and blue skies are described as aozora (青空?), as in aozora bunko.
[edit] Ao vs. Midori

Modern Japanese has a separate word for green (ja:緑 midori), although its boundaries are not the same as in English. Ancient Japanese did not have this distinction: the word midori only came into use in the Heian period, and at that time (and for a long time thereafter) midori was still considered a shade of ao. Educational materials distinguishing green and blue only came into use after World War II, during the Occupation: thus, even though most Japanese consider them to be green, the word ao is still used to describe certain vegetables, apples and vegetation. Ao is also the name for the color of a traffic light, "green" in English. However, most other objects—a green car, a green sweater, and so forth—will generally be called midori. Japanese people also sometimes use the English word "green" for colors. The language also has several other words meaning specific shades of green and blue.


http://en.wikipedia.org/wiki/Ao_%28color%29
warreni
_VISITCOMMUNITY
South Australia, Australia
Joined: August 14, 2007
KitMaker: 5,926 posts
AeroScale: 2,201 posts
Posted: Sunday, September 11, 2011 - 11:14 AM UTC
I wasn't criticising your work Doug. I wish I could make navigation light lens like you can. Although I haven't found much need in the WW1 planes I am building at the moment..
If I might make a suggestion, why not paint the inside of the hole you drilled to represent the bulb? Or part of it? Just to represent the socket the bulb goes into...
DougN1
_VISITCOMMUNITY
Georgia, United States
Joined: August 08, 2011
KitMaker: 410 posts
AeroScale: 409 posts
Posted: Tuesday, September 20, 2011 - 05:24 AM UTC
Thanks to everyone for looking in!

@ Fredrick, thanks for posting the explanation!

@ Warren, no worries, I did not think you were criticizing at all, just asking a question that many likely had

Well, I guess it's time for another update!

I got the cockpit sills faired in and touched up the paint, joined and cleaned up the fuselage halves, then painted the silver dope around the cockpit. After it was dry, I installed the completed cockpit (hard to get a good photo):


The wing had a pretty large step. So I stuck a shim of scrap styrene in each side to help it fit better:


Looks pretty close (I used a black sharpie to highlight the fuselage mating surface to see how much is showing), I might put one more in a little farther forward to try to raise that section up a smidge:


Also need to decide how to handle this poor fit:


Might try putting a tab in under the fuselage section to raise up the wing section to get a better fit...

Thanks for looking in!

Cheers,

Doug
DougN1
_VISITCOMMUNITY
Georgia, United States
Joined: August 08, 2011
KitMaker: 410 posts
AeroScale: 409 posts
Posted: Tuesday, September 27, 2011 - 06:05 AM UTC
Wow, over 300 views since the last update and not a peep from anyone

Well, its update time nonetheless!

I ended up sticking a tab under the front lip of the underside and fit was pretty good. I think I forgot to mention earlier that the initial fit of the wing was really tight, so I ended up sanding some off the mating surfaces. The bottom center section of the A5M should be almost flat, but as it was, it looked like an F4U initially! Now my gear pants should be straight and not pointing towards each other

Wing attached! (note the big gap at the rear was totally my own fault as I got a bit carried away with sanding:


Rubber bands to hold everything in place - top view:


After a little more sanding, next up some Mr Surfacer to sort it all out:


While that was drying, did some work to the engine. First, added the pushrod covers from some .30 styrene rod:


This version also gives you some PE plug wires, but they are flat and go behind the ring they are supposed to come out of. So, I just made my own by drilling some #80 drill bit holes and using some wire:


All ready to be installed:


Thanks for looking! Comments/questions welcome!

Doug
Merlin
Staff MemberSenior Editor
AEROSCALE
#017
_VISITCOMMUNITY
United Kingdom
Joined: June 11, 2003
KitMaker: 17,582 posts
AeroScale: 12,795 posts
Posted: Thursday, September 29, 2011 - 08:01 AM UTC
Hi Doug

This is turning into a real beauty. Can we book a frontpage slot for it when it's finished!?

The engine looks great - I think you can often get away with etched wiring in smaller scales, but what you've done looks so much better.

I must admit to being a bit jealous, because I rather fancy tackling this and Special Hobby's Ki-27 myself.

All the best

Rowan
DougN1
_VISITCOMMUNITY
Georgia, United States
Joined: August 08, 2011
KitMaker: 410 posts
AeroScale: 409 posts
Posted: Friday, October 28, 2011 - 05:53 AM UTC
Thanks Rowan, that would be great, just let me know what you need!

Well, after almost 3 weeks of visiting in-laws, and a rush review build, I finally got some work done on the Claude! Nothing too exciting, got the bottom smoothed out to an acceptable point, and rescribed all the lost panel lines:


Wingroots are always a bit of a challenge to get fit well, but limited run kits like this can be even more of a problem. After getting everything smoothed out, I need to restore the panel line of the wingroot filets. I did not want to scribe or cut a line into the glue joint, as I did not want to weaken it. So, I am employing a solution I first used on my PCM Hurricane wing roots.

First, sand out the wing roots to get them smooth:


Then, using some thin strips of Tamiya tape, I mask off the wingroot filet:


Followed by masking the area off with some cheaper painter's tape:


Then I spray the wing filet area with a very, very heavy coat of Mr. Surfacer 1200 (thinned 50% with Mr. Color leveling thinner):


Now I'll leave this to dry for a couple of hours...
Merlin
Staff MemberSenior Editor
AEROSCALE
#017
_VISITCOMMUNITY
United Kingdom
Joined: June 11, 2003
KitMaker: 17,582 posts
AeroScale: 12,795 posts
Posted: Saturday, October 29, 2011 - 04:40 AM UTC
Hi Doug

That is a very neat technique which I've never seen done before. So, it results in a smooth and faintly raised fairing panel? I'll definitely save that trick up my sleeve.

All the best

Rowan
warreni
_VISITCOMMUNITY
South Australia, Australia
Joined: August 14, 2007
KitMaker: 5,926 posts
AeroScale: 2,201 posts
Posted: Saturday, October 29, 2011 - 08:41 AM UTC
Mr. Color leveling thinner....

Check...

Finally a way to thin 500...

I am lurking and learning Doug...
AussieReg
Staff MemberAssociate Editor
AUTOMODELER
#007
_VISITCOMMUNITY
Victoria, Australia
Joined: June 09, 2009
KitMaker: 8,156 posts
AeroScale: 3,756 posts
Posted: Saturday, October 29, 2011 - 10:52 AM UTC

Quoted Text

I am lurking and learning Doug...


You and me both Warren ! Excellent thread so far Doug, great attention to detail and some really effective techniques being displayed.

Cheers, D
Merlin
Staff MemberSenior Editor
AEROSCALE
#017
_VISITCOMMUNITY
United Kingdom
Joined: June 11, 2003
KitMaker: 17,582 posts
AeroScale: 12,795 posts
Posted: Sunday, October 30, 2011 - 05:45 AM UTC

Quoted Text

Mr. Color leveling thinner....

Check...

Finally a way to thin 500...

I am lurking and learning Doug...


Hi Warren

You can also use cellulose (lacquer) thinners to dilute Mr. Surfacer. It obviously makes quite a "hot" brew (which is what you need to key into styrene), so don't over-work it if applied with a brush.

All the best

Rowan
DougN1
_VISITCOMMUNITY
Georgia, United States
Joined: August 08, 2011
KitMaker: 410 posts
AeroScale: 409 posts
Posted: Tuesday, November 01, 2011 - 07:13 AM UTC
Thanks everyone, I appreciate the comments!

@ Rowan - yes, you can make the panel as thin or thick as you want, depending on how much paint you apply.

@ Warren - as Rowan mentioned, you can use Laquer thinner as well, which I typically do. The nice thing about the Mr. Color leveling thinner is you can apply a very thick coat, to the point where it starts to get waves from being so thick, and when it dries, it will be level and pretty smooth.

Ok, once the Mr Surfacer has dried for a couple hours (not much more), we need to remove the tape, taking care to pull it away from the edge at an angle. This should give us a clean, slightly rough edge (that we will clean up after it dries several hours with some light sanding):


Then, after the light sanding, I put the rivets back in (seen here using a piece of tape for spacing) using a scribing pin tip:


I then go over the entire surface with some 0000 steel wool to smooth everything out. Once I get a final primer coat on, it should look perfect!

Next, the last bit to do before we can start painting is to get the wheel spats fitted properly. As you can see there is not much to attach them with:


After getting the holes drilled out and cleaning up the attachment lugs a bit, there is still a bit of a fit issue to deal with:


I'm going to get the spats/wheels assembled, and then I think I will replace the attachment lugs with some brass rod to get a more secure fit. That will also allow me to get the contour of the spat to better match that of the wing, so we can get a good flush fit. I'll cover that in the next update!

Doug
DougN1
_VISITCOMMUNITY
Georgia, United States
Joined: August 08, 2011
KitMaker: 410 posts
AeroScale: 409 posts
Posted: Wednesday, November 02, 2011 - 06:14 AM UTC
Just a couple of quick snaps to show how the Mr Surfacer wing filet looks now with a little silver sprayed on (since I had it out for the inside of the cowl and wheel spats):


Doug
Merlin
Staff MemberSenior Editor
AEROSCALE
#017
_VISITCOMMUNITY
United Kingdom
Joined: June 11, 2003
KitMaker: 17,582 posts
AeroScale: 12,795 posts
Posted: Wednesday, November 02, 2011 - 08:33 PM UTC
Hi Doug

That really is a very neat technique for creating a smooth fillet! The effect is excellent. When I think of the number of times I've sanded a wing root or some other bad joint nearly to death trying to get it smooth, when I could have levelled it like this...

All the best

Rowan
DougN1
_VISITCOMMUNITY
Georgia, United States
Joined: August 08, 2011
KitMaker: 410 posts
AeroScale: 409 posts
Posted: Sunday, November 20, 2011 - 05:30 AM UTC
Thanks for the replies!

@ Rowan - I've also found it very useful in building up sharp edges (on panels for example) that have gotten rounded due to sanding. Just mask, spray and the sharp edge is back!

Got a bit more done on the Claude:

Wheel Spats and tailplanes attached. Fit of the tailplanes was not great, they were bit too thick on the bottom, so I had to sand them down to a more reasonable level. Here are a couple snaps of the airframe in primer getting ready to paint:


Painting has now commenced! If everything goes according to plan, the rest should go pretty quickly!


Thanks for looking in - questions/comments, etc. welcome!

Doug
Merlin
Staff MemberSenior Editor
AEROSCALE
#017
_VISITCOMMUNITY
United Kingdom
Joined: June 11, 2003
KitMaker: 17,582 posts
AeroScale: 12,795 posts
Posted: Monday, November 21, 2011 - 08:36 AM UTC
Hi Doug

Sorry - I missed your update yesterday. It's really coming together now!

I can see the decal sheet in the background, so is the white paint done early to save painting over the camouflage, or are you going to mask and paint the markings?

All the best

Rowan
Kornbeef
_VISITCOMMUNITY
England - South East, United Kingdom
Joined: November 06, 2005
KitMaker: 1,667 posts
AeroScale: 1,551 posts
Posted: Monday, November 21, 2011 - 07:43 PM UTC
Nice I have to say.

A very good build of an interesting kit & some nice idea's thrown in too, Thanks for sharing it with us Doug. It really does look like it will be beautiful when finished.

Keith
 _GOTOTOP