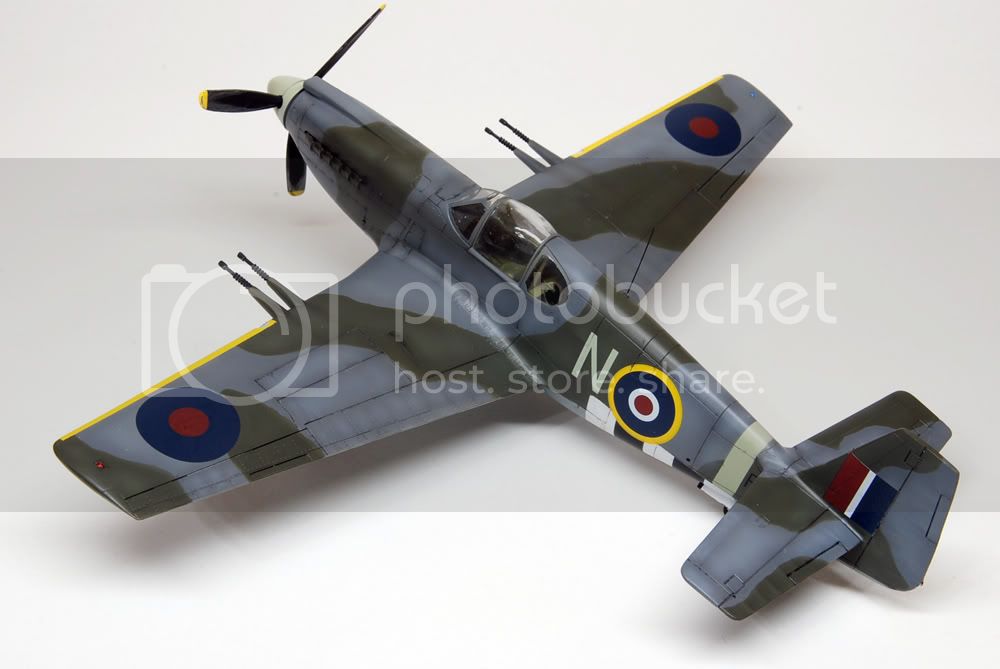
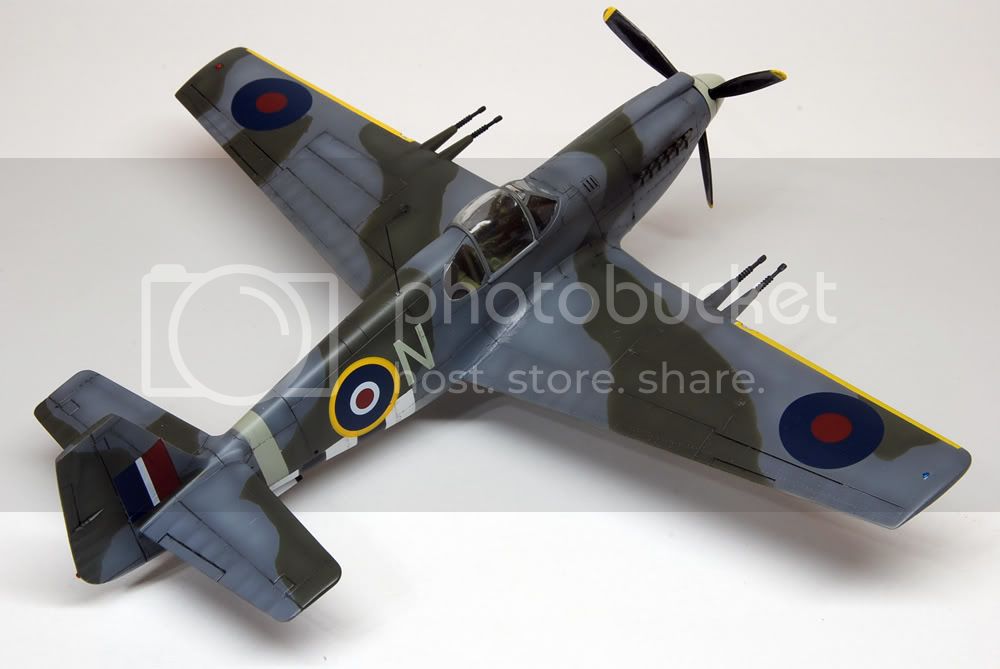
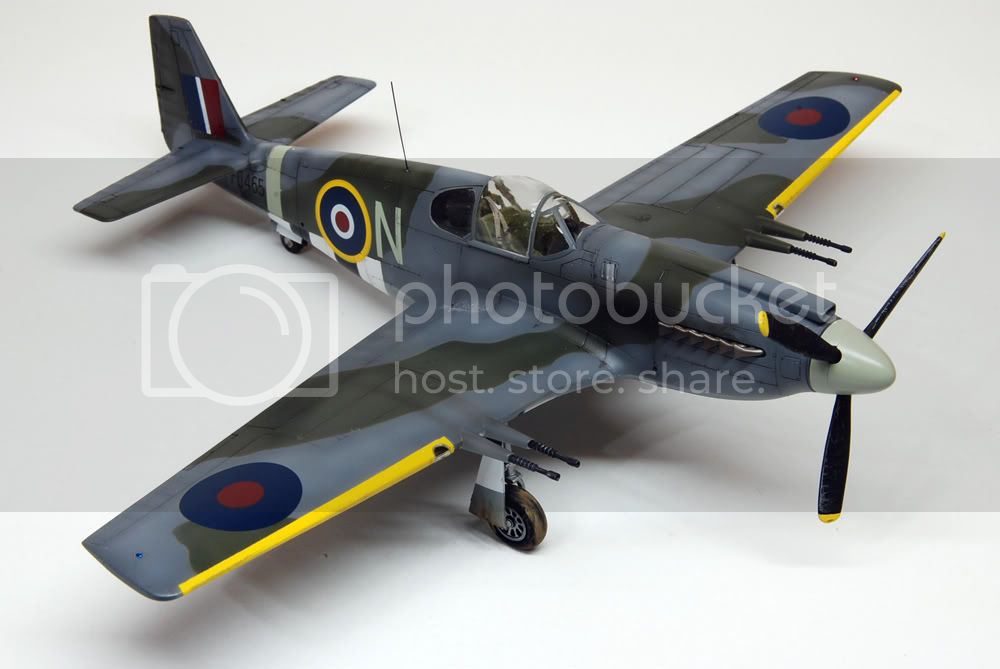
Hello all,
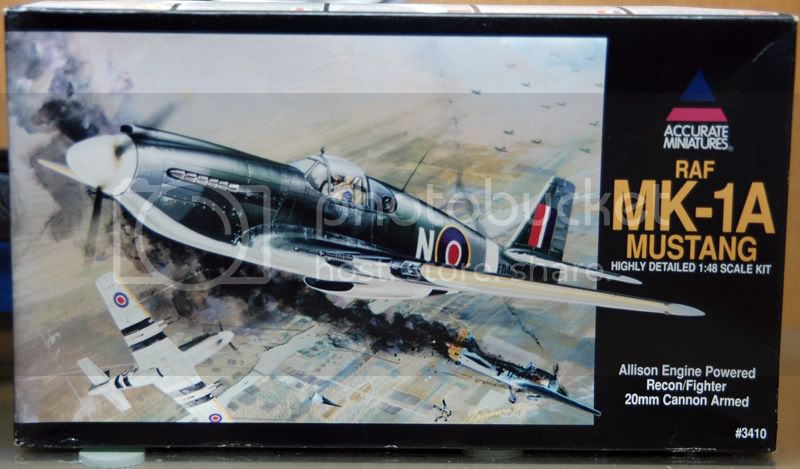
In between my builds for campaigns, I started a new kit. This is Accurate Miniatures' Mustang MkI. The kit will be my second P-51 from Accurate Min (I built the other one as a P-51A) and my third P-51 in 1/48 scale. I'm hoping that together with its brethen, it will scare off the two Me109Es in my shelves
The cockpit was assembled out of the box, but without the seatbelts it looked a bit naked. I used some Sutton harnesses from Eduard's RAF seatbelt set (don't know if RAF P-51s actually used these or American seatbelts).
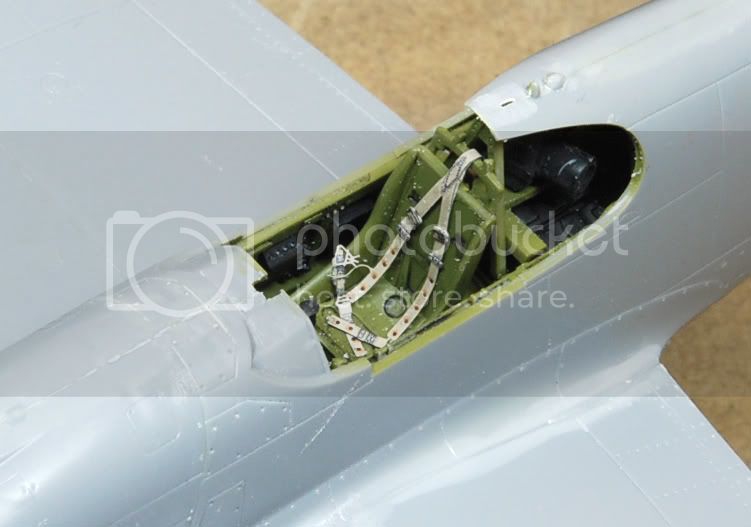
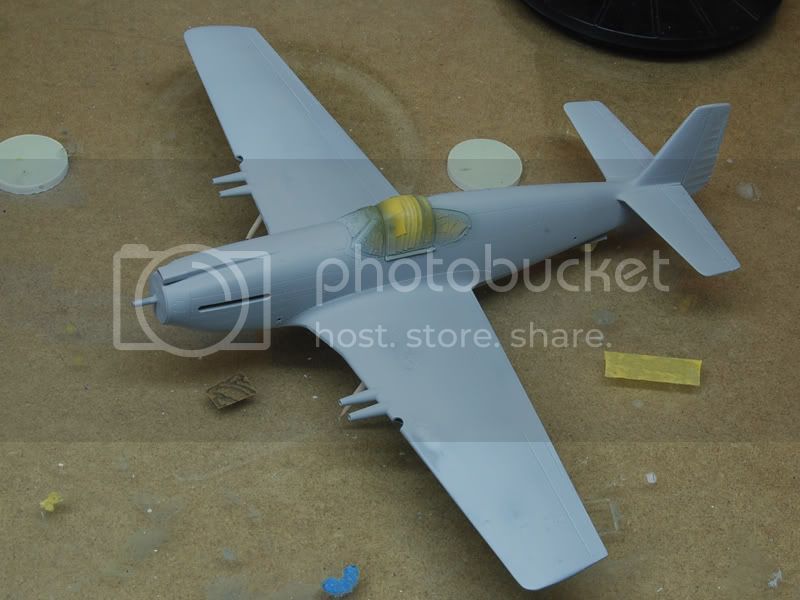
The Accurate Miniatures kit goes together well, IF you know your kit and its potential problems. The instructions tell you to assemble the fuselage halves first, then the engine halves, then assemble all of these together to complete the fuselage. Well, DON'T do this. I assembled the engine parts with the fuselage halves as right and left side, then assembled the half fuselages together. It fits seamlessly.
Another problem is the lower half of the wing not fitting properly. This happens as the landing gears are molded too thick and their backside touch the cockpit floor. Sand the backsides of the landing gear bays until they do not touch the cockpit and the wings will fit like a dream.
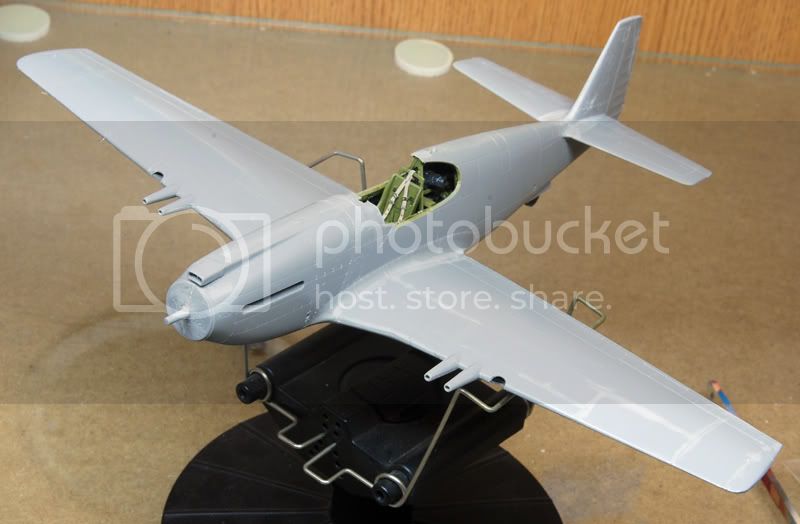
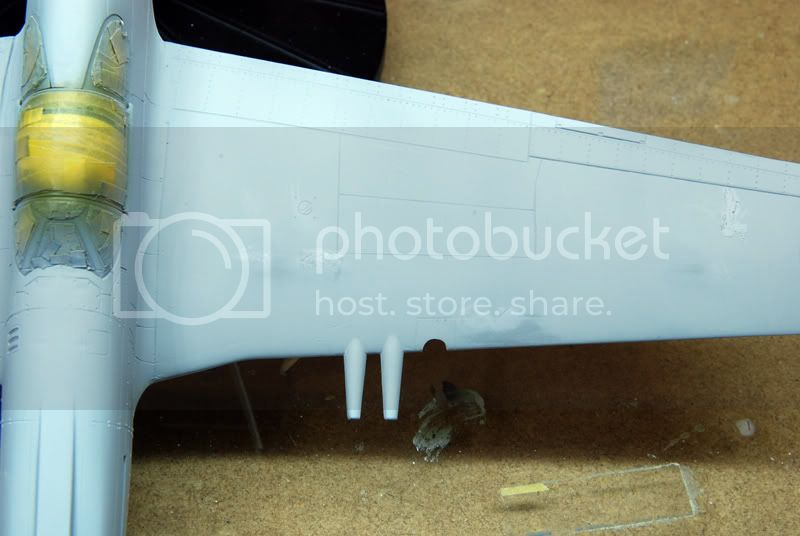
I will now fill the panel lines on the wings, since these were filled smooth on the real aircraft to improve wing performance and overall speed of the aircraft. To do this, I first streched some sprue until it was thin enough, then filled the lines with this (except the gun bay covers). Now I will apply putty to the remaining areas and create my smooth wings. Let's see how that goes.
Hosted by Rowan Baylis
Accurate Min's P-51 MkI
emroglan
Istanbul, Turkey / Türkçe
Joined: December 16, 2004
KitMaker: 1,163 posts
AeroScale: 255 posts
Joined: December 16, 2004
KitMaker: 1,163 posts
AeroScale: 255 posts
Posted: Wednesday, November 09, 2011 - 02:01 AM UTC
GastonMarty
Quebec, Canada
Joined: April 19, 2008
KitMaker: 595 posts
AeroScale: 507 posts
Joined: April 19, 2008
KitMaker: 595 posts
AeroScale: 507 posts
Posted: Wednesday, November 09, 2011 - 12:31 PM UTC
Very nice work. Don't forget that UNLIKE Merlin Mustangs, the inner gear doors cannot drop when on the ground: They should always be closed.
Even AM get this wrong in their instructions, and it is a very common error by modellers...
Gaston
emroglan
Istanbul, Turkey / Türkçe
Joined: December 16, 2004
KitMaker: 1,163 posts
AeroScale: 255 posts
Joined: December 16, 2004
KitMaker: 1,163 posts
AeroScale: 255 posts
Posted: Wednesday, November 09, 2011 - 07:33 PM UTC
Thanks Gaston! That was something I was trying to confirm.
DougN1
Georgia, United States
Joined: August 08, 2011
KitMaker: 410 posts
AeroScale: 409 posts
Joined: August 08, 2011
KitMaker: 410 posts
AeroScale: 409 posts
Posted: Tuesday, November 15, 2011 - 06:19 AM UTC
Quoted Text
Very nice work. Don't forget that UNLIKE Merlin Mustangs, the inner gear doors cannot drop when on the ground: They should always be closed.
Even AM get this wrong in their instructions, and it is a very common error by modellers...
Gaston
What, like this one?
http://upload.wikimedia.org/wikipedia/commons/5/52/P-51A-1NA_Polar_Bear_1.jpg
Or maybe this one?
http://www.vectorsite.net/Yap51_5m.jpg
Or perhaps this one?
http://farm1.static.flickr.com/118/261275468_5a52702fda.jpg
Results of 2 minutes of Google image search...
Doug
Jessie_C
British Columbia, Canada
Joined: September 03, 2009
KitMaker: 6,965 posts
AeroScale: 6,247 posts
Joined: September 03, 2009
KitMaker: 6,965 posts
AeroScale: 6,247 posts
Posted: Tuesday, November 15, 2011 - 06:39 AM UTC
Forbidden
You don't have permission to access /Yap51_5m.jpg on this server.
Actually Gaston may be correct. Those are modern restorations, which may have used B or D model hydraulics. Every period picture I've found (all 3 of them) show the doors up.
http://www.roseannasreply.com/Images/photos/005.jpg
http://www.swissmustangs.ch/mediac/400_0/media/P-51A$20Training.jpg
http://www.swissmustangs.ch/mediac/400_0/media/P-51B$20-$20P-51A$20color.jpg
ColFord
Australian Capital Territory, Australia
Joined: March 07, 2009
KitMaker: 11 posts
AeroScale: 9 posts
Joined: March 07, 2009
KitMaker: 11 posts
AeroScale: 9 posts
Posted: Tuesday, November 15, 2011 - 07:13 PM UTC
The matter of gear doors on Allison engined Mustangs has come up many times. The basic facts are that the door mechanism on the early Allison engined Mustangs had a latch that kept them locked up, that disengaged whilst the undercarriage went up or down. The door could be manually unlatched on the ground for maintenance inside the wheelbay.
Polar Bear has more P-51D attributes to it in regards to its hydraulics and its underslung radiator scoop, being P-51D items substituted during its rebuild to replace the original items that were lost when it crashed way back when. Similarly Gerry Beck's new build P-51A (built from plans and templated components) also utilised some later P-51 type components, especially the hydraulics which are largely P-51D parts.
The following post on the BritModeller forum with various links is a good starting point for details on RAF Allison engined Mustangs, and in particular the Mk.I, Mk.IA and Mk.II.
http://www.britmodeller.com/forums/index.php?showtopic=75403
Enjoy your build, the AM Mustang Mk.IA is not a bad kit to work with, I've built a few.
Regards,
emroglan
Istanbul, Turkey / Türkçe
Joined: December 16, 2004
KitMaker: 1,163 posts
AeroScale: 255 posts
Joined: December 16, 2004
KitMaker: 1,163 posts
AeroScale: 255 posts
Posted: Tuesday, November 15, 2011 - 08:08 PM UTC
Thanks for the discussion. Based on available info here and out there on the 'net, I've glued the bay doors in closed position.
The wings were smoothed out, at least to the best of my ability (my laziness kicks in after some point, so I tend to build imperfect models).
A coat of Mr Surfacer 1200 shows some irregularities and some panel lines that weren't covered properly. More putty work...
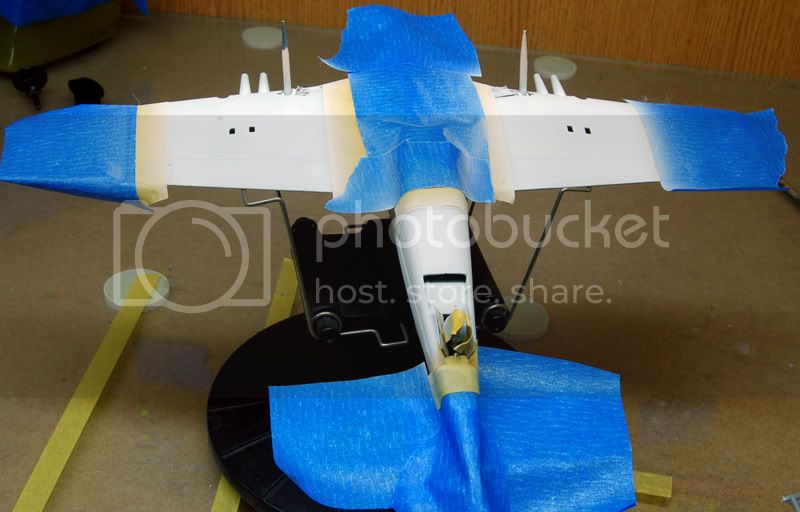
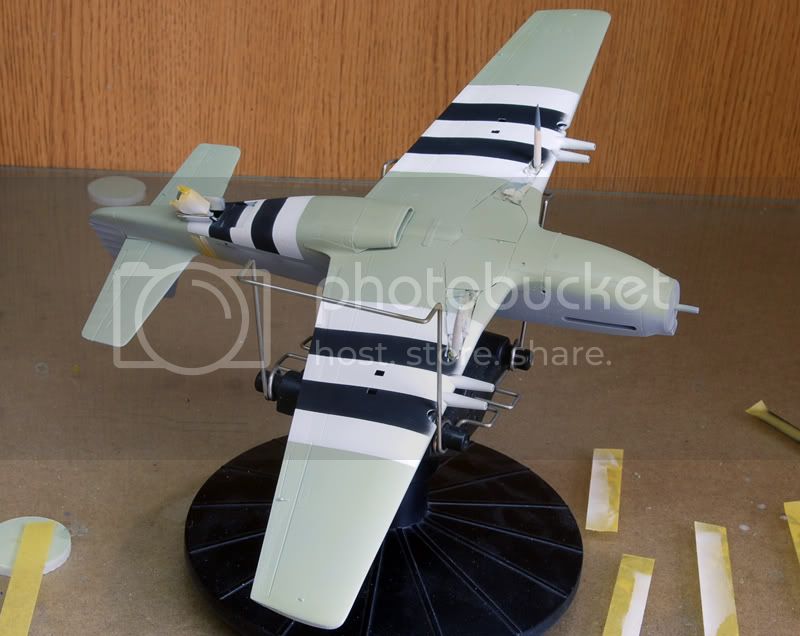
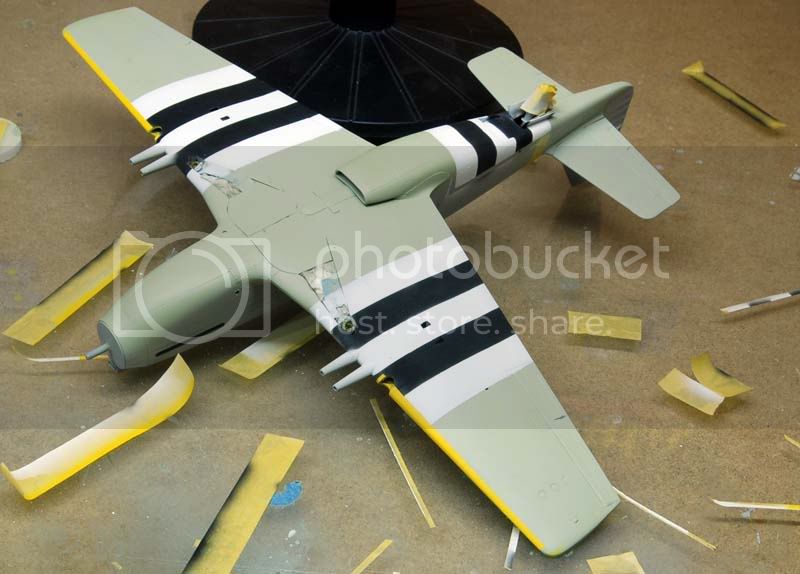
Then I painted the undersides with Sky S from Gunze. At this point I decided to paint the D-Day stripes rather than using decals. Since I would be using Tamiya's white with enamel thinner (I think the best combination for white), I masked the plane completely. The white tends to fly everywhere otherwise.
Here's the completed invasion stripes and the Sky S underside. D-Day stripes are not perfect, but I'm lazy
Okay, now it's time to paint the RAF camouflage. Is the camouflage given by Accurate Miniatures usable or near accurate? Or should I find a better paint scheme?
Posted: Wednesday, November 16, 2011 - 12:10 AM UTC
Hi there
The inner doors certainly can be seen lowered on wartime Allison-engined Mustangs (there are a couple of nice clear shots in Detail & Scale Vol. 50 for starters), but it does seem to be quite uncommon. I presume the doors could be unlocked and lowered for servicing, so perhaps that explains the photos?
All the best
Rowan
EDIT - Sorry, I missed Colin's earlier note about the manual latch to enable servicing.
BlackWidow
European Union
Joined: August 09, 2009
KitMaker: 1,732 posts
AeroScale: 1,336 posts
Joined: August 09, 2009
KitMaker: 1,732 posts
AeroScale: 1,336 posts
Posted: Wednesday, November 16, 2011 - 08:06 AM UTC
Hi Emre,
I will follow your build closely, as I plan to built also an RAF-Mustang next year (the Tamiya kit). So this should be interesting also for me .....
Show me one modeller who builds perfect models! You will find no one. So don't worry about it, as long as you are satified with the result.
As far as I remember these stripes were never as accurate as we modellers usually paint them. Out in the field they often used brushes and just paint some black and white stripes. There are several photos flying around the www where you can see this .....
Happy modelling!
Torsten
I will follow your build closely, as I plan to built also an RAF-Mustang next year (the Tamiya kit). So this should be interesting also for me .....
Quoted Text
.....(my laziness kicks in after some point, so I tend to build imperfect models)......
Show me one modeller who builds perfect models! You will find no one. So don't worry about it, as long as you are satified with the result.
Quoted Text
.....Here's the completed invasion stripes and the Sky S underside. D-Day stripes are not perfect, but I'm lazy ......
As far as I remember these stripes were never as accurate as we modellers usually paint them. Out in the field they often used brushes and just paint some black and white stripes. There are several photos flying around the www where you can see this .....
Happy modelling!
Torsten
ColFord
Australian Capital Territory, Australia
Joined: March 07, 2009
KitMaker: 11 posts
AeroScale: 9 posts
Joined: March 07, 2009
KitMaker: 11 posts
AeroScale: 9 posts
Posted: Wednesday, November 16, 2011 - 08:20 AM UTC
The standardised scheme that the RAF painted its Mustang Mk.IAs in to after they had been received in the UK, consisted of Ocean Grey and Dark Green upper surfaces in a standardised disruptive pattern, with Medium Sea Grey undersurfaces, Sky spinner and rear fuselage identification band, yellow wing leading edge identification stripe. From June to December 1943 the yellow leading edge stripe went from the wing tip to the wing root, but this was corrected around December 1943 to more correctly go from just outboard of the wing mounted cannon to the wing tip.
This the upper surface camouflage pattern I worked up based on original photographs of RAF Mustang Mk.IAs. The same basic scheme was also used for the later Mustang Mk.II.
Regards,
This the upper surface camouflage pattern I worked up based on original photographs of RAF Mustang Mk.IAs. The same basic scheme was also used for the later Mustang Mk.II.
Regards,
emroglan
Istanbul, Turkey / Türkçe
Joined: December 16, 2004
KitMaker: 1,163 posts
AeroScale: 255 posts
Joined: December 16, 2004
KitMaker: 1,163 posts
AeroScale: 255 posts
Posted: Wednesday, November 16, 2011 - 10:45 AM UTC
Hello Colin,
Thanks for the corrected scheme. The more I look at RAF Mustang photos, the more confused I get. First of all, camouflage patterns seem to vary between aircraft. Worse, some of them have soft-edges and an irregular border line where the undersurface grey meets the upper dark green-gray. Others have hard edged camouflage pattern with a distinctive proper border line between the upper and lower surfaces. Yet others seem to be a mixture of both. I'm suspecting field application and/or maintenance resulted in this.
Okay then, to proceed...
First of all, I painted the undersurfaces Sky S. Should I change it back to grey? If so, what is the matching color for Medium Sea Grey for Gunze or Tamiya paints?
Second, where should the yellow leading edge stripe be? From the outer cannon until the edge of the wing? The box art, instructions and other drawings I found online all show different leading edge stripes, possibly due to your explanation.
Lastly, as other British aircraft of the era were generally painted using templates, should the upper surface camouflage be hard-edged? What about the separation line (what was this called in English? Something like demarcation...) between the undersurface color and the upper surface camouflage?
Depending on your answers, I will rework the undersurfaces and then proceed with painting the camouflage. Until then I'll put the project on hold as I'm overwhelmed by too many unknowns at the moment.
ColFord
Australian Capital Territory, Australia
Joined: March 07, 2009
KitMaker: 11 posts
AeroScale: 9 posts
Joined: March 07, 2009
KitMaker: 11 posts
AeroScale: 9 posts
Posted: Wednesday, November 16, 2011 - 07:43 PM UTC
If you are looking at photos of RAF Mustang Mk.Is, the original non-cannon armed versions, yes you will certainly see a wide variety of schemes throughout their lives. Many repaints, differing styles, hard and soft demarcations, a real variety. However the cannon armed Mustang Mk.IAs and Mustang Mk.IIs were painted in a standardised scheme, fairly hard edged and with a fairly standardised demarcation between the upper and lower colours.
For the underside it really should be Medium Sea Grey, Gunze H335 or Tamiya have a recent release XF83 which they put out to go with their Spitfire release.
If you are doing a post-D-Day Mustang Mk.IA, then the yellow wing leading edge id stripe goes from outboard of the outermost cannon fairing to the panel line that is closest out to the wingtip - wing tip end cap fairing panel line.
Only two RAF Squadrons still had Mustang Mk.IAs at and after D-Day, No.II(AC) Squadron (No.2 Squadron) and No.268 Squadron, but No.II(AC) Squadron was in the process of converting to the Mustang Mk.II, so with D-Day markings it is one of those two units. FD472 M on the AM decals was with No.268 Squadron from January 1944 until retired in late 1944.
Regards,
emroglan
Istanbul, Turkey / Türkçe
Joined: December 16, 2004
KitMaker: 1,163 posts
AeroScale: 255 posts
Joined: December 16, 2004
KitMaker: 1,163 posts
AeroScale: 255 posts
Posted: Wednesday, November 16, 2011 - 07:55 PM UTC
Thank you Colin, that was great help!
Well then, I'll convert the undersides to grey and start working from there. Now I know where the yellow stripe is, I can complete my D-Day stripes as well.
By any chance, do you have a larger photo of the Accurate Min instructions you corrected? I know I'm asking a bit too much, but you have really shown me the way
Naseby
Slovakia
Joined: October 15, 2010
KitMaker: 825 posts
AeroScale: 476 posts
Joined: October 15, 2010
KitMaker: 825 posts
AeroScale: 476 posts
Posted: Wednesday, November 16, 2011 - 09:41 PM UTC
The work so far is great Emre, keep the photos comming.
emroglan
Istanbul, Turkey / Türkçe
Joined: December 16, 2004
KitMaker: 1,163 posts
AeroScale: 255 posts
Joined: December 16, 2004
KitMaker: 1,163 posts
AeroScale: 255 posts
Posted: Thursday, November 17, 2011 - 10:08 AM UTC
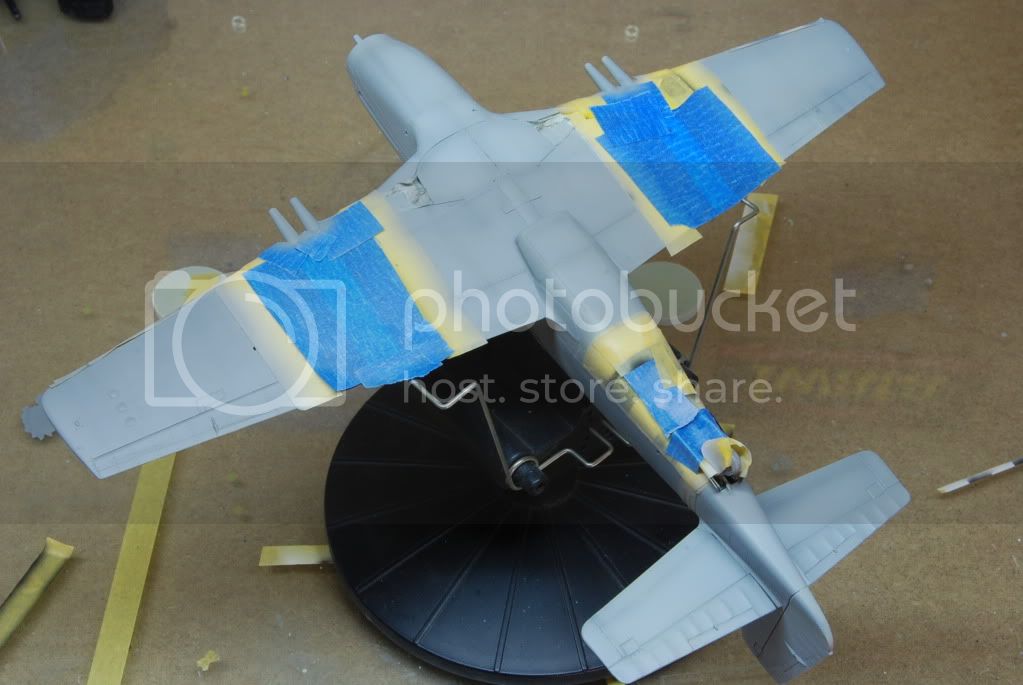
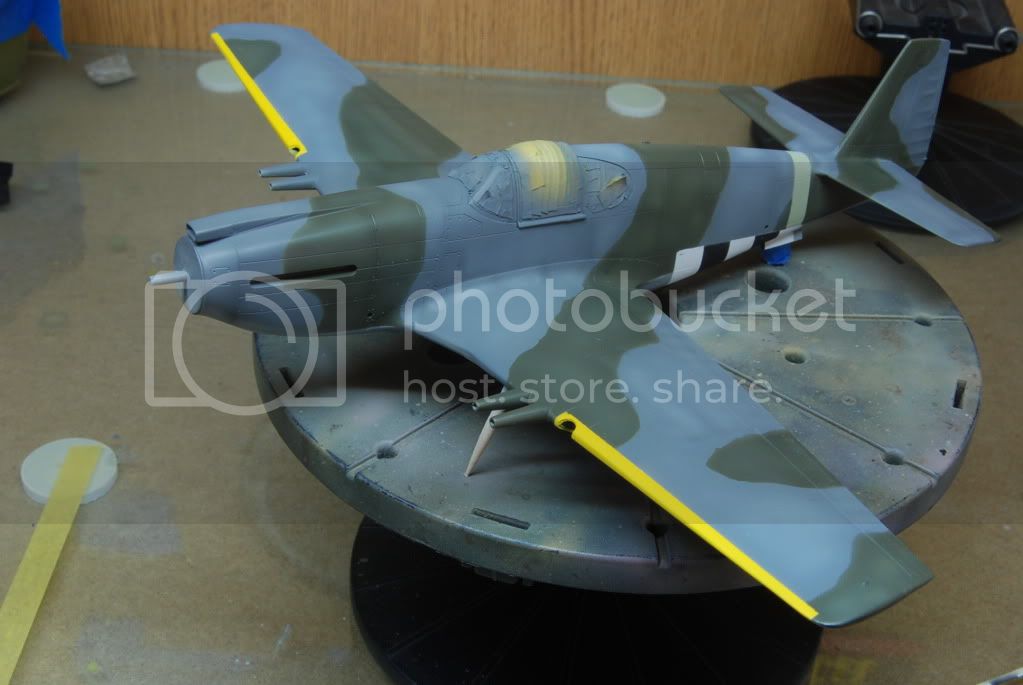
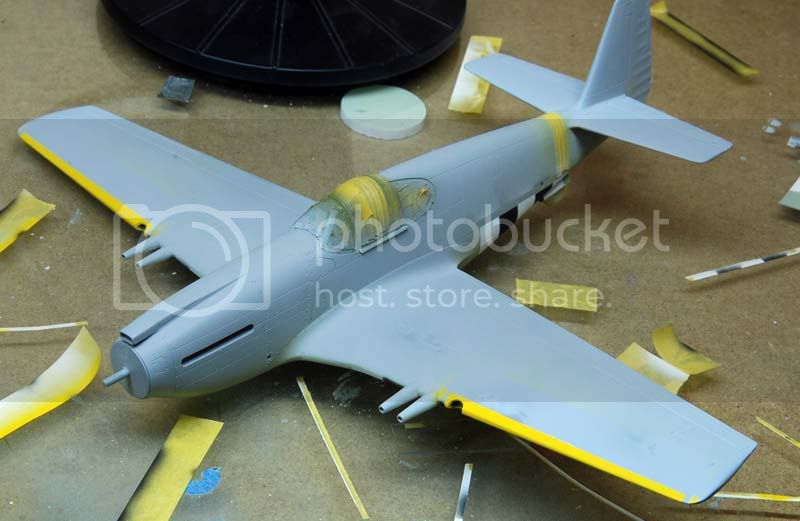
Okay, I started reworking the painting stage. First, I sprayed yellow on the leading edges, masking off the D-Day stripes to protect them. Then I corrected the D-Day stripes as well (they didn't reach into the leading edge as I wasn't sure about the yellow stripe).
Now I will mask all stripes and repaint the underside with grey.
Dirkpitt289
New Jersey, United States
Joined: May 24, 2008
KitMaker: 346 posts
AeroScale: 307 posts
Joined: May 24, 2008
KitMaker: 346 posts
AeroScale: 307 posts
Posted: Friday, November 18, 2011 - 05:09 PM UTC
That is really looking sharp. Look forward to seeing more.
stonar
England - West Midlands, United Kingdom
Joined: August 15, 2008
KitMaker: 337 posts
AeroScale: 309 posts
Joined: August 15, 2008
KitMaker: 337 posts
AeroScale: 309 posts
Posted: Saturday, November 19, 2011 - 01:14 AM UTC
That looks very good.
Flaps up or down? It is often quoted that flaps were raised after landing to prevent damage but according to the Mustang III handbook they were supposed to be lowered,after parking, "to prevent people walking on them".
Maybe the same applied to your subject.
Cheers
Steve
Flaps up or down? It is often quoted that flaps were raised after landing to prevent damage but according to the Mustang III handbook they were supposed to be lowered,after parking, "to prevent people walking on them".
Maybe the same applied to your subject.
Cheers
Steve
emroglan
Istanbul, Turkey / Türkçe
Joined: December 16, 2004
KitMaker: 1,163 posts
AeroScale: 255 posts
Joined: December 16, 2004
KitMaker: 1,163 posts
AeroScale: 255 posts
Posted: Saturday, November 19, 2011 - 10:35 AM UTC
Steve, as they are molded in fixed position, I don't think I will be touching the flaps, so they will stay up.
Thanks for the comments Torsten and Dirk!
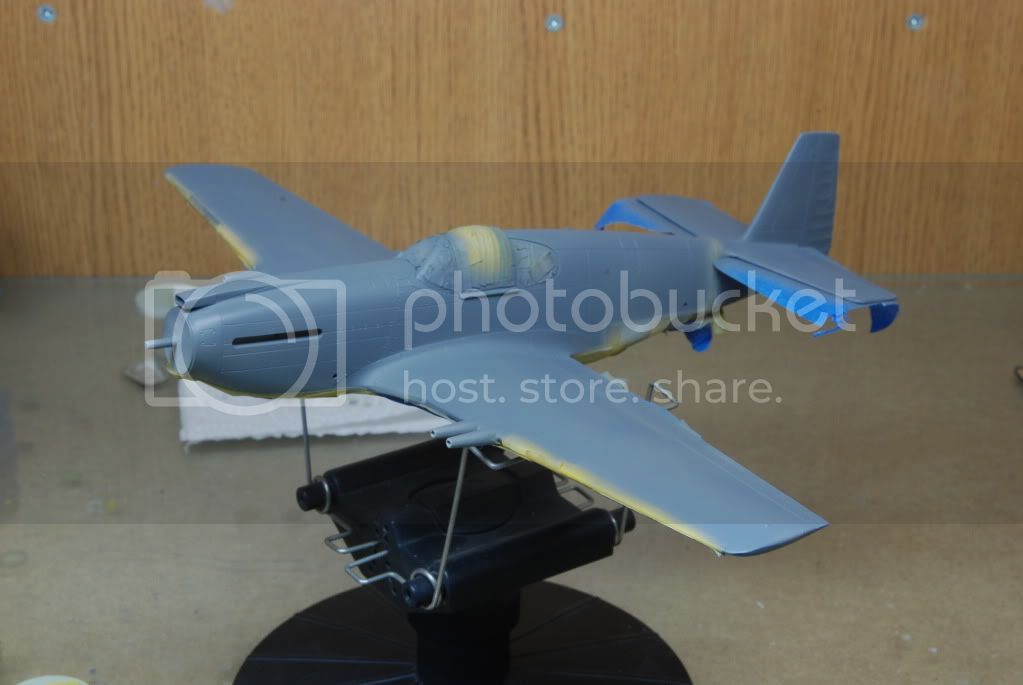
The undersides were repainted with grey and I played around with the tones a little.
The upper surfaces got the dark ocean grey for their camouflage. It certainly is interesting to see a Mustang in these colors, rather than NMF or olive drab.
Now I will start masking the grey areas to prepare for green.
emroglan
Istanbul, Turkey / Türkçe
Joined: December 16, 2004
KitMaker: 1,163 posts
AeroScale: 255 posts
Joined: December 16, 2004
KitMaker: 1,163 posts
AeroScale: 255 posts
Posted: Saturday, November 19, 2011 - 12:59 PM UTC
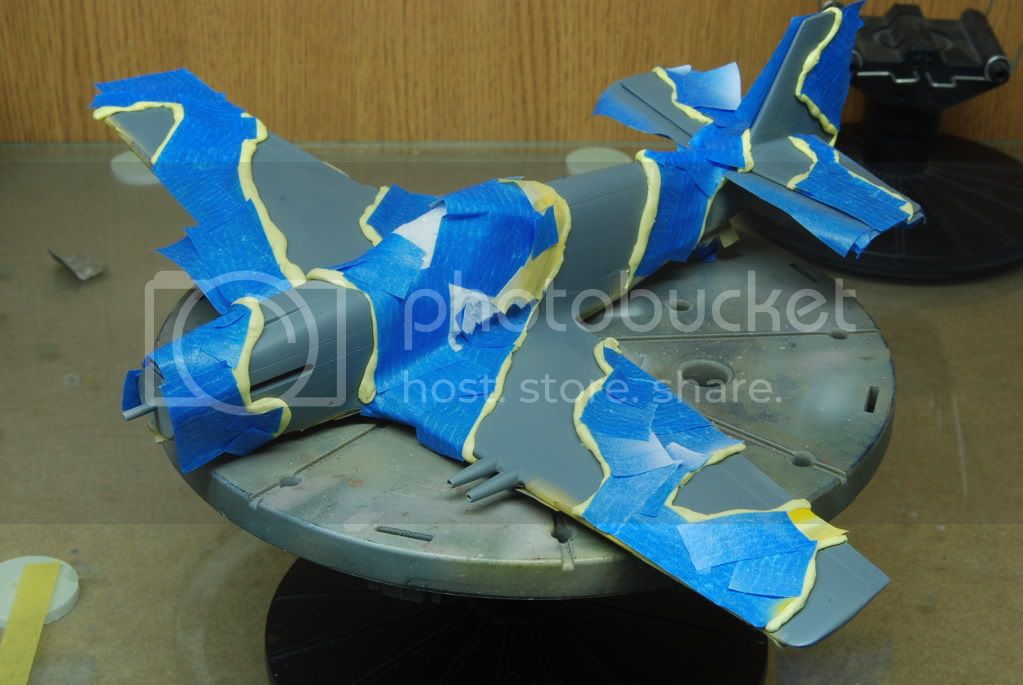
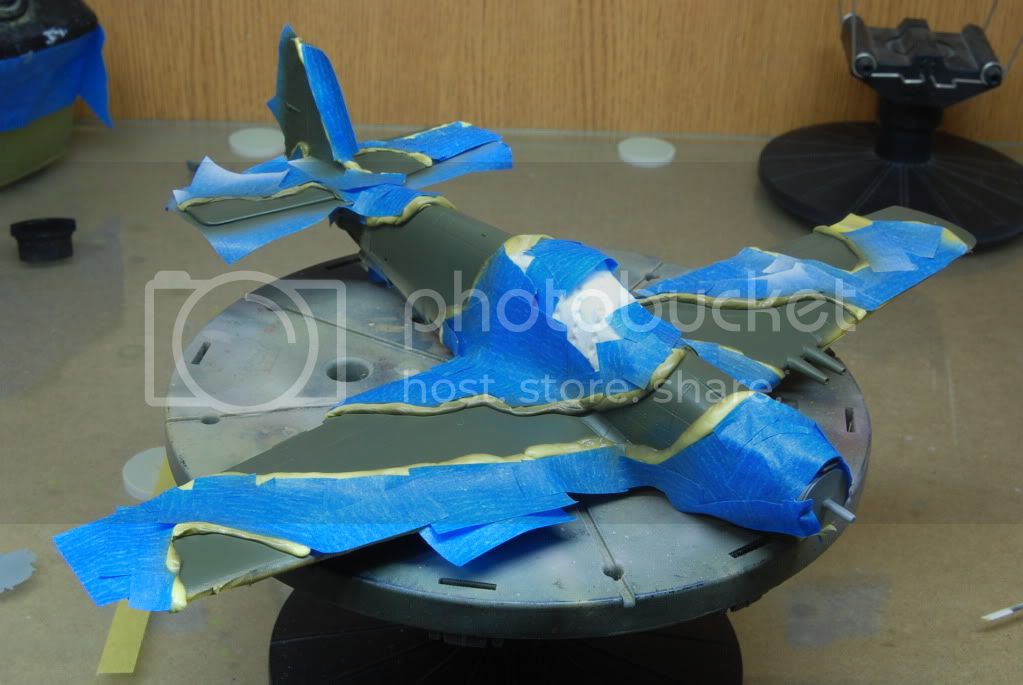
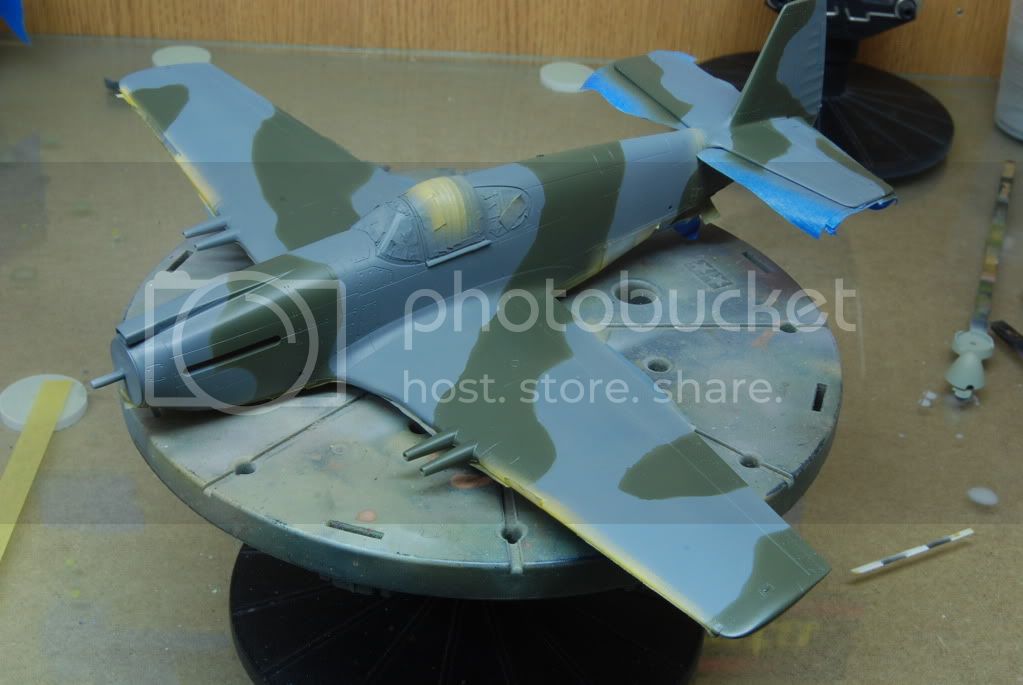
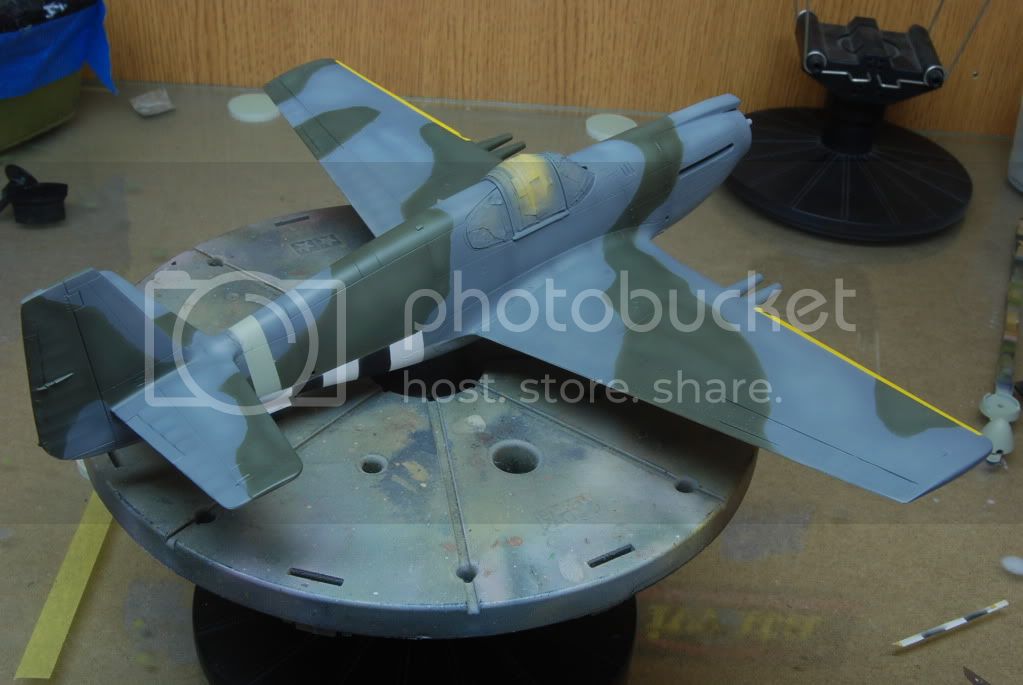
The masking fest begins... I used yellow tack to first outline the camouflage pattern, then used 3M's blue masking tape to cover grey areas.
Then Dark Green was applied...
... and the masking tape and tack were removed.
It looks a little raw and disorderly. I will start fading the colors and add some tones, it will hopefully look better then.
Then Dark Green was applied...
... and the masking tape and tack were removed.
It looks a little raw and disorderly. I will start fading the colors and add some tones, it will hopefully look better then.
Automaton
United States
Joined: August 12, 2007
KitMaker: 153 posts
AeroScale: 139 posts
Joined: August 12, 2007
KitMaker: 153 posts
AeroScale: 139 posts
Posted: Sunday, November 20, 2011 - 01:26 AM UTC
Quoted Text
It certainly is interesting to see a Mustang in these colors, rather than NMF or olive drab.
Hi Emre;
The RAF livery really does go well with the Mustang's lines. You're doing some fine work on this project, should turn out beautiful.
Regards;
Automaton
emroglan
Istanbul, Turkey / Türkçe
Joined: December 16, 2004
KitMaker: 1,163 posts
AeroScale: 255 posts
Joined: December 16, 2004
KitMaker: 1,163 posts
AeroScale: 255 posts
Posted: Sunday, November 20, 2011 - 09:42 PM UTC
Thank you Automaton!
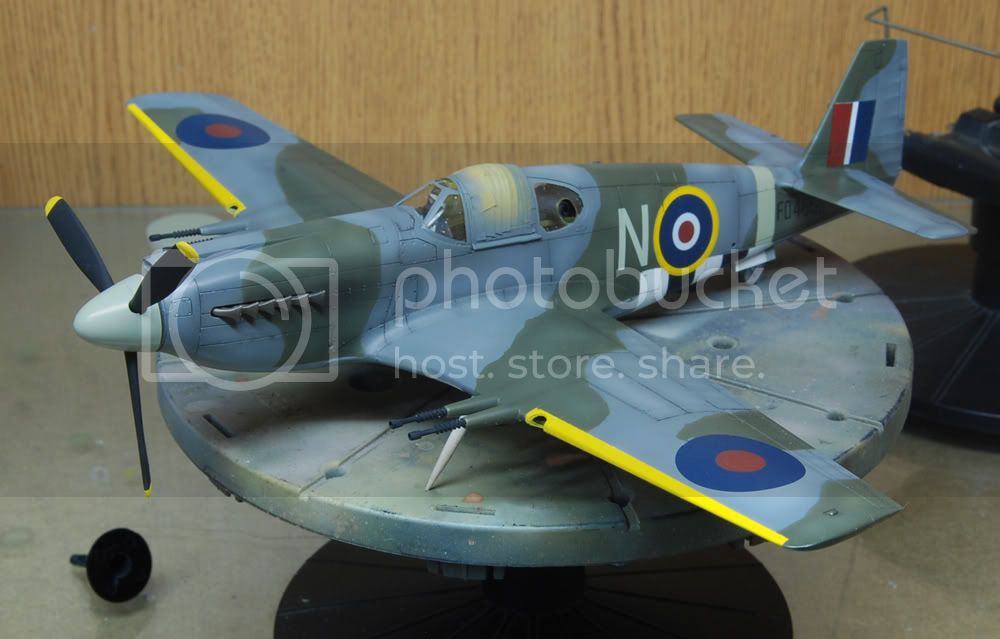
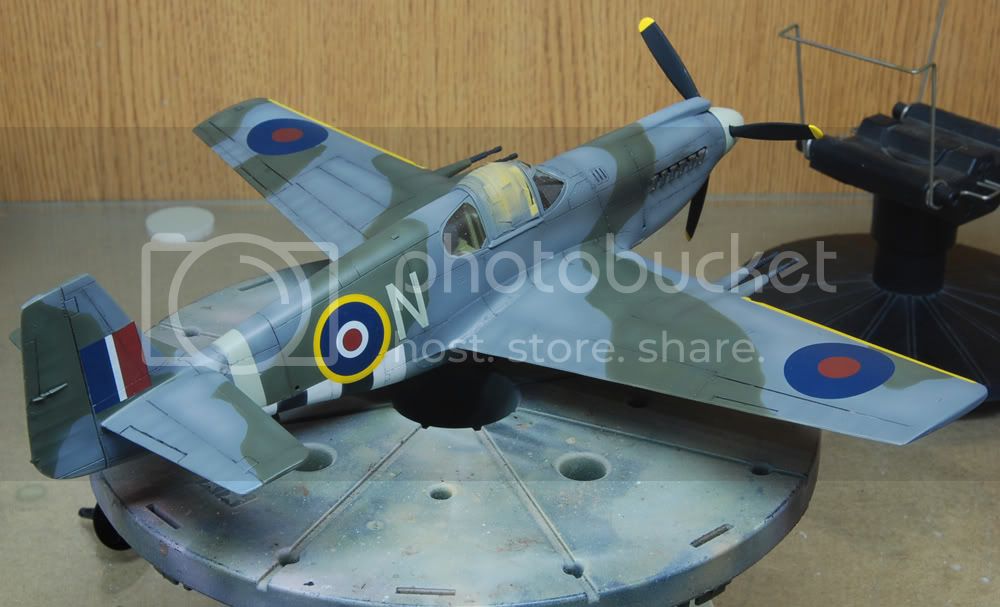
I played around with the green and grey. The masking tapes were removed and there are some small spots where touch ups will be required due to small leaks. Other than that, ready for a gloss coat and decals.
emroglan
Istanbul, Turkey / Türkçe
Joined: December 16, 2004
KitMaker: 1,163 posts
AeroScale: 255 posts
Joined: December 16, 2004
KitMaker: 1,163 posts
AeroScale: 255 posts
Posted: Thursday, November 24, 2011 - 10:51 AM UTC
Nearly there... To my dismay Accurate Miniatures decals are not the best, they are thick like Tamiya decals.
GastonMarty
Quebec, Canada
Joined: April 19, 2008
KitMaker: 595 posts
AeroScale: 507 posts
Joined: April 19, 2008
KitMaker: 595 posts
AeroScale: 507 posts
Posted: Thursday, November 24, 2011 - 03:37 PM UTC
Well look on the bright side: At least the roundel red is not a dull "coarse pixel" brick red, and they are well centered!
Even high quality AM decals usually get this wrong, or ask you to center the reds yourself, which I positively loathe doing...
Gaston
Even high quality AM decals usually get this wrong, or ask you to center the reds yourself, which I positively loathe doing...
Gaston
emroglan
Istanbul, Turkey / Türkçe
Joined: December 16, 2004
KitMaker: 1,163 posts
AeroScale: 255 posts
Joined: December 16, 2004
KitMaker: 1,163 posts
AeroScale: 255 posts
Posted: Thursday, November 24, 2011 - 07:51 PM UTC
Oh no, I can't complain about printing quality. Everything is well centered and the colors are good. Yet they are thick, if I haven't filled in the panel lines on the wings those roundels might have given me a real headache!
emroglan
Istanbul, Turkey / Türkçe
Joined: December 16, 2004
KitMaker: 1,163 posts
AeroScale: 255 posts
Joined: December 16, 2004
KitMaker: 1,163 posts
AeroScale: 255 posts
Posted: Friday, November 25, 2011 - 08:15 AM UTC
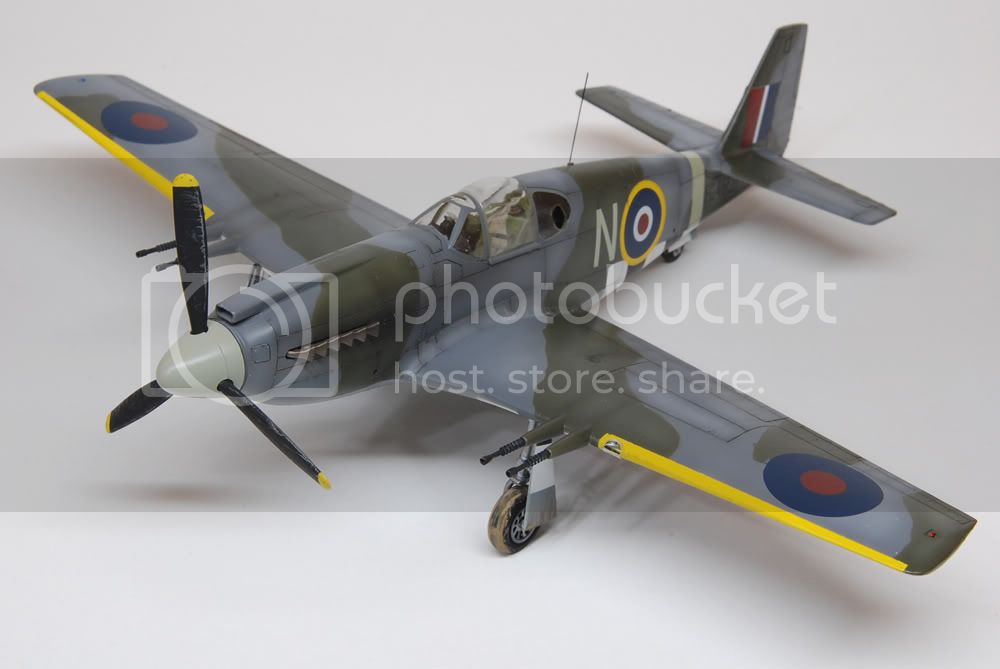
With the final touches, the antenna and the landing gear in place, I'll call this build done. Next time I have to do a hard-edged camouflage, I won't be using the yellow tack. It doesn't properly stick to the surface, which is good for protecting paint but bad for masking. As it moves and wiggles around slightly, my green camouflage areas also look wiggly and strange.
Other than that, I'm mostly satisfied with the result. Next time, I'll probably choose the longer way and use ordinary paper instead of tack. I hate having to cut them to shape, but at least they stay put!