_GOTOBOTTOM
World War II: Soviet Union
Russian aircraft of WWII
Hosted by Rowan Baylis
1/32 Montex Yak 1b
DougN1
_VISITCOMMUNITY
Georgia, United States
Joined: August 08, 2011
KitMaker: 410 posts
AeroScale: 409 posts
Posted: Monday, January 09, 2012 - 08:38 AM UTC
Now that I put the A5M4 Claude to bed to end 2011, Here is my next WIP subject, the first of 2012, Montex's kit of the Yak 1b:


Here are the major components stuck together for a photo op:


Unfortunately, I've found contrasting instructions for interior paint colors - some references say light blue, while some say interior grey. I will probably go with White Ensign's "Grey Interior Primer" rather than the light blue. Best that I can determine, the wheel wells should be the same color as the underside, but I am not sure on the color of the flap interior.

Comments/questions welcome as always!

Doug
Jessie_C
_VISITCOMMUNITY
British Columbia, Canada
Joined: September 03, 2009
KitMaker: 6,965 posts
AeroScale: 6,247 posts
Posted: Monday, January 09, 2012 - 08:52 AM UTC
I think that the conflicting references were due to the fact that many aircraft were painted with whatever paint was available rather than wait forever for the correct paint to arrive from the paint factory. The builders were far more concerned with getting them out the hangar door and into combat than whether they matched the specifications exactly. What it comes down to is that no Colour Commisar can tell you you're wrong when it comes to aircraft of the Great Patriotic War

Just for fun, have you been following Entoni's superlative1/48 build?
Tyronesdaddy
_VISITCOMMUNITY
United States
Joined: July 08, 2008
KitMaker: 9 posts
AeroScale: 8 posts
Posted: Monday, January 09, 2012 - 09:34 AM UTC
Doug,
That kit is resin? It looks like injected molded. How would you rate the quality of the kit? As for interior colours A-14 steel grey was becoming the predominant interior colour when the Yak-1b was being produced. There was a Russian website, which appears to have gone away, with colour pics of the sole surviving Yak-1b supposedly still in its original paint. The interior is mostly a very dark grey. I can email you the pics I downloaded from the site. I would suggest you go to the Soviet Warplanes site at: http://mig3.sovietwarplanes.com/index.html
They have an active forum where you can get your questions asked. You will need to send Massimo Tessitori, who runs the site, an email to join the forum.
Merlin
Staff MemberSenior Editor
AEROSCALE
#017
_VISITCOMMUNITY
United Kingdom
Joined: June 11, 2003
KitMaker: 17,582 posts
AeroScale: 12,795 posts
Posted: Monday, January 09, 2012 - 10:14 AM UTC
Hi Doug

I'm really looking forward to watching this one progress!

Erik Pilawskii wrote this in the Yak 1 chapter of his book Soviet Air Force Fighter Colours 1941-1945 (Classic Colours,2003):

"The interior colour application on all early manufacture Yaks appeared to vary considerably. Metal Use Primer (of the earlier ‘bright’ variety) was commonly found over all of the metal or steel interior surfaces, such as tubular framing, armour plate, etc., while the internal fabric surfaces were not typically painted over, but rather coated with clear 17-A dope. The wooden areas in the cockpit appear to have been variously unpainted or covered in Wood Finishes. Interiors covered in either finish entirely were not uncommon, as were examples that were not painted at all.

The interior wheel well structure was often finished in underside All Blue, as were the struts, wheels, and oleo scissors. Examples are known that seem to have these bays painted black, but this was certainly not the usual treatment."


All the best

Rowan
DougN1
_VISITCOMMUNITY
Georgia, United States
Joined: August 08, 2011
KitMaker: 410 posts
AeroScale: 409 posts
Posted: Monday, January 09, 2012 - 04:22 PM UTC
Thanks guys!

@ Jessica - thanks, I checked out Entoni's build, thats a lot more than I plan to do! I picked this kit as I wanted to do the quick build the A5M4 was supposed to have been

@ Bill - yes, it's 100% resin. After building a few of them, I find that they seem to be easier to build than plastic kits most of the time! Also, thanks for the links, I'm sure it will be useful.

@ Rowan - thanks, I have that book as well, but it seems he was referring to the earlier aircraft, rather than the Yak 1b, which was a mid-war build. Best I can determine, either interior grey or light blue would be appropriate I've decided to go with White Ensign's VVS Interior Grey Primer

Made decent progress today, cleaned up lots of parts and started the build.

First, I added the rivets to the bottom of the wing that are oddly missing (considering the other great detail of the kit). I first measured and drew some guidelines on the lower wing inserts, and then used RB Productions Rivet-R tool to add the rivets. I'll have to redo some of them once I get the wing altogether, but figured it would be easier to at least have them there as a guide to work from:


I also assembled the cockpit, and added all the little levels and knobs provided. Many of the round knobs were not really round once removed from the pour blocks and cleaned up, so I used some drops of Gator Grip glue to make them round. Then I painted everything Model Master Interior Black in preparation for the color coat coming up tomorrow:


Looking at the resin canopies, the center and front are pretty clear, however the rear is a bit cloudy. Once I get them cleaned up (they are somewhat brittle so need to be very careful), I'll dip them in future and they will clear up nicely (it has worked with other resin canopies):


Thanks for looking! Comments/questions (and color help) more than welcome!

Doug
DougN1
_VISITCOMMUNITY
Georgia, United States
Joined: August 08, 2011
KitMaker: 410 posts
AeroScale: 409 posts
Posted: Tuesday, January 10, 2012 - 02:32 AM UTC
Did some painting today and got the interior painted up, just have to put a pin wash in a couple spots and it should be ready to put it all together. Well, that and I need to get some seat belts in there - I did find some old PE parts that should do the trick, I'll see how they look tomorrow.

Here are the main cockpit components painted:


And the main bits dry fit in place to see how it will look:


I also did a little work to dress up the gunsight, I'll take some more pics and post later

Thanks again for looking, comments/questions/suggestions are always welcome!

Doug
Tyronesdaddy
_VISITCOMMUNITY
United States
Joined: July 08, 2008
KitMaker: 9 posts
AeroScale: 8 posts
Posted: Tuesday, January 10, 2012 - 04:13 AM UTC
Nice work!
Merlin
Staff MemberSenior Editor
AEROSCALE
#017
_VISITCOMMUNITY
United Kingdom
Joined: June 11, 2003
KitMaker: 17,582 posts
AeroScale: 12,795 posts
Posted: Tuesday, January 10, 2012 - 05:48 AM UTC
Hi Doug

Lovely job! I think I ended up going for a mix of metal and wood primers in my Eduard kit, as if there were some pre-painted subassemblies coming in from different contractors.

All the best

Rowan
DougN1
_VISITCOMMUNITY
Georgia, United States
Joined: August 08, 2011
KitMaker: 410 posts
AeroScale: 409 posts
Posted: Wednesday, January 11, 2012 - 02:48 AM UTC
Thanks guys Ok, finished up on the interior, dressed up the gunsight a bit with some old PE parts:


I also realized that the armored glass was supposed to have a frame around it (you would think that the masks provided in the kit would give that one away):


Almost forgot about the tailwheel, as it is not shown being assembled until a few steps later, but it must be put in place when the fuselage is closed up. I painted it, and used some aluminum tape for the oleo:


Put a wash on some of the cockpit areas, and added the seat belts I cobbled together from some old PE bits:


One last shot before it all goes together:


Of course, when everything seems to fit perfect in dry fitting, the fuselage halves did not want to go together perfectly as they had so many times. But, in the end, I was able to get everything together properly and superglued in place:


Next I need to clean up the fuselage and start fitting the lower cowl, wings, and tail surfaces.

As always, thanks for looking, comments/questions/suggestions welcome!

Doug
DougN1
_VISITCOMMUNITY
Georgia, United States
Joined: August 08, 2011
KitMaker: 410 posts
AeroScale: 409 posts
Posted: Thursday, January 12, 2012 - 01:06 AM UTC
Made some more progress, although it looks like I won't be able to go as fast through the airframe fitting bit. Fit of the lower nose looks good when dry fit to the fuselage:


However, not so good when the bottom wing center section is added:


Fortunately, I just had to sand the front a bit to get a good fit. Ran into what might be an issue with the rear canopy section. Dry fitting shows that it seems to extend a bit too far forward, according to references the frame of the rear section and center sections should overlap when closed. Here you can see that the rear section extends about 1/8" too far forward:


When all the sections are added, it seems that it is indeed a bit too long:


Choices here are:

1) Try to cut the canopy rear section with a razor saw (which will probably crack it)
2) Shorten the rear section by sanding only (can take a long time, and still might crack it)
3) Leave as is, and open the center section a bit to hide the issue

I think I'll go with #3 for now, I'll just have the center section cracked open a bit I've got to see if future will clear up that rear section, as it is pretty cloudy!

And, had to get something glued in place, so I glued the wing bottom center section in place, I'll get the fit cleaned up in a few hours:


As always, thanks for looking, comments/questions welcome!

Doug
warreni
_VISITCOMMUNITY
South Australia, Australia
Joined: August 14, 2007
KitMaker: 5,926 posts
AeroScale: 2,201 posts
Posted: Thursday, January 12, 2012 - 03:39 AM UTC
Are you sure the canopy pieces are not supposed to overlap that much? Don't forget all the ones around at the moment would have been modified heaps over the originals and they put them together so quickly it is possible that production tolerances could have been rather large.
Nice build though.
eseperic
_VISITCOMMUNITY
Croatia Hrvatska
Joined: November 06, 2009
KitMaker: 624 posts
AeroScale: 609 posts
Posted: Thursday, January 12, 2012 - 09:33 PM UTC
Hi Doug... This is very nice build. I just wanted to help, if possible. This is the best reference photo I have, and it is from a russian modeling site. The aircraft is a restored museum piece, but the canopy is more or less correct. You can see the gap between the central and the rear part of the canopy, as well as the overlap between them...


PS. This nice build also reminded me that I still have to finish my '48 build.
DougN1
_VISITCOMMUNITY
Georgia, United States
Joined: August 08, 2011
KitMaker: 410 posts
AeroScale: 409 posts
Posted: Friday, January 13, 2012 - 06:02 AM UTC
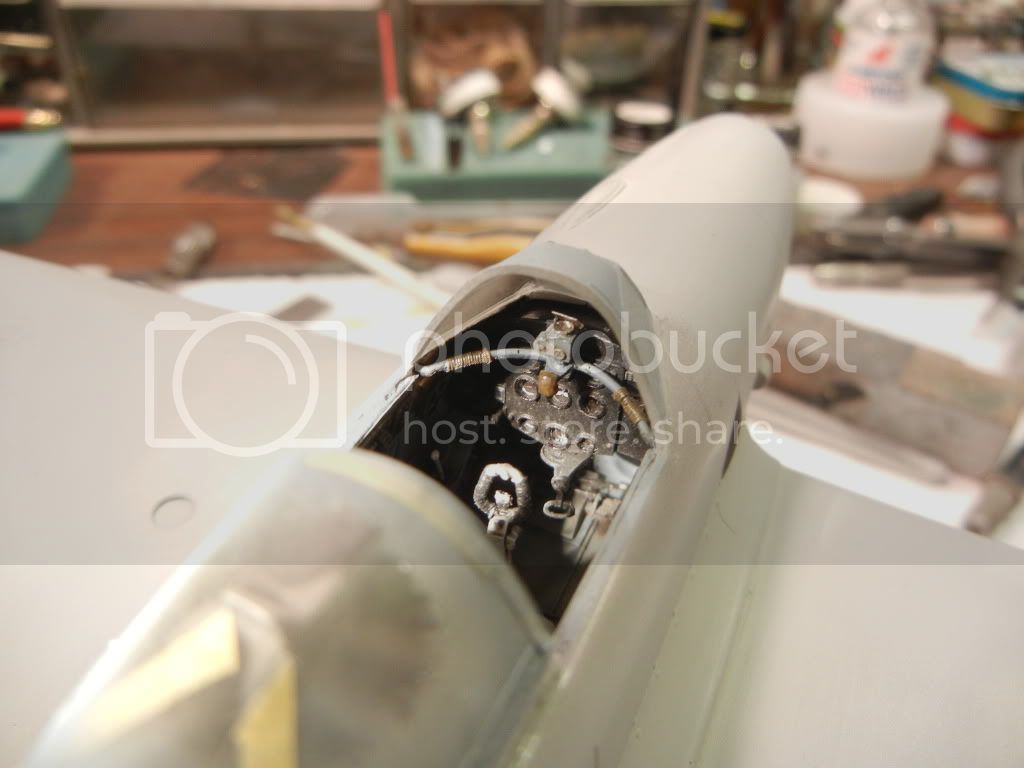
Thanks for the comments and reference pic Been busy with some of the more tedious and boring aspects of the build 
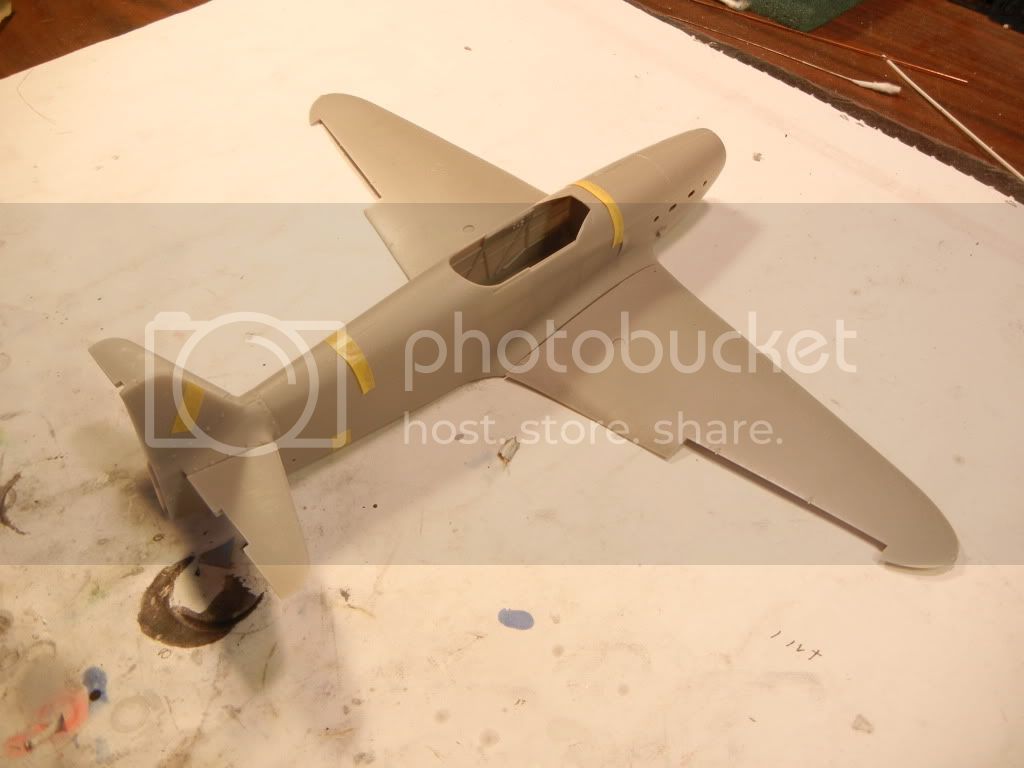
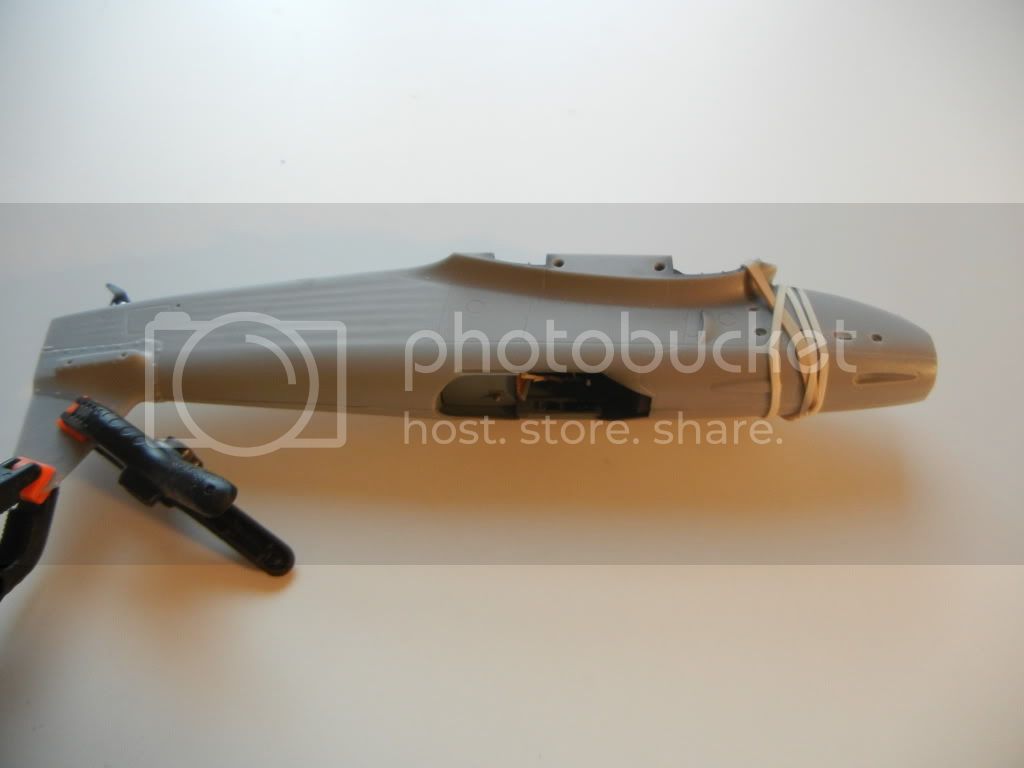
Got the lower cowl piece fitted and glued on:


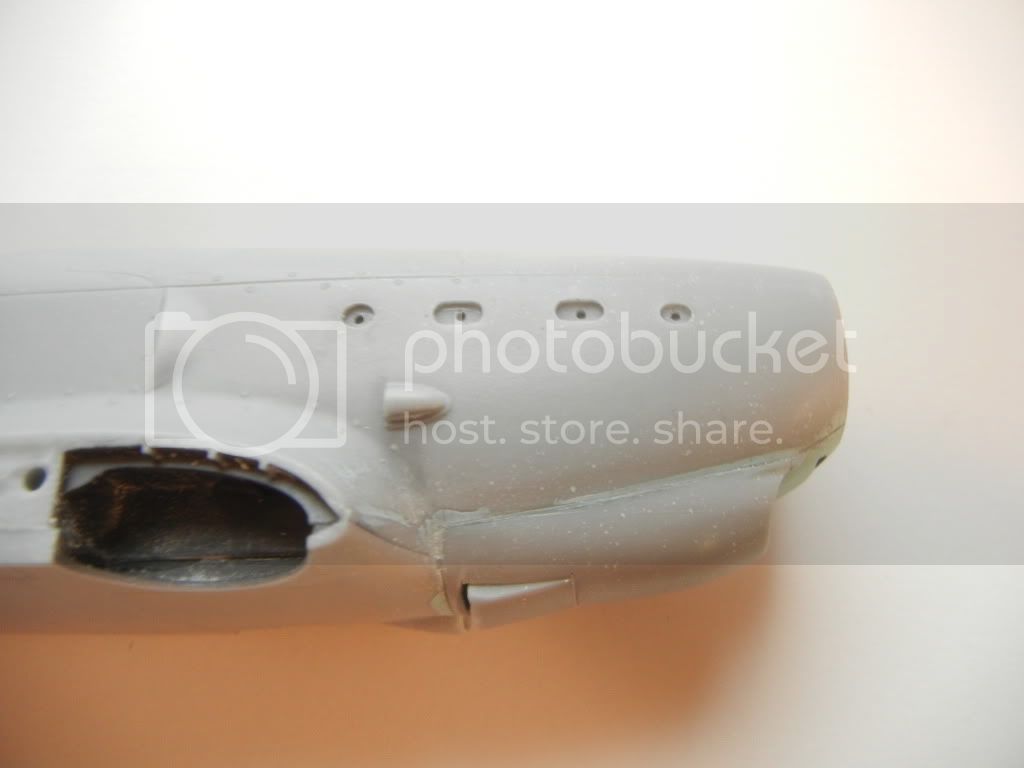
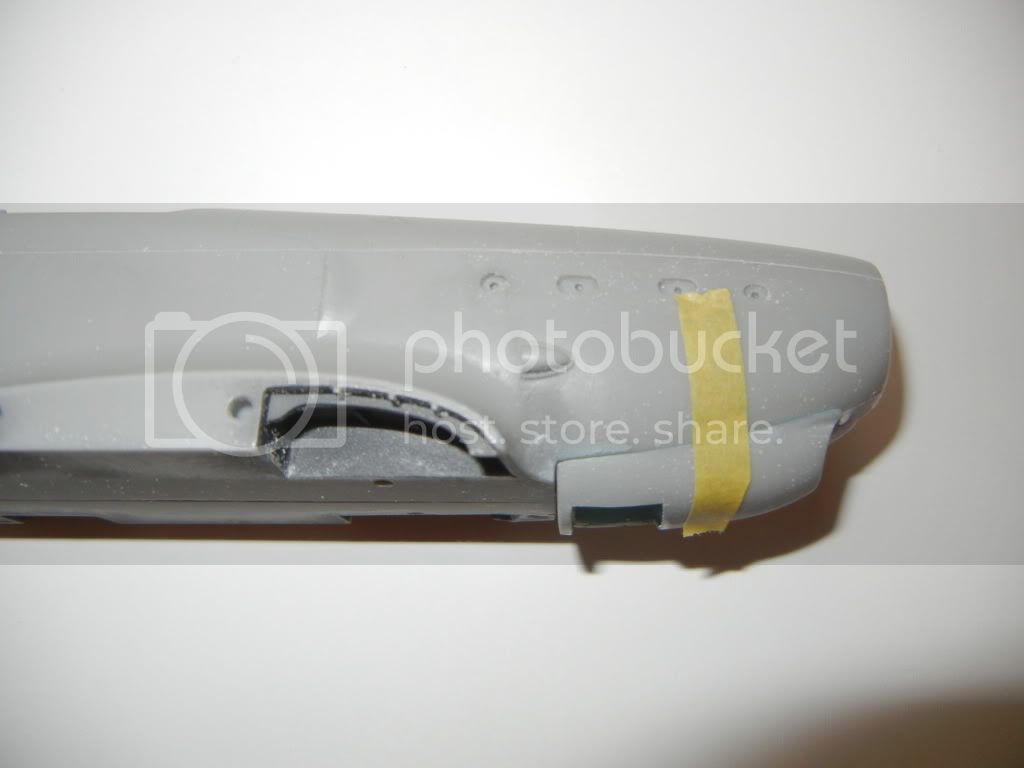
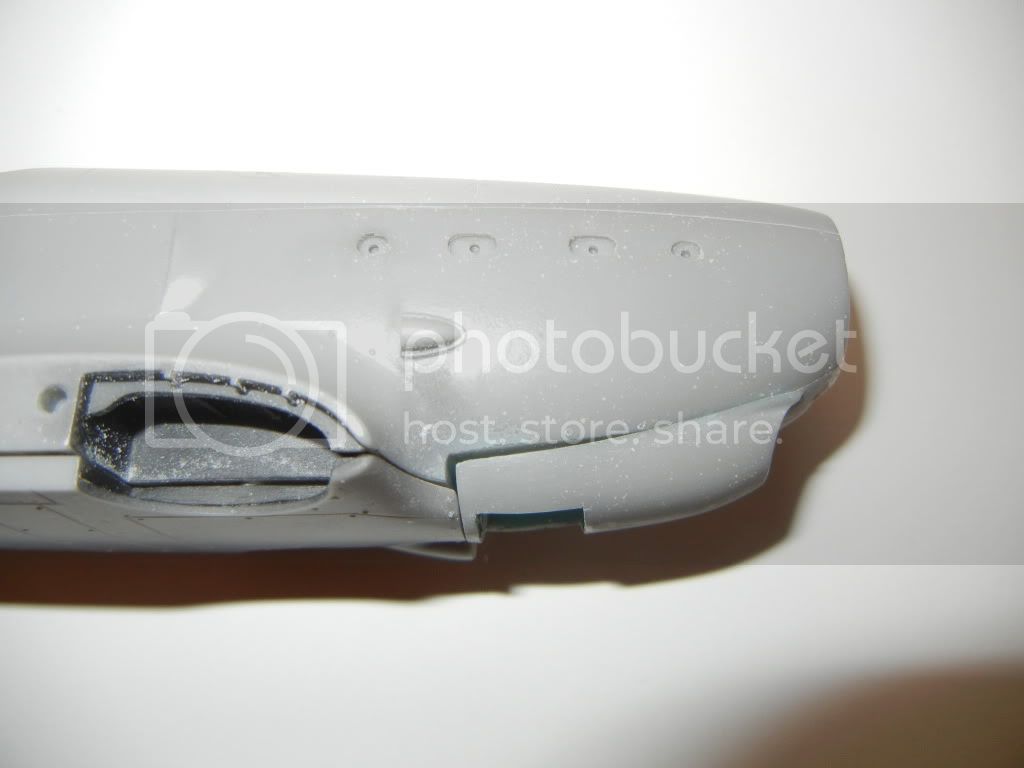
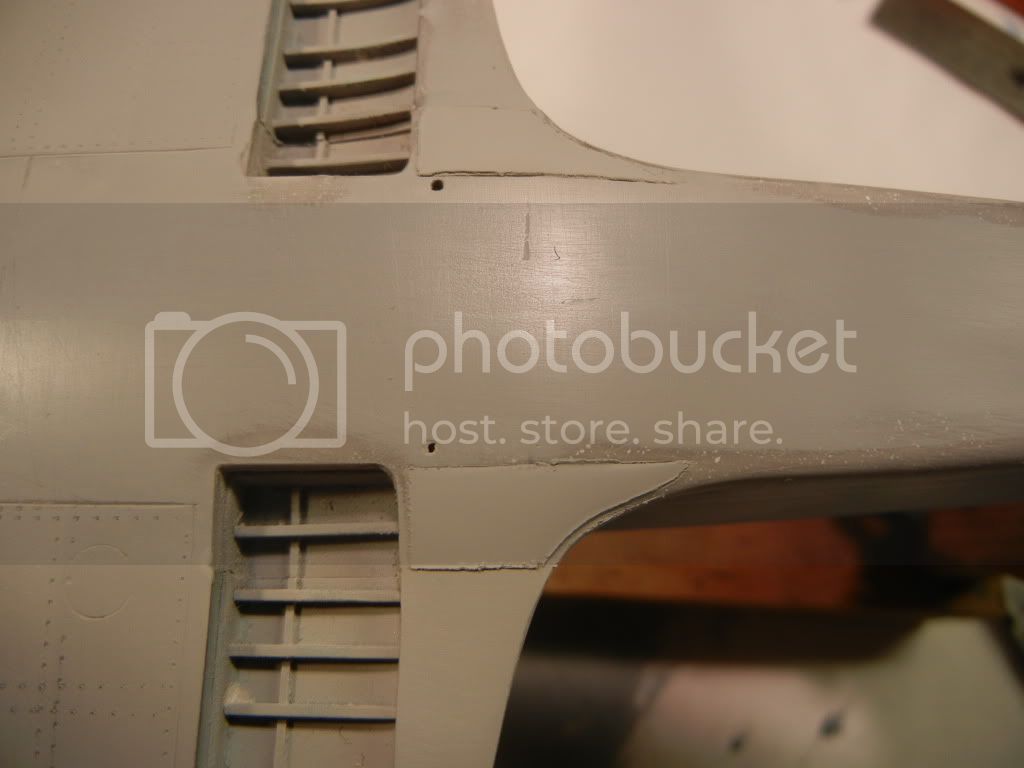
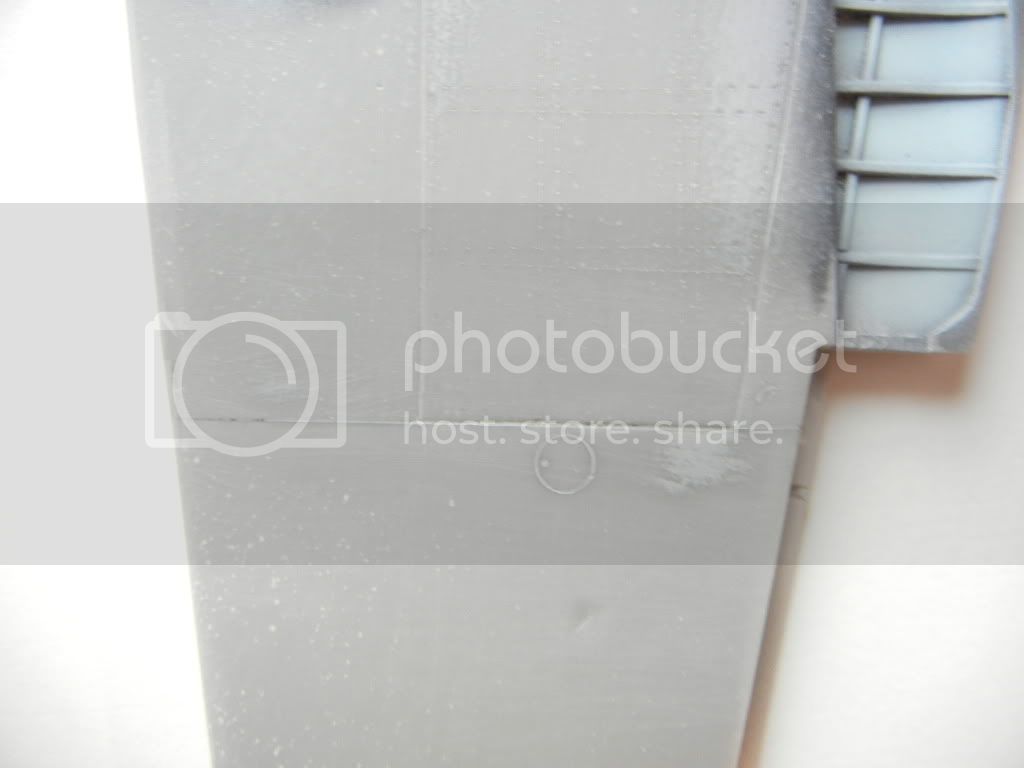
After priming to see how the fit was, and then looking at scale plans and pics of the real thing, it seemed the panel join line was too low, so I scribed a new one in the proper position:


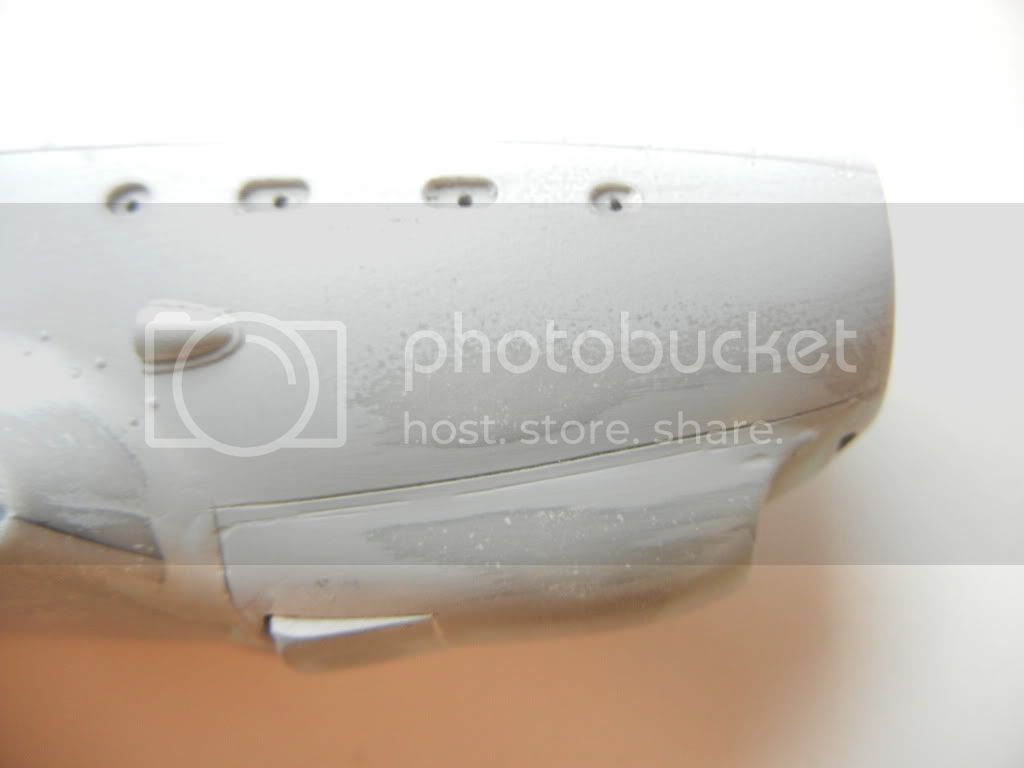
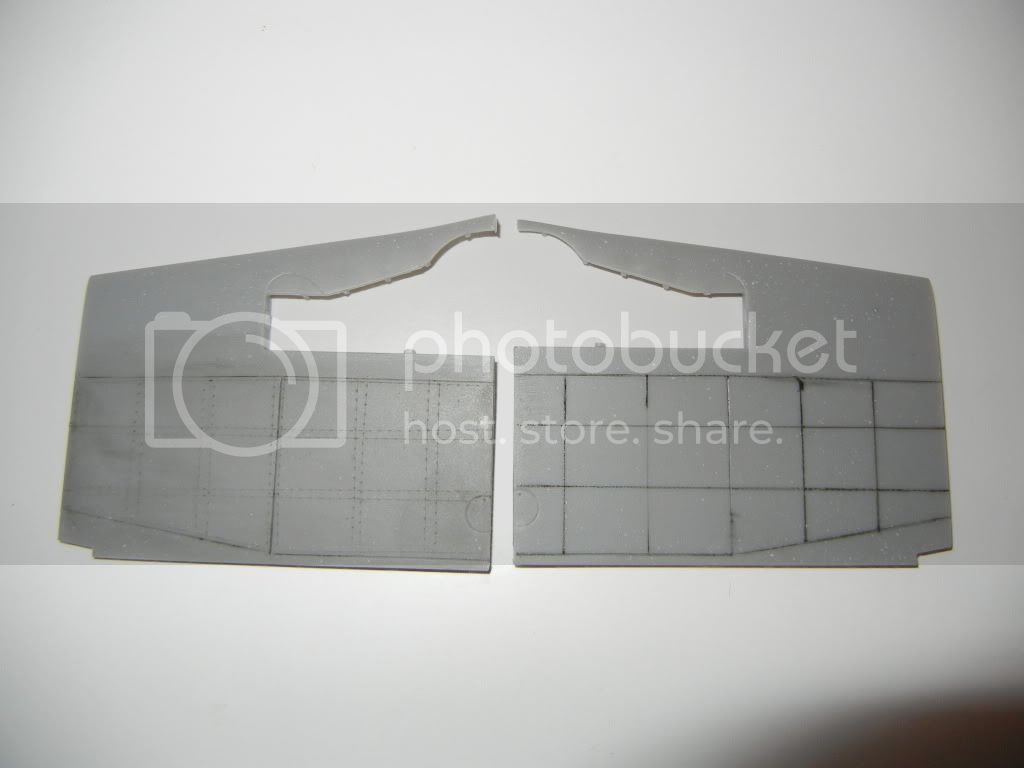
Filled the old line, sanded and replaced the destroyed fastners:


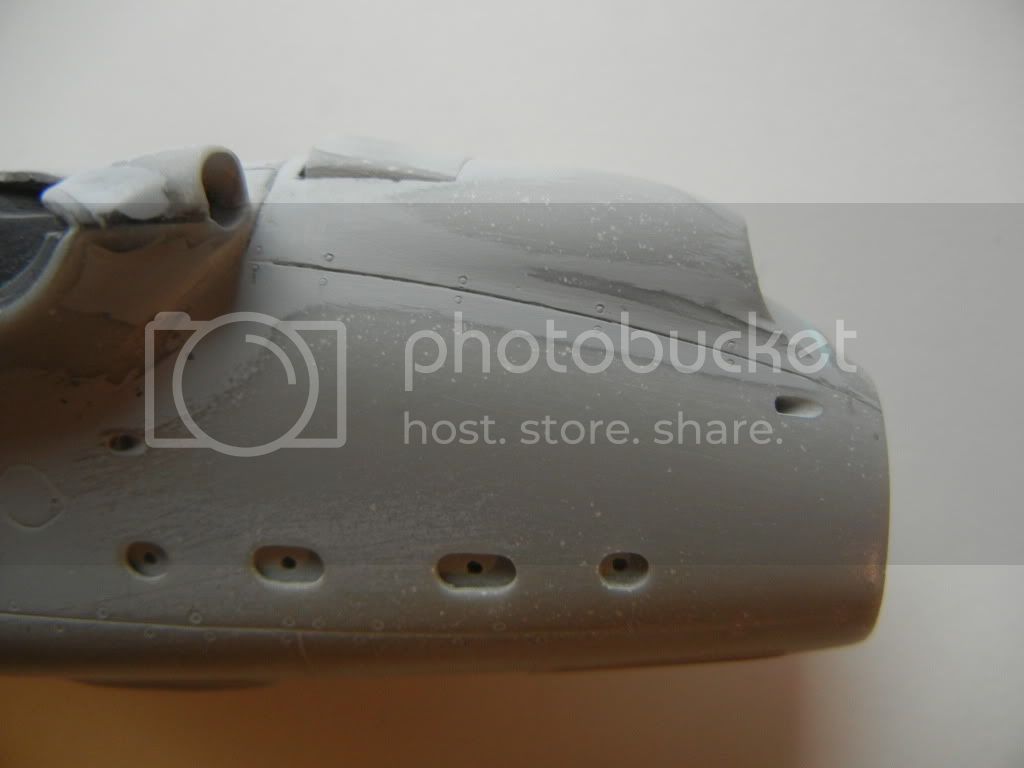
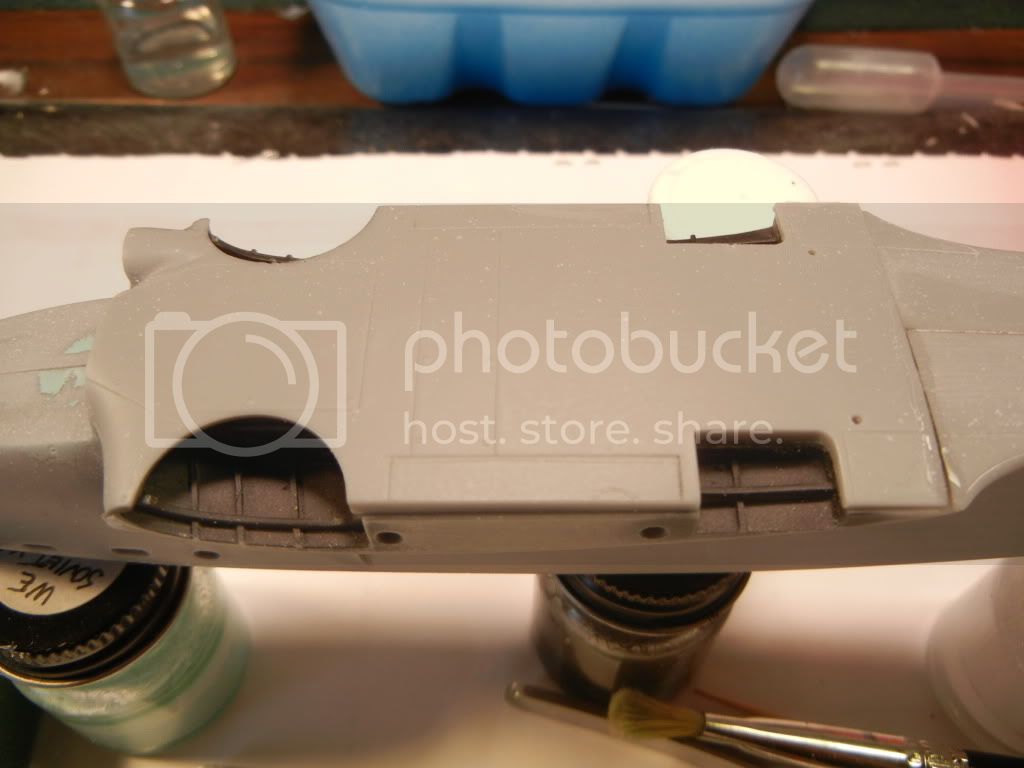
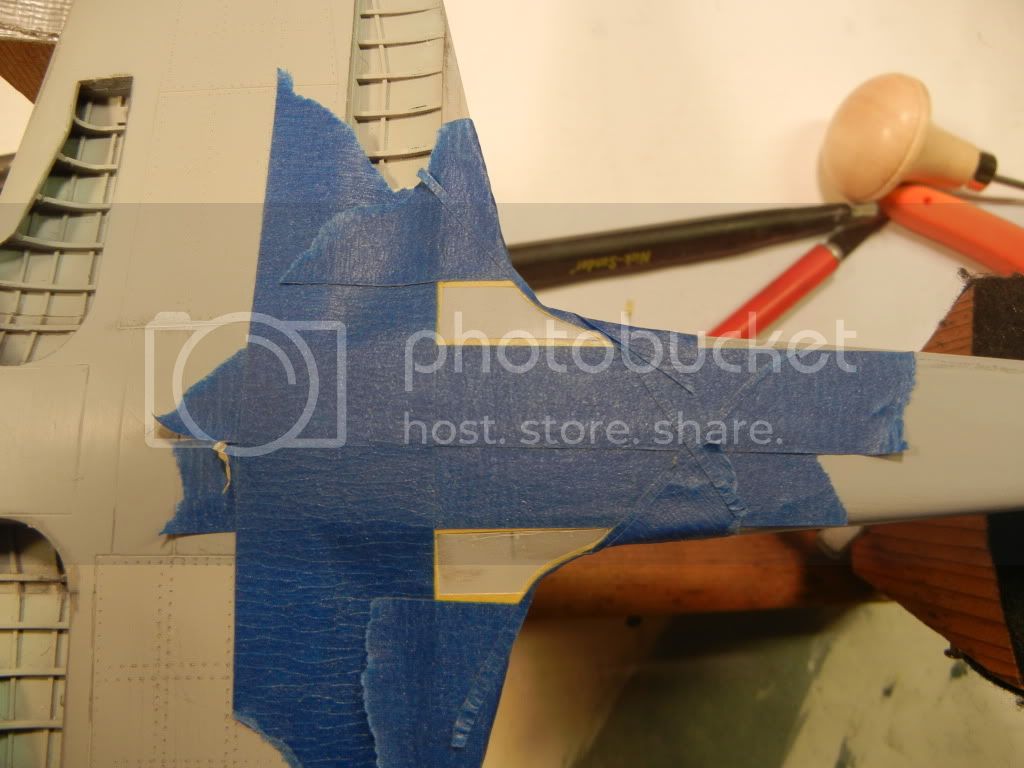
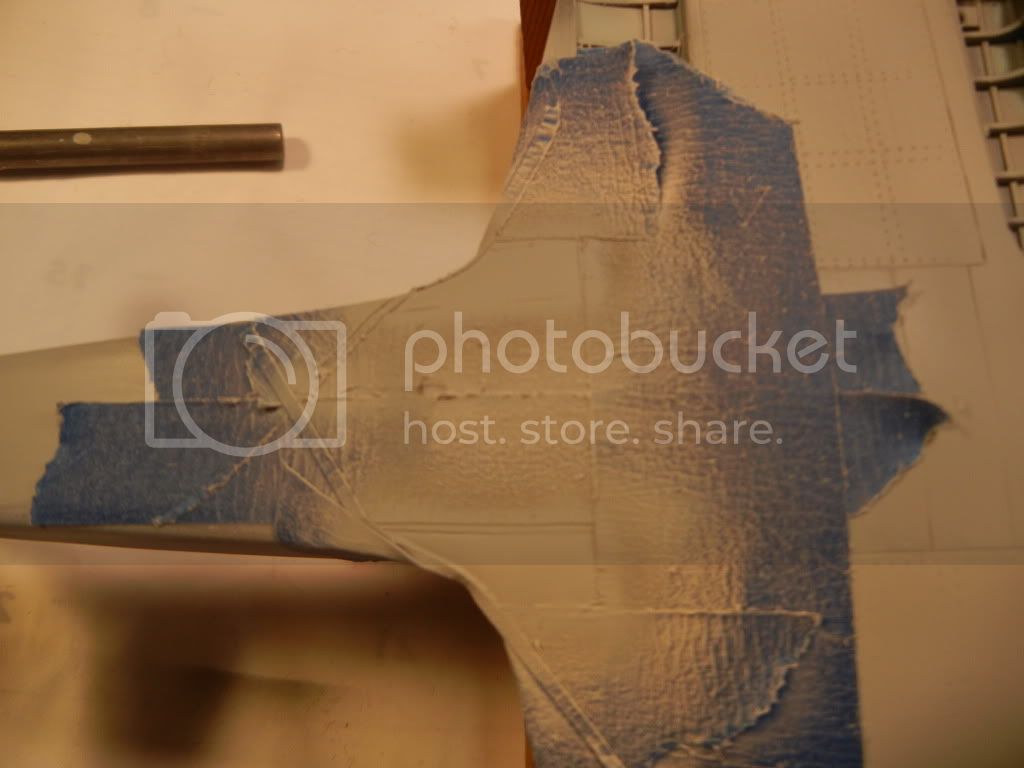
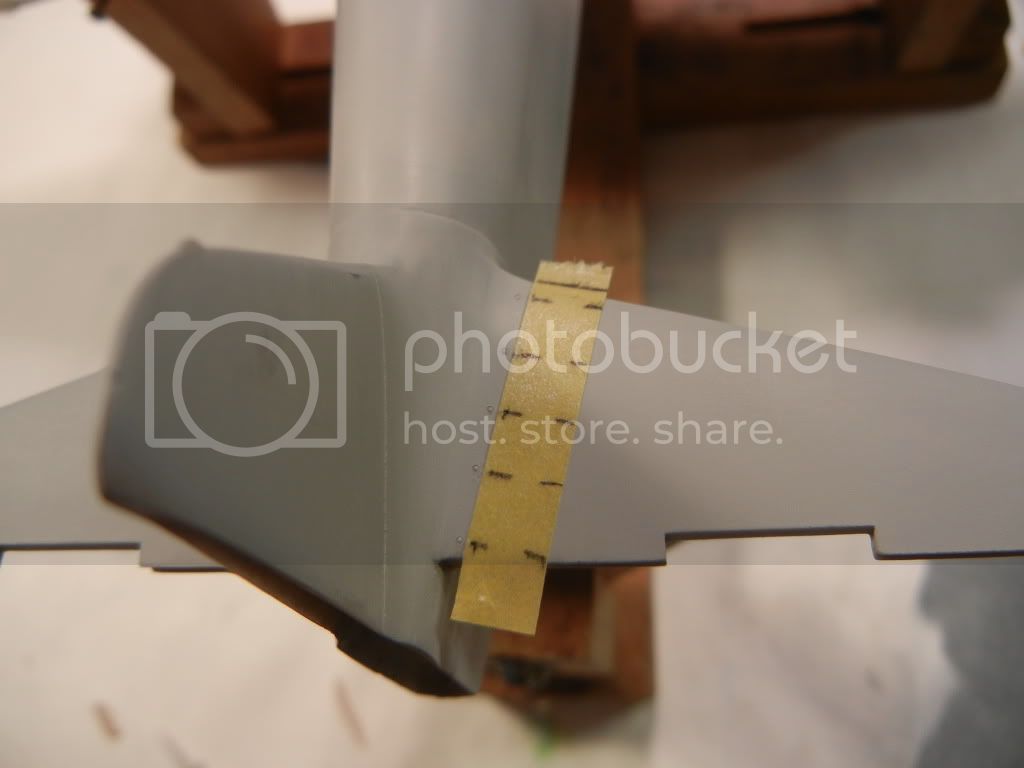
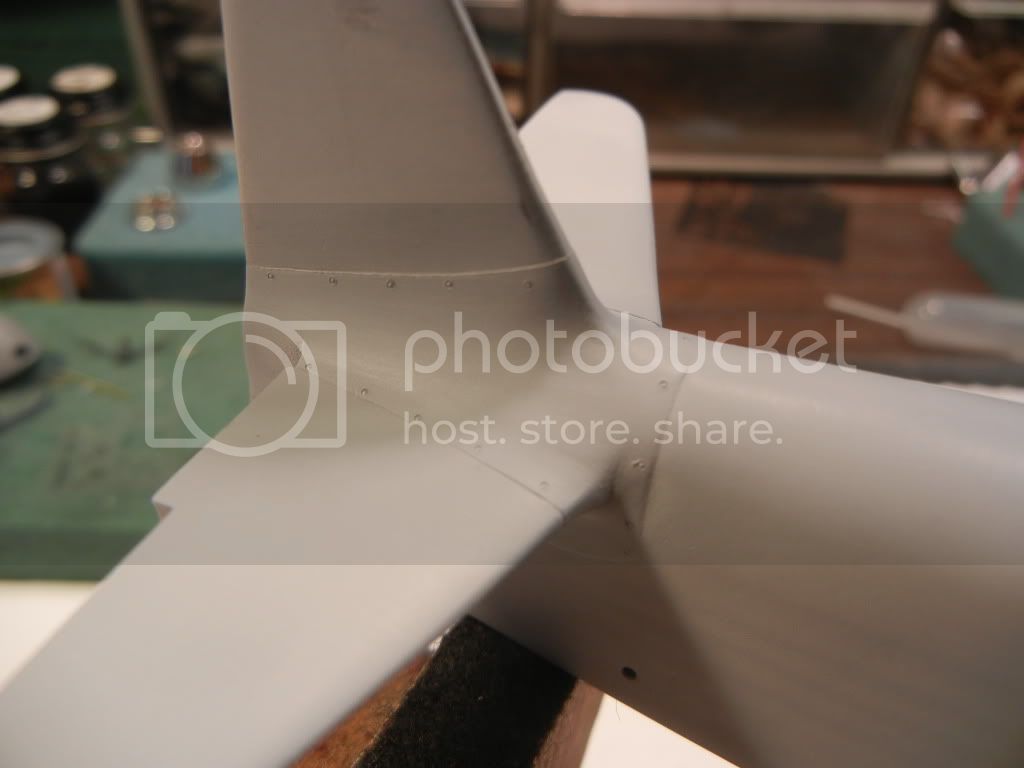
Also cleaned up the join for the lower wing insert, and then scribed the line for the fuel tank panels:


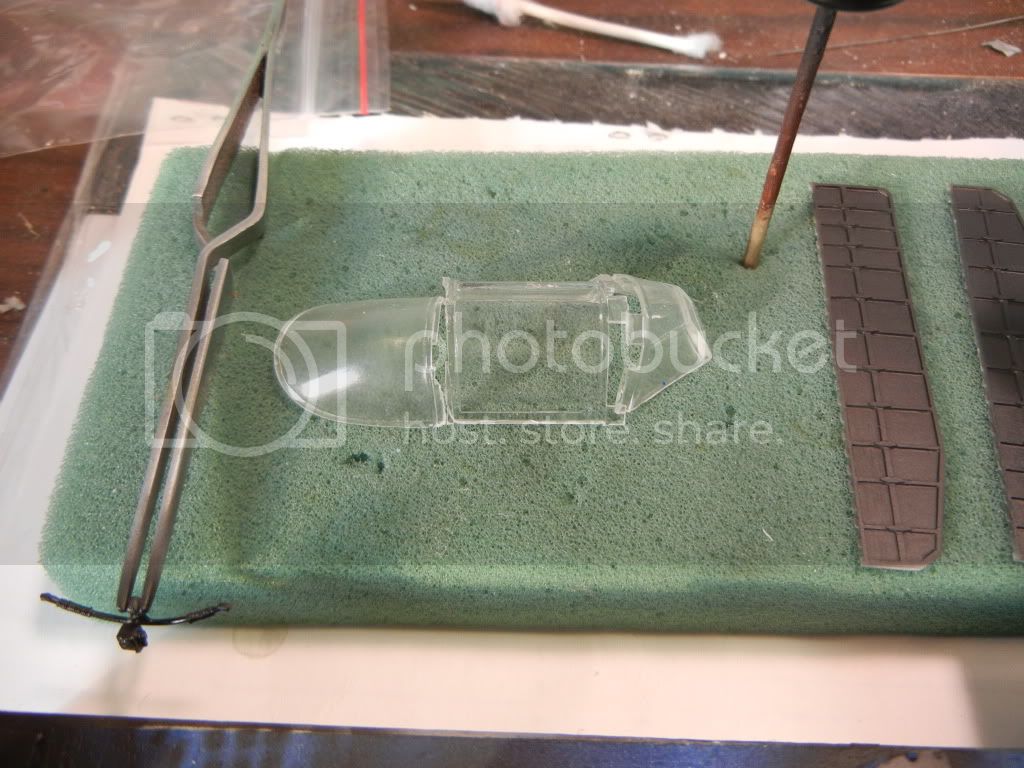
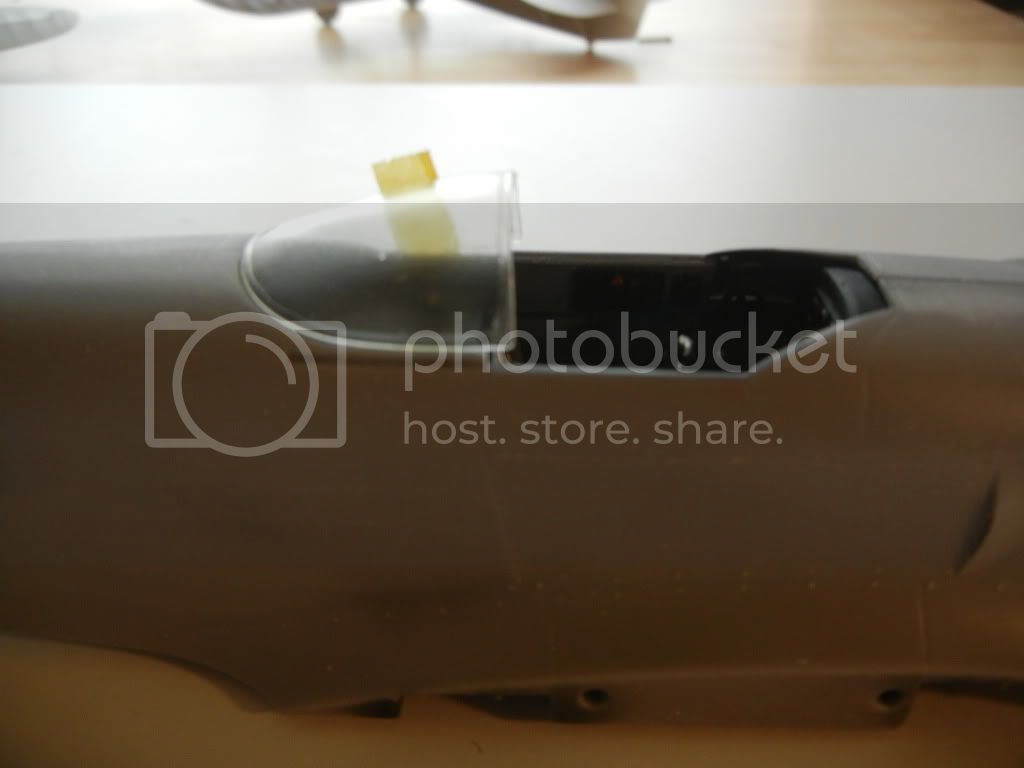
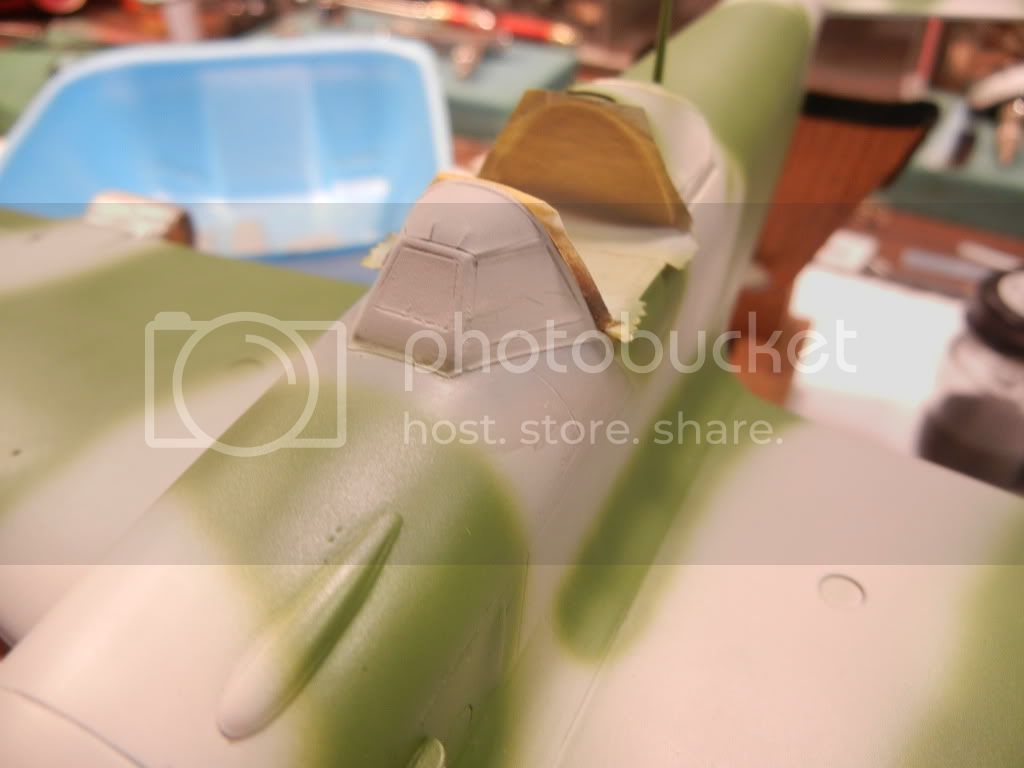
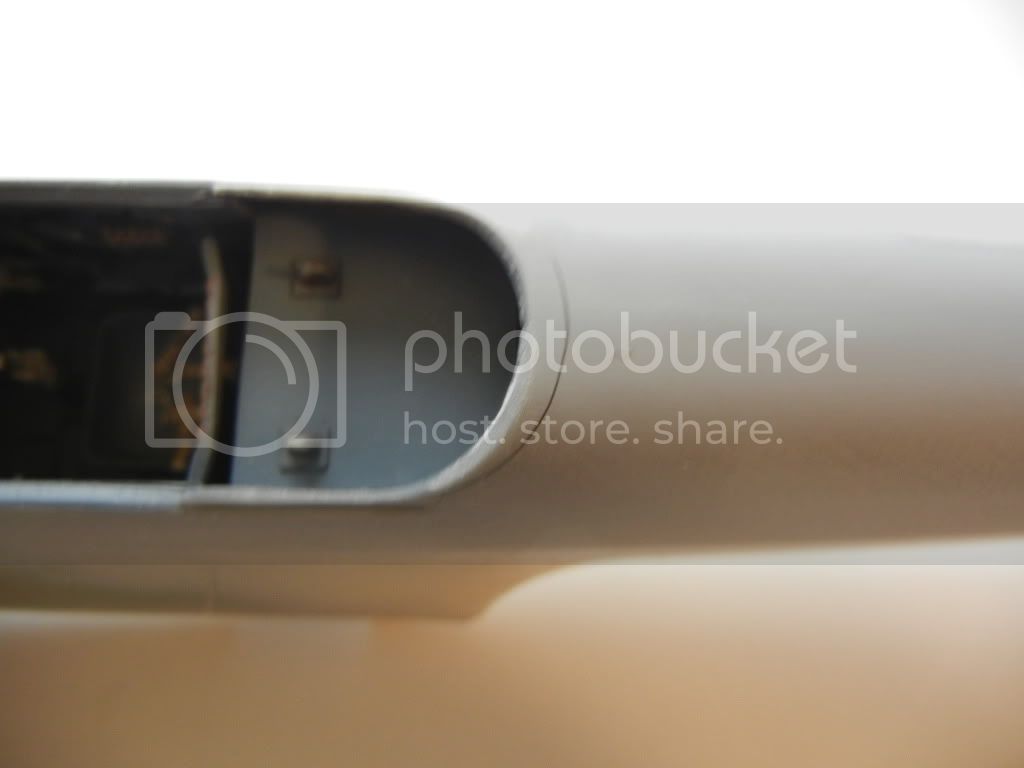
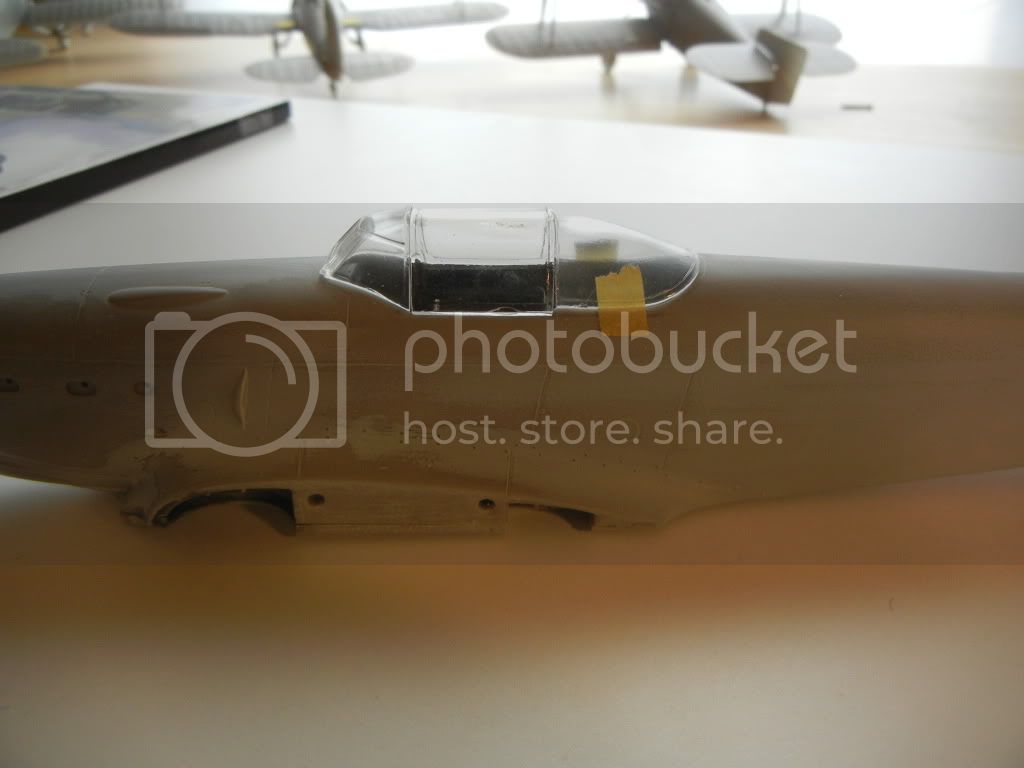
To address the rear canopy fit, and get it to look more like the reference pic Entoni provided, I decided to trim the rear cockpit opening a bit (the pencil line is where the rear of that canopy section sits if I place the front where it is supposed to be:


Done!


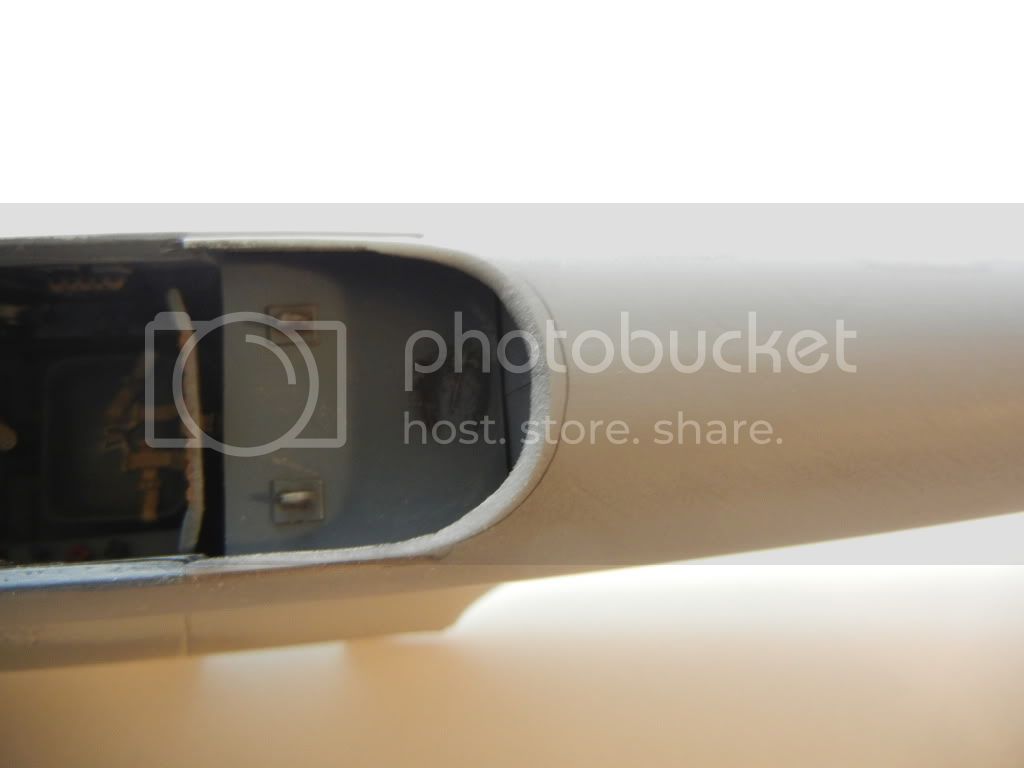
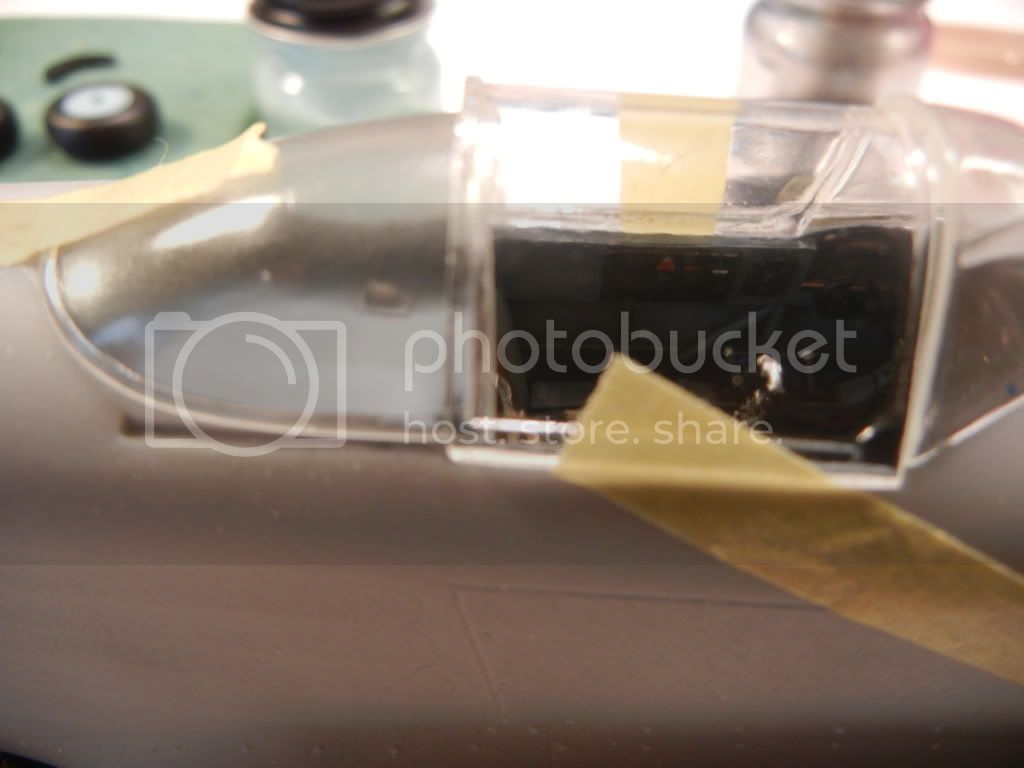
Then I sanded the front of the rear canopy section until the frame was just disappearing, and now have a much better fit:


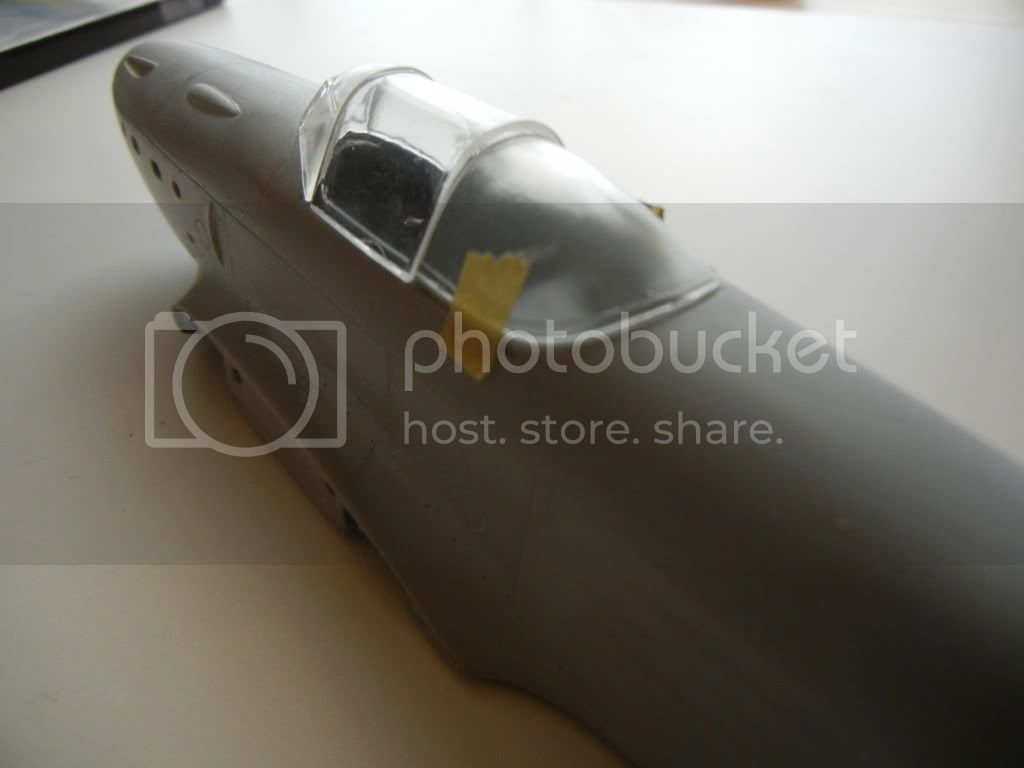
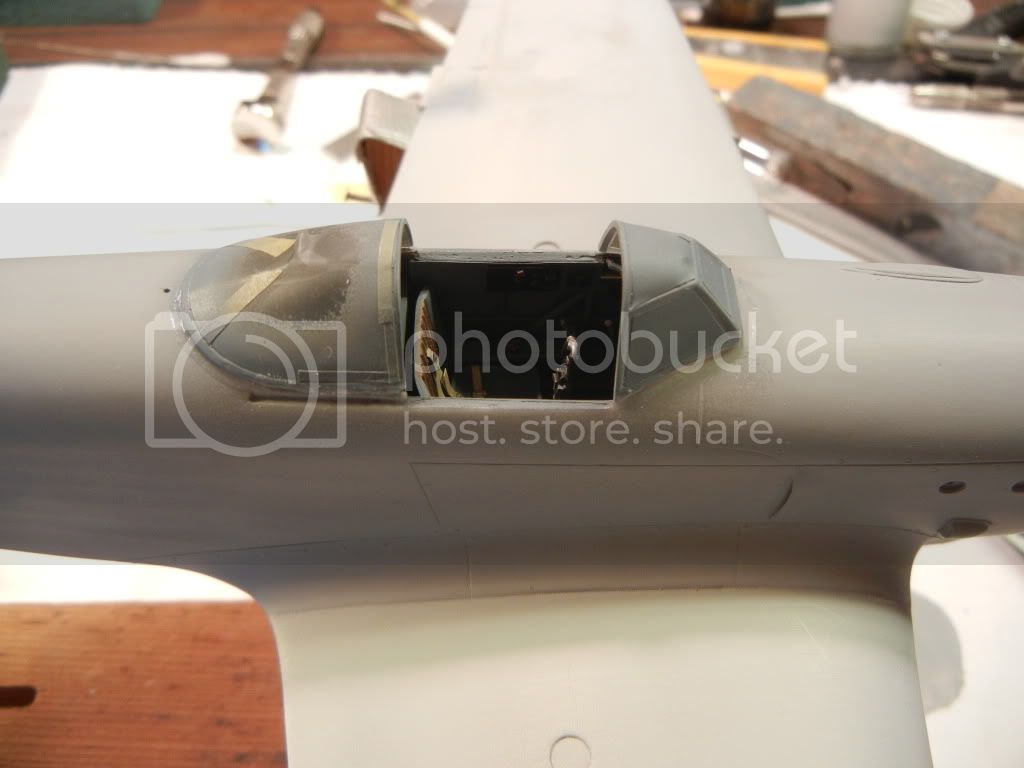
Overall shot of the whole canopy group in place:


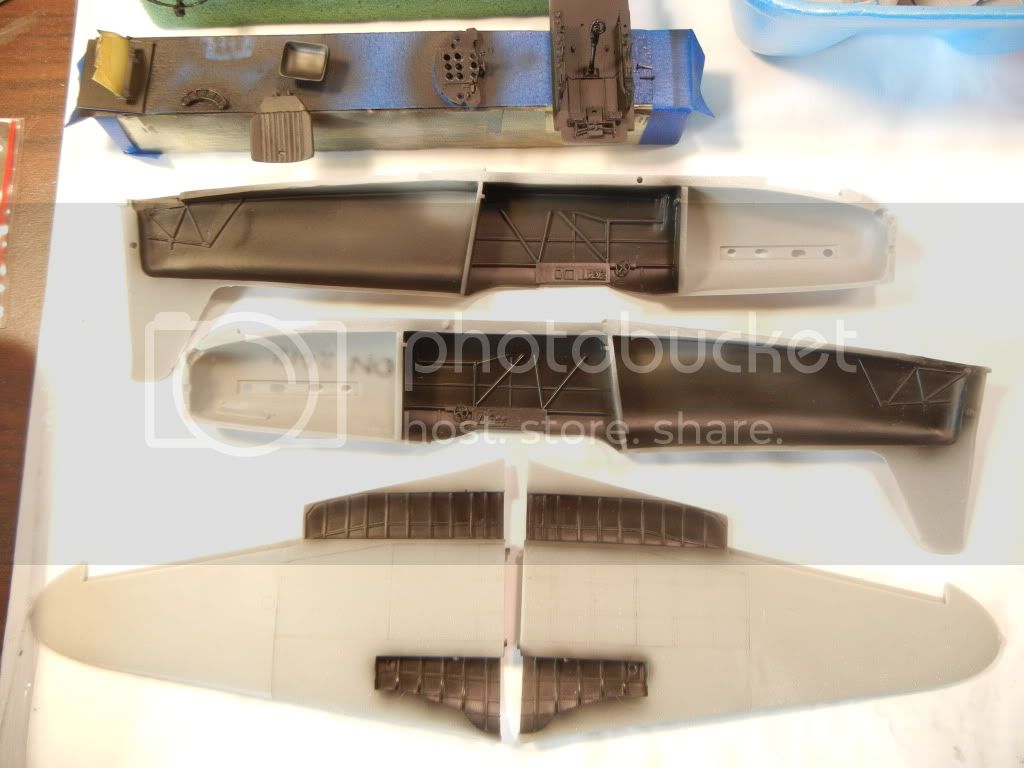
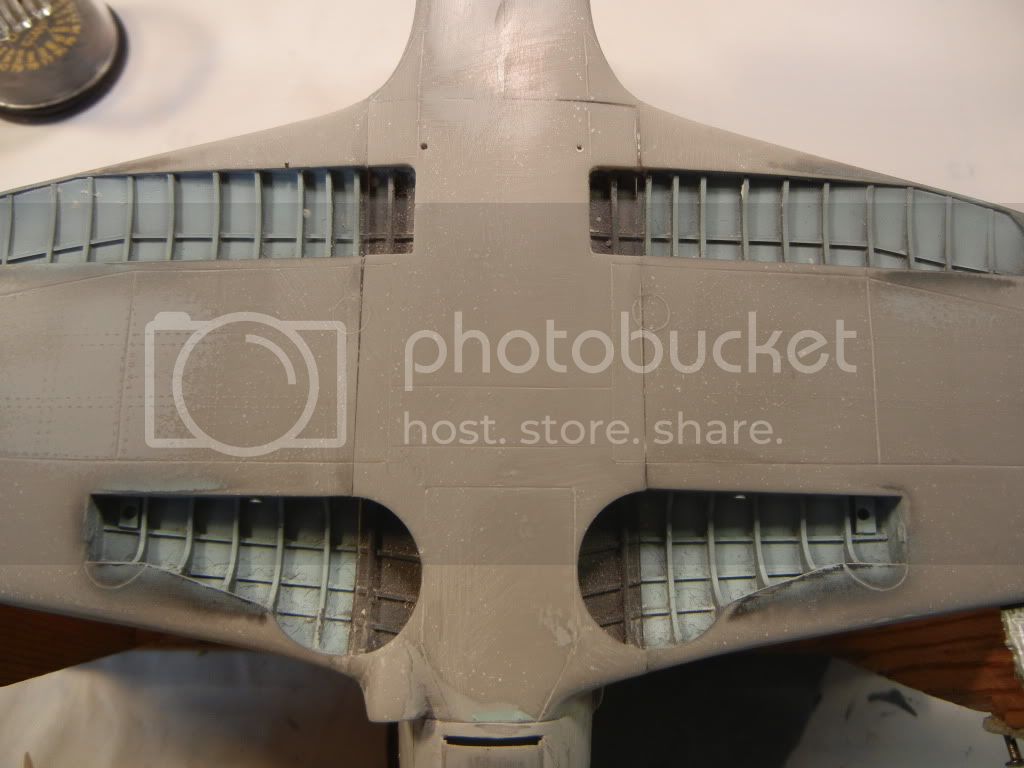
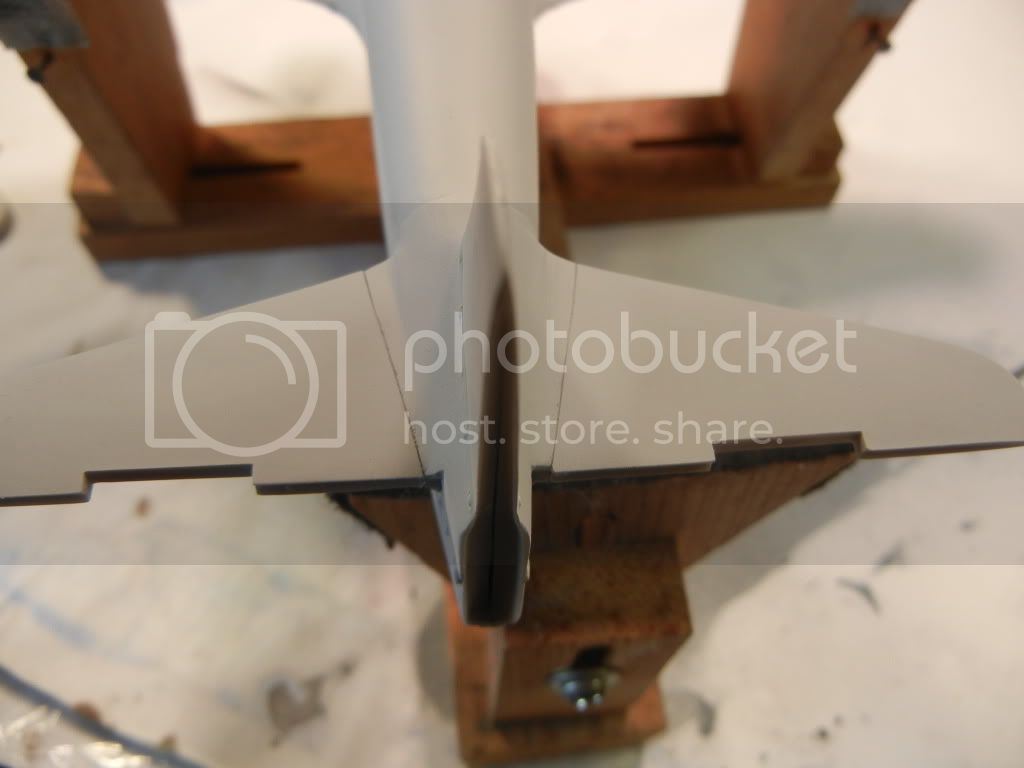
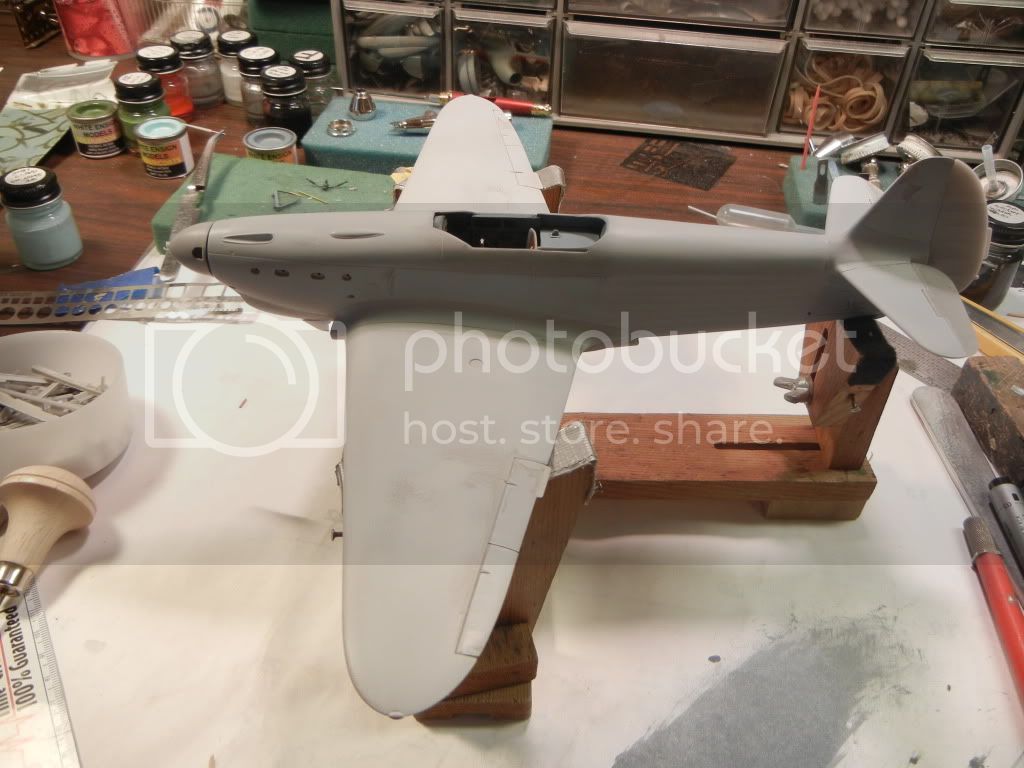
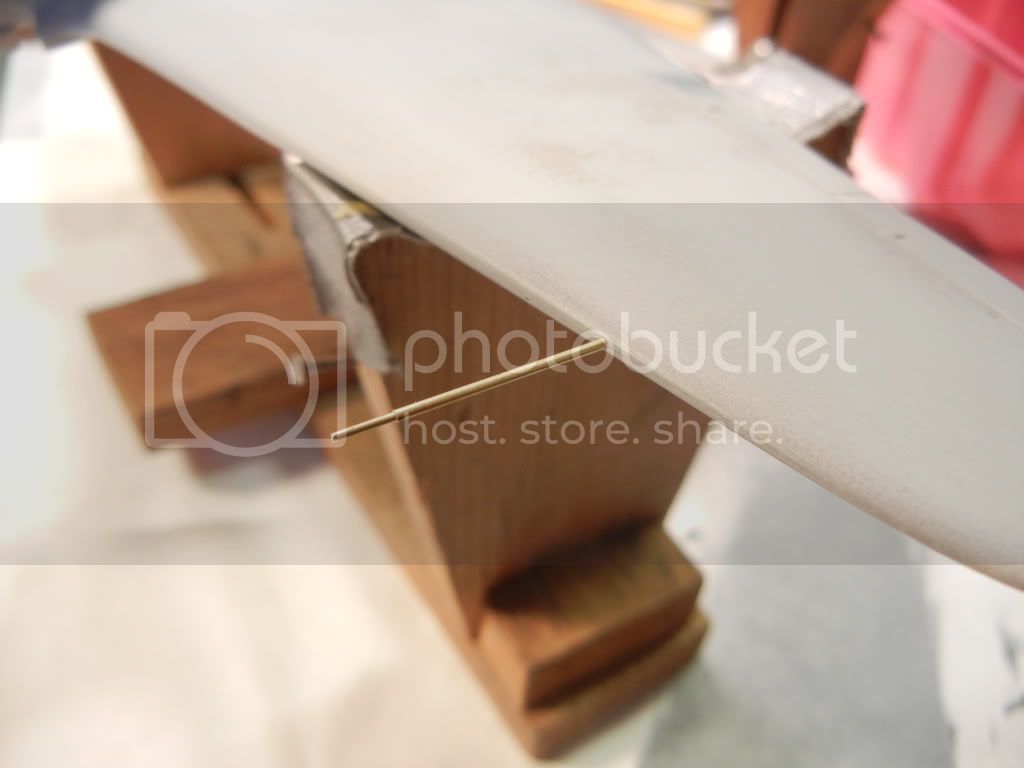
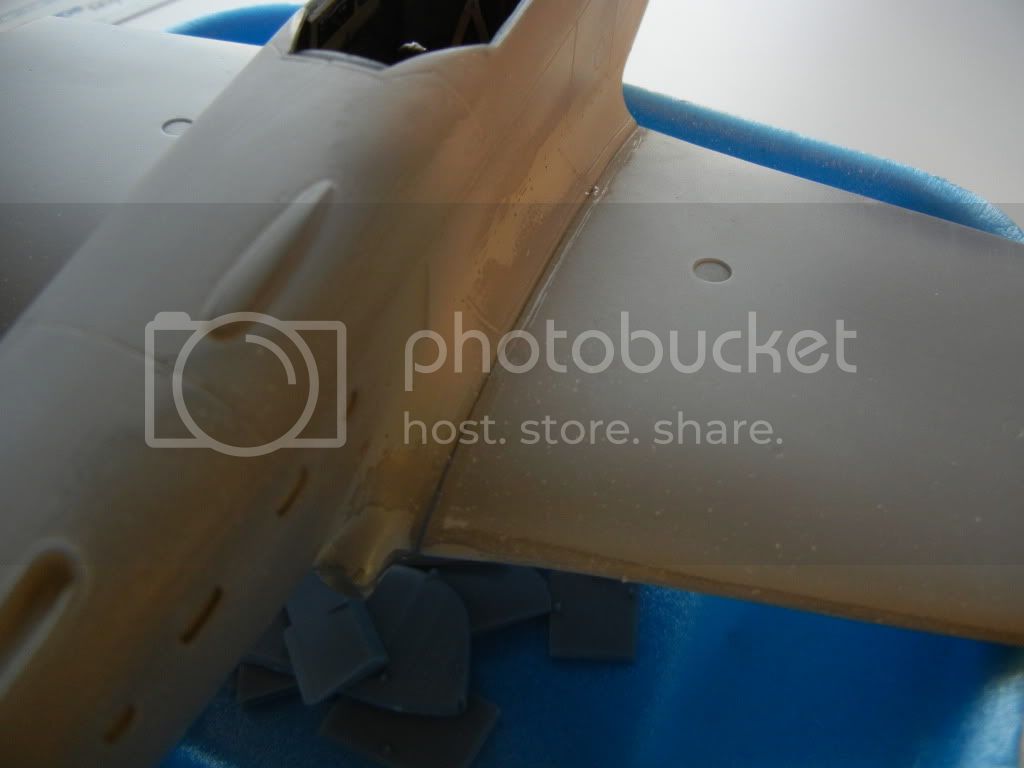
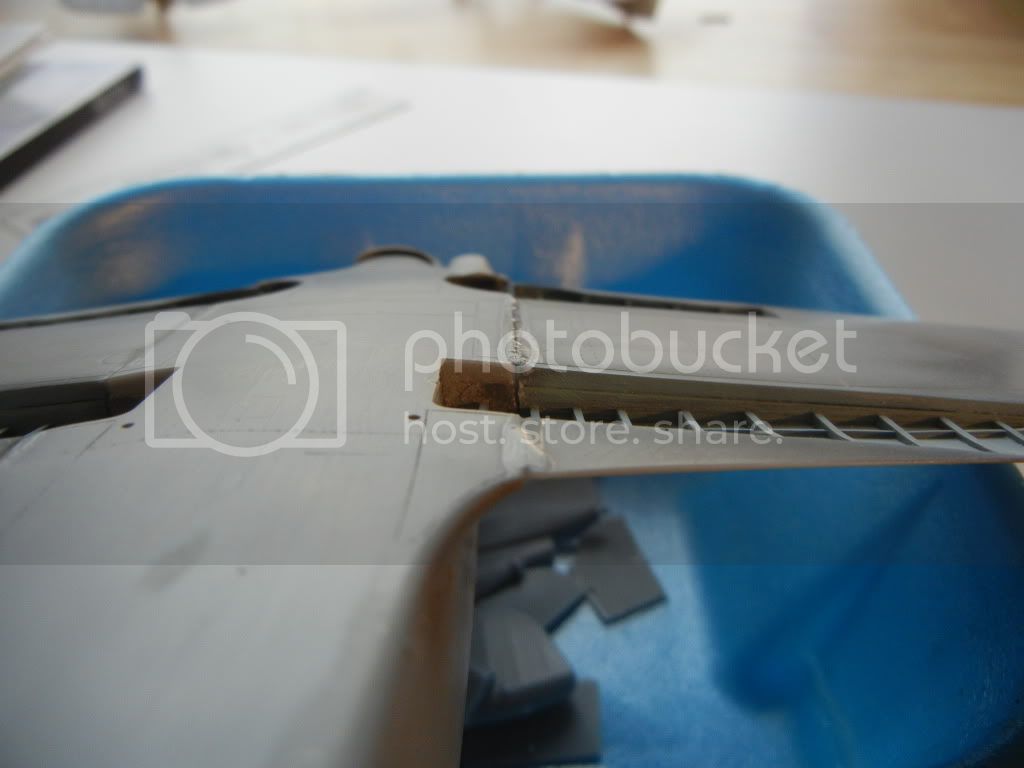
Also got the wings fitted. Fit was poor to start, so I ground out some of the mating surface to improve the fit:
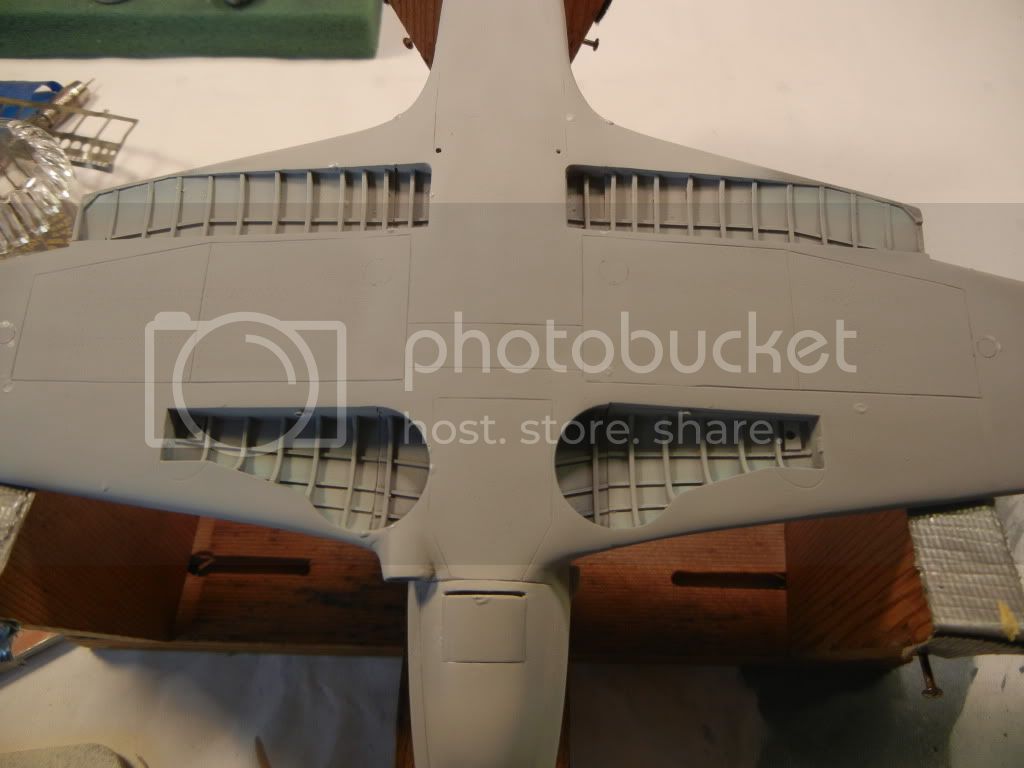


Pretty good fit:


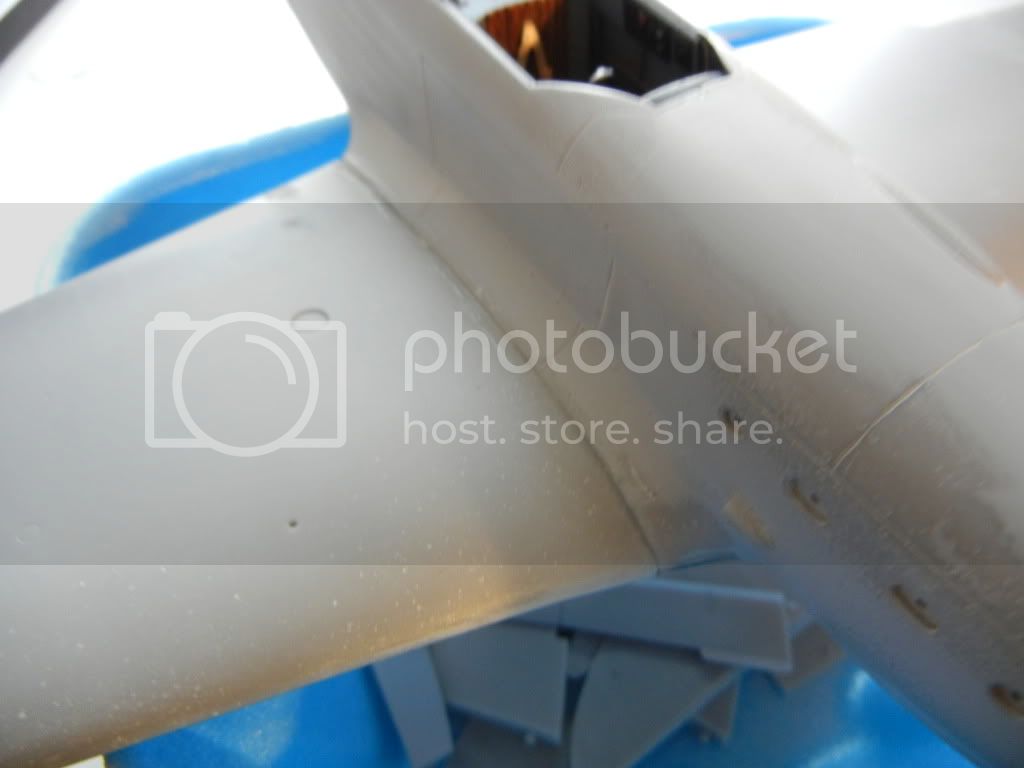
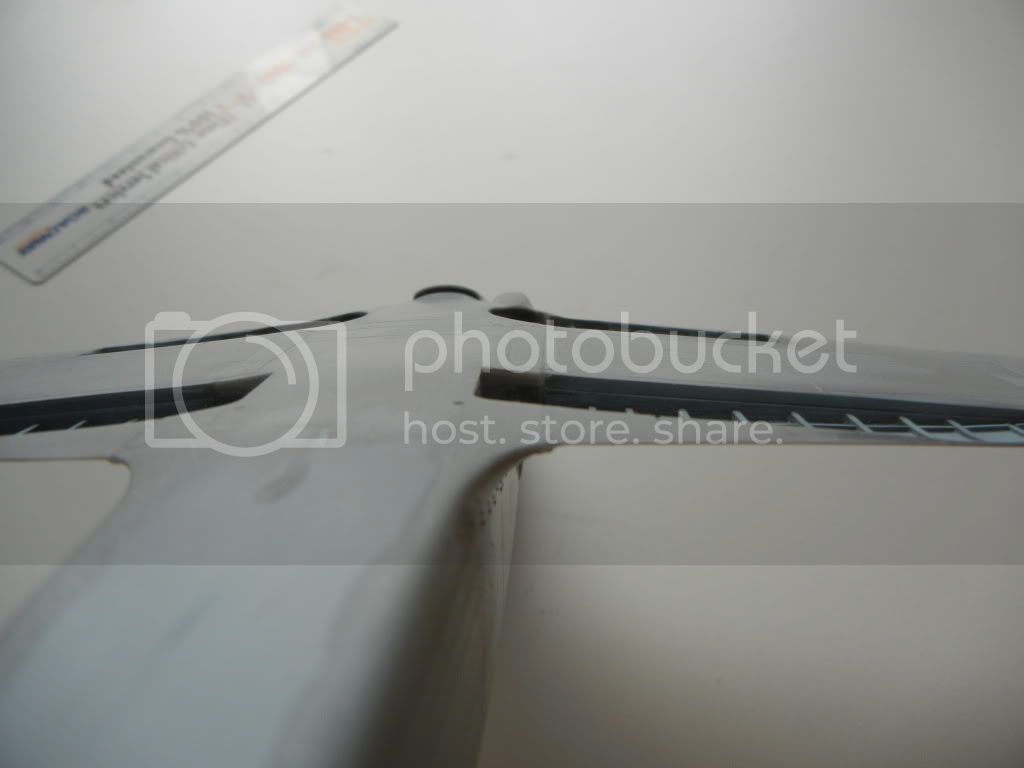
Not as good, as I needed to pull this side down a bit so the dihedral matched:


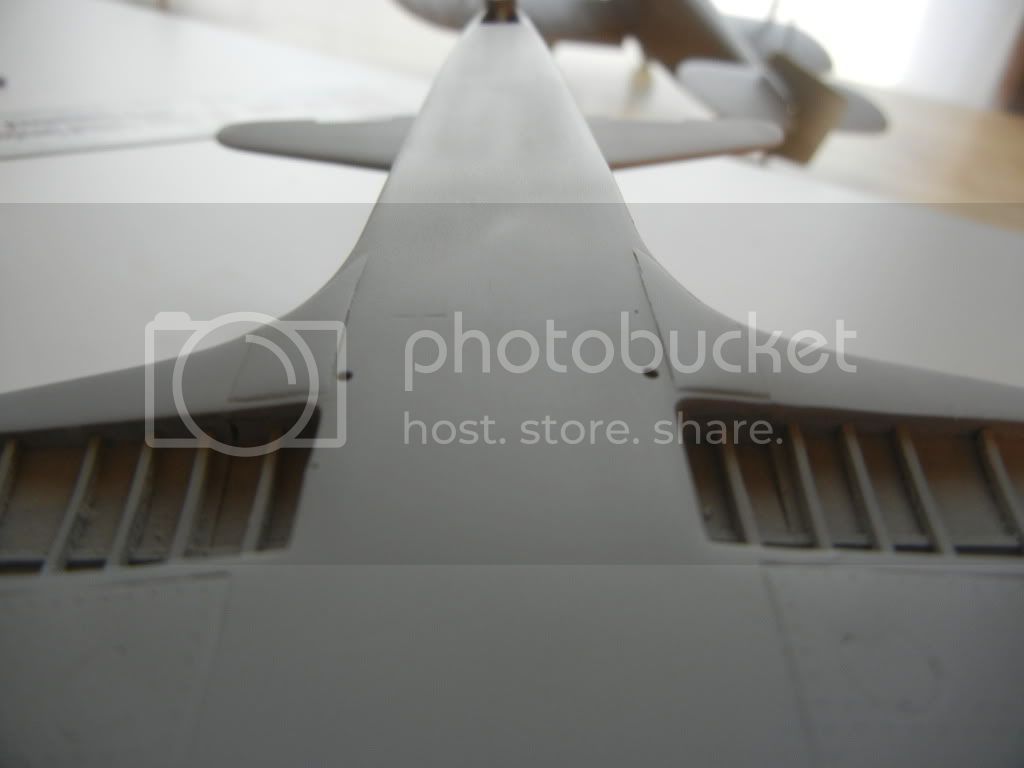
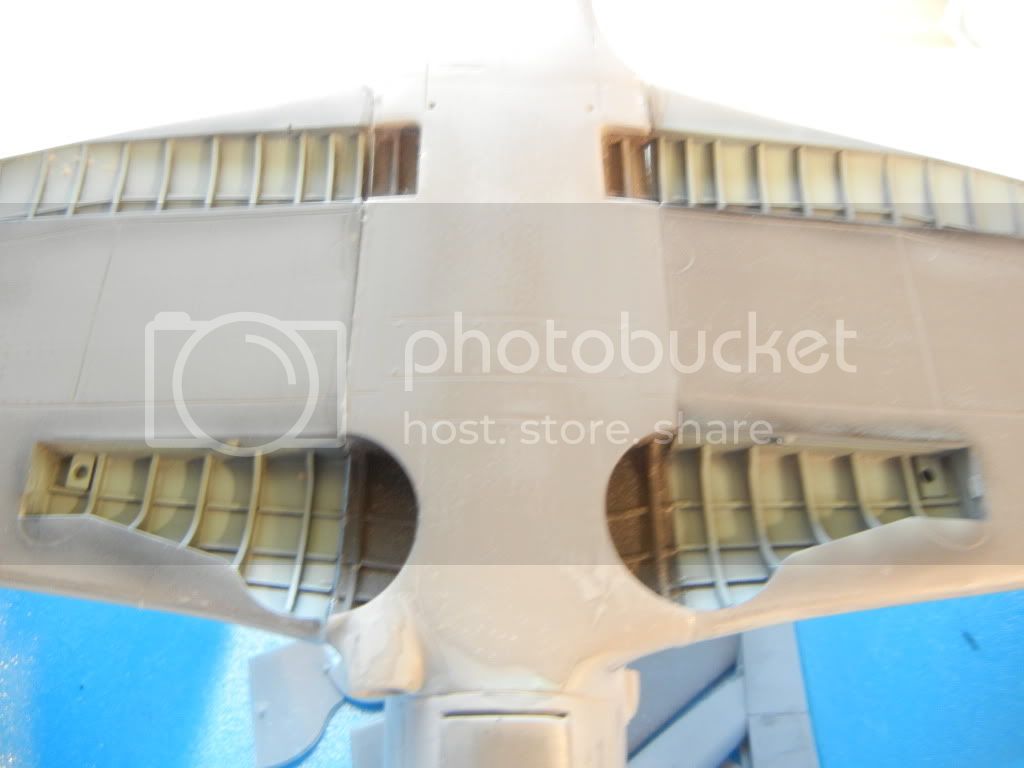
Bottom will need a little work:


Next up, filling and smoothing the wing joins, then it will be time for the tailplanes. After that, I'll mask of the wing fillets and spray some Mr. Surfacer on them to build them up. Now that I have a good fit for the canopies, I'm also going to dip them in future to see if I can clear them up a bit.

Thanks for the suggestions! Comments/questions/suggestions always welcome!

Doug

P.S. And yes Entoni, you need to get going again on your Yak build
DougN1
_VISITCOMMUNITY
Georgia, United States
Joined: August 08, 2011
KitMaker: 410 posts
AeroScale: 409 posts
Posted: Saturday, January 14, 2012 - 01:46 AM UTC
Fortunately, with resin, correcting poor fit is not as painful as with an injected plastic kit as everything sands much faster, so you can get it done pretty quickly. It only took me 37 minutes to get the wing joins sorted, and the panel lines all re-scribed:

All smoothed out:


Much better:


Some primer to check, and a couple drops of Mr. Surfacer to fill air holes in the resin:


Since the wing fit was sorted, I did not have to worry about banging into the tailplanes while sanding, so I attached them. The tailplanes themselves are a bit thicker than the fuselage fillets, so some filling was going to be necessary. After checking reference photos, I could not find any that show the large "bolts" on the fillet that the kit has, so that made it easy - superglue placed to correct the thickness:


After sanding and priming:


I'll do a light sanding of the primer on the wing and tailplanes, and then added the fasteners with a punch as I did with the cowl area.

That's it for now, thanks for looking, comments/questions welcome!

Doug
chukw1
_VISITCOMMUNITY
California, United States
Joined: November 28, 2007
KitMaker: 817 posts
AeroScale: 729 posts
Posted: Saturday, January 14, 2012 - 04:58 AM UTC
Smart work, Doug- all those joints look nice and precise.

Cheers!
chuk
Holdfast
Staff MemberPresident
IPMS-UK KITMAKER BRANCH
#056
_VISITCOMMUNITY
England - South West, United Kingdom
Joined: September 30, 2002
KitMaker: 8,581 posts
AeroScale: 4,913 posts
Posted: Saturday, January 14, 2012 - 09:23 PM UTC
Hi Doug,
You are doing a very nice job of this, I am watching with great interest
I was amazed to see that, on the box, that decals, not masks are included for the markings. Do you have a scheme in mind?
DougN1
_VISITCOMMUNITY
Georgia, United States
Joined: August 08, 2011
KitMaker: 410 posts
AeroScale: 409 posts
Posted: Sunday, January 15, 2012 - 05:17 AM UTC
Thanks Chuck!


Quoted Text

Hi Doug,
You are doing a very nice job of this, I am watching with great interest
I was amazed to see that, on the box, that decals, not masks are included for the markings. Do you have a scheme in mind?


Actually I am afraid the kit decals do not look promising, they are by Techmod and I think they will fall apart when I try to use them. I may need to get some masks for this model, if I do, I was thinking of doing Lidya's aircraft:

Profile Link

Simple scheme, but a great pilot to honor with this model, and I have a 1/32 master box figure of her to go with it.

Thanks for looking, more updates on the way
Merlin
Staff MemberSenior Editor
AEROSCALE
#017
_VISITCOMMUNITY
United Kingdom
Joined: June 11, 2003
KitMaker: 17,582 posts
AeroScale: 12,795 posts
Posted: Monday, January 16, 2012 - 04:00 AM UTC
Hi Doug

Fantastic work overcoming the fit problems.

It's odd that the Techmod decals look iffy - they are normally excellent quality.

All the best

Rowan
GastonMarty
_VISITCOMMUNITY
Quebec, Canada
Joined: April 19, 2008
KitMaker: 595 posts
AeroScale: 507 posts
Posted: Monday, January 16, 2012 - 07:08 AM UTC

On this 1:32 kit, in the tail's overhead view and in the box top drawings, it seems like the fuselage plan view tapers from the engine firewall to the tail...

The real tail remained equally stocky, compared to the firewall viewed from above, until around the fuselage stars...

In reality the overhead view of the real Yak fuselage was somewhat boat-like, with a short taper at both ends, and towards the middle it had paralell sides that started to taper backwards only from around the middle of the tail, not from around in front of the windshield...

Several other Yak kits have this major error: The Eduard Yak-3, though at least one Russian modeller managed to correct this, and the "Accurate" Miniatures Yak-1b, are both among those. The ICM kits do not have this error but have numerous other problems.

To be fair it is not something that jumps at you from most angles, but we do tend to look at models from above...

Gaston

P.S. The 1:48th Modelsvit Yak-1b (available worldwide from Hobbyterra), is derived from South Front's Yak-1 but is better in my opinion, and is correct in every major respect. It is in fact the best WWII aircraft model I have ever seen in that scale, and is by a wide argin the best mass produced WWII single engine fighter subject in that scale, even compared to Tamiya's superlative F4U Corsair. (No, Tamiya's P-47 is not a contender at this level...)

G.


Holdfast
Staff MemberPresident
IPMS-UK KITMAKER BRANCH
#056
_VISITCOMMUNITY
England - South West, United Kingdom
Joined: September 30, 2002
KitMaker: 8,581 posts
AeroScale: 4,913 posts
Posted: Tuesday, January 17, 2012 - 09:44 PM UTC
Hi Doug,

Quoted Text

Actually I am afraid the kit decals do not look promising, they are by Techmod and I think they will fall apart when I try to use them. I may need to get some masks for this model, if I do, I was thinking of doing Lidya's aircraft:

Simple scheme, but a great pilot to honor with this model, and I have a 1/32 master box figure of her to go with it.


I will happily do that scheme for you, if you decide that you do want mask then please drop me a line at [email protected]
DougN1
_VISITCOMMUNITY
Georgia, United States
Joined: August 08, 2011
KitMaker: 410 posts
AeroScale: 409 posts
Posted: Monday, January 23, 2012 - 09:43 AM UTC
Thanks guys

Mal, I appreciate it, I'll let you know if I need them. I tested one of the kit decals, and it seemed ok, but we'll see when it comes time to apply them. I would prefer Lidya's plane, but don't want to wait to get this finished (unless I am forced to)

In the interim, i've just been taking care of some of the more tedious fill/sand/prime/check and repeat stuff to get everything ready for paint. I did decide to make the strengthening plates on the bottom of the wing trailing edge raised instead of scribed (as I wiped out the bulk of the scribing anyway). I used some airbrushed Mr. Surfacer to do this. First, I masked off the areas that will be the raised panels:


Then sprayed on a heavy coat of Mr. Surfacer:


Let dry, remove masking tape:


Oh no!!! Just kidding, it usually looks like that, I usually buff it with some 0000 steel wool, then sand it down to get a nice panel. Here we have the results after some steel wool and sanding. I'm leaving it a little thicker than final as the radiator needs to go between them, and I'll have to fill and sand the join and don't want to destroy the panel:


I also used this technique to repair any sharp demarcations that are lost during sanding. I also worked on the tailplane, and added the fasteners with the punch . I used a piece of masking tape to lay out the spacing so that I could make them the same on both sides:


After they were all done, should look just right under the final paint (compare this to the photo above of the original kit "bolts"):


Also, I added a brass rod on the bottom of the aerial mast so it would be secure on the fuselage, as well as a notch for the aerial wire:


Almost ready for paint!:


GastonMarty
_VISITCOMMUNITY
Quebec, Canada
Joined: April 19, 2008
KitMaker: 595 posts
AeroScale: 507 posts
Posted: Monday, January 23, 2012 - 10:11 AM UTC
Maybe it is the photo, but the cockpit opening seems quite a bit longer on the left side than on the right side, due to paralellism issues on the positioning of the front and rear clear parts in plan view, especially the front part which seems misaligned.

The fuselage plan view taper looks not too bad.

Gaston
DougN1
_VISITCOMMUNITY
Georgia, United States
Joined: August 08, 2011
KitMaker: 410 posts
AeroScale: 409 posts
Posted: Tuesday, January 31, 2012 - 05:12 AM UTC
Guess it's time for another update!

Been working on all the little things that need to be done before painting can actually begin. Other than filling in and sanding pin holes, I glued the canopy in place, adding the gunsight/support bar and the armor plate just beforehand:


Then came the fun of fairing in the canopies:


Of course, some of you may remember that my plan to attach the (too long) rear canopy was to move it back some by cutting out more of the turtledeck, and then sanding the front some. I wanted to place the center canopy in a slightly open postion, which would cover up any issues. However, that was not to be. After fitting the rear canopy, the center section would not go over it at all, so I ended up having to superglue some styrene to the front frame and sand it out to get a proper fit to the center canopy. While that was going on, I also cleaned up the remaining landing gear parts, etc. and made the pitot tube from some brass tubing:


Used Mr Surfacer and tape again to put a frame line around the windscreen, and started in on the painting, as I wanted to get some color on it to keep motivated:


A small bit of spot sanding to do, and then it will be time for the second topside color

Thanks for looking! Comments/questions welcome as always!

Doug
DougN1
_VISITCOMMUNITY
Georgia, United States
Joined: August 08, 2011
KitMaker: 410 posts
AeroScale: 409 posts
Posted: Friday, February 03, 2012 - 04:36 AM UTC
Ok, got the painting done. I mottled over the White Ensign AMT-4 green with some Model Master RLM83 (as it is a nice light green), then again with some Mr. Color RLM71, and finally went over the green areas again with a highly thinned coat of AMT-4 to tie it all back together.

I painted the black areas with Model Master Interior Black, as it is a nice scale representation of black. Mottled that with some Mr. Color Black, and the again put a highly thinned coat of Model Master Interior Black on to tie it all together.

I don't think the result comes across in photos well, but it does give a slight weathered look to the paint.

I painted the bottom with White Ensign AMT-7 to finish off the painting. According to my references, the paint is supposed to have some overspray between the colors, but I did not want to make it too much, so I left it as it is now.

After all that, on to the pics!:


Now a coat of future, decals, flat coat and the small fiddly bits (and making up the aerial wires) are left. Hope to be done next week sometime

Thanks for looking, comments/questions welcome!

Doug
DougN1
_VISITCOMMUNITY
Georgia, United States
Joined: August 08, 2011
KitMaker: 410 posts
AeroScale: 409 posts
Posted: Monday, February 06, 2012 - 06:50 AM UTC
Looking at the model before I started decaling, I noticed that the aerial mast seemed a bit short. Sure enough, I had broken almost 1/2 of it off somewhere along the line. A thorough search of the work area turned up the tip, but I could not find the bit in between. I guess the good news was that the wire pin I drilled in and used to mount the mast worked very well, lol

So I decided to take the opportunity to make a new aerial mast. Looking at plans and photos of the real thing, I noticed that the mast was a little thicker at the top than the kit part had been. I used some scrap resin pour blocks and quickly shaped a new mast. I added a wire on top and bent it over to create the hook at the top visible on the real thing. I also added the band around the top also visible in photos and plans.


So, on to the decals, and low and behold, disaster struck - the decals, at least the ones that would come off the backing paper, shattered and were unusable. After everything dries, I'll touch up any damage, but it seems that this build will have to go on hold for awhile.

I've checked my other kits with Russian markings, and could not find any appropriate sized decals to substitute. I've contacted A2Zee, the current owner of the Montex kit line to see if I can get a replacement set, so we'll see if that works out.

Thanks for following along, sorry I can not show you a finished product!

Doug
 _GOTOTOP