_GOTOBOTTOM
Early Aviation
Discuss World War I and the early years of aviation thru 1934.
Hasegawa 1:32 F4B-4
DougN1
_VISITCOMMUNITY
Georgia, United States
Joined: August 08, 2011
KitMaker: 410 posts
AeroScale: 409 posts
Posted: Monday, February 13, 2012 - 09:15 AM UTC
After being exiled to the Shelf of Doom 3 years ago, this model is finally making it's escape!

Here is the kit box and contents:


I managed to get the upper wing together and add the missing compass housing to the underside of the top wing:


It languished like this until I decided to finish this off while I am waiting for my replacement Yak-1b decals to arrive

Added some details to the cockpit, scratch built the throttle control, replaced the seat, made the frame behind the seat, added seat belts from Tamiya tape and some boxes on the starboard side from the spares box. Also made a bulkhead that blocks off the area behind the seat (per the real thing):


Floor and IP in place:


Looks good when everything is closed up

Here are a couple of shots of the parts stuck together (no glue), showing the excellent fit of the main components:


Thanks for looking!

Doug
Jessie_C
_VISITCOMMUNITY
British Columbia, Canada
Joined: September 03, 2009
KitMaker: 6,965 posts
AeroScale: 6,247 posts
Posted: Monday, February 13, 2012 - 10:21 AM UTC
I have both this one and the P-12 The P-12 is stalled in WIP while I procrastinate on how to do the speed ring without ruining the paint job. I think I'm just going to have to break down and use tons of masking tape. Next I need to figure out how to bend some tube for exhausts without crushing it...

I'll be watching your build closely

My poor neglected P-12. I found out only after closing up the fuselage and painting that Hasegawa gave it the F-4B's tailwheel instead of a proper Army skid. Out came the files, micro drills and the plastic rod...


DougN1
_VISITCOMMUNITY
Georgia, United States
Joined: August 08, 2011
KitMaker: 410 posts
AeroScale: 409 posts
Posted: Tuesday, February 14, 2012 - 10:13 AM UTC
Thanks Jessie! I was going to say you should get that P12 kit going again since it looks like you've done the hard parts, but I am glad to see that you posted a thread on it

Did not get too much progress made today. Just sealed up the fusleage and started working on improving the fit of the other components.

Here is the bottom of the fuselage almost all smoothed out:


And the top:


I'll replace the lost raised rivets on the bottom and the two rows on the top with these:


I added some styrene shims to the gear part to improve the fit:


And also on the cowl cover back edge:


And finally, I ground out the insides of the vertical stab attachments to get a good fit with these parts:


Tomorrow should prove to be equally exciting, as I refine the fit of the parts and the filler, attach them and get them finished off. If I get time, I may try to use the Archer Transfer rivets as well

Thanks for looking!

Doug
DougN1
_VISITCOMMUNITY
Georgia, United States
Joined: August 08, 2011
KitMaker: 410 posts
AeroScale: 409 posts
Posted: Wednesday, February 15, 2012 - 09:55 AM UTC
Just a short update today. Polished out the Mr Surfacer, and applied the Archer Transfers rivets on the bottom to replace those sanded away:


Once dry, I sprayed some Mr Surfacer over the rivets, and then used a cloth damped with some rubbing alcohol to wipe it away some (so the rivets would not be so prominent) and ended up with this:


I'll clean it up a little more tomorrow, but overall, I think this is a viable way to replace raised rivets!

Comments welcome!

Doug
lcarroll
_VISITCOMMUNITY
Alberta, Canada
Joined: July 26, 2010
KitMaker: 1,032 posts
AeroScale: 1,025 posts
Posted: Wednesday, February 15, 2012 - 11:08 AM UTC
Doug,
I'll say it's "a nice way to replace lost rivets"! Looks great, nice product and a nice build you've got going. Keep those photos coming, these "between the wars" birds are starting to grow on me!
Cheers,
Lance
mike_espo
_VISITCOMMUNITY
Illinois, United States
Joined: September 26, 2011
KitMaker: 125 posts
AeroScale: 115 posts
Posted: Wednesday, February 15, 2012 - 02:22 PM UTC
Wow!!! looks Great!!!!!

Building the Classic Airframes 1/48 P-12e the USAAC version of the Navy F4B

Your kit looks 10times better and much easier to build...having many fit problems....
Merlin
Staff MemberSenior Editor
AEROSCALE
#017
_VISITCOMMUNITY
United Kingdom
Joined: June 11, 2003
KitMaker: 17,582 posts
AeroScale: 12,795 posts
Posted: Wednesday, February 15, 2012 - 08:33 PM UTC
Hi Doug

Brilliant work! I've heard of Archer's rivet dry-transfers, but have never seen them in use. For some reason, I even thought they were no longer available - but seeing your build prompted me to find their website. I'm definitely going to get some - and some of the other really interesting items they have listed!

All the best

Rowan
DougN1
_VISITCOMMUNITY
Georgia, United States
Joined: August 08, 2011
KitMaker: 410 posts
AeroScale: 409 posts
Posted: Friday, February 17, 2012 - 09:50 AM UTC
Thanks for the kind comments! I've been following your build as well Mike, and I have to agree, I think this kit is easier to build

Been working on getting the lower wings fitted, and attached the vertical stabilizer. The horizontal stabilizers are just stuck on and they don't move! Also got the upper cowl piece fitted and faired into the rest of the fuselage:


Sprayed the initial coat of silver on the lower wings and upper wing bottom to check for flaws (there are a few I need to go fix):


I've also added some more rivets on the bottom sides of the fuselage where they got worn away when I was working on the bottom. I think they've come out quite well and I don't think you'll be able to tell which were added and which were original when the painting is completed!

Thanks for looking!

Doug
lcarroll
_VISITCOMMUNITY
Alberta, Canada
Joined: July 26, 2010
KitMaker: 1,032 posts
AeroScale: 1,025 posts
Posted: Friday, February 17, 2012 - 11:25 AM UTC
Doug,
Coming along very nicely, this is going to be spectacular once the colors are added, your work is really impressive.
I was very impressed with the rivets, took a look at their site and they have some WWI Lacing/Stiching that I may have to order as well.
Really enjoying watching your build.
Cheers,
Lance

PS Why not register it for the KoTSII Campaign; get it up in the "bright lights" and let it shine?
DougN1
_VISITCOMMUNITY
Georgia, United States
Joined: August 08, 2011
KitMaker: 410 posts
AeroScale: 409 posts
Posted: Friday, February 17, 2012 - 04:06 PM UTC

Quoted Text


PS Why not register it for the KoTSII Campaign; get it up in the "bright lights" and let it shine?


I would, but as I understand the rules for the campaign, I would need to add a figure to the build in order to qualify as it was already started before the campaign began -- as I don't want to do a figure, I put it in as a regular build blog.

If I am wrong, I'd be pleased to put it into the campaign

Doug
lcarroll
_VISITCOMMUNITY
Alberta, Canada
Joined: July 26, 2010
KitMaker: 1,032 posts
AeroScale: 1,025 posts
Posted: Saturday, February 18, 2012 - 01:45 AM UTC
Doug,
I should have read your earlier comments more closely; missed the fact that it had a small amount of work done on it previously. It's a beautiful subject and a fine looking build that would greatly compliment the KoTS II inventory. As for the figure, I would be in the same boat. Although I admire the work folks peoduce in the category it's not something I'd want to do either; it would be like starting all over again, and I'm happy in my present efforts Thanks!
That being said I'll continue to follow it closely, always enjoy seeing good work and it's results.
Cheers,
Lance
DougN1
_VISITCOMMUNITY
Georgia, United States
Joined: August 08, 2011
KitMaker: 410 posts
AeroScale: 409 posts
Posted: Friday, February 24, 2012 - 03:48 AM UTC
Thanks for the kind words everyone! Perhaps the admins will make an exception and let the F4B-4 into the KotS2 campaign without a figure, lol.

The rivets seem to have worked out well, and I'll definately use them again. I understand HGW also makes some of these, so I may have to try them out as well as I beleive they are less expensive than the Archer ones.

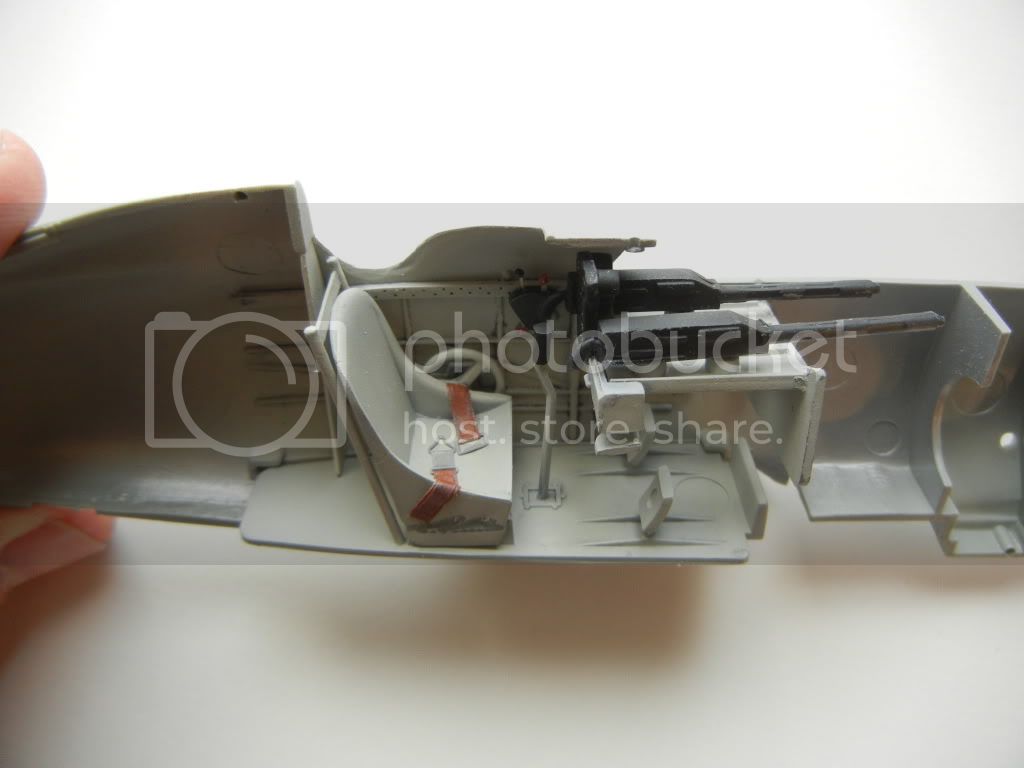
Ok, small update now that I've made the decision to model the modified aerial attachment bracket on the vertical stabilizor. I've got a really good hi-res photo of 6-F-1 with this modification, and can see that it consists of two flat pieces of metal attached to either side of the stab, and a metal rod that angles back to meet them. So, I used some .20 X .10 styrene strip, cut to 15mm to make the two flat parts, and some .20 styrene rod to make the rod part. I drilled a hole in the appropriate spot (the photo shows them attached above the anchors for the bracing wire) and started work. As the whole thing has a small post that sticks out above where all the parts come together, I bent the rod so that it would make up that part as well:

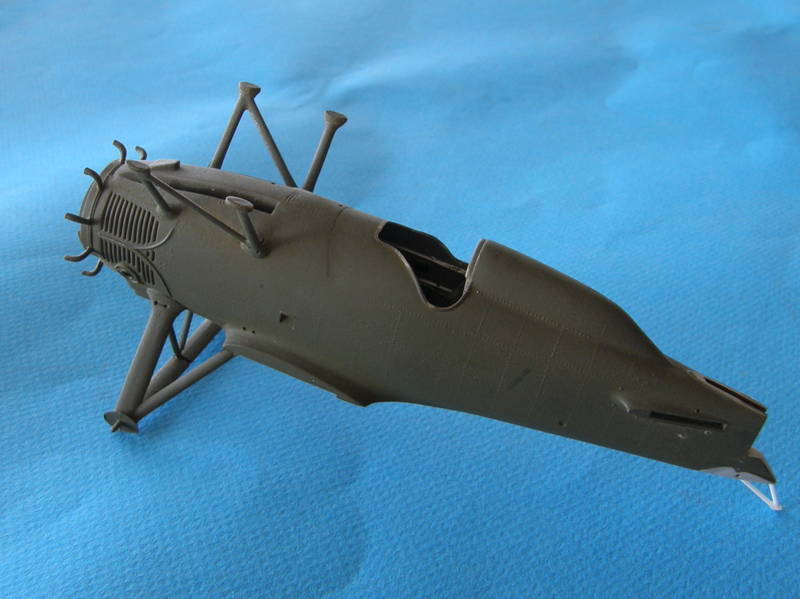
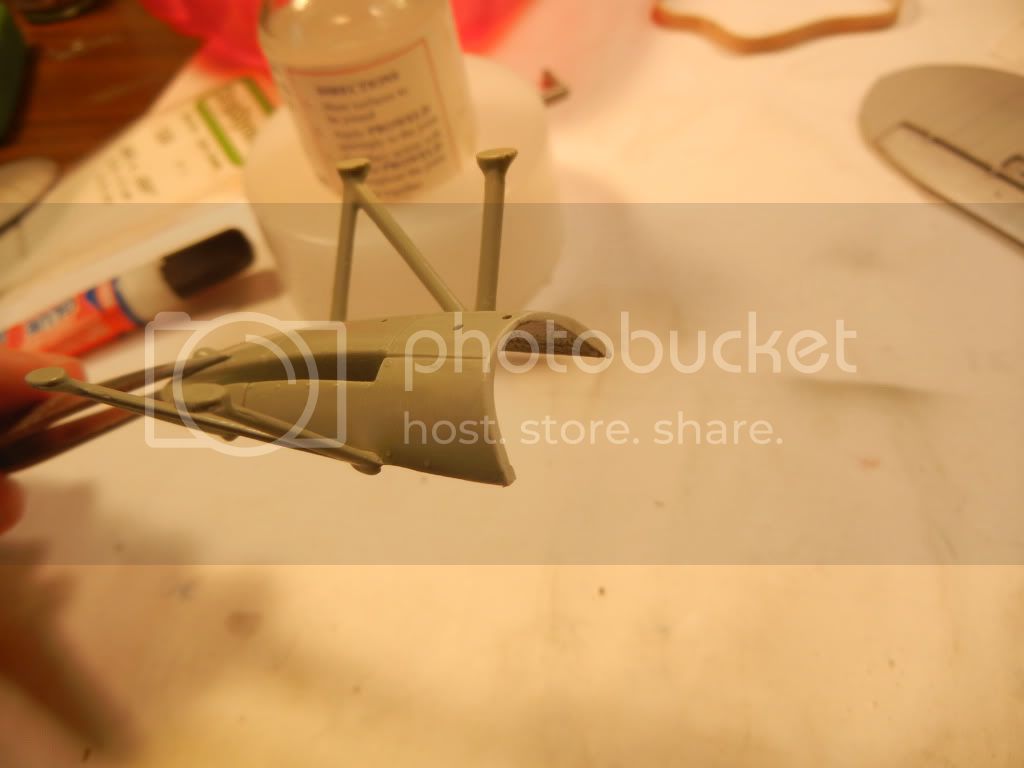
Parts attached, but not joined yet:


After they set, I joined them by tacking with superglue, then using ProWeld to help get a really good bond:


I then globed some more superglue on to the outside of the parts, as they need to all blend together at the top. Once it dries, I'll get it cleaned up and add a couple of attachment rivets on the strips per the real thing.

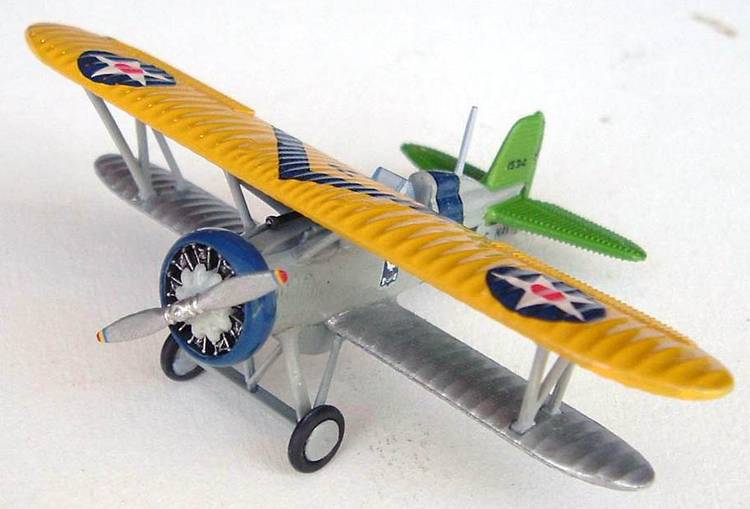
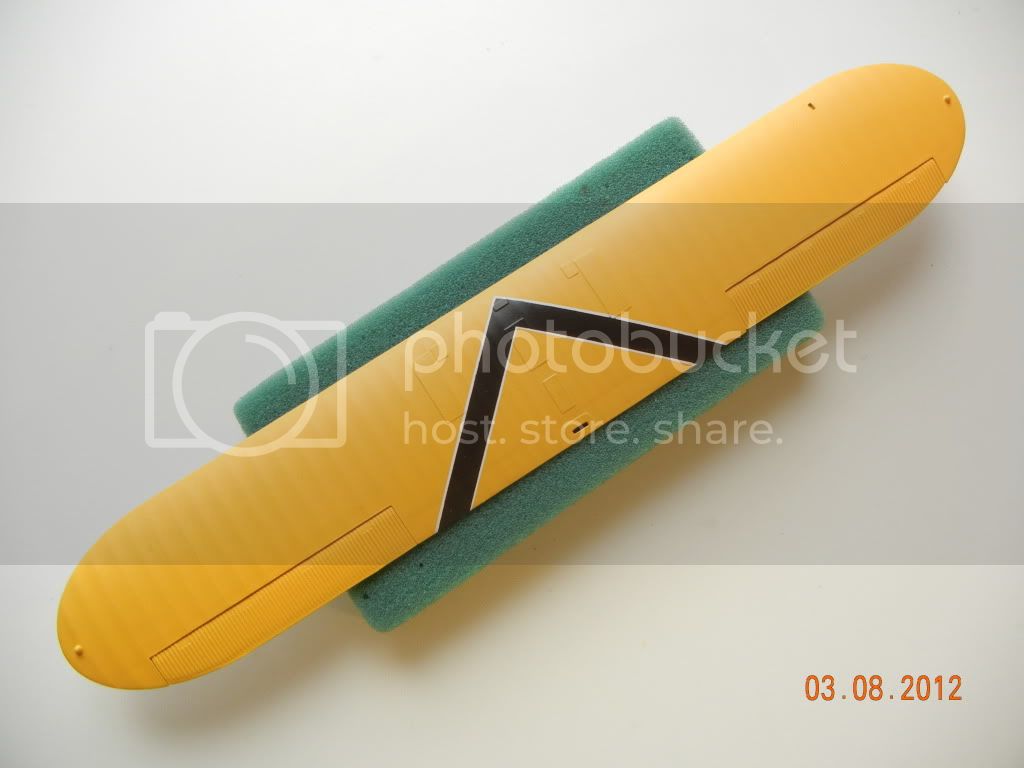
In related news, I also got the yellow paint (White Ensign USN Chrome Yellow) on the upper wing (and the wrap around on the underside of the leading edge). Now it's starting to look like something:


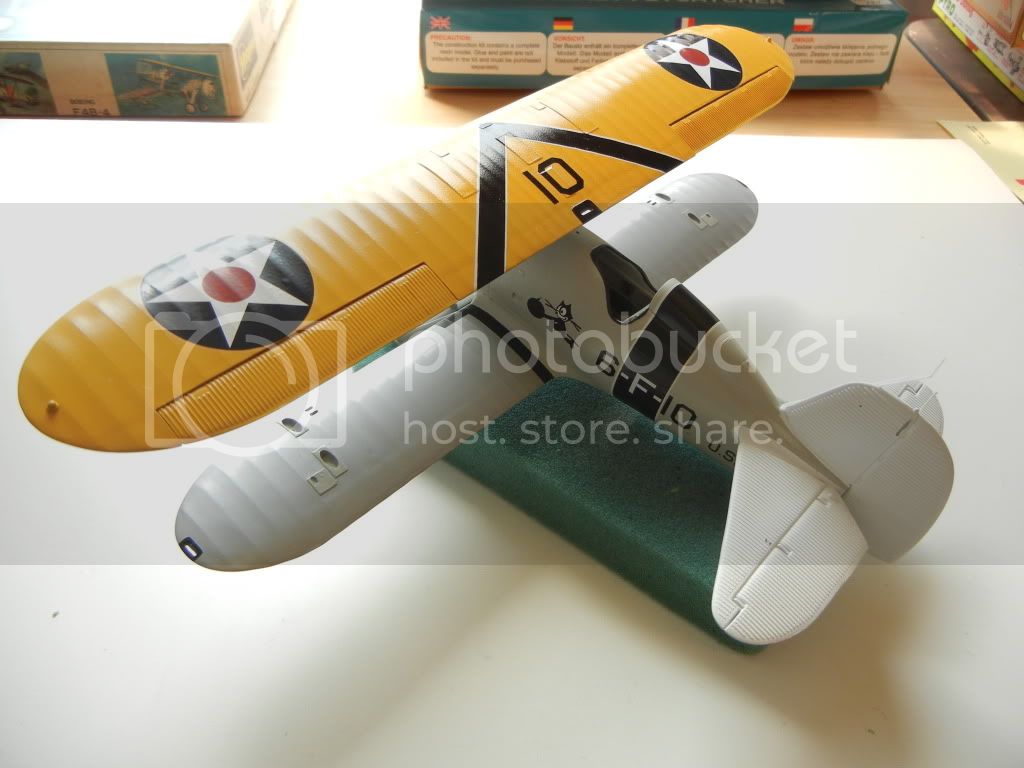
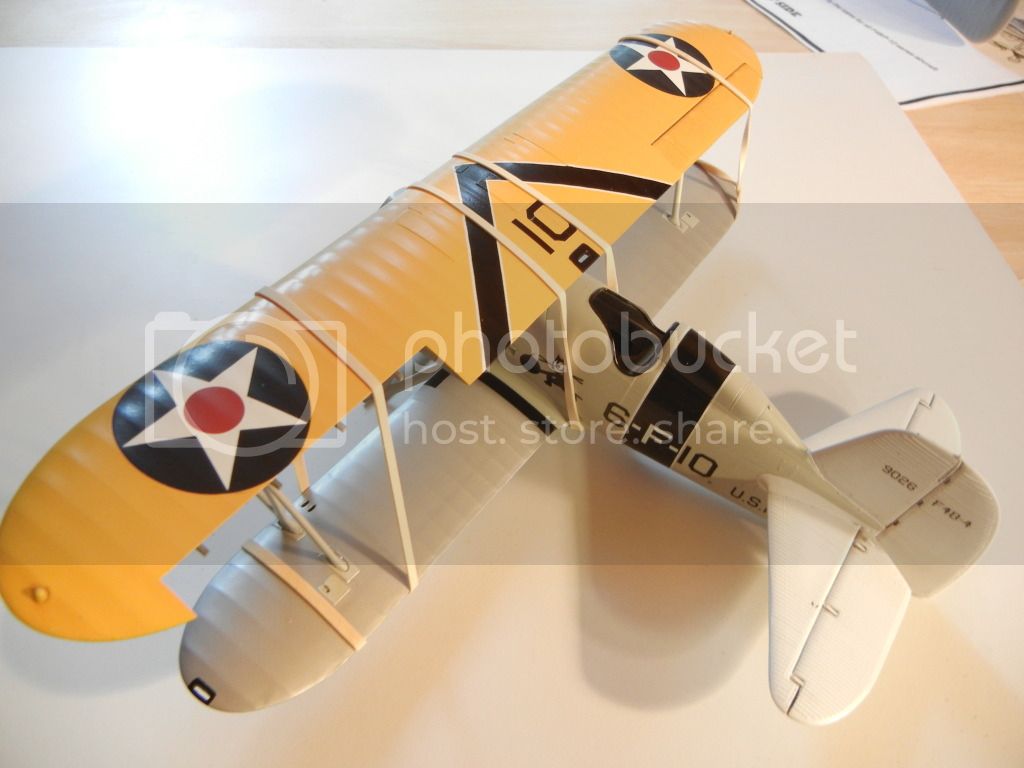
Here is a shot that shows the overall look with the modified aerial attachment (still need to take some off the top post part):


Still need to find some good photos of where the aerial wire attaches to the fuselage side (the one that comes down from the one that goes from the vertical stab to the right wingtip)

Thanks for looking! Comments/questions welcome!

Doug
Jessie_C
_VISITCOMMUNITY
British Columbia, Canada
Joined: September 03, 2009
KitMaker: 6,965 posts
AeroScale: 6,247 posts
Posted: Friday, February 24, 2012 - 02:42 PM UTC
That antenna mount is surprisingly complicated. It's going to add a lot of interest to the model
JPTRR
Staff MemberManaging Editor
RAILROAD MODELING
#051
_VISITCOMMUNITY
Tennessee, United States
Joined: December 21, 2002
KitMaker: 7,772 posts
AeroScale: 3,175 posts
Posted: Friday, February 24, 2012 - 03:36 PM UTC
Awesome job, all! Glad to see these oldies built. I never built either of these, but I did build the BF2C twice. Want to relive that someday.

Keep going, I'm luvin' it!

Here's my 1/100 F4B:

DougN1
_VISITCOMMUNITY
Georgia, United States
Joined: August 08, 2011
KitMaker: 410 posts
AeroScale: 409 posts
Posted: Friday, March 02, 2012 - 09:32 AM UTC
Nice looking model Fredrick!

I've spent most of the past few days researching the correct markings for this airframe (6-F-10), and thanks to a high-res image of the squadron in the blimp hanger - which is in the Squadron book - (as well as one of 6-F-1 that clearly showed the aerial mast mount on the rudder) sent to me by Dana Bell, we were able to discover a few interesting things. 1) The black band on the fuselage has a white edge on either side, and the wing chevron has one as well (which can be seen better on the other aircraft from this section as they are closer in the squadron photo). Additionally, this squadron is also uncommon in that the wing chevron stops short of the leading edge of the wing:


(posted under Fair Use)

Unfortunately, the Yellow Wings decal sheet (as well as the markings guide from the Classic Airframes 1/48 F4B-4 kit) missed all of the above, so the back bands were not going to be of use - good think I planned to paint them anyway

There also seems to be some sort of a box (camera perhaps?) on the port side wingroot, so I'll take a stab at building that as well. In the interim, got the silver paint on the bottom of the wings, removed the yellow leading edge wrap-around (as it was a 1936 order and only put on F4B-4's that were repainted as part of a major overhaul), and got the upper wing painted yellow/silver again. I painted the white tail surfaces, as well as white on the fuselage for the outlines on the fuselage band. I had already painted the wing yellow before discovering the chevron's white outline, so I masked and painted the chevron white. I'll paint the black next week. Here is how she looks so far:


mike_espo
_VISITCOMMUNITY
Illinois, United States
Joined: September 26, 2011
KitMaker: 125 posts
AeroScale: 115 posts
Posted: Friday, March 02, 2012 - 09:59 AM UTC
Lookin good! For the group build. I am trying to replicate the split axle landing gear on my P-12e.

Should be easier in 1/32.
DougN1
_VISITCOMMUNITY
Georgia, United States
Joined: August 08, 2011
KitMaker: 410 posts
AeroScale: 409 posts
Posted: Thursday, March 08, 2012 - 01:55 PM UTC
Thanks Mike, but I won't be doing any more mods to this model, but I would love to see you build one of these 1/32 kits

--

Ok, made some progress on this bird (in between fixing some self-imposed issues on the Yak-1b). Got the chevron on the upper-wing finished off, and painted the grey plates and flotation bags on the underside of the wing:


Also spent about 1.5 hours playing with masking tape to get to the point where I could paint the main airframe grey as well:


Found a couple of spots that need some touch-up, but should be able to get that done in the next couple of days and then it will be time to start putting everything together!

Thanks for looking! Comments/questions welcome!

Doug
mike_espo
_VISITCOMMUNITY
Illinois, United States
Joined: September 26, 2011
KitMaker: 125 posts
AeroScale: 115 posts
Posted: Thursday, March 08, 2012 - 02:41 PM UTC
Fantastic paint job on the upper wing!

The detail on that kit is breathtaking compared to my CA.
Tailor
_VISITCOMMUNITY
Nordrhein-Westfalen, Germany
Joined: May 26, 2008
KitMaker: 1,168 posts
AeroScale: 199 posts
Posted: Thursday, March 08, 2012 - 07:15 PM UTC
Outstanding work overall!
Super lovely paint job on the upper wing!!!
Cheers,
Guido
DougN1
_VISITCOMMUNITY
Georgia, United States
Joined: August 08, 2011
KitMaker: 410 posts
AeroScale: 409 posts
Posted: Tuesday, March 13, 2012 - 08:30 AM UTC

Quoted Text

Fantastic paint job on the upper wing!

The detail on that kit is breathtaking compared to my CA.


You could always start one of these as well Mike - these kits really are very nice, especially when one considers they are almost 40 years old!

Thanks Guido, I'm glad it turned out well

Ok, small update, used up a bunch of tape to masks off all the panels, walkways and handholds, etc. and got everything painted. Just need to do the black padding around the cockpit and I think this thing will be ready to stick together:


You may notice in the last pic that I have now painted the bottom of the ailerons aircraft gray instead of the silver they were. Got some new info since the last update that indicated that was the case, and confirmed on the P-Cola bird, so made the change.

I have to report for Jury Duty tomorrow, so may be awhile before I get to do any more work on this bird!

Thanks to everyone for looking! Comments/questions welcome!

Doug
mtnflyer
_VISITCOMMUNITY
Alberta, Canada
Joined: March 08, 2009
KitMaker: 394 posts
AeroScale: 360 posts
Posted: Tuesday, March 13, 2012 - 10:35 AM UTC
I'm really liking this build, Doug. Looking forward to the next progress postings.
lcarroll
_VISITCOMMUNITY
Alberta, Canada
Joined: July 26, 2010
KitMaker: 1,032 posts
AeroScale: 1,025 posts
Posted: Tuesday, March 13, 2012 - 02:13 PM UTC
Doug,
The paint work is excellent. Great masking and the colours are really going to make this one shine. Great subject, great work...I'm enjoying following this build.
Hopefully the trial is short and we'll see more of this real soon.
Cheers,
Lance
DougN1
_VISITCOMMUNITY
Georgia, United States
Joined: August 08, 2011
KitMaker: 410 posts
AeroScale: 409 posts
Posted: Monday, April 02, 2012 - 08:05 AM UTC
Thanks guys!

Just a quick update since I've managed to get the decals on! I also broke the tail aerial mast, so I'm in the process of making a new one, and will put the final decals on the tail once I get it finished up:


Next up - make sure the decals are set properly (no silvering), finish up the replacement tail aerial mast, then attach a few fiddly bits to the fuselage and then the big moment of attaching the wings!

Thanks for looking, comments/questions always welcomed!

Doug
Mgunns
_VISITCOMMUNITY
Arizona, United States
Joined: December 12, 2008
KitMaker: 1,423 posts
AeroScale: 1,319 posts
Posted: Monday, April 02, 2012 - 11:49 PM UTC
Hello Doug:

This is really a nice looking model. I like the scheme, very striking, and your attention to the small details like the compass housing really set it off. I like the rivet decals, I will have to pick some of those up. I have built a couple of these and really like the a/c.

Looking for further progress.

Best
Mark
DougN1
_VISITCOMMUNITY
Georgia, United States
Joined: August 08, 2011
KitMaker: 410 posts
AeroScale: 409 posts
Posted: Thursday, August 02, 2012 - 05:00 AM UTC
Ok, the Hanger Queen II campaign has got me back on this one again. I had spent to much time pondering whether or not to attach the flat rigging wires to the wing before or after I permanently attached it, as well as whether or not to put the windscreen/gunsight on first. In the end, once I started playing with it, it turns out it has to be after it is permanently attached since they will not be the proper lengths otherwise.

So, short update, I took the big step of attaching the wings:


I also had to shorten up the aileron control rods to fit (shorter one is corrected):


I am using some orthodontic stainless steel flat wire (used for braces) for the rigging. US interwar types seem to have "fatter" main rigging wires than their Euro interwar counterparts, and with it already being stainless steel, you can cut it (with your dremel) and pop it in place.

Here are the pieces for one side of the wing cut and awaiting installation:


Thanks for looking! Comments/questions welcomed!

Doug
 _GOTOTOP