KotS GB 2012 A.W Siskin Mk.IIIA

#372
United Kingdom
Joined: March 10, 2010
KitMaker: 2,568 posts
AeroScale: 1,619 posts
Posted: Wednesday, June 13, 2012 - 03:41 AM UTC
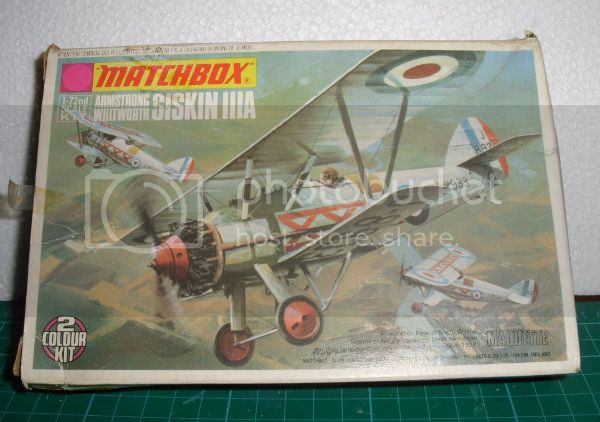
My entry for the Knights of the Sky groups build is the old Matchbox Siskin Mk.IIIA. I picked this up recently at RAF Cosford Model show fairly cheaply. Looks like it should be a quick and simple build. The decals look like they might have had it, but luckily Hannants have a Modeldecal sheet for sale which includes markings for a Siskin.
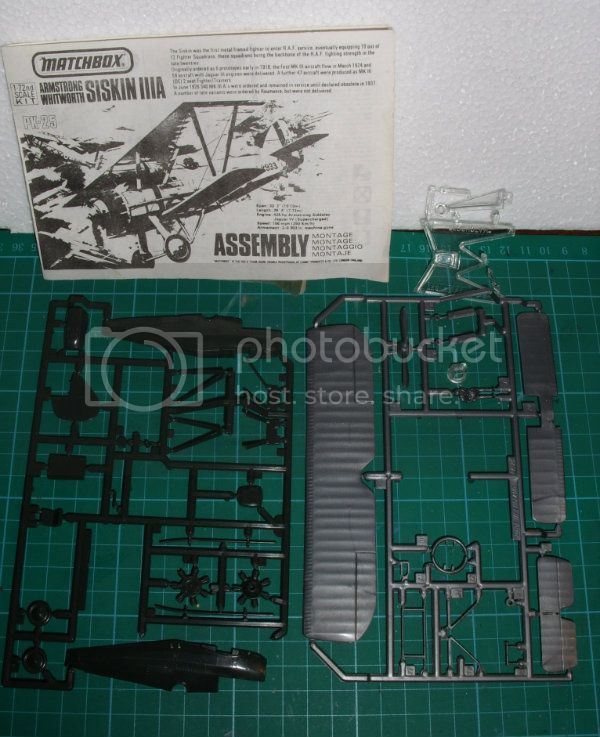
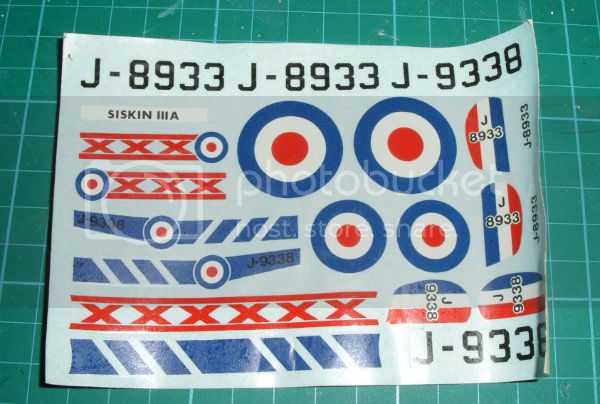
Comments and suggestions are welcome.
On the bench: 1/72 Mosquito, Lightning F.6, DH.2,
AMT Vulcan Shuttle Surak.
Cyber-Hobby 1:35 Sherman Firefly IC - still stalled.
Västra Götaland, Sweden
Joined: February 19, 2010
KitMaker: 1,473 posts
AeroScale: 1,450 posts
Posted: Wednesday, June 13, 2012 - 07:49 PM UTC
Hello Stephen,
nice choice of kit – that box art brings back some memories from childhood builds.
Looking forward to your build
Mikael
_________________________________________________________
Just finished the Wingnut Wings Taube. On to the Junkers D.1

#372
United Kingdom
Joined: March 10, 2010
KitMaker: 2,568 posts
AeroScale: 1,619 posts
Posted: Thursday, June 14, 2012 - 03:21 AM UTC
Hi Mikael,
yeah the early Matchbox box art was always first rate. This is a box I won't be chucking when the models complete!
Its not a plane you see done very often. Besides from this kit I can't think of any other at this scale. There is a 1:32 resin kit by Silverwings available and I think someone did a vac-form a while ago.
On the bench: 1/72 Mosquito, Lightning F.6, DH.2,
AMT Vulcan Shuttle Surak.
Cyber-Hobby 1:35 Sherman Firefly IC - still stalled.

#372
United Kingdom
Joined: March 10, 2010
KitMaker: 2,568 posts
AeroScale: 1,619 posts
Posted: Thursday, June 14, 2012 - 08:12 AM UTC
Brief update:
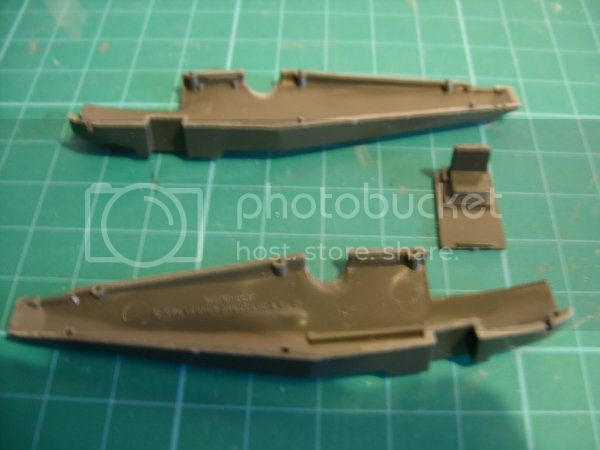
Work on the cockpit has begun and I've started painting the pilot. I had thought about scratchbuilding some frame work, throttle, control stick etc but then I realised that very little would be seen through the small cockpit opening with the pilot in place. So why create work that won't be seen? By the way if anyone has any idea on basic cockpit colours I would be very grateful. I'm not sure if I should paint the sides canvas with a wood floor or if the RAF had started painting interiors green by the late '20's.
This little picture on the box side amused me.
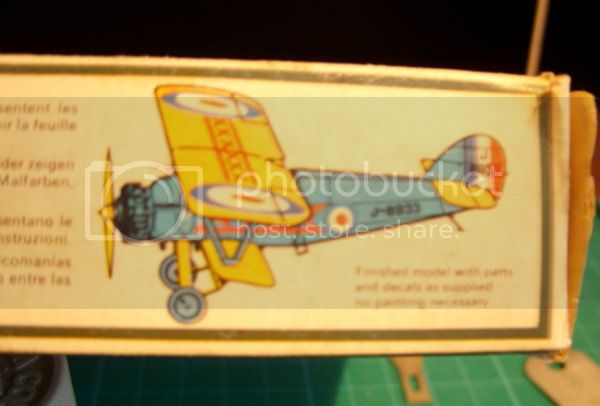
The caption reads 'Finished model with parts and decals as supplied - no painting necessary.'. Well maybe..... If the plastic in the box was the same colour as the picture and if the the RAF had painted Siskin's blue and yellow. Although I have to say in that colour scheme and with USAAC markings it would look pretty good.
On the bench: 1/72 Mosquito, Lightning F.6, DH.2,
AMT Vulcan Shuttle Surak.
Cyber-Hobby 1:35 Sherman Firefly IC - still stalled.
British Columbia, Canada
Joined: September 03, 2009
KitMaker: 6,965 posts
AeroScale: 6,247 posts
Posted: Thursday, June 14, 2012 - 09:45 AM UTC
The fabric areas would have been a splotchy washed-out brick red colour of the primer that was painted on the outside of the fabric bleeding through. The metal areas were most likely interior green-grey, with the slight possibility of being light grey instead.
When once you have tasted flight you will walk the Earth with your eyes turned skyward.
For there you have been, and there you will always long to return.
-Leonardo Da Vinci
England - South East, United Kingdom
Joined: November 06, 2005
KitMaker: 1,667 posts
AeroScale: 1,551 posts
Posted: Thursday, June 14, 2012 - 09:45 AM UTC
Oh a blast from the past indeed, Matchbox did do some rather different subjects, Looking forwards to seeing how this progresses, I've been tempted to try something a bit later myself recently so will watch with extra interest.
Keith
Still can't cure the AMS even with sausage finger implants & olde eyes.

#372
United Kingdom
Joined: March 10, 2010
KitMaker: 2,568 posts
AeroScale: 1,619 posts
Posted: Thursday, June 14, 2012 - 11:03 AM UTC
Keith your right they did some cool stuff. I do admit to having a bit of a softspot for Matchbox and usually pick them up when I can. Originals or reissues I really don't mind. I'm looking forward to the Stranraer that Revell are reissuing later in the year.
Jessie, cheers those colours sound about right so thats what I'll go with.
On the bench: 1/72 Mosquito, Lightning F.6, DH.2,
AMT Vulcan Shuttle Surak.
Cyber-Hobby 1:35 Sherman Firefly IC - still stalled.

#372
United Kingdom
Joined: March 10, 2010
KitMaker: 2,568 posts
AeroScale: 1,619 posts
Posted: Sunday, June 17, 2012 - 08:41 AM UTC
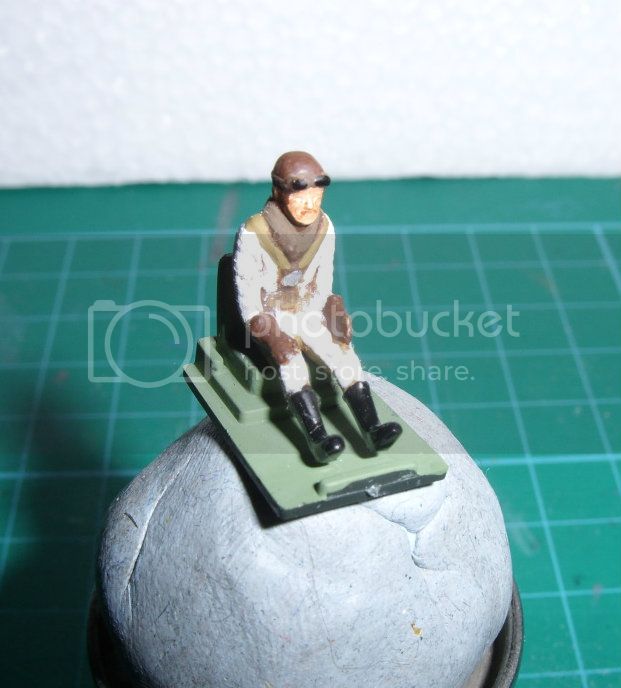
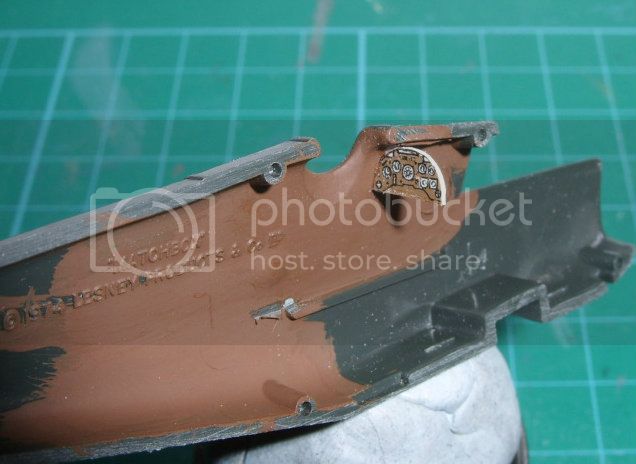
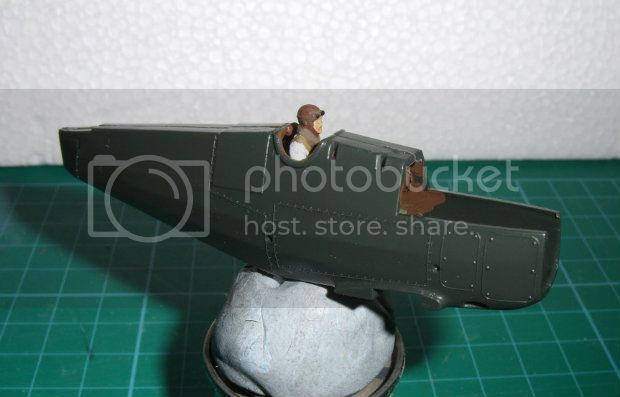
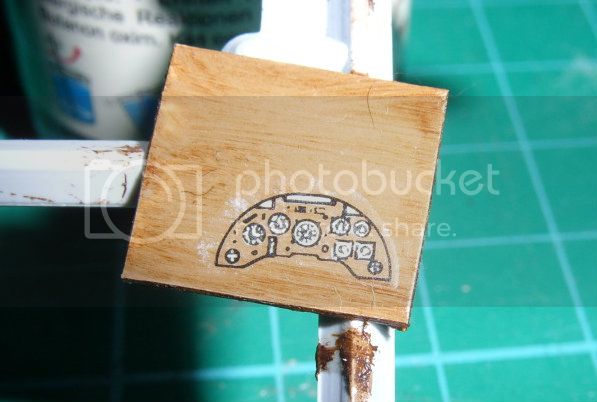
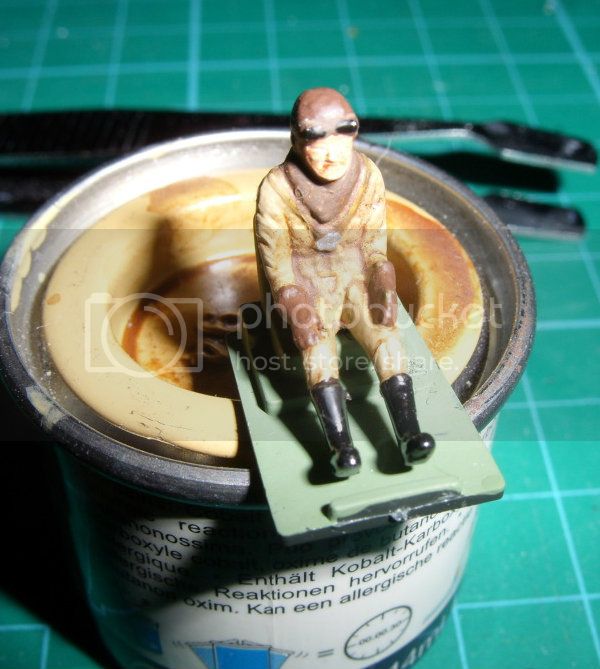
Cockpit and pilot painted. What few references I could find hinted that RAF flying gear of this period was a pale khaki coloured overall with a fur collar, so thats what I went with. On Jessie's recomendation I painted the fuselage insides brick red and cockpit floor and seat green. The decal sheet I have ordered includes an instrument panel decal so in prep for this I painted a small square of plasticard a wood colour and glossed it. The Vickers gun also sen drying in the back is for another build.
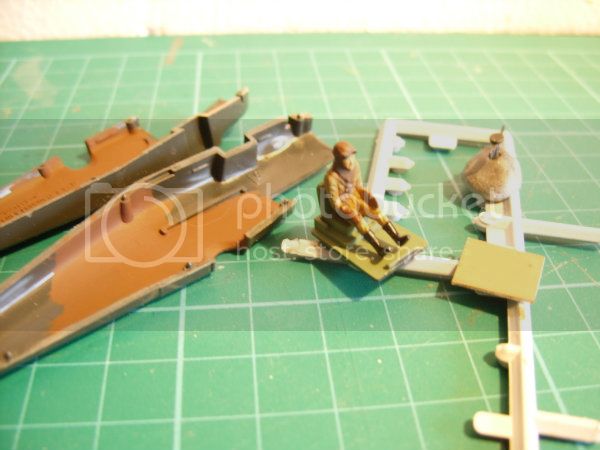
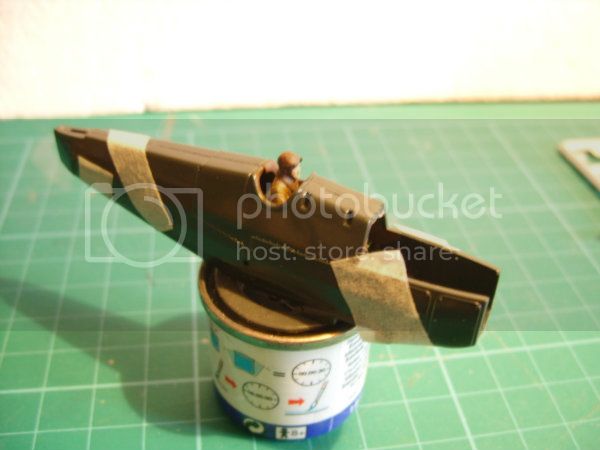
A test fit showed that as expected, very little will be seen with the pilot in place so no real need to add anything else inside. I might need to make some adjustments as he is a little high and too far forward.
On the bench: 1/72 Mosquito, Lightning F.6, DH.2,
AMT Vulcan Shuttle Surak.
Cyber-Hobby 1:35 Sherman Firefly IC - still stalled.

#372
United Kingdom
Joined: March 10, 2010
KitMaker: 2,568 posts
AeroScale: 1,619 posts
Posted: Wednesday, June 20, 2012 - 09:03 AM UTC
Decals arrived this morning.
Its the Modeldecal sheet 31A Pre-War RAF I picked up from Hannants. The set for the Siskin are for a very attractive black and white checked machine of 43 Sqn 1930. The sheet also has markings for a Fury, Bulldog and Gladiator. Just the excuse I need to grab some of those!
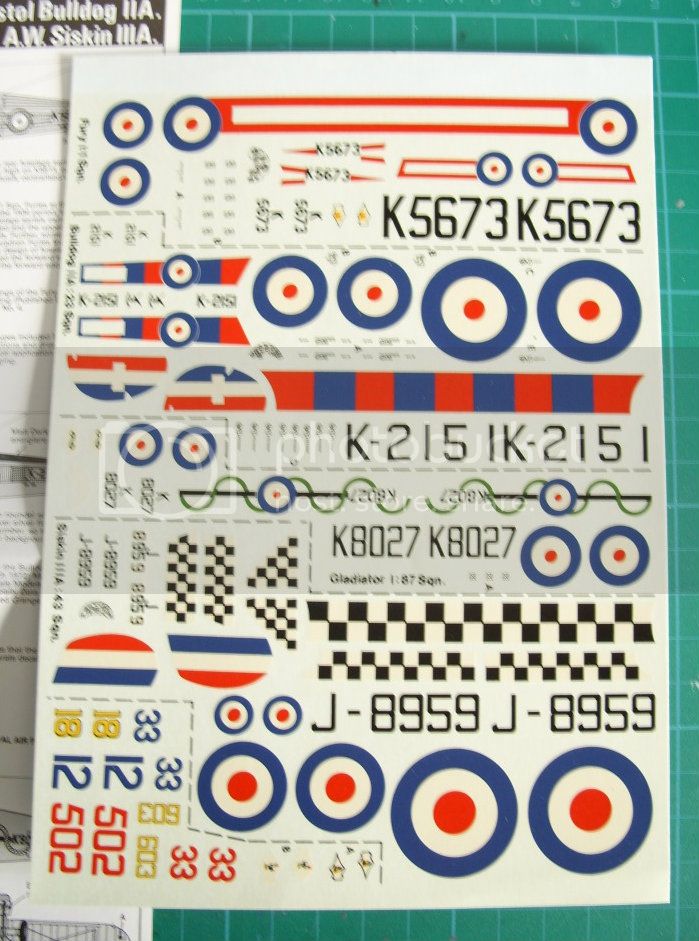
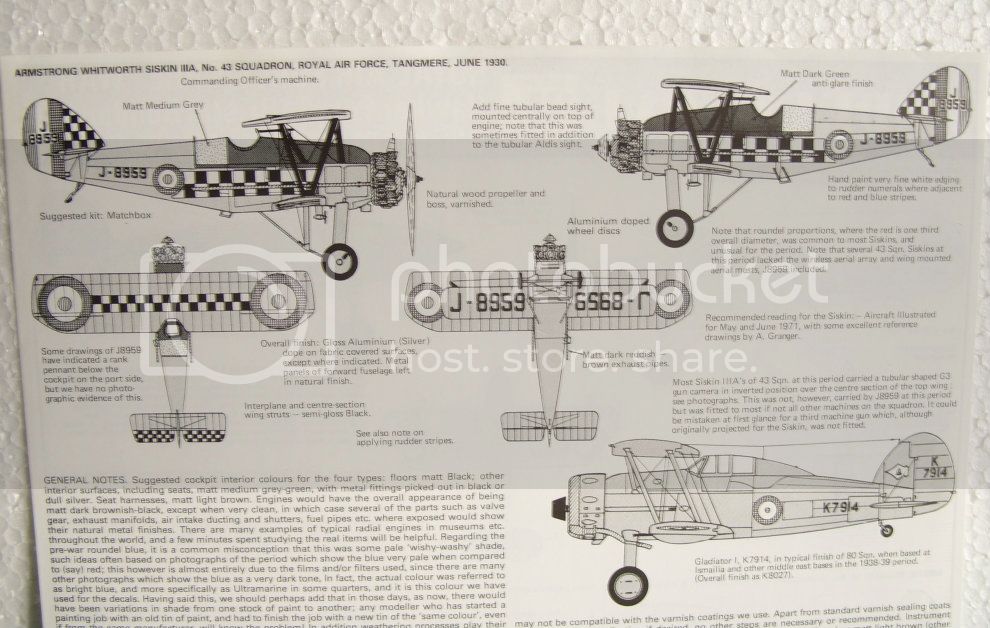
First job was to get the included intstrument panel decal on the the plastic I'd prepped earlier. This was also my first attempt at trying the oil paint over acrylic method for simulating wood grain. Not a bad result although I think I wiped off a little too much of the oil. The prop will need to be much more prominent. I'll trim and glue this in after its had a night or two to properly dry out.
Mucking about with the camera I found a function to get better close ups of small objects - so heres a better pic of the pilot trying to fly a tin of paint.
On the bench: 1/72 Mosquito, Lightning F.6, DH.2,
AMT Vulcan Shuttle Surak.
Cyber-Hobby 1:35 Sherman Firefly IC - still stalled.
Västra Götaland, Sweden
Joined: February 19, 2010
KitMaker: 1,473 posts
AeroScale: 1,450 posts
Posted: Wednesday, June 20, 2012 - 08:38 PM UTC
Nice progress Stephen, that decal sheet looks very attractive. The woodgrain looks pretty convincing to me.
Mikael
_________________________________________________________
Just finished the Wingnut Wings Taube. On to the Junkers D.1
United Kingdom
Joined: June 21, 2012
KitMaker: 3 posts
AeroScale: 2 posts
Posted: Wednesday, June 20, 2012 - 09:50 PM UTC
Built the same kit some years ago. Its still hangin in the loft. Easy build. Interior finish, washed out pink/red from the red exterior primer (close to an iron oxide red colour in 1/72). Wood parts, varnished wood/veneer, instruments usually natural metal finish depending on original metal used . Metal interior fram probably grey during this period. Interwar pilots were a posh lot as the RAF at that time was like an exclusive flying club. Flying suits were white with black shoes as standard issue. Flying helmets either black or brown depending on from which source acquired. Boots were privately purchased,usually in black sometimes brown with either white or off white/dirty brown linings which showed as the upper part of the boot was turned down most of the time. The figure in the kit is closer to WW2 pilots flying gear, so check photos of interwar era RAF and University air squadrons. A number of photos exist of test pilots and University air squadron pilots in the gear. Hope this helps.

#372
United Kingdom
Joined: March 10, 2010
KitMaker: 2,568 posts
AeroScale: 1,619 posts
Posted: Thursday, June 21, 2012 - 01:59 AM UTC
Cheers John, next inter-war plane I do I'll keep our advice in mind. My references on this area are very limited, mostly just some colour profiles and a few black and white pics and cutaway diagrams. Very hard to work out interior details or colours from them. I had seen pilots in light coloured overalls, hence why I painted mine a pale khaki. White never crossed my mind. He is a lot lighter in reality than the pics show so I might be able to give him a dry brush with matt white to highlight this. Luckily very little will be seen once its closed up. These early Matchbox pilots are difficult to place in a particular era. I always thought they looked more WWI with that big collar and lack of a parachute harness or life jacket. The later pilots in the seafox, wellesley and privateer kits on the other hand are definately in WWII kit.
Mikael - Thanks, I may just be being a little too critical with myself. I do agree about the decals, it really is a ncie sheet. I will certainly be getting a Bulldog to do in that red and blue scheme.
On the bench: 1/72 Mosquito, Lightning F.6, DH.2,
AMT Vulcan Shuttle Surak.
Cyber-Hobby 1:35 Sherman Firefly IC - still stalled.

#372
United Kingdom
Joined: March 10, 2010
KitMaker: 2,568 posts
AeroScale: 1,619 posts
Posted: Thursday, June 21, 2012 - 09:06 AM UTC
On the bench: 1/72 Mosquito, Lightning F.6, DH.2,
AMT Vulcan Shuttle Surak.
Cyber-Hobby 1:35 Sherman Firefly IC - still stalled.
United Kingdom
Joined: June 21, 2012
KitMaker: 3 posts
AeroScale: 2 posts
Posted: Thursday, June 21, 2012 - 11:45 PM UTC
Glad to be of some use. For a reproduction of the flying suit go to:
www.blueswallowaircraft.com. look under Sidcot suit. named after Sidney Cotton for those who might be interested. It had many versions from WW1 onwards till late 1940's I think.
Nice interpretation on your pilot figure by the way.
Colorado, United States
Joined: January 25, 2004
KitMaker: 11,669 posts
AeroScale: 11,011 posts
Posted: Friday, June 29, 2012 - 12:40 PM UTC
Its good to see the older kits still being built. With just a bit of imagination and deaft treatment thay can show well against some of the modern moulds.
". . .The most important thing is to know why you build and then get the most that you can out of building." via D.D.

#372
United Kingdom
Joined: March 10, 2010
KitMaker: 2,568 posts
AeroScale: 1,619 posts
Posted: Monday, July 02, 2012 - 08:44 AM UTC
Thanks Stephen, Matchbox did some great kits back in the day. I'm WAY too young to have been around when most of them were first out, but when I got into modelling in the mid 90's there were still plenty about in model shops. Luckily they were all within the range of my pocket money, unlike most of Airfix, Revell etc.. Its great that Revell have been reissuing a lot more these last few years. Kits like the Spitfire, Hellcat, Mustang and the like have since been bettered, but its the obscure types they did that interest me now. I'm really looking forward to getting the Stranraer seaplane soon. I'm also hoping that with the success of the Airfix Valiant, they'll bring the Victor back (it fetches stupid money on evilbay these days).
But back to the Siskin:
The cabane struts are very clever in this kit. They're already moulded in pairs at the correct angle and lock together under the fuselage cowl. The top wing then fits to the struts perfectly, without any of the usualy mucking about trying to get angles correct that puts me right off bi-planes. I have to wonder that if Matchbox could do this in 1974, why can't it be done on more modern bi-plane kits?
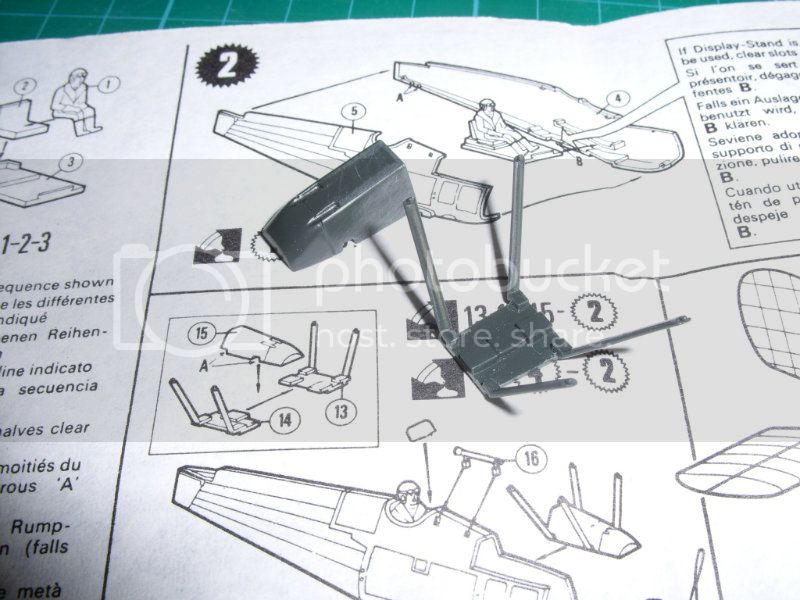
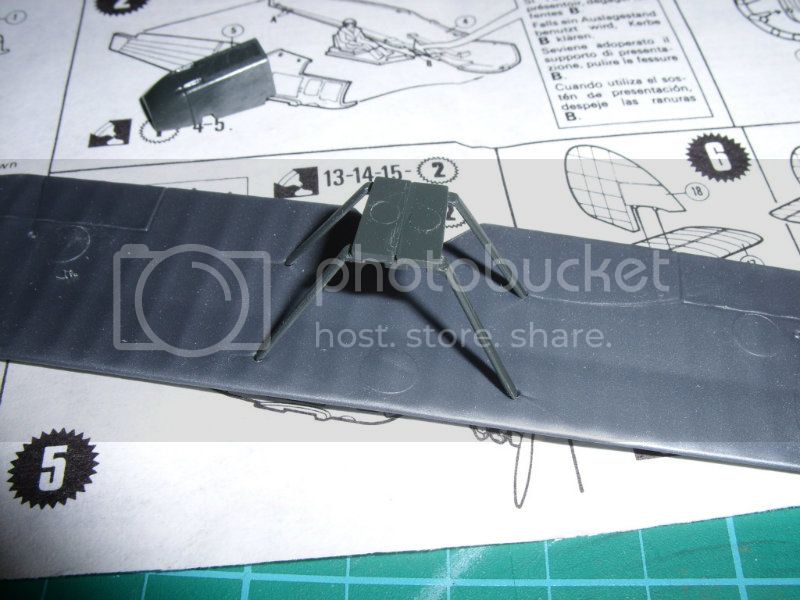
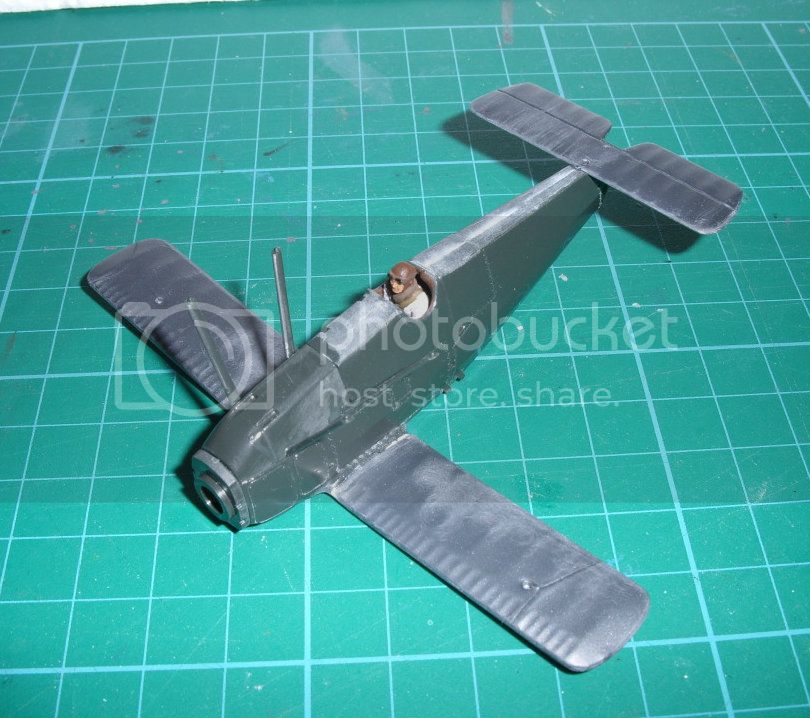
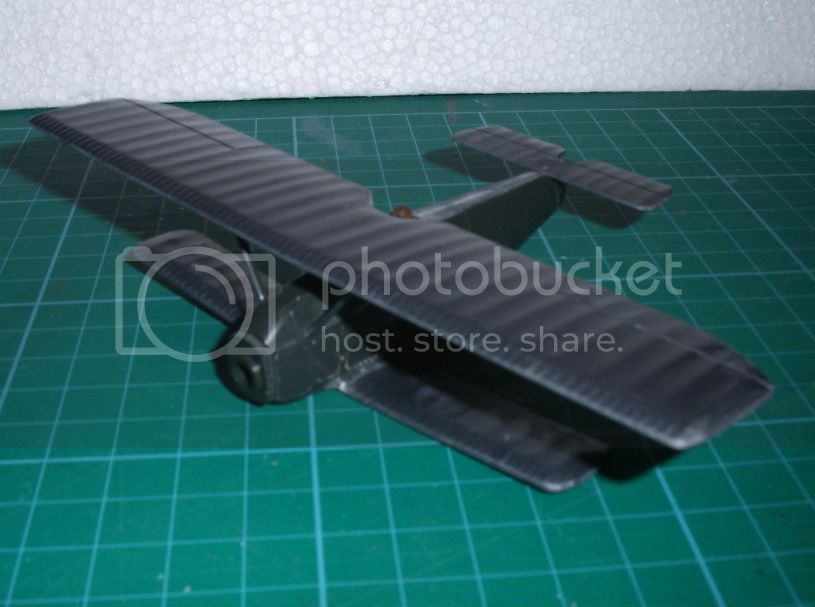
I haven't added the rudder yet as it needs four decals applying to it and it will be a lot easier to do this first and then fit it. A few more bits and then she'll be ready for painting.
On the bench: 1/72 Mosquito, Lightning F.6, DH.2,
AMT Vulcan Shuttle Surak.
Cyber-Hobby 1:35 Sherman Firefly IC - still stalled.
Västra Götaland, Sweden
Joined: February 19, 2010
KitMaker: 1,473 posts
AeroScale: 1,450 posts
Posted: Thursday, July 12, 2012 - 08:48 AM UTC
That was indeed some very well thought out struts! Actually WNW are pretty good in this department too, though perhaps not quite as easy...
Mikael
_________________________________________________________
Just finished the Wingnut Wings Taube. On to the Junkers D.1

#372
United Kingdom
Joined: March 10, 2010
KitMaker: 2,568 posts
AeroScale: 1,619 posts
Posted: Friday, July 27, 2012 - 07:57 AM UTC
Work continues on the Siskin.
Landing gear legs are now assembled. Despite being made out of 5 parts, they went together fairly easily just needed some carfeful eyeballing to get lined up correctly. I tacked on the two halves of the exhaust ring to allow me to glue on the two pipes and blend them in. Hopefully each should look like a single piece after painting.
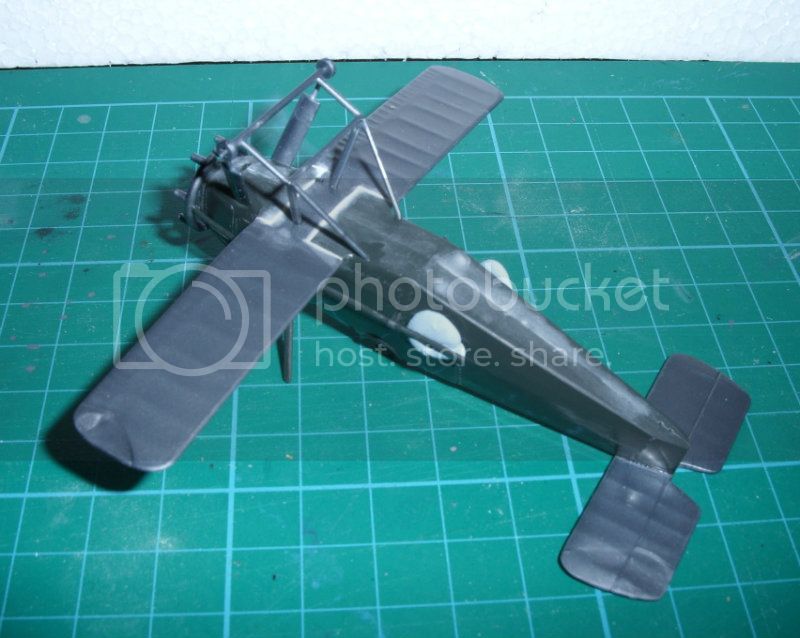

And thats pretty much it for major assembly. Next job to do is to drill out some location holes for the rigging and then its on to painting. As this will be my first attempt at rigging, I'm planning on using a fairly simple rig using photos and diagrams as reference. Just the main wires, nothing too complicated. I hope

On the bench: 1/72 Mosquito, Lightning F.6, DH.2,
AMT Vulcan Shuttle Surak.
Cyber-Hobby 1:35 Sherman Firefly IC - still stalled.
Västra Götaland, Sweden
Joined: February 19, 2010
KitMaker: 1,473 posts
AeroScale: 1,450 posts
Posted: Tuesday, July 31, 2012 - 06:52 AM UTC
Hi Stephen,
The Siskin is coming along very nicely. Your filling and sanding skills will provide a good base for the paint!
Mikael
_________________________________________________________
Just finished the Wingnut Wings Taube. On to the Junkers D.1

#372
United Kingdom
Joined: March 10, 2010
KitMaker: 2,568 posts
AeroScale: 1,619 posts
Posted: Friday, August 03, 2012 - 04:35 AM UTC
Thanks Mikael,
I was pleased with my filling and sanding job. After a coat of primer it was completely seamless and needed no further work! Now thats something that doesn't happen very often, even for the best of us.
Anyway, painting has started. I used Humbrol 27001 matt aluminium brushed straight from the tin. On larger kits I usually airbrush, but when its this small its hardly worth it. I left the area aheah of the cockpit unpainted as this needs to be green and I want to minimise the amount of metallic pigment that might show through. Maybe a coat of Klear might help with this.

On the bench: 1/72 Mosquito, Lightning F.6, DH.2,
AMT Vulcan Shuttle Surak.
Cyber-Hobby 1:35 Sherman Firefly IC - still stalled.

#372
United Kingdom
Joined: March 10, 2010
KitMaker: 2,568 posts
AeroScale: 1,619 posts
Posted: Wednesday, August 15, 2012 - 04:35 AM UTC
Painting now complete. I'll leave it overnight to dry out thoroughly before I start decalling. My apologies for the poor quality of the photo, I've had to use my phones camera as I've lent my camera to relatives while they're on holiday. Might not get that back till the end of the month at the earliest.
Incidently, while going through my books and magazine for reference material on B-17's I stumbled across a large black and white photo of the very Siskin I have markings for. It showed some details not mentioned on the sheet. Notably that the green area did not extend all the way to the nose and a lack of radio gear. Apparently not all Siskins had them fitted despite the fact that it was officially the first RAF fighter that should have had radio as standard!
On the bench: 1/72 Mosquito, Lightning F.6, DH.2,
AMT Vulcan Shuttle Surak.
Cyber-Hobby 1:35 Sherman Firefly IC - still stalled.

#372
United Kingdom
Joined: March 10, 2010
KitMaker: 2,568 posts
AeroScale: 1,619 posts
Posted: Friday, August 17, 2012 - 10:53 PM UTC
Afraid I haven't managed anymore work since, had to be rushing around getting ready for my holiday. The down side is that I won't be back till just before the deadline. I may be pushing it to finish by then.
On the bench: 1/72 Mosquito, Lightning F.6, DH.2,
AMT Vulcan Shuttle Surak.
Cyber-Hobby 1:35 Sherman Firefly IC - still stalled.
Colorado, United States
Joined: January 25, 2004
KitMaker: 11,669 posts
AeroScale: 11,011 posts
Posted: Thursday, August 30, 2012 - 06:21 PM UTC
The GB cutoff is now extended to Sept.14, 2012. Model On! 
". . .The most important thing is to know why you build and then get the most that you can out of building." via D.D.

#372
United Kingdom
Joined: March 10, 2010
KitMaker: 2,568 posts
AeroScale: 1,619 posts
Posted: Monday, September 03, 2012 - 05:34 AM UTC
Cool. I've just got to do decalling and final assembly so should be more than enough time to get her finished.
On the bench: 1/72 Mosquito, Lightning F.6, DH.2,
AMT Vulcan Shuttle Surak.
Cyber-Hobby 1:35 Sherman Firefly IC - still stalled.

#372
United Kingdom
Joined: March 10, 2010
KitMaker: 2,568 posts
AeroScale: 1,619 posts
Posted: Thursday, September 06, 2012 - 10:02 AM UTC
First few decals are on the fuselage. Its coming along very nicely now and I think I may be starting to like RAF inter-war aircraft a bit more than I used to.
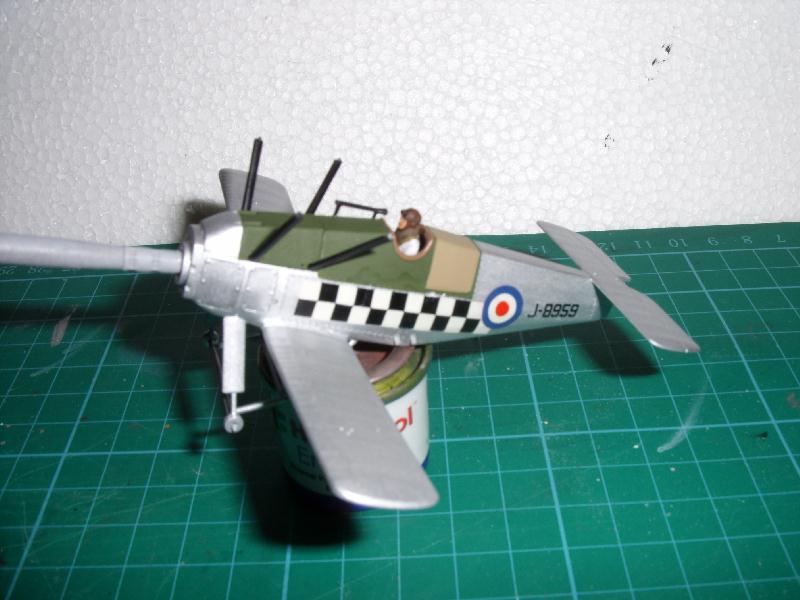
The decals are very ncie to work with a little Micro Set. But, they DO NOT like Micro Sol! I added a little to get the decals to settle down around the raised stitching detail and I found that a little of the red ink on the roundel stained the white of the roundel and the two closest white checks. It just looks a little pink in places and it should be easy to paint out when the decals are dry.
I have decided against doing the rigging. Given that I haven't tried it before I don't feel confident trying to do it on a rush job. I'll probably give it a go on one of the Ye Olde Airfix bipes I have in my stash rather than risk ruining the Siskin.
On the bench: 1/72 Mosquito, Lightning F.6, DH.2,
AMT Vulcan Shuttle Surak.
Cyber-Hobby 1:35 Sherman Firefly IC - still stalled.


